1
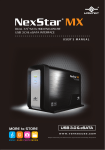
NST-400MX-S3
NST-400MX-S3R
USB 3.0 Interface
USB 3.0&eSATA Interface
USER’S MANUAL
www.vantecusa.com
3
Package Contents:
NST-400MX-S3
Dual 3.5” SATA to USB 3.0 with JBOD
External Hard Drive Enclosure
1
2
3
4
5
6
1
2
3
4
5
6
1 NexStar MX
2 USB 3.0 Cable
3 Power Adapter
4 User’s Manual
5 Enclosure Stand
6 Installation Screws
NST-400MX-S3R
Dual 3.5” RAID Enclosure w/Fan
USB 3.0 & eSATA Interface
1 NexStar MX
2 USB 3.0 & eSATA Cable
3 Power Adapter
4 User’s Manual
5 Enclosure Stand
6 Installation Screws
TRADEMARKS
MS-DOS, Microsoft, Windows NT/2000/XP/Vista/7/8 are trademarks of Microsoft Corporation.
Apple, Macintosh and Mac are trademarks of Apple Computer.
NexStar is a registered trademark of Vantec Thermal Technologies.
*All other third-party brands and names are the property of their respective owners.
Table of Contents:
1. Introduction
02
2. Specifications/Features
03
3. System Requirements
04
4. Parts Layout
05
5. Installation
06
6. LED Indicator
09
7. Mode Configuration
10
8. Disconnecting the NexStar MX
14
9. Hardware Formatting Guide
15
10. Warranty
21
11. Contact
21
Table of Contents
1
1.Introduction:
Vantec NexStar® MX Dual Bay External HDD
Enclosure now in USB 3.0 only or USB 3.0 plus
eSATA interface is a quick and simple way to
expand storage capacity to your computer.
It comes without the hassle of diving inside
the PC and messing with all those wires,
cables and connections. It provides maximum
storage with the increased capacity of two
spanning hard drives for your precious family
photos, music, video, and games. For 400MXS3, it will support Individual and JBOD modes;
and for 400MX-S3R, it will support Individual,
JBOD, RAID 0 and RAID 1 modes for effective
storage management. The sturdy drive cage
protects your hard drive while the aluminum
case effectively draws away the heat; the
front vents and the rear fan keep your hard
drive(s) cool and improve performance. The
Vantec NexStar® MX is a high performance,
high capacity, and durable portable storage
solution and lets you store your personal data
in an enclosure with style!
Introduction
2
2.Specifications/Features:
Dual 3/5” RAID Enclosure w/FAN USB 3.0 (S3) or USB3 & eSATA (S3R) interface
Features:
•
•
•
•
•
•
Aluminum Casing Cools Down Your Hard Drive
40mm Rear Heat Exhaust Fan
Easily Add Storage to Any System with USB 2.0, 3.0 or eSATA (for 400MX-S3R only)
Hot-Swappable: Plug & Play Without Rebooting
Attractive LED Indicates Power & HDD Activity
Support Individual, JBOD (for 400MX-S3); Individual, JBOD, RAID 0, RAID 1 (for 400MX-S3R)
Specifications:
• Model:
NST-400MX-S3
• Device Support:
SATA I/II/III Hard Drives
• Device Size:
3.5”
• Internal Interface: SATA
• External Interface: USB 3.0
• HDD Capacity:
Up To 8TB*
• Power Supply:
AC Adapter
• Fan:
40mm
• Material:
Aluminum & Plastic
• Dimension:
197 x 123 x 72 mm
*Check our website www.vantecusa.com for any updates
Power Adapter
USB 3.0 Cable
Specifications:
• Model:
NST-400MX-S3R
• Device Support:
SATA I/II/III Hard Drives
• Device Size:
3.5”
• Internal Interface: SATA
• External Interface: USB 3.0 & eSATA
• HDD Capacity:
Up To 8TB*
• Power Supply:
AC Adapter
• Fan:
40mm
• Material:
Aluminum & Plastic
• Dimension:
197 x 123 x 72 mm
*Check our website www.vantecusa.com for any updates
Power Adapter
USB 3.0 Cable
eSATA Cable
Specifications/Features
3
3.System Requirements:
Microsoft Windows XP/Vista/7/8
Mac OS 10.4 & greater
1. For USB 2.0 speeds, the system must
1. For USB 2.0 speeds, the system must
support USB 2.0 specifications
support USB 2.0 specifications
2. For USB 3.0 speeds, the system must
2. For USB 3.0 speeds, the system must
support USB 3.0 specifications
support USB 3.0 specifications
3. For eSATA Speeds, the System Must
3. For eSATA Speeds, the System Must
Support eSATA Specifications
Support eSATA Specifications
4. Port Multiplier Is Required For eSATA
4. Port Multiplier Is Required For eSATA
Syetem Requirements
4
4.Parts Layout:
NST-400MX-S3
1
Power ON/OFF Switch
2
USB 3.0 Port
3
Power Jack
NST-400MX-S3R
Parts Layout
5
1
Power ON/OFF Switch
2
eSATA Port
3
USB 3.0 Port
4
Power Jack
5.Installation:
Dual 3/5” RAID Enclosure w/FAN USB 3.0 (S3) or USB3 & eSATA (S3R) interface
5.1.Hardware Installation:
Installing the hard drive:
(1) Release the four screws then
pull out the rear panel and tray
of the NexStar MX.
( figure 5.1-A )
( figure 5.1-A )
(2) Place the first HDD onto the
drive caddy then insert the HDD
into the SATA connector.
( figure 5.1-B )
( figure 5.1-B )
(3) Place the second HDD onto the
drive caddy then insert the HDD
into the SATA connector.
( figure 5.1-C )
( figure 5.1-C )
Installation
6
(4) Secure the hard drive onto
the drive caddy with the
provided screws. ( figure 5.1-D )
( figure 5.1-D)
ON
1 2
(5) Choose the Mode Configuration
for the NexStar MX. Connect the
power adapter and power on the
unit. Press the reset button and
hold for 10-15 seconds.
*Please note, changing mode will
erase all data on the drives in this
400MX enclosure. Please backup
any important data before you
continue. For Mode Configuration
details, see page 10. ( figure 5.1-E )
( figure 5.1-E)
(6) Insert the drive caddy back into
the aluminum housing. Be sure to
align and secure with the provided
screws. ( figure 5.1-F )
( figure 5.1-F)
Installation
7
Connecting the NexStar to your computer:
USB 3.0(S3 and S3R)
NOTE:
(1) Connect the type (B) USB connector to the
For new hard drives, you will need to initialize and
partition your hard drive before it will appear in
Windows Explorer or on your Mac desktop. Please
refer to your hard drive manufacturer’s documentation
or read the”Creating a New Partition” section of this
manual.
NexStar and the type (A) USB connector to an
available USB port on your system.
(2) Connect the power cable to the NexStar and
plug the cable into an available outlet.
(3) Turn on the NexStar via the power switch.
(4) Your operating system should detect
the NexStar and automatically install the
necessary drivers. Once your operating system
finishes setting up the NexStar , it will mount
your hard drive. On Mac OS systems, the
new volume should appear on desktop. On
DC 12
V
USB
3.0
a Windows PC, the new volume will appear
POW
ER
under My Computer.
ON
eSATA Cable
OFF
eSATA
or
(5) Your NexStar External Hard Drive is now ready
USB3.0 Cable
for use.
eSATA (S3R)
(1) Connect the eSATA to the NexStar and to an
NOTE:
available eSATA port on your system.
(2) Connect the power cable to the NexStar and
If you can see the USB icon in the system tray, but there
is no any disk appear in your computer, please confirm
your hard disk is partitioned.
plug the cable into an available outlet.
(3) Turn on the NexStar via the power switch.
(4) Your operating system should detect
the NexStar and automatically install the
necessary drivers. Once your operating system
finishes setting up the NexStar, it will mount
your hard drive. On Mac OS systems, the
new volume should appear on desktop. On
a Windows PC, the new volume will appear
under My Computer.
(5) Your NexStar External Hard Drive is now ready
for use.
Installation
8
6.LED Indicator:
Dual 3/5” RAID Enclosure w/FAN USB 3.0 (S3) or USB3 & eSATA (S3R) interface
General Operation:
Power LED
HDD 1 LED
HDD 2 LED
Green
ON : Power on
OFF: Power off
Blue
ON : HDD inserted
Flash Randomly: Accessing (Read/Write/Rebuild)
Flash Consistently (3 flashes per second): HDD error
OFF: HDD not installed/Removed/sleep mode
Blue
ON : HDD inserted
Flash Randomly: Accessing (Read/Write/Rebuild)
Flash Consistently (3 flashes per second): HDD error
OFF: HDD not installed/Removed/sleep mode
RAID Rebuild LED for 400MX-S3R
LED Activity Chart: this chart describe LED activity under RAID rebuild process
Constant On
Blinks Randomly
Online: USB (or eSATA) is connected to PC.
Offline: USB (or eSATA) doesn’t connect to PC.
Operations
Online
Offline
HDD1 LED
HDD2 LED
Power LED
FAN
In progress
ON
Complete
ON
In progress
ON
Complete
OFF
NOTE:
1. RAID Rebuild Mode: RAID1
2. Rebuild speed around 250GB/HR
3. LED blinking consistently (3 flashes per second) indicates HDD failure
LED Indicator
9
7.Mode Configuration:
Individual Drive Mode:
This mode enables each Hard Drive to be seen
as separate single drives with separate Hard
Drive capacities. ( figure 6-A) ( figure 6-B)
NST-400MX-S3
NST-400MX-S3R
ON
1 2
Individual Mode
Individual Mode
( figure 6-A)
Volume A
Volume B
Volume A
Volume B
Volume A
Volume B
Volume A
Volume B
NST-400MX-S3
NST-400MX-S3R
NST-400MX-S3R
NST-400MX-S3R
Port 0
Port 0
Port 0
Port 0
Drive A
Port 1
Drive B
Equal hard drives
Drive A
Port 1
Drive A
Drive B
Unequal hard drives
Port 1
Drive B
Equal hard drives
( figure 6-B)
Mode Configuration
10
Drive A
Port 1
Drive B
Unequal hard drives
JBOD Mode:
This mode concatenates a series of physical drives as a single large volume; Hard Drive 1 and 2 are
combined into a storage capacity that is equal to the sum of each of the physical hard drives 1 and 2.
Switching to this mode will prompt to initialize and format the hard disks. If you choose to add a second
hard disk at a later time, you will need to format the entire array of disks again ( figure 6-C) ( figure 6-D)
NOTE:
All data previously stored on the hard drive will
be lost! Please back up all data to a separate
storage before continuing.
NST-400MX-S3
NST-400MX-S3R
ON
1 2
JBOD Mode
JBOD Mode
( figure 6-C)
JBOD
JBOD
JBOD
JBOD
500GB
1000GB
500GB
1000GB
NST-400MX-S3
NST-400MX-S3
NST-400MX-S3R
NST-400MX-S3R
Port 0
Port 0
Port 0
Port 0
Port 1
Port 1
Port 1
Port 1
Drive A
Drive A
Drive A
Drive A
Drive A
Drive A
Drive A
Drive A
250GB
250GB
250GB
750GB
250GB
250GB
250GB
750GB
Equal hard drives
Unequal hard drives
Equal hard drives
( figure 6-D)
Mode Configuration
11
Unequal hard drives
RAID 0 Mode (Striped):
NST-400MX-S3R
This mode splits data evenly across the two Hard
Drives resulting in capacity that is the sum of
2 times the smaller volume. Data access speed
is increased however at the cost of no data
redundancy.
Two equal hard drives: The capacity is equal to
1 2
the sum of both hard drives.
ON
Switching to this mode will prompt to initialize
and format the hard disks.
( figure 6-E) ( figure 6-F)
NOTE:
RAID 0 Mode
All data previously stored on the hard drive will
be lost! Please back up all data to a separate
storage before continuing.
( figure 6-E)
RAID 0
RAID 0
500GB
500GB
NST-400MX-S3R
NST-400MX-S3R
Port 0
Port 0
Port 1
Drive A
Drive B
Drive A
Drive A
250GB
250GB
250GB
750GB
Equal hard drives
Unequal hard drives
Striping across
Striping across
( figure 6-F)
Mode Configuration
12
Port 1
RAID 1 Mode (Mirror):
NST-400MX-S3R
This mode allows the device automatically to
copy data to both hard drives. It stores all data in
duplicate on separate drives to protect against
data loss due to drive failure. It provides the
highest level of data protection for critical data
that you cannot afford to lose if a hard drive fails.
1 2
The capacity is equal to the smaller of the two
ON
hard drives. Switching to this mode will prompt
to initialize and format the hard disks. This will
not work to create a mirror set from existing hard
drives. ( figure 6-E)
RAID 1 Mode
NOTE:
All data previously stored on the hard drive will
be lost! Please back up all data to a separate
storage before continuing.
( figure 6-E)
NOTE:
If one drive fails, the SAFE volume is still usable, but it is in a vulnerable state because its mirrored hard
drive is inaccessible. When the offline drive comes back online, the appliance begins a rebuild process
immediately to restore data redundancy. Although the volume remains available during the rebuild
process, the volume is susceptible to data loss through damage to the remaining drive until redundancy
is restored at the end of the rebuild and verification process. Host access takes precedence over the
rebuild process. If you continue to use the SAFE volume during the rebuild, the rebuild process will take
a longer time to complete, and the host data transfer performance will also be affected.
Mode Configuration
13
8.Disconnecting the NexStar MX:
Dual 3.5” RAID Enclosure w/Fan USB 3.0 & eSATA Interface
Microsoft Windows XP/Vista/7/8 :
Mac OS:
Make sure all operations using the hard
drive within the NexStar MX has ceased.
Make sure all operations using the hard
drive within the NexStar MX has ceased.
Close any windows and programs
pertaining to the NexStar MX
Close any windows and programs
pertaining to the NexStar MX
Double click the green “Safely Remove
Hardware” icon in the system tray and
select [Safely Remove USB Mass Storage
Device]. Select the device you wish to
remove and click on [Stop]. The system
should prompt, “It is now safe to remove
the USB device.” If not, wait for any
programs still using the device to finish and
try again.
From the Desktop, drag the NexStar MX
hard drive to the trash.
You may now safely turn off and disconnect
the NexStar MX.
You may now safely turn off and disconnect
the NexStar MX.
WARING:
NEVER remove the NexStar MX while the hard drive is in
use. Doing so may corrupt the data on the hard drive or
damage the hard drive, NexStar MX and the computer.
Disconnecting the NexStar MX
14
9.Hard Drive Formatting Guide
Dual 3/5” RAID Enclosure w/FAN USB 3.0 (S3) or USB3 & eSATA (S3R) interface
Please make sure your External Enclosure is turned on and connected to the PC
before formatting the Hard Drive.
In order to use a disk volume larger than 2 TB’s, you will need an operating system that supports
GUID Partitioning Table. Windows 7, Windows Vista, Windows XP 64bit, Mac 10.4, and Mac 10.5 all
have this capability through the GPT. The GUID partitioning scheme has the ability to partition both
internal and external drives far beyond 2 TB’s in size.
For PC Users:
STEP1: Right-click “My Computer” and select “Manage”.
STEP2: Select “Disk Management” and you will see your Hard Drive shown as “Unallocated”
(Disk number may vary)
Hard Drive Formatting Guide
15
STEP3: Right-click on the “Unallocated” box and select “New Partition”.
(Disk number may vary)
STEP4: The “New Partition Wizard” will appear. Please follow the “New Partition Wizard”
step by step instructions to complete the Hard Drive formatting procedure
Hard Drive Formatting Guide
16
STEP5: Once the Hard Drive formatting procedure is completed, the Hard Drive will be
recognized as a “New Volume” (New Volume drive letter may vary i.e. “New Volume
(Z:)” )
STEP6: Double-click “My Computer”. You will see “New Volume” appear on your PC (Drive
letter may vary i.e. “New Volume (Z:)”)
Hard Drive Formatting Guide
17
For Mac Users:
STEP1: When you connect the NexStar MX
Dual to a Mac with a new hard drive,
the dialog “Disk Insertion” will appear.
Please select “Initialize”. (A formatted
HDD will not display this dialog)
STEP2: Select which HDD you want to erase.
Individual Mode :
This mode can show each hard disk
as individual device.
JBOD Mode :
JBOD MODE can integrate two
different brands of hard drives with
different capacity to a larger format
hard drive.
Hard Drive Formatting Guide
18
RAID 0 Mode :
Raid 0 Mode can integrate two
different brands of hard drives with
different capacity to a larger format
hard drive.
>Two hard drives of the same
capacity: the total capacity is the
sum of the two hard drives.
>Two hard drives of the different
capacity: the total capacity is the
twice volume of the smaller hard
drive.
STEP3: Click “Erase” at the upper right side.
Select which kind of format from
Volume Format. Please input the
name you wish to name your new
Volume. Click “Erase” at lower right
side.
STEP4: After you hit “Enter”, the dialog “Erase
Disk” will appear. Please click “Erase” to
begin formatting your hard drive.
WARING:
All data will be erased after the format
Hard Drive Formatting Guide
19
Select how you want to use your
new Volume or click “Cancel” if you
want to use default settings.
This will conclude the Hard Drive Formatting guide.
Hard Drive Formatting Guide
20
10.Warranty:
The NexStar MX comes with a 1 year limited
warranty ( 90 day parts ) . If your unit should
become defective within that time frame, please
go to www.vantecusa.com for information on
how to receive warranty exchange or repair.
Cosmetic defects and missing parts are not
covered under this warranty. Please check the
contents of the unit to make sure you received
all parts. Also, check for any cosmetic flaws. If
any parts are missing or if there are cosmetic
defects, please contact the retailer from which
you purchased the unit immediately and ask for
a replacement.
11.Contact:
Vantec Thermal Technologies
www.vantecusa.com
Copyright © 2013 Vantec Thermal Technologies. All Right Reserved.
All Registered Trademarks Belong To Their Respective Companies.
Warranty/Contact
21