1
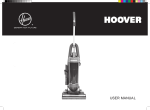
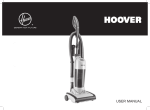
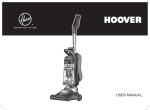
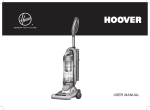
USER MANUAL
cigarette ends or other similar items.
IMPORTANT SAFETY REMINDERS
GB
Do not spray with or pick up flammable liquids, cleaning fluids,
aerosols or their vapours.
This appliance should only be used for domestic cleaning, as
described in this user guide. Please ensure that this guide is
fully understood before operating the appliance.
Do not run over the power cord when using your appliance or
remove the plug by pulling on the power cord.
Do not continue to use your appliance if it appears faulty.
Do not leave the appliance plugged in. Always switch off and
remove the plug from the socket after use, or before cleaning
the appliance or any maintenance task.
Hoover service: To ensure the continued safe and efficient
operation of this appliance we recommend that any servicing
or repairs are only carried out by an authorised Hoover service
engineer.
This appliance can be used by children aged from 8 years and
above and persons with reduced physical, sensory or mental
capabilities or lack of experience and knowledge if they have
been given supervision or instruction concerning use of the
appliance in a safe way and understand the hazards involved.
Children shall not play with the appliance. Cleaning and user
maintenance shall not be made by children without supervision.
Do not stand on or wrap the cord around arms or legs when
using your appliance.
Do not use the appliance to clean animals or people.
When using the cleaning tools, ensure to always steady the
appliance with your other hand. This will ensure that the
appliance does not fall while in use.
If the power cord is damaged stop using the appliance
immediately. To avoid a safety hazard, an authorised Hoover
service engineer must replace the power cord.
Warning: a thermal cut out switches off the appliance to prevent overheating
if it is used when full or there is a blockage or dirty filters. If this should
happen then switch off, unplug and correct the fault. It will take approximately
45 minutes for the cut out to automatically reset.
Keep hands, feet, loose clothing and hair away from rotating
brushes.
Use only attachments, consumables or spares recommended
or supplied by Hoover.
The Environment
The symbol on this appliance indicates that this appliance may not
be treated as household waste. Instead it must be handed over to the
applicable collection point for the recycling of electrical and electronic
equipment. Disposal must be carried out in accordance with local
environmental regulations for waste disposal. For more detailed
information about treatment, recovery and recycling of this appliance, please
contact your local city office, your household and waste disposal service or
the shop where you purchased the appliance.
When using cleaning tools ensure that the appliance is kept in
the upright (parked) position. This will avoid possible damage
to the carpet or floor covering. When cleaning stairs, do not
position the appliance above you.
Static electricity: some carpets can cause a small build up
of static electricity. Any static discharge is not hazardous to
health.
This appliance complies with the European Directives 2006/95/EC,
2004/108/EC and 2011/65/EU.
Do not use your appliance out of doors or on any wet surface
or for wet pick up.
Do not pick up hard or sharp objects, matches, hot ashes,
HOOVER Limited, Pentrebach, Merthyr Tydfil, Mid Glamorgan, CF48 4TU, UK
-2-
GB
GETTING TO KNOW YOUR CLEANER
HOSE TO EXTENSION
TUBE CONNECTOR
Effortless
cleaning
with your
new Hoover
HANDLE
UPPER HANDLE RELEASE
BUTTON
EXHAUST filter
Pre-motor
filter
MINI TURBO NOZZLE *
Power on/off
button
Brushbar on/
off button
Bin release button
Carry handle
HANDLE TUBE
RELEASE BUTTON
cord STORAGE
HOOK
EXTENSION HOSE
Inner cyclones*
Cord
2-in-1
tool
DUST BIN
EXHAUST
filter cover
This vacuum cleaner is
supplied with an Energy
Label as required by
European Regulation (EU) 665/2013.
EXTENSION
HOSE SOCKET
BrusH BAR
* Certain models only
WHEELS
-3-
crevice tool
put 2-in-1 tool and crevice tool on
board storage area.
PREPARING YOUR CLEANER
Cleaner release
recline to unlock the cleaner
Insert the main handle in the cleaner body
and then adjust handle up/down to the
desired height.
2
1
SUPPLY CORD
POWER SWITCH
Plug in your machine and
turn it on.
Do not run over the supply
cord.
Clip the supply cord in the cord
clip at the back of the handle
to avoid accidentally running
the cleaner over the cord and
causing any damage.
twist the handle to manoeuvre under or around
furniture
BRUSH BAR SWITCH
MINI TURBO BRUSH assembly*
Assemble the mini turbo brush holder to the
handle tube of the cleaner,then put the mini turbo
nozzle to the holder.
* Certain models only
Press the brush bar on/off
button at the top of the unit.
Brush bar on - carpet
Brush bar off - hard floor
-4-
GB
GB
CLEANING TOOLS
CLEANING THE STAIRS
Handle
All accessories can fit onto the end of the hose, handle and handle tube.Combine accessories depending on use.
Mini Turbo Nozzle*
The Mini turbo nozzle* is ideal for removing pet hairs.
DO NOT touch the rotating brush.
It is dangerous to place the cleaner
above you when cleaning stairs.
Parquet Nozzle*
The parquet nozzle is ideal for cleaning delicate surfaces.
Connecting Accessory to Hose
1
Plug in the long stretch hose in
the hose socket.
2
choose your accessory.
3
connecting accessory to hose.
connect hose to handle tube
3
connect accessory to the
handle tube.
connecting accessory to handle tube
1
Remove handle tube.
2
2
1
IMPORTANT! When using cleaning tools, the cleaner must be kept in the upright position,
particularly when cleaning stairs. Hold unit while using hose or handle tube.
* Certain models only
-5-
ALWAYS work with the cleaner
below you. Ensure it is positioned
up against the bottom step.
STORING THE CLEANER
Turn the cleaner off and remove the plug. Wind the
power cord around the cord storage hooks.
GB
EMPTYING THE Bin
!
1
IMPORTANT: before emptying the bin, make
sure vacuum cleaner has been switched off.
CLEANING THE PRE MOTOR FILTERS
1
Rotate the upper part of the dust bin to open.
take out the pre-motor filter.
4
Wash both filter and sponge under warm water until
the water runs clean. Remove excess water by
shaking and leave to dry for 24 hours. Reassemble
and refit filters to cleaner, only when they are
completely dry.
To remove the bin from the cleaner press the
bin release button.
3
2
2
gently tap both filters to release
any excess dust.
<40
Hold the container over
the Bin and press the
easy open button.
The bin door will open
and you can empty into a
bin with no dust contact.
!
43 Once emptied, gently tap
or shake the container to
release any excess dust.
Do not overfill the bin
above the max level line.
IMPORTANT! Ensure
<40the pre-motor filter and
exhaust filters are reassembled to the cleaner before use.
CLEANING THE EXHAUST FILTER
The exhaust filter should be washed every month.
Remove the exhaust filter from your cleaner and wash
with lukewarm water.
Remove excess water by shaking and leave to dry for
24 hours. Refit filters only when completely dry.
-6-
CHANGING THE BELT OR BRUSHES
CLEARING A BLOCKAGE
If your cleaner is not picking up efficiently, the belt or brushes (or both) may need replacing, but first
please make sure you have:
• Emptied the bin
• Cleaned the filters
• Checked for blockages
1
Turn the cleaner over and remove 2 rear
rollers and 2 retaining screws.
IMPORTANT: Switch the cleaner off and
remove the plug from the electricity supply
before attempting any maintenance.
4
Hold the brush assembly and stretch the
belt until the brush can be slotted back
into the cleaner housing.
IMPORTANT: Switch the cleaner off and
remove the plug from the electricity supply
before attempting any maintenance.
Check the cleaning
tools and hose for
blockages.
The hose can be
removed at both ends.
2
Remove the brush guard.
5
Rotate the brush to ensure free movement
of the belt.
Turn the cleaner
over and rotate the
brushes to identify
any obstructions
including hair.
3
Remove brush assembly and check for
wear on the belt.
Loop the new belt around the
motor and brush channel.
6
Refit the brush guard with 2 retaining screws
and 2 rear rollers..
NOTE: when the brush was blocked and stopped rotating,switch off and remove the plug from the
electricity supply,then use a pair of scissors to cut through any threads or hairs caught around the
brush. Reassemble the brush and brush guard.
-7-
Check for a blockage in
the hose socket. Use a
flexible rod to remove
any obstruction.
Removing a blockage from
the mini turbo nozzle.
Open the nozzle at each
side,lift cover and remove
the blockage.
*Certain models only
GB
GB
Important information
User checklist
Hoover Service
Should you require service at any time, please contact your local Hoover Service
Office.
If your cleaner is not working properly run through the
following checklist.
1. Is there a working electricity supply to the cleaner?
Check with another electrical product.
2. Is the bin full or choked with fine dust?
To empty the bin, see the User Manual on P6.
3. Is the hose blocked?
To clear a blockage, see the User Manual on P7.
4. Is there a blockage in the cleaner base?
To clear a blockage, see the User Manual on P7.
5. Are the filters blocked?
To clean filters, see the the User Manual on P6.
6. Are the brushes rotating correctly?
To check the brushes, see the User Manual on p7.
7. Has the cleaner overheated?
If so, it will take about 30minutes to reset.
Hoover spares and Consumables
Always replace parts with genuine Hoover spares. These are available from your
local Hoover dealer or direct from Hoover. When ordering parts always quote
your model number.
USE ONLY HOOVER SPARES
CONSUMABLES & SPARE PARTS
If there is any doubt call the Hoover Service Office for advice. They may be able
to assist you over the telephone. A service charge will be made if the cleaner is
examined and found to be in working order, has not been assembled in accordance
with these instructions or has been used incorrectly. working order, has not been
assembled in accordance with these instructions or has been used incorrectly.
CODE
PRE-MOTOR & EXHAUST FILTER KIT
U71 - 35601420
HOSE
D146 - 35601418
AGITATOR
Y31 - 35601419
DUST & BRUSH FURNITURE NOZZLE
P15 - 35601415
PET HAIR REMOVER NOZZLE
J61 - 35601417
BELT
V29 - 35600744
PARQUET EXTRA NOZZLE
G87PC - 35600655
Quality
Hoover’s factories have been independently assessed for quality. Our products
are made using a quality system which meets the requirements of ISO 9001
WARNING!
A thermal cut out switches off the cleaner to prevent overheating if it is used when
full or there is a blockage or dirty filters. If this should happen switch off, unplug and
correct the fault.
It will take about 45 minutes for the cut out to automatically reset.
GUARANTEE STATEMENT
The guarantee conditions for this appliance are as defined by our representative in
the country in which it is sold. Details regarding these conditions can be obtained
from the dealer from whom the appliance was purchased. The bill of sale or receipt
must be produced when making any claim under the terms of this guarantee.
IMPORTANT: Do not run cleaner over the supply cord as this could damage the
supply cord insulation.
Subject to change without notice.
-8-
Hoover Limited
Pentrebach
Merthyr Tydfil
Mid Glamorgan
CF48 4TU
HOOVER CUSTOMER HELPINE
08444 995 599
PRINTED IN P.R.C.
48017168