1
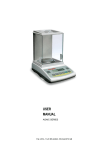
USER MANUAL
PCE-ABZ/C SERIES
USER MANUAL
____________________________________________________________________________________________________________________
Contents:
1. General description .......................................................................................................... 3
2. Completeness .................................................................................................................. 3
3. General view .................................................................................................................... 4
4. Keys and indicators ......................................................................................................... 5
5. Technical Data ................................................................................................................. 6
6. Security rules ................................................................................................................... 7
7. Preparations – working environment ............................................................................... 8
8. Preparation – the balance................................................................................................ 9
9. Operation principles ....................................................................................................... 10
10. Testing and calibration ................................................................................................... 11
11. External calibration / calibration options ........................................................................ 11
12. Internal calibration (autocalibration)............................................................................... 13
13. Connecting a balance to a computer or a printer........................................................... 14
14. Special functions description ......................................................................................... 17
15. Legend ........................................................................................................................... 18
16. Normal weighing ............................................................................................................ 18
17. Weighing with tare ......................................................................................................... 18
18. Autozeroing (Aut …) ...................................................................................................... 19
19. Pieces counting (PCS …) .............................................................................................. 20
20. Serial port setting (rS-232CS) ........................................................................................ 21
21. Date and time setting (F..-dAt) ....................................................................................... 22
22. Maintenance and repairs of small defects ..................................................................... 23
Declaration of Conformity ................................................ Fehler! Textmarke nicht definiert.
2
USER MANUAL
____________________________________________________________________________________________________________________
1. General description
PCE-ABZ...C series balances are destined for high accuracy weighing in
laboratory practice.
Balances are equipped with an internal calibration system for proper accuracy
control during operation. The user should also own weight standard of OIML F2 or
F1 class for periodical control of the balance (weight value stated in Technical
Data sheet) - available separately.
All balances are metrologically tested - calibration on demand.
2. Completeness
A standard set consist of:
1. Balance
2. Tin floor plate and pan ring,
3. Pan support and pan
4. Feeder ZN 12V/500mA,
5. User Manual,
6. Guarantee card.
3
USER MANUAL
____________________________________________________________________________________________________________________
3. General view
Front view:
9
1
2
3
4
8
5
1 – pan
2 – support pan
4 – display LCD
5 – keyboard
6 – legs
7 – water-level
7
6
Rear view:
Feeder
Adjust switch
RS232C
1
ON
OFF
RxD(receiver)
TxD(transmitter)
2
6
7
3
8
4
GND
Case
4
5
9
USER MANUAL
____________________________________________________________________________________________________________________
4. Keys and indicators
Max
key
key
key
key
key
key
→T←
→0←
Menu
I/
indicator
bar indicator
indicator
OFF
Max, Min, d, e, II
-
Min
e
d
I
tare (subtract package weight from weighed mass)
numeric key / zeroing (balances for direct sale use
only),
numeric key / data output (print / transmission),
numeric key / internal calibration on and off,
numeric key / Menu,
switch-on/switch-off (standby),
result stabilisation,
load indicator 0 ÷ 100%,
stand-by mode,
metrologic parameters and accuracy class.
5
USER MANUAL
____________________________________________________________________________________________________________________
5. Technical Data
Type
Capacity (Max)
Min load (Min)
Reading unit (d)
Verification unit (e)
Tare range
Accuracy class
Working temperature
Weighing time
Pan dimension
Balance base dim. (including legs)
Weighing chamber dimensions
Power
Balance weight
Calibration weight (OIML)
PCE-ABZ 100C
100g
10mg
0,1mg
1mg
-100g
PCE-ABZ 200C
200g
10mg
0,1mg
1mg
-200g
I
+18 ÷ +30 °C
<8s
φ90mm
215(235)x345x350mm
175x140x230mm
~230V 50Hz 9VA / =12V 300mA
6,5kg
E2 100g
E2 200g
6
USER MANUAL
____________________________________________________________________________________________________________________
6. Security rules
To avoid electrical shock or damage of the balance or
connected peripheral devices, it is necessary to follow
the security rules below.
•
All repairs and necessary regulations can be made by authorised
personnel only.
•
To avoid fire risk use a feeder of an appropriate type (supplied with the
balance). Pay attention that supply voltage is compatible with specified
technical data.
•
Do not use the balance when its cover is opened.
•
Do not use the balance in explosive conditions.
•
Do not use the balance in high humidity.
•
If the balance seems not to operate properly, unplug it from the mains
and do not use until checked by authorised service.
According to legal regulations it if forbidden to dispose
electronic equipment in waste containers.
•
Please return wasted balance to the point of purchase or other company
specialised in recycling of wasted electronic components.
7
USER MANUAL
____________________________________________________________________________________________________________________
7. Preparations – working environment
+30°C
+18°C
When choosing a location to set up the balance, remember the following rules to
ensure proper working conditions and user-friendly operating:
- setup the balance on an even, flat surface leaving necessary room for easy
access,
- maintain proper working temperature,
- avoid strong air drafts, vibrations, dust, big temperature changes and humidity
over 75%,
- avoid locations with extreme heat radiation and electrometic PCE-ABZ 100C or
metic PCE-ABZ 200C fields.
8
USER MANUAL
____________________________________________________________________________________________________________________
8. Preparation – the balance
1
1. Take the balance and supplied
accessories (a feeder, pan
elements) out of the box.
2. Place the balance on a stable
ground
not
affected
by
mechanical
vibrations
and
airflows.
3. Level the balance with rotating
rear legs 6 so that the air bubble
in water-level 7 at the back of
the balance is in the middle.
4. Place tin floor plate 4 and the
pan ring 3 in the weighing
chamber and gently put on the
pan support 2 and finally the
pan 1.
5. Plug a feeder to the power
socket at the back of the
balance.
2
3
4
7
6
Moisture in the air may condense on the surface of the balance when
transferred to the warmer environment. In this case leave the balance
for at least 4 hours unplugged from the mains for conditioning to avoid
wrong operating or damage of the balance.
6. Leave the pan empty and plug the feeder to the mains. At the end of selftests, the balance displays zero indication and is now ready to work.
9
USER MANUAL
____________________________________________________________________________________________________________________
9. Operation principles
Do not overload the balance more then 20% of maximum load
(Max). Do not press the pan with a hand.
Before transportation take off the pan (move it slightly and lift it
up) and the pan base and preserve from any damages.
1. To ensure proper weighing accuracy the balance is equipped with internal
calibration system. The system automatically calibrates the balance every 2
hours and with temperature changes more than 1°C (values modification
possible) without user intervention. When the balance is moved to another
localisation remember to level the balance and proceed with internal calibration.
2. Weighed sample should be placed in the centre of the pan.
3. In balances equipped with →0← key and with d=e, make sure that zero
indicator is displayed. If not, press →0← key and wait until zero indication and
zero indicator appears. In other balances the key does not operate.
4. The balance is equipped with a tare equal to its range. To tare the balance press
→T← key (left or right). Storing a tare value does not extend measuring range,
but only subtracts it from a load placed on the pan. To make weight control
easier and to avoid range overdrawing, the balance is equipped with a load
indicator (graduated in percentages).
5. Weighing result should be read when the indicator " " lights, which signalises
stabilisation of a result.
6. When the balance is not used but it is necessary to be ready to work
immediately, it can be switched off by pressing I/ key. The balance reading
system is then switched off to "standby" mode (signalled by the indicator
"OFF"). To switch the balance on press I/ key. The balance is immediately
ready to operate maximum accuracy (after self tests).
7. The mechanism of the balance is a precise device, sensitive to mechanical
strokes and shocks.
8. The balance should not be used to weigh ferrometic PCE-ABZ 200C materials
due to accuracy decrease.
10
USER MANUAL
____________________________________________________________________________________________________________________
10. Testing and calibration
To ensure reliable results it is advised to check balance accuracy with an object of
precisely known weight before and after each measuring session.
To check a balance with EC verification use a weight standard as stated in
Technical Data table for specific balance type (or of better accuracy) with valid
calibration certificates. In case permissible error is exceeded please contact an
authorised service.
11. External calibration / calibration options
Calibration with external weight standard in verified balances should be performed
in case balance indications exceed permissible error. To calibrate the balance
a service centre should use calibration weight as stated in Technical Data table (or
of better accuracy) with valid calibration certificate.
External calibration in verified balance should be performed in
authorised PCE services, as it is possible only after removing protective
seals. In this case the validity of the verification is void and the balance
must be re-verified by the nearest Notified Body or at the place of
installation.
In balances with EC verification calibration function is blocked for the user. It is
only possible to print calibration report useful for routine balance check-through.
The report printout example
Date: ...
Time: …
CALIBRATION REPORT
---------------------------------------------------FACTORY NUMBER:
...
PROGRAM NUMBER:
...
- internal weight value registered during
factory calibration ,
CALIBRATION PRIMARY MASS: ...
CALIBRATION MASS:
...
DIFFERECE MASS:
...
- internal weight value registered during
last calibration ,
- difference between internal weight
values: factory value–current value
(PCE-ABZ 200C diosis).
11
USER MANUAL
____________________________________________________________________________________________________________________
Operations sequence:
0.0000g MENU Press MENU to call functions and press
→T← to choose calibration "CAL ..".
CAL ...
T
C_LOAD
T
Press →T← to choose "C_LOAD" and
calibration weight value.
m1
m2
...
m
T
CAL-EXt
T
-----m
Press →T← to choose "CAL_EXt".
Wait until zeroing process is finished.
LOAD
When "LOAD" communicate
a calibration weight on the pan.
CAL
Wait until calibration process is finished.
unLOAD
put
When "unLOAD" communicate appears
remove the calibration weight from the
pan.
CAL
WAIT
Wait until internal calibration is finished.
0.0000g
12
USER MANUAL
____________________________________________________________________________________________________________________
12. Internal calibration (autocalibration)
Internal calibration is performed automatically after each start-up, also in defined
time intervals and temperature changes.
To calibrate the balance with internal weight, simply empty the pan and press
key.
The beginning of internal calibration is signalised with –CAL– communicate on
the display.
Internal calibration settings (time intervals and temperature changes)
0.0000g MENU
CAL ...
Press MENU to call functions and press
→T← to choose calibration "CAL ..".
T
Calibration function options:
-CAL - calibration (see chapt. 11)
-C_LOAD – calibration weight
-C_tIME - time interval setting
-C_tEMP - temp. change setting
-rEPort - calibration report
CAL
...
C_tIME
T
Press →T← to choose option (to
accelerate press several times
) and
value.
0,1,2 ...
...
2h
C_tEMP
T
T
0.5, 1.0,...
...
0.5 C
T
C_tEMP MENU
0.0000g
13
USER MANUAL
____________________________________________________________________________________________________________________
13. Connecting a balance to a computer or a printer
The balance may send data to a computer or a printer through RS232C port.
When cooperating with the balance, a
computer should be equipped with a
program which enables processing data from
the balance.
AXIS offers computer programs cooperating
with balances. There is also a freeware
program for testing a serial port of the
balance.
We also offer:
• Computer wires
• Thermal printers
• Label printers
Serial port working modes:
Standard mode
The balance sends weighing result after initialising signal from a computer or after
pressing
key.
Automatic mode (when cooperating with a printer)
The balance sends data automatically after result stabilisation; next transmission is
possible after removing previously weighted sample.
To select serial port working mode use LPt function (see further part of the
manual).
Standard transmission parameters: 8bits, 1stop, no parity, 4800bps. To change
transmission parameters use rS function (see further part of the manual).
Data transmission protocol description (Long protocol)
1. Standard mode:
Computer→Balance: initialising signal S I CR LF (53h 49h 0Dh 0Ah)
Balance→Computer: balance indication in the following format (16Bytes)
14
USER MANUAL
____________________________________________________________________________________________________________________
Byte
Byte
Byte
Byte
Byte
Byte
Byte
Byte
Byte
1
2, 11 and 14
3÷4
5÷9
10
12
13
15
16
-
sign or space
space
digit or space
digit, decimal point or space
digit
k, l, c, p or space
g, b, t, c or %
CR (0Dh)
LF (0Ah)
2. Automatic mode:
After stabilisation of each weighing result, excluding zero indication, the balance
sends 3-digit successive measurement number and a weighing result.
To clear the measurement counter chose automatic mode once more (see
LPt function description for further details).
Sample printout:
1
2
3
1250.5 g
1250.0 g
1250.1 g
...
When dAt function is active, a printout is extended with current date and time:
1
2
3
1250.5 g 2005.04.20 8:05
1250.0 g 2005.04.20 8:05
1250.1 g 2005.04.20 8:06
...
15
USER MANUAL
____________________________________________________________________________________________________________________
Connection cable WK-1 (balance – computer / 9-pin):
BALANS
COMPUTER
Connection cable WD-1 (balance - KAFKA printer):
BALANS
PRINTER
KAFKA printer internal switches set-up:
SW-1
on
SW-2
off
SW-3 SW-4 SW-5 SW-6 SW-7 SW-8
on
off
off
on
off
off
It is possible to use a transmission protocol other then LonG on customer’s
demand, e.g. Farb protocol used for cooperation with automatic paint mixer:
continuous transmission (Send option), transmission speed 2400bps, additional
“+” sign in first byte.
16
USER MANUAL
____________________________________________________________________________________________________________________
14. Special functions description
All balances, beside basic functions like weighing and tare, are equipped with a set
of additional functions: calibration, pieces counting, autozeroing and serial port
working mode setting. Other functions: recipe ingredients summing, density
calculation and other special functions can be enabled as an option on customer
request (described in additional brochure when ordered).
To display all available function, enter Function Menu with MENU key. Functions
are displayed: Aut… , PCS, CAL…, rS-232C, dAtE…, etc. When special
functions are displayed, MODE indicator is displayed.
To make clear how to manage with each function, in further part of instruction
descriptions are replaced with pictures.
17
USER MANUAL
____________________________________________________________________________________________________________________
15. Legend
- press a key
- balance indication
123.4 g
- forced change
- automatic change
16. Normal weighing
0.0 g
When the pan is empty and indication
is different than zero press →T←
key.
T
Weighing result should be read when
the indicator " " lights.
123.4 g
17. Weighing with tare
12.3 g
The balance is equipped with tare
equal to its range.
T
0.0 g
123.4 g
18
USER MANUAL
____________________________________________________________________________________________________________________
18. Autozeroing (Aut …)
0.0000g MENU
AUt ...
T
On
T
0.0000g
When "Aut" function is activated, the
balance automatically ensures stable
zero indication if the pan is empty or
if zero indication was acquired by
pressing →T← key.
Function has options:
- On – function is activated
- OFF – function is not activated
- CorrECt - maximum zero flow to
be automatically corrected
- out – exit of setting
Changing value of maximum zero
flow:
- next digit,
- decimal point,
→T← - next position,
MENU - end.
Note: Autozeroing function is
activated automatically for 10 min.
after switching-on.
19
USER MANUAL
____________________________________________________________________________________________________________________
19. Pieces counting (PCS)
0.0000 g
T
0.1204 g
MENU
PCS
T
This function enables to count
identical pieces, e.g. turnbuckles or
buttons.
A measurement is performed in two
phases:
- first phase - single piece weight
calculation on the basis of defined
pieces amount (5, 10, 20, 50, 100,
200 or 500 pieces),
- second phase – pieces counting.
5
SAMPLE
It is advised that single piece
weight is not less than one reading
unit and sample weight used in
first phase is bigger than 100
reading units.
T
To leave function press MENU key
and then with →T← key chose
"PCS" and "OFF".
5 pcs
Note:
Err-PCS communicate signalises that
a sample was not put on the pan. The
same communicate appears if single
piece weight is less than one reading
unit (it is possible to count pieces but
measuring error is bigger).
To chose previously used pieces
amount select “..” in first phase.
During pieces counting T key
function does not change.
T
5 pcs
0 pcs
12
12 pc s
20
USER MANUAL
____________________________________________________________________________________________________________________
20. Serial port setting (rS-232CS)
0.000g MENU
rS-232C
-
T
-
bAud
T
Function alows to set RS232C
parameters:
velocity (bAud: 1200, 4800, 9600),
bits (bit: 7, 8),
parity control (PArItY: 0, 1;
Odd: 0, 1),
continuous transmition – without key
, 10 times per secund (SEnd:
0, 1).
-4800
-9600
T
bItS
T
PArItY
T
SEndInG
T
out
T
Press MENU to choose "rS-232C",
press →T← to choose parameter.
Set parameter and choose "out" to
finish.
21
USER MANUAL
____________________________________________________________________________________________________________________
21. Date and time setting (F..-dAt)
0.000g MENU
Function puts date and time into
printout and alows to set actual.
dAtE...
Function has options:
dAtE – date setting,
tIME – time setting.
T
dAtE
T
06.04.10
T
tIME
T
Changing value:
- next digit,
→T← - next position,
MENU - end.
12.27.35
out
T
0.0000g
22
USER MANUAL
____________________________________________________________________________________________________________________
22. Maintenance and repairs of small defects
1. The balance should be kept clean.
2. Take care that no dirt gets between a casing and the pan. If found any, remove
the pan (lift it up), remove dirt and then replace the pan.
3. In case of improper operation caused by short-lasting power supply decay,
unplug the balance from the mains and then plug it again after few seconds.
4. To calibrate the balance contact nearest service.
5. It is forbidden to make any repairs by unauthorised persons.
6. To repair the balance, please contact our nearest service.
Error communicates:
Communicate
Possible cause
selftests failed
if displayed more than
1 minute, contact an authorised
service
pan missing
put the pan on
mechanical damage
contact an authorised service
overloading
remove the load from the pan
mechanical damage
contact an authorised service
C-1 ... 6
(over 1 min.)
L
H
place the balance on a stable
ground not affected by
mechanical vibrations and
airflows
unstable ground
vibrations
indicator does
air flows
not appear
balance damage
------
Remedy
contact an authorised service
taring in progress
as above
23