1
SIDE 1
®
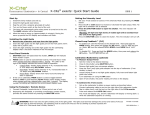
X-Cite 200DC: Quick Start Guide
Warning – Refer to User Manual 035-00446R for all safety precautions prior to use.
Start-Up
1. Install the lamp module (see side 2).
2. Install the light guide (see below).
3. Plug the unit into a properly grounded AC outlet.
4. Turn on the Power switch at the front of the unit.
5. The lamp will automatically strike when power is turned on to the
unit. The LAMP indicator will be illuminated.
6. Allow the lamp to warm up (approximately 4 minutes). During the
warm up period the LED display and indicators will flash.
Installing the Light Guide
1. Remove the protective end caps from the light guide
2. Insert the light guide into the light guide port on the front panel
until it seats with a positive click.
3. Insert the light emitting end of the light guide into the collimating
adapter after it has been installed on the microscope.
Front Panel Controls
1. SHUTTER button will open/close the shutter, OPEN LED will
indicate when shutter is open.
2. Power “on”/off” switch
3. Iris Adjustment Dial.
Using the Footpedal / Remote Device
1. Connect Footpedal /remote device to 3.5mm jack at rear of unit.
2. Depressing the footpedal, or providing a momentary contact
closure, provides the same function as pressing the SHUTTER
button.
Illuminating a Specimen
1. To Illuminate a specimen, press and release the SHUTTER button to
open the shutter (OPEN LED will turn on- green).
2. User the Iris Adjustment Dial for intensity adjustment to desired level.
Warning: UV light and high levels of visible light will be emitted
from the end of the light guide !
3. Press the SHUTTER button to close the shutter. The OPEN indicator will
turn off.
Adjusting Light Output
1. To adjust light intensity, use the Iris Adjustment Dial and set to desired
level by turning.
2. There are no hard stops, motion is smooth from 0 to 100%. 0, 12.5, 25,
50, 100% are marked on the fascia around the dial for reference.
3. Note that as the lamp ages, absolute power at a given setting will
decrease. Adjust the intensity as necessary. If monitoring absolute
value of lamp output is desired, contact Lumen Dynamics about
purchasing the X-Cite® Optical Power Measurement System.
Viewing Accumulated Lamp Hours
1. The X-Cite 200DC system automatically accumulates the number of
hours for which the lamp has been on, and shows this information on
the LED display. The lamp hours are shown when the unit is powered
on and after lamp has warmed up.
Refer to User Guide 035-00446R for Power Measurement options.
WARNING: Never look into the light emitting end of the light guide! The light could severely damage the cornea and retina of the eye
if the light is observed directly. Eye shielding must be used at all times as well as clothing to protect exposed skin
Refer to X-Cite 200DC User’s Guide 03500446R, Section 3
Printed in Canada
035-00447R Rev. 0
SIDE 2
®
X-Cite 200DC: Quick Start Guide
Warning – Refer to User Manual 035-00446R for all safety precautions prior to use.
Installing the Lamp Module
1.
2.
3.
4.
6.
Locate the 4-pin Intelli-Lamp sensor connector at the rear of the lamp module
and connect it to its mate located on the top of the lamp-housing wall.
Tip: the Intelli-Lamp connector will only attach in the correct orientation. If
you are having difficulty attaching the connector, try rotating it by 180º.
7.
Locate the Power connector with two leads and connect it to its mate located
on the bottom of the lamp-housing wall.
Tip: the Lamp Power connector will only attach in the correct orientation. If
you are having difficulty inserting the connector, try rotating it by 180º.
Be sure the AC power cord is disconnected from the unit.
Remove the screw from the lamp access side panel using the 3mm hex
tool.
Carefully remove the lamp module from its container, holding only the
ceramic component and glass rim
As illustrated below, position the lamp facing towards the front of the unit
with the power leads facing towards you.
Caution: Do not touch the bulb’s glass envelope or the inside surface of
the reflector. Skin oils can cause the lamp module to fail prematurely.
Rim
5.
Make sure the middle of the lamp is in position to fit into the spring
clamp. Slide the lamp until it snaps into the spring clamp. The leading
edge of the reflector should fit snugly into the lamp holder recess.
*Center
lamp
power
lead as
shown*
8.
It is very important to ensure that the lamp anode cooling fin (bar) and
lamp power lead, at the front of the lamp are centered within the lamp
holder cutout. Rotate the lamp as required.
9. Replace the lamp housing side panel and tighten the fastening screw.
10. Replace the hex tool in the clips underneath the system for future use.
Note: if the lamp housing panel is not secured completely, the lamp will not
strike and the “bulb” message will display when power is turned on to the unit.
Lumen Dynamics Group Inc.
2260 Argentia Rd.
Mississauga, Ont.
Canada, L5N 6H7
Tel: 1-905-821-2600
Toll Free: 1-800-668-8752
Fax: 1-905-821-2055
www.ldgi-xcite.com