1
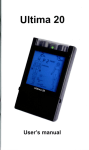
User Manual for TENS AA
PRESCRIBING INFORMATION
FOREWORD
Read this User Manual carefully before you start
using your TENS AA.
The manufacturer strongly recommends carefully
reading of the “ Warnings and Cautions” and
Chapters of this User Manual.
.
WARNINGS AND CAUTIONS
Prescription labeling:
Federal law restricts this device to sale or use
by or on the order of a practitioner so licensed
by the state.
Contraindications:
1.
2.
3.
Do not place the pads on the carotid sinuses
located at the two sides of the neck, (where
a doctor feels for a pulse), or over the eyes.
Do not use this T.E.N.S. unit if you have a
heart pacemaker or serious heart rhythm
problem.
Any electrode placement that causes current
to flow transcerbrally (through the head).
1
4. The use of T.E.N.S. whenever pain syndromes
are undiagnosed, until etiology is established.
WARNINGS
1.
2.
3.
4.
5.
6.
7.
8.
9.
Do not use this T.E.N.S. unit during the
pregnancy or at anytime on the abdomen
during pregnancy.
This T.E.N.S. unit is not effective for pain of
central origin. (Include headache).
T.E.N.S. unit should be used only under the
continued supervision of a physician.
T.E.N.S. unit has no curative value.
T.E.N.S. is a symptomatic treatment and as
such suppresses the sensation of pain,
which would otherwise serve as a protective
mechanism.
The user must keep the device out of the
reach of children.
Electronic monitoring equipment may not
operate properly when T.E.N.S. stimulation
is in use.
Do not use T.E.N.S. unit if you are driving or
operating machinery.
WARNINGS
Do not use any pad which size is less than 40mm
X 40mm.
Allergic reactions to the self-adhesive pads can
occur, even though they are hypoallergenic:
● Do not apply to broken skin.
● Do not apply pads to skin that do not have
normal sensation .If the skin is numb,
stimulation will not be felt and too great an
intensity might then be used accidentally.
If you have epilepsy, consult your doctor
2
23
22
2.
Where applicable place the black adapter
closer to the spinal column; e, g. if the arm
is to be treated, place the black adaptor
higher up the arm the red adaptor.
GENERAL INFORMATION
Statement: This T.E.N.S. Unit has been tested for
EMC requirement according to EN60601-1-2
before using T.E.N.S.
PRECAUTIONS
1.
2.
PADS
The pads that are supplied with your T.E.N.S.
Pain Relief Unit are self-adhesive and can be
used several times. Skin must be allowed to
breathe, so the pads should be removed
periodically. periodically. When not in use, the
pads should be placed onto the clear plastic
shield.
The condition of the pads does affect the
conductivity and, therefore, the performance of
the unit. When the pads initially lose their
adhesive quality, it is possible to reactivate their
adhesiveness by applying a fine spray of water.
Once the pads have finally lost their adhesive
quality, new pads should be purchased.
Isolated cases of skin irritation may occur
at the site of electrode placement
following long-term application.
Effectiveness is highly dependent upon
patient selection by a person qualified in
the management of pain patients.
ADVERSE REACTIONS
Skin irritation and electrode burns are potential
adverse reactions.
GENERAL WARNINGS
1.
2.
3.
4.
5.
Do not immerse T.E.N.S. units in water.
Do not place the T.E.N.S. unit close to
excessive heat.
Do not use any pad which size is less than
40mm X 40mm.
Use only the specified batteries: 2x 1.5volt
AA Alkaline (LR6). The use of any other
battery could damage the unit.
Remove batteries if unit is not used for a
long period of time.
3
6.
7.
Do not use the unit while asleep.
Keep the unit away from sources of high
magnetic fields such as TV’S, microwave ovens
and hi-fi speakers, as these may affect the LCD
screen.
8. Temperature & R.H. of storage: -20 --+80 , 8%-80% R.H.
9. Temperature & R.H. of transportation: -20 --+80 ,
8%--80% R.H.
1,2,3,4,5,10,12,14,16,18,20,25,
30, 35, 40, 50, 60, 70, 80, 90,
100,110,120,130,140,150,
D. Output voltage range
The output voltage of two channels can be adjusted
individually in 20 steps. For 500Ω load, the output
The peak pulse output current of two channels can be
adjusted individually in 20 steps. For 500Ω load, the
output voltage can be change from 12mA to 150 mA
in steps of 7 mA roughly.
E. Peak pulse output current
The peak pulse output current of two channels can be
adjusted individually in 20 steps. For 500-ohm load,
the output voltage can be change from 12mA to
150mA in steps of 7mA roughly.
RED & BLACK FASTENERS ON LEADS
At the end of the leads supplied with your unit, you
will find red and black adapters. these are Cathode
and Anode respectively. The following general points
are made for your information:
1.
More sensation tends to come from the black
adapter(Cathode).
4
21
Amplitude
CONTENTS
Time
Prescribing Information ……………………………1
Contents ……………………………………………5
(2).Mono-Phasic waveform
Amplitude
Operating Instruction for Physician……………….6
Instruction For Use…………………………………6
How to Assemble Your Unit……………………….7
Time
After Use…………………………………………….12
Operation of the T.E.N.S .Unit………..…………..13
B. Pulse duration
Specification………………………………………..17
Except Mode B, Mode D Mode E, which pulse
duration can not be adjusted, by pressing PW+ or
PW- key, the pulse width can be adjusted from
Features…………………………………………….18
50μS to 250μS in step of 10μS
.
Detail Information…………………………………..22
C. Pulse frequency
Except M Mode B and Mode E, with a pulse rate,
by pressing PR+ or PR- key, the pulse width can
be adjusted to one of the following values (Hz):
20
5
OPERATING INSTRUCTIONS FOR PHYSICIAN
INTENDED USE
T. E. N. S. Stands for (Transcutaneous Electrical
Nerve Stimulation). This T.E.N.S. system is used to
provide symptomatic pain relief for chronic, acute or
post-operative pain.
5.
Two knobs on top of the unit adjust the
intensity by turning in clockwise or counterclockwise.
6.
By pressing “PR-”key and “PW-”key
simultmeously, the waveform can be
changed in two types.
7.
By pressing “timer key”for 2 seconds the
unit will be locked or unlocked in toggle.
While the unit is locked, all parameters
can not be adjusted except timer and
intensity. By pressing ON/OFF key can
not change the status of locked/unlocked.
8.
When the batteries are low, the symbol of
battery is flashing in 2Hz indicating that
the batteries should be replaced.
9.
Automatic shut off: When the unit intensity
levels are 0 on both channels, and it has
not been in use for 5 minutes, the unit will
be shut off automatically.
HOW DOES T.E.N.S. WORK
T.E.N.S. is believed to work by stimulating your
body's own natural defenses against pain.
The unit produces a gentle stimulus through pads
normally placed over the area of pain. This stimulus
helps the body to produce natural pain relievers
called endorphins.
The correct positioning of the pads is important.
Some people feel immediate benefit from T.E.N.S.
However some may only achieve benefit after
repeated treatment sessions and over an extended
period of time.
INSTRUCTIONS FOR USE
Your T.E.N.S. Pain Relief unit has been designed to
be simple and easy to use.
Detail information regarding to the Waveform,
Pulse duration, Pulse frequency, Output
voltage range, and Peak pulse output current:
A.
Waveform
There are 2 types of waveforms:
(1). Symmetrical Bi-Phasic rectangular waveform
6
19
CONTENT IN THE PACK
100µS in the next 6 seconds. Pulse rate is
selectable.
Mode E--- Modul II, Pulse rate and Pulse width
Modulation.
Frequency increase from 50Hz to 100Hz while
pulse width decrease from 200µS to 60µS
within 5 seconds.
Treatment timer:
Continuous,15min,30min,45min,60min, 90min
selectable.
FEATUERS
1.
When mode changes, the intensity will
automatically go down to zero;
2.
When the unit is turned on, it will
automatically enter the mode that the unit
had worked in before the unit was turned
off;
3.
4.
When the treatment timer is set, it will
begin to count down one minute by one
minute; Once it count down to Zero, the
unit will automatically shut off;
When the pulse rate, pulse width or
intensity is being adjusted, the auto-repeat
function is available, when the key is held
down over 1 seconds, it will automatically
increased/decreased 1 step per 1/4
seconds.
Your TENS pack should contain the following:
• 1 x T.E.N.S. Unit
• 2 x Leads
• 4 x Self Adhesive Pads with Connectors
(size: 40mm X 40mm)
• 2 x Alkaline AA1.54V (LR6) Batteries
• 1 x Instruction Booklet (which you are
reading)
Having checked all the contents are correct
please proceed to assemble the unit.
HOW TO ASSEMBLE YOUR UNIT
Assembly of the TENS AA unit is very simple
and requires only five steps.
STEP 1 BATTERIES
Remove the battery cover and insert two
batteries, as shown on the diagram inside the
battery compartment. Replace the battery
cover.
18
7
SPECIFICATION
Model:
TENS AA
Channel:
Dual
Output:
Maximum 150Ma(peak
value)cross 500Ω load
Pulse Width: From 50µS to 250µS adjustable
Pulse Rate:
Waveform:
From 1Hz to 150 Hz adjustable
Symmetrical Bi-phasic rectangular
Monophasic rectangular
Mode:
5 Modes are available
Mode A---Constant
Mode B---Burst I
Two train per second, 250ms on,
250ms off;
Note: Your unit will not function if the batteries
are inserted incorrectly. To check, press the
button once and the LCD display will start up.
Having made this check press the
button
again to switch the unit off.
CAUTION
There is a risk of explosion if the batteries are
fitted incorrectly. Replace with AA Alkaline 1.5
volt batteries (LR6). Do not mix old and new
8
25 pulses within one train, pulse
width=200µS
Mode C--- Burst II
Two train per second, 250ms on,
250ms off;
Pulse width and Pulse rate are
selectable.
Mode D---Modul I , Pulse width
modulation
Pulse width modulated from
100µS to 250µS within 6
seconds and then back to
17
batteries. Do not dispose of the batteries in a fire
and keep them out of reach of children. The
batteries must be removed from the unit if unit is
not used for a long period of time.
.
STEP 2 LEADS
Decide whether you wish to use the unit with one
lead or two.
If using two leads, insert the plugs into both jacks
on the plugs of the unit. If only using one lead,
insert into the ch1 jack as marked on the unit.
Please read the following detail specification
carefully before using the T.E.N.S. Unit.
16
9
STEP3 PADS
Remove pads from the bag and connect to the
leads.
Turn in counter-clockwise decrease the
intensity.
Stands for Pulse Rate Up, press
this key to increase the frequency.
Stands for Pulse Rate Down, press this
key to decrease the frequency.
Stands for Pulse Width Up, press
t his key to increase the Pulse Width.
5
Stands for Pulse Width Down, press this
key to decrease the Pulse Width.
6
7
10
15
Press the key
&
simultaneously
to select the waveform. The following
waveform symbols will be displayed for 3
seconds when you press the key.
Symmetrical Bi-phasic rectangular
Monophasic rectangular
STEP 4 PLACEMENT OF PADS
Ensure wherever you intend to place the pads.
that the skin is clean and thoroughly dry.
remove the pads from the clean plastic shield
and position on your body as required.
NOTE
In a very small percentage of people, using
T.E.N.S. in Monophasic Rcetangular waveform
can exacerbate the symptoms of pain. If this
occurs, stop treatment in this waveform in
immediately.
Press this key to select mode, total 5
modes are available. Constant, Burst I,
Burst II, Modul I, Modul II.
8
9
Press this key to set the treatment time.
These two knobs adjust the intensity of
channels, left side is for the Ch1, right
side is for Ch2. Turn the knob and the
intensity over zero, the corresponding
LED light located at the top of the knob
will light up.
Turn in clockwise increase the intensity.
14
STEP 5 READING
Read section on “ Operation of the T.E.N.S.
Uint”, and decide how to use the T.E.N.S. uint
11
adhesive quality in order not to affect the
efficiency of the unit.
for the treatment.
NOTE: AFTER USE
Always ensure that the unit is switched OFF
before removing the pads. After use, return the
pads to the clear plastic shields. There is no
need to separate the pads unit from the leads
and pads.
OPERATION THE T.E.N.S. UNIT
TENS AA is easy to operate by pressing the key
as following diagram.
10
WHAT DOES EACH KEY DO
This key switches the unit on and off. Press
once the unit is on, the LED light (green
color) and the LCD display located at the
front of the unit will light up, there will be no
feeling from either lead at this point as the
intensity always starts at zero. Press this
key again the unit will switch off.
Life of the pads: When the pads initially lose
their adhesive quality, it is possible to reactivate
their adhesiveness by applying fine spray of
water. Replace the pads when they lose their
12
13