1
lindab
|
we simplify construction
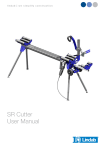
SR Cutter
User Manual
Contents
CE marking
Technical data
Presentation
Lubrication points
Mounting the wheel set
Preparations for cutting
Instructions for cutting
Instructions for moving the bench
Problem solving
Spare parts
Contact
2
3
4
5
6
7
10
14
15
22
26
SR Cutter 226601
Declaration of conformity
Lindab hereby declares under sole responsibility
that this product complies with the following
directives: 98/37/EC, 2006/95/EC, EMC 89/336/
EEC.
3 Wear ear defenders
The noise level can vary when cutting the
ducts, sometimes it exceeds 85 dB(A).
Always wear ear defenders to protect yourself.
2 26601
4 Make sure the stand is steady
Never use the stand on uneven or unsteady
surfaces. Make sure the legs are extended
correctly and secured tightly before use.
Lars-Åke Mattsson
R&D Manager, Ventilation
5 Do not overload the stand
Do not exceed the maximum workload. Do
not climb, sit or stand on the stand.
Safety instructions
6 Do not use in a humid environment
Risk of electrical short circuit.
Read through the manual before you start using
the SR Cutter. Keep the manual to hand so that
everyone who uses the SR Cutter has access to
the manual.
7 Protect the electric cable
Risk of damage to the cable from sharp plate
edges.
1 wear protective goggles
Risk of chips from the nibbling machine. Risk
when cutting the duct's needle.
2 Use protective gloves
Risk of cut injury when handling the duct.
2
8 Assembly and disassembly
Use the handle to make assembly easier
9 Moving
The SR Cutter must be moved on its own
wheels. Avoid heavy loads.
Technical data
Bench – collapsed
Length
Width
Height
1910
500
380
mm
mm
mm
Length
1910
Length (with extended telescope arms) 4800
Width
730
Height
1270
Working height
820
mm
mm
mm
mm
mm
Maximum permitted load
Weight
kg
kg
Part name
Part no
SRCS
226601
SRCS US
100584
CSS EU 230
226607
CSS UK 110
226609
CSS CH 230
226608
CSS US 110
100886
NCP
226618
CSCP 40
100754
CSCP 60
100755
CSCPS
226617
Bench – erected
75
36
Shears
Model
Power
Voltage
Stroke frequency
Weight
3514-7R
500
230
2400
2.2
W
V
/min
kg
200
0.35
mm
kg
Needle pliers
Length
Weight
Click pliers, small (Ø 80-224)
Length
Weight
290
1.0
mm
kg
Click pliers, large (Ø 250-315)
Length
Weight
290
1.1
mm
kg
440
4.5
mm
kg
Stand for click pliers
Length
Weight
3
Presentation
Squeeze handle
Knife arm
Left telescopic arm
Knife blade
Left adjustable
(retracted)
stopper
Slidable middle duct
support
Stand for click
pliers
Click pliers
Setting block
Fixed duct support
Left
locking
knob
Right adjustable
stopper
Lift handle
Cord holders
Right telescopic
arm
Foldable legs
Right locking
knob
Shears
Needle pliers
Transport wheels
Foldable legs
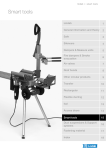
With this workbench you can cut ducts of 80-315 mm diameters and lengths of 200-3000 mm.
The bench is equipped with:
• wheels and foldable legs so you can easily move it to wherever you are currently installing ducts
• scale for setting the desired duct length
• knife to make a hole for the shears
• shears to cut the duct
• pliers to cut the inner and outer needle
• pliers to make the notches
4
Lubrication points
Lubricate these points with thin oil when necessary. It is important that lubrication is carried out.
5
Mount the wheel set
6
Preparations for cutting
Fold out the bench
1. Life the bench opposite the wheel side.
2. Press in the buttons and turn out the legs.
3. Lift the bench by the handle on the wheel
side.
4. Press in the buttons and turn out the legs.
Open the knife stand
1. Loosen the locking handle on the knife stand.
2. Take the stand out of its horizontal position.
3. Move the stand to its vertical position.
4. Tighten the locking knob.
7
Mount the click pliers set (accessory)
1. Push the rectangular washer into the dovetail
groove.
315
300
280
250
224
200
180
160
150
140
125
112
100
80
2. Secure the two screws.
Tighten all three screws.
8
3. Block the grooves for the dimensions which
are not used with the clip.
Install the arm
1. Pull out the small locking knob.
2. Fit the arm over the stand and let the locking
knob engage.
Mount the click pliers onto the arm.
Mount the shears
1. Take the shears over the split pin so the pin
locks.
2. Hang the cables in the cable holder.
9
Instructions for cutting
Set the desired duct length
1. Loosen the telescopic arm's locking knob.
2. Set the desired duct length on the scale.
3. Tighten the locking knob
For lengths of 200-1700 mm use the right telescopic arm and for lengths of 1700-3000 mm
use the left telescopic arm.
Position the duct
1. Turn the duct so that the opening of the fold
is facing you.
2. Place the duct on the bench.
3. Push the end of the duct towards the stopper
on the telescopic arm.
10
4. Adjust the slidable middle duct support so it
is as close as possible to the duct end.
Adjust the knife arm so that it
matches the duct's diameter
1. Loosen the locking handle on the setting
block.
2. Move the block so that the arm is horizontal
when it hits the duct.
3. Tighten the locking handle.
Make a hole with the knife
1. Squeeze the handle right down so the knife's
edge comes out.
2. Rotate the duct so the knife hits the duct a bit
"before" the duct's spiral fold.
3. Hold the duct with one hand.
4. Press the knife arm firmly downwards until
the knife arm stopper touches the duct.
Scratch a line with the knife
1. Scratch a thin line with the point of the knife
around the duct. The easiest way to do this
is turning the duct away from you. Use the
scratched line as a guide to cut straight.
11
Cutting the duct with the shears
1. Start the shears.
2. Insert the shears' cutting tooth into the hole.
3. Turn the duct almost one full turn towards
you. Make sure the scratched line is in the
centre of the strip that is cut off.
4. Do not turn the last bit but hold the duct still
and lead the shears forward instead.
Cutting the outer needle
Cutting the inner needle
Lindab recommends cutting the outer needle
from Ø 100 and bigger.
Lindab recommends cutting the inner needle
from Ø 315 and bigger.
12
NOTE: If you experience problems passing over
the fold or to do with cutting ducts straight,
see the "Problem solving" chapter.
Use the correct click pliers to get
the notch at the right distance
from the duct end
Adjust the click pliers' arm so
the height of the click pliers arm
matches the duct's diameter
Use the 40-pliers for Ø 80-224 (Ø 3"-9").
Use the 60-pliers for Ø 250-315 (Ø 10"-12").
1. Pull the locking pin knob out. (The knob can
be locked in its outer, free position by twisting
it.)
2. Move the block to a suitable groove.
3. Let the knob spring back in to lock the block.
Making notches
For the recommended number of notches, see
"Assembly Instructions Lindab Safe and Lindab
Safe Click".
1. Insert the opening of the pliers over the duct
end as far as it can reach.
2. Keep in place by holding the duct with your
other hand.
3. Press the handle fully together.
4. To control the notch, see the instructions for
"Checking the notch".
5. Place the notches evenly around the circumference.
You can easily loosen the pliers from the arm for
separate use.
13
Moving the bench
1. Move the click pliers down between the fixed
duct and the right-hand duct support.
2. Push the right telescopic arm in and lock the
knob.
3. Push the slidable middle duct support to the
right – up to the fixed duct support.
4. Lower the knife arm.
5. Hold onto the handle and turn in the legs on
the wheel side.
6. Move the bench as shown in the picture.
7. Use a high grip, with the bench in a vertical
position, to get it through narrow passages.
Fold the bench as small as it will
go e.g. for stowing in a car.
1. Loosen the top part of the click pliers stand.
14
2. Place the stand as shown in the picture.
3. Collapse the knife stand.
4. Turn the legs in.
Problem solving
Problem
Cause
Solution
Remove and sharpen the knife or replace it
with a new one.
The knife is blunt.
After sharpening, make sure you adjust the
stopper so that the knife enters far enough
to make a large enough hole.
The knife is difficult
to press through the
duct.
Choose the correct height for setting the
knife arm.
The arm must be as horizontal as possible
when its stopper hits the duct.
The knife arm is set at an
incorrect height.
15
Problem
Cause
Solution
The tooth does not hit the
hole.
Tip: Check that the edge of the knife
touches the centre of the shears' tooth.
The hole is too small.
The cutting tooth of
the shears cannot
enter the knife hole.
The knife arm's stopper
was not pressed all the way
down to the duct when the
hole was made.
The hole is too small.
Press the stopper all the way down to the
duct.
Choose the correct hole for setting the knife
arm.
The knife arm is set at an
incorrect height.
Continued on next
page...
16
The arm must be as horizontal as possible
when its stopper hits the duct.
Problem
Cause
... continued from
previous page.
The hole is too small.
The stopper of the knife
arm was set incorrectly e.g.
after sharpening the knife.
(The cutting tooth of
the shears cannot
enter the knife hole.)
Solution
Adjust the stopper so that the knife goes in
to make a large enough sized hole.
17
Problem
Cause
Solution
The duct is difficult to
cut with the shears.
The shears are blunt.
Remove the cutting tooth of the shears and
replace it with a new one. (After very heavy
wear the side cutter may also need to be
replaced.) See the chapter on spare parts.
The opening of the fold
is turned away from the
shears.
Turn the duct so that the opening of the fold
is facing the shears.
The knife hole was made in
the wrong place.
Make the knife hole in the place, i.e. just
before the fold.
The shears are blunt.
The fold is difficult to
cut with the shears.
Remove the cutting tooth of the shears and
replace it with a new one. (After very heavy
wear the side cutter may also need to be
replaced.) See the chapter on spare parts.
The wrong work method is
being used.
Press the shears forward a bit harder but
make sure you work them upwards...
and down.
18
Problem
Cause
Solution
The bearing pivots points
for the shears or knife are
too loose.
Tip: Check that the edge of the knife
touches the centre of the shears' tooth.
Allow the shears to guide themselves.
The duct was not cut
off properly and has
a nick.
The shears were forced
to the left or right during
cutting.
Tip: Before cutting, scratch a thin line with
the point of the knife around the duct. Make
sure the scratched line is in the centre of the
strip that is cut off.
19
Problem
Cause
Solution
The scale is set to an
incorrect length.
Set correct length on the scale.
During cutting, the duct was
not pressed close enough
to the stopper at the end of
the telescopic arm.
The cut duct is the
wrong length.
Press the duct close to the stopper.
The fixed duct support has
come loose from the bench.
Fix the support with its two tightening
screws.
Make sure that the free distance between
the closest edge of the shears' cutting tooth
corresponds with the marking on the scale.
NOTE: Applies to both right and left
stoppers.
20
Problem
Cause
Solution
The hole was not completely cut out.
The cut duct has a
nick at the knife hole.
The hole is too wide.
Adjust the stopper so that the knife goes in
far in enough to make a large enough hole.
The click pliers make
holes in the duct.
Unscrew the stop screw slightly. Check how
the notch looks, see instructions for "Checking the notch".
The pliers' stop screw has
been screwed in too far.
The click pliers make a
faint notch.
Screw the stop screw in slightly. Check how
the notch looks, see instructions for "Checking the notch".
The pliers' stop screw has
been unscrewed too far.
21
SR Cutter
Working bench
SRCS
226601
SRCS US
100584
Spare parts
Roller (100)
Roller (250)
CSPR 100 226605
CSPR 250
Shears stand with pin
for Dräco
Pin for Dräco
Knife arm with knife
stand
Knife
CSSA
CSSAA
SRCKA
CSKE
101168
Wheel kit
SRW
22
226606
101246
Leg shoe
100156
SRCSF
101248
Duct support 250 with
rollers 250
Handle with duct
support 100
SRCR 250
SRCH
101249
100765
100772
226612
Shears (Dräco 3514-7R)
Shears
CSS EU 230
226607
CSS UK 110
226609
CSS CH 230
226608
CSS US 110
100886
Spare parts
Shears cutting tooth
37140
Pin set for shears
cutting tooth 37140
Shim set for shears cutting
tooth 37140
CSSK
CSSKPS
CSSSSS
226611
100146
Side cutting edges
for shears
Screw and pin set
SJS
SSPS
226623
100147
100002
23
Click pliers
Click pliers
CSCP 40
100754
CSCP 60
100755
Spare parts
Gauge
CSNC
24
Adapter for click pliers
100096
CSCPA
100756
Stand for click pliers
Stand
CSCPS
226617
Spare parts
Clips
CSCPSC
101488
25
Contact
Belgium
Lindab N.V.
( +32 9 385 5011
www.lindab.be
Poland
Lindab SP. z o.o.
( +48 22 489 88 00
www.lindab.pl
Czech Republic
Lindab s.r.o.
( +420 233 107 100
Romania
Lindab SRL
( +40 21 2094 100
www.lindab.ro
Denmark
Lindab A/S
( +45 73 232323
www.lindab.dk
Estonia
Lindab AS
( +372 6348200
www.lindab.ee
Finland
Oy Lindab Ab
( +358 9 2534 4500
www.lindab.fi
France
Lindab S.A
( +33 4 78 06 36 41
www.lindab.fr
Germany
Lindab GmbH
( +49 4532 2859-0
www.lindab.de
Hungary
Lindab Kft.
( +36 23 531 100
www.lindab.hu
Ireland
Lindab (Irl) Ltd
( +353 1 456 8200
www.lindab.ie
Italy
Lindab S.r.l
( +39 011 99 520 99
www.lindab.it
Latvia
Lindab SIA
( +371 780 43 71
www.lindab.com
Lithuania
Lindab UAB
( +370 52 729 729
www.lindab.com
Norway
Lindab A/S
( +47 22 80 39 00
www.lindab.no
26
Russia
OOO Lindab
( +7 812 360 53 60
www.lindab.ru
Switzerland
Lindab AG
( +41 58 800 31 00
www.lindab.ch
Sweden
Lindab Sverige AB
( +46 431 850 00
www.lindab.se
UK
Lindab Ltd
( +44 1604 788 350
www.lindab.co.uk
USA
Lindab Inc.
( +1 757 488 1144
www.lindabusa.com
27
1042 EN 2010-03-16