1
an spx brand
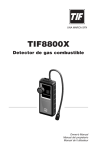
TIF8800X
Combustible Gas Detector
Owner’s Manual
Manual del propietario
Manuel de l’utilisateur
Safety Precautions
warning: To prevent personal injury,
• Study, understand, and follow all safety precautions and
instructions relating to this tool.
•Wear eye protection that meets ANSI Z87.1 and OSHA
standards when using the TIF8800X Gas Detector.
• Verify the instrument is functioning correctly by testing it on a
known combustible leak source before approaching a
suspected hazardous area.
• Charge or replace battery pack in an area known to be non-
hazardous. The process of charging or replacing the battery
pack could cause a spark and, in an environment containing
combustible gas, could lead to an explosion.
•Reinstall the rubber boot and battery cover after replacing the
battery pack. Operating the instrument with the rubber boot
removed may impair the intrinsic safety of the tool—without
the rubber boot in place, there is a possibility of static charge
leading to explosion.
• This instrument is not designed to reliably detect carbon
monoxide and should not be used as a detector for carbon
monoxide.
Table of Contents
General Description . . . . . . . . . . . . . . . . . . . . . . . . . . . . . . . . . . . . . . . . . 2
Applications . . . . . . . . . . . . . . . . . . . . . . . . . . . . . . . . . . . . . . . . . . . 2
Features . . . . . . . . . . . . . . . . . . . . . . . . . . . . . . . . . . . . . . . . . . . . . . 2
Parts & Controls . . . . . . . . . . . . . . . . . . . . . . . . . . . . . . . . . . . . . . . . . . . 3
Setup . . . . . . . . . . . . . . . . . . . . . . . . . . . . . . . . . . . . . . . . . . . . . . . . . . . . 4
Install the Battery Pack . . . . . . . . . . . . . . . . . . . . . . . . . . . . . . . . . . . 4
Charge the Battery Pack . . . . . . . . . . . . . . . . . . . . . . . . . . . . . . . . . 5
Operating Instructions . . . . . . . . . . . . . . . . . . . . . . . . . . . . . . . . . . . . . . . 6
Instrument Status Indicators . . . . . . . . . . . . . . . . . . . . . . . . . . . . . . . . . 7
Maintenance . . . . . . . . . . . . . . . . . . . . . . . . . . . . . . . . . . . . . . . . . . . . . .
General Care . . . . . . . . . . . . . . . . . . . . . . . . . . . . . . . . . . . . . . . . . .
Battery Pack . . . . . . . . . . . . . . . . . . . . . . . . . . . . . . . . . . . . . . . . . . .
Sensor . . . . . . . . . . . . . . . . . . . . . . . . . . . . . . . . . . . . . . . . . . . . . . .
8
8
8
9
Specifications . . . . . . . . . . . . . . . . . . . . . . . . . . . . . . . . . . . . . . . . . . . 10
Replacement Parts . . . . . . . . . . . . . . . . . . . . . . . . . . . . . . . . . . . . . . . . 11
Warranty . . . . . . . . . . . . . . . . . . . . . . . . . . . . . . . . . . . . . . . . . . . . . . . . 11
Troubleshooting . . . . . . . . . . . . . . . . . . . . . . . . . . . . . . . . . . . . . . . . . . . 12
Safety Precautions . . . . . . . . . . . . . . . . . . . . . . . . . . . . inside front cover
1
General Description
The TIF8800X is a battery-operated combustible gas detector that provides a
ticking signal that increases in frequency as the source of combustible gas or
vapor is approached. This tool is ideal for pinpointing the location of combustible
gas leaks as small as 1 ppm (gasoline vapor).
Applications
The TIF8800X may be used in almost any situation where a combustible gas,
vapor, or residue needs to be found. Some applications are
•
•
•
•
Gas lines and pipes
Fuel leaks
Liquid or gas-fired heating systems
Propane filling stations
warning: The TIF8800X is not designed to reliably detect
carbon monoxide. To prevent personal injury, do NOT attempt to
use this instrument to detect carbon monoxide.
Features:
•
•
•
•
•
•
•
Audible “ticking” signal
Leak strength indicating LEDs
Adjustable sensitivity
Cordless operation
Rechargeable battery pack
Battery pack status indication
One-year warranty
2
Parts and Controls
1
7
6
2
5
4
Side View
1.On/Off switch
2. Instrument status indicators (five LEDs)
3.Probe tip and sensor
4.NiMh battery pack (behind cover)
5. Charger input jack
6. Leak intensity indicators (six LEDs)
7.Sensitivity control
3
3
Setup
Install the Battery Pack
Before using the TIF8800X, it is necessary to install and charge the supplied
NiMh battery pack.
1.Remove the rubber boot from around the tool.
2.Unthread the screw holding the battery cover in place, and remove the cover.
3.Connect the 4-pin plug on the battery pack harness to the tool, and position
the battery pack in the chamber. See Figure 1.
Connect
4-pin plug
from
battery pack
harness.
Figure 1
Battery Pack
Installed
4.Reinstall the battery cover and screw.
5.Reinstall the rubber boot.
caution: To prevent personal injury, always reinstall the rubber
boot. Failure to do so may impair the intrinsic safety of the tool—
without the rubber boot in place, there is a possibility of static
charge leading to explosion.
Note: If the boot or the battery cover is lost or damaged, replacement parts are
available. Refer to the Replacement Parts section of this manual for details.
44
Setup
Charge the Battery Pack
Before using the gas detector for the first time, you will need to charge the
battery pack in order for the unit to function correctly.
CAUTION: To prevent equipment damage,
• Charge the battery pack only in temperatures between 32°F and 104°F
(0°C and 40°C). Charging outside this temperature range may cause
permanent damage to the battery pack.
• Use only the AC adapter that is included with the TIF8800X to charge the
battery pack. If a replacement adapter is needed, refer
to the Replacement Parts section of this manual.
1. Place the power switch in the OFF / CHARGE
position. See Figure 2.
2.Plug the AC adapter (included with the TIF8800X) into
an appropriate wall outlet, and connect the charger
jack to the charge input on the tool.
See Figure 3.
During the charge cycle, the yellow LED (charge) is
illuminated. Once charging is complete, the green
LED (READY) will also illuminate.
Notes:
Top
View
Power
Switch
Figure 2
• Leaving the AC adapter connected to the tool after
charging will not damage the tool. However, the tool
will not operate until the AC adapter has been
disconnected.
• The battery pack is shipped pre-charged but its
condition upon arrival to the user is unknown due to
Charger
parasitic drainage that occurs during storage and
Input Jack
shipment. An initial charge cycle is recommended to
achieve full performance of the tool. This initial charge
will take 2-6 hours depending on the actual condition
of the battery pack. Subsequent charges (applied after
the red low-battery LED illuminates) will take
approximately 15 hours.
• New battery packs need to be conditioned before
they’re capable of optimum performance. To condition
a new battery pack: charge it fully, then operate the
tool as normal until the low battery LED illuminates.
Repeat this procedure a minimum of 3 to 5 times.
5
Side
View
Figure 3
Operating Instructions
Once the battery pack is fully charged, the TIF8800X is ready to use.
1.Move to a known, non-contaminated atmosphere.
2.Turn the sensitivity control fully counter-clockwise.
3.Turn the power switch ON. The power light should be illuminated and no
sound should be heard. Once the instrument has warmed up for about 30
seconds, a ticking sound will be heard.
4.Rotate the sensitivity control to the highest setting that does not cause the
instrument to alarm.
5.Search the general area of the suspected leak.
When a detectable compound enters the tip, the
tick rate speeds up. Along with the increased tick
rate, the leak intensity LEDs illuminate from left to
right. The larger the concentration, the more LEDs
will light up. See Figure 4.
6. In most cases, it is not necessary to adjust the
sensitivity of the instrument. However, if the alarm
sounds before a leak source can be found, it is
likely the air is contaminated with heavy
concentrations of gas. You may desensitize the
instrument by turning the sensitivity knob counterclockwise to a lower setting in order to pinpoint the
leak location.
Tech Tip
Joint compounds used on newly installed
piping may contain combustible solvents
and could cause a false alarm.
6
Leak Intensity LEDs
Figure 4
Instrument Status Indicators
There are five (5) instrument status
indicators, or LEDs, on the front of the
instrument. The indicators are explained
below, from top to bottom.
Instrument
Status
Indicators
Power Indicator (red): This LED
illuminates when the instrument is ON.
Low Battery (red): This LED illuminates
when a battery charge is needed. The
battery pack must be fully recharged
before the tool is used again.
Charge (yellow): This LED illuminates
during the recharge process.
Ready (green): This LED illuminates
when the charge cycle is complete.
A fully charged battery pack provides
up to three (3) hours of continuous
operation.
Fault (red): This LED illuminates only if
there is a problem with charging the
battery pack. Refer to the
Troubleshooting section of this
manual.
7
Maintenance
General Care
• Do not allow dirt or grease to obstruct the charger input jack on the side of the
instrument.
• Use only a soft cloth dampened with mild soap to clean the body of the tool.
• This tool is a precision electronic device. Avoid extreme mechanical shock,
exposure to strong magnetic fields, and extreme temperatures. Never
immerse the tool into a liquid.
Battery Pack
The unit is equipped with a nickel–metal–hydride (NiMh) battery pack.
If the low battery LED is ON, the battery pack needs to be charged before the
tool is used again. Keeping the battery pack charged is important for the tool to
function correctly, especially when detecting very small leaks.
Charging the Battery Pack
CAUTION: Charge the battery pack in temperatures
ranging between 32°F and 104°F (0°C - 40°C).
Charging outside this temperature range may
cause permanent damage to the battery pack.
Side
View
1. Place the power switch in the OFF / CHARGE
position.
2.Plug the AC adapter into an appropriate wall outlet,
and connect the charger jack to the tool.
During the charge cycle, the yellow LED (charge)
is illuminated. Once charging is complete, the green
LED (READY) will also illuminate.
Charger
Input Jack
Notes:
• Leaving the AC adapter connected to the tool after
charging will not damage the tool. However, the tool
will not operate until the AC adapter has been
disconnected.
• Charges done after the low-battery indicator (red
LED) illuminates take approximately 15 hours.
8
Figure 5
Maintenance
Disposal of Batteries
Batteries are recyclable. Do not incinerate or expose batteries to
open flames. Dispose of batteries according to local, state, and
federal regulations.
Sensor
If the tool does not sound an alarm in the presence of a known leak, the sensor
may need to be replaced. Refer to Replacement Parts for the sensor part
number.
1.The sensor is located on the end of the probe tip. Place the power switch in
the OFF / CHARGE position, grip the end of the probe tip and pull the sensor
straight out of the sensor socket.
2.Align the pins in the new sensor with the receptacles in the sensor socket,
and push the sensor into place.
3.Test the tool in the presence of a known leak. If it still does not alarm,
immediately discontinue using the tool and return it to TIF for service. Refer to
the Warranty section of this manual.
9
Specifications
Power Supply:
4.8V NiMH rechargeable battery pack
Continuous Operation
Time:
Up to 3 hours
Battery Pack
Lifetime
Approximately 200 charge cycles
Warm-up Period:
Approximately 30 seconds
Duty Cycle:
Continuous; no limitation
Response Time:
Instantaneous
Sensitivity:
Variable; as low as 1 ppm (gasoline vapor)
Operating
Environment:
32°F to 125°F (0°C to 52°C)
Dimensions:
8 in. x 3 in. x 1.8 in. (20.3 x 7.6 x 4.6 cm)
Weight:
Approximately 16 ounces (454 grams)
Probe Length
15 in. (38 cm)
10
Replacement Parts
Several components of the unit are consumable and will eventually require
replacement. Additionally, optional accessories for the unit are available through
your dealer. Specify the part number below to ensure obtaining the correct part.
caution: Use only the TIF8809 battery pack in this instrument.
Substitution of components may impair the intrinsic safety rating of the
tool and cause personal injury.
TIF8801
Sensor
TIF8802
AC Adapter (battery charger)
TIF8802A
AC Adapter (Australian style)
TIF8802E
AC Adapter (European style)
TIF8802J
AC Adapter (Japanese style)
TIF8808
Battery Cover
TIF8809Nickel Metal Hydride (NiMh) Battery Pack
TIF8818
Rubber Boot
Warranty
This product has been produced to provide unlimited service. Should it become
inoperable after the user has performed the recommended maintenance, a
no-charge repair or replacement will be made to the original purchaser. This
applies to all repairable units that have not been damaged or tampered with. The
claim must be made within one year of the date of purchase.
The following items are consumables and are not covered under warranty :
Sensor
Battery Pack
Charger
Damage caused by the user’s failure to perform the required maintenance on this
tool will not be covered under warranty. Damage caused by abuse or misuse of
this tool is not covered under warranty.
Repair Information
Before returning the instrument for repair, carefully review the Troubleshooting
section of this manual to determine if the problem can be solved. If the tool still
fails to work correctly, contact the company at (800) 327-5060 for more
information. Repaired or replaced tools will carry an additional 90-day warranty.
11
Troubleshooting
Symptom
Possible Cause
Solution
Power indicator LED
does not light; tool is
non-responsive.
1) Battery pack not charged.
Fault LED lights during
charging.
1) Problem with battery pack. 1) Disconnect AC adapter from
tool and wait one hour for
battery pack to cool. Do not
use tool or attempt to charge
battery pack during this time.
After one hour, reconnect AC
adapter to tool. If red LED
(fault) illuminates again,
replace battery pack.
2) AC adapter is connected
to tool.
2) Internal failure.
Tool does not seem
operable; does not alarm
in the presence of leaks.
1) Connect AC adapter to tool
and charge battery pack. Refer
to Setup for instructions.
2) Remove AC adapter.
Refer to Replacement Parts
section of this manual.
2) If battery pack is not the
problem, discontinue using tool
and return it for service.
caution: This tool should
be serviced by TIF only. Failure
to do so may impair the
intrinsic safety of the device.
1) Sensor failed.
1) Verify unit on known
combustible gas leak source. If
no response, replace sensor.
Refer to Maintenance for
instructions.
2) Internal failure.
2) If replacing sensor does not
solve problem, immediately
discontinue using tool and
return it for service.
caution: This tool should
be serviced by TIF only. Failure
to do so may impair the
intrinsic safety of the device.
12
Troubleshooting (continued)
Symptom
Possible Cause
Power indicator LED
does not light; tool is
non-responsive.
1) Battery pack not charged.
Battery life is less than
3 hours of operation.
1) Battery pack needs to be
conditioned.
2) AC adapter is connected
to tool.
Tool does not operate
1) Battery pack not
and battery pack charge
connected.
cycle will not complete
(24+ hour charge applied
and green light does not 2) Bad battery pack.
illuminate).
Solution
1) Connect AC adapter to tool
and charge battery pack. Refer
to Setup for instructions.
2) Remove AC adapter.
1) To condition battery pack:
charge it fully, then operate
tool as normal until the low
battery LED illuminates.
Repeat this procedure a
minimum of 3 to 5 times.
1) Follow instructions in the Setup
section of this manual to check
that the battery pack
connection is secure.
2) Replace battery pack.
Refer to Replacement Parts
section of this manual.
655 Eisenhower Drive
Owatonna, MN 55060-0995 USA
800
800
numéro gratuit 800
Fax 866
telécopieur 866
Toll free
llamada gratuita
327
327
327
259
259
5060
5060
5060
1241
1241
www.tif.com
553240
Rev B, August 11, 2010