1
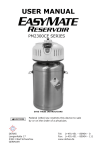
USER MANUAL
PM2300CE SERIES
SAVE THESE INSTRUCTIONS
CAUTION
Federal (USA) law restricts this device to sale
by or on the order of a physician.
300 Held Drive
Tel: (+001) 610-262-6090
Northampton, PA 18067 USA
Fax: (+001) 610-262-6080
www.precisionmedical.com
Contents
RECEIVING / INSPECTION.............................................................................. 2
Intended Use............................................................................................... 2
Operator profile...................................................................................... 2
READ ALL INSTRUCTIONS BEFORE USING................................................. 2
Abbreviations............................................................................................. 2
Safety Information - warnings and cautions.................................... 2
Specifications............................................................................................ 4
Component description......................................................................... 5
OPERATING INSTRUCTIONS.......................................................................... 5
To check the Liquid Oxygen Level:........................................................... 6
Breathing from the Reservoir............................................................ 7
Battery Replacement.............................................................................. 7
CLEANING / Maintenance.......................................................................... 8
returns......................................................................................................... 8
Disposal instructions............................................................................ 8
Troubleshooting...................................................................................... 8
Accessories / Replacement Parts...................................................... 9
Reservoir Fill Procedure..............................................................................9
LIMITED WARRANTY..................................................................................... 12
DECLARATION OF CONFORMITY................................................................ 13
1
RECEIVING / INSPECTION
Remove the Precision Medical, Inc. EasyMate Reservoir from the packaging and
inspect for damage. If there is any damage, DO NOT USE and contact your Liquid
Oxygen Supplier.
Intended Use
The Precision Medical, Inc. EasyMate Reservoir is intended to provide a stationary
storage source of liquid oxygen for Portable liquid oxygen systems and to provide
supplemental USP oxygen to patients that may have difficulty extracting oxygen from
the air that they breathe.
Operator profile
Supplemental oxygen patient that may have ambulatory capabilities requiring oxygen
on a continuous basis.
READ ALL INSTRUCTIONS BEFORE USING
This manual instructs a user to operate the EasyMate Reservoir. This is provided for
your safety and to prevent damage to the Reservoir. If you do not understand this
manual, DO NOT USE the Reservoir and contact your Liquid Oxygen Supplier.
DANGER
Oxygen supplied from the Reservoir is for supplemental use and is not
intended to be life-sustaining or life-supporting.
Abbreviations
DISS
Diameter Indexed Safety System
psig
Pounds Per Square Inch Gauge
lpm
Liters Per Minute
USP
United States Pharmacopeia
MAWP
Maximum Allowable Working Pressure
PH
Test Pressure
Safety Information - warnings and cautions
DANGER
Indicates an imminently hazardous situation which, if not avoided,
will result in death or serious injury.
WARNING
Indicates a potentially hazardous situation which, if not avoided,
could result in death or serious injury.
CAUTION
Indicates a potentially hazardous situation which, if not avoided,
may result in minor or moderate injury.
CAUTION
Used without the safety alert symbol indicates a potentially
hazardous situation which, if not avoided, may result in property
damage.
CONSULT ACCOMPANYING DOCUMENTS
Symbol for “NO SMOKING”
Symbol for “Equipment MUST be kept in a well-ventilated area at
all times.”
2
Symbol for “DO NOT touch Liquid Oxygen or parts that have been in
contact with Liquid Oxygen.”
OR
Symbol for “Warning: High pressure oxidizing gas
vigorously accelerates combustion”
Symbol for “USE NO OIL”
Symbol for “PUSH to ACTIVATE”
Wipe Fill Connector dry
ALWAYS keep the Reservoir in an upright position
8 L/min
Maximum Flowrate is 8 Liters / Minute
Volume, FULL
Volume, EMPTY
Mass
Examine; check
Symbol indicates the device complies with the requirements of
Directive 93/42/EEC concerning medical devices and all applicable
International Standards. (On CE marked Devices ONLY)
Symbol indicates the pressure vessel complies with the requirements
of Directive 99/36/EC concerning transportable pressure equipment.
(On CE marked Devices ONLY)
WARNING
• This equipment is not intended for use by patients who would suffer immediate,
permanent, or serious health consequences as a result of an interruption in the oxygen
supply.
• DO NOT smoke in an area where oxygen is being used or stored.
• DO NOT disassemble or repair the Reservoir, this could create a hazardous condition
or cause equipment failure. If you have problems, questions, or are unsure if
equipment is operating properly, call your Liquid Oxygen Supplier.
• DO NOT use if dirt or contaminants are present on or around fill connectors on the
Portable or Reservoir.
• DO NOT use oils, greases, lubricants or any combustible materials on or near the
Reservoir. Wash hands properly prior to usage.
• DO NOT touch liquid oxygen or parts that have been in contact with liquid oxygen.
Liquid oxygen is extremely cold (-297°F/-183°C). When touched, liquid oxygen, or parts
of the equipment that have been carrying liquid oxygen, can freeze skin and body tissue.
• Fill the Reservoir with only Medical Grade Liquid Oxygen. USP applies in the United States.
• Before filling the Reservoir for the first time, Reservoir should be purged with oxygen.
• Verify that the fill connector of the Reservoir is compatible with the Reservoir being filled.
• Use only as prescribed by a physician.
• Consult with a transportation company when transporting the Reservoir by a public
transportation system.
3
WARNING
Keep equipment in a well-ventilated area at all times.
The Reservoir periodically releases small amounts of oxygen gas that must be ventilated to
prevent buildup.
• DO NOT store liquid oxygen equipment in a closet, car / trunk, or other confined area.
• DO NOT place blankets, draperies, or other fabrics over equipment.
TO AVOID INCREASED RISK OF FIRE
• Keep the Reservoir away from electrical appliances. Use and store the Reservoir at least
five feet from electrical appliances that may cause heat or sparks.
• DO NOT use near any type of flame or flammable/explosive substances. Use and
store Reservoir at least five (5) feet away from equipment such as furnaces, water
heaters, and stoves that may contain open flames.
CAUTION
•
•
•
•
•
•
•
•
The Reservoir contains magnetic, ferrous material that may affect the results of an MRI.
ONLY use Precision Medical, Inc. Flowmeter (1MFA1883) or Dial Flowmeter (PM2300FCV-8).
DO NOT autoclave.
DO NOT gas sterilize.
DO NOT clean with aromatic hydrocarbons.
DO NOT immerse the Reservoir in any kind of liquid.
Store the Reservoir in a clean area when not in use.
Avoid dropping the Reservoir or placing it in a position where it could fall or be knocked
over and become damaged.
Specifications
Dimensions:
PM2345-0CE
PM2335-0CE
Diameter:
16 in
(40.6 cm)
16 in
(40.6 cm)
Height:
35 in
(88.9 cm)
31.6 in
(80.3 cm)
Full:
164.5 lbs
(74.6 kg)
133.3 lbs
(60.5 kg)
Empty:
51.2 lbs
(23.2 kg)
45.2 lbs
(20.5 kg)
Weight:
Volume of Liquid Oxygen:
45 Liters
Working Pressure:
Maximum Allowable Working
Pressure (MAWP):
35 Liters
18 –26 psi (1.24 –1.79 bar)
26 psi
(1.79 bar)
Operating Conditions:
Temperature:
Altitude:
0°F to 104°F
(-17.7°C to 40°C)
500 ft (152 m) below Sea Level to 10,000 ft (3,048 m)
Storage Conditions:
Temperature:
Humidity:
-40°F to 158°F
(-40°C to 70°C)
95% Noncondensing
Oxygen DISS Outlet Connection:
Restricted to a maximum flow of 10 lpm ±1 lpm directly from
outlet fitting.
Maximum Usable Flow:
8 lpm
Specifications are subject to change without prior notice.
4
Component description
CAUTION
Missing or illegible labels must be replaced, contact Precision Medical, Inc.
Condensation
Collection Container
Fill Connector
Vent Valve
Liquid Level
Indicator
*Fill Connector
Activation
Button
Oxygen
DISS Outlet
Connection
Handle / Tie
Down Point (2)
Serial # Label
Fill Connector
*CAIRE
PB
PENOX
TAEMA
Portable:
Reservoir:
OPERATING INSTRUCTIONS
WARNING
• Read this User Manual before operating the Reservoir.
• Before filling, to prevent freezing and possible equipment failure, use a
clean dry cloth to wipe the fill connectors dry on the Reservoir and Portable.
Extreme cold hazard.
• DO NOT press or move the plastic poppet in the center of the fill connector on
the Reservoir. This will cause a release of liquid oxygen from the fill connector.
• DO NOT leave the Liquid Oxygen System unattended during the filling operation.
5
Liquid Level
Indicator
Activation
Button
To check the Liquid Oxygen Level:
Push the Activation Button on the Liquid Level Indicator. The lights will scroll from
bottom to top, then the lights indicating the level of liquid oxygen will remain on for
5 seconds.
100%
75%
50%
25%
Each light represents approximately 12.5% of what the Reservoir
is designed to contain.
EXAMPLE: This level sensor indicates that Reservoir is
approximately 75% Full of Liquid Oxygen.
0%
100%
75%
50%
When ONLY two (2) lights are illuminated, the Reservoir has 25%
of Liquid Oxygen; almost empty. Contact your Liquid Oxygen
Supplier to fill the Reservoir.
25%
0%
100%
75%
50%
25%
• When ONLY the bottom light is flashing, indicates that the
Reservoir is nearly empty; RESERVOIR NEEDS TO BE FILLED.
• A flashing bottom light for a half second “ON” and a half
second “OFF” for an eight (8) second duration, indicates the
battery needs to be replaced.
0%
6
WARNING
If the Portable will not disengage easily, the Reservoir and the Portable may
have become frozen together.
• DO NOT USE FORCE. Simply allow a few minutes for the frozen parts to
warm, then disengage the Portable when the ice has melted.
• A MINOR LEAK is a trickle or a slight spray of Liquid oxygen coming from
the Reservoir. The leaking may be stopped by reengaging and disengaging
the Portable. If the leak persists, move the Reservoir to a well ventilated area
if possible and call your Liquid Oxygen Supplier.
• A MAJOR LEAK is a steady stream of Liquid oxygen coming from the Reservoir.
Ventilate the area by opening a window and/or door, if possible and stay away
from the Reservoir. Call your Liquid Oxygen Supplier as soon as possible.
CAUTION
Inspect the Reservoir for visual damage before use, DO NOT USE if damaged.
To fill Portable:
1. Check the Liquid Oxygen level of the Reservoir.
2. Remove fill connector protective cap.
3. Use a clean dry cloth to wipe the fill connectors on the Portable and the Reservoir.
4. Follow the Portable User Manual for the filling instructions.
5. Carefully position the Portable, ensuring that the fill connector of the Portable
aligns with the fill connector of the Reservoir.
6. Replace fill connector protective cap.
WARNING
• If a liquid oxygen leak occurs at the fill connector when you disconnect the
Portable, reconnect and disconnect the Portable to help dislodge any ice or
other obstruction. If the liquid leak persists, notify your Liquid Oxygen Supplier.
• If you notice a steady stream of liquid oxygen at the fill connector when you
disconnect the Portable, stay away from the device and immediately notify
your Liquid Oxygen Supplier.
• DO NOT direct flow of oxygen at any person, or flammable material.
• Use ONLY a Flowmeter connected to the DISS outlet to breathe from the
Reservoir.
• Using a Flowmeter other than the Precision Medical, Inc. EasyMate
Reservoir Flowmeter will deliver lower than stated values.
Breathing from the Reservoir
Attach a Precision Medical, Inc. EasyMate Reservoir Flowmeter to the DISS outlet
connection. The Precision Medical, Inc. EasyMate Reservoir Flowmeter is calibrated
to function with the restrictor in the outlet fitting of the Reservoir.
NOTE: Maximum Usable Flow: 8 lpm.
Battery Replacement
When the Low Battery is indicated by the bottom light flashing rapidly on the Liquid
Level Indicator, refer to section “To check the Liquid Oxygen Level” for complete
instructions. For battery replacement call your Liquid Oxygen Supplier.
7
CLEANING / Maintenance
WARNING
•
•
•
•
DO NOT allow water to enter any components, or Fill Connector.
DO NOT immerse the Reservoir in any kind of liquid.
DO NOT use any strong solvent or abrasive cleaners.
DO NOT use alcohol, solvents, polishes, or any oily substance on Oxygen
Equipment.
1. Clean exterior surfaces with a cloth dampened with mild detergent and water.
2. Wipe dry with a clean cloth prior to use.
3. Store Reservoir in a clean area free from grease, oil, and other sources of contamination.
4. Check and empty the Condensation Collection Container daily.
5. Clean the Condensation Collection Container with mild detergent and water, as
necessary.
returns
Returned products require a Returned Goods Authorization (RGA) Number, contact
Precision Medical, Inc. All Reservoirs must be depleted of Liquid Oxygen prior to shipping
and must be packaged in sealed containers to prevent damage. Precision Medical, Inc.
will not be responsible for goods damaged in transit. Refer to Precision Medical, Inc.
Return Policy available on the Internet, www.precisionmedical.com.
Manuals available on our Website; www.precisionmedical.com.
Disposal instructions
Dispose of the Reservoir in accordance with the local regulations.
Please Recycle
Troubleshooting
If the Reservoir fails to function, consult the Troubleshooting Guide below.
If problem cannot be solved, consult your Liquid Oxygen Supplier.
Problem
Probable Cause
Portable will not fill
Remedy
1. Not connecting the Fill 1. Make sure the Fill Connectors
Connectors completely
are fully engaged
2. Contact Liquid Oxygen
2. Reservoir empty
Supplier to refill Reservoir
Unable to disconnect Fill connectors frozen
Allow time for the Fill
the Portable from
from moisture on the Fill
Connectors to thaw
Reservoir
Connectors
Bottom light flashes
Low Battery
Call your Liquid Oxygen
rapidly
Supplier for battery
replacement
No light(s) will show
Dead battery
Call your Liquid Oxygen
on the Liquid Level
Supplier for battery
Indicator
replacement
Water leaking from
Condensation Container Empty the Condensation
Reservoir
is full
Container
MINOR LEAK of Liquid Frost in the Fill Connector Disconnect and reconnect
Oxygen (Ref page 7)
Portable
MAJOR LEAK of Liquid Equipment Failure
Call your Liquid Oxygen
Oxygen (Ref page 7)
Supplier
8
Accessories / Replacement Parts
DESCRIPTION
PART #
Flowmeter, 0-8 lpm
Dial Flowmeter, 0-8 lpm
Condensation Collection Container
Roller Base
PB Protective Cap Assembly
1MFA1883
PM2300FCV-8
505660
505382
507027
Reservoir Fill Procedure
“For Liquid Oxygen Supplier ONLY”
• Refer to all applicable governing standards for handling, storing, transporting and
filling of liquid oxygen systems.
• For recommended testing of the Reservoir, refer to
www.precisionmedical.com under the “Forms and Notices” section.
• This fill procedure will help the Liquid Oxygen Supplier fill the Reservoir in a safe
and efficient manner.
a) Liquid oxygen source requirements
The Reservoir must only be filled with Medical Grade Liquid Oxygen. The saturation
pressure should be a minimum of 23 psig (1.59 bar) to ensure proper operation and
prevent any delay in use. In order to achieve the saturation pressure of the Reservoir,
the saturation pressure of the LOX fill source must be considered. The fill source
saturation pressure requirement depends on the type of filling technique used. The
most common technique “Standard Fill” uses a fill source with a saturation pressure
of 40 - 50 psig (2.76 - 3.45 bar). The less common technique is the “Fast Fill” that
requires a LOX saturation pressure of 20 - 22 psig (1.38 - 1.52 bar). In this case the
fill source must have a pressure building system so that head pressure in the fill
source can be raised in order to transfer the LOX into the Reservoir.
b) Required Equipment
Liquid Oxygen source
Liquid Oxygen transfer line
Vent-to-Fill key (P/N 505400)
Pressure Gauge, 0 - 30 psig (0 - 2.07 bar), (P/N 505648)
c) Pre-Fill Inspection
Perform the following visual inspection of the Reservoir and determine its
operational status before filling. Correct any problems before filling the Reservoir.
1. Ask the patient (when applicable) if there are any questions or concerns
regarding the equipment since the last fill.
2. Visually inspect the Reservoir for damage or missing components.
3. Verify that the following labels are present and legible:
1) Fill Connector label
2)Liquid Level Indicator label
3) Outlet Connection label
4)Warning label
5) Serial Number label
4. Verify that no frost or heavy condensation is present on the container below
the plastic shroud.
5. Verify that the Liquid Level Indicator is consistent with the delivery schedule
and expected patient usage. Verify the Liquid Level Indicator is functioning
when activated.
9
NOTE: A flashing bottom light for a half second “ON” and a half second
“OFF” for an eight (8) second duration, indicates the battery needs to
be replaced.
6. Verify that the Fill Connector is not worn, leaking, or damaged.
NOTE: Ensure that the Protective Cap for the fill connector is not damaged.
7. Verify that the slots on the Vent Valve are not bent or broken.
8. Verify that the Condensation Collection Container is in place and empty.
d) Fill Procedure
DANGER
Explosive hazard. Extreme high pressure can rupture a transfer line. Make
sure the specified pressure relief valve is present, in the proper location, and
functioning properly on the transfer line assembly.
WARNING
• Fire hazard. Liquid oxygen spilled on asphalt or any other combustible surface will
increase the possibility of fire if an ignition source is present. ALWAYS fill the unit on
a noncombustible surface, such as concrete or a steel drip pan.
• Fire hazard. Liquid oxygen spillage will occur if the Reservoir is tipped over. Before
transporting, secure the Reservoir containing liquid oxygen in an upright position.
• Fire hazard. Oxygen can accumulate in a delivery vehicle. Exhaust vent gases
to outside of vehicle.
1. Wear proper protective clothing during the fill process.
2. For the fill method being used, verify the proper saturation pressure of the fill
source per section (a) “Liquid oxygen source requirements”.
3. Attach one (1) end of the transfer line source adapter to the liquid withdrawal
valve of the source tank. Position the source adapter relief valve straight up.
4. Attach a 0 - 30 psig (0 - 2.07 bar) pressure gauge to the Reservoir Oxygen Diss
Outlet Connection. If the Reservoir contains some liquid oxygen, verify that the
Reservoir pressure gauge reads in the range of 18 - 26 psig (1.24 - 1.79 bar).
If pressure exceeds 28 psig (1.93 bar), service is required. DO NOT fill the
Reservoir.
5. Remove fill connector Protective cap from fill connector on the Reservoir.
Check the fill connectors on both the Reservoir and the fill adapter to ensure
that they are clean and dry. Wipe the connectors with a clean, lint-free cloth or
blow-dry with gaseous oxygen or nitrogen as needed.
6. Using the Vent-to-fill key, open the Vent Valve on the Reservoir by rotating the
tool a ¼ turn counterclockwise.
NOTE: At this point you may hear a venting noise if the Reservoir unit is
pressurized.
7. Engage the transfer line to the Fill Connector on the Reservoir by aligning
the fill connector on the transfer line directly over the Fill Connector on the
Reservoir, and apply downward force.
8. Maintain a downward force on the transfer line fill adapter while slowly opening
the liquid valve on the source tank. At this point a vigorous audible venting
noise will confirm that the filling process has begun. Adjust the source tank liquid
valve as needed to maintain pressure gauge at 20 - 22 psig (1.38 - 1.52 bar)
during the fill.
10
NOTE: • It may be necessary to open the source tank liquid valve completely and
partially close the Reservoir vent valve to maintain the proper pressure
throughout the fill.
•As the level of liquid oxygen nears the top of the Reservoir inner container,
the sound and appearance of vapors escaping through the Vent Valve will
change. The vapor will become denser, and as liquid oxygen reaches the
Vent Valve, a discharge of liquid oxygen will be visible and audible.
WARNING
Extreme cold hazard. Liquid oxygen discharge from the Fill Connector can occur.
When disconnecting the transfer line, never stand directly over the Reservoir Fill
Connector. If the Reservoir Fill Connector stays open and minor liquid oxygen
discharge occurs, carefully engage and disengage the transfer line to help dislodge
any ice or other obstruction. If major liquid oxygen discharge (steady stream) occurs,
open the Vent Valve (if safely possible) to vent pressure and stop the release of
liquid oxygen. Open windows and doors to ventilate the room and do not walk on
areas exposed to liquid oxygen for 60 minutes after frost disappears.
9. When you observe the first steady discharge (greater than 1 second) of liquid
oxygen from the Vent Valve, close the Vent Valve and disconnect the transfer line
from the Reservoir by lifting the fill adapter straight up. If the transfer line will not
disengage close the liquid valve on the source tank and allow the transfer line
and fill connectors to thaw.
CAUTION
If the Vent Valve freezes in the open position, terminate the fill by disconnecting the
transfer line and then allow the vent valve to warm until it closes easily. If the vent
valve remains open for a period of time, the liquid oxygen in the unit will de-saturate
to a pressure lower than required.
10. Close the source tank liquid valve when the frost melts from the transfer line
assembly.
e) Post-Fill Inspection
Perform the following procedure to inspect the Reservoir and determine its
operational status after filling it with liquid oxygen. Correct observed problems
before placing the unit in service.
1. Verify that the Reservoir Fill Connector is closed and not leaking.
2. Verify that the Vent Valve is completely closed and not leaking.
3. Verify that the pressure gauge attached to the Reservoir Oxygen DISS Outlet
Connection reads equal or greater than 20 psig (1.38 bar) within five minutes
after terminating the fill.
4. Verify that there is no frost or heavy condensation on the container below the
plastic shroud.
5. Verify that all lights are illuminated when the Liquid Level Indicator button is activated.
6. Disconnect the pressure gauge from the Reservoir Oxygen DISS Outlet Connection.
f) Checking Saturation Pressure
Perform the following procedure as needed to determine the saturation pressure of
the liquid oxygen in the Reservoir.
1. Attach a 0 - 30 psig, (0 - 2.07 bar) pressure gauge to the Reservoir Oxygen DISS
Outlet Connection. Note the pressure indicated on the gauge.
2. Momentarily open the Vent Valve on the Reservoir and observe the pressure
gauge pointer as it drops.
3. Note the pressure value where the gauge drops the lowest and then close
the Vent Valve. This is the approximate saturation pressure of the Reservoir.
Saturation pressure readings between 18 and 26 psig (1.24 - 1.79 bar) are in the
acceptable pressure range of the unit.
11
LIMITED WARRANTY
AND
LIMITATION OF LIABILITY
Precision Medical, Inc. warrants that the Precision Medical EasyMate
Reservoir (the Product) and the following component parts thereof will be
free of defects in workmanship and/or material for the following period:
EasyMate Reservoir One (1) year from date of shipment
Vessel Vacuum Five (5) years from date of shipment
This limited warranty does not cover:
1) Normal routine service items,
2) Defects due to the wear and tear caused by mating components
3) Repair or replacement necessitated by misuse, abuse, or accident.
Replacement parts or repaired products shall be free from defects in
workmanship and materials for the duration of the unexpired portion of
the original warranty or ninety (90) days from the date of reshipment,
whichever is longer.
Should any failure to conform to this warranty appear within the applicable
period, Precision Medical, Inc. shall, upon written notification thereof and
substantiation that the goods have been stored, installed, maintained
and operated in accordance with Precision Medical, Inc.’s instructions,
operational verification procedure, which is included in the Service Manual
and standard industry practice, and that no modifications, substitutions, or
alterations have been made to the goods, shall, in its discretion, and at its
own expense, repair or replace the defective component(s).
ORAL STATEMENTS DO NOT CONSTITUTE WARRANTIES AND THERE
ARE NO WARRANTIES OTHER THAN AS SET FORTH IN THIS CONTRACT.
Neither the representative of Precision Medical, Inc. nor any retailers are
authorized to make oral warranties about the merchandise described in
this contract, and any such statements shall not be relied upon and are not
part of the contract for sale. This writing is a final, complete and exclusive
statement of the terms of the contract and sale.
Precision Medical, Inc. Disclaims any warranty of merchantability, fitness
for a particular purpose or any other warranty of quality, whether express
or implied except as set forth above.
Precision Medical, Inc. Shall not under any circumstances be liable for
special, incidental or consequential damages including but not limited to
lost profits, lost sales, or injury to person or property. Correction of nonconformities as provided above shall constitute fulfillment of all liabilities
of Precision Medical, Inc. Whether based on contract, negligence, strict
tort or otherwise. Precision Medical, Inc. Reserves the right to discontinue
manufacture of any product or change product materials, designs, or
specifications without notice.
Precision Medical, Inc. reserves the right to correct clerical or typographical
errors without penalty.
12
DECLARATION OF CONFORMITY
Manufacturer:
Precision Medical, Inc.
300 Held Drive, Northampton, PA 18067, USA
CONTACT: Quality Manager
Phone: 610-262-6090
Authorized European Representative:Emergo Europe (European Office)
Molenstraat 15
2513 BH, The Hague
The Netherlands
Phone: +31 (0) 70.345.8570
Fax: +31 (0) 70.346.7299
Product:
EasyMate Reservoir
Model(s):
PM2335 (CE), PM2345 (CE) Series
MDD Class:
IIb
Classification criteria:Clause 3.2 Rule 11 of Annex IX of MDD
As delivered, the object of the declaration described above is in conformity with the
requirements of MDD 93/42/EEC Annex II.3, Directive 2007/47/EC Of The European
Parliament And Of The Council, 99/36/EC Transportable Pressure Equipment
Directive 1999 and the following documents:
BS EN 1251-1, BS EN 1251-2, BS EN 1251-3, BS EN 1418, BS EN 1626, BS EN 1797-1,
BS EN 12300, BS EN 60601-1-6, BS EN 60601-1-2, BS EN ISO 18777, BS EN ISO 15614-1,
EN 980, EN 1041, ISO 14971, ISO 15001, ISO 7000
Notified Body for Product Safety:
TUV Rheinland Products Safety GmbH
Certification Registration No’s: H
D 60019110 0001
Notified Body for Pressure Equipment: TUV Rheinland Pressure Equipment GmbH
Certification Registration No’s: 0
1 202 USA-U-10-4086-T
ISO 13485 Certified
Precision Medical, Inc.
300 Held Drive
Northampton, PA 18067 USA
(+001) 610-262-6090
(+001) 610-262-6080
www.precisionmedical.com
505129EN Rev1 03/18/11 Printed in USA