1
Cabling of extra equipment in armrests
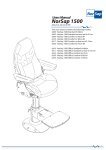
The diagram below shows how to cable the wires thru the chair and column.
Receiving the chair prepped for additional equipment in the armrests,
the wiring of your equipment should follow these steps.
1.
2.
3.
4.
5.
6.
7.
8.
9.
10.
Release the hand wheel (pos 1) holding the equipment holder in place.
Mount your equipment, making sure the cable is going thru the pipe.
Pull the cables out from underneath the arm rest (pos 2), open the zipper to gain access.
Use a flexible cable channel (pos 3) to secure the cables
going from the armrest all the way to the column top. Leave enough play for chair adjustments.
Either use existing holes underneath the square top of the column (pos 6) or
drill new holes corresponding with the size of the cables / cable channel (pos 5).
Place the cables thru the column top. Make sure to have enough play of the cables to
compensate adjustments of the seat, swivel (see # 10) and height (pos 4).
Find a suitable place to strip tight the cables (pos 8).
The cable is connected to further wiring solutions from under the pedestal.
If mounted on a deck rail, please view the deck rails user manual for further info.
If needed, you may drill a hole in the pedestal for extraction of the cable and
pull the cables through a designated hole in the lower part of the column. (pos 9)
To avoid breakage of cables/wires within the column, a 360° swivel restriction needs to be applied.
Place an B415-M8x16 bolt (pos 10) with a B480-M8 washer.
5
8
7
6
1
2
3
10
4
9
illustration shows a NorSap 1500 chair
Page 7 of 14