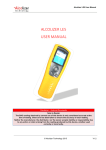
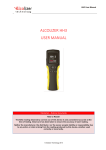
1
Alcolizer 5 Series Operations Manual 1011 R2 Table of Contents Introduction ................................................................................................................................ 4 General Information ................................................................................................................... 5 5 Series Function Description Diagram ..................................................................................... 6 Logo Display Screen Description .............................................................................................. 7 Standard Active Breath Test ...................................................................................................... 7 Passive STD (Standard) Breath Test ........................................................................................ 11 Passive Only Breath Test ......................................................................................................... 15 User Menu Functions ............................................................................................................... 18 GPS and GPS Mode Functions ....................................................................................... 18 GPS ........................................................................................................................... 18 GPS Mode ................................................................................................................. 19 ID Code ..................................................................................................................... 20 Test Type................................................................................................................... 21 Print Last ................................................................................................................... 21 Print Record .............................................................................................................. 21 Records...................................................................................................................... 22 About ......................................................................................................................... 22 Off ............................................................................................................................. 23 ◄Back....................................................................................................................... 23 Calibration Due Warning Message .......................................................................................... 24 Alcolizer 5 Series – Toolbox Software Installation ................................................................. 25 Installation Files.............................................................................................................. 25 .NET Framework ............................................................................................................ 25 Toolbox Installation ........................................................................................................ 25 Running the Toolbox for the First Time ......................................................................... 26 Driver Setup .................................................................................................................... 26 2 Toolbox Operation Guide......................................................................................................... 28 Operation Panel .............................................................................................................. 28 Records Download .......................................................................................................... 29 Save Event Log ............................................................................................................... 29 Record Filter ................................................................................................................... 30 Toolbox: Access Code Enabled Operations ............................................................................. 31 Operation Panel (Additional Functions) ......................................................................... 31 Set S5 Time..................................................................................................................... 31 Change Units .................................................................................................................. 32 Clear Records .................................................................................................................. 32 Device Config ................................................................................................................. 32 Warranty on Alcolizer 5 Series ................................................................................................ 33 Certifications ............................................................................................................................ 34 Contents 3 Introduction Congratulations on the purchase of your new Alcolizer 5 Series Your new breathalyser is precision engineered using state of the art electronics and electrochemical fuel cell sensor technology to give reliable, accurate and trouble free operation. Alcolizer 5 Series breath test devices are manufactured under ISO 9001:2008 Quality Assurance Scheme and certified to Australian Standard 3547-1997 for Type 2 devices. Please read this entire Operations Manual carefully before using the device for the first time - and retain for future reference. ALKALINE POWERED VERSION: ENSURE THE DEVICE HAS FULLY CHARGED ALKALINE BATTERIES PRIOR TO USE. Replace the two AA Alkaline batteries if required. Alcolizer recommends the Energiser Industrial Type EN9. LI-ION POWERED VERSION: ENSURE THE DEVICE IS FULLY CHARGED PRIOR TO USE. The battery charge cycle may take up to two hours to fully charge the battery pack. Disclaimer The BAC reading obtained by correct use of this device is only considered accurate at the time you test yourself. Great care has been taken to ensure the accuracy of your reading. Neither the manufacturer, the distributor, nor the owner accepts liability or responsibility due to any action or claim arising from the reading produced by this device, whether used correctly or incorrectly. 4 General Information 1. To obtain an accurate reading do not consume alcohol or use mouth wash containing alcohol for at least 10 minutes prior to using this device. 2. Remember your Blood Alcohol Concentration (BAC) readings can continue to rise or fluctuate for up to 2 hours after you last consumed alcohol. Should your BAC readings be near or over the local legal limit, you are advised to stop drinking, wait 15 minutes and then retest yourself. 3. DO NOT DRIVE until a new test shows a decline in your BAC reading and your BAC reading is below the local legislation legal limit. 4. It can take up to 1 hour for the average person’s system to absorb a 0.01 BAC reading before the level returns to zero. In such circumstances further testing later in the day or the following morning is strongly recommended. 5. STORAGE: Do not store device in direct sunlight or places where extreme temperature conditions can occur. 5 5 Series Function Description Diagram Alcolizer 5 Series functions are accessed via the TEST & keys. Communication is via the USB port, printer communication is via Bluetooth. Battery replacement of the two AA Alkaline batteries in the alkaline powered device is via the battery compartment located at the base of the instrument. The charging port for the Li-Ion powered device is also located at the base of the instrument. LCD Colour Graphics Display Test key Activates selected function Up arrow key Moves cursor upwards. Note: press & display the menu Down arrow key Moves cursor downwards. to s e d t o m o v e AA Battery Compartment Li-Ion Charging Port Alcolizer 5 Series has optional functions which may or may not be active on your device. The Screen images shown in this Operations Manual may differ to your device depending on the options fitted or functions enabled. t h e c u r s e r d o w n i n 6 menu’s Down arrow Button Logo Display Screen Description At switch on the 5 Series device will display its logo screen for a period of five seconds or can remain on while ever one of the TEST or keys is held pressed down. The screen displays assorted information. Alcolizer or customer logo: Denotes ISO certified device: Alcolizer device type name: Up to four displayed data fields. Field is not displayed if no data in field. Standard Active Breath Test (With Mouth Piece) Before taking a breath sample, ensure the subject has not consumed alcohol for at least 10 minutes. 1. Switch the device on by pressing either the TEST or keys. A company logo screen will appear for a period of five seconds prior to the operation screen displaying. The logo screen can be terminated sooner by pressing either the TEST or keys a 2nd time. Operation Screen 2. Fit a new mouthpiece to the device’s sample inlet port. NOTE: Hygiene precautionary procedure. Grasp the mouth piece at the “non ribbed end” and tear the plastic wrapping from the ribbed end, downwards to about half way. Note the sample inlet hole is now exposed. “Roll” the mouth piece inlet hole onto the sample inlet port. Remove the balance of the plastic wrap just prior to testing to ensure hygienic use. 7 3. Press TEST key to perform test. Wait … screen will display while the device performs an internal self check. (If self check is unsuccessful an error code will display and the device will not accept a breath sample). 4. After the internal self check is completed the BLOW screen will display. Note: The BLOW window has two display parameters. The graphical display shows the continuous breath sample flow. The flow rate is valid when maintained within the blue section. The bar indicator displays the accumulated breath volume. A breath sample will be taken when the bar indicator is filled, and then when the flow rate drops below a predetermined level as indicated in the above graph. If any step in a breath test sequence is not completed or the device is left idle for a prolonged period of time, then the device will terminate the breath test and display TEST TIMED OUT, the operator will need to TRY AGAIN. The standard breath test time out period is 60 seconds. If a test time out does occur during a breath test, a new breath test must be performed. Press TEST key to perform new breath test as per step 3 above. 5. Take a deep breath, place mouth over mouthpiece inlet (ribbed end) and blow a gentle to medium breath sample into the mouth piece. The exhaled breath volume is indicated via a yellow bar graph, scrolling left to right at the bottom the screen together with the breath flow rate as indicated in the blue section of the screen. A beeping sound is also heard during the breath sample delivery phase, indicating a satisfactory breath sample is being delivered. Continue blowing until the device takes a sample of the exhaled breath volume, indicated by a click and long beep sound. Note: The frequency of the sound beeps increases with the intensity of the blow pressure. Blowing too hard or too soft will result in INVALID SAMPLE TRY AGAIN being displayed (see next screen). 8 If INVALID SAMPLE TRY AGAIN is displayed due to incorrect blow pressure, simply start the BLOW breath sample delivery phase again and blow correctly as described above. The INVALID SAMPLE TRY AGAIN message will flash on and off three times; then revert back to the BLOW screen as above. 6. After a valid breath sample is taken, the Analysing Sample message is displayed until the device calculates your BAC reading. This will normally take a few seconds. In cold climate conditions it may take longer to display your BAC reading. During this period, the alcohol level increase is indicated in the scroll bar. When the BAC reading is calculated, it will be displayed on the screen together with unit of measurement (E.G: g/100mL) and retained until the Recovering period has ended; this is indicated by the Recovering seconds indicator. The Recovering period is the time the Fuel Cell sensor requires to recover from the previous breath test. This period will vary according to BAC readings displayed. Recovery time from a 0.000g/100mL (zero) BAC reading - 5 seconds. Recovery time from a 0.100g/100mL BAC reading – 20 seconds. While the device is still in the recovering period it is possible to enlarge the reading displayed by pressing either the TEST or keys. Pressing any key again will return the screen to normal display. Once the recovering period has ended this function is no longer available. Note: Once in this display mode no further testing is possible. Press either the TEST or keys to return the device to normal operation. 9 When the recovery period has ended, the device is ready for the next breath test. The BAC display window appears blank if “Keep Previous Reading” function is not enabled. Note: This function is an option – contact your distributor to enable this function. To perform another breath test repeat steps 1 to 5 above. Note: If the device function “Keep Previous Reading” is enabled, the last BAC reading is retained on the display screen until another breath test procedure is started. Also included in the display screen is: Test Time and Date, Unit of Measurement (E.G: g/100mL) and other text data description options, if enabled. To perform another breath test repeat steps 1 to 5 above. Note: At night or in dark environments the display of the 5 Series device can be used as a warning beacon by displaying an oscillating red then blue screen at half second intervals. This function can only be enabled while in the “Press to Test” display mode. Press either of the keys and hold pressed for a minimum period of three seconds to switch on the red blue flashing display screen. Pressing any key again will return the screen to normal operational display mode. 10 Passive STD (Standard) Breath Test (Without Mouth Piece) A passive test is a test that is performed in a non invasive manner without using a mouthpiece. The test is performed by holding the 5 Series device approximately 80mm to 100mm in front of the test subject’s mouth and asking them to count or talk so that exhaled breath may be picked up by the device and analysed for the presence of any alcohol. The following Passive Breath Test operating instructions presumes that the device’s passive mode function has being enabled. Refer to User Menu functions for instructions on how to enable or disable the passive mode of operation. 1. Switch the device on by pressing either the TEST or keys. A company logo screen will appear for a period of five seconds prior to the passive operation screen displaying. The logo screen can be terminated sooner by pressing either the TEST or keys a 2nd time. Passive Operation Screen 2. Press TEST key to perform Passive test. The device will perform an internal self check. (If self check is unsuccessful an error code will display). 3. After the device completes the internal self check and after a couple of seconds the Ready for passive Test screen will display. 11 If any step in a breath test sequence is not completed or the device is left idle for a prolonged period of time, then the device will terminate the breath test and display Test Timed out. The standard Passive breath test time out period is 60 seconds. If a test time out does occur during a passive breath test, then a new passive breath test must be performed. Press the TEST key to perform a new passive breath test as per step 1 above. Hold the device no further than 100mm in front of the test subject’s mouth, so that the subject is breathing or talking directly into the device’s sample inlet port. Ask the Subject to start talking / counting from 20 onwards, until you tell them to stop. “20…21…22…23…24…25…etc.” The subject should count in a one second rhythm. While subject is talking / counting, the operator must press the TEST key to take a sample when they reach “24…25.” Note: The device is set to take 3 pump samples. During these 3 pumps the operator must hold the device steady and at the same distance from the subject. The 5 Series will give 3 sample pump clicks, followed by a long beep sound. Analysing Sample will then appear. 4. After a passive breath sample is taken, Analysing Sample message is displayed until the device calculates the passive BAC reading. This will normally take a few seconds. In cold climate conditions it may take longer to display the passive BAC reading. When the passive BAC reading is calculated, it will be displayed and retained until the Recovering period has ended. If a PASS NO ALCOHOL reading is displayed the device has indicated that no alcohol was detected in the near vicinity of subject’s exhaled breath. When Recovering period has ended the device is ready for next passive breath test. To perform another passive breath test repeat steps 1 to 3 above. 12 If a WARNING ALCOHOL PRESENT reading is displayed the device has indicated that alcohol was detected in the near vicinity of subject’s exhaled breath. When a WARNING ALCOHOL PRESENT reading is displayed, the device requires that a STANDARD ACTIVE BREATH TEST (With Mouth Piece) be performed, after the recovery period has ended. The Recovering period is the time the Fuel Cell sensor requires to recover from last breath test, this period will vary according to BAC reading. Recovery time from a PASS NO ALCOHOL reading - 5 seconds. Recovery time from a WARNING ALCOHOL PRESENT reading can take several seconds depending on concentration detected. 5. When this display appears the device is ready to perform the STANDARD ACTIVE BREATH TEST (With Mouth Piece). Fit a new mouthpiece to the device’s sample inlet port. Press TEST key to perform test. Refer to STANDARD ACTIVE BREATH TEST (With Mouth Piece) Step 2 and onwards for operating instructions (page 8). When the BAC reading is calculated, it will be displayed on the screen together with unit of measurement (E.G: g/100mL) and retained until the Recovering period has elapsed. When Recovery period has elapsed the device is ready for next passive breath test. The BAC display window will be clear if “Keep Previous Reading” function was not enabled. To perform another passive breath test repeat steps 1 to 4 above. 13 Note: If the device function “Keep Previous Reading” is enabled, the last passive reading is retained on the display screen until another passive breath test procedure is started. Note: This function is an option, please consult your distributor to enable this function Also included in the display screen is: Passive Test Time and Date and other text data description options, if enabled. To perform another passive breath test repeat steps 1 to 4 above. 14 Passive Only Breath Test (Without Mouth Piece) A Passive Only test is a test that is performed in a similar manner to the Passive Standard test with the exception that if alcohol is detected, a Standard Active Test is not automatically required. This means that the unit will allow continuous passive testing after its recovery period. 1. Switch the device on by pressing either the TEST or keys. A company logo screen will appear for a period of five seconds prior to the passive operation screen displaying. The logo screen can be terminated sooner by pressing either the TEST or keys a 2nd time. Passive Operation Screen 2. Press TEST key to perform Passive test. The device will perform an internal self check. (If self check is unsuccessful an error code will display). 3. After the device completes the internal self check and after a couple of seconds the Ready for passive Test screen will display. If any step in a breath test sequence is not completed or the device is left idle for a prolonged period of time, then the device will terminate the breath test and display Test Timed out. The standard Passive breath test time out period is 60 seconds. If a test time out does occur during a passive breath test, then a new passive breath test must be performed. Press the TEST step 1 above. key to perform a new passive breath test as per 15 Hold the device no further than 100mm in front of the test subject’s mouth, so that the subject is breathing or talking directly into the device’s sample inlet port. Ask the Subject to start talking / counting from 20 onwards, until you tell them to stop. “20…21…22…23…24…25…etc.” The subject should count in a one second rhythm. While subject is talking / counting, the operator must press the TEST key to take a sample when they reach “24…25.” Note: The device is set to take 3 pump samples. During these 3 pumps the operator must hold the device steady and at the same distance from the subject. The 5 Series will give 3 sample pump clicks, followed by a long beep sound. Analysing Sample will then appear. 4. After a passive breath sample is taken, Analysing Sample message is displayed until the device calculates the passive BAC reading. This will normally take a few seconds. In cold climate conditions it may take longer to display the passive BAC reading. When the passive BAC reading is calculated, it will be displayed and retained until the Recovering period has ended. If a PASS NO ALCOHOL reading is displayed the device has indicated that no alcohol was detected in the near vicinity of subject’s exhaled breath. When Recovering period has elapsed the device is ready for next passive breath test. To perform another passive breath test repeat steps 1 to 3 above. If a WARNING ALCOHOL PRESENT reading is displayed the device has indicated that alcohol was detected in the near vicinity of subject’s exhaled breath. The Recovering period is the time the Fuel Cell sensor requires to recover from last breath test, this period will vary according to BAC reading. Recovery time from a PASS NO ALCOHOL reading - 5 seconds. Recovery time from a WARNING ALCOHOL PRESENT reading can take several seconds depending on concentration detected. When Recovery period has elapsed the device is ready for next passive breath test. The BAC display window will be clear if “Keep Previous Reading” function was not enabled. To perform another passive breath test repeat steps 1 to 4 above. 16 Note: If the device function “Keep Previous Reading” is enabled, the last passive reading is retained on the display screen until another passive breath test procedure is started. Note: This function is an option, please consult your distributor to enable this function Also included in the display screen is: Passive Test Time and Date and other text data description options, if enabled. To perform another passive breath test repeat steps 1 to 4 above. 17 User Menu Functions The user menu is used to enable or disable some of the device’s operating functions, inputting of numerical codes and viewing of device stored data. To enter the user menu, press both the displayed. keys together until the user menu is To select a menu function press either of the keys to scroll up and down the menu list. The selected menu function is highlighted by a dark blue bar. To access the highlighted menu press the TEST key, this allows you to set functions YES/NO, read records and input data. To exit the user menu select ◄Back and then press the TEST This restores the device to selected or previous operating mode. key. The down arrow head ▼ denotes that additional selectable menu functions are available. Menu Function Descriptions: GPS and GPS Mode Functions These functions allow the acquisition of a GPS position on 5 Series models equipped with the GPS option. On other none GPS models these selectable menu functions will not appear. GPS This function allows you to manually acquire a GPS fix and to view the Acquire Fix function progress on the displayed satellite screen. Press either of the keys to select GPS menu function. Press TEST key to start acquiring GPS fix and also display the detailed satellites information screen. Press either of the keys to exist this display and abort acquire GPS fix function. Note: For best performance the acquiring GPS fix operation should be performed outdoors in an area away from trees and buildings. The data acquisition should take 30 to 90 seconds for a cold start and 10 to 30 seconds for a hot start, in most instances. Also placing unit on vehicle bonnet or roof usually results in faster acquisition times. Please also note that a GPS position fix from this function is not recorded against any BAC test record. 18 GPS Mode This function allows you to select two GPS operational modes of operation – Mobile or Static, Mobile is the default mode of operation from device start-up. Mobile operation: this will initiate with every Standard Active Breath Test when the BAC reading is displayed. The GPS position fix will then be logged with the test reading. If there is no location fix then Location Unknown is logged against the test reading. The default time for locating a GPS position fix is set to 120 seconds; if a GPS fix is not located within this period then Location Unknown is recorded. Note: If device is configured to record GPS fix for positive test readings, then a GPS fix operation will only occur when a reading is above zero. In Static GPS Mode no GPS readings will be recorded against a zero breath test reading. Static Operation: this operation will initiate a once only GPS position fix before a Standard Active Breath Test. The same GPS position fix or Location Unknown will then be logged against all breath test readings performed thereafter while ever the device remains in the on state. Press either of the keys to select GPS Mode menu function. Press TEST key to select either Mobile or Static GPS Mode functions. Mobile GPS Mode: operational display screen Locating GPS position when BAC reading is displayed. Static GPS Mode: operational display screen Locating GPS position fix once only before Standard Active Breath Tests are commenced. Record with GPS coordinates 19 Area Code This is a 6 digit numeric code to identify the area location of a breath test. Press the TEST key to access the 6 digit Area code number. The digit that is underlined can be changed by pressing either of the keys. Press the TEST key to accept the new value and to proceed to the next digit. The above procedure is used to change and accept each digit’s value. When no digits are underlined the area code number will be stored. The area code is recorded in the internal data log against the breath test performed and all subsequent tests until a new area code number is stored. ID Code This is an 8 digit numeric code to identify the person using the device. This code can also be used for other identification purposes. Press the TEST key to access the 8 digit ID code number. The digit that is underlined can now be changed by pressing either of the keys. Press the TEST next digit. key to accept the number and to proceed to The above procedure is used to change and accept each digit’s value. When no digits are underlined the ID code number will be stored. The ID code is recorded the internal data log against the breath test performed and all subsequent tests until a new ID code number is stored. Location Code This is an 8 digit numeric code which can be used instead of the Area code which only has only 6 digits. Press TEST key to access the 8 digit Location code number. The first digit that is underlined can now be changed by pressing either of the keys. Press the TEST key to accept the new value and to proceed to next digit. The above procedure is used to change and accept each digit’s value. When no digits are underlined the Location code number will be stored. The Location Code is recorded in the internal data log against the breath test performed and all subsequent tests until a new Location code number is stored. 20 Test Type This function allows the selection of: Standard, Passive Standard or Passive Only breath test modes. Repeatedly press TEST key to select: Standard, Passive Standard or Passive Only test modes Press either of the keys to exist this display. Refer to Test procedures above for operation of selected test mode. Print Last This function allows the printing of the last recorded test reading to a Blue Tooth enabled printer. Ensure that the Blue Tooth printer and 5 Series device have been correctly set up to communicate with each other. Switch on BT printer. Press TEST key to print last reading. Note: Only BAC and Passive test readings can be printed – menu function operation records cannot be printed. If a print link to BT print cannot be established then a “Print Failure” message is displayed. Print Record This function allows the printing of previous test records stored in the device’s memory. Switch on BT printer. Press TEST key to display records window. Press either of the keys to scroll and select the test record to be printed. Press TEST key to print selected test record. Note: Repeat this print record process to print further test records. 21 Records This function shows the number of breath test records and menu access functions stored in the device’s memory. It also allows the user to view these records. Press TEST key to access Records display screen. Press either of the keys to scroll up and down the records list. The selected record will display all related data associated with the breath test reading or menu access function information. Breath Test record. Menu Function Access record. To exit the records display screen: press the TEST key. About The About screen displays the instrument’s certifications, model numbers, serial numbers, firmware versions for both the main module and sample module. Also displays Days To Recal remaining before a recal is required. Press TEST key to access the first About display screen. First About screen: C-Tick certification CE certification AS3547 certification 22 Press TEST key again to access the second About display screen. Second About screen: Main Module Model number Serial number Firmware version Sample Module Model number Serial number Firmware version Days to Recal: Displays the number of days remaining before recalibration of device is required. Press TEST key to exit About display screen. Off This function allows device to be switched off manually. Press TEST key to manually switch unit off. The device will switch off display back light after two minutes and power off after a further five minutes if no functions have occurred within that period (default values). Note: The device can also be switched off manually by pressing and holding the TEST key for a minimum period of three seconds. This function is only active while in the “Press to Test” display mode. ◄Back This function allows device to revert back to previous menu or operation screen. Press TEST key to revert back to previous menu or operation screen 23 Calibration Due Warning Message The Alcolizer 5 Series requires re-calibration every 6 months (190 days) as per Australian Standards Certification requirement. The device will display a warning message after switch on if 14 days or less remain before calibration is required. To cancel the warning messages press the TEST key. The device will resume normal operation until zero days to re-calibration is reached. It is recommended that re-calibration of the device is performed before the warning message period expires. When re-calibration warning message period has expired, the Recalibration Due Now screen is displayed and the device is locked, preventing any further breath tests until the device is re-calibrated. The device can be returned to Alcolizer for re-calibration prior to the number of days warning message period expiring, to avoid the inability and inconvenience of performing further breath tests when required. Re-Calibration Return Addresses Alcolizer - Brisbane P.O. Box 1856 Cleveland DC Queensland 4163 Australia Alcolizer - Perth P.O. Box 73 Claremont WA 6910 Australia Phone: + 61 7 3821 1606 Fax: +61 7 3821 1633 Email: [email protected] Web: www.alcolizer.com Phone: + 61 8 9230 7866 Fax: +61 8 9286 3877 Email: [email protected] Web: www.alcolizer.com 24 Alcolizer 5 Series – Toolbox Software Installation Installation Files Insert the CD in the CD drive of your PC and execute the setup.exe file to commence installation process. .NET Framework The Series 5 Toolbox requires version 3.5 of the .NET framework. This will be installed automatically if it is required. After accepting the License Agreement the installer will commence to install the .NET framework. This may take several minutes. Note: If .NET framework is already installed on your PC then the .NET installation process will not be displayed. Click on the Accept icon to accept license agreement and start .NET framework installation. .NET framework installation progress display bar. Toolbox Installation The Series 5 Toolbox Setup Wizard installer program will display when version 3.5 of the .NET framework is recognised as been installed on your PC. Click on the Next icon to commence installation of the Series 5 Toolbox program. Select the installation folder location and user requirements. Click on the Next icon to commence installation process. 25 The confirm installation window will display. If you are satisfied that all installation parameters have been collected and correct, then click on the Next icon to start the installation process onto your PC. The Series 5 Toolbox has now been installed and is available from the PC desktop: Start / Programs / Alcolizer selection menu group. Click on the Close icon to exit the installation program. Note: For ease of operation create a desktop shortcut to the Series 5 Toolbox. Running the Toolbox for the First Time Start up the toolbox software program from the Start / Programs / Alcolizer selection menu or from desktop Series 5 toolbox shortcut icon. Driver Setup Attach the Series 5 device to the PC using the USB cable provided. Press any button on the Series 5 device to turn the instrument on. The PC will recognise the device and attempt to match it to a driver. 26 When the “Found New Hardware Wizard” display window appears decline to search Windows Update for a driver. Select “No, not this time” item icon. Click on the Next icon to continue. Select “Install the software automatically” item icon. Click on the Next icon to continue. Search process may take a minute or so to locate the correct driver. When the correct driver is found, click on “Continue Anyway” icon to continue installing the driver. Installation is now complete and the instrument is ready for communication. Click on the Finish icon to close this window. Note: Every time you connect to a new USB connection port that has not had the Series 5 USB driver previously installed, the above “Found New Hardware” installation process will be repeated. 27 Toolbox Operation Guide Operation Panel Figure Ref. 1 2 3 4 5 6 7 8 9 10 Description The icon is used to download records from S5 device. See figure ref. 7 for downloaded records. File menu selection allows “Save Event Log” and “Exit” functions. Use “Save Event Log” function to save records to your PC as either .cvs or .xml file formats. Use “Exit” function to exit the 5 Series Toolbox operations. Log Records menu selection allows “Event Log Filter” function. The “Clear Records” function is only active under access code privileges. Use “Event Log Filter” function to select record event type and column name you wish to enable and display in Event Log window. See figure ref. 7 The Setup group window displays the customer’s “Inventory No” and “Station” ID alpha numeric code. These ID codes are set by the customer under access code privileges. Set Access code function use is for authorised personal. Enter password code into access code box and then click on icon to gain access to other menu function items. The Serial Number group window displays the device’s “Main Serial No” and “Sample Serial No”. The Event Log group window displays the device’s downloaded stored records data. Either message is displayed according to the connection status of the 5 Series device to PC toolbox. This box group displays the 5 Series device: firmware Revision number, Units of measure used and number of Records stored in memory. This display shows the software Version of 5Series Toolbox. 2 3 1 4 5 6 7 8 9 28 10 Records Download This function allows you to view the 5 Series device’s logged records. Open 5 Series Toolbox program from Start / Programs / Alcolizer selection menu or from desktop 5 Series Toolbox shortcut icon. Attach the 5 Series device to the PC using the USB cable provided. Press any button on the device to turn the instrument on. Check that “Alcolizer S5 connected” message is displayed. Click on the icon to download and display event logged records from 5 Series device into toolbox Event Log display window. Save Event Log This function allows you to save event logged records as either .cvs or .xml file formats. Click on the icon to open selection menu, then click on function. In the Save In selection box select or create new folder in which you wish to save your event log file. In the File name selection box select or create new file name in which you wish to save all event log records as displayed in the 5 Series Toolbox. In the Save as type selection box select either .cvs or .xml file formats. Note: When opening either .cvs (spreadsheet format) or .xml file formats all event type logged data together with all column name types will be displayed. You will then need to filter data according to your requirements. 29 Record Filter This function allows you to enable which event log records and also enable which column types will be viewable in the event log display window. Click on the then click on icon to open selection menu, function. Tick the “Event Type / Enabled” tick box for each event type you want to display in the Event Log display window. Tick the “Column Name / Enabled” tick box for each column name you want to display in the Event Log display window. Note: Un-tick Event Type or Column Name tick boxes if you do not want those items displayed in the Event Log display window. Click on icon to enter changes and exit Record Filter window. 30 Toolbox: Access Code Enabled Operations These additional operational functions can only be enabled by authorised personal when the correct access code number is entered into the access code box. Operation Panel (Additional Functions) Figure Ref. 1 2 3 4 5 6 Description The Tools menu selection allows “Set S5 Time”, “Change Units” of measure and “Device Config” functions. Log Records menu selection allows “Event Log Filter” and “Clear Records” functions. Use “Clear Records” function to clear records from 5 Series device’s memory. The icon is used to set the device’s date and time. The icon is used to select different units of measure in the 5 Series device. Enter Access password code into access code box and then click on icon to enable additional menu function items. The Setup group window displays “Field 0” and “Field 1” ID alpha numeric codes. Enter ID codes as required, and then click on icon to record codes. These ID codes will be recorded against each test record. The two field names can be changed to customer’s choice, consult Alcolizer for name configuration change. 2 1 3 4 5 6 Set S5 Time Click on the icon on main toolbox screen (figure ref 3). The Setting Date & Time window will display. If PC clock is correct then click on icon to synchronize S5 clock to PC clock. Manual entry: - enter date and time into date and time boxes and then click on icon to record new date and time settings. Note: If the S5 device has been configured for daylight saving operation, then ensure that your PC or manual set time is not also set for daylight savings time. 31 Change Units Click on the icon on main toolbox screen (figure ref 4). The Unit Selection window will display. Click on the unit of measure you wish to use, that selection will then be highlighted. Click on of measure. icon to enter the selected unit The S5 device will now record and download all breath tests with the selected unit of measure. Clear Records This function allows you to clear stored records in the S5 device. Click on the then click on icon to open selection menu, function. The Warning window will display, asking “Clear all records, are you sure?” If you are sure you wish to clear all records then: Click on device. icon to clear all records from S5 Note: before clearing all records it is recommended that you first save your records, refer to “Save Event Log” function. Device Config This function allows you to configure the operation of the S5 device to your specification requirements. Click on the icon to open selection menu, then click on function. This function downloads the present S5 device configuration into the Configuration Editor display window. This function uploads the configuration file displayed in the Configuration Editor display window to the connected S5 device. This function allows you to load a saved configuration file into the Configuration Editor display window. This function allows you to save the displayed configuration file. Alcolizer recommends that only authorised technical personal with a thorough understanding of device operations attempt to configure the device. Consultation with Alcolizer technical personal is highly recommended. 32 Warranty on Alcolizer 5 Series 1. The Alcolizer 5 Series device is manufactured by Alcolizer and is guaranteed to be free from defects in workmanship and material for a period of 12 months from the date of purchase. 2. Alcolizer will repair or replace, at its option, any device which becomes defective within that period except when such defects result from obvious abuse, accidental damage or improper use. The protective leather case shall be covered by this warranty except where defects are attributable to general wear and tear. 3. Alcolizer 5 Series devices serviced and repaired by Alcolizer shall carry a sixty (60) day workmanship guarantee. When a defective part is replaced under warranty the new part shall be guaranteed for the duration of the original warranty or a period of sixty (60) days whichever is the greater. 4. The warranty by Alcolizer is subject to the following conditions:a. Alcolizer reserves the right to determine whether the failure is or is not covered by warranty b. Alcolizer will not honour any obligations expressed or implied except as stated above. c. Alcolizer shall not be held liable for any inconvenience, loss of use, or consequential damages resulting from the use of Alcolizer equipment. d. Alcolizer will not warrant service carried out by any unauthorized agencies or unauthorized modifications by the user. e. The purchaser is responsible for the cost of returning the instrument to Alcolizer for warranty or other servicing requirements. If your 5 Series requires service, send the device back to Alcolizer with the details of the fault or contact your authorized distributor. Return address: Alcolizer Brisbane Unit 9 / 132-140 Ross Court Cleveland Queensland 4163 Australia 33 Certifications Alcolizer has the following trademarks and certifications for the Alcolizer 5 Series, that guarantees the customer a premium device. This product is produced under an ISO 9001:2008 Quality Management System. AS3547 LicSMK02334 SAI Global The AS3547 Certified Product Standard and the C-Tick and CE Electromagnetic compliance standards, provides you with the peace of mind that the 5 Series device will give accurate BAC readings and will not interfere with (or be interfered with by) your television, computer or other equipment prone to interference by annoying electromagnetic emissions. For more information on Alcolizer Products Please visit our Web Site www.alcolizer.com Proudly designed and Manufactured in Australia by Alcolizer 34