1
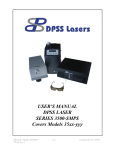
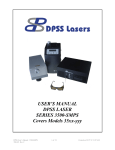
TROUBLESHOOTING
Note:
The information in this section is intended to be used as an aid to the user in assessing
problems with the operation of the laser and as a guide to assist experienced users in resolving
routine problems. If there is any question about the procedures contained in this section or
associated hazards, call DPSS Lasers Inc. Customer Service.
Caution:
These procedures could result in exposure to hazardous laser radiation or bright light sources.
Procedures should be performed only by persons who are familiar with the hazards involved
and with the use of appropriate safety equipment.
WARNING:
Do not remove any covers from the laser unless specified:
1) Unauthorized removal of covers from the laser will void all warranties.
2) There are no user serviceable components within the laser head or power supply.
3) Inexperienced handling of the components in the laser can cause severe damage.
TROUBLE SHOOTING GUIDE:
PROBLEM
Power-On light not on
Key switch on but no status
LED’s on.
•
•
•
•
POSSIBLE CAUSES
Line cord not connected
Main power switch at rear of
power supply not on
Cables not connected
between power supply and
laser head
Cables J2 & J3 interchanged
at head or power supply
•
•
•
•
•
Fault light on at first turn on
•
•
•
•
•
•
•
•
Interlock open
Cooling system not turned
on
System recently turned on
and water (water cooled
units only) has not started
flowing yet.
Flow switch interlock
connector (water cooled
units only) not plugged in at
power supply or laser head
Water hoses interchanged at
Cooling system (water
cooled units only)
Cooling system pump
malfunction (water cooled
units only)
Laser head over temperature
Power supply over
temperature
•
•
•
•
•
•
•
•
•
DPSS User’s Manual: 3500-SMPS
780-023 Rev. A
15 of 15
SOLUTION
Connect line cord to power supply
and suitable AC power source
Turn on main power switch at read
of power supply.
Connect all cables between power
supply and laser head
Verify that all cables are well
seated and there are no bent pins
in the connectors
Verify that J2 & J3 are correctly
connected.
Check all user installed interlocks
for proper operation.
Turn on Cooling system.
Wait 30 seconds and press
STANDBY button to clear fault
Open Cooling system reservoir
(water cooled units only) and
verify that water is bubbling.
Verify that the flow switch
interlock cable (red twisted pair) is
connected at power supply and
laser head.
Reverse water hose connections
at Cooling system (water cooled
units only)
Touch laser baseplate to verify
that it is close to room
temperature.
Touch power supply enclosure
and verify that it is close to room
temperature
Ensure that ambient cooling air is
Created on 02/11/03 5:38 PM
Fault light on after laser is
operating.
•
•
•
•
Interlock open
Cooling system water not
flowing (water cooled units
only)
Laser head over temperature
Power supply over
temperature
•
•
•
•
•
No pulsed laser output after 5
minutes (assumes no faults
detected and system running
with laser READY and qswitch ENABLE)
•
•
Low output power after one
hour warm-up
•
•
•
•
•
•
Power oscillation after turn-on
•
Power oscillation after several
hours of operation
•
•
•
Shutter not open
REMOTE connector not
connected
RF BNC cable not connected
at power supply or laser
head
•
•
Beam path partially blocked
Ambient temperature too
high
Cooling system not
functioning properly
Laser misaligned
Damaged or contaminated
optics internal to the laser
head
It is normal for the laser
output power to oscillate
slightly during the first hour
of operation
Ambient temperature
changing dramatically
Cables J2 or J3 not seated
well
Cooling system malfunction
•
•
•
•
•
•
Allow laser to warm-up for one
hour prior to use.
•
Verify that ambient temperature
remains within acceptable
operating limits.
Verify that cables J2 and J3 are
well connected at power supply
and laser head.
Verify that Cooling system is
maintaining set temperature.
Check optics in optical path for
contamination or damage
Turn of laser system and clean
laser output window according to
cleaning instruction in Service
Appendix
If necessary, an aperture can be
placed one foot away from the
laser head to block this green
emission
Contact DPSS Service
Representative
•
•
Poor beam quality
•
•
Contaminated or damaged
optics external to the laser
head
Contamination or damage to
laser output window
•
•
Scattered green emission with
UV output
•
It is normal for some green
light to be emitted with the
UV output
•
Strong UV emission when qswitch is DISABLE
•
Electronic malfunction
•
DPSS User’s Manual: 3500-SMPS
780-023 Rev. A
16 of 16
not recirculating through power
supply or Cooling System.
Check all user installed interlocks
Open Cooling system reservoir
and verify bubbling action of
water
Verify that laser baseplate is at or
near room temperature
Verify that the power supply
chassis is at or near room
temperature
Ensure that there is adequate
ventilation for the Cooling system
and the power supply
Open shutter on laser head
Verify that either JUMPER or
alternate control is connected to
REMOTE connector
Verify that RF BNC cable is
connected at power supply and
laser head
Verify that shutter is fully open
Verify that ambient temperature is
within acceptable operating limits
Verify that Cooling system is
maintaining set temperature
Refer to Service Appendix for
laser alignment procedure.
Created on 02/11/03 5:38 PM
If the problem experienced cannot be resolved by this troubleshooting guide, please contact a DPSS Lasers Inc.,
Customer Service Representative at either your local distributor or directly through the DPSS Lasers Inc., Customer
Service Department.
DPSS User’s Manual: 3500-SMPS
780-023 Rev. A
17 of 17
Created on 02/11/03 5:38 PM