1
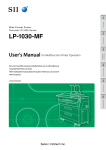
W i d e Fo r mat Pr i nte r Te r i o s t a r LP-2 0 5 0 Se r i e s Multifunction Model LP-2050-MF Printer Model LP-2050 Quick Reference Guide U00121382803 Preface Your Printer is a Teriostar LP-2050 Series Wide Format Printer. This manual describes the basic operation methods for both the LP-2050 and LP-2050-MF models. For more detailed information, see the User's Manuals on the supplied CD-ROM. Keep this guide in a place where you can easily read it when required. Table of Contents Turning the Power On/Off……………………… 3 Operating the Printer from a Computer MF … 23 Power On………………………………………………… 3 Troubleshooting………………………………… 24 Power Off………………………………………………… 3 When an Error Message Appears……………………… 24 Mode Buttons…………………………………… 3 Smears on a Printout………………………………… 24 Replacing the Paper……………………………… 4 Changing the Time Until Power Save Mode………… 24 Replacing the Toner Cartridge…………………… 6 Automatic Paper Cutting After a Certain Time……… 24 Automatic Paper Cutting After Opening Replacing the Waste Toner Bottle……………… 8 and Closing a Door…………………………………… 25 Replacing the Charger Unit……………………… 10 Changing the Print Density…………………………… 25 Replacing the Process Cartridge………………… 12 Wrinkles on Tracing Paper…………………………… 25 Selecting Paper to Match the Print Data……………… 25 Part Names………………………………………… 14 Missing Print or Slow Data Reception………………… 26 Paper Jams………………………………………… 16 Service Representatives………………………… 29 Copying MF …………………………………… 20 Importing Images (Documents) to a Computer MF … 21 Disposal Method……………………………………… 29 Turning the Power On/Off Power On 1 Power Off 2 1 Press down for 1 sec. or longer 2 Mode Buttons zzCOPY button MF Changes to copy mode, and the lamp at the button's left lights up. For more details, see the separate User's Manual for Multifunction Printer Operation. zzSUBMIT button MF Changes to submission mode, and the lamp at the button's left lights up. For more details, see the separate User's Manual for Multifunction Printer Operation. zzSCAN button MF Changes to scan mode, and the lamp at the button's left lights up. For more details, see the separate User's Manual for Multifunction Printer Operation. zzPRINT button Changes to print mode and enables printing. zzMENU button Changes to menu mode, which enables the Printer setting specification. 3 Replacing the Paper 1 5 2 6 3 No 4 7 4 Ok TT Replacing the Paper 8 10 11 60 cm (23.63 inches) 9 5 Approximately 90° Replacing the Toner Cartridge 1 4 x10 x10 5 2 6 3 6 TT Replacing the Toner Cartridge 7 8 Disposing of Empty Toner Cartridges Put the used toner cartridge into the bag provided in the box of the new toner cartridge, and dispose of it according to the local regulations. 7 Replacing the Waste Toner Bottle 1 2 x10 3 ① ② 4 8 TT Replacing the Waste Toner Bottle 5 7 6 ① ② Disposing of Used Toner Bottles Dispose of the waste toner bottle according to the local regulations. 9 Replacing the Charger Unit 1 5 Press down for 1 sec. or longer 2 6 3 7 4 10 TT Replacing the Charger Unit 8 9 10 11 TIP The charger unit can be installed in either direction. If lines or other defects appear on the printout, inverting the charger unit right and left sides may solve the problem. 11 Replacing the Process Cartridge 1 5 Press down for 1 sec. or longer 2 6 7 3 4 8 9 12 ② TT Replacing the Process Cartridge 10 ③ 14 11 15 12 ① 13 ② ① ③ ② 16 ③ 13 Part Names Front Side Multifunction Model Printer Model Scanner cover Toner door Document table Front door Drawer for rolls 1 and 2 Drawer for rolls 3 and 4 14 TT Part Names Rear Side Paper outlet slot Filter cover Latch button Waste toner door Process cartridge drawer Fuser unit drawer Paper outlet cover 15 Paper Jams The door requiring action is displayed, in accordance with the paper jam location. Open the specified door and take the appropriate action to remove the paper jam. 3 Paper jam in a Roll paper drawer 1 Paper jam in the front door 1 2 16 TT Paper Jams 2 2 3 When you cannot pull out the paper easily: ② ① 3 Paper jam in the Fuser unit 1 17 TT Paper Jams 3 Paper jam in a roll paper drawer or front door 1 4 2 5 6 18 TT Paper Jams 7 2 3 8 4 5 Original jam MF 1 19 Copying MF Press COPY Set the original Position the original facing down. Set it in the Printer aligned with the original width guide. The inserted original is automatically pulled into the Printer, and set. 20 Importing Images (Documents) to a Computer MF 1 Double-click TerioStation. 2 Click the Scan tab. 3 Click Save Folder. 4 Select the destination folder to save the scanned data. Click OK. 5 Click Scan. 21 TT Importing Images (Documents) to a Computer MF 6 Click Preferences. 7 Input the Printer IP address in the Assign host name/IP address field. Click OK. 8 Set the scan conditions, and then click Scan. 9 Load the original. Important If "Scanner is operating in another mode" is displayed, press SCAN on the operation panel. If "Color processing is not supported because the scanner being used is a dedicated monochrome device" is displayed, you cannot scan in color mode. 22 Operating the Printer from a Computer 1 Start the web browser and enter "http://(IP address set on the Printer)" in the address field. Press Enter. 2 Click English. 3 Click an item from the left menu to check the settings or Printer status. 23 MF Troubleshooting Automatic Paper Cutting After a Certain Time When an Error Message Appears Take the action specified by the panel message. Or see the User's Manual for Basic Printer Operation, Chapter 4. Set Top Cut Timer in the Printer Engine menu. Menu Smears on a Printout Replace the process cartridge. (& page 12) Printer Engine Changing the Time Until Power Save Mode Roll 1 Top Cut Timer or Set Time Before Power Save in the Printer Engine menu. Roll 2 Top Cut Timer or Menu Roll 3 Top Cut Timer or Printer Engine Roll 4 Top Cut Timer Time Before Power Save Off 15 minutes 30 minutes or or or 1 hour 30 minutes or or 2 hours 60 minutes or or 4 hours 90 minutes or or 1 minute 235 minutes or 5 minutes or 10 minutes 24 TT Troubleshooting Automatic Paper Cutting After Opening and Closing a Door Wrinkles on Tracing Paper Set Humidity for Tracing Paper to High Humidity in the Printer Engine menu. Set Top Cut at Door Open to On in the Printer Engine menu. Menu Menu Printer Engine Printer Engine Humidity for Tracing Paper Top Cut at Door Open High Humidity On Selecting Paper to Match the Print Data Changing the Print Density Select Optimal at Paper Supply Mode. Set Print Density in the Printer Engine menu. Menu Menu PDL settings Printer Engine Select the port and format Print Density Paper Parameters Low or Paper Supply Mode Slightly Low or Optimal Normal or Slightly High or High 25 TT Troubleshooting Missing Print or Slow Data Reception Change the driver settings. 1 4 Click Change in the operation mode of the driver. 5 Change the output process selection from Process with Printer to Process with Computer. Click OK. 6 Click Apply. In Start Menu, open Devices and Printers. 2 Right-click the SII LP-2050 icon, and then click Printing Preferences. 3 Click the Options tab. 26 TT Troubleshooting 7 Click OK. 8 Print. If the problem persists: 1 Perform steps 1 to 4 and open Driver Operation Mode. 2 Set the resolution of the printer driver to 200dpi or 100dpi. Click OK. If the symptom persists, perform the following setting operation. 27 TT Troubleshooting 3 Click Apply. 4 Click OK. 5 Print. The User's Manuals and driver are on the supplied CD-ROM. 28 Service Representatives SIIT offers support to ensure you get the most from your Teriostar LP-2050 Series Printer. For details, contact your dealer or nearest service representative. http://www.seiko-i.com/ Disposal Method Dispose of the used toner cartridges and waste toner bottles according to the local regulations. 29 This equipment has been tested and found to comply with the limits for a Class A digital device, pursuant to Part 15 of the FCC Rules. These limits are designed to provide reasonable protection against harmful interference when the equipment is operated in a commercial environment. This equipment generates, uses, and can radiate radio frequency energy and, if not installed and used in accordance with the instruction manual, may cause harmful interference to radio communications. Operation of this equipment in a residential area is likely to cause harmful interference in which case the user will be required to correct the interference at his own expense. The CE mark, that shows that the products sold in the EU are conformed to the requirements of EC directive, is statutorily obliged to be affixed to the products. In each directive, the scope of directive to be applied to equipment is explicitly defined. Our company’s product LP-2050 series conforms the EMC directive (2004/108/EC), low voltage directive (2006/95/EC) and RoHS Directive 2011/65/EU. Inquiry of CE mark: Seiko Instruments GmbH Siemensstraße 9, D-63263 Neu-Isenburg Germany Tel: +49-6102-297-0 Fax: +49-6102-297-320 Seiko I Infotech Inc. 8 Nakase 1-chome, Mihama-ku, Chiba-shi, Chiba 261-8507, Japan Phone : +81 43 211 1363 Fax : +81 43 211 8709 1-8, Nakase, Mihama-ku, Chiba-shi, Chiba, 261-8507, Japan TEL: (043) 211-1369 U00121382803 April, 2015 Seiko I Infotech Inc., 2015 All rights reserved. The contents of this manual may be changed without prior notice. is a registered trademark of Seiko Instruments Inc.