1
Mobile Phone
This is the Internet version of the user's guide. © Print only for private use.
Z600
This is the Internet version of the user's guide. © Print only for private use.
Sony Ericsson
GSM 900/1800/1900
This manual is published by Sony Ericsson AB,
without any warranty.
Sony Ericsson Mobile Communications AB
reserves the right to make changes or
improvements to any of the products described in
this guide without prior notice.
Such changes will, however, be incorporated into
new editions of this manual.
All rights reserved.
© Sony Ericsson Mobile Communications AB,
2003
Publication number: 3-255-627-12(1)
Please read the guidelines for safe and efficient
use (% 116 Safe and Efficient Use) and the
Limited warranty (% 120 Limited Warranty)
chapters before you use your mobile phone.
T9™ text input is a registered trademark of Tegic
Communications Inc. and the T9™ text input
software is provided under license of Tegic
Communications Inc.
Bluetooth™ is a trademark owned by the
Bluetooth SIG, Inc.
Java™ and all Java™-based marks and logos,
including the coffee cup logo, are trademarks or
registered trademarks of Sun Microsystems, Inc.
in the United States and other countries.
Please note:
Some of the services in this manual are not
supported by all networks. This also applies to the
GSM International Emergency Numbers (for
example, 112).
Power consumption of charger during stand-by: below 0.3W
Halogenated flame retardant is not used in the cabinets.
Halogenated flame retardant is not used in the printed wiring boards in main portions.
This is the Internet version of the user's guide. © Print only for private use.
3
My Z600 information
Phone information for your reference.
For easy reference, please record the
identification numbers of your mobile phone
and SIM card. This information will assist you
in customer inquiries to your retailer,
manufacturer or network operator/service
provider. In case of loss or theft of your phone
and/or SIM card, call your network operator/
service provider immediately to prevent misuse.
My mobile phone number:
__________________________________
Operator customer service number:
__________________________________
My SIM card number:
(Printed on your SIM Card)
__________________________________
My phone’s ID number (IMEI):
(Printed on the label underneath the battery)
__________________________________
4
This is the Internet version of the user's guide. © Print only for private use.
About this manual
Composition of this manual, Icon explanation.
Composition of this manual
Explanation of the icons
(Instruction purpose only.)
Icons
Explanations
This manual is composed of the following
sections:
• Your Z600: your phone information.
Important
• Getting started: start using your Z600.
Contact your network operator/
service provider for details
Notes
• Basic operation: basic features of your Z600.
• Menu operation: how to use menu options.
}
Use the Soft/Navigation key to
select
% xx
See also page xx
• Appendix: additional information.
Note that the screen and icon in this manual may
vary slightly in font and/or colour from the
actual screen.
Press the centre of the Navigation
key
Press the Navigation key down
This is the Internet version of the user's guide. © Print only for private use.
5
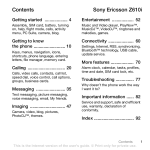
Contents
My Z600 information . . . . . . . . . . . . . . 4
Getting started
Phone information for your reference.
SIM card and Battery . . . . . . . . . . . . . 16
About this manual . . . . . . . . . . . . . . . . 5
SIM card and Battery information.
Composition of this manual, Icon explanation.
Using your Z600 . . . . . . . . . . . . . . . . . 19
Start using your phone.
Your Z600
Included in your kit . . . . . . . . . . . . . . . 9
Basic operation
What’s in your kit.
Making Calls (Saving contacts) . . . . . 21
Covers and the Hand Strap . . . . . . . . 10
Use Phonebook, Voice dialling, Speed dialling.
Attaching covers and the Hand Strap.
Receiving calls . . . . . . . . . . . . . . . . . 25
Quick reference
Receiving/Answering/Ending calls.
. . . . . . . . . . . . . . . . 11
An overview of the phone and its functions.
During a call . . . . . . . . . . . . . . . . . . . . 27
Basic features . . . . . . . . . . . . . . . . . . 12
Call options.
Key functions, External display, Menu overview.
Voice control . . . . . . . . . . . . . . . . . . . 31
Using voice commands.
6
This is the Internet version of the user's guide. © Print only for private use.
Text entry . . . . . . . . . . . . . . . . . . . . . 32
Connectivity . . . . . . . . . . . . . . . . . . . . 73
Standard and T9 text entry.
WAP, Bluetooth, Synchronization, etc.
Menu operations
Phonebook . . . . . . . . . . . . . . . . . . . . . 35
Phonebook menu, Voice commands.
Messaging . . . . . . . . . . . . . . . . . . . . . 43
Chat, SMS, MMS, E-Mail, etc.
My shortcuts . . . . . . . . . . . . . . . . . . . 58
Operator direct link . . . . . . . . . . . . . . 91
Accessing Operator defined direct links.
Internet services . . . . . . . . . . . . . . . . 91
Accessing an online web page.
Settings . . . . . . . . . . . . . . . . . . . . . . . 92
Personalising your phone settings.
Creating your own Shortcuts menu.
Organizer . . . . . . . . . . . . . . . . . . . . . . 99
Calls . . . . . . . . . . . . . . . . . . . . . . . . . . 59
Calendar, Notes, Alarms, Timer, Stopwatch,
Calculator and Code memo.
Call options (configuring call conditions).
Camera . . . . . . . . . . . . . . . . . . . . . . . 66
Entertainment . . . . . . . . . . . . . . . . . 106
Playing games and downloading an application.
Using the integrated camera.
Pictures & sounds . . . . . . . . . . . . . . . 69
Selecting, Composing, Recording sounds and
pictures.
This is the Internet version of the user's guide. © Print only for private use.
7
Appendix
Troubleshooting . . . . . . . . . . . . . . . 108
Security . . . . . . . . . . . . . . . . . . . . . . 111
PIN, PIN2, SIM card and Phone locks.
Icon glossary . . . . . . . . . . . . . . . . . . 113
Icons which may appear in the display.
Safe and Efficient Use . . . . . . . . . . 116
Please read this information before using your
mobile phone.
8
This is the Internet version of the user's guide. © Print only for private use.
Your Z600
Your Z600
Included in your kit
What’s in your kit.
The kit should include one mobile phone, one
standard battery, two sets of exchangeable
covers, one charger, one CD and this instruction
manual. If one of these items is missing, please
contact your retailer immediately.
Plug type differs from country to country.
This is the Internet version of the user's guide. © Print only for private use.
9
Your Z600
Covers and the Hand
Strap
The Hand Strap
Attach the hand strap to the phone as illustrated
below.
Attaching covers and the Hand Strap.
The exchangeable cover
Your Z600 comes with 2 different coloured
covers. Place the cover onto the phone as
illustrated below.
2
The hand strap is not included in your kit.
1
10
This is the Internet version of the user's guide. © Print only for private use.
Your Z600
Quick reference
An overview of the phone and its functions.
1
13
18
2
19
9
3
4
5
6
14
8
15
9
16
10
20
17
11
1
2
3
4
Earpiece
Display
Volume keys
Return key
12
13
14
15
5
6
Voice mail key
Charging/Network
indicator
Operator key
Navigation key
Soft keys
Clear key
Keypad
(Alphanumeric
keys)
16
17
On/Off key
Camera
Strap hole
External antenna
connector
Camera key
Infrared port
18
19
20
21
22
Mirror
External display
Loudspeaker
Battery cover
Connector
7
8
9
10
11
21
7
12
22
This is the Internet version of the user's guide. © Print only for private use.
11
Your Z600
Basic features
Camera
Activate Camera function.
Take a picture.
Volume
Adjust the volume.
Key functions, External display, Menu overview.
Key functions
On/Off
Switch on/off the phone.
Soft
Select an option that
appears above in the
display.
Return
Exit the menu.
Operator
Access Operator direct
link.
Clear
Delete items from a list.
Delete text/digit before the
cursor.
Press and hold to turn on/
off mute (during calls) or
sound.
,
Voice mail Press and hold to access
your voice mail. % 50 Call
voice mail
12
This is the Internet version of the user's guide. © Print only for private use.
Your Z600
Navigation Key
Press centre Open Main menu from
standby mode.
Select an option.
Press right
Open Main menu from
standby mode.
Scroll through the menus,
list and texts.
External Display
Your Z600 has an external display for viewing
information (for example, date, battery status,
message indication) without opening the phone.
This display is deactivated when the phone is
opened.
External display key functions
Mode
Explanation
Press left
Access SMS (Write new)
from standby mode.
Scroll through the menus,
list and texts.
Key
Standby
Activate backlight.
2nd press toggles
between status
items.
Press up
Access Internet services
from standby mode.
Scroll through the menus,
list and texts.
Event
Activate backlight.
2nd press dismisses
screen or returns to
standby mode.
Press down Access Phonebook from
standby mode.
Scroll through the menus,
list and texts.
Sleep
Activate backlight.
Go to standby/event
screen.
This is the Internet version of the user's guide. © Print only for private use.
13
Your Z600
Press
and
hold
14
Incoming call
Mute ringer.
2 x press in rapid
succession rejects
the call.
Standby
Event
Sleep
Activate backlight.
Info/Help text
More information, explanation or tips about
some menus or functions are available in your
phone. Select the menu or function and press
Info.
More option
If you press More, a list of options is displayed.
The option list differs depending on which
menu you are in.
Pressing More in standby mode offers you the
following options: Turn on silent, Turn on
Bluetooth, Turn on infrared, Post note, Phone
status.
This is the Internet version of the user's guide. © Print only for private use.
Your Z600
Menu overview
to access the Main menu from standby mode
and move the Navigation key to scroll through
the menu options.
Some menus are operator, network dependent.
1
2
3
4
5
6
7
8
9
10
11
12
(* Only visible during calls.)
1 Operator
direct link
2 Internet
services
4 Camera
5 Messaging
Text
Picture
Call voice mail
E-mail
Chat
WAP push
Area info
Options
8 Phonebook
Call contact
Find and send*
Add contact
Manage contact
Pictures
Personal rings
Voice commands
Special numbers
Advanced
Options
11 Organizer
Calendar
Notes
Alarms
Timer
Stopwatch
Calculator
Code memo
7 Pictures &
sounds
My pictures
More pictures
My sounds
More sounds
Themes
More themes
Picture editor
Music DJ
Record sound
10 Connectivity
Online services
Bluetooth
Infrared port
WAP options
Synchronization
GSM Networks
Data comm.
Accessories
3 My shortcuts
Write new
Ring volume
Select profile
My numbers
Edit shortcuts
6 Entertainment
Games & more
Other games
9 Calls
Missed calls
Call list
Divert calls
Manage calls
Time and cost
Next call
Options
12 Settings
Sounds and alerts
Display
Profiles
Language
Time and date
Voice control
Locks
Handsfree
Master reset
This is the Internet version of the user's guide. © Print only for private use.
15
Getting started
Getting started
SIM card and Battery
SIM card and Battery information.
SIM card
Inserting the SIM card
1
Remove the battery cover and the battery.
2
Insert the SIM card into the holder.
3
Replace the battery and the cover.
Your SIM (Subscriber Identity Module) card
contains a computer chip with your service
details and phone numbers. Like a credit card, it
should be kept securely and handled carefully.
Do not bend, scratch or expose to moisture.
Avoid static electricity. To avoid corrupting the
memory of your SIM card, always switch off
your phone before removing or inserting your
SIM card.
When you insert a new SIM card, your phone
prompts you to select whether or not you wish to
copy the SIM contents to the phone memory
% 35 Phonebook.
16
To remove the SIM card
Follow steps 1-3 above removing the SIM card
from the holder in step 2.
This is the Internet version of the user's guide. © Print only for private use.
Getting started
Battery
Use only the Sony Ericsson-specified Z600
battery and charger. When supplied, your
battery will not be fully charged.
Both the status bar within the battery icon in
the display and the charging indicator (red)
show the charging status.
Charging (5 °C-45 °C) is complete when
appears.
Full charging can take up to approximately
3 hours, but may vary depending on certain
conditions (for example, if your phone is
switched on or if temperature is outside the
operating range).
When your battery is completely empty, it can
take some time until the battery icon appears
during charging.
As an energy-saving measure disconnect the
charger from both the mains socket and the
phone after charging.
On exposure to high temperatures your battery
may expand slightly. This has no influence on
your safety/health and will reduce to its original
size once re-exposed to a lower temperature.
Inserting the Battery
1
Slide the battery cover down to remove.
2
Align the claws on the battery terminal with
those of the phone and press battery down.
3
Align the claws at the side of the cover with
slots of the phone and slide back into place
until the lock clicks.
2
1
This is the Internet version of the user's guide. © Print only for private use.
17
Getting started
Removing the battery
First power off and wait until the display goes
blank. Remove the cover and then the battery.
Removing the charger from the phone:
If you insert a new battery, you must reset the clock.
Charging the battery
18
1
Plug the charger into a mains socket.
2
Connect the charger to the bottom (jack) of
the phone.
Usage time
When your battery is nearly empty,
appears
and a beep indicates that approximately 1
minute of talk time remains; however, if the
Turn on silent option is activated there will be no
tone.
This is the Internet version of the user's guide. © Print only for private use.
Getting started
Using your Z600
Start using your phone.
Switching on your phone
To switch on/off your phone, press and hold .
(The first time you turn on the phone it takes up
to 40 seconds to begin operating.)
Entering PIN
Enter your PIN (Personal
Identification Number)
using the number keys (the
PIN appears in code as ****)
to
and press Ok or
confirm. % 111 PIN
(Personal Identification
Number).
Connecting to the network
After successfully entering your PIN, your
phone searches for an available GSM network.
The network search is automatic and may take a
few seconds. (To select the network manually
% 87 GSM Networks.)
You are ready to make and receive calls when
the network operator’s name and the signal
strength icon appear in the display and the
network indicator (green) blinks.
The following indicates the strength of the
received network signal. If the signal is very
weak, there is a risk of losing service.
Strong
signal
Weak signal
Network not
available
This is the Internet version of the user's guide. © Print only for private use.
19
Getting started
If you cannot obtain service
If you cannot obtain a network service the
reception strength may be too weak. Move to a
higher elevation, a window or an open space and
make sure that there is nothing obstructing the
internal antenna area (front cover).
Roaming
If you are out of range of your “Home” network
operator, especially when abroad, another
network operator may be selected automatically
subject to signal strength and roaming
agreements between network operators
% 87 GSM Networks.
20
This is the Internet version of the user's guide. © Print only for private use.
Basic operation
Basic operation
Making Calls
(Saving contacts)
Use Phonebook, Voice dialling, Speed dialling.
Dialling a Number
1
Dial the complete
number of the party
you wish to call
(including the area
code even if dialling
locally). In the case of
international calls,
press and hold
until + appears. Enter
the country code
followed by the area code and then the
number.
2
Press
3
Press Call to dial the number displayed or
4
} More } Save number to save the number in
the Phonebook.
Select New contact to create a new contact
entry or Add to old to save the number to an
existing contact.
To hide/show your phone number when making a
call % 65 Next call.
Automatic re-dialling: If connection fails, the
message Retry? is displayed. Press Yes to activate the
automatic re-dialling option (not available for fax or
data calls). The phone automatically re-dials the
number up to 10 times until the call is connected,
you press a key or receive an incoming call. You will
hear a tone when the call is connected.
to correct any mistakes.
This is the Internet version of the user's guide. © Print only for private use.
21
Basic operation
Selecting a Phonebook entry
1
In standby mode, press and hold an
alphanumeric key to advance to the first
letter on the key and then press the same
key repeatedly to go to the letter you wish to
find (for example, to advance to contacts
beginning with “L”, press and hold
to
again 3 times to
go to J and then press
go to L).
2
Highlight the contact you wish to call and
press Select.
3
Select the number and press Call.
Making emergency calls
Your phone supports the international
emergency numbers, 112, 911 and 08. This
means that these numbers can be used to make
an emergency call in any country, with or
without a SIM card inserted (network
dependent), if a GSM network is within range.
In some countries, other emergency numbers
may also be promoted. Your operator may
therefore have saved additional local emergency
numbers on your SIM card.
To make an emergency call, enter an emergency
call number (112, etc.) and press Call.
You can also select a Phonebook entry from Call
contact in Phonebook menu % 36 Call contact.
To call a contact from the SIM card, % 42 Call from
SIM.
22
This is the Internet version of the user's guide. © Print only for private use.
Basic operation
Voice dialling
Voice dialling makes dialling Phonebook
entries easy. Simply press and hold the volume
key and say the person’s name (Voice Tag) into
the microphone. If you have several numbers for
that person, say the number type, for example,
“home”. On recognition of the Voice Tag, the
phone automatically dials after 3 seconds (the 3
seconds gives you time to cancel your call by
pressing
or
).
It is necessary to set up the Voice Tag and turn
the Voice dialling option on in advance to use
this option % 23 Turn the Voice dialling on
and record number types, % 23 Creating a
Voice Tag entry.
Turn the Voice dialling on and record
number types
1
}
2
Follow the instructions in the display and
record number types.
} On
Settings } Voice control } Voice dialling
Creating a Voice Tag entry
1
}
2
Select a contact.
3
Follow the instructions in the display. An
icon appears next to a contact name that has
a voice command.
Settings } Voice control } Voice dialling
} Edit names } New voice
Press the handsfree button to start the Voice dialling
when using a handsfree or Bluetooth headset. To
activate Voice answer using accessories % 26 Voice
answering.
This is the Internet version of the user's guide. © Print only for private use.
23
Basic operation
Speed dialling
Voice redialling
You can “speed dial” your chosen number by
pressing the corresponding key and then Call.
(For example, to call the number saved in
position 1 on your SIM card, press
and
Call.)
To use the Speed dialling option it is necessary
to change the position of the numbers saved in
SIM memory % 24 Change SIM position
numbers.
You can use your voice to redial the last dialled
number. Simply press and hold the volume key
and say “Re-dial” into the microphone. The
voice command is played back to you and the
last dialled number is called.
It is necessary to set up the redial command and
turn the Voice redialling option on in advance to
use this option % 24 Turn on and record a
redial command.
You can assign up to 9 keys using
to
.
Turn on and record a redial command
1
24
}
Settings } Voice control } Voice redial
} On
Change SIM position numbers
2
Instructions appear. Press Ok.
1
}
3
2
Select the position number you wish to
change.
3
Lift the phone to your ear, wait for the tone
and say “Redial”, or another word. If the
recording sounds okay, press Yes. If not,
press No and repeat step 2.
Select the position to which you wish to
move the number.
4
Press Select to confirm.
Phonebook } Advanced } Position list
This is the Internet version of the user's guide. © Print only for private use.
Basic operation
Receiving calls
Answering/Ending calls
Receiving/Answering/Ending calls.
When the phone is open
When you receive a call, the phone rings and the
message Answer? is displayed.
If your subscription includes the Calling Line
Identification service and the caller’s number is
identified, the number is displayed. If you have
saved the number in the Phonebook, the name
and number are displayed. If you have assigned
a picture to the contact, the picture is displayed.
If the number is a restricted number, the display
will show Withheld.
Press Yes/No to accept/reject a call.
When the phone is closed
Open the phone and press Yes/No to accept/
reject a call, or simply open the phone to accept
the call when Open to answer option is set to On
% 62 Open to answer.
If you do not wish to answer the call, press No. The
call will then be rejected (the caller will hear a busy
tone (network dependent) or will be diverted if a
divert has been set).
If a call is not answered,
appears in the top line
of the display.
Press Calls for information about the missed call
% 59 Call list.
In very rare cases, ciphering does not work in some
networks, meaning that a third party can listen to
your phone call. In this case,
appears in the
display.
Press End call or close the phone to end a phone
call.
This is the Internet version of the user's guide. © Print only for private use.
25
Basic operation
Headset
When the headset is connected to your phone,
answer a call by pressing the headset button.
Press headset button again to end the call.
Bluetooth headset
When the Bluetooth headset is activated, press
the headset button to accept/end a call.
Voice answering
You can answer/reject an incoming call by
using your voice, when using a portable
handsfree (headset) or a car handsfree kit. When
the phone rings, say “Answer/Busy” to answer/
reject an incoming call. (When a call is rejected,
the caller is diverted to your voice mail if
activated or hears a busy tone.) It is necessary to
set up the Voice answer command and turn the
Voice answering option on in advance to use
this option % 26 To turn on voice answering
and record voice answer command.
26
To turn on voice answering and
record voice answer command
1
}
2
Select the accessories you wish to be able to
use with voice answering by pressing Check
followed by Save.
3
Follow steps 2-3 in % 24 Turn on and
record a redial command and say
“Answer” in step 3.
4
Say “Busy”, or another word and press Ok.
} On
Settings } Voice control } Voice answer
This is the Internet version of the user's guide. © Print only for private use.
Basic operation
During a call
Call options.
Adjusting the Ringer/Speaker
volume
During a call, use the volume key to adjust the
ringer/speaker/headset volume (press =
increase volume/press = decrease volume).
The microphone must be turned on to change
the volume % 27 Turn the microphone off/on.
Bluetooth headset
If the Bluetooth headset goes out of range
during a call, the message, Bluetooth connection
lost. Retrieve call in phone? is displayed and you
are prompted to select Yes/No to transfer/end the
call.
You can also transfer the sound to the phone or
other headset devices during a call when you are
using the Bluetooth headset.
To transfer sound
1
} Transfer sound or
} More in standby mode.
2
} To phone or select other handsfree device.
To transfer a call from Phone to Bluetooth headset,
press the Bluetooth headset button, when Bluetooth
headset is activated.
Turn the microphone off/on
Press and hold
to mute/unmute the
microphone.
Sending DTMF
Press the alphanumeric key (
)
followed by
and
to send the DTMF
tone. Press
to clear the display after the call
is finished.
This is the Internet version of the user's guide. © Print only for private use.
27
Basic operation
Notepad
Ongoing call menu
Use your phone as a Notepad by entering a
phone number during a call. When ending the
call, the number entered will reappear in the
display. Press Call to call the number or press
More and Save number to save the number in the
Phonebook.
During a call,
or press
for the following
options (some options are network dependent):
} Record to record the conversation.
The person you are talking hears tone signals while
using the Notepad.
and select Turn off tones to
turn the tone off.
} Turn off tones/Turn on tones to turn off/on
tones.
} Hold call to put the ongoing or conference
call on hold.
} Switch calls to switch between 2 calls.
} Release active to end an active call.
} Retrieve call to retrieve a held call.
} Join calls to join calls into a conference
call.
} Transfer call to connect the two calls.
} Extract part to have a private conversation
with one of participants from the conference
call and put others on hold. (Select Join calls
to resume the conference call.)
} Release all to end multiple calls.
28
This is the Internet version of the user's guide. © Print only for private use.
Basic operation
} Release part to release a participant from
the conference call.
} Parties in conf. to view the identity of the
parties in the conference call.
} Calls to make a new call.
Call hold
Press Hold to hold the ongoing call or manage 2
calls at the same time.
One active call
1
2
} Main menu }
Phonebook } Call contact
One active call (and/or one call on
hold) and one call waiting
1
Your phone alerts you (beep) that a call is
waiting and the display automatically offers
you call waiting options.
2
} Answer to answer the second call and put
the ongoing call on hold.
or
} Busy to indicate to the calling party that
your line is engaged.
or
} Release & answer to answer the second call
and end ongoing call.
To turn the call waiting option on/off % 61 Call
Waiting.
to retrieve a number from the Phonebook
(or use the keypad to enter a number).
3
} Call
You can only put one call on hold.
Using the Notepad to make a second call, the call is
put on hold automatically.
This is the Internet version of the user's guide. © Print only for private use.
29
Basic operation
When the headset is connected to your phone,
answer a waiting call by pressing the headset
button. In the case of one active call and one call
on hold, alternate between 2 calls by pressing
the headset button.
Handling two calls
When you have one ongoing call and one call on
hold, you can do the following:
} Switch to switch between the two calls.
and select Transfer call to connect the
two calls. You are disconnected from both
calls.
} End call to end the ongoing call, then
press Yes to retrieve the held call or No to
end both calls.
You cannot answer a third call without ending one of
the first two calls.
30
Conference call
It is possible to have a conference call consisting
of 5 calls and a single held or waiting call
(network dependent). There may be additional
charges for calls involving multiple parties.
You must first have one ongoing call and one
call on hold to create a conference call.
Creating a conference call
1
} Join calls
2
} Hold to put the conference call on hold.
3
Call the next person you wish to include in
the conference call.
4
5
} Join calls
Repeat steps 2-4 to include more
participants.
Select Release part in step 4 to release a
participant or press End call to end the
conference call.
This is the Internet version of the user's guide. © Print only for private use.
Basic operation
Voice control
Using voice commands.
With your phone, you can use your voice to:
• Voice dial % 23 Voice dialling.
• Re-dial the last dialled number % 24 Voice
redialling.
• Answer and reject calls % 26 Voice
answering.
• Record or listen to sound recordings by using
voice commands % 32 Sound recordings.
• Activate the voice control by saying a “magic
word” % 31 The magic word.
You can save approximately 50 recorded words
as voice commands in the 40 seconds available.
This also depends on what is saved in the
memory (other functions). To edit your voice
commands % 96 Editing your voice
commands.
The magic word
You can record a magic word and use it as a
voice command to allow total handsfree access
to voice control. Instead of pressing a volume
key, you say the magic word and then one of
your recorded voice command. It is
recommended to select a long, unusual word
which can easily be distinguished from ordinary
background speech.
Turn on and record the magic word
1
}
2
Select a profile and press Save.
3
Instruction appears. Press Ok.
4
Lift the phone to your ear, wait for the tone
and say the profile name. Repeat steps 3 and
4 to record voice commands for the other
profiles.
} On
Settings } Voice control } Magic word
Turn off the magic word when you no longer need
total handsfree access in order to save battery power.
This is the Internet version of the user's guide. © Print only for private use.
31
Basic operation
Sound recordings
Record or listen to sound recordings by using
voice commands.
Turn on and record recording
command
1
}
Settings } Voice control } Sound recorder
} On
2
Instruction appears. Press Ok.
3
Lift the phone to your ear, wait for the tone,
say “Record” and press Yes.
4
Say “Play” and press Yes.
You can listen to the recording by pressing and
holding a volume key from standby mode and say
“play” after the tone. Press Cancel to stop listening.
32
Text entry
Standard and T9 text entry.
Input languages
Before you start entering letters, you need to
select the input languages that you wish to use
when writing.
Selecting input languages
1
}
2
to scroll to the language that you wish to
use for entering letters and
or press
Check to select each language you wish.
3
Press Save to exit the menu.
Settings } Language } Input
When writing, you can switch to one of your selected
input languages by pressing More and then selecting
Input language.
This is the Internet version of the user's guide. © Print only for private use.
Basic operation
Standard text entry
T9 text entry
Press the corresponding alphanumeric key
multiple times until the desired character
appears (multi-tap mode).
T9 text entry method uses a built-in dictionary
that recognises the most commonly used word
for each sequence of key presses. You need to
press each key only once, even if the letter you
wish is not the first letter on the key.
Sample entry with standard text
entry (entering s)
1
}
2
Press
multiple times until s is
displayed.
3
Wait to confirm.
Messaging } Text } Write new
Press
to shift between:
Aa upper case letter and then revert back to lower
case
A upper case letters permanently
a lower case letters permanently
Press and hold
or press More and select Input
method followed by T9 input to activate/deactivate the
T9 function % 33 T9 text entry.
Press
to clear the character or number before
the cursor.
Sample entry with T9 text entry
(entering Sony)
1
2
}
Messaging } Text } Write new
} More } Input method } T9 input, or press
and hold
if
does not appear.
3
Press
Aa.
4
To type the word Sony,
press each of the
following keys in
order:
,
,
,
.
to shift to
This is the Internet version of the user's guide. © Print only for private use.
33
Basic operation
5
At the end of the word, check the preview
screen for the possibilities found for the key
combination you typed.
6
to highlight Sony. If your desired word
is first on the list, just press Select to select it
or press
to enter a space and proceed
with the next word
Adding a symbol
To insert a symbol when creating a message,
press
or
multi times until the desired
symbol appears or press More and select Add
symbol to add a symbol from the list.
For “Smart Punctuation”, just press
where you
would add a full stop, hyphen or apostrophe. T9 will
automatically insert the most likely punctuation.
If the word you intended to type does not appear in
the list, press More followed by Spell word and type
the word using standard text entry method % 32
Text entry. When finished, press Insert. This new
word will automatically be added to the T9 memory
and will appear in T9 mode in the future.
T9 function is not supported by some languages.
While using text entry, press More to open the
options of Add symbol, Insert item, Spell word (T9
only), Text format, Input language, Input method,
Word suggestions (T9 only), My words (T9 only)
and Help.
34
This is the Internet version of the user's guide. © Print only for private use.
Phonebook
Menu operations
Selecting a menu item with the
Navigation key/Soft key
1
to access the Main menu from standby
mode and move the Navigation key to scroll
through the menu options.
2
or press Select to select a menu option.
3
to exit a menu.
Your phone automatically defaults to standby mode
after a few minutes of inactivity.
Phonebook
Phonebook menu, Voice commands.
You can store the information on your SIM card
and on your phone. You have space for up to
510 entries (up to 20 characters for each name
and up to 40 digits for each number). Entries
saved as contacts are saved only in your phone
memory. To synchronise your phone-based
contact list with your PDA or PC % 86
Synchronization.
Saving Phonebook Entries
% 21 Making Calls (Saving contacts),
% 36 Add contact.
Making Calls
% 21 Making Calls (Saving contacts),
% 22 Selecting a Phonebook entry or
% 36 Call contact.
This is the Internet version of the user's guide. © Print only for private use.
35
Phonebook
Call contact
Find and send
}
}
Phonebook } Call contact
Select this option and enter a letter using the
keypad to retrieve an entry from your
Phonebook.
Default number
Each contact has a default phone number. The
first phone number you link to a contact
automatically becomes the default number. If
you select a certain contact in the Call contact
list, the default number is highlighted.
Set the default number
1
}
Phonebook } Manage contact
} Edit contact and retrieve an entry from
your Phonebook.
36
2
Highlight the name and press Edit or More.
3
} Default number
4
Highlight the number you wish as default
and press Select.
Phonebook } Find and send
You can find and send a number (DTMF)
during a call. (This option is only available
during a call.)
and select
To access Find and send option,
Main menu followed by Phonebook, and then
select Find and send.
Add contact
}
Phonebook } Add contact
You can add contacts to your Phonebook.
Adding contacts
1
}
2
Scroll to the field you wish to fill in and
press Add.
3
Enter the number/information or press Look
up to retrieve a number from Phonebook/SIM
entries/Unsaved numbers.
4
When you have entered the number/
information, press Save.
Phonebook } Add contact
This is the Internet version of the user's guide. © Print only for private use.
Phonebook
Manage contact
}
Phonebook } Manage contact
6
Press Save.
Manage contact contains the following options:
Send contact
View contact
Sending contact
Display all information that is saved in each
entry. Retrieve an entry from your Phonebook
and press View.
Edit contact
Edit existing contacts.
Editing contact
1
}
Phonebook } Manage contact
} Edit contact and retrieve an entry from
your Phonebook.
2
Select an entry and press Edit.
3
} Edit info (you can also edit the following
items: picture, ring signal, voice, positions,
default number.)
4
Select the field you wish to edit and press
Edit.
5
Enter the information and press Ok.
You can send a contact to another device.
1
}
Phonebook } Manage contact
} Send contact and retrieve an entry from
your Phonebook.
2
Select the contact you wish to send.
3
} Send and select from the following
options: As picture msg, As text msg, Via
Bluetooth or Via infrared.
Delete contact
Follow steps 1-2 in % 37 Editing contact and
select Delete in step 2.
You can also delete an entry by pressing
highlighted.
This is the Internet version of the user's guide. © Print only for private use.
when
37
Phonebook
My card
Groups
You can add your own business card to the
Phonebook. Select Add to create your business
card.
You can also exchange business cards between
your phone and another similar phone, a PDA or
a PC via Bluetooth, the infrared port, text or
picture message.
You can create a group of contacts. Using the
group, you can send a text message to the
several recipients at a time (% 43 Multi-Party
message).
Sending your business cards
1
}
2
} Send and select from the following
options: As picture msg, As text msg, Via
Bluetooth or Via infrared.
Phonebook } Manage contact } My card
Assigning groups
1
}
Phonebook } Manage contact } Groups
} New group
2
Enter a name for the group and press Ok.
3
} New member and retrieve the contact and
number from your Phonebook.
4
Repeat step 3 to add more members or press
Done to save.
When you receive a business card via a text message,
you accept the card by pressing Yes. To be able to
receive a business card via the infrared port or
Bluetooth, make sure to turn these functions on.
38
This is the Internet version of the user's guide. © Print only for private use.
Phonebook
Pictures
}
Phonebook } Pictures
You can add a picture to a Phonebook contact.
Adding a picture to a contact
1
}
2
Retrieve an entry from your Phonebook and
press Select.
The phone will automatically take you to My
pictures.
3
Phonebook } Pictures
Select a picture and press Select followed by
Yes.
Personal rings
}
Phonebook } Personal rings
3
Select a ring signal.
Voice commands
}
Phonebook } Voice commands
Assign a voice command to a contact.
% 95 Voice dialling.
Special numbers
}
Phonebook } Special numbers
This section may contain special numbers such
as Fixed numbers, My numbers, SOS number,
Info numbers and Service numbers (SIM card
dependent). You can Call, Edit and Delete the
Fixed Numbers list. You need the PIN2 to edit,
delete and copy.
Assign a personal ring to a contact.
Fixed numbers
To set a ring signal for a caller
This section may contain Fixed numbers (SIM
card dependent). The fixed dialling function
allows calls to be made only to certain numbers
(except emergency calls, 112 etc.) saved on the
SIM card. Before you use the Fixed numbers,
1
2
}
Phonebook } Personal rings
} New contact
Retrieve an entry from your Phonebook and
press Select.
This is the Internet version of the user's guide. © Print only for private use.
39
Phonebook
you will need to turn this option on. You need
the PIN 2 to edit and delete.
Partial numbers can be saved. For example, saving
0123456 allows calls to be made to all numbers
starting with 0123456.
Numbers with question marks can be saved. For
example, saving 01234567?0, allows calls to be
made to numbers from 0123456700 to 0123456790.
Press and hold
to enter ?.
Creating Fixed numbers entries
40
1
}
Phonebook } Special numbers
} Fixed numbers } New number
2
Enter the PIN2 and press Ok.
3
Enter the phone number and press Ok to
confirm.
4
Enter a new name and press Ok to confirm.
5
Enter a position and press Ok to confirm.
Editing Fixed numbers
1
}
Phonebook } Special numbers
} Fixed numbers
2
Highlight the name you wish to edit and
press Select to confirm.
3
} Edit
4
Enter the PIN2 and press Ok.
5
Edit the Number, Name and Position and
press Ok to confirm.
My numbers
You can check your own phone number(s).
Depending on your SIM card, you can save
multiple My Number entries.
Info numbers
This section of the Phonebook may contain Info
numbers, for example, taxi number (network/
SIM dependent).
This is the Internet version of the user's guide. © Print only for private use.
Phonebook
Service numbers
Position list
This section of the Phonebook may contain
Service Dialling Numbers (SIM card
dependent). Service numbers cannot be edited.
Change the position of Phonebook entries saved
in your SIM card. To change the position % 24
Change SIM position numbers.
SOS numbers
Copy all to SIM
View your local emergency numbers.
To make an emergency call % 22 Making
emergency calls.
Copy all contacts saved in the Phone memory to
the SIM card. Please note that everything on the
SIM card is replaced.
Advanced options
}
Phonebook } Advanced
If the memory is full, you will receive the message,
Memory full. and copy option will be cancelled.
Memory status
Display how much memory is available for the
Phone, SIM, E-mail and Voice commands areas.
Copy from SIM
Copy contacts saved in the SIM memory to the
Phone memory.
When you have selected a contact from the SIM card
in the Call from SIM option, you can copy it to the
phone by pressing More and then selecting Copy to
phone.
This is the Internet version of the user's guide. © Print only for private use.
41
Phonebook
Call from SIM
Ask to save
If you insert a SIM card with saved contacts into
your phone, you can call a contact by selecting
this option. If you wish to edit a contact saved
on the SIM card, you first need to copy the
contact to the phone.
Turn this option off to save a new phone number
to the Phonebook at the prompt.
Send all
Synchronize view
Set the order of the names (starting first or last
name) during synchronization of contacts.
Send all contacts via Bluetooth or the infrared.
Fixed dialling
Delete all
Select this option and enter PIN2 to activate/
deactivate the Fixed dialling option.
Delete all contacts saved in the Phone memory.
Options
}
Phonebook } Options
Contact info.
Set the contact fields in contact information.
Select Check/Uncheck to select/clear fields.
If your Phonebook is empty, you are prompted
to copy information from your SIM card. Press
Yes to copy information from your SIM card to
Phone or No to add new contacts.
42
This is the Internet version of the user's guide. © Print only for private use.
Messaging
Messaging
Chat, SMS, MMS, E-Mail, etc.
This feature offers correspondence options to
read, write and send messages (text, chat and
picture message) and/or E-mail % 50 E-mail.
Before you use Messaging option you will need
to set your service centre number % 46 Service
centres.
Multi-Party message
It is possible to send one message to maximum
10 recipients at a time.
To create a multi-party SMS, follow steps 1-4 in
% 45 Send text message and select a group
from the Phonebook in step 4 (% 38 Groups).
Long message
It is possible to send a longer message by
linking two or more messages (160 characters
each) to one recipient at a time. Long message
can only be displayed/read once all parts are
received (by recipient) % 47 Long message.
Once you have created a message, the phone will
automatically split the message into pieces and send
to recipients.
Please check with your service provider for the
maximum number of messages that can be combined
to one long message.
Receive message
When a new message arrives, you will hear a
beep (editable % 58 Message alert) and see the
message Read now? appears while in standby
mode. Press Yes to display the message.
To read message
1
}
Messaging } Text or } Picture and
select one of the following options:
} Inbox to read received messages or
} SIM archive to read messages saved on
SIM card or
} Unsent items to read unsent messages or
This is the Internet version of the user's guide. © Print only for private use.
43
Messaging
} Sent items or Last sent to read sent
messages.
2
Scroll through the list of messages to select
the message you wish to read and press
Read.
3
Press More offers you the following options:
Reply and delete, Chat, Call, Delete, Forward,
Save in archive and Print via Bluetooth.
The capacity for storing incoming and outgoing
messages depends on your SIM card and the phone
memory.
The message memory is full when
is displayed.
Delete old messages in order to free memory space
for new messages.
While reading the message you can, for example,
start a chat session with the sender or go to a WAP
address displayed.
Select Delete all in step 3 % 43 Receive message to
clear all messages.
You can receive a maximum of 20 messages. You
may have to delete old messages before you can
receive new ones.
44
To call back the sender of a message
or a number in the message text
Follow steps 1-3 in % 43 To read message and
select Call in step 3 to call back the sender or
highlight the number you wish to call back from
the number(s) appearing in the message, then
press Call.
To save a message on the SIM
Follow steps 1-3 in % 43 To read message and
select Save in archive in step 3.
When the phone number/WAP address/ picture/
animation/melody is highlighted, press More and
select Save to save it in Phonebook/Bookmarks/
My pictures/My sounds.
This is the Internet version of the user's guide. © Print only for private use.
Messaging
Send text message
Create and send text messages (SMS).
To Create and send text message
1
}
2
Create your message.
Messaging } Text } Write new
3
} Continue
4
} On to request reply or
} Off not to request reply (if the Request
reply option is set to Set on send).
5
Enter the number or select the number/
group from the Phonebook by selecting
Look up.
6
Press Send.
If you are interrupted (for example, incoming call)
while creating a message, select Unsent items to
retrieve the message and complete it continuing from
step 3 % 45 Send text message.
Selecting Recipients offers the option to add another
name/number to the group list.
Select View status from More menu to check the status
of sent messages % 47 Status request.
As a shortcut,
in standby mode to start writing a
text message.
This is the Internet version of the user's guide. © Print only for private use.
45
Messaging
Text message templates
you can create and save messages that you send
often as templates. There are 5 pre-defined
templates in your phone (editable).
To create a template
1
}
2
Write a message and } Ok.
3
The message, Use template to create message
now?, appears
} Yes to send the message now or
} No to save the template.
Messaging } Text } Templates
} New template
Text message options
Message options allows you to customise
outgoing messages including the format,
confirmation report etc.
When Set on send is activated, you need to select
the settings each time you send a message.
Some of these options may be network operator
dependent.
Service centres
Register your service centre number before you
send short messages.
E-mail gateways
Enter an E-mail gateway phone number to send
a text message to an E-mail address via your
network operator.
SMS type
Specify how your message is transmitted: Text,
E-mail, Fax, Voice (if available), Pager, ERMES,
Set on send. The default setting is Text.
46
This is the Internet version of the user's guide. © Print only for private use.
Messaging
Validity period
Specify how long messages are stored in the
service centre by selecting: 1 hour, 12 hours, 1
day, 1 week, Maximum, Set on send. The default
validity period is Maximum (network dependent).
Request reply
Include a reply request if you wish the recipient
to reply.
Status request
Select On or Set on send if you would like to
receive confirmation that your message has
been successfully transmitted.
Long message
Select On if you would like to send a long
message.
Picture Message (MMS)
}
Messaging } Picture
Picture message can contain text, pictures and
sound, and are sent via MMS (Multimedia
Messaging Service). You can also send contacts
(Phonebook entries), calendar entries, sound
recordings and notes as attachments.
To avail of MMS service you must first set your
Server Centre number and create a WAP profile
% 49 Message server and % 79 WAP options.
To compose and send picture
message
1
}
2
Select from the following options:
Messaging } Picture } Create new
} Picture to access My pictures.
SMS memory
} Text to write a message.
Display how much memory is available for
Phone and SIM areas.
} Sound to access My sounds.
} Camera picture to compose from/access
Camera.
} Recording to record a sound.
This is the Internet version of the user's guide. © Print only for private use.
47
Messaging
} Page to start a new page.
3
} Add to continue composing the message.
4
} More for the following options:
If you entered the phone number manually, press
Proceed to go to % 48 Advanced send options.
} Send to send the message.
} Preview to view the message.
} Preview page to view the page in the
message.
} Page timing to set the duration in
seconds that the page will be displayed
on the recipient’s display.
Advanced send options
By pressing More before sending a picture
message, you can enter more information to
accompany the message as follows:
} To:
Phone number or E-mail
address. These can be
selected from the
Phonebook.
} Subject:
Write a title
(} Ok to confirm).
} Cc:
Phone number or E-mail
address.
} Bcc:
Phone number or E-mail
address.
} Background to set the background
colour.
} Delete page to remove the page.
5
} More } Send and enter the number or
select number/group/E-mail address from
Phonebook entries by selecting Look up.
6
48
} Send
This is the Internet version of the user's guide. © Print only for private use.
Messaging
} Attachments:
Add your own card, a
business card or melody
from My sounds.
} Priority:
High, Normal or Low.
} Delivery report: Turn on/off.
} Read report:
Turn on/off.
Read report
Select On if you would like to receive
confirmation that your messages has been read
by the recipient.
Delivery report
Select On if you would like to receive
confirmation that your messages has been
successfully transmitted.
Picture message template
Restrict messages
There are 5 pre-defined templates in your phone
(editable). To make changes to templates, select
a template and press Add.
Limit messages sent/received, for example, if
you do not wish to receive any advertisements.
Picture message options
Select On if you wish to be alerted about the
problems when sending messages, for example,
the message is too large or recipient might not
be able to view the message.
Customise outgoing messages including the
format, confirmation report etc.
Validity period
Specify how long messages are stored in the
service centre by selecting: 1 hour, 12 hours, 1
day, 1 week, Maximum. The default validity
period is Maximum (network dependent).
Content alert
Message server
View or enter your message server information.
WAP profile
Specify which WAP profile is used or create a
new WAP profile by selecting Create new.
This is the Internet version of the user's guide. © Print only for private use.
49
Messaging
Memory status
Display how much memory is used for MMS
function.
Call voice mail
}
Messaging } Call voice mail
Select this option to call your voice mail. You
can also press and hold
for quick access to
your voice mail.
To set up the voice mail number % 58 Voice
mail number.
or
appears in the display
(network dependent) to inform you when you
have received new voice messages. Press Yes to
listen to/read the message.
50
E-mail
}
Messaging } E-mail
You can send and read E-mail by accessing to
your office E-mail server or your Internet
service provider on the Internet (POP3 and
IMAP4 are supported).
You will need the specific parameters from your
Internet service provider in order to complete
the setup (some service providers or network
operators do not offer this service).
It may also be possible for you to obtain these
parameters in a text message or from the web
page of your network operator/service provider
(at www.SonyEricsson.com you can receive
settings in a text message). Be sure to make your
settings before you start using E-mail % 54 Email Options.
This is the Internet version of the user's guide. © Print only for private use.
Messaging
Send and receive E-mail
This option offers the fastest way to send E-mail
saved in Outbox and check for new E-mail.
You will still be able to access the mail from your PC
after you have read it using your phone. You can
only delete mails from your PC.
The phone can save up to six complete E-mail
depending on size (you can download headers only
% 54 Set account).
You can receive an E-mail with attachments. The
attachments can be found at the end of the message.
You can save the sender’s address by pressing the
Save after selecting the sender.
Reading E-mail
1
}
Messaging } E-mail } Send and receive
to download E-mails to the phone.
2
}
3
to highlight the E-mail that you wish to
read and press Select to read it.
Pressing More when reading, you have the
following options: Reply all, Mark for deletion,
Mark as unread and Copy to archive.
Messaging } E-mail } Inbox
When the E-mail address or phone number is
highlighted, select Save to save it.
This is the Internet version of the user's guide. © Print only for private use.
51
Messaging
To Create and send E-mail
1
}
2
Select one of entries for the following
options and press Edit:
3
Messaging } E-mail } Write new
} To: to enter name
and E-mail address
(to retrieve an Email address from
Phonebook entries
or received E-mails
in your inbox, press
Add followed by
Look up and select
Phonebook or
Archive).
} Cc: to send a copy of the E-mail to
another recipient.
} More and select one of entries for the
following options:
} Send now to send the E-mail
} Send with attach. to attach a picture
from My pictures (% 69 My pictures) or
from a digital camera connected via IR
(% 66 Camera) before sending. Select
Send to send the E-mail.
} Save to outbox to save the E-mail in the
Outbox.
} Save to draft to save the E-mail in the
Drafts folder.
4
Send and receive to send all E-mails saved in
the Outbox (% 51 Send and receive Email).
} Priority: to set the E-mail priority.
} Subject: to write a title.
} Text: to write your message.
} Attachments: to add pictures.
52
This is the Internet version of the user's guide. © Print only for private use.
Messaging
To delete an E-mail (POP3 users)
1
}
2
Select an E-mail and press More.
3
} Mark for deletion.
4
The message is deleted the next time you
connect to your E-mail server by selecting
Send and receive.
Messaging } E-mail } Inbox
To delete an E-mail (IMAP 4 users)
1
}
Messaging } E-mail } Inbox
2
Select an E-mail and press More.
3
} Mark for deletion. The message is marked
Archiving
You can archive an E-mail in order to read it
later. You can archive only as much text as the
display shows.
To archive an E-mail
1
Open the E-mail.
2
Make sure that the text you wish to archive
is visible in the display.
3
Place the cursor in the text and press More.
4
} Copy to archive
The text can be found in Archive in the
menu.
for deletion on the server.
4
} Empty inbox
5
The message is deleted the next time you
connect to your E-mail server by selecting
Send and receive.
This is the Internet version of the user's guide. © Print only for private use.
53
Messaging
E-mail Options
It may be possible to receive the E-mail settings
in a text message directly from your network
operator/service provider.
Request settings from Sony Ericsson
Editing account
Receiving settings in text
message
1
2
54
Set account
Set an account to be used for E-mail. If you have
several E-mail accounts, you can set one of
them as default. If no account is available, you
are prompted to set a new account (% 54
Editing account).
Make sure you have created a data account
before setting up an E-mail profile % 88 Data
accounts.
Select this option to set up an E-mail account.
Use a PC to go to www.SonyEricsson.com
and select your region. Use the
configurators to request that a text message
be sent to your phone with the settings you
need.
1
}
2
} Edit account } New account
3
Enter the account name (for example,
Home).
} Yes to install the new settings when the
message arrives.
The settings will be entered automatically.
4
Messaging } E-mail } Options
Enter the following options by pressing
Select:
} Connect using: The data account you
wish to use with this Email account.
POP3 or IMAP4
} Protocol:
This is the Internet version of the user's guide. © Print only for private use.
Messaging
} Incoming server: The name or IP address
of the server provider for
incoming E-mail (for
example, mail.server.com
or 10.1.1.1.).
} Incoming port: The number of the port
for the mail server. It is
not necessary to change
from the default 110.
} Mailbox:
A user name for your Email account.
A password for your E} Password:
mail account. Your
service provider may
alternatively request a
password on connection.
} Outgoing server: The name or IP address
of SMTP server for
sending E-mails.
} Outgoing port: The number of the port
for the SMTP server. It is
not necessary to change
from the default 25.
} E-mail address: Your E-mail address.
} Download:
Whether to receive
headers and text or
headers only.
Your name.
} From name:
} Signature:
If you wish to add your
business card to your Emails.
} Copy outgoing: If you wish to send the
copy of E-mails to an Email address.
} Check interval: Set the amount of time
allowed to connect to
your E-mail server.
5
} Save to confirm the setting.
If you do not have an E-mail service, contact your
operator to get all necessary settings.
This is the Internet version of the user's guide. © Print only for private use.
55
Messaging
Chat
}
4
You can have a chat using your Z600. You can
select the nickname (% 57 Area info) that will
appear in the recipient’s display each time you
send a chat message.
Starting a chat session
1
}
2
Enter the recipient’s phone number, or
retrieve it from the Phonebook by pressing
Look up.
3
Messaging } Chat } Start new
Write your message and press Send.
Receiving a chat session invitation
56
1
When you receive a chat session invitation,
you hear a beep (editable % 58 Message
alert) and see the message Chat message,
Chat now? appears while in standby mode.
2
} Yes to read the chat message or
} No to reject.
3
Write your chat message reply.
} Send to send your chat message or
press
to suspend a chat session
Messaging } Chat } Resume to resume
(}
a chat session).
Messaging } Chat
5
Press and hold
to end a chat session.
If you receive a new chat message while another chat
session is ongoing, press Yes to end the ongoing
session and start the new one.
Entering Nickname
1
}
2
Enter your nickname (maximum of 11
characters) and press Ok.
Messaging } Chat } Nickname
This is the Internet version of the user's guide. © Print only for private use.
Messaging
WAP push
Area info
}
}
Messaging } WAP push
You can receive 2 kinds of messages, Content
Push (message, comprised of WAP service or
service link) and Setting Push (configuration
data for WAP, MMS, E-mail settings). When a
new message arrives, you will hear a beep
which sounds different from the single beep of
the ringer and see
in standby mode.
Messaging } Area info
Receive an area information like weather
reports, traffic reports, etc. broadcast to a group
of phones in a certain area (network dependent).
When you receive this message, the message
automatically appears in the display. You cannot
save area messages.
Reception
Inbox
Select this option to read received messages.
Clear inbox
Select this option to delete messages in the
inbox.
Allow push
Select On or Prompt if you wish to receive
service information messages.
Set this option On to receive an area
information.
Message list
Select this option and New code to enter an area
information code.
Cell information
The cell information channel is used by some
network operators to send messages to their
subscribers within a certain network area. Set
this option On to turn on the channel.
This is the Internet version of the user's guide. © Print only for private use.
57
My shortcuts
My shortcuts
Options
}
Messaging } Options
You can set up your voice mail number and
message alert.
Voice mail number
Enter your Voice mail no. % 50 Call voice
mail.
Message alert
Set the alert type from Silent, Click or Tone.
58
Creating your own Shortcuts menu.
You can place your favourite functions that you
wish to reach quickly and easily in the My
shortcuts menu. To select profile % 94 Profiles.
Selecting a menu item in Shortcuts
menu
1
}
2
to highlight the
desired function and
press Check or press
to select the
function.
3
Enter the position
number you wish for
this function in your
shortcuts menu and
press Ok.
4
Press Save to exit the list.
My shortcuts } Edit shortcuts.
This is the Internet version of the user's guide. © Print only for private use.
Calls
Calls
Call options (configuring call conditions).
Missed calls
If you have missed a call, the message, Missed
calls: appears in standby mode, indicating the
number of missed calls. Press Yes to display
missed calls and Call to call the number.
Call list
}
Calls } Call list
Provides a record and quick access of up to 30 of
the last outgoing calls, up to 10 of the last
incoming calls and up to 10 missed calls. Caller
ID (Caller Line Identification) of a caller is
required to support Call list entries. When the
Call list reaches its capacity, the oldest number
is deleted automatically to provide space for the
new entry. (This feature is dependent on your
network operator/service provider.)
To display and call a number
1
}
2
to highlight a name/number you wish to
call and press Call to call a number.
Calls } Call list
As a short cut, you can also press Calls in standby
mode to display the entire Call list (to delete the
entire list, % 65 Options).
Date displayed in the Call History is the same as the
format selected in Time and date % 95 Time and
date.
Divert calls
}
Calls } Divert calls
You may need to register for this service with
your network operator/service provider.
Sometimes a divert option is automatically set
by the network operator.
This is the Internet version of the user's guide. © Print only for private use.
59
Calls
Setting a Divert
1
}
2
Select a call category and then a divert
alternative % 60 Divert options.
3
} Activate
4
Enter the phone number to which you wish
your calls to be diverted and press Ok, or
retrieve it from the Phonebook by pressing
Look up.
5
Wait for confirmation from the network.
Calls } Divert calls
In step 3, you also have the option to cancel or get
status.
If the returned response is Command error, the
network was unable to set, clear or check the
selected Divert.
When the Restrict calls function is on, some Divert
calls options cannot be activated.
60
Divert options
} Voice calls: Divert incoming call on a different
condition:
} Divert always
Divert all calls unconditionally (the phone
will not even ring).
} When busy
Divert incoming calls when you are on the
phone (line engaged).
} Not reachable
Divert incoming calls when your phone is
switched off or out of network coverage.
} No reply
Divert incoming calls if you do not answer
the call after a certain period of time.
} Fax calls: Divert all fax calls (the phone will
not even ring).
} Data calls: Divert all data calls (the phone will
not even ring).
} Check all: Check all divert settings.
This is the Internet version of the user's guide. © Print only for private use.
Calls
Manage calls
}
Calls } Manage calls
Select this option to activate/set up call options.
Call Waiting
If activated, your phone will alert you (beep)
when a call is waiting so that you don't miss any
calls. Select Activate, Cancel or Get status.
Restrict calls
Limit calls made from your phone, for example,
if you lend your phone to someone else but do
not wish them to make international calls. The
restrictions in the Restrict calls menu require the
Restrict calls password. If you divert incoming
calls, you cannot activate some Restrict calls
options.
Accept calls
} All outgoing
Restrict incoming calls to only from certain
numbers. The rejected phone numbers are saved
in the Call list % 59 Call list.
Restrict all outgoing calls except emergency
calls (112, etc.).
Adding numbers to accepted callers
list
Restrict all international calls.
1
}
Calls } Manage calls } Accept calls
} Accepted list } New
Restrict all outgoing international calls except
those to your home country.
2
Select a contact from the Phonebook or
Groups.
Restrict all incoming calls.
} Calls } Manage calls } Accept calls } Accept options
to set an accept option.
} Outgoing intl
} Outgoing intl roam
} All incoming
} Inc. when roam
Restrict all incoming calls when you are outside
of coverage from your registered network
operator (for example, when abroad).
This is the Internet version of the user's guide. © Print only for private use.
61
Calls
} Cancel all
Activating a group
Cancel all settings of the restrict call service.
1
} Change password
Change the Restrict calls password.
2
Select a group.
Closed groups
3
} Activate (Calls can only be made within
the selected group.)
The Closed User Group function is a way of
lowering call costs. On some network it is
cheaper to make calls within a call group. You
can save 10 groups.
4
Adding a group
Open to answer
1
2
3
62
}
Calls } Manage calls } Closed groups
} Edit list
}
Calls } Manage calls } Closed groups
} Edit list } New group
Enter the name of the user group and press
Ok.
Enter the index number and press Ok. (The
index number is provided by your network
operator/service provider.)
5
to go back to the Closed groups option.
} Open calls } On to call outside a closed
user group.
}
Calls } Manage calls } Open to answer
Answer an incoming call by opening the phone
and end a call by closing it. Set this option on/
off to activate/deactivate the active open to
answer option (the default is On).
This is the Internet version of the user's guide. © Print only for private use.
Calls
Default priority
}
Calls } Default priority
You can request a certain priority when you
make a call, if your subscription supports the
call priority service. The priority levels are
defined by your network operator/service
provider and are normally within the rage of 0-4,
where 0 is the highest priority. Select this option
to receive available priority levels and then
select a priority level.
Time and cost
}
Calls } Time and cost
Track or control how long you are on the phone
and the cost of calls/data transmission made.
Call/GPRS costs can be used as a security
measure, for example, when you lend your
phone to someone, you must use your PIN2 as a
security code when you set or change the call
cost options.
Call timers
Check the length of your last call, total calls
(incoming and outgoing) and outgoing calls.
Select Reset timers and Total time/Outgoing time to
reset the total/outgoing call time.
Turn Minute minder on to hear the beep every
minute during calls.
Call costs
Check the cost of your last call, total calls,
remaining credit and limited credit.
Setting credit and tariff
}
Calls } Time and cost } Call costs } Set credit
to set a unit figure at which your phone will not
allow any more calls to be made. When the
amount reaches 0, no more calls can be made.
Enter your PIN2 at the prompt and set the
charge limit % 111 PIN2.
}
Calls } Time and cost } Call costs } Set tariff
to set the currency and price per unit which will
be used to calculate the call cost. Enter your
PIN2 at the prompt % 111 PIN2.
This is the Internet version of the user's guide. © Print only for private use.
63
Calls
Enter a currency and the price per unit (to enter
a decimal point, press
).
In order to be able to make phone calls again, reset
the Credit counter or set the credit to Unlimited.
Calling cards
You can use the calling card service to redirect
the cost of a call (voice call only) to a credit card
or a calling card account.
You can save 2 separate calling card numbers.
The numbers and the codes associated with
them are protected by the code. The numbers
and the codes are provided by your network
operator/service provider.
To avail the Calling cards option, you first need
to turn this option on % 64 Use calling cards.
64
Using My cards
1
Calls } Time and cost } Calling cards
} My cards
}
2
Enter your phone lock code and press Ok.
3
} New card to enter the card settings and
select which you wish to send first (the
number you wish to call or the verification
code).
or
Select a card followed by Activate card to
select a card.
Use calling cards
Select this option and enter your phone lock
code (% 97 Phone lock) to turn the calling card
service on/off.
This is the Internet version of the user's guide. © Print only for private use.
Calls
To make a calling card call
Next call
1
Enter the phone number using the keypad or
retrieve a number from the Phonebook.
}
2
Press Call.
The access number of the calling card
server is called. During the connecting
phase, you are asked to send the phone
number you wish to call and the verification
code.
Specify the type of the next incoming call. The
setting remains until you change it next time.
The default setting is Voice call (SIM
dependent).
3
The message, Send called number? appears.
Press Yes or wait a moment to send the
number and code.
You can hide/show your phone number when
making a call. Enter the phone number you wish
to call and select Call and hide ID/Call and show ID
(network dependent).
SMS counter
Check the number of sent SMS.
Select Reset counter to reset the SMS counter.
Data counters
Check the volume of your last and total data
connection.
Select Reset counter to reset the Data counters.
Calls } Next call
Next incoming call
Call and hide/show ID
You can also set a next call type by pressing More and
selecting Call and hide ID/Call and show ID after
entering a phone number.
Options
}
Calls } Options
Select Clear call list to delete all call list entries
and Call listing to turn the call list option on/off.
This is the Internet version of the user's guide. © Print only for private use.
65
Camera
Camera
Using the integrated camera.
Your phone has a digital camera. You can take
pictures, save and view them and send them via
E-Mail or MMS (Multimedia Message Service).
Before you send a picture using E-Mail or as a
picture message, you need to avail these services
% 50 E-mail, % 47 Picture Message (MMS).
The phone that you are sending the picture needs
to support data transmission and MMS in order
to receive and show the picture.
You can also use a picture as a screen saver or as
wallpaper (% 93 Screen saver, % 93 Wallpaper),
or save it together with a contact in your Phonebook
so that the picture appears when that person calls
% 39 Adding a picture to a contact.
66
Options
When the camera is activated, press More to
select one of the following options:
} My pictures to view all your pictures.
} Size to select the size.
} Night mode to use in poor lighting
conditions.
} Effects to select different effects for your
picture.
} Default name to create a name for your
picture.
} Self-timer to take a picture a few seconds
after pressing the camera button.
This is the Internet version of the user's guide. © Print only for private use.
Camera
Taking a picture
There are different ways to take a picture:
Taking a picture using Camera menu
1
}
2
Hold the phone as shown in the illustration.
You can see the subject in the phone display.
3
} Capture to take a picture.
Camera
Taking a picture using the camera
button
On the side of the phone, press the camera
button to activate the camera. Hold the phone as
illustrated below. You can see the subject in the
phone display. Press the camera button again to
take the picture.
Do not take a picture directly of the sun; this could
cause serious harm to your eyesight, damage your
product or cause a discolouration of pictures.
This is the Internet version of the user's guide. © Print only for private use.
67
Camera
Taking a self-portrait
It is possible to take a self-portrait. Hold the
phone as illustrated below. You can see your
reflection in the mirror. On the side of the
phone, press the camera button to activate the
camera. Press the camera button again to take
the picture.
Saving and deleting pictures
When you have taken a picture,
to save it in
My pictures % 69 My pictures. If the message,
Memory full appears, you cannot save any more
pictures until you have deleted an item from the
phone memory.
Sending a picture
1
}
Camera
2
Take a picture.
3
} Send and create your picture message
% 47 Picture Message (MMS).
repeatedly to take a succession of pictures.
or
68
to adjust the picture brightness.
This is the Internet version of the user's guide. © Print only for private use.
Pictures & sounds
Pictures & sounds
Selecting, Composing, Recording sounds and
pictures.
The Pictures & sounds menu allows access to a
variety of Picture and Sound functions.
My pictures
}
Pictures & sounds } My pictures
All pictures and animations are saved in My
pictures. You can add, edit, or delete pictures.
The number of pictures that can be saved
depends on the size of the pictures. File types
supported are GIF, JPEG and WBMP.
To view pictures, press View.
Editing and saving a picture
1
2
3
}
Pictures & sounds } My pictures
Scroll to the picture you wish and press
More.
4
} More again and select Save picture to save
the picture in My pictures.
To edit pictures taken with the camera, you must
select 120 x 160 as picture size.
Exchanging pictures
You can exchange pictures via Bluetooth, the
infrared port, picture message or E-mail. For
more information on sending pictures in
messages % 43 Messaging. Save the E-mail
address of a WAP album in your Phonebook
and you can save pictures in that album if you
send the pictures as attachments.
Sending a picture
1
}
2
Scroll to the picture you wish to send and
press More.
Pictures & sounds } My pictures
} Edit to edit a picture. % 70 Picture editor.
This is the Internet version of the user's guide. © Print only for private use.
69
Pictures & sounds
3
} Send and select the transfer method from
the following options: As picture msg, As email, Via Bluetooth or Via infrared.
You are not allowed to exchange copyright protected
material.
Receiving and saving a picture
1
}
Connectivity } Bluetooth/Infrared port
} Turn on or
} More } Turn on Bluetooth/Turn on infrared in
standby mode.
2
} Save when you receive the picture.
The picture will be saved in My pictures.
When you receive a picture in a message,
to
highlight the picture and press Save to save it.
Picture editor
}
Pictures & sounds } Picture editor
You can create your own picture.
Drawing picture
1
}
2
Select a type.
3
Select Tool and the tool you wish to work
with.
4
When editing or drawing a picture use the
keypad for the following functions:
Pictures & sounds } Picture editor
Press Function
move the cursor up and left.
move the cursor up.
move the cursor up and right.
More pictures
Pictures & sounds } More pictures
Select this option to download a picture
% 85 Downloading items.
}
70
move the cursor left.
activate the current drawing tool.
move the cursor right.
This is the Internet version of the user's guide. © Print only for private use.
Pictures & sounds
Press Function
move the cursor down and left.
}
Pictures & sounds } Themes
save, preview, open a picture or
start a new picture.
Change the appearance of the display. Your
phone comes with pre-set themes. You cannot
delete some of these, but you can download new
themes.
Pressing More offers you the following options:
Send, Delete, Rename, view Theme info and
Memory status.
press and hold to exit the picture
editor.
More themes
move the cursor down.
move the cursor down and right.
More
Themes
undo the last action.
select tool.
select a colour.
}
Pictures & sounds } More themes
Select this option to download a theme
% 85 Downloading items.
For more information, visit
www.SonyEricsson.com or
wap.SonyEricsson.com.
Sending a theme
Follow steps 1-3 in % 69 Sending a picture
and select Themes in step 1.
Receiving and saving a theme
% 70 Receiving and saving a picture.
The theme will be saved in Themes.
This is the Internet version of the user's guide. © Print only for private use.
71
Pictures & sounds
My sounds
More sounds
}
}
play, send, rename these sounds.
Select this option to download sounds such as
ring signals % 85 Downloading items.
To listen to a sound
Music DJ
Pictures & sounds } My sounds
Select My sounds to access ring signals. You can
1
2
}
Pictures & sounds } My sounds
Highlight a sound you wish to hear and
press Play.
Pictures & sounds } Music DJ
Compose your own melody.
Composing melody
Sending a sound
1
}
1
}
2
2
Highlight a sound you wish to send.
3
} More } Send
Choose to insert a selection of pre-recorded
music blocks. You can select from 4
different selections.
4
Select a transfer method.
3
Copy and paste these blocks to build up
your melody.
4
} More to play the melody and view other
options.
Pictures & sounds } My sounds
Receiving sounds
% 70 Receiving and saving a picture.
The sound will be saved in My sounds.
Deleting or Renaming a sound
Follow steps 1-3 in % 72 Sending a sound and
select Delete or Rename in step 3.
72
}
Pictures & sounds } More sounds
Pictures & sounds } Music DJ
Select Save melody in step 4 to save your own melody
in My sounds.
This is the Internet version of the user's guide. © Print only for private use.
Connectivity
Connectivity
Record sound
}
Pictures & sounds } Record sound
Record and play your own memos or ongoing
calls % 95 Voice control.
Recording a sound
1
2
}
Pictures & sounds } Record sound
When the recording starts, the message
Recording and the time of the current
recording appear in the display.
3
} Stop to end recording. The recording will
automatically stop if you receive an
incoming call or when the call ends. (The
recorded sound is saved in My sounds.)
You are responsible for the confidentiality of the
recording.
You must seek the permission of the person you are
calling before recording.
WAP, Bluetooth, Synchronization, etc.
Online services
}
Connectivity } Online services
Online services are customised services offered
by network operators (network dependent),
independently of mobile phones and mobile
manufacturers. A SIM card which supports
Online services works in the same way as a
normal SIM card. When you have inserted your
SIM card and turned on your phone, your
network operator can download data to your
SIM card. When you restart your phone after the
first data download, a new submenu appears
under the menu.
Select this option to enter your new menu
system.
This is the Internet version of the user's guide. © Print only for private use.
73
Connectivity
SAT (SIM Application Toolkit)
Getting started
When access to network-specific functions
(SAT) is available, the SAT menu is displayed in
Menu overview. This feature is dependent on
your network operator and may not be
supported by some networks.
To synchronise with your PC, and to browse the
Internet, you also need to install software on
your PC from the Sony Ericsson web site,
www.SonyEricsson.com/support/. You can
exchange items or play games without having to
add the other device to the list of My devices.
Bluetooth™
Turn on
}
Connectivity } Bluetooth
Your Z600 has built-in Bluetooth™ wireless
technology which supports the following
applications:
• Dial-Up
• PC Applications
• Item Exchange
% 75 Item Exchange
Select this option to turn on/off the Bluetooth.
You can also turn on/off the Bluetooth by
pressing More in standby mode and selecting
Turn on Bluetooth/Turn off Bluetooth.
My Devices
To communicate with another Bluetooth device,
you first need to add the device to the list of my
devices.
• Bluetooth Handsfree
% 26 Bluetooth headset
Please check for any exceptions, due to national
requirements or limitations, in usage of Bluetooth
equipment before using this product.
74
This is the Internet version of the user's guide. © Print only for private use.
Connectivity
Adding a device to your phone (My
device)
1
}
2
} New device to search for all types of
Connectivity } Bluetooth } My devices
available devices or
} More to select a specific type of device to
search for. Wait for a connection from
remote devices.
3
A Searching message is displayed.
(If no connection request comes within 3
minutes, your phone will return to My
devices option.)
4
A name of available devices such as PC,
PDA, Mobile Phone, Headset or Other is
displayed.
5
Enter a passkey (up to 16 digits) for the
device, both in phone and, for example, in
the PC. (If a passkey does not come with the
Bluetooth device when you buy it, you need
to create one yourself.)
6
Connectivity } Bluetooth } My devices
and select a device from the list followed by
More to view a list of options.
}
We recommend that your phone and the Bluetooth
device you are communicating with are within a
range of 10 metres.
You can stop the connection at any time by pressing
Cancel.
When Bluetooth is activated,
is displayed.
Item Exchange
It is possible to exchange items with other
Bluetooth devices supporting item push profile.
You can send/receive the following items:
• Own Business Card (My card) or contacts
from the Phonebook % 38 Sending your
business cards, % 37 Sending contact.
• Calendar overview/appointments/tasks
% 100 Advanced Options.
• Pictures % 68 Sending a picture, Themes
% 71 Sending a theme.
This is the Internet version of the user's guide. © Print only for private use.
75
Connectivity
Sending an item
Receiving an item
1
Select an item you wish to send (for
example, % 38 Sending your business
cards) and select Bluetooth as the transfer
method.
1
From standby mode, press More and select
Turn on Bluetooth or Turn on infrared.
2
2
A message with item/device information is
displayed.
A list of possible receivers is displayed.
3
3
Select a device to which you wish to send
} Yes to save an item or
} No to discard the received item (if you do
not make any choice within 3 minutes, the
item is automatically discarded).
If the list of receivers is empty, your phone will
automatically start searching devices.
Handsfree
4
76
A Connecting/Sending... message is
displayed.
This option offers you to add a Bluetooth
handsfree to your phone and/or choose the
sound transferring method.
This is the Internet version of the user's guide. © Print only for private use.
Connectivity
Adding a Bluetooth handsfree
Options
1
}
2
The message, Add a handsfree device to use
with phone?, is displayed.
3
} Yes to add a hands free or
} No to cancel this option.
You have the following Bluetooth options:
} Visibility: You can choose if your phone
can be found by other Bluetooth devices
when using Bluetooth. Select Show phone/
Hide phone to show/hide your phone.
Connectivity } Bluetooth } Handsfree
If you connect the cable headset or the car kit to the
phone, the Bluetooth headset is immediately
deactivated.
Once the headset is activated,
is displayed.
Please also see the Bluetooth Headset user manual.
} Phone name: You can select a name for
your phone. This name is displayed in other
devices when your phone is found, and is
also for the infrared port.
} Phone services: Display supported
services.
Selecting a sound transferring
method
1
2
}
Connectivity } Bluetooth } Handsfree
} Ongoing call
Select from the following options:
In phone or Always ask.
This is the Internet version of the user's guide. © Print only for private use.
77
Connectivity
Infrared port
}
Connectivity } Infrared port
Connecting 2 devices
1
Place your phone as in the picture. The
infrared port on the phone must face the
infrared port on the other device. If you are
connecting to a PC, make sure your PC has
activated infrared communication.
2
Your phone now establishes contact with
the other device.
You can use the built-in infrared port to
establish contact between your phone and a PC
or another device equipped with an infrared
port.
Activate the infrared port
1
}
2
} On to activate the infrared port or
} 10 minutes to activate the infrared port for
only 10 minutes.
Connectivity } Infrared port
Select Off in step 2 to turn off the infrared port.
You can also activate the Infrared port by pressing
More in standby mode and selecting Turn on infrared.
78
This is the Internet version of the user's guide. © Print only for private use.
Connectivity
WAP options
}
Connectivity } WAP options
WAP (Wireless Application Protocol) allows
access to a variety of useful information.
To avail of WAP service you must first register
with your network operator/service provider to
ensure that your subscription allows access to
these services. In some cases registration has
already been completed.
Once registered with your network operator/
service provider you will be provided with the
specific parameter settings required to access
WAP. It may also be possible for you to obtain
these parameters in a text message or from the
web page of your network operator/service
provider (% 54 Receiving settings in text
message) and the settings are also available at
www.SonyEricsson.com/.
As a safety measure, a Security Code may be
necessary to change the settings of your browser.
Use the code that is set as your Security Code
% 82 Security.
Your browser can display pages in the most common
formats on WAP and Websites (WML and HTML)
as well as iMode site (cHTML).
You cannot make phone calls while accessing the
mobile Internet.
Getting started
Before you use WAP, via a WAP service
provider, you will need to set a specific data
account for WAP and a WAP profile
% 80 Receiving settings in text message or
% 80 Creating profile settings manually.
This is the Internet version of the user's guide. © Print only for private use.
79
Connectivity
Receiving settings in text
message
5
It may be possible to receive the WAP settings in
a text message directly from your network
operator/service provider % 54 Request
settings from Sony Ericsson.
Enter the following option:
} Name:
A name for the data
account
} Phone no:
The phone number of
your Internet Service
Provider or the address
of the external data
network you wish to
connect to, either an IP
address or a text string.
or
} APN:
WAP Profile
You can manually enter or edit existing settings
information from your network operator/service
provider. Make sure you have created a data
account before setting up a WAP profile
% 88 Data accounts.
} User id:
Your user ID to log on to
the external data
network.
} Password:
Your pass word to long
on to the external data
network.
Creating profile settings manually
1
80
}
Connectivity } WAP options
} WAP profiles } New profile
2
Enter a profile name and press Ok.
3
} Connect using } Edit
6
} Save to save the new data account.
4
} New account and select an account type
7
Select the new data account to be used.
(GSM data or GPRS data).
8
} IP address: } Edit
This is the Internet version of the user's guide. © Print only for private use.
Connectivity
9
Enter IP address for the gateway and press
Ok.
10 } Save to save the new profile.
To edit the data account % 88 Data accounts.
Editing profile settings
1
}
Connectivity } WAP options
} WAP profiles and highlight a profile you
wish to edit
2
} Edit for following options: Rename,
Connect using, IP address:, Advanced and
Delete.
Advanced function allows you to set the
following options:
} Change
homepage:
Enter the address of the
WAP site you wish to
have as you homepage.
} Second
account:
Select an alternative
data account, if the first
fails.
} User id:
Enter your user ID for
the WAP gateway.
} Password:
Enter your password for
the WAP gateway.
} Security:
Turn on a secure
connection on/off.
} Show pictures:
View pictures while
browsing.
This is the Internet version of the user's guide. © Print only for private use.
81
Connectivity
Security
Your phone has support for WAP secure
browsing. When you turn on security, the
connection between your phone and the WAP
gateway is secure.
Establish a secure connection when using
certain WAP services such as banking or WAP
shopping, you need certificates in your phone.
You have the following security options:
} Trusted certificates:
Select a trusted certificate from the list. You
can also download trusted certificates from
www.SonyEricsson.com/.
} Client certificates:
Check the certificates in your phone.
} Contracts:
You can sign a contract with your phone by
entering a digital signature PIN. Digital
signature records can be traced back to your
private key through a certificate that is used
for signing a contract. All transactions
(signed contracts) made with your phone
when browsing are stored in your phone.
Select Contracts to check your contracts.
82
} Locks:
The security module is located on the SIM
card, if your network operator/service
provider supplies such a service. It can
contain both certificates and your private
keys. The security module is protected by a
special access PIN and your phone asks you
for it when establishing a secure
connection:
} Access lock: Enter the access PIN (for
the security module) and the signature
PIN.
} Protection: Turn this option on to set if
PIN check should occur after powering
the phone.
} Change PIN: Enter or Edit the access
PIN and the signature PIN.
This is the Internet version of the user's guide. © Print only for private use.
Connectivity
Cookies
} Allow cookies to accept Cookies function.
3
} Clear cookies to delete Cookies function
that offers privacy and protects against site
bugs. It is recommended to clear any
sensitive information about previously
visited WAP services. This is to avoid a
security risk if your phone is misplaced, lost
or stolen.
• Select a name to open your homepage
(for example, SonyEricsson).
• Select Bookmarks to go to one of your
bookmarks.
• Select Enter address to enter the address
of a WAP or select one of the 10 most
recently entered addresses.
Passwords
Turn this option on/off to save/not save
passwords. To save or delete passwords, select
Remember pwds or Clear passwords.
Clear cache
}
Internet services or press the
. When
the WAP page is loaded into the phone,
press More and select from the following:
4
} More } Exit WAP to exit WAP menu.
When you enter a WAP address, the normal http://
prefix is not needed.
Delete cache from your phone.
Using WAP
1
}
2
Select a profile you wish to use. The phone
will automatically return to WAP options
menu.
Connectivity } WAP options
} WAP profiles
Bookmarks
You can save up to 25 bookmarks (alphabetical
order). Do not save passwords for sensitive
sites, such as online banking. If a password is
saved, the risk of unauthorised use of your
phone and sites is greater.
This is the Internet version of the user's guide. © Print only for private use.
83
Connectivity
Select New bookmark and enter the title and
address using the keypad. Press Ok to save your
entry.
Using a bookmark
1
}
2
Highlight a bookmark.
3
} More and select one of the following
options:
Internet services } More } Bookmarks
} Go to: Go to the marked WAP address.
} Edit: Edit the title and/or address.
} Delete: Delete the bookmark.
} Send as text msg: Send a link to the
WAP address in a text message.
} Send: Send a link to the current WAP
address via Bluetooth or infrared.
} Set as homepage: Set the WAP address
as the home page.
While Browsing
} More while browsing, for the following
options:
} Name:
Go to the home page for the
current profile /Access the
URL site of the current
default setting.
} Bookmarks: Add the site to your
bookmarks, or see the list
of bookmarks for the
current profile.
} Enter address: Enter the WAP address
using keypad.
} Save picture: Save a picture from the site.
} Send as text
msg:
} Send link:
} Reload:
84
Send a text message with a
link to the current WAP
page to another phone.
Send a link to another
phone via Bluetooth or
infrared.
Refresh the contents of the
WAP page.
This is the Internet version of the user's guide. © Print only for private use.
Connectivity
} Exit WAP:
} Status:
} Set as
homepage:
Disconnect and return to
standby.
Display current status
information such as profile,
access type, connection
time, data rate, security,
address.
Set the current site as the
home page of WAP profile
you are using.
If you select an E-mail address when browsing, you
can reply with a text message.
Downloading
You can download pictures, themes, games and
ring signals from internet and/or WAP sites.
Downloading items
1
Start the WAP and access a site that offers
downloading items.
2
Click on the link provided by the internet/
WAP site to start downloading.
The phone will automatically guide you
through the installation process of the newly
downloaded items.
This is the Internet version of the user's guide. © Print only for private use.
85
Connectivity
Synchronization
}
Connectivity } Synchronization
You can synchronise the Calendar and
Phonebook in your phone with similar programs
in, for example, a PC, PDA, or mobile phone
and with similar programs on the Internet.
Before you start the synchronization, you need
to do the remote settings % 86 Setting up the
remote settings.
Synchronization with nearby
devices
After installing the synchronization program
from the Sony Ericsson WAP site,
www.SonyEricsson.com/support/, you can
synchronise your phone with your PC. A status
bar shows the progress of the synchronization. If
you use a cable, the synchronization starts as
soon as you connect the cable. For more
information, please refer to the synchronization
software online help.
Internet synchronization
You can synchronise your phone contacts,
appointments and tasks with similar programs
on the Internet, using WAP % 79 WAP
options.
In order to use these programs on the Internet
you need the user ID, password and addresses
for the different programs. You must also have a
WAP profile set in your phone.
Setting up the remote settings
1
}
2
} Remote login and
Connectivity } Synchronization } Options
} Remote settings
} WAP profiles to select the WAP profile
or add a new one if no profile exists.
} Sync. server to enter the user ID,
password and server URL.
3
Press
menu.
4
} Applications } Phonebook or } Calendar and
to go back to the Remote settings
enter database path, User ID and password.
86
This is the Internet version of the user's guide. © Print only for private use.
Connectivity
5
Press
menu.
6
} Sounds to turn the sound on (off) to alert
2 times to go back to the Options
(not to alert) when an error occurred or the
synchronization is completed.
Remote sync.
Start the synchronization:
} Start to start a remote synchronization.
} Applications to select an application to be
synchronised.
GSM Networks
}
Connectivity } GSM Networks
Select a network automatically when you switch
on your phone, or manually from a list of
available networks.
New search
Search for available networks.
Select network
Select a network from a list of available
networks.
Search mode
Set the search mode to Automatic or Manual.
Preferred networks
Edit the automatic network selection priority
list. This feature is helpful, for example, to
priorities roaming partners. Select from the
following options:
} New network to add a network operator
to the list.
This is the Internet version of the user's guide. © Print only for private use.
87
Connectivity
} Change priority after selecting a
network from the list to adjust the
network priority.
Creating a new data account
1
}
} Full name to display full name of the
network operator
2
} New account } Add
3
} GPRS data or } GSM data
4
Enter a name.
5
In order to access to an Internet server at your
service provider, you first need to set up the data
account.
Enter APN:/Phone no:, User id: and Password
(for detail information % 88 Editing a data
account).
6
} Save to save the new account.
Data accounts
1
}
2
Select a data account.
3
} Edit
4
Enter the following option:
} Delete to delete a network from the list.
Data comm.
}
Connectivity } Data comm.
You can have several data accounts saved in
your phone with different settings for different
purposes. The main setting for a data account
(GSM/GPRS) is the connection method.
You can create a new data account or edit an
existing data account.
Please contact your network operator for
charging details.
88
Connectivity } Data comm.
} Data accounts
Editing a data account
Connectivity } Data comm.
} Data accounts
} Phone number: The phone number of
(GSM only)
your Internet service
provider.
This is the Internet version of the user's guide. © Print only for private use.
Connectivity
} APN:
(GPRS only)
The address of the
external data network
you wish to connect to,
either an IP address or a
text string.
} User id:
Your user ID to log on to
the external data
network.
} Password:
Your password to long on
to the external data
network.
} Password
request:
} Data rate:
(GSM only)
} Dial type:
(GSM only)
} Allow calls:
(GPRS only)
Allow calls during GPRS
connection or not.
} IP address:
The IP address that the
phone uses when
communicating with the
network. (If you do not
enter an address, the
network provides you
with a temporary IP
address.)
(GPRS only)
} DNS address:
(GPRS only)
} Advanced
settings:
If you wish to be asked
for a password each time
you log on to the external
data network.
The speed for the
connection.
Analog or ISDN
connection.
(GPRS only)
5
The IP address to the
DSN server.
These are optional.
Consult your network
operator whether your
connection needs these
settings.
Repeat step 4 for other settings.
Press
to delete an account.
This is the Internet version of the user's guide. © Print only for private use.
89
Connectivity
Pref. services
Select your preferred data transfer method from
GPRS and GSM or GSM only.
SMS access
Select if you wish the SMS be sent using GSM or
GPRS.
Receive a fax/data call (separate
numbers)
1
Connect your phone to a computer.
2
Answer the call from within the software
program (if it does not answer
automatically).
You cannot answer a fax or data call by
pressing Yes on the phone.
Fax and data calls
To send fax messages and make data calls, you
need to connect your phone to a computer, and
then start the appropriate software program.
Accessories
Receive fax and data calls
View the list of accessories which are currently
connected to your phone.
}
Connectivity } Accessories
The procedure of receiving fax messages and
data calls depends on your network and
subscription. If you have separate number for
voice, fax and data calls, your phone recognizes
the type of call.
90
This is the Internet version of the user's guide. © Print only for private use.
Operator direct link
Operator direct link
Internet services
Accessing Operator defined direct links.
Accessing an online web page.
Operator direct link menu provides you with a
easy access to operator defined direct links.
Simply select this option or press
to access
the direct link or download items such as
sounds, pictures, etc.
Selecting this option brings you to an online
web pages.
This is the Internet version of the user's guide. © Print only for private use.
91
Settings
Settings
Personalising your phone settings.
Sounds and alerts
}
Settings } Sounds and alerts
Customise signals such as ring signals and
different types of alerts.
Ring Volume
Select from 6 ringer volume levels.
To turn the ring signal (except the alarm and timer)
on/off, press and hold
from standby mode or
press More and select Turn on silent/Turn off silent.
appears in standby mode to remind you when the
ringer is switched off.
Increasing ring
Select On when you wish the ring signal to rise
in steps from the lowest volume to the highest.
Ring signals
Select from the different ring signals. To
download a ring signal % 85 Downloading
items.
If you subscribe to the Two Line Service, you
can set different ring signals for the two voice
lines. Line 1 and Line 2 are displayed instead of
Voice calls. If your subscription includes the
Change Line Identification (CLI) service, you
can assign a personal ring signal to up to 10
callers (network dependent) % 39 Personal
rings.
More ring signals
Select this option to download ring signals
% 85 Downloading items.
Vibrating alert
Set the vibrating alert to On/Off or On if silent.
Alarm signal
Select from the different alarm signals.
Message alert
Select from the different message alerts.
92
This is the Internet version of the user's guide. © Print only for private use.
Settings
Key sound
Set the key sound to Silent or Tone.
Minute minder
Switch the Minute minder On (Off) to be (not be)
reminded by a beep in 1 minute intervals of the
time you are on the phone.
Display
}
Settings } Display
You can customise the functions related to
presentation in the display, for example,
Wallpaper, Screen saver, Light, etc.
Wallpaper
Select pictures as a wallpaper to appear in the
display in standby mode. Set picture to select a
picture and Activate to turn the wallpaper
function On/Off.
You can select Wallpaper by pressing More and Set as
wallpaper when viewing pictures in My pictures.
To download a wallpaper, % 85 Downloading.
Start-up picture
Switch off or set a picture that appears when
you switch on your phone.
Screen saver
The phone has a screen saver, which is activated
automatically when the phone has been in idle
mode for a few seconds. After a few more
seconds, the screen saver changes to sleep mode
to save power. Set picture to select a picture as
the screen saver and Activate to turn it on/off.
Themes
% 71 Themes.
More themes
% 71 More themes.
Light
You can set the display light to On or Automatic.
In automatic mode, the display light is turned
off a few seconds after you last press a key.
This is the Internet version of the user's guide. © Print only for private use.
93
Settings
Contrast
Select profile
Adjust the contrast of your display using the
Navigation key.
Select from the different profiles.
Edit line tags
Display the current profile setting.
When you have two voice line service, you can
change the name of line.
Profiles
}
Settings } Profiles
Your phone has a number of preset profiles
which are set to suit a certain environment. You
can rename, change and add accessories to these
profiles. For example, when you go to a
meeting, you can simply select the Meeting
profile and a number of settings, such as the ring
signal is turned off. You can also change your
profile using the voice commands % 96 Voice
profiles.
94
View profile
Edit profile
Select this option to edit profiles.
Reset profiles
Select this option to reset all profile settings.
Language
}
Settings } Language
Select the appropriate language for Menus and
Input (% 32 Input languages).
This is the Internet version of the user's guide. © Print only for private use.
Settings
Time and date
}
Settings } Time and date
The time is always displayed in standby mode.
Setting the Time and date
1
}
2
Select one of the following options:
Settings } Time and date
} Set time: Set a time.
3
When your phone changes network, and the time
sent out from the operator deviates from the time in
your phone, you are asked whether you wish to
update the time if you have turned on Auto time zone.
If you press Yes, the time is updated automatically.
Voice control
}
Settings } Voice control
} Time format: Select a time format from 24
hours and am/pm.
This option offers you to control some functions
using your voice.
} Set date: Set a date.
Voice dialling
} Date format: Select a date format from
different formats.
Turn the Voice dialling option on/off and edit
Voice tags % 23 Voice dialling.
} Advanced and select one of the following
Voice redial
options to set the time zone and daylight
saving functions: Time zone, Daylight-saving
and Auto time zone.
Turn the Voice redial option on/off % 24 Voice
redialling.
Voice answer
Turn the Voice answer option on/off
% 26 Voice answering.
This is the Internet version of the user's guide. © Print only for private use.
95
Settings
Caller name
Select whether you wish to hear the recorded
contact name when you receive an incoming
call from the contact. Select On/Off to turn this
option on/off.
Voice profiles
This option offers you to change your profiles
with your voice and/or keep all your voice
commands up to date by re-recording them or
deleting the ones you do not use. Select this
option to edit your voice commands.
96
Changing a profile with voice
commands
1
In standby mode, press and hold a volume
key.
2
Lift the phone to your ear, wait for the tone
and say profile command for the required
profile. The profile command is played back
to you and the current profile is changed.
Editing your voice commands
1
}
To turn on and record profile
commands
2
Select a voice command you wish to edit.
1
3
} Play voice to listen to a recorded voice
}
} On
Settings } Voice control } Voice profiles
2
Instructions appear. Press Ok.
3
Select a profile.
4
Lift the phone to your ear, wait for the tone
and say the profile name. Repeat steps 3-4
to record voice commands for the other
profiles.
Settings } Voice control } Voice profiles
} Edit commands
command or
} Replace voice.
4
Lift the phone to your ear, wait for the tone
and say the command. You can also edit the
voice command for a contact name in Edit
contact in the Phonebook.
This is the Internet version of the user's guide. © Print only for private use.
Settings
Sound recorder
Turn the Sound recorder option on/off
% 32 Sound recordings.
Magic word
Locks
}
Settings } Locks
SIM lock
Turn the Magic word option on/off % 31 The
magic word.
Select this option to turn the SIM lock on/off
and/or change your PIN and PIN 2. For more
details on SIM card lock % 111 SIM card lock.
Erase all
Phone lock
Delete all voice commands.
The phone lock protects the phone against
unauthorised use if it is stolen and the SIM card
is exchanged. It is not on when you buy the
phone. You can change the phone lock code
(default 0000) to any 4-8 digit personal code.
Select Protection and On/Automatic/Off to turn the
phone lock on/off (the default is Off) or Change
code to change the code.
If you set to automatic, you do not need to enter your
phone lock code until a different SIM card is
inserted. Please contact your local Sony Ericsson
retailer if you should forget your new code.
This is the Internet version of the user's guide. © Print only for private use.
97
Settings
Handsfree
Master reset
}
}
Settings } Handsfree
Set your handsfree mode and type.
Answering mode
Select the answering mode from Normal, Any key
or Auto.
Handsfree type
Select the handsfree type from Basic or
Automatic.
98
Settings } Master reset
Reset all of your phone’s settings back to the
factory settings except Phonebook, Scheduler
and Network/SIM card based settings (select
Reset all if you wish to delete all contacts,
messages and other personal data saved in your
phone). This will automatically restart your
phone (you will need the phone lock code
% 97 Phone lock).
This is the Internet version of the user's guide. © Print only for private use.
Organizer
Organizer
Calendar, Notes, Alarms, Timer, Stopwatch,
Calculator and Code memo.
Calendar
}
Organizer } Calendar
Display the calendar, save
your daily schedule and set
alarms for important tasks.
The monthly calendar
appears as follows: The
calendar can also be
synchronised with a PC
calendar or, using WAP,
with a calendar on Web
% 86 Synchronization.
7: Days on which you have appointments are
marked in bold.
Appointments and tasks
You can save up to 300 appointments and 80
tasks in your calendar, depending on the size of
each item. You can choose to add a new
appointment/task, or to use an old appointment/
task as a template by copying and editing it.
Entering a new appointment
1
2
}
Organizer } Calendar } Add appointment
and enter the appropriate information in one
of the following options: Subject:, Location:,
Icon, Start date, Start time, Duration and
Reminder.
Confirm each entry by pressing Ok, Select or
Save.
Entering a new task
1
}
2
} Task
Organizer } Calendar } Tasks } New task
or
} Phone call
3
Enter the task or phone number and press
Ok.
This is the Internet version of the user's guide. © Print only for private use.
99
Organizer
4
The message, Set reminder? appears. Press
Yes/No to/not to enter the date and time.
When you are in the list of appointments/tasks for a
certain day, press More to Edit, Delete, Reschedule,
Send or Copy. You can also call a number included in
a phone call task.
Viewing your calendar
1
}
2
Select one of the following options:
Organizer } Calendar
} View today: View all appointments for
today and unfinished tasks.
} View week: Move within and among the
days using the Navigation key. Press
Select to view a certain day.
} View month: Move within and days or
weeks using the Navigation key. Press
Select to view a certain day.
In the weekly and monthly views, you can go to next
week by pressing
, to next month by pressing
and to next year by pressing
. You can go
back a week, a month or a year by pressing
,
and
respectively. To reach the current
day, press
.
Advanced Options
Selecting Advanced offers you the following
options:
} Find: Search for appointments or tasks
that contain a specific text.
Enter the text you wish to search for and
press Ok.
} Send: Send appointments/tasks via
Bluetooth, the infrared port or picture
message (% 47 Picture Message (MMS)).
Select from Send day, Send week, Send month
and select a transfer method.
You can also send an individual appointment/task by
selecting the appointment/task and Send.
100
This is the Internet version of the user's guide. © Print only for private use.
Organizer
} Never: Set the alarm off.
} Memory status: Display how much
memory is available for new appointments
and tasks.
} Delete all: Delete all appointments and
tasks in your calendar.
Options
The following options are available:
} View
} Starting day: Select a start day for the
week.
} Week display: Select 5-day week or 7day week.
} Profile switch
} Off: Switch profile off.
} Manual: Remind you to switch profile
when a meeting is about to start.
} Auto: Switch profile automatically
} Reminders
} Always: Set the alarm to ring even if the
phone is switched off.
} If phone on: Set the alarm to ring only
when the phone is switched on.
Notes
}
Organizer } Notes
Use your phone as a Notepad. You can add, edit,
delete or send a note. (You can save up to 10
notes.)
Adding and viewing a note
1
}
Organizer } Notes or
press More in standby mode and select Post
note.
2
} New note to add a new note or
select a note you wish to display.
3
Enter the text and press Ok.
If the note is long and you cannot see all of it, press
More and Show note.
To turn off the note in standby mode, press More and
select Hide note.
This is the Internet version of the user's guide. © Print only for private use.
101
Organizer
Exchanging notes
You can send and receive notes using Bluetooth,
the infrared port or picture messaging.
Sending a note
1
}
2
Highlight a note.
3
} More } Send
4
Select a transfer method.
Organizer } Notes
Receiving a note
1
} More } Turn on Bluetooth or
} Turn on infrared in standby mode.
2
The message, Add note? appears. Press Save
to save the note to your phone memory.
102
Alarms
}
Organizer } Alarms
Select Alarm to set the alarm at a specific time,
or Recurrent alarm to set it recurrently at a
specific time on several days.
Assign a sound to Alarm % 92 Alarm signal.
Timer
}
Organizer } Timer
To start and stop the timer at a certain time.
Enter the time you wish the timer to run for
using the keypad (maximum 99:59:59) and
press Start. Once the timer is set, you have the
following options: Cancel and New time.
You will still hear the alarm even if the phone is set
to Silent or switched off.
Press any key to turn the alarm/timer off.
The volume of the alarm/timer is determined by the
ringer volume setting. If the ringer volume is off or
the Turn on silent option is selected, the alarm/timer
will ring at the minimum volume. The alarm/timer
will still be heard even during a call.
When the alarm/timer is on,
appears in the
display in standby mode.
This is the Internet version of the user's guide. © Print only for private use.
Organizer
Stopwatch
}
Organizer } Stopwatch
Once the counter reaches 23:59:59.9 the timer
stops automatically.
The stopwatch is automatically turned off if you
answer an incoming call or exit the stopwatch
menu.
Calculator
}
Organizer } Calculator
The Calculator can perform addition (+),
subtraction (-), multiplication (×), division (÷)
and percentage (%) calculations.
• Use the Navigation key to go through the
mathematical operations of ÷, ×, –, +, ., %, = in
that order.
• Press
to select “.”.
• Press
to clear the entered value.
• Press
to exit the calculator.
Using the calculator
1
}
2
Enter a number.
3
Select the mathematical function using the
Navigation key and then enter another
number.
4
Press Select or
Organizer } Calculator
to select “=” for a result.
In this example we are going to subtract 20%
from 120.
–
%=
Code memo
}
Organizer } Code memo
Code memo function offers the option to store
all the different security codes, for example, the
one for your credit card. You can save a
maximum of 10 codes in the Code memo.
This is the Internet version of the user's guide. © Print only for private use.
103
Organizer
Checkword and security
To open code memo for the first time
To confirm that you have entered the correct
password for the code memo and to prevent
unauthorised access to your codes, you must
enter a checkword. When you enter your
password to open the code memo, the
checkword is displayed for a short time. If the
password is correct, the correct codes appears. If
you enter the incorrect password, the checkword
and the codes that are displayed are also
incorrect.
Factors strengthening the security of the Code
memo functions are:
• You get no feedback about whether the
password is correct, except for the
checkword.
1
Organizer } Code memo
The message with instructions is displayed.
Press Ok.
}
2
Enter a 4-digit password and press Ok.
3
Re-enter the new password to confirm.
4
Enter a checkword (maximum 15
characters) and press Ok.
The checkword can consist of both letters and
number. To enter a number, press and hold the
alphanumeric key.
• All codes are encrypted in the mobile phone.
• When you access your codes, they are
displayed for a limited time only.
104
This is the Internet version of the user's guide. © Print only for private use.
Organizer
To add a new code
1
}
2
Enter your password and press Ok.
3
} New code
4
Enter a name associated with the code, for
example, the name of the credit card
company and press Ok.
5
Enter the code and press Ok to confirm.
Organizer } Code memo
To open code memo
Follow steps 1-2 in % 105 To add a new code.
Your entered checkword and your codes are
displayed when the decryption process has
finished.
To change the password
1
Follow steps 1-2 in % 105 To add a new
code and press More.
2
} Change password and enter your new
password followed by Ok.
3
Re-enter the new password and press Ok.
4
Enter a checkword and press Ok.
If you forgot your password, enter any password to
access the Code memo function. The checkword and
codes that are displayed are incorrect. You must now
reset the Code memo.
To reset code memo
1
Follow steps 1-2 in % 105 To add a new
code and press More.
2
} Reset
3
} Yes
The message Reset code memo? is displayed.
The code memo is reset and all entries are
cleared. The next time you select the Code
memo function, you must start at % 104 To
open code memo for the first time.
This is the Internet version of the user's guide. © Print only for private use.
105
Entertainment
Entertainment
Downloading a game
Playing games and downloading an application.
1
Entertainment
2
Follow instructions to download a game.
Your phone has several entertaining
applications and games. You can play some of
the games with another person, both using your
phone, or you can play on two phones using
Bluetooth wireless technology or infrared. You
can also download games and applications
directly to your phone. Help texts are available
in some games and applications.
3
} More to get more information about the
Downloading applications
1
1
}
2
2
} Games & more } New applications (for
example, Sony Ericsson)
3
4
Entertainment
Follow instructions to download an
application.
} More to get more information about the
}
Entertainment } Other games
} New game
application.
Make sure the file sizes do not exceed the free
memory in your phone.
Playing games
}
Entertainment } Other games
Select the game you wish to play. (Press
More to delete, read the game information,
or view the memory status.)
3
4
} Start
} Help to read the help text or
game.
game.
106
This is the Internet version of the user's guide. © Print only for private use.
to end the
Entertainment
Movement
Use the Navigation key to move up, down, left
or right and to select an item, or use the keys as
follows:
left up
left
left down
up
select/fire
down
right up
right
right down
This is the Internet version of the user's guide. © Print only for private use.
107
Appendix
Appendix
Troubleshooting
Problem
Possible Causes
Possible Remedies
Unable to switch
on
Empty battery
Charge the battery % 18 Charging the battery.
Defective battery
Replace the battery. Note that after several years
reduction in battery capacity is normal.
The
icon
appears
Weak signal
Move to an open space or closer to a window.
Outside GSM coverage area
Check operator coverage map.
SIM not valid
Call your service provider.
Network access not allowed
Try manual network search % 87 GSM Networks.
Dialling error
Use full national area code. When abroad, use full
country code.
Restrict calls set
Check restrict call settings % 61 Restrict calls.
Another SIM inserted
Check for new restrictions.
Call not possible
108
This is the Internet version of the user's guide. © Print only for private use.
Appendix
Problem
Possible Causes
Possible Remedies
Difficult to hear
the other party
–––
Adjust earpiece volume, and reduce noise around
you % 27 Adjusting the Ringer/Speaker volume.
Phone loses
network
Weak signal
Reconnection, or connection to another operator is
automatic. Switching phone off and on may
accelerate this.
SIM error
Damaged SIM card
Please contact your service provider.
SIM card not
registered
Network does not recognise
the SIM card
Please contact your service provider.
Not able to
receive calls
Restrict calls set
Check restrict call settings % 61 Restrict calls.
Divert set
Check call divert settings % 60 Setting a Divert.
Battery Charging Battery over-discharged
indicator does not
appear
Charge the battery a full charging cycle (up to
approximately 3 hours) for the indicator to appear.
This is the Internet version of the user's guide. © Print only for private use.
109
Appendix
Problem
Possible Causes
Possible Remedies
Unable to access
any WAP sites
Not subscribed
Check with your network operator/service provider
to confirm whether your subscription allows access
to WAP services and whether it is possible to access
WAP when roaming.
Wrong access selected
Check that the default Access Profile is usable in
the current network and that GPRS (operator
dependent) is turned on in this profile.
Unable to access Account already in use
an E-mail account
110
Check that you are logged off of your E-mail
account on your PC.
This is the Internet version of the user's guide. © Print only for private use.
Appendix
Security
PIN2
PIN, PIN2, SIM card and Phone locks.
PIN2 is a code provided by your network
operator/service provider and is required for
access to some features such as Fixed Numbers
or Call Cost. These features are not supported by
all networks.
PIN (Personal Identification
Number)
When the PIN is enabled, your phone prompts
you to enter the PIN each time you switch on the
phone. You can change your PIN to any 4-8
digit number at any time as long as the PIN
option is enabled. To change the PIN % 97 SIM
lock.
For security purposes, if you enter the PIN
incorrectly 3 times, your PIN will be blocked and
you will have to enter the PUK (Personal Unblocking
Key) to unblock it % 112 Unblocking the SIM
card.
If the PIN option is disabled, the risk of
unauthorised use of your phone is greater. The
disabling of the PIN control is SIM card
dependent.
SIM card lock
The SIM card lock protects your subscription,
but not your phone itself, from unauthorized
use. If you change SIM cards, the phone still
works with the new SIM card. Most SIM cards
are locked at the time of purchase. If the SIM
card lock is on, you have to enter a PIN every
time you turn on your phone. If you enter your
PIN incorrectly 3 times in a row the SIM card is
locked. This is indicated by the message, PIN
blocked. To unblock it you need to enter your
PUK (Personal Unblocking Key). Your PIN and
PUK are supplied by your operator. To edit your
PIN/PIN 2 and turn the SIM card lock on/off
% 97 SIM lock.
This is the Internet version of the user's guide. © Print only for private use.
111
Appendix
Unblocking the SIM card
If you enter the PIN incorrectly 3 times in a row,
the SIM card is blocked.
1
Enter the PUK (Personal Unblocking Key)
and press Ok.
2
Enter the new PIN (4-8 digits) and press Ok.
3
Enter the new PIN again and press Ok.
The SIM card is unblocked.
If you enter the wrong PUK 10 times, your SIM
card is blocked completely. In this case contact
your network operator/service provider.
In order to receive more information (SIM and
PUK), please contact your network operator/
service provider.
112
This is the Internet version of the user's guide. © Print only for private use.
Appendix
Icon glossary
Icon Explanation
Icons which may appear in the display.
Icon Explanation
Icon Explanation
Icon Explanation
Home network,
within range
Preferred
network,
available
Desktop icon
Network signal
(strong)
Ciphering not
supported
Personalised
profile
Network signal
(strong) &
GPRS within
range
Network signal
(strong) &
GPRS attached
Network
forbidden and
not available
Alarm set
Premium
charge zone
Battery status
Signals off,
(expect alarm &
timer)
No incoming
calls available
Active call
Card lock or
phone lock.
Secure
connection
(WAP)
Line 1,
activated
Line 2,
activated
Timer set
MMS
notification
Call ended
Missed calls
SMS
notification
E-mail
notification
Incoming call
barring
Unconditional
divert
Voicemail
notification
This is the Internet version of the user's guide. © Print only for private use.
113
Appendix
Icon Explanation
114
Icon Explanation
Icon Explanation
WAP push
notification
Icon Explanation
Fax notification
High priority
(task/message)
Low priority
(task/message)
Cell
information
notification
A GPRS
session, in
progress
Answered call
Dialled number
Infrared port,
activated
Infrared
communication,
in progress
Home number
(contact)
Work number
(contact)
Mobile number
(contact)
Fax number
(contact)
Bluetooth,
activated
Bluetooth
communication,
in progress
Other
information
E-mail address
(contact)
Bluetooth
headset
attached
Chat prompt
Picture attached
(contact)
SMS saved on
the SIM card
Chat session, in
progress
All day
calendar
(appointment)
Magic word,
activated
Voice message
unread
Message unread
Message read
Reminder set
(appointment)
Task completed
Only part of an
unread E-mail/
MMS saved
Only part of a
read E-mail
saved
This is the Internet version of the user's guide. © Print only for private use.
Appendix
Icon Explanation
Icon Explanation
Unread
message will be
deleted the next
time you
connect to the
server
Read message
will be deleted
the next time
you connect to
the server
Message saved
(unsent items)
Message
template
Message sent
Message
delivered
Mesage read by
the recipient
Sent message
expired/been
rejected
Message
damaged
E-mail with
attachment
Upper & lower
case
T9 text input
Lower case
Upper case
Icon Explanation
Icon Explanation
MMS play
Picture not
available
MMS pause
MMS stop
Business card
attached
(MMS)
Message option
Theme attached
(MMS)
Event attached
(MMS)
Recorded sound
attached
(MMS)
Melody
attached
(MMS)
Picture size,
large
Note attached
(MMS)
Save picture
(camera)
Picture size,
small
This is the Internet version of the user's guide. © Print only for private use.
115
Appendix
Safe and Efficient Use
Please read this information before
using your mobile phone.
RECOMMENDATIONS
• Always treat your product with care and keep it
in a clean and dust-free place.
• Do not expose your product to liquid or
moisture or humidity.
• Do not expose your product to
extreme high or low temperatures.
• Do not put your product in a
microwave oven; this may cause
damage to either the oven or the product.
• Do not expose your product to open
flames or lit tobacco products.
• Do not use your product when in, or around
aircraft, or areas posted “turn off two-way
radio”.
• Do not use your product in an area
where a potentially explosive
atmosphere exists.
• Do not place your product or install
wireless equipment in the area above your
car’s air bag.
• Do not touch the External Antenna Connector.
• Do not attempt to disassemble your
product. Only Sony Ericsson
authorised personnel should perform
service.
• Do not direct the infrared ray at anyone’s eye
and make sure that it does not disturb any
other infrared units.
• Do not drop, throw or try to bend
your product.
• To avoid hearing impairment, accept the call
before holding your product (or portable
handsfree device) to your ear.
• Do not close your phone with an object
inserted between keypad and display; this may
cause damage to your product.
ANTENNA
• Do not paint your product.
• Do no use your product near medical
equipment without requesting permission.
116
Only use an antenna that has been specifically
designed by Sony Ericsson for your mobile
phone. Use of unauthorised or modified antennas
could damage your mobile phone and may violate
regulations, causing loss of performance and
This is the Internet version of the user's guide. © Print only for private use.
Appendix
SAR levels above the recommended limits % 117
RADIO FREQUENCY (RF) EXPOSURE AND
SAR
EFFICIENT USE
Hold your mobile phone as you would any other
phone. Do not cover the top of the phone when in
use, as this affects call quality and may cause the
phone to operate at a higher power level than
needed, thus shortening talk and standby times.
While in data transfer, the mobile phone is not
designed to be held next to the ear.
RADIO FREQUENCY (RF)
EXPOSURE AND SAR
Your mobile phone is a low-power radio
transmitter and receiver. When it is turned on, it
emits low levels of radio frequency energy (also
known as radio waves or radio frequency fields).
Governments around the world have adopted
comprehensive international safety guidelines,
developed by scientific organizations, e.g.
ICNIRP (International Commission on NonIonizing Radiation Protection), through periodic
and thorough evaluation of scientific studies.
These guidelines establish permitted levels of
radio wave exposure for the general population.
All Sony Ericsson mobile phone models are
designed to operate within these stringent levels.
The levels include a safety margin designed to
assure the safety of all persons, regardless of age
and health, and to account for any variations in
measurements.
Specific Absorption Rate (SAR) is the unit of
measurement for the amount of radio frequency
energy absorbed by the body when using a
mobile phone. The SAR value is determined at
the highest certified power level in laboratory
conditions, but the actual SAR level of the mobile
phone while operating can be well below this
value.
This is because the mobile phone is designed to
use the minimum power required to reach the
network. Therefore, the closer you are to a base
station, the more likely it is that the actual SAR
level will decrease.
Variations in SAR below the radio frequency
exposure guidelines do not mean that there are
variations in safety. While there may be
differences in SAR levels among various mobile
phones, all Sony Ericsson mobile phone models
are designed to meet the relevant radio frequency
exposure guidelines.
A separate leaflet with SAR information for this
mobile phone model is included with the material
that comes with this mobile phone. This
information can also be found, together with more
information on radio frequency exposure and
SAR, on www.SonyEricsson.com/.
This is the Internet version of the user's guide. © Print only for private use.
117
Appendix
DRIVING
Please check if local laws and regulations restrict
the use of mobile phones while driving or require
drivers to use handsfree solutions. We
recommend that you use only Sony Ericsson
handsfree solutions intended for use with your
product. Please note that because of possible
interference to electronic equipment, some
vehicle manufacturers forbid the use of mobile
phones in their vehicles unless a handsfree kit
with an external antenna supports the installation.
Please contact your vehicle manufacturer for the
appropriate position of the external antenna on
your vehicle.
Always give full attention to driving and pull off the
road and park before making or answering a call if
driving conditions so require.
PERSONAL MEDICAL DEVICES
Mobile phones may affect the operation of cardiac
pacemakers and other implanted equipment.
Please avoid placing the mobile phone over the
pacemaker, e.g. in your breast pocket. When
using the mobile phone, place it at the ear
opposite the pacemaker. If a minimum distance of
15 cm (6 inches) is kept between the mobile
phone and the pacemaker, the risk of interference
is limited. If you have any reason to suspect that
interference is taking place, immediately turn off
118
your mobile phone. Contact your cardiologist for
more information.
For other medical devices, please consult the
manufacturer of the device.
CHILDREN
DO NOT ALLOW CHILDREN TO
PLAY WITH YOUR MOBILE PHONE
OR ITS ACCESSORIES. THEY
COULD HURT THEMSELVES OR
OTHERS, OR COULD
ACCIDENTALLY DAMAGE THE MOBILE
PHONE OR ACCESSORY. YOUR MOBILE
PHONE OR ITS ACCESSORY MAY CONTAIN
SMALL PARTS THAT COULD BE DETACHED
AND CREATE A CHOKING HAZARD.
DISPOSING OF THE PRODUCT
Your mobile phone should not be
placed in municipal waste. Please
check local regulations for disposal of
electronic products.
This is the Internet version of the user's guide. © Print only for private use.
Appendix
POWER SUPPLY
BATTERY USE AND CARE
Connect the AC power adapter only to designated
power sources as marked on the product. Make
sure the cord is positioned so that it will not be
subjected to damage or stress. To reduce risk of
electric shock, unplug the unit from any power
source before attempting to clean it. The AC
power adapter must not be used outdoors or in
damp areas. Never alter the cord or plug. If the
plug will not fit into the outlet, have a proper outlet
installed by a qualified electrician.
Limit the distance between the mains socket and
the mobile phone when charging for easy
accessibility. As an energy-saving measure,
disconnect the charger from the main socket after
charging.
We recommend that you fully charge the battery
before you use your mobile phone for the first
time. The battery can only be charged in
temperatures between +5 °C (41 °F) and +45 °C
(+113 °F).
A new battery or one that has not been used for a
long time could have reduced capacity the first
few times it is used.
The talk and standby times depend on the actual
transmission conditions when using the mobile
phone. If the mobile phone is used near a base
station, less power is required and talk and
standby times are prolonged.
• Warning! May explode if disposed of in fire.
EMERGENCY CALLS
• Use only Sony Ericsson branded original
batteries and chargers intended for use with
your mobile phone. Other chargers may not
charge sufficiently or may produce excessive
heat. Using other batteries and chargers could
be dangerous.
Mobile phones operate using radio signals, which
cannot guarantee connection under all conditions.
Therefore you should never rely solely upon any
mobile phone for essential communications (e.g.
medical emergencies).
Emergency calls may not be possible on all
cellular networks or when certain network
services and/or mobile phone features are in use.
Check with your local service provider.
• Do not expose the battery to liquid.
• Do not let the metal contacts on the battery
touch another metal object. This could shortcircuit and damage the battery.
• Do not disassemble or modify the battery.
This is the Internet version of the user's guide. © Print only for private use.
119
Appendix
• Do not expose the battery to
extreme temperatures, never above
+60 °C (+140 °F). For maximum
battery capacity, use the battery in
room temperature.
• Turn off your mobile phone before removing
the battery.
• Keep out of children’s reach.
• Use the battery for the intended
purpose only.
• Do not allow the battery to be put
into the mouth. Battery electrolytes may be
toxic if swallowed.
DISPOSING OF THE BATTERY
Please check local regulations for
disposal of batteries or call your local
Sony Ericsson Customer Care Centre
for information. The battery should
never be placed in municipal waste.
Use a battery disposal facility if available.
Limited Warranty
Sony Ericsson Mobile Communications AB,
S-221 88 Lund, Sweden, (Sony Ericsson), provides
this Limited Warranty for your mobile phone and
original accessory delivered with your mobile
phone (hereinafter referred to as "Product").
120
Should your Product need warranty service,
please return it to the dealer from whom it was
purchased, or contact your local Sony Ericsson
Customer Care Centre (national rates may apply)
or visit www.SonyEricsson.com to get further
information.
OUR WARRANTY
Subject to the conditions of this Limited Warranty,
Sony Ericsson warrants this Product to be free
from defects in design, material and workmanship
at the time of its original purchase by a consumer,
and for a subsequent period of one (1) year.
WHAT WE WILL DO
If, during the warranty period, this Product fails to
operate under normal use and service, due to
defects in design, materials or workmanship,
Sony Ericsson authorised distributors or service
partners, in the country/region
% 122 EUROPEAN UNION (EU) where you
purchased the Product, will, at their option, either
repair or replace the Product in accordance with
the terms and conditions stipulated herein.
Sony Ericsson and its service partners reserve
the right to charge a handling fee if a returned
Product is found not to be under warranty
according to the conditions below.
This is the Internet version of the user's guide. © Print only for private use.
Appendix
Please note that your personal settings/
downloads might be lost when the Product is
repaired or replaced.
CONDITIONS
1 The warranty is valid only if the original proof of
purchase issued to the original purchaser by
an, for this Product, Sony Ericsson authorised
dealer, specifying the date of purchase and
serial number*, is presented with the Product
to be repaired or replaced. Sony Ericsson
reserves the right to refuse warranty service if
this information has been removed or changed
after the original purchase of the Product from
the dealer.
2 If Sony Ericsson repairs or replaces the
Product, the repaired or replaced Product shall
be warranted for the remaining time of the
original warranty period or for ninety (90) days
from the date of repair, whichever is longer.
Repair or replacement may involve the use of
functionally equivalent reconditioned units.
Replaced parts or components will become the
property of Sony Ericsson.
3 This warranty does not cover any failure of the
Product due to normal wear and tear, or due to
misuse, including but not limited to use in other
*
In some countries/regions additional information is requested.
If so, this is clearly shown on the valid proof of purchase.
than the normal and customary manner, in
accordance with the Sony Ericsson instructions
for use and maintenance of the Product. Nor
does this warranty cover any failure of the
Product due to accident, software or hardware
modification or adjustment, acts of God or
damage resulting from liquid.
4 Since the cellular system on which the Product
is to operate is provided by a carrier
independent from Sony Ericsson, Sony
Ericsson will not be responsible for the
operation, availability, coverage, services or
range of that system.
5 This warranty does not cover Product failures
caused by installations, modifications, or repair
or opening of the Product performed by a nonSony Ericsson authorised person.
6 The warranty does not cover Product failures
which have been caused by use of accessories
or other peripheral devices which are not
Ericsson or Sony Ericsson branded original
accessories intended for use with the Product.
7 Tampering with any of the seals on the Product
will void the warranty.
8 THERE ARE NO EXPRESS WARRANTIES,
WHETHER WRITTEN OR ORAL, OTHER
THAN THIS PRINTED LIMITED WARRANTY.
ALL IMPLIED WARRANTIES, INCLUDING
This is the Internet version of the user's guide. © Print only for private use.
121
Appendix
WITHOUT LIMITATION THE IMPLIED
WARRANTIES OF MERCHANTABILITY OR
FITNESS FOR A PARTICULAR PURPOSE,
ARE LIMITED TO THE DURATION OF THIS
LIMITED WARRANTY. IN NO EVENT SHALL
SONY ERICSSON OR ITS LICENSORS BE
LIABLE FOR INCIDENTAL OR
CONSEQUENTIAL DAMAGES OF ANY
NATURE WHATSOEVER, INCLUDING BUT
NOT LIMITED TO LOST PROFITS OR
COMMERCIAL LOSS, TO THE FULL EXTENT
THOSE DAMAGES CAN BE DISCLAIMED BY
LAW.
Some countries/states do not allow the exclusion
or limitation of incidental or consequential
damages, or limitation of the duration of implied
warranties, so the preceding limitations or
exclusions may not apply to you.
The warranty provided does not affect the
consumer's statutory rights under applicable
legislation in force, nor the consumer's rights
against the dealer arising from their sales/
purchase contract.
122
EUROPEAN UNION (EU)
If you have purchased your Product in an EU
country you can have your Product serviced,
under the conditions set out above, within the
warranty period in any EU country where an
identical Product is sold by an authorised Sony
Ericsson distributor. To find out if your Product is
sold in the EU country you are in, please call the
local Sony Ericsson Customer Care Centre.
Please observe that certain services may not be
possible elsewhere than in the country of original
purchase, e.g. due to the fact that your Product
may have an interior or exterior which is different
from equivalent models sold in other EU
countries. It may not be possible to repair SIMlocked Products.
This is the Internet version of the user's guide. © Print only for private use.
Appendix
FCC Statement
Declaration of Conformity
This device complies with Part 15 of
the FCC rules. Operation is subject to
the following two conditions: (1) This
device may not cause harmful
interference, and (2) This device must
accept any interference received, including
interference that may cause undesired operation.
We, Sony Ericsson Mobile Communications
AB of
Nya vattentornet
S-221 88 Lund, Sweden
declare under our sole responsibility that our
product
Sony Ericsson type AAB-1021031-BV
and in combination with our accessories, to which
this declaration relates is in conformity with the
appropriate standards 3GPP TS 51.010-1, EN
300 328, EN 301 489-7, EN 301 489-17 and EN
60950, following the provisions of, Radio
Equipment and Telecommunication Terminal
Equipment Directive 99/5/EC with requirements
covering EMC Directive 89/336/EEC, and Low
Voltage Directive 73/23/EEC.
Lund, August 2003
Place & date of issue
Hiroshi Yoshioka, Head of Product Business Unit GSM/UMTS
We fulfil the requirements of the R&TTE Directive
(99/5/EC).
This is the Internet version of the user's guide. © Print only for private use.
123
Index
A
Alarm 92, 103
B
Battery 17, 120
– Charging 18
– Inserting 17
Bluetooth headset 26
Bluetooth wireless technology 74
C
Calculator 103
Calendar 99
Call costs 63
Call list 59
Call timer 63
Call Waiting 29
Calling cards 64
Camera 66
Chat, see Messaging
124
Ciphering 25
Clock 95
Code memo 104
Conference call 30
Contrast 94
D
Data communication 88
Declaration of Conformity 123
Display 11, 13, 93
Divert calls 59
DTMF 27
During a call 27
E
E-mail, see Messaging
Emergency calls 22
External display 13
F
Fixed dialling 42
G
Games 106
Groups 38
H
Headset 26, 30
I
Icons (display) 113
Infrared port 78
K
Key functions 12, 13
Key sound 93
L
Language (display) 94
Light 93
This is the Internet version of the user's guide. © Print only for private use.
Locks 97
– Phone 97
– SIM card 97, 111
M
Magic word 31
Making Calls 21, 35
Master reset 98
Menu overview 15
Messaging 43
– Chat 56
– E-mail 50
– Picture Message 47
– Text message 45
Microphone off/on 27
Minute minder 93
Missed calls 59
MMS, see Messaging: Picture
Message
My numbers 40
My shortcuts 58
N
Network 19, 87
Network specific function, see
SAT
Networks 87
Notes 101
O
Online services 73
P
Personal ring signal 39
Phone 25
Phonebook 35
– Saving Entries 35
– Service numbers 41
Pictures 69
PIN 19, 111
PIN2 111
Profiles 94
PUK 111
R
Reset
– all 98
– Master 98
– profiles 94
Restrict calls 61
Ring signals 92
Ring Volume 92
Ringer Volume
– Adjusting 27
Roaming 20
S
SAT (SIM Application
Toolkit) 74
Screen saver 93
Shortcuts 58
Signal Strength 19
This is the Internet version of the user's guide. © Print only for private use.
125
SIM card 16
– Inserting 16
– Lock 111
– Removing 16
– Unblocking 112
SMS, see Messaging: Text
message
Sound recording 97
Speaker Volume
– Adjusting 27
Speed dialling 24
Stopwatch 103
Synchronization 86
V
Voice control 31
– Voice answering 26
– Voice dialling 23
– Voice redialling 24
Voice dialling 23
Voice mail 50, 58
W
Wallpaper 93
WAP 79
T
Text entry 32
– Standard text entry 33
– T9 text entry 33
Themes 71
Timer 103
126
This is the Internet version of the user's guide. © Print only for private use.
This is the Internet version of the user's guide. © Print only for private use.
127
www.SonyEricsson.com
Sony Ericsson Mobile Communications AB, SE-221 88 Lund, Sweden
EN 3-255-627-12(1). Printed in France
This is the Internet version of the user's guide. © Print only for private use.