1
M a n ual / q u ick
re fe re n ce g uid e
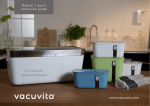
For Vacuvita Home Base
and vacuum bags
www.vacuvita.com
Welcome to the Vacuvita easy access storage system!
Keep food fresh and healthy
Vacuvita is based on a simple fact - when you remove oxygen, food
stays fresh up to five times longer. Vacuvita is a fully-automatic
vacuum food storage system. By removing air and storing the food in
an airtight environment you protect your food against humidity and
other outside influences. Cookies and chips stay crispy, coffee beans
keep their wonderful smell and fruits and vegetables retain their rich
flavours. Placing food in a vacuum bag will prevent freezer burn that is
caused by dehydration and oxidation that occur when storing food in
the freezer.
The Vacuvita easy access vacuum storage system is one of a kind.
Just one touch is enough to release the vacuum immediately.
The Vacuvita Home Base’ lid will open by itself so you can access your
food within seconds. The springs and dampers are perfectly balanced
for smooth opening and one-handed closing of the cover. Creating
a vacuum is as easy as closing the lid. Your Vacuvita system can be
expanded to your fridge and freezer with our specially designed
Vacuvita containers and vacuum bags.
Because Vacuvita is so versatile and easy to use, you will find yourself
eating fresh foods more often.
2
Vacuvita manual
Please carefully read this manual to ensure that you will use your
Vacuvita products in the most effective and safe way and get the best
results possible.
www.vacuvita.com
Important safety instructions
Please read this user manual carefully for
instructions before using this product and
keep it for future reference. When using
your Vacuvita products, always take basic
precautions, including the following:
1.Use the Vacuvita Home Base and vacuum
bags only for their intended purpose, as
described in this manual.
2.Do not use the appliance on wet or hot
surfaces or near a heat source.
3.Place the device on a stable and flat
surface. Caution: position the cord where
it cannot be tugged, cause the user to
become entangled, or cause the product
to be overturned.
4.To protect against the risk of electric
shock, do not immerse any part of the
Home Base, power cord or plug into
water or other liquids.
5.Always unplug the device before cleaning.
6.Never pull the cord to disconnect the
www.vacuvita.com
Home Base from the outlet. Unplug the
device by removing the plug itself.
7.Do not operate the appliance with a
damaged power cord or plug. Do not
operate the device if it malfunctions or is
damaged. Contact us at
[email protected] for the nearest
Authorised Service Center for
examination, repair or adjustment.
It should not be serviced by the user.
8.Closely supervise children when using
any electrical appliance. Do not allow the
appliance to be used as a toy.
9.Keep Vacuvita Home Base and other
Vacuvita products and packaging away
from animals and small children. There is
a danger of suffocation.
10.Do not let the cable or adapter tube hang
over the edge of a worktop, to prevent
entanglement or tripping.
11.Do not use an extension cable.
Vacuvita manual 3
Proper use
• T
he Vacuvita Home Base and other Vacuvita products are not a
substitute for refrigeration or freezing. Perishables still need to
be kept in the refrigerator or freezer. Vacuum packaging is not a
substitute for canning.
• Do not use any accessories other than Vacuvita accessories, as they
are specifically designed to be used with our high performance
vacuum equipment.
• During the vacuum packaging process or while using the vacuum
adapter, small amounts of liquids, crumbs or food particles may be
sucked into the adapter. Clean the adapter after each use. Regularly
clean the filter of the Home Base.
• Avoid overfilling; never fill the vacuum bags or Vacuvita containers
beyond the “maximum” fill mark.
• Do not change, adjust or mechanically alter the vacuum bags, or
the sealing or valves of the Home Base or the containers. These
products are manufactured with special care to guarantee best
results and maximum safety. Tampering with these products may
influence performance or result in injuries or damage.
• When vacuum packaging items with sharp edges (e.g. dried pasta
or skewered products) in the sealing bags, protect the bag from
punctures by wrapping items in soft cushioning material, such as a
paper towel. You may want to use a Vacuvita container instead of a
bag.
• Important: Do not store fresh onions, garlic, soft cheeses or
mushrooms in Vacuvita Home Base or Vacuvita accessories.
• Beef may appear darker after vacuum packaging due to the
removal of oxygen. This is not an indication of spoilage.
• When using a Vacuvita vacuum bag, make sure that the zip is
properly closed before starting the vacuum process. Gently stretch
the bag flat before closing the zip or using the vacuum adapter.
4
Vacuvita manual
• D
o not place crisp, dry foods and humid products in the same
Home Base, container or bag. Moisture will migrate from the humid
products to the dry and may cause them to turn soft or soggy.
• Foods with strong flavour and/or smell should be kept separately
from other products to avoid transferring of that taste or odor to
other foods.
• Some foods, such as tomatoes, saffron or pepper-based soups
and sauces may cause staining of the plastic surfaces. This is not a
malfunction and has no effect on the operation of the containers.
• Never use empty Vacuvita containers in the microwave. Always
open the container prior to using it in a microwave to allow hot air
to escape and prevent ruptures, damage to the container or injuries
from exposure.
• You can heat cooked foods, such as leftovers, in a Vacuvita bag
using a microwave. The bag should not be used to microwave raw
foods. Always open the bag prior to putting it in a microwave to let
the steam escape. Avoid microwaving foods containing oil, as it will
get hot very quickly and could cause the side of the bag to stick
together. Vacuvita vacuum bags cannot be re-used or re-selealed
after being used in a microwave.
www.vacuvita.com
Content
Quick Reference Guide
6
Standby mode
15
The Vacuvita Home Base
6
16
The vacuum adapter and tube
7
Using the Vacuvita Home Base
with vacuum bags
Vacuum bags
8
Cleaning the vacuum adapter
17
Vacuvita containers
9
Troubleshooting18
System overview
10
Storage chart
19
Food Safety Tips
22
How to use your Vacuvita products
12
Prepare for use
12
Using your Vacuvita Home Base
12
Cleaning the Home Base
13
Warranty22
Cleaning the dust and particle filter
14
1 year Limited Warranty
22
leaning or replacing
C
the removable air filter
14
What are the limits of Vacuvita’s Liability?
23
Emergency vacuum release
15
How to Obtain Warranty Service
23
www.vacuvita.com
Vacuvita manual 5
Quick Reference Guide
The Vacuvita Home Base
The Vacuvita Home Base is designed as a convenient and stylish
stand-alone unit. It really is everything you need to get started.
DO use with
DO NOT use with*
Bread
Soup
Rolls
Sauces / Marinades
Cookies
Processed fruits
and vegetables
Cereal
Cooked meals
Fresh fruits and vegetables*
Raw meats, fish, poultry
Potato chips
Salads
Coffee beans
Onions, garlic
*Foods that need to be kept at low temperatures should be
stored in a Vacuvita container or vacuum bag. Fresh fruits and
vegetables that can be kept outside the refrigerator, such as
apples and peppers, can be stored in the Vacuvita Home Base.
Do not put the Home Base in the refrigerator or freezer. Always
use proper food saving techniques to avoid food-borne illness.
The Home Base is not intended for outdoor use.
6
Vacuvita manual
Do not place crisp, dry foods and humid products in the Home
Base simultaneously. Moisture will migrate from the humid
products to the dry and may cause them to turn soft or soggy.
Do not allow water or liquids inside the Vacuvita Home Base.
Do not submerge the Home Base in water.
For full instructions, see chapter ‘How to use your Vacuvita
products’, page 14.
For a full list of products and preservation times, see chapter
‘Storage chart’, page 21 or www.vacuvita.com.
www.vacuvita.com
The vacuum adapter and tube
The vacuum adapter quickly and easily connects the additional storage
units, such as the Vacuvita containers or vacuum bags to the Home
Base. This vacuum adapter allows you to use our external vacuum
solutions for long-term storage in the cupboard, fridge or freezer.
Simply connect the free end of the tube to the Home Base and place
the adapter on the designated area of the Vacuvita container or
vacuum bag. Just one touch to the capacitive touch button starts
the vacuum process.
During the vacuum process small crumbs, food particles or drops of
liquid may be pulled into the vacuum system. It is recommended that
you regularly clean and thoroughly dry the adapter, especially after
using it on bags containing liquids.
Do not attempt to detach the tube from the adapter.
For full instructions, see chapter ‘How to use your Vacuvita products’,
page 14.
www.vacuvita.com
Vacuvita manual 7
Vacuum bags
Vacuvita vacuum bags are BPA and BPS-free and come in a variety
of convenient sizes. Your Home Base unit comes with five mediumsize bags (1/2 gallon) and five large bags (1 gallon). More bags are
available from the website and more sizes are coming soon!
Besides long-term storage, the bags are ideal for sous-vide
cooking. This is a cooking technique that is based on the principle
of slowly cooking your food under a vacuum in a temperaturecontrolled environment.
DO use with
DO NOT use with*
Marinated meats, fish, poultry
Cereal
Hard cheese
Potato chips
Deli meats
Leafy greens
Fresh vegetables
Onions
Coffee beans
Garlic
Fresh fish
Mushrooms
Fresh meat
Soft Cheese
*If you want to keep delicate products, such as potato chips
and cereal, you can try one of the Vacuvita containers.
8
Vacuvita manual
The bags can be opened and resealed, so it’s very easy to use only one
portion of the contents and store the rest away for a later time!
Do not re-use the bags used for raw meats, fish or poultry.
Always take proper hygienic precautions to prevent food-borne
illnesses.
For more information on sous-vide cooking or a full list of products,
visit www.vacuvita.com.
www.vacuvita.com
Vacuvita containers
Like the vacuum bags, the Vacuvita containers are free from BPA
and BPS. The containers are safe to use in the microwave, fridge and
freezer and come in three different, stackable sizes (1 gallon, 1/2 gallon
and 1/4 gallon).
The containers are perfect for marinating. Marinating usually takes
around 24 hours, but in some cases the Vacuvita system brings this
down to just 20 minutes! Vacuum helps to open up the pores of meat,
fish and poultry, allowing the marinate to get absorbed more quickly.
DO use with
DO NOT use with
Potato chips
Garlic
Cookies
Mushrooms
Nuts
Soft cheese
Raw pasta
Onions
Fresh meat, fish poultry
Soup
Sauces
Always realease the vacuum and open the lid before placing
the container inside the microwave. The containers are suitable for
www.vacuvita.com
storage at room temperature and inside your freezer or refrigerator.
Some foods, such as tomatoes, saffron or pepper based soups
and sauces may cause staining of the plastic surfaces. This is not a
malfunction and has no effect on the operation of the containers.
For a full list of products, visit www.vacuvita.com.
For detailed instructions, please consult the Vacuvita Container User
Manual, included with your containers.
Vacuvita manual 9
System overview
7
13
5
11
6
4
12
2
3
8
1
1. Vacuvita Home Base
2.Easy access control button, to automatically
open the lid and release the vacuum
3. Blue indicator light
4. Home Base lid
5.Capacitive touch control to enable the
“external vacuum” function
6. Circular indicator LED light rings
7. Adapter socket (with removable cap)
10
Vacuvita manual
10
9
8. Power inlet
9. Air outlet with replaceable air filter
10. Emergency vacuum release switch
11. Dust and particle filter
12. Dishwasher box
13. Lid seal
www.vacuvita.com
18
23
19
20
22
17
21
15
16
14. 14V/1.5A Power adapter
www.vacuvita.com
15. Vacuum adapter assembly, including:
16.Tube
17. Adapter housing
18. Detachable adapter lid
19. Adapter channel
20.Adapter ball
24
21. 5 x Vacuvita bags; medium
22.Bag seal
23.Zip
24.5 x Vacuvita bags; large
Vacuvita manual 11
How to use your Vacuvita products:
Prepare for use
-Remove all packaging and foils. Some
parts of product packaging are eligible for
recycling. Keep packaging away from small
children.
-Position the Vacuvita Home Base on a flat
surface, with the lid closed. Place the plug
from the power adapter into the socket
at the back of the appliance and plug the
other end of the power adapter into a
power outlet.
-The circular indicator LED light rings on the
top of the Home Base will briefly blink to
indicate that the power is on.
-The blue indicator lights behind the control button will switch on
and you will hear a short two-tone sound.
-You will hear the pump removing the air from the Home Base - the
vacuum process has started.
-This vacuum process can be interrupted at any time, by simply
pushing the easy access control button to open the lid.
-Pressing the easy access control button releases the vacuum and
opens the lid automatically.
12
Vacuvita manual
Using your Vacuvita
Home Base
SCALE 2 : 1
SECTION A-A
-Open the Vacuvita Home Base by
pressing easy access control button.
-There will be a brief sound of air being
released and the lid will automatically
open within a few seconds.
-Place your food inside the Vacuvita Home
Base. For advice on proper storage of
different types of food, see ‘Storage
chart’ page 19.
Always allow food to cool to room temperature before
applying the vacuum.
-For easy cleaning and storage, it is
recommended that you use the
dishwasher box supplied with the
Home Base.
-Close the Home Base by gently pressing
down the lid.
-When the lid is closed, the blue indicator
light behind the control button will switch
on and a two tones sound will occur.
www.vacuvita.com
-You will hear the air pump removing the air from the Home Base the vacuum process has started.
-During the vacuum process, the pump may switch to a higher pump
level up to two times. You will hear a slightly louder and higher
pump sound. This is normal for the operation of the pump and does
not affect the lifetime of the Vacuvita Home Base.
- After max. 90 seconds (depending on the fill level) the Home
Base will reach its vacuum level and the pump will switch off
automatically.
-Just as your refrigerator checks and adjusts its temperature when
operating, the Vacuvita Home Base checks its vacuum level at
regular intervals. At those intervals the pump will switch on to
maintain the vacuum level in the Home Base.
-To open your Home Base again, just press the easy access control
button. This may be done at any time while it is operating.
-Clean both the outside and the inside of the Home Base using a
sponge or cloth with water and mild soap.
Be careful not to flood the vacuum socket or air filter with water!
Do not use the inside of the Home
Base as a bowl for washing up. Do not
submerge the Home Base in water!
-If required, the lid seal can be removed for
cleaning. Gently pull it from the inside of
the lid and use water and a mild soap.
Do not put the seal in the dishwasher.
Do not use sharp objects to remove or reinstall the seal.
Cleaning the Home Base
SCALE 2 : 1
SECTION A-A
-Open the Vacuvita Home Base by pressing
the control button on the front.
-To protect against the risk of electric shock,
cut the electric power by removing the plug
from the power outlet.
-Remove the dishwasher box from the inside
and clean it by putting it in the dishwasher,
or using water and mild soap.
www.vacuvita.com
-To pull the seal, make sure it is positioned
properly, with the solid section facing
towards the inside and the two thinner
flaps facing outside the Home Base.
-Gently press the seal in the groove, by
first positioning the seal at the four
corners and then pressing it down in the
straight sections
-Be sure to press along the entire length of
the seal, so that it is properly positioned
and distributed evenly along the groove.
Make sure not to stretch the seal during application.
Vacuvita manual 13
Cleaning the dust and particle filter
Cleaning or replacing the removable air filter
uring the vacuum process small crumbs or
D
food particles may be sucked into the vacuum
system. It is recommended that you regularly
clean the filter on the Home Base.
-Occasionally, you may need to clean or
replace the air filter on the outside of the
Home Base. It is recommended to clean
the filter once every year, or when the
pump sound is clearly louder and the
vacuum process takes longer than prior.
-Remove the power plug from the wall
socket. Place a soft cloth or towel in front
of the Home Base.
-Gently tilt the Home Base forward, until
the front touches the cloth. Do not drop
the Home Base, as this may result in
damage or malfunction!
-Remove the dishwasher box from the Home
Base.
-Place your finger in the slot on the filter.
-Simply pull the filter upward, sliding it out of the wall. Do not pull it
towards you!
-Gently tap the crumbs and particles out of the filter.
-If the filter cannot be cleaned, replace it with an original Vacuvita
part. Visit vacuvita.com for details.
-Gently slide the filter back after cleaning and return the dishwasher
box.
If the filter cannot be cleaned, replace it with an original
Vacuvita part. Visit www.vacuvita.com for details.
-Pull the filter from the bottom of the Home Base to clean it.
-Clean the filter by gently tapping it on a hard surface or use the
corner of a clean cloth to remove dust and particles.
-After cleaning, push the filter back in place.
-Return the Home Base to its upright position and put the plug back
into the wall socket.
14
Vacuvita manual
www.vacuvita.com
Emergency vacuum release
Warning: In case of emergency, always remove the power
plug from the wall socket.
In case of an emergency or system malfunction,
the vacuum can be released by pressing the
emergency vacuum release switch.
-Turn the Vacuvita Home Base, so the back
is facing you.
-Using a thin product, such as a skewer,
paperclip or needle, gently press the
switch located behind the little hole in the
Home Base housing.
-You will immediately hear the sound of
vacuum being released.
-Keep the switch pressed until the sound has stopped
-Open the Home Base lid by pressing the button in the front, or
open the lid manually.
-The Home Base is ready for normal use again.
Standby mode
has a standby mode. This standby mode allows the Home Base to open
and close, but does not switch on the pump to create a vacuum.
-Close the Vacuvita Home Base lid.
-Place your hand on the lid as shown —
there is no need to wait for the vacuum to
be completed. Press down firmly.
-After five seconds, the blue indicator light
on the front of the Home Base will begin
to blink. Keeping your hand on the lid,
press the control button on the front of
the Home Base with your other hand.
- The blue indicator light will switch off;
this means the standby mode is activated.
-If present, any vacuum will be released
from the Home Base and the lid will open.
-Open and close the Home Base in the
usual way. The blue indicator light and pump will not switch on
when the Home Base is closed in standby mode.
-To switch off the standby mode, simply place your hand on the lid
again and press. After five seconds, the blue indicator light will
switch back on and blink.
-Keeping your hand on the lid, press the button on the front of the
Home Base control button on the front of the Home Base with your
other hand.
If the sealing is compromised, a vacuum cannot be created, or when
there is no need or desire for vacuum storage, the Vacuvita Home Base
www.vacuvita.com
Vacuvita manual 15
Using the Vacuvita Home Base with vacuum
bags
-Use only Vacuvita vacuum bags. They are
designed to be used with the Vacuvita
high-performance vacuum system.
-Place your food item inside the bag.
Always allow food to cool to room
temperature before applying vacuum.
-Do not fill the bags beyond the maximum
fill line, as food or liquids may be pulled into
the vacuum adapter.
-Firmly press to close the zip completely.
-Place the bag on a flat surface, with the
valve facing up.
-Remove the cap from the adapter socket
behind the Home Base lid. Insert the free
side of the adapter hose into the vacuum
socket.
-The LED light rings will switch on, below
the Home Base lid.
-Place the vacuum adapter on the marked
area around the valve of the vacuum bag.
Gently press it down.
- Press the capacitive touch control (the
16
Vacuvita manual
middle of the area lit up by the LED light
rings on the Home Base) to activate the
vacuum process.
-Hold down the adaptor on the vacuum
bag. The system will automatically switch
off when it reaches the right vacuum
level. Alternatively, you can stop the
vacuum process manually by pressing the
capacitive touch control.
-If there is still a lot of air inside the
vacuum bag when it switches off, make
sure the valve is not blocked by any food
in the bag and repeat until the right result
has been obtained.
-Remove the adapter from the vacuum
bag and disconnect the tube from the
Home Base.
-If you wish, you can write down the date
and contents of the bag in the designated
area.
-Store your bag in a place that is
appropriate to your food type and your
intended preservation period (see also
chapter ‘Storage chart’, page 19).
www.vacuvita.com
-To open, firmly grasp two sides of the bag near the zip and gently
pull them apart.
- The bags are suitable for repeated use; just take out a portion of
the contents and reseal as described above.
The bags are not intended to be cleaned.
Do not use the bags for different (raw) products after
each other.
Always apply proper hygienic precautions to prevent
foodborne illness.
-For an optimal vacuum process with
liquids (such as freshly-made soup) we
recommend placing the liquid in a bowl in
the freezer for a few hours. When the liquid
has frozen, the vacuum process is the same
as that with solid food.
-Alternatively you can hang the vacuum bag
containing the liquids from your kitchen worktop, keeping the valve
flat on the surface. This will prevent the liquid from running into the
valve and blocking the airflow.
-If liquids do enter the vacuum adapter the process will switch
off automatically. Remove the adapter from the bag, clean it as
described below and restart the process.
www.vacuvita.com
Cleaning the vacuum adapter
-Disconnect the adapter tube from the
Vacuvita Home Base.
-Remove the lid from the adapter.
-Turn the adapter channel
counterclockwise and lift it from the
inside of the housing.
-Remove the ball.
-The parts may be cleaned using water
and mild soap.
Do not scrub the sealing surfaces using scouring materials
as this may damage the sealing and cause malfunctions.
Make sure all the parts are dried properly before use,
especially the inside cavities of the adapter housing.
Vacuvita manual 17
Troubleshooting
When the Home Base is unable to achieve the required vacuum level, either in the Home Base itself, the bags or the containers, one of the following
light indicators codes may appear:
Lights are blinking
Blue indicator light
+
+
Inner LED light ring
Blue indicator light
+
+
Middle LED light ring
Blue indicator light
+
Outer and inner LED light
ring
+
This means:
Possible solutions:
The proper vacuum level in the
Home Base cannot be reached.
The system has automatically
switched off.
• Check if there are any items sticking out of the dishwasher box that might
prevent the lid from closing completely.
It takes too long for the proper
vacuum level in the Home Base
to be reached. The system has
automatically switched off.
• Remove the lid seal and carefully clean it.
The proper vacuum level in the
container or bag cannot be
reached.
The system has automatically
switched off.
• Check all connections between the Home Base and the container or bag.
• Check if there is anything crossing the seal.
• If so, remove the items and try the process again.
• Closely inspect the seal for small damages, holes or ruptures.
• If the seal is intact and clean, re-install and try the system again.
• Check if there are any items sticking out of the container that might prevent
the lid from closing completely.
• Check if there is anything crossing the seal.
• Firmly press the lid back on the container and try again.
Blue indicator light
+
Outer and middle LED light
ring
+
It takes too long for the proper
vacuum level in the container
or bag to be reached.
The system has automatically
switched off.
• Remove the container seal and carefully clean it.
• Closely inspect the container seal for small damages, holes or ruptures.
• If the seal is intact and clean, re-install it back and try the system again.
• Check the seal on the bag to see if it is properly closed.
• Check if there are no holes or tears in the bag.
Light does not switch on
+
Pump does not switch on
+
This means:
Possible solutions:
There is no electrical connection
between the lid magnet and steel
plate on the Home Base.
The system did not switch on.
• Make sure the Home Base is properly connected to a power outlet.
• Remove any items that might prevent the lid to close completely.
• Clean the magnet on the lid and the steel plate on the Home Base.
• Make sure the Home Base is not in standby mode. See page 15 for
instructions regarding starting and stopping the standby mode.
In case the suggested tips do not help or the problem persists, please visit www.vacuvita.com or email us at [email protected].
18
Vacuvita manual
www.vacuvita.com
Storage chart
Room
temperature
No
vacuum
Vacuum
Store in
Baked goods
2-3 days
7-10 days
Bread, rolls
2-3 days
Coffee, tea
Cookies
www.vacuvita.com
Room
temperature
No
vacuum
Vacuum
Store in
Vacuvita Home Base
Vacuum bags
Vacuvita container
Dry foods
10-30
days
30-90
days
Vacuvita Home Base
Vacuum bags
Vacuvita container
7-8 days
Vacuvita Home Base
Vacuum bags
Vacuvita container
Nuts
30-60
days
120-180
days
Vacuvita Home Base
Vacuum bags
Vacuvita container
30-60
days
365 days
Vacuvita Home Base
Vacuum bags
Vacuvita container
Pasta
(uncooked)
180 days
365 days
Vacuvita Home Base
Vacuum bags
Vacuvita container
120 days
300 days
Vacuvita Home Base
Vacuum bags
Vacuvita container
Potato chips
5-10 days
20-30
days
Vacuvita Home Base
Vacuvita container
Rice
(uncooked)
180 days
365 days
Vacuvita Home Base
Vacuum bags
Vacuvita container
Vacuvita manual 19
Storage chart
Fridge
No
vacuum
Vacuum
Store in
Fridge
No
vacuum
Vacuum
Store in
Cheese, hard
12-15 days
50-55
days
Vacuum bags
Vacuvita container
Meat, cooked
4-5 days
8-10 days
Vacuum bags
Vacuvita container
Cooked
meals*
2 days
10 days
Vacuum bags
Vacuvita container
Meat, fresh
2 days
6 days
Vacuum bags
Vacuvita container
Desserts
5 days
10-15 days
Vacuum bags
Meat,
90 days
365 days
Vacuum bags
Vacuvita container
sausages,
smoked
Deli meats
Fish, fresh
Fruits, fresh
Lettuce
20
Vacuvita manual
3 days
2 days
3-7 days
3 days
6-8 days
4-5 days
8-20 days
6-8 days
Vacuum bags
Vacuvita container
Vacuum bags
Vacuvita container
Vacuum bags
Vacuvita container
Vacuum bags
Vacuvita container
Vacuvita container
Poultry, fresh
2 days
6 days
Vacuum bags
Vacuvita container
Spices, fresh
2-3 days
7-14 days
Vacuum bags
Vacuvita container
Vegetables,
fresh
5 days
18-20 days
Vacuum bags
Vacuvita container
www.vacuvita.com
Freezer
No
vacuum
Vacuum
Store in
Freezer
No
vacuum
Vacuum
Store in
Baked goods
6-12
months
18 months
Vacuum bags
Vacuvita container
Fruit
6-10
months
18-30
months
Vacuum bags
Vacuvita container
Bread, rolls
6-12
months
18-36
months
Vacuum bags
Vacuvita container
Meat, fresh
6 months
18 months
Vacuum bags
Vacuvita container
Coffee,
6-9
18-27
Vacuum bags
Meat, minced
4 months
12 months
Vacuum bags
beans
months
months
Vacuvita container
Coffee,
ground
6 months
12-34
months
Vacuum bags
Vacuvita container
Poultry,
fresh
6 months
18 months
Vacuum bags
Vacuvita container
Deli meats
2 months
4-6
months
Vacuum bags
Vacuvita container
Spices
3-4
months
8-12
months
Vacuum bags
Vacuvita container
Fish, fresh
6 months
18 months
Vacuum bags
Vacuvita container
Vegetables,
fresh
8 months
24 months
Vacuum bags
Vacuvita container
Vacuvita container
* Depends on ingredients.
For a full list, please visit www.vacuvita.com.
www.vacuvita.com
Vacuvita manual 21
Food Safety Tips
The vacuum packaging process extends the life of foods by removing
most of the air from the sealed container, thereby reducing oxidation,
which affects its quality and flavor. Removing air can also inhibit the
growth of microorganisms, such as molds and bacteria.
Illness-causing bacteria can grow in perishable foods within two
hours. But by refrigerating foods properly, you can help keep food
safe. You can significantly reduce the growth of microorganisms at
temperatures of 40°F (4°C) or below. Freezing at 0°F (-17°C) does
not kill microorganisms, but stops them from growing. Therefore,
the long-term storage of perishable foods should be in the freezer or
refrigerator.
It is also important to note that vacuum packaging is NOT a substitute
for canning and it cannot reverse the deterioration of foods. It can
only slow down the changes in quality. It is difficult to predict how
long foods will retain their quality because this also depends on the
condition of the food on the day it was vacuumed packaged.
Use separate containers or vacuum bags for produce and for meat,
poultry, seafood, and eggs. Placing ready-to-eat food inside a
container that has held raw meat, poultry, seafood, or eggs can spread
bacteria and make you ill. Preventing cross-contamination is simple.
Use one container or vacuum bag for fresh produce and one for raw
meat, poultry, or seafood. Before using them again, thoroughly wash
containers and utensils that have been used to hold raw meat, poultry,
seafood, or eggs. Vacuum bags are not intended to be cleaned after
being used for raw meats, poultry or seafood.
22
Vacuvita manual
Prevent cross-contamination by separating raw products
from ready-to-eat foods.
Always thaw foods in the refrigerator or microwave — do
not thaw perishable foods at room temperature.
Always take proper hygienic precautions to prevent
food-borne illnesses.
For more tips and advice on food safety and preventing food-borne
illnesses, visit www.foodsafety.gov.
Warranty
1 year Limited Warranty
Vacuvita B.V. (“Vacuvita”) warrants that from the date of purchase,
this product will be free from defects in material and workmanship
provided this product is used strictly as described in this user manual,
using only original Vacuvita parts and accessories. This limited one
year warranty shall be effective from the date of the original purchase
and shall expire one (1) year after the original purchase date (“Limited
Warranty Period”). Vacuvita, at its option, will repair or replace this
product or any component of the product found to be defective during
the Limited Warranty Period, provided the defect is not caused by
the use of any non-Vacuvita branded part or accessory or has not
been tampered with by others than Vacuvita personnel or service
agents. A replacement will be made with a new or refitted product or
component. If the product is no longer available, a replacement
www.vacuvita.com
may be made with a similar product of equal or greater value. This is
your exclusive Limited Warranty. Do NOT attempt to repair or adjust
any electrical or mechanical functions on this product. Doing so will
void this Limited Warranty. This Limited Warranty applies only to the
original purchaser of the product and only from the date of initial retail
purchase as per the original sales receipt and is not transferable. Proof
of purchase is required to obtain warranty performance.
Vacuvita dealers, service centers, or retail stores selling Vacuvita
products do not have the right to alter, modify or in any way change
the terms and conditions of this Limited Warranty. This Limited
Warranty does not cover ordinary wear and tear of parts or damage
resulting from any of the following: negligent use or misuse of the
product, use on improper voltage or current, use contrary to the
operating instructions or this DFU, disassembly, repair or alteration
by anyone other than Vacuvita or an authorized Vacuvita service
center, or use of this product with non-Vacuvita parts or accessories.
Furthermore, this Limited Warranty does not cover Acts of God such
as fire, flood, hurricanes and tornadoes. This Limited Warranty shall not
be deemed to exclude or replace any warranties set by law. Apart from
the specific legal rights conferred to you in this Limited Warranty, you
may have other rights which vary from jurisdiction to jurisdiction.
What are the limits of Vacuvita’s Liability?
Damage to a product caused by use of non-Vacuvita parts or
accessories, accident, misuse, or abuse is not covered by this Limited
Warranty. Improper care and cleaning will void this Limited Warranty.
Vacuvita shall not be liable for any indirect, incidental or consequential
damages caused by the breach of any express, implied or statutory
www.vacuvita.com
warranty or condition. Except to the extent prohibited by applicable
law, Vacuvita disclaims all warranties, conditions or representations,
express, implied, statutory or otherwise. Vacuvita does not claim the
product to be fit for a particular purpose. Vacuvita shall not be liable
for any damages of any kind resulting from the purchase, use or misuse
of, or inability to use the product including indirect, incidental, special,
consequential or similar damages or loss of profits, or for any breach
of contract, fundamental or otherwise, or for any claim brought against
purchaser by any other party. Some provinces, states or jurisdictions
do not allow the exclusion or limitation of incidental or consequential
damages or limitations on how long an implied warranty lasts, so the
above limitations or exclusions may not apply to you. This warranty
gives you specific legal rights, and you may also have other rights
that vary from province to province, state to state or jurisdiction to
jurisdiction.
How to Obtain Warranty Service
In the U.S.A.
If you have any question regarding this warranty or would like to
obtain warranty service, please visit www.vacuvita.com or email us at
[email protected].
In the U.S.A., this warranty is offered by:
Vacuvita B.V.
Orionstraat 15
2516 AS The Hague
The Netherlands
PLEASE DO NOT RETURN THIS PRODUCT TO THIS ADDRESS.
Vacuvita manual 23
Designed to suit your taste
Vacuvita B.V.
Orionstraat 15, 2516 AS The Hague, The Netherlands
www.vacuvita.com