1
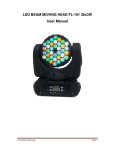
USER MANUAL
Important: Damages caused by the disregard of this user manual are not subject to
LED PAR 64 -- 36LEDs X 3W RGBW
warranty.The dealer will not accept liability for any resulting defects or problems.
CAUTION
Keep this device away from rain and moisture!
Unplug mains lead before opening the housing!
If the device has been exposed to drastic temperature fluctuation(e.g.after a
delivery),dont switch it on immediately.The arising condensation water might damage
your device.Leave the device switched off until it has reached room temperature.
This device is designed for indoor use only
only!It must be used in an area with good
ventilation.
First thanks for your use our LED par light. Vielen Dank!
Everyone involved with the installation,operation and maintenance of this device has to
� be qualified
� follow the instructions in this manual and consider this manual to be part of the total
product
� keep this manual for the entire service life of the product
� pass this manual on to every further owner or user of the product
� include every supplementary update with the original manual
Do not shake the device.Avoid brute force when installing or operating.This device is
allowed to be operated with an AC of 90V-240V.It falls under protection-class I.The
power plug must be only be plugged into a protection-class i outlet.The yellowish-green
or green conductor must be earthed!
Check the device and the power cord from time to time.Make sure the power cord is not
crimped or damaged by sharp edges.Never let the power cord come into contact with
other cables!Always connect the device to the mains least.Always disconnect from the
mains,when the device is not in use or before cleaning it.Never leave the device running
unattended.
Before your initial start-up,please make sure that there is no damage caused during
shipment.
Should there be any,don't use the device and consult your supplier.
I.SAFETY INSTRUCTIONS
you can suffer a dangerous electric shock when touching the wires!
Operate the device only after having familiarized with its functions.Keep away children
and amateurs from the device!do not permit operation by person not qualified for
operating the device.Most damages are the result of unprofessional operation!
This device has left our premises in absolutely perfect condition.In order to maintain this
condition and to ensure a safe operation,it is absolutely necassary to follow the safety or
problems.
There are no serviceable parts inside the device.Maintenance and service operations can
be only carried by a qualified person.Please consider that unauthorized modifications on
the device are forbidden due to safety reasons!Please note that damages caused by
CAUTION: Be careful with your operations.With a dangerous voltage
-1-
Master-Slave Set
Two or more of the lights connected with 3-pin signal cable, set any of a host
for the demonstration program or gradual, jump, and other fixtures set to
receive address to SLav.
manual modifications on the device or unauthorized operation by unqualified persons are
not subject to warranty.
If this device will be operated in any away different to the one described in this manual,it
may suffer damages and the guarantee becomes void. Furthermore,any other operation
may lead to dangers like short-circuit,burns,electric shock,etc.
DMX Operation
The wires must not come into contact with each other,otherwise the fixtures will not
II.OPERATION
work at all,or not work properly.
Menu extension
Only use a stereo shielded cable and 3-pin XLR-plugs and connectors in order to connect
the controller with the fixture or one fixture with another.
Press the Menu button to choose different submenu .
Press the Up or Down buttons to select the submenu you need ,choose it press enter
button to save it .
DMX start address setting
The device has maximum 8 channels.if you set,for example,the start address to channel
1,the device will use the channels#1st to 8th for control.the first available channels for
the next fixture will be the 9th please be sure that you do not have any overlapping
channels in order to control each device correctly and independently form any other
fixture on the DMX chain.if tow ,three or more devices are addressed similarly,they will
work similarly.
Press the Menu button until it shows AXXX ,XXX is the address your set last time .
Press Up or Down button to select your desired address ,ect. A001.
Press Enter button to save .
Auto Operation
Press the Menu button until it shows one of CF01/CJ01/dEoo
They mean RGBW color fade/ RGBW color jump to change/Demo Mode.
Press Up or Down button to select one of them the device will be operated automatically
by the built-in programs.
Press enter button ,the display will show CF01 or CJ01 ,press Up the digital will go up
until CF50or CJ50.
Press Up or Down button to select .
Press Enter button to save.
DMX control mode selection
This device has 2 different DMX control mode: one is d001,another one is A001.
d001 is 4 CH mode, A001 is 8 CH mode.
If two, three or more devices are set to same mode,they will work similarly .
Press the Menu button until it shows d001 or A001.
Press Enter button to select your desired mode.
Music Operation
Press the Menu button until shows SoUd .
Press Up or Down button to select .
Press Enter button to save (the device will be operated by the music signal received by
the built-in micro-phone).
-2-
LED digital display window Function CRT:
shows "
A512
8CH dmx mode
d512
4CH dmx mode
SLAv
Slave mode
CF50
RGBW color fade
CJ50
RGBW color jump
to change
CP50
Color Pulse
(csad)",then you come into the expand menu.
When you continue press "menu" it will shows all the expand menu ,the
expand menu have 8 different in total included
.
How to exit the expand menu:
when it shows "
automatically and exit the expand menu.
Expand Menu extenion:
(CSAd):means color scale adjustment.
Default is 255(100%)
r0-255
G0-255
b0-255
W0-255
RGBW manual
dimmer
Strobe 1-50
Strobe
Sound
Sound
Demo
Demo mode
Mnaual set : press "Enter" to choose different submenu.Example:(r255),under
submenu, press "up "or "down" to change the value from 0-255.
DMX controller Set:
when shows
,press "up and down "together until it shows
,then come into dmx controller adjustment mode,the one in the Slave mode ,it
will receive maximum channels value from 1 to 4 ch of controller . Press "Enter " exit the
dmx controller adjustment mode ,you can see the values under the submenu such as r255
or g255 etc .
Expand Menu:
When you are at "
" ,press enter ,it will remember all your operation s
(demo)"menu, press "Enter last" 5 seconds,it will
(Lt30)means:LED screen saver (waiting time)(0-90'')
Default is 30'', under menu function ,if waiting more than 30 seconds ,it will come into
-3-
screen save automaticlly .
synchronization(on/off)
If set 0,screen saver function will be closed . Press "up" or "down"to change time of
waiting 1-90''.
"Syon" means open the master-slave functtion (default). "SyoF"
Note:screen saver only apply to "function menu" of "LED digital display window
Function CRT",, under "Expand menu" it will never come into screen saver.
Press "UP" or "Down "to change situation.
LoAd
Under screen saver ,press any button exit scree saver .
Press "Enter" until it shows LdEd(loaded),it means have put all settings back to default
entries.
(HPon):means high power (on/off)
Power optional."HPon" means open high power on(default) ,"HPoF" means close high
power on.
HPon=actual powerX100%
Press "UP " shows"HPon"
HPoF=actual power33.3%
Press "Down"shows"HPoF"
rEturn
press "Enter" ,it will remember all your operation s automatically and exit the expand
menu.
4CH Dmx mode Function CRT:
(SFon): means signals flashing (on/oFF)
4CH
If the light as slave,which have not receive the signal from master light or dmx
controller ,it's screen will be flash to remind you .
NO.
CH1
CH2
CH3
CH4
"SFon " mens opne teh signals flashing function(Default is open)."SFof "means close the
function .
Press "UP "to open the function ,press "Down "to close the function .
DMX delay(on/oFF)
Value
0-255
0-255
0-255
0-255
Function
Red color dimmer
Green color dimmer
Bluecolor dimmer
White color dimmer
8CH Dmx mode Function CRT:
"ddon" means open the dmx delay of controller joecky,"ddoF" means close the dmx
delay of controller jockey.(default)
8CH
Press UP to open the funtion
NO.
Value
Function
Press Down to close the funtion
CH1
0-255
Mater dimmer
-4-
CH2
0-255
Red color dimmer
CH3
0-255
Green color dimmer
CH4
0-255
Blue color dimmer
CH5
0-255
White color dimmer
0-5
N/A
Slow to fast
CH6
6-255
0-5
201-255
0-255
(Note:you can use Mater dimmer to blackout) speed
from slow to fast ,6 is slowest ,255 is fasteset
CH8
N/A
Sound control
6-10
CH7
11-15
16-20
21-25
31-255
26-30
Color
optional
31-190
191-200
(Note:can use Mater dimmer to blackout,this step just
change the lights to sound mode, changes of the lights is
not depend on the controller at the moemnt,but depend
on the MIC of each lights ,so the lights can not work
synchronously some times .)
Colour temperature, every 5 values for a
gears,Example:
201-205:3200k
206-210:3400k
...........
Macro speed channels
Slow to fast
This CH work with CH7 it can adjust the speed
of Color Fade in&Fade out &Color jump to
change & Color pulse variable from slow to
fast ,each 5 value for a gears
III. Technical specifications
Color Fade in&Fade out
(Use Mater dimmer black out, next CH to adjust speed)
Color jump to change
Use
Mater
dimmer
black out, next CH to adjust speed)
(
Color pulse variable
(Use Mater dimmer black out, next CH to adjust speed)
N/A
Use Mater dimmer black out
Each value correspond a preset color
Red 100% Green100%Blue100%White100%
-5-
Power supply:
AC90-250V,50-60Hz
Power consumption:
120W max
LED quantity:
36X3W LEDs(Red 8+Green
10+Blue10+White8)
Service life:
Exceed 50,000 hous
Working mode:
Auto/Sound mode,DMX mode 4 or 8
channels selectable
Dimensions:
240X240X340mm
Weight(net/gross):
2.41gks/3.5kgs