1
ccxs_qrg_EN.fm Seite 1 Montag, 7. Mai 2007 6:39 18
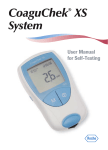
CoaguChek XS
®
Quick Reference Guide
ccxs_qrg_EN.fm Seite 2 Montag, 7. Mai 2007 6:39 18
Determining INR/Quick value from capillary blood
Please note: This Quick Reference Guide is not
intended as an alternative to reading the User’s
Manual. Before performing a test for the first time,
be sure to consult the User’s Manual regarding how to set
up and use your CoaguChek XS monitor.
ccxs_qrg_EN.fm Seite 3 Montag, 7. Mai 2007 6:39 18
Preparing to test and testing
Preparing to test and testing
Preparing to test
1
Have the test strip container close by.
2
Make sure the code chip associated with that lot of test strips is
inserted in the monitor.
Prepare the lancing device by inserting a fresh lancet.
Do not prick your finger until asked to do so.
The CoaguChek Softclix lancing device has been specifically developed for self-monitoring by the patient.
It is not suitable for use in hospitals or for testing
different persons as there is a risk of contamination.
3
ccxs_qrg_EN.fm Seite 4 Montag, 7. Mai 2007 6:39 18
Preparing to test and testing
Testing
pm
28:88 am
18:88
88-88-88
error
set
code
mem
888
%Q
Sec
INR
QC
C
1
Wash your hands with soap and warm water. Dry them thoroughly.
2
Place the monitor on a level, vibration-free surface or hold it in
your hand so it is roughly horizontal. Turn the monitor on by
pressing the On/Off button
.
3
Check that all of the display segments are functioning and that the
date and time are correctly set.
Note: An explanation for each symbol appearing on the display is
given at the end of this Quick Reference Guide.
4
ccxs_qrg_EN.fm Seite 5 Montag, 7. Mai 2007 6:39 18
Preparing to test and testing
11:23
4
16-05-05
The flashing test strip symbol prompts you to insert a test strip.
Remove a test strip from its container.
Close the container again with the stopper immediately after removing the test strip. Leaving the container open for a longer period of time may destroy
the strip and create error messages.
5
Slide the strip in as far as it will go (in the direction indicated by
the arrows). A beep tone indicates that the monitor has detected
the test strip (providing the beep tone is turned on in the settings).
5
ccxs_qrg_EN.fm Seite 6 Montag, 7. Mai 2007 6:39 18
Preparing to test and testing
11:25
16-05-05
107
Sec
6
The code number of the code chip inserted in the monitor flashes
in the display. Make sure that this number is identical with the
code number printed on the test strip container. If the two numbers are identical, confirm by pressing the M button.
7
The hourglass symbol shows that the test strip is warming up.
When this process is complete, you may apply the drop of blood.
8
The blood drop symbol and the application area flash to indicate
that the monitor is ready to test. At the same time a 120-second
countdown begins. Within this time you must have applied the
drop of blood to the test strip, otherwise you receive an error message
The CoaguChek Softclix lancing device has been specifically developed for self-monitoring by the patient.
It is not suitable for use in hospitals or for testing
different persons as there is a risk of contamination.
6
ccxs_qrg_EN.fm Seite 7 Montag, 7. Mai 2007 6:39 18
Preparing to test and testing
9
Now prick the side of a fingertip with the lancing device. Stroke
the lanced finger until a drop of blood is formed. Do not press or
squeeze the finger.
Apply the first drop of blood from the finger.
10 Apply the blood directly from the finger to the semicircular, transparent sample application area of the test strip. Alternatively, you
can touch the blood drop against the side of the sample application area (instead of applying it to the centre from above). The test
strip draws up the blood by capillary action. During this process
you must hold the blood drop to the test strip until the flashing
blood drop symbol disappears and the monitor beeps (providing
the beep tone is turned on).
Apply the blood drop to the test strip within 15 seconds of
pricking the fingertip. When applied from above, the blood must
cover the entire sample application area.
7
ccxs_qrg_EN.fm Seite 8 Montag, 7. Mai 2007 6:39 18
Preparing to test and testing
11:27
16-05-05
11:28
16-05-05
QC
11 When you have applied enough blood, the blood drop symbol disappears and measurement starts.
Do not add more blood. Do not touch the test strip until the
result is displayed.
12 Following a successful outcome of the automatic quality control
check ("QC" is shown with a tick after it), the actual test begins.
The hourglass flashes until the monitor has the result.
8
ccxs_qrg_EN.fm Seite 9 Montag, 7. Mai 2007 6:39 18
Preparing to test and testing
11:29
16-05-05
30
INR
13 The result is displayed in your chosen unit, and is automatically
saved. Enter the test result in your patient logbook.
14 Remove the test strip from the measurement chamber and turn
the monitor off.
9
ccxs_qrg_EN.fm Seite 10 Montag, 7. Mai 2007 6:39 18
Display information and symbols
Display information and symbols
The following symbols may appear in the display.
Symbol
Meaning
Battery status:
• When the batteries still have their full
charge, all segments are lit.
• Individual segments disappear one by one
as the batteries become weaker.
• When there is no segment remaining, you
can no longer perform a test. You can,
however, still access the monitor's
memory.
Test strip (without sample application area)
Test strip (with sample application area)
QC
Automatic quality control successfully
completed
Apply blood sample
User must wait until the monitor has
completed an action.
888
10
•
•
•
Results in the chosen unit;
Error numbers
Code number
ccxs_qrg_EN.fm Seite 11 Montag, 7. Mai 2007 6:39 18
Display information and symbols
Symbol
Meaning
%Q
Results are displayed as a Quick percentage
value.
Sec
Results are displayed in seconds.
INR
Results are displayed in INR (International
Normalized Ratio) units.
Result is above the chosen therapeutic range
(only with INR as unit)
Result is below the chosen therapeutic range
(only with INR as unit)
Result is above the measuring range.
Result is below the measuring range.
set
The monitor is in Setup Mode.
code
Gives the code number of the code chip
presently inserted.
mem
The monitor is in Memory Mode.
error
Reports an error (see User’s Manual)
Room or monitor temperature is outside the
acceptable range.
Measurement chamber cover is open.
11
ccxs_qrg_EN.fm Seite 12 Montag, 7. Mai 2007 6:39 18
0123
Roche Diagnostics GmbH
D-68298 Mannheim
Germany
www.roche.com
www.coaguchek.com
QRG for 0 4626168001 (03) 2006-12 EN
COAGUCHEK and SOFTCLIX
are trademarks of Roche.