1
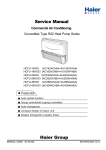
Service Manual
Commercial Air Conditioning
Duct Type
HDU-24H03/H
(AD242AHAAA+AU242AOAAA)
HDU-28H03/H
HDU-42H03/H
(AD282AHAAA+AU282AOAAA)
(AD142AMBHA+AU142ARBHA)
2. Products technical parameters
Contents
1. Description of Products & Features
2. Specifications
3. Mechanical Data
4. Electrical Data
5. Electrical Control Functions
6. Diagnostic Information
7. Installation Instruction
8. Exploded Views & Part Lists
Features
High static pressure 196Pa
Flexible setting of the air outlet
Super-silence design
Wired Remote Control
Haier Group
2002.9.
1. DESCRIPTION OF PRODUCTS & FEATURES
1.1 Products coding direction
Old code
H DU – 24
H 03/ H
High static pressure 196Pa
Power: 03(230V/50Hz).04(240V/50Hz).12(115V/60Hz).13(230v/60Hz)
“H” refer to cooling and heating, ”C” refer to cooling only
Nominal cooling capacity (BTU/h), 24=24000BTU/h
Indoor and outdoor unit code: "D" Duct type; "U" Outdoor unit
“H” means “Haier”
New code
A D 24
2 A H A A A
Climate type: T1 (see table 1)
Design number (A.Fix speed, H.inverter)
Product type: A stands for heat pump type, refrigerant is R22
B stands for heat pump type, refrigerant is R407
M stands for cool only type, refrigerant is R22
N stands for cool only type, refrigerant is R407
Appearance character, high static pressure type
Product series: one by one type
Applicable voltage: 2 stands for 220-240V/50Hz,4 stands for 220v/60Hz
N stand for 380V/50Hz
Cooling / Heating capacity,24=24000BTU/h
Product type : “B” stands for cassette type, “C” stands for convertible
type, ”D” stands for duct, “S” stands for split type, ”Q” stands for chiller
system, "E" stands for ceiling concealed type, “U” stands for outdoor unit
Air conditioner
1.2 Brief Introduction to T1 T2
T3 working condition
Table 1
Climate type
Type of Air Conditioner
T1
T2
T3
Cool only
18
43
10
35
21
52
Heat pump
-7
43
-7
35
-7
52
Electricity heating
43
35
1.3 Operating Range of air conditioners
Normal condition
Operation
Operation Range Outside / Inside
Cooling
150C – 43oC
Drying
150C – 43oC
Heating
-7oC – 18oC
52
1.4 Brief Introduction to Series of Products
i) Seriation of products:
The following air duct type air conditioners are now available for export:
HDU-24H03/H HDU-28H03/H HDU-42H03/H
ii) Features of Products:
a. Totally concealed machine body
All the machine body is to be installed inside the ceiling, having no effect on the
beauty of the room and without taking any room space.
b. Air intake via the rear air intake duct
This new design has changed the former unique pattern of air intake, and a larger
distance between air intake and air return cycles as well as better air quality can be achieved.
c. Flexible and easier installation
The machine body is to be installed in a totally concealed way,its fan system has a longer distance
coverage so as to supply its airflow to several rooms, and the indoor unit may be installed inside the
ceiling of a room or corridor. The installation is simple and flexible, and there is no need to have
specified personnel for management, thus cutting down the expenses; the machine is lighter and
smaller, and convenient for installation, it takes an extremely small building space, thus lower the
construction cost; the indoor unit is to be concealed inside the ceiling, and hence the usable space
can be saved and the room decoration will not be affected.
2. SPECIFICATION
Piping
Outdoor unit
Indoor unit
Item
Model
Function
Capacity
BTU/h
Total power input
W
EER or COP
BTU/W
Dehumidifying capacity
10‐³×m³/h
Power source
PH-V-Hz
Running current
A
Power cable
Unit model (color)
Fan
Type × Number
Speed
r/min
Air-flow(H-M-L)
m³/h
Heat exchanger Type / Diameter
Flow
Total area
m²
Temp. scope
Static pressure
Pa
Dimension
External
mm×mm×mm
L×W×H
Package
mm×mm×mm
Drainage pipe (material , I.D./O.D.)
Control type (wireless/wired)
Fresh air hole dimension
mm
Noise level
(H-M-L)
dB(A)
Weight
(net / gross)
kg
Unit model (color)
Compressor
Model / Manufacture
Type
Fan
Type × Number
Speed
r/min
Air-flow(H-M-L)
m³/h
Heat exchanger Type / Diameter
Flow
Total area
m²
Temp. scope
Dimension
External
mm×mm×mm
L×W×H
Package
mm×mm×mm
Drainage pipe (material , I.D./O.D.)
Refrigerant control method
Defrosting
dB(A)
Noise level
H-M-L
Four way valve
Weight
(net / gross)
kg
Refrigerant
Type
Charge
kg
Pipe
Liquid
mm
Gas
mm
Connect method
m
Drop
Between
I.U. & O.U.
m
Piping length
HDU-24H03/H
Cooling
Heating
24000
2800
8.6
26000
2700
9.6
3.0
1PH,220-230V~,50HZ
13.0
12.5
/
AD242AHAAA / WHITE
centrifugal×3
1230/-/910
900~1500
TP2M/9.52
6/6
0.221
2-7
30
1410×645×350
1557×800×370
PVC 18/20
wired
/
42/36/30
48/58
AU242AOAAA / WHITE
ZR34K3-PFJ-522 / COPELAND
scroll
Axial 1
840/-/640
3240
TP2M/9.52
10/10
0.62
43-60
948×830×340
1050×979×440
PVC 18/20
capillary
Auto
58/-//
74/89
R22
2.4
9.52
15.88
FLARED
MAX :15
MAX :30
Piping
Outdoor unit
Indoor unit
Item
Model
Function
Capacity
BTU/h
Total power input
W
EER or COP
BTU/W
Dehumidifying capacity
10‐³×m³/h
Power source
PH-V-Hz
Running current
A
Power cable
Unit model (color)
Fan
Type × Number
Speed
r/min
Air-flow(H-M-L)
m³/h
Heat exchanger Type / Diameter
Flow
Total area
m²
Temp. scope
Static pressure
Pa
Dimension
External
mm×mm×mm
L×W×H
Package
mm×mm×mm
Drainage pipe (material , I.D./O.D.)
Control type (wireless/wired)
Fresh air hole dimension
mm
Noise level
(H-M-L)
dB(A)
Weight
(net / gross)
kg
Unit model (color)
Compressor
Model / Manufacture
Type
Fan
Type × Number
Speed
r/min
Air-flow(H-M-L)
m³/h
Heat exchanger Type / Diameter
Flow
Total area
m²
Temp. scope
Dimension
External
mm×mm×mm
L×W×H
Package
mm×mm×mm
Drainage pipe (material , I.D./O.D.)
Refrigerant control method
Defrosting
dB(A)
Noise level
H-M-L
Four way valve
Weight
(net / gross)
kg
Refrigerant
Type
Charge
kg
Pipe
Liquid
mm
Gas
mm
Connect method
m
Drop
Between
I.U. & O.U.
m
Piping length
HDU-28H03/H
Cooling
Heating
28000
3450
8.1
30000
3200
9.4
3.0
1PH,220-230V~,50HZ
13.0
12.5
/
AD282AHAAA / WHITE
centrifugal×3
1230/-/910
900~1500
TP2M/9.52
6/6
0.24
2-7
30
1410×645×350
1557×800×370
PVC 18/20
wired
/
42/36/30
48/58
AU282AOAAA / WHITE
JT95BCBV1L / DAIKIN
scroll
Axial 1
840/-/3240
TP2M/9.52
10/10
0.62
43-60
948×830×340
1050×979×440
PVC 18/20
capillary
Auto
58/-//
74/89
R22
2.8
9.52
15.88
FLARED
MAX :15
MAX :30
Piping
Outdoor unit
Indoor unit
Item
Model
Function
Capacity
BTU/h
Total power input
W
EER or COP
BTU/W
Dehumidifying capacity
10‐³×m³/h
Power source
PH-V-Hz
Running current
A
Power cable
Unit model (color)
Fan
Type × Number
Speed
r/min
Air-flow(H-M-L)
m³/h
Heat exchanger Type / Diameter
Flow
Total area
m²
Temp. scope
Static pressure
Pa
Dimension
External
mm×mm×mm
L×W×H
Package
mm×mm×mm
Drainage pipe (material , I.D./O.D.)
Control type (wireless/wired)
Fresh air hole dimension
mm
Noise level
(H-M-L)
dB(A)
Weight
(net / gross)
kg
Unit model (color)
Compressor
Model / Manufacture
Type
Fan
Type × Number
Speed
r/min
Air-flow(H-M-L)
m³/h
Heat exchanger Type / Diameter
Flow
Total area
m²
Temp. scope
Dimension
External
mm×mm×mm
L×W×H
Package
mm×mm×mm
Drainage pipe (material , I.D./O.D.)
Refrigerant control method
Defrosting
dB(A)
Noise level
H-M-L
Four way valve
Weight
(net / gross)
kg
Refrigerant
Type
Charge
kg
Pipe
Liquid
mm
Gas
mm
Connect method
m
Drop
Between
I.U. & O.U.
m
Piping length
HDU-42H03/H
Cooling
Heating
42000
4800
8.75
44000
4700
9.46
5.0
3N,380-400V~,50HZ
9.2
9.0
/
AD42NAHAAA / WHITE
centrifugal×3
1090/-/930
1560~2580
TP2M/9.52
3/3
0.338
2-7
30
1410×645×350
1557×800×370
PVC 18/20
wired
/
42/36/30
62/77
AU42NAQAAA / WHITE
H23A62QDBE / Bristol
scroll
Axial 2
840/-/6000
TP2M/9.52
5/5
0.92
43-60
948×1225×340
1050×1375×440
PVC 18/20
capillary
Auto
64/-//
91/111
R22
4.0
9.52
19.05
FLARED
MAX :30
MAX :50
3. Mechanical data
Indoor Unit
Air outlet
Duct
Duct
Drainpipe
Air inlet
Outdoor Unit
Connecting piping
and electrical wiring
Air inlet
Air inlet
Air outlet
Air outlet
Compressor
(Inside of unit)
Drain hose
HDU-24H03/H
HDU-28H03/H
HDU-42H03/H
indoor unit dimensions
HDU-24H03/H HDU-28H03/H
840
750
205
30
130
HDU-42H03/H
controller introduction
Operation
Buttons and display of the wire controller.
MODE
CLOCK
Used to select AUTO
RUN, COOL, DRY,
HEAT and FAN
operation.
Used to set correct time.
TIMER
Used to select
TIMER ON,
TIMER OFF,
TIMER ON/OFF.
FAN SPEED
MODE
FAN
SWING
Used to select fan
speed: LO, MED, HI,
AUTO
AUTO
TEMP
SET
% ROOM
ON
AM
PM
CLOCK
SET
TIMER
SLEEP
C
Used to set clock and
timer setting.
Power ON/OFF
Used for unit start and
stop.
Cautions:
On cooling only unit, heating
mode is not available.
Used to select your
desired temp.
FILTER RESET RESET
OFF
AM
PM
ON/OFF
TIME
TEMP
SET
Used to confirm Timer
and Clock settings.
SLEEP
Used to select sleep
mode.
Note:
The above information is the explanation of
the displayed information therefore varies
with those displayed in actual operation.
Operation
Buttons and display of the wire controller.
DRY
HEAT
AUTO
COOL
Remote control
SLEEP
MODE
FAN
SWING
AUTO
TEMP
SET
% ROOM
ON
AM
PM
CLOCK
SET
TIMER
SLEEP
C
FILTER RESET RESET
OFF
AM
PM
ON/OFF
FAN SPEED
TIMER ON
OPERATING LAMP
TIMER OFF
FAN OPERATION
CLOCK
TEMP.
Clock
When unit is started for the first time, clock should be adjusted as follows:
Press CLOCK button, "AM"or "PM" flashes.
Press
or
to set correct time. Each press will increase or decrease 1min. If the
button is kept depressed, time will change quickly.
After time setting is confirmed, press SET, "AM "and "PM" stop flashing, while clock
starts working.
OPERATION
The air conditioner has the function of POWER
FAILURE RESUME.
C
Fan operation
Enjoy yourself by just a gentle press.
(1) Unit start
(3) Fan
Press ON/OFF button, unit starts.
Previous operation status appears on display.
(Not Timer setting)
Power indicator lights up.
Press FAN button. For each press, fan speed
changes as follows:
LOW
(2) Select operation mode
Press MODE button. For each press, operation
mode changes as follows:
AUTO
COOL
DRY
HEAT
FAN
Unit will run in selected mode.
stop display at "
" FAN.
For cooling only type no " HEAT
" function.
MID
HIGH
Unit will run at selected fan speed.
(4) Unit stop
Press ON/OFF button.
Only time and room temp remains on LCD.
All indicators go out.
Vertical flap closed automatically.
Hints
Wire controller can memorize settings in each operation mode. To run it next time just select
the operation mode and it will start with the previous setting.
No reselecting is needed.(TIMER ON/OFF needs reselecting)
In FAN mode, temp. can't be set.
OPERATION
AUTO RUN, COOL,HEAT and DRY operation
Recommendations
Use COOL in summer.
Use HEAT in winter.
Use DRY in spring,autumn and in damp climate.
NAF
EDO
M
G
NW
S
I
OT UA
P
M
ET
2
KC
OLC
TES
4
TES
3
M
R
EIT
PELS
C
RELTFSEIERT
TESER
M A
5
O
F
N
/
1
(1) Unit start
(4) Fan speed selection
Press ON/OFF button, unit starts.
Previous operation status appears on display
(Not Timer setting). Power indicator lights up.
Press FAN button. For each press, fan speed changes
as follows:
AUTO
(2) Select operation mode
Press MODE button. For each press, operation mode
changes as follows:
LOW
MID
HIGH
AUTO
Unit will run in operation mode displayed on LCD.
Stop display at your desired mode.
Unit runs at the speed displayed on LCD.
In HEAT mode, warm air will blow out after a short
period of time due to cold-draft prevention function.
In DRY mode, when room temp. becomes 2 C higher
than temp. setting, unit will run intermittently at LOW
speed regardless of FAN setting.
(3) Select temp. setting
(5) Unit stop
Press TEMP button
Press ON/OFF button.
Only time and room temp remains on LCD.
All indicators go out.
Vertical flap closes automatically.
AUTO
COOL
DRY
HEAT
FAN
Every time the button is pressed, temp. setting
increases 1 C.
If button is kept depressed, temp.setting will
increase quickly.
Every time the button is pressed, temp. setting
decreases 1 C.
If button is kept depressed, temp. setting will
decrease quickly.
Unit will start running to reach the temp. setting
on LCD.
Hints
Wire controller can memorize each operation
status. When starting it next time, just press
ON/OFF button and unit will run in previous
status.
OPERATION
C
TIMER operation
Set Clock correctly before starting Timer operation.
You can let unit start or stop automatically at following time: Before you wake up in the
morning, or get back from outside or after you fall asleep at night.
TIMER ON/OFF
(1)After unit start, select your desired
operation mode.
Operation mode will be displayed on LCD.
Power indicator lights up.
(2)TIMER mode selection
Press TIMER button to change TIMER mode.
Every time the button is pressed, display changes
as follows:
ON
ON
OFF
blank
OFF
Select your desired TIMER mode (ON or OFF)
(3)Timer setting
Press TIME
button.
Every time the button is pressed, time increases 10min.
If button is kept depressed, time will change quickly.
Every time the button is pressed, time decreases 10min.
If button is kept depressed, time will change quickly.
Time will be shown on LCD. It can be adjusted within
24hours.
(4)Confirming your setting
After setting correct time, press SET button to confirm
"ON" or "OFF" stops flashing.
Time displayed: Unit starts or stops at x hour x min (ON
or OFF).
Timer mode indicator lights up.
To cancel TIMER mode
Just press TIMER button several times until TIMER mode disappears.
Hints
Wire controller possesses memory function, when use TIMER mode next time, just
press SET button after mode selecting if timer setting is the same as previous one.
OPERATION
C
TIMER ON-OFF
(1)After unit start, select your desired
operation mode
Operation mode will be displayed on LCD.
Power indicator lights up.
Every time the button is pressed, display changes as follows:
ON
OFF
After time setting, press TIMER button to confirm.
"ON" stops blinking, While "OFF" starts blinking.
Time displayed: Unit starts at Xhour X min.
(2) Press TIMER button to change TIMER
mode
ON
(4) Time confirming for TIMER ON
(5)Time setting for TIMER OFF
Follow the same procedures in "Time setting for
TIMER ON".
blank
OFF
(6)Time confirming for TIMER OFF
ON
Select OFF
.
(3)Time setting for TIMER ON
After time setting, press SET button to confirm
"OFF" stops flashing.
Time displayed: Unit stops at X hour X min.
Press TIME button.
Every time the button is pressed, time increases 10min.
If button is kept depressed, time will change quickly.
Every time the button is pressed, time decreases 10min.
If button is kept depressed, time will change quickly.
Time will be shown on LCD.
It can be adjusted within 24hours.
AM refers to morning and PM to afternoon.
To cancel TIMER mode
Just press TIMER button several times until TIMER mode disappears.
According to the Time setting sequence of TIMER ON or TIMER OFF, either Start-Stop or Stop-Start can
be achieved.
OPERATION
Comfortable Sleep
At night, before going to bed you
can press down the SLEEP button
on the controller and the airconditioner will run by the
comfortable sleeping mode to
make you sleep more comfortable.
C
Press SLEEP button once to make the air conditioner have the previous-set sleep time (first poweron is "1h"), the sleep symbol will appear. Press time button / , you can choose the time in 1~8
hours. Each press of / , the time increases/reduces 1 hour and "xh" appears in the humidity
setting part, "OFF" appears in "TIMER OFF" display part and timer-off time; press SLEEP button
again to cancel sleep function, the sleep symbol diappears.
In cooling, dehumidifying mode
One hour after sleeping operation start, the temp. is 1 C higher than the setting one. After another
hour the temp. rises 1 C and then run continuously for another 6 hrs' and then close. The actual
temp. is higher than the setting one which is to prevent from being too cool to your sleep.
In heating mode
One hour after start up, the temp. decrease 2 C lower than the setting one. After another hour
decrease by more 2 C.
The temperature will automatically rise by 1 C after another 3 hrs' operation, and then automatically
close after 3 hrs' continuous operation. The actral temperature is lower than the setting one which
is to prevent from being too hot to your sleep.
Note:
In AUTO mode, unit will run in SLEEP function according to the operation mode.
After setting SLEEP function, it is forbidden to calibrate clock.
If the set sleep-time does not reach 8 hours, the unit will stop operation automatically after set time
is complete.
Set "TIMER-OFF" function first, then set SLEEP, and the sleep-set is performance; set TIMER-ON
function first, the sleep function can only be set before TIMER-ON; if set theSLEEP function first,
the TIMER function can not be set.
SETTING T
SHUT DOWN
1 hr
SLEEP RUN BEGINS
SLEEP RUN STOPS
about 6 hrs
decrease 2 C
1 hr
1 hr
decreases 2 C
increase 1 C
about 3 hrs
3 hrs
1 hr
increase1 C
increase 1 C
SHUT DOWN
SETTING T
SLEEP RUN BEGINS
Heat mode
SLEEP RUN STOPS
Cooling mode
INSTALLATION MANUAL FOR WIRE CONTROLLER
1. Remove upper part of wire controller
Remove upper part of wire controller by press.
PCB is mounted on lower part of wire
controller, be careful not to damage it.
Upper part of wire
controller
Lower part of wire
controller
2. Install wire controller
(1) For exposed installation,
use 2 wood screws (accessory).
(2) For recessed installation,
use 2 wood screws (accessory).
Note
Try as far as possible a flat surface for installation. Don't use excessive
force when tightening screws, or lower part might got deformed.
INSTALLATION MANUAL FOR WIRE CONTROLLER
3. Indoor unit wiring
Hint
When make wiring, please keep
a distance between wires and
power supply cord.
Connect terminals (A,B,C,D) on lower part of
wire controller to terminals (A,B,C,D) on PCB
of indoor unit.
wiring from here
AB
Wire size
CD
Lower part of
wire controller
Cord kind
Size
Shield wire (4 core)
(refer to Hint 3,4)
0.33mm2
Use shielede wires for telecommunication
between wire controller and indoor unit;
indoor unit and outdoor unit. Ground the
shield on one side.
Otherwise misoperation because of
noise may occur.
Signal wire is self-provided.
Shielded wire
ground
Hint
Tread surface of the terminal well so that shielding may not contact other part.
4. Replace the upper part of wire controller
Be careful not to press the wiring.
Hint
1. Switch box and cord for wiring are not supplied.
2. Don't touch PCB with hand.
4. Mechanical data
model: HDU-24H03/H HDU-28H03/H HDU-42H03/H
model: HDU-24H03/H HDU-28H03/H
model: HDU-42H03/H
A
B
C
C6
104
3
1
100UF/16V
C5
+5
+5
7
R2
10K
600D
7805
Vout
Vin
C25
3
100UF/16V
1
+12
R9
1K
C9
103
R5
10K
R33
10K
+12
R29
10K
1K
R7
+5
C27
104
C17
4.7UF/50V
R8
10K
10K
R10
+5
+5
+12
8
5
IC7
4 6
+12
R3
10K
LM358
DL3
IC2
C14
103
DL2
CN11
C16
104
XT
CEPKWYG
DL6
GND
A B C D
TKGG DL1
FQPV
D
1
CN12
JEFCUWYC
+12
GND
2
2
2
7812
Vout
OSC
C4
104
Vin
1
104
C7
R1
5.6K
9014
Q4
R32
10K
+5
10UF/16V
C13
+5
Q1
9014
R4
1K
+12
GND
2
+5
31
30
29
12
13
14
C12
L1
101K
D4
D2
4.7UF/50V
3
2200UF/35V
C3
CN1
EX HT
21
20
19
18
17
16
D3
D1
103
32
11
+5
33
10
C18
34
9
CN3
T1
4
CN9
CHECK
R11
10K
35
8
+5
36
7
VREF
37
6
C2
10K
R13
+5
L2
331K
C23
104
R24
RA1
5.6K
+5
0.1UF/275V
R15
20K
22
23
24
25
26
27
28
38
5
15
39
4
41
42
40
TEST
RESET
XIN
XOUT
GND
IC1
TMP87C846
VDD
4
3
2
1
3
LX
C8
102
5
0.1UF/275V
Q3
9014
C1
1
1
2
3
4
5
6
7
8
9
C19
103
8
3
VR
FUSE
+12
I8
I7
I6
I5
I4
I3
I2
I1
GND
6
6
104
C20
CN10
R27
10K
R26
10K
+12
DL5
18
17
15
16
14
13
12
11
10
S
N
L
TLP521
IC5
TLP371
IC4
+12
Q8
Q7
Q6
Q5
Q4
Q3
Q2
Q1
VCC
R12
5.6K
+5
IC3
2803
R14
1K
R18
330
3.15A/250V
R6
10K
4
2
DL4
CN2
Q2
IC7
LM358
+12
CA1
R25
1K
5.6K
R21
SHY
LN
5
C21
104
+12
7
103
C10
33K
C11
103
R17
7
41
40
39
28
JK6
JK5
JK1
JK2
JK3
R16
2.2K
LED
LF
N
MF
HF
D5
8
CN4
CN5
CN8
C22
47
0.01UF/275
R28
FM
PUMP
D6
R23
10K/0.5W
R22
10K/0.5W
8
N
S
A
B
C
D
indoor PCB of HDU-24H03/H HDU-28H03/H HDU-42H03/H
SN: 0010400132
A
B
C
D
CT1
CN3
1
R7
DB1
TM TH
EX HT
CN2
CA1
R7
840
D8
4148
560
FS
C7
10UF/16V
TEST
C13
1K
840
R5
1K
C8
10UF/16V
R6
2
2
HEAT
IC5
T600D
10K
R9
470UF/16V
R4
5.1K
R3
5.1K
+5
COOL
C18
103
+5
RW
101
+5
R21
10K
+5
+5
C11
104
OSH
FIU
RXJG
RA1
1
C6
104
3
100UF/16V
C5
+5
C12
104
C9
104
Vout
VOLTREG
+5
2
OSC
8MHz
C10
4.7UF/50V
R8
1K
GND
2
D2
D3
4
CS
SK
DI
Vin
14
13
1
3
C4
104
R10
10K
D1
C3
2200UF/35V
+12
+5
D4
2
1
4PIN
+5
CN1
15
16
17
18
VAREF
DO
VSS
11
12
19
21
8
20
22
7
9
23
10
24
25
26
27
28
6
TEST
VCC
RESET
IC1
TMP87P808N
4
5
4
3
2
1
3
4PIN
2
1
C2
0.1UF/275V
CN4
C17
103
R20
1K
+5
5.6K
R19
8
1
2
3
4
5
6
7
IC2
5
D5
C1
+5
VR
FUS2
6
C14
22UF/250V
D6
D7
6
R17
33K
C16
103
C15
103
2.2K
R18
+12
200K
R14
4007
0.1UF/275V
LX
9
16
15
14
13
12
11
10
J9
R16
10k
TLP371
IC4
VCC
Q1
Q2
Q3
Q4
Q5
Q6
Q7
TLP521-1
IC3
R15
560
GND
A1
A2
A3
A4
A5
A6
A7
ULN2003A
R11
R12
R13
62K/1W*3
+5
C19
103
5
N
L
+12
R23
10K/0.5W
R22
10K/0.5W
JK2
JK3
JK4
7
5
25
7
D9
4007
N
H
1
2
1
2
1
2
S
2PIN
2PIN
2PIN
CN6
CN7
CN8
8
V
C
OF
8
A
B
C
D
outdoor unit PCB of HDU-24H03/H HDU-28H03/H
SN: 0010400212
A
B
C
D
CT1
CN3
1
R7
DB1
TM TH
EX HT
CN2
CA1
R7
840
D8
4148
560
FS
C7
10UF/16V
TEST
C13
1K
840
R5
1K
C8
10UF/16V
R6
2
2
HEAT
IC5
T600D
10K
R9
470UF/16V
R4
5.1K
R3
5.1K
+5
COOL
C18
103
+5
RW
101
+5
R21
10K
+5
+5
C11
104
OSH
FIU
RXJG
RA1
1
C6
104
3
100UF/16V
C5
+5
C12
104
C9
104
Vout
VOLTREG
+5
2
OSC
8MHz
C10
4.7UF/50V
R8
1K
GND
2
D2
D3
4
CS
SK
DI
Vin
14
13
1
3
C4
104
R10
10K
D1
C3
2200UF/35V
+12
+5
D4
2
1
4PIN
+5
CN1
15
16
17
18
VAREF
DO
VSS
11
12
19
21
8
20
22
7
9
23
10
24
25
26
27
28
6
TEST
VCC
RESET
IC1
TMP87P808N
4
5
4
3
2
1
3
4PIN
2
1
C2
0.1UF/275V
CN4
C17
103
R20
1K
+5
5.6K
R19
8
1
2
3
4
5
6
7
IC2
5
D5
C1
+5
VR
FUS2
6
C14
22UF/250V
D6
D7
6
R17
33K
C16
103
C15
103
2.2K
R18
+12
200K
R14
4007
0.1UF/275V
LX
9
16
15
14
13
12
11
10
J9
R16
10k
TLP371
IC4
VCC
Q1
Q2
Q3
Q4
Q5
Q6
Q7
TLP521-1
IC3
R15
560
GND
A1
A2
A3
A4
A5
A6
A7
ULN2003A
R11
R12
R13
62K/1W*3
+5
C19
103
5
N
L
+12
R23
10K/0.5W
R22
10K/0.5W
JK2
JK3
JK4
7
5
25
7
D9
4007
N
H
1
2
1
2
1
2
S
2PIN
2PIN
2PIN
CN6
CN7
CN8
8
V
C
OF
8
A
B
C
D
outdoor PCB of HDU-42H03/H
SN: 0010400214
The PCB 0010400212 and 0010400214 are different from the risistance R7, for
0010400212 the resistance value is 560ohm, for 0010400214 the value is 840ohm.
5 ELECTRICAL CONTROL FUNCTIONS
This section includes introduction of items and electrical functions of serial machines
5.1 Introduction of electrical control functions
5.1.1 Auto-running
After system is on and turned to auto-running mode, the system shall first choose a suitable
operation mode according to present indoor temperature. Then it shall operate under the
chosen mode. Tr represents indoor temperature and Ts represents set temperature in the
following choices.
a. To both cold and heat producing machine
For the first time when the machine enters auto-running mode, it shall choose operation
mode according to the following listed:
Tr ≥Ts –3oC
choose cold producing mode ( set temperature is Ts+3 )
Tr ≤Ts-3oC
choose heat producing mode ( set temperature is Ts-3 )
After it enters into auto-running, operating mode shall switch between cold producing and
heat producing according to changes of indoor and outdoor temperature. The switching
mode is as the following chart showing:
cold producing
indoor
temperature
drops
Ts+3
Ts-3
cold producing
heat producing
air supply
Ts-3
indoor
temperature
rises
heat producing
b. For only cold-producing machine
For the first time it enters auto-running mode, the system shall choose running mode
according to the following listed:
Tr ≥Ts –3oC
o
Tr ≤Ts-3 C
choose cold producing mode ( set temperature is Ts+3 oC
)
choose ventilation mode
After it enters into auto-running, operation mode shall switch between cold producing and
ventilation according to changes of indoor and outdoor temperature. The switching mode is
as the following chart shows:
cold producing
indoor
temperature
drops
ventilation
cold producing
Ts-3
ventilation
Ts+3
indoor
temperature
rises
5.1.2 Auto wind speed choice
Tr herein after refers to indoor temperature and Ts refers to set temperature.
a. When machine is for cold producing and wind speed is switched from low speed
to high speed, switching shall not be enabled until operation under present wind speed
exceeds 3 minutes. There is no time lag when switching from high wind speed to low wind
speed. Switching shall be as the following chart shows:
high speed
set temperature+3 oC
temperature
drops
set temperature +2 oC
high speed
medium speed
set temperature+1 oC
medium speed
low speed
set temperature
temperature
rises
low speed
b. During heat producing (suitable for both heat and cold producing machine), when
wind speed is switched from low to high, switching shall not be enabled until operation
under present wind speed exceeds 3 minutes. There is no time lag when switching from
high wind speed to low wind speed.
Switching shall be as the following chart shows:
temperature
drops
low speed
Ts
low speed
medium speed
Ts-1℃
Ts-2℃
medium speed
high speed
Ts-3℃
high speed
temperature
rises
5.1.3 Dehumidifying running
When system enters dehumidifying running, air-compressor, outdoor unit and indoor fan
shall operate as the following stipulations: (Tr herein after refers to indoor temperature and
Ts refers to set temperature)
7.1.3.1 Tr>Ts+2 oC, and when air compressor and outdoor fan are continuously running,
indoor fan runs in set wind speed. Working section under such status is section A.
5.1.3.2 Ts≤Tt≤Ts+2 oC, air compressor and outdoor fan runs for 10 minutes with a 6
minutes’ break, and indoor fan runs in low speed. Working section under such status is
section B.
5.1.3.3 Tr<Ts, air compressor and outdoor fan stops running, indoor air fan runs in low
speed. Working section under such status is section C.
After system enters dehumidifying operation mode, it shall switch among section A, B, and
C with changes of indoor temperature. Switching of operation mode is as the following
chart shows:
indoor
temperature
drops
section A
Ts+1
section A
Ts+3
section B
section B
Ts-1
Ts
section C
section C
indoor
temperature
rises
5.1.4 Overloading and overheating cut-off protection (suitable for cold and heat
producing machine )
Under heat producing mode, if indoor air fan is on and air compressor has been
running for over 2 minutes, whenever temperature of indoor vent pipe is above 64 oC,
outdoor air fan shall stop operating. And whenever temperature of indoor pipe is equal to or
below 54 oC, plus outdoor air fan has stopped for over 45 seconds, outdoor air fan shall get
back to operation. If temperature of indoor vent pipe is over 67 oC for more than 10 seconds,
air compressor shall stop running and indoor air fan shall run in set conditions when set
temperature is reached. When temperature of indoor air vent pipe is lower than 58 oC and
air compressor has been out of operation for more than 3 minutes, air compressor and
outdoor air fan shall get back to normal operation.
Heat producing current cut-off protection
After air compressor is on for over 60 seconds, CT current is higher than I1( 13.5A)
and this situation lasts for 5 seconds, outdoor air fan shall stop running. After more than 45
seconds’ stop for outdoor air fan and current in air compressor is lower than I2 (11A),
outdoor air fan shall get back to operation. When CT current is higher than I3 (21A) and
this situation lasts for more than 3 seconds, air compressor, outdoor air fan shall stop
running. After air compressor has been out of operation for 3 minutes and CT current is
lower than 18A, air compressor and outdoor air fan shall get back into operation.
5.1.5 Cold wind preventing in heat producing (suitable for heat and cold producing
machine)
For the first time the machine enters heat-producing mode or when the last defrosting
completes, if indoor vent pipe temperature equals to or above 28 oC and lower than 38 oC,
indoor air fan shall run in low speed. Whenever indoor vent pipe temperature is higher than
38 oC or air compressor has been operating for more than 4 minutes, indoor air fan shall run
in set wind speed.
5.1.6 Blowing of left heat during heat producing (suitable for cold and heat producing
machine)
When air compressor is out of operation during heat producing or heat producing is turned
off, indoor air compressor shall run in low speed for 50 minutes and then stop running.
5.1.7 Auto defrosting control (suitable for cold and heat producing machine)
5.1.7.1 Conditions for defrosting starts:
a. Indoor unit enters over-loading protection and outdoor unit stops running, outdoor air fan
does not enter over-heating protection after it gets back to operation for 10 minutes,
accumulated operation time for air compressor is over 45 minutes, and air compressor has
been running for more than 20 minutes, and indoor vent piper temperature is lower than 43
o
C.
b. Air compressor has been running for more than 20 minutes, indoor vent pipe
temperature drops 1 oC for every 6 minutes and this situation appears continuously for 3
times, inner vent pipe temperature is lower than 40 oC, and after air compressor gets back to
operation for 5 minutes.
c. Accumulated time for air compressor running is over 3 hours, and air compressor
has been running without break for 20 minutes, indoor vent pipe temperature is lower than
40 oC.
d. Temperature difference between indoor vent pipe temperature and indoor
temperature is lower than 16 oC. and air compressor has been running without break for
more than 20 minutes, accumulated running for 45 minutes.
Whenever one of the above conditions is met, defrosting shall start.
5.1.7.2 Conditions for defrosting stops
5.1.7.2.1 Defrosting is over 9 minutes
5.1.7.2.2 CT current value is over I4(12A)
5.1.7.3 After defrosting starts, elements shall carry out the following actions:
Air compressor and outdoor air fan stops running, meanwhile indoor air fan stops running.
After 55 seconds, switch valve closes. After another 5 seconds, air compressor starts up.
5.1.7.4 Elements shall carry out the following actions after defrosting completes:
Air compressor stops running and outdoor air fan operates in high speed immediately. After
55 seconds switch valve turns on. And after another 5 second, air compressor gets back to
operation. Indoor air fan operates in cold-protection condition.
5.1.8 Anti-freezing function
Indoor vent pipe temperature shall be tested after air compressor has been running for more
than 9 minutes. Whenever indoor vent pipe temperature is lower than -1 oC, outdoor air fan,
air compressor shall stop operating. After air compressor is stopped, air compressor and
outdoor air vent shall not get back to operation only the following listed two conditions are
both met.
5.1.8.1 Air compressor has been out of operating for more than 3 minutes
5.1.8.2 Indoor vent pipe temperature rises and is above 7 oC
5.1.9 Test of water fill and control of drainage pump
a. Under cold producing mode (including automatically cold producing operation)
and dehumidifying mode, air compressor turns on and water pump starts working. When
air compressor is turned off, water pump shall be turned off after 5 minutes.
b. After water tanker is full, floater switch shall break. When controller detects this
signal, pump shall get into operating. After floater replaces, water pump shall continue
working for 5 minutes.
c. Whenever water full signal is detected continuously for over 5 minutes, pump
lamp shall blink for alarming. Air compressor shall stop working and pump shall be on for
5 minutes with every 5 seconds break. After floater replaces, there is a time lag of 5
minutes and then the pump stops running.
5.1.10
3 minutes’ protection for air compressor
After air compressor stops running, it shall not be re-operated until 3 minutes later.
Whenever system is out of power during operation for less than 3 minutes, air compressor
shall re-operate at least after 3 minutes when power on again.
5.1.11 Power cut-off memory function
When power being cut-off, repaired for faults, or operating stopped for fixing occurs
during operation, the system shall re-operate under previous conditions after power is on.
P.S:
a. Function set: press sleeping key continuously for 10 times within 5 seconds, panel
beeper rings for 4 times.
b. Memory items: operation mode, set wind speed, set temperature, wind swing situation,
electrical heating situation, and health function situation.
c. Function cancellation: press the sleeping key for 10 times using the controller and then
panel beeper rings for two times.
5.1.12 Remote network monitoring and controlling function
Air conditioner is connected to remote controlling detector (manufactured by Haier) for
tele-communication through prefabricated orifice on main board by two-core wire, and it
shall carry out orders form the computer or centralized controller through remote-control
detector. Meanwhile, air conditioner shall send its present operation situation and error
information to remote-control detector.
The following drawing is connection of air conditioner with remote-control detector
CN11
Computer
board
1
2
AA+
remote-control detector connecting orifice
5.1.15 Trail run
In turning off situation, press and hold compelling key, the beeper shall ring for once and
beep twice after 5 seconds. Loosen the key and enter compelled cold producing, indoor air
fan shall run in high speed, and air compressor, outdoor air fan shall operate. Press
compelling key again and compelled cold producing shall end.
5.2 Defrost operation Flow Chart
5.2.1 Model: HDU-24CA03/M(R1) HDU-28CA03/M(R1) HDU-36CA03/M(R1) HDU-42CA03/M(R1)
Come to defrost
Compressor
ON
Open outdoor fun
Compressor
Condition
off or 55s?
E-Heat off for 30s?
for
compressor
Return
OFF
Operation
fun motor
indoor
Return
Turn off compressor
outdoor fun
OFF
compressor
4-way value
ON
Return
Compressor
ON ?
Turn off for
55s?
Turn off
4-way value
Return
Clear the sign of
defrosts
Return
Compressor
ON
Return
B
Return
6 DIAGNOSTIC INFORMATION (TROUBLE SHOOTING)
6.1 Fault Codes
HDU-24CA03/M(R1) HDU-28CA03/M(R1) HDU-36CA03/M(R1) HDU-42CA03/M(R1)
No.
Code
Flash time of
compressor
running
indicate lamp
1
E0
10
2
E1
1
3
E2
2
4
E3
3
5
E4
4
6
7
E5
E6
5
6
8
E7
7
9
E8
8
10
E9
9
Trouble contents (old)
drainage system trouble
indoor temperature sensor
broken
indoor coil temperature sensor
broken
outdoor temperature sensor
broken
outdoor
coil
temperature
sensor broken
over current protect limit
pressure protect
communication
trouble
between
wired
remote
controller and indoor unit
communication
trouble
between indoor and outdoor
unit
three phase protect
Trouble contents (new)
drainage system trouble
indoor
temperature
broken
indoor coil temperature
broken
outdoor temperature
broken
outdoor coil temperature
broken
over current protect limit
pressure protect
sensor
sensor
sensor
sensor
three phase protect
Communication
trouble
between wired remote controller
and indoor unit
communication
trouble
between indoor and outdoor unit
Indicate lamp of remote control receiver board:
Green----power lamp
Yellow----timer lamp
Red----running of compressor
Red----water pump
The faults are shown by lamp flashing or display on the remote controller
Relay JK2 on outdoor board has output
Relay JK2 on outdoor board has no output
Leg 14 of 2003 on outdoor board has no
output
Relay JK3 on outdoor board has output
Relay JK3 on outdoor board has no output
Communication indicator of indoor
board does not flash
Leg 13 of 2003 on outdoor board has
no output
Abnormal power supply of outdoor board
Obstruction in signal S between indoor
and outdoor unit
Result of examination
pipe pressure is normal Two pins of CN2 on outdoor board are both
low voltage
Alarm displayed while
temperature condition
under the normal
wlrk in cool mode
Compressor does not
operation
output when in heat
4-way valve has no
board communication
indoor and outdoor
The trouble of the
Symptom
Change a new fuse
Fuse of outdoor board is damaged
Pressure testing circuit is in trouble
Socket CN7 on outdoor board and
connection wire are not linked well
Socket CN2 on outdoor board and
connection wire are not linked well
Relay JK2 on outdoor board is damaged
2003 is damaged
Temp. of indoor coil pipe is too low,
freeze-proof protection
Return it to the manufacturer for service
Link the connection wire well
Link the connection wire well
Change a new relay JK2
Change a new 2003
After the temp.of the indoor coil pipe
increasing to 8 the machine
automatically start
Socket CN6 on outdoor board and
Link the connection wire well
connection wire are not limked well
Safety unit is protecting the machine for After 3 minute the machine automatically
3 minute.
start
Change a new relay JK3
Change a new 2003
2003 is damaged
Relay JK3 on outdoor board is damaged
Return it to the manufacturer for service
Return it to the manufacturer for service
Communication circuit is in trouble
Power supply circuit of outdoor board is
in trouble
Plug in the transformer
Plug in the power line
Power line is not linked well
Transformer is not linked well
Insert the linking assemblies
Measures
Linking assemblies are not ready
Possible reason
6.2 Trouble Shooting - Detailed for engineer
Temp. of indoor coil pipe is too low,
freeze-proof protection
Leg 15 or 16 of 2003 on outdoor board
Relay on outdoor board has output
Relay on outdoor board has output
Change new relays
Change a new 2003
After the temp. of the indoor coil pipe
increasing to 8 the machine
automatically start.
Socket CN8 on outdor board and connection
Link the connection wire well.
wire are not linked well
Change new relays
Change a new 2003
After the temp. of the indoor coil pipe
Temp. of indoor coil pipe is too high,overheat
decreasing to 48 the machine
protection
automatically start.
Socket CN9 on outdoor board and connection
Link the connection wire well.
wire are not linked well
2003 is damaged
has no output
Relay JK1 or JK5 on outdoor board has Relay JK1 or JK5 on outdoor board is
damaged
no output
Leg 15 or 16 of 2003 on outdoor board
Change a new relay JK2
Change a new 2003
Socket CN7 on outdoor board and connection Link the connection wire well.
wire are not linked well
Relay JK2 on outdoor board has no output Relay JK2 on outdoor board is damaged
Relay JK2 on outdoor board has output
After 3 minute the machine automatically
start
Measures
Temp. of indoor coil pipe is too high,overheat After the temp. of the indoor coil pipe
decreasing to 48 the machine
protection
automatically start.
Safety unit is protecting the machine for 3
minute.
Possible reason
Leg 14 of 2003 on outdoor board has no
2003 is damaged
output
Result of examination
2003 is damaged
has no output
while outdoo rfan does
Relay JK1 or JK5 on outdoor board has Relay JK1 or JK5 on outdoor board is
not work.
damaged
no output
compressor works
In heat mode,
not work.
while outdoor fan does
compressor works
In cool mode,
temperature condition.
under the normal
work in heat mode
Compressor does not
Symptom
speed
Change a new float
Measures
Relay JK6 is damaged
CN5 on indoor board has no output
2803 is damaged
Link wire of float feedback signal is
obstructed
Relay JK1 on indoor board has no output
Relay JK1 is damaged
Change a new relay JK1
Change a new 2803
Change a new relay JK2
Relay JK2 is damaged.
Relay JK2 on indoor board has no output
Change a new relay JK1
Change a new 2803
Leg 17 of 2803 on indoor board has no output 2803 is damaged
Terminal COM of relay JK1 on indoor board
Relay JK1 is damaged.
has no voltage
Change a new relay JK1
Relay JK1 on indoor board has no output Relay JK1 is damaged.
Change a new 2803
Change a new relay JK2
2803 is damaged
Terminal COM of relay JK2 on indoor board
Relay JK2 is damaged.
has no voltage
2803 on indoor board has no output
Link CN8 well
Change a new 2803
Change a new link wire
CN11 on indoor board is not linked well Link CN11 well
Outputs of relay JK1,JK2 and JK3 are normal CN8 on indoor board is not linked well
2803 on indoor board has no output
Change a new 2803
2803 is damaged
Leg 12 of 2803 has no output
Change a new relay JK6
Change a new indoor board
CN11 on indoor board is not linked well Link CN11 well
Float itself is damaged
Possible reason
Main chip of indoor board is damaged
No signal of float rising
Result of examination
Indoor fan has no high Leg 16 of 2803 on indoor board has no output 2803 is damaged
speed
Indoor fan has no mid
speed
Indoor fan has no low
work
Indoor fan does not
is normal
Alarm when water level
when water is full.
not discharge water
Drainage pump does
Symptom
Change a new computer board
Change a new fuse
Link the transformer well or change a new
one
Parts of filter circuit are damaged
Fuse is damaged
Transtormer is not linked well or it is
damaged
Reset chip T600D is damaged
Properly loosen installation bolts of four
circuit boards
Change a new buzzer
Joints of connection line are not linked well Link the joints well
Display panel is improperly installed
Has square wave signal in both ends of buzzer Buzzer is damaged
Change a new computer board
Change a new rest chip T600D
Connection parts between front controlling
Link the connection parts well
board and indoor board is not linked well
Filter capacitor C2,C3 on power supply of
Change a new capacitor
display board is damaged
7805 and its input output filter capacitor are
damaged
Change a new computer board
Short-circuit of other circuits
Power supply part of indoor board is damaged Change a new computer board
Link power line well
Measures
Power line is not linked well
Possible reason
Has no square wave signal in both ends of
Main chip is damaged
buzzer
Reset voltage is low
+5V output is abnormal
board has no voltage
Power supply input of front controlling
Output of 7805 is abnormal
The second side of transformer has no output
No voltage after passing fuse
Power supply input of circuit board has no
voltage
Result of examination
Front board and main Front board and main board communication
Connection line is malfunction
Change new connection line
board communication line is obstructed.
malfunction displays
Socket CN2 on indoor board is not linked well Link CN2 well
E7
Four triode in the communication circuit may
Change a new computer board
be damaged
One or two button is
blocked
when pressing button
Buzzer is not sounded
switch on
has no response when
Front controlling board
switch on
No response when
Symptom
7. Installtation instruction
7.1 Installation for outdoor unit
<Heat Pump model/Cooling Only model >
WARNING
BE SURE TO READ THESE INSTRUCTIONS CAREFULLY BEFORE BEGINNING
INSTALLATION. FAILURE TO FOLLOW THESE INSTRUCTIONS COULD CAUSE SERIOUS
INJURY OR DEATH, EQUIPMENT MALFUNCTION AND/OR PROPERTY DAMAGE.
BE SURE TO READ INSTALLATION MANUAL FOR INDOOR UNIT WITH THIS MANUAL.
1. Accessories
Edging
"Edging" for protection of electric wires from an
opening edge.
2. Selection of the place of installation
Select the place of installation satisfying the following conditions and, at the same time, obtain a consent
from the client or user.
Place where air circulates.
Place free from heat radiation from other heat sources.
Place where drain water may be discharged.
Place where noise and hot air may not disturb the neighborhood.
Place where there is not heavy snowfall in the winter time.
Place where obstacles do not exist near the air inlet and air outlet .
Place where the air outlet may not be exposed to a strong wind.
Place surrounded at four sides are not suitable for installation. A 1m or more of overhead space is
needed for the unit.
Mount guide-louvers to place where short-circuit is a possibility.
When installing several units, secure sufficient suction space to avoid short circuiting.
(1) Open space requirement around the unit
Unit: mm
Air inlet
L3
Case
L2
500
Air
inlet
(Servicing
space)
Distance
L1
Air outlet
L1
I
II
III
open
open
500
L2
300
0
open
L3
150
300
150
(2) Installation where the area with strong winds.
Install the unit so that the air outlet section of the unit must NOT be faced
toward wind direction.
NO
3. Installation of outdoor unit
(1) Installation
Wind direction
Fix the unit in a proper way according to the condition of a place where it is installed by referring to the following .
(a) Concrete foundation
Unit
Foundation anchor
Unit
Anchor bolt
Concrete foundation
To fix by bolts
Note (1) Give enough room for the concrete
foundation to fix by anchor bolts.
Note (1) Place the concrete foundation deep enough.
Install the unit so that the angle of inclination must be less than 3 degrees.
Gas pipe
(1) Outline piping
Outdoor
unit
Liquid
pipe
Flare connection
HDU-24H03/H
HDU-28H03/H
Gas piping
19.05(3/4")x1.0mm
15.88(5/8")x1.0mm
Liquid piping
9.52(3/8")x0.8mm
9.52(3/8")x0.8mm
Install the removed flared nuts to the pipes to be connected,
then flare the pipes.
(3) Limitations for one way piping length and vertical height difference.
90 + 0.5
HDU-42H03/H
Service valve
Indoor
unit
(2) Piping size
Model
Check joint
Flare connection
4. Refrigerant piping
One way piping length: less than 30m (HDU-24H03/H , HDU-28H03/H).
less than 50m (for HDU-42H03/H).
Vertical height difference: Less than 15m (for HDU-24H03/H , HDU-28H03/H).
less than 30m (for HDU-42H03/H).
Precautions for refrigerant piping
Do not twist or crush piping.
Be sure that no dust is mixed in piping.
Bend piping with as wide angle as possible.
Keep insulating both gas and liquid piping.
Check flare-connected area for gas leakage.
(4) Air purge
a. For HDU-24H03/H , HDU-28H03/H.
Purge air out of indoor unit and piping as shown in the Fig.
(1) Remove the valve cap on 2-way valve in outdoor unit.
(2) Loosen by 1-1.5 turn the flare nut of gas pipe, which is connected
to 3-way valve.
(3) Loosen the valve rod of 2-way valve by 90 degrees (use a hexagon
wrench) for about 15 seconds, air will be pushed out from flare nut
on gas pipe.
(4) Open 2-way and 3-way valves using specified torque.
(5) Tighten the caps on the valves with specified torque.
(6) Conduct gas leakage using gas leakage detector or soap water.
Liquid pipe
9.52mm(3/8")
Gas pipe
15.88mm(5/8")
Flare nut
90
Note: When additional refrigerant piping is necessary, first purge air out of connecting pipe by external gas,
then drive out the excessive refrigerant by purging method.
Brand new unit is charged 80g more refrigerant than spec. This is only for first installation to purgeair in
the indoor unit and connecting pipe.
b. For HDU-42H03/H.
Carry out the air purge of the indoor unit and refrigerant piping by vacuuming.
Procedures:
1) Tighten all the flare nuts of the piping on the side of indoor and outdoor units so that there is no leakage.
2) Carry out vacuuming from the service valve charge port with the service valves (both liquid and gas side)
of the outdoor unit fully closed.
3) After vacuuming, remove the cap nut for the valve stem, and tighten the cap nuts (cap nuts for valve stem
and charge port) with service valve (both liquid and gas) fully opened.
(5) Method of opening and closing service valve of outdoor unit
1) Remove the hexagonal cap nut.
2) Operate the valve using a hexagonal wrench to open by left turn
and to close by right turn.
3) Tighten the hexagonal cap nut after the piping works.
Open
Hexagon wrench
(attachment)
(6) Additional charge of refrigerant
Outdoor unit is precharged at a factory for the piping length up to 5m. Additional charge is not required
up to 5m.
Item
Model
Heat
pump
Basic
Factory charge amount
refrigerant
of refrigerant
charge
(i)
Outdoor unit Indoor unit
amount
Additional
charge
amount (ii)
per meter
Length that
additional
charge is not
required
Maximum
piping
length
HDU-42H03/H
3.44
3.52
0
0.06
5m
(v)
(viii)
50m
HDU-24H03/H
HDU-28H03/H
2.32
2.40
0
0.06
5m
(vii)
(viii)
30m
Notes (i) Basic refrigerant charge amount means refrigerant amount when refrigerant piping length is 5m.
(ii) When the refrigerant piping length exceeds the length that additional refrigerant charge is not
required, charge additional refrigerant based on to the calculated amount of refrigerant per unit
piping length.
Example of additional charge amount calculation
Calculate the additional charge amount when the piping length is 25 m.
(25 - 5 ) x 0.06 = 1.2
Additional charge amount (kg)
Additional charge amount per 1m (kg/m)
Length that additional refrigerant charge is not required (m)
Total length of the piping (one way) (m)
Additional charge amount of refrigerant =0.70kg(Calculate the amount in any case.)
If air perge with the refrigerant is forbidden at the local, please use the vacuum method
(Please see the below figure)
2-way valve
To use vacuum pump
2-way valve
3-way valve
1
Detach the service port's cap of 3-way valve, the
valve rod's cap for 2-way valve and 3-way's, connect
the service port into the projection of charge hose
(low) for gaugemanifold. Then connect the projection
of charge hose (center) for gaugemanifold into
vacuum pump.
Gaugemanifold
Vacuum pump
2
Open the handle at low in gaugemanifold, operate
vacuum pump. If the scale-moves of gause (low)
reach vacuum condition in a moment, check 1 again.
2 Open
3
Vacuumize for over 15min. And check the level gauge
which should read -0.1 MPa (-76 cm Hg) at low
pressure side. After the completion of vacuumizing,
close the handle 'Lo' in gaugemanifold and stop the
operation of the vacuum pump.
Check the condition of the scale and hold it for 1-2min.
If the scale-moves back in spite of tightening, make
flaring work again, the return to the beginning of 3 .
3 Close
3-way valve
Gaugemanifold
Vacuum pump
2-way valve
3-way valve
4
Open the valve rod for the 2-way valve to and angle of
anticlockwise 90 degree.
After 6 seconds later, close the 2-way valve and male
the inspection of gas leakage.
3-way valve
Open
90
5
No gas leakage?
In case of gas leakage, tighten
parts of pipe connection. If
leakage stops, then proceed 6
steps.
2-way valve
Service port
Service port
Open
90
4 90 for 6 sec.
90
4 90 for 6 sec.
If it does not stop gas leakage, discharge whole refrigerants
from the serice port. After flaring work again and vacuumize,
fill up prescribed refrigerant from the gas cylinder.
6
Detach the charge hose from the service port, open
2-way valve and 3-way. Turn the valve rod
anticlockwise until hitting lightly.
2-way valve
2-way valve
Liquid pipe 9.52mm
3-way valve
3-way valve
Gas pipe 19.05mm
6
7
To prevent the gas leakage, turn the service port's
cap, the valve rod'd cap for 2-way valve and 3-way's
a lottle more than the point where the torque increases
suddenly.
6
6
6
2-way valve
3-way valve
8
After attaching the each caps, check the gas leakage
around the caps.
7 Valve rod cap
Valve rod cap
7 Service port cap
CAUTION:
If the refrigerant of the air conditioner leaks, it is necessary to make
all the refrigerant out, then charge the liquid refrigerant into air
conditioner according to the amount marked on the name plate.
2-way valve
3-way valve
7 Valve rod cap
7 Service port cap
5. Electric wiring
7 Valve rod cap
WARNING
DANGER OF BODILY INJURY OR DEATH
TURN OFF ELECTRIC POWER AT CIRCUIT BREAKER OR POWER SOURCE BEFORE
MAKING ANY ELECTRIC CONNECTIONS. GROUND CONNECTIONS MUST BE
COMPLETED BEFORE MAKING LINE VOLTAGE CONNECTIONS.
(1) Selection of size of power supply and interconnecting wires.
Precautions for Electric wiring
Electric wiring work should be conducted only by authorized personnel.
Do not connect more than three wires to the terminal block. Always use round type crimped terminal
lugs with insulated grip on the ends of the wires.
Use copper conductor only.
Select wire sizes and circuit protection from table below. (This table shows 20 m length wires with
less than 2% voltage drop.)
Circuit breaker
Item
Model
Phase Switch breaker Overcurrent protector
(A)
rated capacity (A)
Power source
wire size
(minimum)
Earth leakage breaker
Switch
breaker
Leak
current
HDU-42H03/H
3
30
20
2.5mm2
30
30mA
HDU-24H03/H
HDU-28H03/H
1
40
26
4.0mm2
40
30mA
(2) Wiring connection
Make wiring to supply power to the outdoor unit, so that the power for the indoor unit is supplied by
• and •terminals.
TB1
TB1
TB
TB2
TB2
TB
HDU-24H03/H
HDU-28H03/H
HDU-42H03/H
Interconnecting
wires
Interconnecting
wires
WARNING
DO NOT CONNECT THE NEUTRAL WIRE N TO R , S OR T PHASE. INTERCONNECTING WIRES MUST BE WIRED WITH SAME SYMBOLS ON THE TERMINALS OF BOTH
INDOOR AND OUTDOOR UNIT.INCORRECT WIRING CAUSE EQUIPMENT DAMAGE OR
A FIRE.
(3) Wiring procedure
1) Remove set screws on the side before taking off the front panel toward the direction shown in
figure.
2) Connect wires to the terminal block correctly and fix the wires with a wire clamp equipped near
by the terminal block.
3) Route the wires in a proper way and penetrate the wires through the opening for electric wiring
on the side panel.
Opening for
electric wiring
6. Test run
Front panel
CAUTION
THIS UNIT WILL BE STARTED INSTANTLY WITHOUT "ON" OPERATION WHEN ELECTRIC
POWER IS SUPPLIED.
BE SURE TO EXECUTE "OFF" OPERATION BEFORE ELECTRIC POWER IS DISCONNECTED
FOR SERVICING.
This unit has a function of automatic restart system after recovering power stoppage.
(1) Before starting test run (for all Heat pump models)
Confirm whether the power source breaker (main switch) of the unit has been turned on for over 12
hrs to energize the crankcase heater in advance of operation.
(2) Test run
Run the unit continuously for about 30 minutes, and check the following.
Suction pressure at check joint of service valve for gas pipe.
Discharge pressure at check joint on the compressor discharge pipe.
Temperature difference between return air and supply air for indoor unit.
7.2 Installation for indoor unit
Safety precautions
Please read these "Safety Precautions" first then accurately execute the installation work.
Though the precautionary points indicated herein are divided under two headings,
WARNING
and
CAUTION , those points which are related to the strong possibility of an installation done in error
resulting in death or serious injury are listed in the
section. However, there is also a
WARNING
possibility of serious consequences in relationship to the points listed in the
CAUTION section as well.
In either case, important safety related information is indicated, so by all means, properly observe all that is
mentioned.
After completing the installation, along with confirming that no abnormalities were seen from the operation
tests, please explain operating methods as well as maintenance methods to the user (customer) of this equipment,
based on the owner's manual.
Moreover, ask the customer to keep this sheet together with the owner's manual.
WARNING
This system should be applied to places as office, restaurant, residence and the like. Application to inferior
environment such as engineering shop could cause equipment malfunction.
Please entrust installation to either the company which sold you the equipment or to a professional contractor.
Defects from improper installations can be the cause of water leakage, electric shocks and fires.
Execute the installation accurately, based on following the installation manual. Again, improper installations
can result in water leakage, electric shocks and fires.
When a large air-conditioning system is installed to a small room, it is necessary to have a prior planned
countermeasure for the rare case of a refrigerant leakage, to prevent the exceeding of threshold concentration.
In regards to preparing this countermeasure, consult with the company from which you perchased the equipment,
and make the installation accordingly. In the rare event that a refrigerant leakage and exceeding of threshold
concentration does occur, there is the danger of a resultant oxygen deficiency accident.
For installation, confirm that the installation site can sufficiently support heavy weight. When strength is
insufficient, injury can result from a falling of the unit.
Execute the prescribed installation construction to prepare for earthquakes and the strong winds of typhoons
and hurricanes, etc. Improper installations can result in accidents due to a violent falling over of the unit.
For electrical work, please see that a licensed electrician executes the work while following the safety standards
related to electrical equipment, and local regulations as well as the installation instructions, and that only
exclusive use circuits are used.
Insufficient power source circuit capacity and defective installation execution can be the cause of electric
shocks and fires.
Accurately connect wiring using the proper cable, and insure that the external force of the cable is not conducted
to the terminal connection part, through properly securing it. Improper connection or securing can result in
heat generation or fire.
Take care that wiring does not rise upward, and accurately install the lid/service panel. Its improper installation
can also result in heat generation or fire.
When setting up or moving the location of the air conditioner, do not mix air etc. or anything other than the
designated refrigerant (R22) within the refrigeration cycle.
Rupture and injury caused by abnormal high pressure can result from such mixing.
Always use accessory parts and authorized parts for installation construction. Using parts not authorized by
this company can result in water leakage, electric shock, fire and refrigerant leakage.
CAUTION
Execute proper grounding. Do not connect the ground wire to a gas pipe, water pipe, lightning rod or a
telephone ground wire. Improper placement of ground wires can result in electric shock.
The installation of an earth leakage breaker is necessary depending on the established location of the unit.
Not installing an earth leakage breaker may result in electric shock.
Do not install the unit where there is a concern about leakage of combustible gas.
The rare event of leaked gas collecting around the unit could result in an outbreak of fire.
For the drain pipe, follow the installation manual to insure that it allows proper drainage and thermally insulate
it to prevent condensation. Inadequate plumbing can result in water leakage and water damage to interior
items.
NOTICE
All Wiring of this installation must comply with NATIONAL, STATE AND LOCAL REGULATIONS. These
instructions do not cover all variations for every kind of installation circumstance. Should further information be
desired or should particular problems occur, the matter should be referred to your local distributor.
WARNING
BE SURE TO READ THESE INSTRUCTIONS CAREFULLY BEFORE BEGINNING INSTALLATION. FAILURE TO FOLLOW THESE INSTRUCTIONS COULD CAUSE SERIOUS INJURY OR DEATH, EQUIPMENT
MALFUNCTION AND/OR PROPERTY DAMAGE.
1. Before installation [Before finishing installation, do not throw the attached parts installation
needs]
Confirm the way to move the unit to the installation place.
Before moving the unit to the installation place, do not remove their packages.
When have to remove the package, use a soft material or protection board with rope to lift the unit
assembly to avoid unit damage or bumping a scrape.
2. Choose installation place
(1) The chosen installation place should meet the following requirements and get the user’s consent.
Place ensures ideal airflow distribution.
The passage of airflow has no obstacles.
When importing outside air, it should be imported directly from outdoors. (if the pipe can not be
extended, it also can not be imported from top)
Place ensures enough space for maintenance.
The pipe length between indoor and outdoor unit is in the permitted limit (referring to outdoor unit
installation part).
The indoor unit, outdoor unit, electric wire and connection wire is at least 1m away from television
and radio. This is to avoid the image disturbance and noise caused by the above-mentioned home
appliance. (Even if 1m away, if the electromagnetic wave is too strong, it can also cause noise.)
(2) The height of ceiling
The indoor unit can install on the ceiling, which height is no more than 3m.
(3) Install and use the hoisting screw. Check if the installation place can bear the weight of unit
assembly.
If not certain, strengthen it before install the unit.
Over 300
Air out
Over 900
Checking meatus
(600x600)
Over 200
Over 100
Air in
Ceiling
3. Preparation before installation
(1) The position relation among hoisting screw (unit: mm)
360
890
600
794
250
HDU-24H03/H
HDU-28H03/H
Down side
Up side
360
1270
853
794
250
750
HDU-42H03/H
Down side
Up side
1103
(2) If necessary, cut the opening installation and checking needed on the ceiling. (If has ceiling)
Before installation, finish the preparation work of all the pipes (refrigerant, drainage) and wire
(wire controller connection wire, indoor and outdoor unit connection wire) of indoor unit, so that
after installation, they can be immediately connected with outdoor unit.
Cut the opening on the ceiling. Maybe it needs to strengthen the ceiling to keep the ceiling even
and flat and prevent the ceiling from vibration. For details, please consult to the builder.
(3) Hanger bolts installation
Use care of the piping direction when the unit is installed.
(Use M10 screw bolt)
In order to bear the weight of the unit, for existed
ceiling, using foundation screw bolt, for new ceiling,
using burying embedded screw bolt, burying screw
bolt or spot supplied other parts.
Insert
Hole-in anchor
Hole-in plug
Concrete
Before going on installation, adjust the gaps with ceiling.
Hanging bolt M10
Hanging bolt
4. Installation of indoor unit
M10 nut
M10 washer
Fix the indoor unit to the hanger bolts.
If required, it is possible to suspend the unit to the beam, etc.
Directly by use of the bolts without using the hanger bolts.
M10 spring washer
Main unit
Note
When the dimensions of main unit and ceiling holes does not match, it can be adjusted with the slot
holes of hanging bracket.
Adjusting to the levelness
Piping side
Supply water
(a) Adjust the out-of levelness using a level or by
the following method.
Water level
0~5 mm
(0~0.2")
Make adjustment so that the relation between
the lower surface of the unit proper and water
level in the hose becomes as given below.
PVC hose
Bring the piping side slightly lower.
(b) Unless the adjustment to the levelness is made properly, malfunctioning or failure of the float
switch may occur.
5. Drain Piping
(a) Drain piping should always be in a downhill grade (1/50~1/100) and avoid riding across an
elevation or making traps.
Inproper piping
Good piping
Suspension
bolts
Avoid riding across an elevation
1.5m ~ 2m
Air vent
Keep free from traps
Do not pipe under water
A downhill grade
Heat
insulation of 1/100 or more
(b) When connecting the drain pipe to unit, pay suffcient attention not to apply excess force to the piping
on the unit side. Also, fix the piping at a point as close as possible to the unit.
(c) For drain pipe, use hard PVC general purpose pipe
VP-25(I.D.1") which can be purchased locally. When
connecting, insert a PVC pipe end securely into the
drain socket before tightening securely using the
attached drain hose and clamp. Adhesive must not
be used connection of the drain socket and drain
hose (accessory).
Drain socket
Stage
difference Drain hose
part
Drain socket
Main unit
Pipe cover(large)
[for insulation]
(accessory)
Drain hose
Clamp (accessory)
(accessory)
Adhesion
Pipe cover(small)
[for insulation]
(accessory)
VP 25 joint
(field purchased)
VP 25
(field purchased)
Pipe cover
[for insulation]
(field purchased)
(d) When constructing drain piping for several units,
position the common pipe about 100 mm below
the drain outlet of each unit as shown in the sketch.
Use VP-30(11/4") or thicker pipe for this purpose.
Secure the elevation as high as possible
(approx. 100 mm)
(e) The stiff PVC pipe put indoor side should be heat insulated.
A downhill grade of
1/100 or more
VP 30
(f) Avoid putting the outlet of drain hose in the places with irritant gas generated. Do not insert the drain
hose directly into drainage, where the gas with sulfur may be generated.
(g) Backwater bend
Because the drain spout is at the position, which negative pressure may occur. So with the rise of water
level in the drain pan, water leakage may occur. In order to prevent water leakage, we designed a
backwater bend.
The structure of backwater bend should be able to be cleaned. As the below figure shown, use T type joint.
The backwater bend is set near the air conditioner.
2H 1H
As figure shown, set a backwater bend in the middle of drain hose.
H1=100mm or the static pressure of air sending motor
H2=1/2H1 (or between 50~100mm)
Drainage Test
1
2
3
4
Conduct a drainage test after completion of the electrical work.
During the trial, make sure that drain flows properly through the piping and that no water leaks
from connections.
In case of a new building, conduct the test before it is furnished with the ceiling.
Be sure to conduct this test even when the unit is installed in the heating season.
Procedures
1
2
Supply about 1000 cc of water to the unit through the air outlet using a feed water pump.
Check the drain while cooling operation.
6. Installation of air suction and discharging duct
muffler cavity (air sending)
Enlarging chart of
profile chart A
Vibration resistance hook
Sacking joint
Insulation
A
Air outlet
Air conditioner
main unit
Checking meatus
Air volume adjuster
Ceiling
Air suction grille with air filter
Please consult the after-sales service worker of Haier Air Conditioner for the choosing and installation
of suction inlet, suction duct, discharging outlet and discharging duct. Calculating the design drawing
and outer static pressure, and choose the discharging duct with proper length and shape.
The length difference among every duct is limited below 2:1.
Reduce the length of duct as possible as can.
Reduce the amount of bend as possible as can.
Use heat insulation material to bind and seal the part connecting main unit and the flare part of air
discharging duct. Perform duct installation work, before the fitment of ceiling.
Bad example
Bad example
Good example
7. Calculation method of the dimension of the simple quadrate air duct
Presuming the unit length friction impedance of the duct is 1Pa/m, when the dimension of one side of
the air duct is fixed as 250mm, as shown below:
Air volume Duct(mmxmm) Air volume Duct(mmxmm)
A
Air conditioner
B
Static pressure box
A
A
3
/h
A 2400m
(40m3/min)
3
/h
B 600m
(10m3/min)
250x560
250x190
1200m3/h
(20m3/min)
300m3/h
(5m3/min)
HDU-42H03/H
Straight part
Calculate as per 1m length 1Pa, 1Pa/m
Bend part
Each bend takes as a3~4m long straight duct
Air out part
Calculate as 25Pa
Static pressure box
Calculate as 50Pa/each
Air inlet grille (with air filter)
Calculate as 40Pa/each
The chosen chart of simple duct
Note:1Pa/m=0.1mmAg/m
Item
Air volume
3
3
m /h(m /n)
100
200
300
400
500
600(10)
800
1,000
1,200(20)
1,400
1,600
Shape
Square duct
Dimension
Item
Air volume
(mmxmm)
m /h(m /n)
250 x
250 x
250 x
250 x
250 x
250 x
250 x
250 x
250 x
250 x
250 x
60
90
120
140
170
190
230
270
310
350
390
3
3
1,800(30)
2000
2400
3,000(50)
3,500
4,000
4,500
5,000
5,500
6,000(100)
250x120
HDU-24H03/H
HDU-28H03/H
Equipped with
air filter (bought)
The calculation of duct resistance (the simple calculation is as follow table)
Shape
250x310
Square duct
Dimension
(mmxmm)
250
250
250
250
250
250
250
250
250
250
x
430
x
470
x
560
x
650
x
740
x
830
x 920
x 1000
x 1090
x 1180
8. The attentive matters in installation of air suction and discharging duct
Recommend to use anti-frost and sound-absorbing
duct. (locally bought)
The duct installation work should be finished
before the fitment of ceiling.
The duct must be heat insulated.
Special air discharging outlet
Use screw bolt to fix
The specific air-discharging outlet should be installed at
the place where the airflow can be reasonably distributed.
The surface should leave a checking meatus for checking
and maintenance.
Duct
Air
Air
9. The examples of improper installation
Do not use air in duct and take the ceiling inner side instead. The result is because of the irregular
outer air mass, strong wind and sunshine, the humidity is increased.
There may be water drop on the outside of duct. For cement and other new constructions, even if
not taking ceiling inner side as duct, the humidity will also be so high. At this time, use glass fiber
to perform heat preservation to the whole. (use iron net to bind the glass fiber)
Maybe exceeding the unit operation limit (for example: when indoor dry bulb temperature is 35 C,
wet bulb temperature 24 C), it may lead to overload of compressor.
Affected by the capacity of air discharging fan, the strong wind in the outer duct and wind direction,
when unit air sending volume exceeds the limit, the discharged water of heat exchanger will overflow,
leading to water leakage.
Air discharging fan
Improper example
10. The operation method of fan controller
Through the fan controller switch in the electric box, the air volume of this unit can be continuously
adjusted.
It is unnecessary to adjust air volume through the duct side wind level (unit outside static adjustment).
The air volume set should be in the operation air volume range.
Figure I shows the position of fan controller in the electric box and operation method.
After finishing the electric work, perform test run. According to the main points in Figure II making the
chosen switch No. accordant. And confirm if it reaches the needed air volume.
Note:
1) When operating the fan controller, it is possible to touch the electric charging part, so do cut off the
power supply.
2) Do not set the dial at the position less than 1.
3) The figure circled in Figure II indicate the capacity number of fan controller. The non-listed capacity
number may exceed the permitted operation capacity range, so it is impossible to operate.
4) When delivering from factory, the capacity number of fan controller is set at “No.5”.
Rotate this switch
Condition of standard air volume
(air volume 100Pa)
High
Low
(capacity number
setting:
No. 1 ~ No. 8)
200
•
•
•
•
•
•
Outer static pressure Pa
•
Once the fan controller
has trouble, this linker
can perform emergency
assistant control. When
this linker is connected
to the linker from the
PCB, it can operate with
total load.
When this linker is
connected to the linker
from the PCB, through
the fan speed adjustment
panel to adjust speed.
•
150
•
•
•
•
100
•
50
0
26
30
Lower limit
Figure 1
Example of
duct
•
34 35
40
43
Upper limit
Standard air volume(m3/min)
Figure 2
The example of the method of choosing capacity number:
3
1) If the unit is in high-speed operation, needing take outer static pressure is 180Pa in capacity air volume 34m /min
as working condition point, according to Figure II “The characteristic chart of air volume”, the capacity number
of fan controller is No. 2.
3
2) If the unit is in low speed operation, needing take outer static pressure is 60Pa in capacity air volume 32m /min as
working condition point, according to Figure II “The characteristic chart of air volume”, the capacity number
of fan controller is No. 4.
11. Refrigerant pipe
[The air side pipe, liquid side pipe must be faithfully heat insulated, if no heat insulation, it may cause
water leakage.]
The outdoor unit has been charged with refrigerant.
When connect the pipe to the unit or dismantling the pipe from the unit, please follow the figure shown,
use spanner and torque spanner together.
When connect cone nut, the inner side and outside of cone nut should paste with refrigerant oil. Use
hand to twist 3-4 rings, then fasten with spanner.
Referring to Table I to confirm the fasten torque. (too tight may damage nut leading to leakage)
Check if the connection pipe leaks, then do heat insulation treatment, as below figure shown.
Only use seal cushion to bind the joint part of air pipe and heat insulation parts.
Paste the refrigerant oil here
Middle size seal cushion (accessory)
(Use seal cushion to
bind the pipe joint)
Torque spanner
Clamp
Heat insulation (accessory)
(for liquid pipe)
Heat insulation (accessory)
(for gas pipe)
Gas pipe
Liquid pipe
Spanner
Pipe joint
Cone nut
Liquid pipe
Gas pipe
Electric box
Upper
310
Air inlet
Specification of pipe Tighten torque
(mm)
30
Down side
Drain hose connection mouth
VP25 PVC pipe
Cone dimension
A (mm)
9.52
3270~3990 N.cm
(333~407 kgf.cm)
12.0~12.4
15.88
9720~11860 N.cm
(990~1210 kgf.cm)
22.9~23.3
Air outlet
Cone
45
90
2
0.5
A
Other instruction
1. Power supply
The air conditioner must use a special power circuit. The user should provide by himself with
special switch (25A~30A), grounding wire. The wiring should be done by a qualified electrician
according to the wiring rules specified by national standard
An creepage breaker should be installed.
The grounding wire and null wire of the power cord should be strictly separated. It is incorrect to
connect the null wire with grounding wire.
2. Cut and flaring method
A
Flarer
Use pipe cutter to cut the pipe, the burrs must be removed.
After inserting the flarer, perform flared nut.
Pipe diameter
Dimension A (mm)
Liquid pipe
9.52mm (3/8”)
1.0-1.2
Gas pipe
19.05mm (3/4”)
1.4-2.2
Gas pipe
15.88mm (5/8”)
1.4-2.2
Correct
Incorrect
Slant
Broken
Burrs
Uncompleted
Too long
Test run
The following items must be noticed carefully during installation. After finishing installation,
performing checking.
After installing the refrigerant pipe, drain hose and electric wire properly, perform test run to ensure
the system not have trouble.
Test run
(1) Open the stop valve of gas pipe.
(2) Open the stop valve of liquid pipe.
(3) Press ON/OFF button to start operation, use wire controller to set to Cooling operation.
(4) Confirm the function of the unit according this manual.
8. Exploded Views & Part Lists
model: indoor unit of HDU-24H03/H HDU-28H03/H
INDOOR UNIT PART LIST OF HDU-24H03/H HDU-28H03/H
No.
Name of parts
Part specialized code
1
connection frame of inlet air
0010100506
2
hanging
001A13011049
3
boarding assy. Of liquid pipe
0010800288
4
evaporator brackt 1
001A13011068
5
bottom plate assy.
0010100502
6
fix slot assy.
0010100511
7
air discharge framework
0010100503
8
evaporator brackt 2
001A13011069
9
evaporator fixing plate 1
0010100504
10
cover board assy. 1
0010800284
11
cover board assy. 2
0010800285
12
fix tendon assy. 1
0010800282
13
evaporator fixing plate 3
0010800290
14
cover board assy.3
0010800286
15
fix tendon assy. 2
0010800283
16
transformer
001A3800141
17
PCB
0010400132
18
fan speed adjusting board
001A3300352
19
fan motor capacitor
001A3600254
20
electrical box cover
0010850004
21
termianl block
001A4000151
22
electrical box assy.
0010800399
23
bracket of floater
001A13011050
24
float switch
001A3400160
25
sensor bracket
001A1436026
26
ambient temp. sensor
001A3900006
27
supporting plate
001A1101236
28
snail shell 2
001A13011043
29
fan 2
001A2301105
30
evaporator assy.
0010750004
31
hermitic circle of snail shell
001A13011044
32
fan 1
001A2301104
33
snail shell 1
001A13011042
34
motor bracket
001A13011039
35
motor fixing bolt
001A13011045
36
motor
001A3000290
37
drain pan assy.
0010201091
38
guarding plate assy.2
0010100500
39
guarding plate assy.1
0010100498
QTY.
1
4
1
1
1
1
1
1
1
1
1
1
1
1
1
1
1
1
1
1
1
1
1
1
1
1
1
1
1
1
2
1
1
1
2
1
1
1
1
model: outdoor unit for HDU-24H03/H HDU-28H03/H
OUTDOOR UNIT PART LIST OF HDU-24H03/H HDU-28H03/H
No.
Name of parts
Part specialized code
1
Front grille
001A1236028
2
handle
001A1436160
3
Front panel
001A0100261
4
Axial fan
001A5402022
5
Fan motor
001A3000082
6
Bracket for fan motor
001A0100266
7
Condenser assy.
001A0400119
8
Electric box
001A1301453
9
cable clamp
001A5745009
10
Capacitor for fan motor
001A3600018
11
Resumable transformer
001A3800141
12
clip for sensor
001A5736055
13
temp. Sensor Pipe environment
001A3900153
14
Capacitor for compressor
001A3600030
15
Capacitor clamp
0010100001
16
outdoor PCB
0010400212
17
AC contactor
001A3900161
18
Terminal block
001A4000151
19
electrical source connection block
001A4000110
20
4-way valve
001A2500081
21
coil of 4-way valve
001A2500076
22
High pressure switch
001A3400138
23
capillary
0010751180
25
filter
001A2411024
26
Tube assy.
001A0500461
27
3-way stop valve
001A2500083
28
2-way stop valve
001A2500082
29
muffle
001A2111912
30
Compressor
0010751129
31
Accumulator
0010751125
32
Partition plate
001A0100350
33
Front panel
001A0100524
34
Bottom cover assy.
001A0100351
35
branch triby
001A1301117
36
Valve pedestal
001A1301506
37
Top cover assy.
001A0100264
38
Back grille
001A0100109
39
Junction box
001A0100394
40
Slide plate(right)
001A0100390
41
wire assy.
001A4400511
QTY.
1
2
1
1
1
1
1
1
1
1
1
1
1
1
1
1
1
1
1
1
1
1
1
1
1
1
1
1
1
1
1
1
1
1
1
1
1
1
1
model: indoor unit for HDU-42H03/H
INDOOR UNIT PART LIST OF HDU-42H03/H
No.
Name of parts
1
air inlet frame assy.
2
hanging
3
boarding assy. Of liquid pipe
4
fix slot assy.
5
bottom plate assy.
6
air discharge framework
7
wiring clap
8
cover plate assy. 1
9
fix tendon assy. 1
10
cover plate assy. 2
11
float braket
12
evaporator fixing plate 3
13
heat exchanger assy.
14
cover plate assy. 3
15
fix tendon assy. 2
16
evaporator fixing plate 2
17
transformer
18
relay SCL-DPDT-C1
19
capacitor
20
cover of elelctrical box
21
fan speed adjusting board
22
press clip
23
wiring harness
24
indoor PCB
25
terminal block
26
electrical box
27
liquid inlet pipe assy.
28
air return pipe assy.
30
evaporator fixing plate 3
31
float switch
32
motor hold
33
motor hold
34
motor bracket
35
snail shell 1
36
fan 1
37
hermitic circle of snail shell
38
hermitic circle of snail shell
39
fan 2
40
snail shell 2
41
spring washer M4
42
indoor motor
43
drain pan assy.
44
guard plate assy. 1
45
guard plate assy. 2
Part specialized code
001A01001000
001A13011049
0010800288
001A0100999
001A01001002
001A1301205
0010800284
0010800282
0010800285
001A13011050
0010800290
0010701072
0010800286
0010800283
0010800289
001A3800141
0010400298
001A3600254
001A13011035
001A3300352
001A5745116
001A4400755
0010400132
001A4000151
001A13011036
0010701050
0010700693
0010800290
001A3400160
001A13011045
001A13011045
001A13011039
001A13011040
001A2301102
001A13011044
001A13011044
001A2301103
001A13011041
001A5401035
001A3000291
0010800329
0010800280
0010800281
QTY.
1
4
1
1
1
1
1
1
1
1
1
1
1
1
1
1
1
3
1
1
1
1
1
1
1
1
1
1
1
1
1
1
1
1
1
1
1
1
1
1
1
1
1
1
model: outdoor unit for HDU-42H03/H
OUTDOOR UNIT PART LIST OF HDU-42H03/H
No.
Name of parts
Part specialized code
1
Front grille
001A0100122
2
service panel assy
001A1301707
3
Front panel
001A1301640
4
Axial fan
001A5402022
5
Fan motor
001A3000244
6
Bracket for fan motor
001A0100740
7
Condenser assy.
001A0400173
8
AC contactor
001A3900161
9
Capacitor for fan motor
002A3600018
10
connection block
001A4000011
11
Resumable transformer
001A03800141
12
outdoor PCB
0010400214
13
temp. Sensor Pipe environment 001A3900153
14
clip for sensor
001A5736055
15
Terminal block
001A4000158
16
Electric box
001A1301708
17
Top cover assy.
001A0100827
18
Slide plate(right)
001A0100733
19
Back grille
001A1303642
20
High pressure switch
001A3400138
21
segregator
001A20000175
22
coil of 4-way valve
001A2500121
23
4-way valve
001A2500117
24
muffle
001A2400128
25
Compressor
001A2000195
26
wiring harness
0010400044
27
2-way stop valve
001A2500115
28
3-way stop valve
001A2500116
29
Valve pedestal
001A1301762
30
Bottom cover assy.
001A0100735
31
Power line clip
001A5701062
32
Partition plate
001A0100734
33
Partition plate tray
001A17561212
34
handle
001A1436160
35
cover
001A1301763
QTY.
2
1
2
2
2
1
1
1
2
1
1
1
1
1
1
1
1
1
1
1
1
1
1
1
1
1
1
1
1
1
1
1
1
1
1