1
Service Manual
Platinum™Series
Platinum 5
Platinum 10
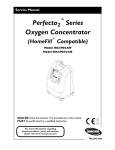
Platinum XL - 5 Liter
Oxygen Concentrator
Model IRC5LX, IRC10LX (HomeFill™II Compatible)
Model IRC5LXO2, IRC10LXO2 (With SensO2®and HomeFill II Compatible)
DEALER: Keep this manual. The procedures in this manual
MUST be performed by a qualified technician.
For more information regarding
Invacare products, parts, and services,
please visit www.invacare.com
ACCESSORIES
WARNING
DO NOT OPERATE THIS EQUIPMENT WITHOUT FIRST READING AND
UNDERSTANDING THIS MANUAL. IF YOU ARE UNABLE TO UNDERSTAND
THE WARNINGS, CAUTIONS, AND INSTRUCTIONS, CONTACT INVACARE
TECHNICAL SERVICES BEFORE ATTEMPTING TO USE THIS EQUIPMENT OTHERWISE SERIOUS INJURY OR PROPERTY DAMAGE MAY RESULT.
ACCESSORIES
There are many different types of humidifiers, oxygen tubing, cannulas and masks that
can be used with this device. You should contact your local home care provider for
recommendations on which of these devices will be best for you. They should also give
you advice on the proper usage, maintenance, and cleaning.
WARNING
Invacare products are specifically designed and manufactured for use in conjunction
with Invacare accessories. Accessories designed by other manufacturers have not
been tested by Invacare and are not recommended for use with Invacare products.
Platinum™Series
2
Part No 1110538
TABLE OF CONTENTS
TABLE OF CONTENTS
ACCESSORIES ................................................................................... 2
SPECIAL NOTES ................................................................................ 7
FEATURES ........................................................................................ 8
TYPICAL PRODUCT PARAMETERS .................................................... 9
SECTION 1—IMPORTANT SAFEGUARDS .......................................... 11
Important Safeguards ...............................................................................................................................11
Maintenance ...............................................................................................................................................12
Radio Frequency Interference ...............................................................................................................12
To Reduce the Risk of Burns, Electrocution, Fire or Injury to Persons......................................12
SECTION 2—INSTALLATION/SEQUENCE OF OPERATION .................. 13
Installation/Verification of Battery Free Power Loss Alarm ...........................................................13
Sequence of Operation ...........................................................................................................................13
SensO2 Oxygen Sensor Technology - Ceramic Zirconia Sensor .................................................14
Technical Description .........................................................................................................................14
Operating Sequence ............................................................................................................................14
SECTION 3—PNEUMATIC DIAGRAM ............................................... 16
SECTION 4—TROUBLESHOOTING .................................................... 17
SECTION 5—CABINET .................................................................... 25
Removing Cabinet ....................................................................................................................................25
SECTION 6—PREVENTIVE MAINTENANCE ...................................... 26
Cleaning the Cabinet Filter ....................................................................................................................26
Replacing the Outlet HEPA Filter.........................................................................................................27
Check the Outlet HEPA Filter..........................................................................................................27
Replace the Outlet HEPA Filter before 06\09\06 ........................................................................27
Replace the Outlet HEPA Filter after 06\09\06............................................................................28
Replacing the Compressor Inlet Filter.................................................................................................28
Replacing the Exhaust Canister/Exhaust Muffler (Platinum 5 Models Manufactured before 7/
24/03) .................................................................................................................................................................29
Replacing the Throttling Muffler ...........................................................................................................31
Cleaning the Heat Exchanger.................................................................................................................31
Part No 1110538
3
Platinum™Series
TABLE OF CONTENTS
TABLE OF CONTENTS
SECTION 7—COMPRESSOR .............................................................. 33
Replacing Compressor Assembly .........................................................................................................33
Replacing Capacitor .................................................................................................................................35
5-Liter Models (Platinum 5 and Platinum XL) ...............................................................................35
10-Liter Model (Platinum 10) ............................................................................................................36
Rebuilding the Thomas Model 2650 and 2660 Compressor - Platinum 5 and 10 Models ......37
Removing Compressor and Compressor Heads .........................................................................38
Rebuilding the Compressor...............................................................................................................41
Platinum XL Model - Rebuilding the Gast Compressor..................................................................45
Removing the Head Cover and Valve Plate Assembly.....................................................................46
Removing Head Cover Gaskets, O-Ring Gaskets, Exhaust Valves and Limiter ........................46
Installing the New Intake Valves, Exhaust Valves With Limiters...................................................48
Removing the Existing Retainer Plate, Cups and Cylinders............................................................49
Installing the New Head Cover Gaskets and O-Ring Gaskets ......................................................51
Installing the Head Cover .......................................................................................................................52
SECTION 8—P.E. VALVE .................................................................. 53
Replacing P.E. Valve..................................................................................................................................53
SECTION 9—SIEVE BEDS ................................................................. 54
Replacing Sieve Beds ................................................................................................................................54
SECTION 10—CHECK VALVES ......................................................... 56
Replacing Check Valves...........................................................................................................................56
SECTION 11—REGULATOR .............................................................. 58
Replacing Regulator..................................................................................................................................58
Adjusting Regulator..................................................................................................................................60
SECTION 12—HEAT EXCHANGER ................................................... 61
Replacing Heat Exchanger ......................................................................................................................61
SECTION 13—CONTROL PANEL ...................................................... 62
Removing Control Panel.........................................................................................................................62
SECTION 14—COOLING FAN ........................................................... 64
Replacing Cooling Fan .............................................................................................................................64
SECTION 15—P.C. BOARD .............................................................. 66
Replacing P.C. Board................................................................................................................................66
SECTION 16—TRANSFORMER ......................................................... 68
Replacing Transformer Assembly .........................................................................................................68
Platinum™Series
4
Part No 1110538
TABLE OF CONTENTS
TABLE OF CONTENTS
SECTION 17—ON/OFF SWITCH ......................................................... 69
Replacing On/Off Switch.........................................................................................................................69
SECTION 18—FLOWMETER .............................................................. 70
Replacing Flowmeter ...............................................................................................................................70
SECTION 19—HOUR METER ............................................................ 72
Replacing Hour Meter .............................................................................................................................72
SECTION 20— 4-WAY VALVE .......................................................... 73
Replacing 4-Way Valve............................................................................................................................73
Replacing Manifold Assembly (Units Manufactured before 7/24/03)............................................74
Replacing Manifold Assembly (Units Manufactured after 7/24/03) ...............................................77
Replacing Pilot Valve Poppets and O-Rings........................................................................................80
SECTION 21—PURITY INDICATORS ................................................ 83
SensO2 Alarm Indicators ........................................................................................................................83
Operation ..............................................................................................................................................83
Indicator Lights .....................................................................................................................................83
Indicators - If your unit does not feature the O2 Sensor ...............................................................84
LX Models Indicator Light Explanation...........................................................................................84
SECTION 22—TIMING ..................................................................... 85
Timing the Platinum 5, XL, and 10 Concentrators...........................................................................85
Autotuning.............................................................................................................................................85
Manual Tuning.......................................................................................................................................87
SECTION 23—LEAK TEST ................................................................ 89
Leak Test ....................................................................................................................................................89
SECTION 24— ALARM TEST ............................................................ 91
Alarm and Sensor Tests..........................................................................................................................91
Power Loss Alarm ...............................................................................................................................91
Low Pressure Test...............................................................................................................................91
Time-Out Test......................................................................................................................................92
High Pressure Test ..............................................................................................................................92
Oxygen Sensor .....................................................................................................................................93
P.E. Valve Coil Test .............................................................................................................................94
Part No 1110538
5
Platinum™Series
SECTION 25— SIEVE BED PRESSURE CHECK ..................................... 96
Installing the Sieve Bed Pressure Tap-In Kit Installation and Checking Bed Pressure .............96
Disassembly ...........................................................................................................................................96
Installation..............................................................................................................................................97
Pressure Testing...................................................................................................................................97
After Testing .........................................................................................................................................98
LIMITED WARRANTY ..................................................................... 99
Platinum™Series
6
Part No 1110538
SPECIAL NOTES
SPECIAL NOTES
Signal words are used in this manual and apply to hazards or unsafe practices which
could result in personal injury or property damage. Refer to the table below for
definitions of the signal words.
SIGNAL WORD
MEANING
DANGER
Danger indicates an imminently hazardous situation which,
if not avoided, will result in death or serious injury.
WARNING
Warning indicates a potentially hazardous situation which, if
not avoided, could result in death or serious injury.
CAUTION
Caution indicates a potentially hazardous situation which, if
not avoided, may result in property damage.
NOTICE
THE INFORMATION CONTAINED IN THIS DOCUMENT IS SUBJECT TO
CHANGE WITHOUT NOTICE.
DANGER
Users MUST not smoke while using this device. Keep all matches, lighted cigarettes
or other sources of ignition out of the room in which this product is located. NO
SMOKING signs should be prominently displayed. Textiles and other materials that
normally would not burn are easily ignited and burn with great intensity in oxygen
enriched air. Failure to observe this warning can result in severe fire, property
damage, and cause physical injury or death.
Part No 1110538
7
Platinum™Series
FEATURES
FEATURES
FRONT VIEW
Oxygen Outlet
Flowmeter
Oxygen Purity and Fault
Indicator Lights (SensO2
model)/Fault and Power
Indicator Lights
(LX model)
Power Switch
Circuit Breaker
Hour Meter
Cabinet Filter
(one of two
shown)
*NOTE: This outlet fitting is to be used only for filling oxygen cylinders with the
HomeFill II home oxygen compressor. The outlet fitting does not affect concentrator
performance. Refer to the HomeFill II owner's manual, part number 1100873, for
connection and operating instructions. When not in use, the plug provided with the
concentrator should be inserted into the outlet fitting.
Outlet Fitting*
Power Cord
ACCESSORIES (NOT SHOWN):
Remote Humidifier/Flowmeter Accessory IRCRF5
PreciseRX™ Pediatric Humidifier/ Flowmeter
Accessory - IRCPF16
Homefill II home oxygen compressor - IOH200
TOP VIEW
Platinum™Series
8
Part No 1110538
TYPICAL PRODUCT PARAMETERS
TYPICAL PRODUCT PARAMETERS
ELECTRICAL REQUIREMENTS:
120 VAC ± 10% (132 VAC/108 VAC), 60 Hz
RATED CURRENT INPUT:
Platinum 5 and XL: 4.3 A
Platinum 10: 4.7 A
SOUND LEVEL:
Platinum 5 and XL: 50 dB Average
Platinum 10: 58 dB Average
ALTITUDE:
Platinum 5 and XL - Up to 6,000 ft. (1828 meters) above sea
level without degradation of concentration levels. From 6,000
ft. (1828 meters) to 13,129 ft. (4000 meters) below 90%
efficiency
Platinum 10 - Up to 4,000 ft. (1230 meters) above sea level
without degradation of concentration levels. From 4,000 ft.
(1230 meters) to 13,129 ft. (4000 meters) below 90% efficiency.
*OXYGEN OUTPUT
CONCENTRATION LEVELS:
All 5LXO2/5LX models 95.6% to 87% at 0.5 to 5 L/min. and all
10LXO2/10LX models 95.6% to 87% at 2 L to 10 L/min.
* Stated concentration levels achieved after initial warm-up
period (approximately 30 minutes).
MAXIMUM OUTLET PRESSURE:
Platinum 5 and XL: 5 ± 0.5 psi. (34.5 ± 3.45 kPa)
Platinum 10: 9 psi ± 0.5 psi. (62.0 kPa ± 3.45 kPa)
FLOW RANGE:
Platinum 5 and XL - 0.5 to 5 L/min. For flowrates less than 1
L/min., we recommend the use of the Invacare Pediatric
Flowmeter IRCPF16 Accessory.
Platinum 10 - 2 L/min. to 10 L/min.
LOW FLOW ALARM:
Platinum 5 - 0 L/min. to 0.5 L/min.
Platinum 10 - 0 L/min. to 1 L/min.
Rapid Audible Alarm Beeping (No Accessories Connected).
AVERAGE POWER CONSUMPTION:
Platinum 5 and XL: 400W
Platinum 10: 585W
PRESSURE RELIEF MECHANISM
OPERATIONAL AT:
35 psi ± 3.5 psi (241 kPa ± 24.1 kPa).
CHANGE IN MAXIMUM
RECOMMENDED FLOW WHEN BACK
PRESSURE OF 7K PA IS APPLIED:
0.7 L/min.
FILTERS:
Cabinet (2), Outlet HEPA and Compressor Inlet.
SAFETY SYSTEM:
Current overload or line surge shutdown. High temperature
compressor shutdown. High Pressure Alarm w/compressor
shutdown. Low Pressure Alarm w/compressor shutdown.
Battery Free Power Loss Alarm. SensO2 Oxygen System
(SensO2 Model) Low Flow Alarm.
WIDTH:
18 3/8 in. ± 3/8 in. (46.7 cm ± 1 cm).
HEIGHT:
26 3/8 in. ± 3/8 in. (67.0 cm ± 1 cm).
DEPTH:
14 3/8 in. ± 3/8 in. (36.5 cm ± 1 cm).
Part No 1110538
9
Platinum™Series
TYPICAL PRODUCT PARAMETERS
WEIGHT:
Platinum 5 and XL: 52 lbs ± 2 lbs (23.6 kg ± 1 kg).
Platinum 10: 53 lbs ± 2 lbs (24.0 kg ± 1 kg).
SHIPPING WEIGHT:
Platinum 5 and XL: 58 lbs ± 2 lbs (26.3 kg ± 1 kg).
Platinum 10: 60 lbs ± 2 lbs (27.2 kg ± 1 kg).
OPERATING AMBIENT
TEMPERATURE:
50°F - 95°F (10°C - 35°C) at 20-60% relative humidity.
EXHAUST:
Platinum 5 and XL: Less than Ambient + 35°F (+19°C).
Platinum 10: Less than Ambient + 45°F (+25°C).
OXYGEN OUTPUT:
Platinum 5 and XL: Less than Ambient + 4°F (+2°C).
Platinum 10: Less than Ambient + 8°F (+4.4°C).
CABINET:
Impact Resistant flame-retardant plastic cabinet that conforms
to UL 94-V0.
REGULATORY LISTING:
Double Insulated Product ETL certified complying with UL 1097
ETL certified to CSA C22.2 No. 68.
ELECTRICAL:
No extension cords.
PLACEMENT:
No closer than three inches from any wall, furniture, draperies,
or similar surfaces.
TUBING:
Platinum 5 and XL: 7 ft cannula with a maximum 50 ft of
Crush-Proof Tubing (DO NOT pinch).
Platinum 10: Recommended use up to 50 ft high flow tubing
with high flow cannula at all flow rates.
RELATIVE HUMIDITY:
20 to 60%.
TIME OF OPERATION:
Up to 24 hours per day.
RECOMMENDED STORAGE AND
SHIPPING TEMPERATURE:
-20°F to 150°F (-29°C to 65°C), at 15-95% relative humidity.
LABEL
SYMBOL
O2
LABEL
SYMBOL
I/O
Platinum™Series
STATUS
SENSO2 MODELS INDICATOR LIGHTS (LED)
SYSTEM OKAY
O2 over 85% (± 2%)
GREEN Indicator Light
O2 Between 73% (± 3%) to 85%
(±2%)
YELLOW Indicator light
A. YELLOW Solid
B. YELLOW Flashing Sensor Failure
Call a qualified technician.
SYSTEM FAILURE
O2 Below 73% (±3%)
RED Indicator light
Continuous Audible Alarm Sieve-GARD™Compressor Shutdown
Call a qualified technician
STATUS
LX MODEL INDICATOR LIGHTS (LED)
SYSTEM OKAY
GREEN Indicator Light
SYSTEM FAILURE
RED Indicator light
Continuous Audible Alarm Sieve-GARD™ Compressor Shutdown
Call a qualified technician
10
Part No 1110538
SECTION 1—IMPORTANT SAFEGUARDS
SECTION 1—IMPORTANT
SAFEGUARDS
WARNING
IMPORTANT SAFEGUARDS contains important information for the safe
operation and use of this product. DO NOT use this product or any available
optional equipment without first completely reading and understanding these
instructions and any additional instructional material such as Owner’s Manuals,
Service Manuals or Instruction Sheets supplied with this product or optional
equipment. If you are unable to understand the Warnings, Cautions or Instructions,
contact a healthcare professional, dealer or technical personnel before attempting
to use this equipment - otherwise, injury or damage may occur.
Important Safeguards
The use of oxygen therapy requires that special care be taken to reduce the risk of fire. Any
materials that will burn in air, and some that will not, are easily ignited and burn rapidly
in high concentrations of oxygen. For safety concerns, keep all sources of ignition out of
the room in which this product is located and away from areas where oxygen is being
delivered. Textiles, oil and other combustibles are easily ignited and will burn with great
intensity in oxygen-enriched air. NO SMOKING signs should be prominently displayed.
A spontaneous and violent ignition may occur if oil, grease or greasy substances come in
contact with oxygen under pressure. These substances MUST be kept away from the
oxygen concentrator, tubing and connections, and all other oxygen equipment. DO NOT
use any lubricants unless recommended by Invacare.
For optimum performance, Invacare recommends that each concentrator be on and
running for a minimum of 30 minutes at a time. Shorter periods of operation may be
harmful for maximum product life.
Keep the oxygen tubing, cord, and unit away from heated or hot surfaces, including space
heaters, electric blankets, stoves and similar electrical appliances.
DO NOT move or relocate concentrator by pulling on the power cord.
NEVER drop or insert any object into any opening.
NEVER block the air openings of the product or place it on a soft surface, such as a bed
or couch, where the air opening may be blocked. Keep the openings free from lint, hair
and the like.
Fill humidifier with water to the level shown by the manufacturer. DO NOT overfill.
Invacare recommends that Crush-Proof oxygen tubing be used with this product and
NOT exceed 50 ft. (15.2m) in length. Recommended use for Platinum 10 is up to 50 ft. in
length of high flow tubing.
Part No 1110538
11
Platinum™Series
SECTION 1—IMPORTANT SAFEGUARDS
Maintenance
The Platinum Oxygen Concentrator was specifically designed to minimize routine
preventive maintenance. Only professionals of the healthcare field or persons fully
conversant with this process, such as authorized or factory trained personnel, should
perform preventive maintenance or performance adjustments on the oxygen
concentrator.
Radio Frequency Interference
Most electronic equipment is influenced by Radio Frequency Interference (RFI).
CAUTION should be exercised with regard to the use of portable communications
equipment in the area around such equipment.
To Reduce the Risk of Burns, Electrocution, Fire or
Injury to Persons
DO NOT come in contact with the concentrator while you are wet.
DO NOT place or store product where it can drop into water or other liquids.
DO NOT reach for product that has fallen into water. Unplug IMMEDIATELY.
No adjustments should be made to the flowrate unless prescribed by a physician
therapist.
The product should NEVER be left unattended when it is plugged in.
Close supervision is necessary when this product is used by, on or near children or
physically challenged individuals.
The Platinum concentrator is intended to be used only as an oxygen supplement as
described in the Owner's Manual.
Invacare products are specifically designed and manufactured for use in conjunction with
Invacare accessories. Accessories designed by other manufacturers have not been tested
by Invacare and are not recommended for use with Invacare products.
DO NOT connect the concentrator in parallel or series with other oxygen concentrators or
oxygen therapy devices.
Use of some administration accessories or certain humidifiers not specified for use with
oxygen concentrator may impact the performance.
Avoid creation of any spark near medical oxygen equipment. This includes sparks from
static electricity created by any type of friction.
Platinum™Series
12
Part No 1110538
SECTION 2—INSTALLATION/SEQUENCE OF OPERATION
SECTION 2—INSTALLATION/
SEQUENCE OF OPERATION
Installation/Verification of Battery Free Power Loss
Alarm
When your new Platinum concentrator arrives, it should be checked for proper operating
conditions.
1. If the unit has been in below-freezing temperatures, allow it to warm up to room
temperature before operating.
2. The concentrator may need to be turned on for four to five seconds to charge the
Battery Free Power Loss Alarm. Connect power cord to outlet and turn the
concentrator on. Turn flow control knob counterclockwise and flow will begin
IMMEDIATELY. Set flow rate to five L/min. Let the unit run for 30 minutes, then turn
unit off.
3. Unplug the power cord and press on/off ( I/O ) switch to the On (I/) position. An
intermittent audible alarm will sound. This confirms proper operation of the Battery
Free Power Loss Alarm. Turn On/Off switch Off (O ).
4. Connect power cord to outlet and turn on concentrator. Unit will beep on start-up.
5. Check the oxygen concentration per specifications after 30-40 minutes running time.
Sequence of Operation
Turning on (I) the power switch applies 120 VAC to the compressor motor, hour meter,
transformer, cooling fan and the printed circuit (P.C.) board.
Room air enters the compressor via the cabinet filter and the compressor inlet filter. The
air is compressed by the wobble pistons in the compressor to a pressure of 21 p.s.i. (144.79
kPa) for Platinum 5, XL and 25 p.s.i. (172.36 kPa) for Platinum 10.
As increased pressure creates increased temperature, a heat exchanger is used to lower
the temperature before the air enters the 4-way valve. It is then channeled to a sieve bed
containing the adsorption material. Restriction downstream of the sieve bed causes
pressure to build up inside the sieve bed which is necessary for the adsorption process. A
small amount of relatively pure oxygen enters the top of the second bed through a
restrictive leak in the pressure equalization (P.E.) valve with the balance entering a storage
tank. The nitrogen removed is exhausted back from the bed through the 4-way valve into
room air. A muffler is located at the exhaust end of the valve to muffle the sound of the
exhaust as it exits the concentrator.
The oxygen not being used to exhaust is channeled into the storage tank. The pressurized
oxygen is regulated down to five p.s.i. (34.4 kPa), enters an accurate flow-measuring
device, flows through Outlet HEPA filter and check valve, then out to the patient.
Part No 1110538
13
Platinum™Series
SECTION 2—INSTALLATION/SEQUENCE OF OPERATION
The electrical activation of the 4-way Valve is accomplished every 8 to 15 seconds by the
pressure sensor and P.C. Board electronics when the pressure reaches a set point of 21
p.s.i. (144.79 kPa) for Platinum 5 and XL; 25 p.s.i. (172.36) for Platinum 10. The time
between cycles is dependent on altitude, flow rate and internal environmental factors.
A P.E. valve opens just prior to the shift of the 4-way valve. This allows highly
concentrated oxygen to enter the just exhausted bed from the top. This additional
pressure allows the bed to start its cycle at a higher pressure. The P.E. valve will close just
after the shift of the 4-way valve.
If main power is lost, the Battery Free Power Loss Alarm will sound a short "BEEP", with
a long pause after. All units are equipped with a diagnostic alarm system that signals if
the pneumatic pressure or electrical systems malfunction. The Troubleshooting Guide in
this manual explains the alarm system signals and reasons, in detail, for your
convenience.
SensO2 Oxygen Sensor Technology - Ceramic Zirconia
Sensor
Technical Description
The oxygen being produced by the concentrator flows out of the product tank and into
the flowmeter. A small flow of oxygen produced by the unit is sent through a precision
orifice to the oxygen sensor mounted on the printed circuit board.
As the oxygen enters the sensor, it passes through a screen and contacts the sensing disk.
Electric current flowing through a metal film resistor heats the disk in excess of 300° C.
Oxygen molecules contact the electrode of the disk and pick-up extra electrons to become
oxygen ions. These oxygen ions are attracted to the electrode on the bottom of the zirconia
sensing disk. Because of the crystal structure of the zirconia, only oxygen ions can pass
through. When the oxygen ions reach the bottom electrode, the extra electrons are
released from the oxygen ions and oxygen molecules return to the air. The number of
electrons is directly related to the oxygen concentration. The electrons travel to the P.C.
board where they are counted and the oxygen concentration reading is calculated.
A microprocessor on the P.C. board contains software that interprets the signal being
received from the sensor. It compares the signal to clinically acceptable limits. Signals
outside of the clinically acceptable limits generate responses in the form of lights, audible
indicators, and/or system shut-down.
Operating Sequence
Once the power switch has been turned on (I/), the SensO2 circuit will wait five minutes
for the concentrator to begin producing clinically acceptable oxygen and the oxygen
sensor to stabilize. The GREEN light will illuminate (indicating normal system operation)
while the oxygen sensor is warming up.
Platinum™Series
14
Part No 1110538
SECTION 2—INSTALLATION/SEQUENCE OF OPERATION
After five minutes, if the oxygen purity exceeds 85% ± 2%, the GREEN light will continue
to illuminate.
If the oxygen level is not above 85% ± 2% after the first five minutes, the system will
continue to monitor the O2 and wait for a maximum of 30 minutes from start-up to reach
85% ± 2% before activating an alarm. Environmental factors such as low voltage, high
altitude, or age of the machine will affect the time required to reach 85% ± 2%.
If the oxygen level is not above 85% ± 2% within the first 30 minutes, the oxygen
concentration alarm sequence will activate and the unit will shut down.
When oxygen concentration is above 85% ± 2%, the sensor measures oxygen purity every
10 minutes. If a reading falls below 85% ± 2%, a YELLOW light will illuminate. If the
oxygen purity falls below 73% ± 3% the RED light/Alarm/Shut-Down mode will activate.
Part No 1110538
15
Platinum™Series
SECTION 3—PNEUMATIC DIAGRAM
SECTION 3—PNEUMATIC
DIAGRAM
Plantinum Oxygen Concentrator
Ouput
HEPA Filter
Output
Check
Valve
Flowmeter
Patient
Output
Oxygen Sensor
(SensO2 models Only)
Pressure
Regulator
Pressure Sensor
P.S.I.
O2
P.C. Board
Product
Tank
Check
Valves
Air Inlet
Cabinet
Filter(s)
Compressor
Inlet Filter
Sieve
Bed
P.E. Valve
Sieve
Bed
4-way
Valve
Compressor
Solenoid
Pilot
Relief
Valve
Exhaust
Muffler
Heat
LEGEND Pneumatic Connections
Platinum™Series
16
Electrical Connections
Part No 1110538
SECTION 4—TROUBLESHOOTING
SECTION 4—TROUBLESHOOTING
SYMPTOM
PROBABLE CAUSE
NORMAL OPERATION: No Problems
Internal Status Indicators:
RED: Off
GREEN: Off
Unit plugged in, power
switch on. Single beep on
start up.
POWER LOSS:
No Problems.
Internal Status Indicators:
RED: Off
GREEN: Off
Unit unplugged, power
switch on, alarm off.
No power at outlet.
POWER LOSS:
Internal Status Indicators:
RED: Off
GREEN: Off
Unit plugged in, power
switch, alarm off, battery
Free circuit drained.
Battery Free Circuit drained. Plug in cord
and turn power switch ON (I) to recharge.
Check electrical outlet with a table lamp or
voltmeter set on 50-200 VAC scale. If
outlet isn't working, check protective
device in home's electrical panel or consult
an electrician. Also ensure that unit is
properly plugged in. DO NOT use
extension cords. Move to another outlet
or circuit.
Power cord:
a. Frayed.
b. Broken or damaged spade.
c. Spade connector from power cord
loose or disconnected (inside back
of unit).
Part No 1110538
SOLUTION
System Okay.
17
a. Reattach cord.
b. Replace power cord connectors on
plug.
c. Reattach connector.
Platinum™Series
SECTION 4—TROUBLESHOOTING
SYMPTOM
POWER LOSS:
(Continued)
Internal Status Indicators:
RED: Off
GREEN: Off
Unit plugged in, power
switch, alarm off. Battery
Free circuit drained
PROBABLE CAUSE
On/Off ( I/O ) switch.
a. Disconnected wire.
b. Faulty switch.
Circuit breaker tripped.
P.C. board.
a. P.C. board damaged.
b. Loose or damaged connector.
Transformer assembly.
a. Faulty.
INTERNAL POWER
LOSS SENSO2:
Internal Status Indicators:
b. Connector loose or disconnected.
RED: Off
c. Faulty wiring.
GREEN: Off
Alarm may or may not be
on.
Control Panel Indicators: P.C. board faulty.
RED: Off
YELLOW: Off
GREEN: Off
Fan operates,
Compressor not
operating.
Platinum™Series
18
SOLUTION
Check all electrical connections to the
ON/OFF ( I/O ) switch for any
disconnected wires.
If the concentrator does not come on at all
and wiring is intact, color code and remove
wires one at a time. Remove and replace
with new one. Transfer wires from old
switch to new switch one at a time to the
matching contact.
Reset breaker.
NOTE: Breaker may trip to safeguard
concentrator during a power surge.
If breaker trips IMMEDIATELY, there is a
probable short in the unit. Check for
pinched or charred wires. If the breaker
does not trip, run unit for approximately
two hours. The circuit breaker should be
less than 10 ohms. If breaker trips again,
there is an internal problem. Contact
INVACARE TECHNICAL SERVICE at 1800-832-4707.
a. Replace P.C. Board. Refer to
Replacing P.C. Board on page 66.
b. Repair or replace connector.
a. Replace. Refer to Replacing
Transformer Assembly on page 68.
b. Reattach connector.
c. Replace transformer assembly. Refer
to Replacing Transformer Assembly
on page 68.
Replace P.C. board. Unit requires retiming
after P.C. board replacement. Refer to
Replacing P.C. Board on page 66.
Part No 1110538
SECTION 4—TROUBLESHOOTING
SYMPTOM
PROBABLE CAUSE
P.C. board:
HIGH PRESSURE:
a. Malfunction
Internal Status Indicators:
RED: One Flash
GREEN: Two Flashes
Unit plugged in, power
switch on, continuous
alarm. Compressor shut
down.
b. Disconnected wire.
c. Shifting valve at pressures greater
than 25 p.s.i. for Platinum 5 and XL;
29 PSI for Platinum 10.
4-way Valve:
a. Not shifting.
a. Set flow to max L/min. for
concentrator. Check voltage across
Pilot Valve 1 on 200 volt scale. If
meter reads 0 volts when unit is
turned on, replace P.C. board
b. Check spade connectors on pilot
valves 1 or 2 and connectors on P.C.
board.
c. Replace P.C. board. Unit requires
retiming after P.C. board
replacement. Refer to Replacing P.C.
Board on page 66.
a. Check voltage. If voltage rises to
approximately 24 volts D.C. when
unit shuts down, P.C. board is
functioning properly. Replace the
valve if shorted or open. Refer to
Replacing 4-Way Valve on page 73.
b. Replace 4-way valve. Refer to
Replacing 4-Way Valve on page 73.
c. Coil should read 80 ohm ± 10.
b. Bad coil.
c. Coil resistance.
Part No 1110538
SOLUTION
19
Platinum™Series
SECTION 4—TROUBLESHOOTING
SYMPTOM
PROBABLE CAUSE
Compressor inlet filter dirty or plugged.
LOW PRESSURE:
Internal Status Indicators:
RED: One Flash
GREEN: One Flash
Compressor:
Or
a. Leaks at fittings or tubing
RED: One Flash
b. Leaking or defective relief valve.
GREEN: Three Flashes
c. Insufficient voltage at outlet.
d. Worn cup seals or gaskets.
Control Panel Indicators:
RED: On
YELLOW: Off
GREEN: Off
Unit plugged in, power
switch on, continuous
audible alarm.
Compressor shut down
(Failure to cycle due to
low pressure).
Heat exchanger:
a. Leak at tubing or body chamber.
b. Inspect tubing and heat exchanger.
Defective Parts:
Internal Status Indicators:
RED: One Flash GREEN:
Five Flashes
Or
RED: Two Flashes
GREEN: Three Flashes
CONTROL PANEL
INDICATORS:
RED: On
YELLOW: Off
GREEN: Off
Unit plugged in, power
switch on, continuous
audible alarm.
Compressor shut down.
Defective main valve coil.
Platinum™Series
Regulator cracked or leaking.
P.E. valve leaking.
Connector loose.
Defective P.E. valve coil. (Resistance 80
ohm’s ± 10.)
Defective P.E. valve.
Connector loose.
Defective P.C. board.
20
SOLUTION
Replace compressor inlet filter. Refer to
Replacing the Compressor Inlet Filter on
page 28.
a. Replace or repair.
b. Repair leak or replace.
c. DO NOT use extension cords. Use
another outlet.
d. Rebuild top end of compressor. Refer
to Rebuilding the Thomas Model
2650 and 2660 Compressor Platinum 5 and 10 Models on page 37
or Platinum XL Model - Rebuilding
the Gast Compressor on page 45.
a. Replace or retighten.
b. Replace or retighten tubing. Replace
heat exchanger. Refer to Replacing
Heat Exchanger on page 61.
Replace regulator. Refer to Replacing
Regulator on page 58.
Replace P.E. Valve. Check voltage at P.E.
valve connector on 24 volt D.C. scale. The
P.E. Valve activates or energizes
approximately one second prior to the
activation of the 4 way valve with
approximately 24 volts. If voltage is in
excess of 24 volts consistently, replace the
P.C. board. Refer to Replacing P.C. Board
on page 66. If the P.C. board voltage acts
normally, replace the P.E. valve. Refer to
Replacing P.E. Valve on page 53.
NOTE: Check for leaks starting at the
compressor output through all the
pneumatic connections. Major leaks will
cause system pressures to remain below
adequate shift (exhaust) pressures and will
cause compressor shutdown.
a. Replace main valve.
b. Replace main valve coil.
Reattach connector.
Replace P.E. coil if shorted or open on
resistance check. Refer to Replacing P.E.
Valve on page 53.
Replace P.E. valve. Refer to Replacing P.E.
Valve on page 53.
Reattach connector.
Replace P.C. board. Refer to Replacing P.C.
Board on page 66.
Part No 1110538
SECTION 4—TROUBLESHOOTING
SYMPTOM
Unit not operating:
Alarm: On or Off
Internal Status Indicators:
RED: Two Flashes
GREEN: Four Flashes Or
RED: Two Flashes
GREEN: Five Flashes
LOW
CONCENTRATION:
NOTE: Check for O2
purity using a calibrated
Oxygen Analyzer at Test
Point 1 (OXYGEN
OUTLET) of the
concentrator.
Internal Status Indicators:
RED: Two Flashes
GREEN: One Flash73%
Shutdown Control Panel
Indicators: SensO2
ONLY:
RED: On
YELLOW: Off
GREEN: Off
PROBABLE CAUSE
P.C. board Failure.
Replace P.C. board.Refer to Replacing P.C.
Board on page 66.
Cabinet filters dirty.
Clean or replace. Refer to Cleaning the
Cabinet Filter on page 26, Replacing the
Outlet HEPA Filter on page 27, and
Replacing the Compressor Inlet Filter on
page 28.
Replace inlet filter. Refer to Replacing the
Compressor Inlet Filter on page 28.
Compressor inlet filter dirty.
Compressor:
a. Defective.
b. Faulty capacitor.
c. Bad motor windings.
d. Worn seals.
For SensO2 units, the
e. Bad bearings.
RED indicator will signal
f. Leak at fittings or tubing.
extremely low purity and
g. Leaky or defective relief valve.
will be accompanied by a
h. Insufficient voltage (outlet).
continuous audible alarm
and a system shutdown. Heat exchanger:
Repairs are required.
a. Leak at tubing or body chamber.
b. Inspect tubing and heat exchanger.
Regulator cracked or leaking.
Exhaust muffler dirty or plugged.
Fan:
a. Not operating. Unit overheating.
b. Faulty fan.
Sieve beds defective.
Tubing kinked or blocked.
Part No 1110538
SOLUTION
21
a. Replace compressor. Refer to
Replacing Compressor Assembly on
page 33.
b. Replace capacitor. Refer to Replacing
Capacitor on page 35.
c. Replace compressor.
d. Rebuild top end of compressor. Refer
to Rebuilding the Thomas Model
2650 and 2660 Compressor Platinum 5 and 10 Models on page 37
or Platinum XL Model - Rebuilding
the Gast Compressor on page 45.
e. Replace compressor.
f. Replace fittings or tubing.
g. Replace relief valve.
h. DO NOT use extension cords.
a. Replace or retighten.
b. Replace or retighten tubing. Replace
heat exchanger. Refer to Replacing
Heat Exchanger on page 61.
Replace. Refer to Replacing Regulator on
page 58.
Replace. Refer to Replacing the Exhaust
Canister/Exhaust Muffler (Platinum 5
Models Manufactured before 7/24/03) on
page 29.
a. Leads to fan disconnected.
Reconnect.
b. Replace.Refer to Replacing Cooling
Fan on page 64.
Replace. Refer to Installing the Sieve Bed
Pressure Tap-In Kit Installation and
Checking Bed Pressure on page 96.
Repair or replace.
Platinum™Series
SECTION 4—TROUBLESHOOTING
SYMPTOM
LOW
CONCENTRATION
(Continued)
PROBABLE CAUSE
P.C. board:
a. Shifts at wrong pressures.
Flowmeter:
a. Flowmeter opened beyond
maximum flow rate.
b. Cracked or broken fitting.
c. Input tubing leaking or loose.
Timing.
P.E. valve:
a. Bad coil.
b. Restrictor blockage.
Inspect P.C. board restrictor tubing for
kinks or tears.
FLUCTUATING FLOW:
Regulator/Flowmeter:
a. Incorrectly set regulator.
b. Flowmeter malfunction.
Outlet HEPA filter:
a. Dirty or plugged
Platinum™Series
SOLUTION
Check pressure at product tank. Pressure
should rise to 21 p.s.i. (25 p.s.i. for
Platinum 10) at shift point. If not, replace
P.C. Board. Refer to Replacing P.C. Board
on page 66.
a. Return flow to maximum setting.
b. Replace fitting.
c. Repair or replace. Refer to Replacing
Flowmeter on page 70.
To accommodate for varying tolerances
when replacing components, an adjustable
timer is used to control the shifting of the
Pressure Equalization (P.E.) valve. Refer to
Timing the Platinum 5, XL, and 10
Concentrators on page 85.
a. Replace P.E. valve.
b. Replace P.E. valve. Refer to Replacing
P.E. Valve on page 53.
Replace P.C. board. Unit may need
retiming after board replacement. Refer to
Replacing P.C. Board on page 66.
a. Check pressure at oxygen outlet.
Adjust regulator.
b. If flow is still unstable, check for leaks
starting at the compressor outlet
fitting through all pneumatic
connections. If no leaks are found and
flow is still fluctuating, replace the
regulator. If pressure at test point is
within spec (5 p.s.i. ± 0.2 max. [34.4
kPa ± 6.89]), replace flowmeter.
Refer to Replacing Flowmeter on
page 70.
a. If low flow conditions persist, replace
outlet HEPA filter. Refer to Replacing
the Outlet HEPA Filter on page 27.
22
Part No 1110538
SECTION 4—TROUBLESHOOTING
SYMPTOM
UNIT EXCESSIVELY
LOUD:
PROBABLE CAUSE
Pneumatic exhaust:
a. Muffler cracked, damaged or missing.
b. Muffler tubing disconnected or
damaged.
Compressor inlet filter missing and/or
orange sticker removed.
Compressor removed.
Incorrect style of inlet filter (aftermarket).
UNIT OVERHEATS:
Base exhaust vent plugged or restricted.
Cabinet filters dirty or blocked.
Fan:
a. Leads to fan disconnected.
b. Defective fan.
c. Fan installed upside down.
Heat exchanger:
a. Dirty or plugged.
b. Damaged.
a. Replace. Refer to Replacing the
Exhaust Canister/Exhaust Muffler
(Platinum 5 Models Manufactured
before 7/24/03) on page 29.
b. Reconnect or replace tubing.
a. Replace compressor inlet filter. Refer
to Replacing the Compressor Inlet
Filter on page 28.
a. Replace Compressor. Refer to
Replacing Compressor Assembly on
page 33.
a. Replace with factory OEM sound
reduced style inlet HEPA filter.
Place unit at least 3-inches from any wall.
DO NOT place unit on pile or shag carpeting that may restrict air flow.
Clean or replace. Refer to Cleaning the
Cabinet Filter on page 26.
a. Reconnect leads.
b. Replace fan. Refer to Rebuilding the
Thomas Model 2650 and 2660
Compressor - Platinum 5 and 10
Models on page 37 or Platinum XL
Model - Rebuilding the Gast
Compressor on page 45.
c. Install fan with air flow arrow pointing
down.
a. Clean heat exchanger.
b. Replace heat exchanger. Refer to
Replacing Heat Exchanger on
page 61.
Compressor:
a. Defective.
b. Faulty capacitor.
c. Bad motor windings.
d. Worn seals.
e. Bad bearings.
Line voltage excessive (surge).
Part No 1110538
SOLUTION
23
a. Replace compressor. Refer to
Replacing Compressor Assembly on
page 33.
b. Replace capacitor. Refer to Replacing
Capacitor on page 35.
c. Replace compressor.
d. Replace compressor.
e. Replace compressor.
Have line voltage inspected by certified
electrician. A voltage regulator may be
required and is obtainable from your local
electric company.
Platinum™Series
SECTION 4—TROUBLESHOOTING
SYMPTOM
OXYGEN PURITY:
Good
Internal Status Indicators:
Control Panel Indicators:
RED: Off
YELLOW: On
GREEN: On
After 30 minutes of
run time, unit operates
normally, oxygen purity
within normal range.
GREEN or YELLOW
panel indicator should
illuminate.
UNIT NOT
OPERATING,
INTERNAL STATUS
INDICATORS:
RED: Off
GREEN: Off
Control Panel Indicators:
RED: Off
YELLOW: Off
GREEN: Off
Power Switch ON.
Continuous audible
alarm.
UNIT OPERATING,
INTERNAL STATUS
INDICATORS:
RED: Three (3) Flashes
GREEN: One (1) Flash
CONTROL PANEL
INDICATORS:
RED: Off
YELLOW: Flashing
GREEN: On
Low-Flow Alarm does
not activate on flows less
than 0.5 L/min.
NOTE: This feature was
added on units
manufactured after
November 2002. These
units can be identified by
a single beep on start up.
PROBABLE CAUSE
P.C. board defective.
SOLUTION
Replace P.C. board. Refer to Replacing P.C.
Board on page 66. Unit may need retiming
after P.C. board replacement. Refer to
Timing the Platinum 5, XL, and 10
Concentrators on page 85.
Transformer assembly:
a. Assembly connector disconnected.
b. Faulty transformer assembly.
a. Reattach connector.
b. Replace transformer assembly. Refer
to Replacing Transformer Assembly
on page 68.
Internal repairs required.
Replace SensO2 circuit board. Refer to
Replacing P.C. Board on page 66.
System leak.
Repair leak in product tank, regulator,
tubing, fittings, or flow meter.
Replace check valves. Refer to Replacing
Check Valves on page 56.
Defective check valves.
NOTE: On models manufactured after 12/02, the error code displayed on the internal status
indicators is maintained in memory to aid in repairs. The error code MUST be cleared from the
unit's memory after fixing the fault. The error code memory will be cleared after turning power on
and off five times after the fault was detected.
Platinum™Series
24
Part No 1110538
SECTION 5—CABINET
SECTION 5—CABINET
Removing Cabinet
DANGER
To prevent electrical shock, ALWAYS disconnect concentrator from electrical outlet before servicing.
NOTE: For this procedure, refer to FIGURE 5.1.
1. Unplug unit.
2. Remove the four mounting screws that secure cabinet assembly to the base assembly.
3. Lift the cabinet straight up.
NOTE: When required, vacuum inside of the cabinet and exposed foam insulation.
4. To re-install cabinet, reverse STEPS 2-3.
L
Cabinet Assembly
Mounting
Screws
Mounting
Screws
Base Assembly
FIGURE 5.1 Removing Cabinet
Part No 1110538
25
Platinum™Series
SECTION 6—PREVENTIVE MAINTENANCE
SECTION 6—PREVENTIVE
MAINTENANCE
DANGER
To prevent electrical shock, ALWAYS disconnect concentrator from electrical
outlet before servicing.
NOTE: The Platinum Concentrators are specifically designed to minimize routine preventive
maintenance at intervals of once per year. In places with high dust or soot levels, maintenance may
need to be performed more often. The following MUST be performed at a minimum of one year in
service to assure years of additional reliability. Refer to Troubleshooting on page 17 for plugged
filter symptoms. Only qualified technicians should perform preventive maintenance on the
concentrator. Power should be disconnected before beginning preventive maintenance on the
Invacare concentrator.
Cleaning the Cabinet Filter
NOTE: For this procedure, refer to FIGURE 6.1.
NOTE: Perform this procedure as needed depending upon the environment the concentrator is
used in.
NOTE: There are two cabinet filters, one located on each side of the cabinet.
1. Remove each filter and clean at least once a week depending on environmental
conditions.
NOTE: Environmental conditions that may
require more frequent cleaning of the filters
include but are not limited to: high dust, air
pollutants, etc.
Cabinet Filter
(located on both
sides of
concentrator)
2. Clean the cabinet filters with a vacuum
cleaner or wash in warm soapy water
and rinse thoroughly.
Cabinet Filter
3. Dry the filters thoroughly before
reinstallation.
CAUTION
DO NOT operate the concentrator
without the filters installed.
FIGURE 6.1 Cleaning the Cabinet Filter
Platinum™Series
26
Part No 1110538
SECTION 6—PREVENTIVE MAINTENANCE
Replacing the Outlet HEPA Filter
Check the Outlet HEPA Filter
NOTE: The outlet HEPA filter can be checked by performing the following procedure.
1. Turn the concentrator on and adjust the flowmeter to the maximum flow of the unit.
2. Observe the flowmeter's flow indicator while connecting a fifty foot cannula tube to
the outlet barb of the concentrator (not shown).
3. If the flow indicator fluctuates, the outlet HEPA filter may need replacement. Refer to
Troubleshooting on page 17.
Replace the Outlet HEPA Filter before 06\09\06
NOTE: For this procedure, refer to FIGURE 6.2.
NOTE: Perform this procedure as needed depending on the outlet HEPA filter check results.
1. Unplug the unit.
2. Locate the filter access and humidifier adapter storage plate located on the side of the
concentrator.
3. Insert a flathead screwdriver in the plate groove on the top edge of the plate and
gently pry the humidifier adapter storage plate open (Detail “A”).
4. Remove plate and set aside.
5. Grasp the existing outlet HEPA filter and disconnect from the short silicone tube
(Detail “B”).
6. Disconnect existing outlet HEPA filter from the long silicone tube (Detail “B”).
7. Discard existing outlet HEPA filter.
8. Attach new outlet HEPA filter to short and long silicone tubes.
9. Reinstall filter access and humidifier adapter storage plate.
DETAIL “A”
Plate Groove
Filter Access and Humidifier
Adapter Storage Plate
Long Silicone Tube
Compressor
Inlet Filter
Long Silicone
Tube
Humidifier Bottle
Adapter
(storage location)
Short Silicone Tube
(not shown)
DETAIL “B”
Outlet
HEPA
Filter
Short
Silicone
Tube
Outlet HEPA
Filter
FIGURE 6.2 Replace the Outlet HEPA Filter before 06\09\06
Part No 1110538
27
Platinum™Series
SECTION 6—PREVENTIVE MAINTENANCE
Replace the Outlet HEPA Filter after 06/09/06
NOTE: For this procedure, refer to FIGURE 6.3.
NOTE: Perform this procedure as needed depending on the outlet HEPA filter check results.
1. Unplug the unit.
2. Remove the cabinet. Refer to Removing Cabinet on page 25.
3. Remove the tubing from both sides of the existing HEPA filter and discard old filter.
4. Connect tubing to both sides of the new HEPA filter as shown below.
5. Install cabinet. Refer to Removing Cabinet on page 25.
Control Panel
Tubing
Tubing
HEPA Filter
FIGURE 6.3 Replace the Outlet HEPA Filter after 06/09/06
Replacing the Compressor Inlet Filter
NOTE: For this procedure, refer to FIGURE 6.2 on page 27 and FIGURE 6.4.
NOTE: Perform this procedure as needed depending upon the environment the concentrator is
used in.
1. Unplug the unit.
2. Locate the filter access and humidifier adapter storage plate located on the side of the
concentrator.
3. Insert a flathead screwdriver in the plate groove on the top edge of the plate and
gently pry the humidifier adapter storage plate open to remove the plate. Refer to
Detail “A” in FIGURE 6.2.
Platinum™Series
28
Part No 1110538
SECTION 6—PREVENTIVE MAINTENANCE
4. Grasp the compressor inlet filter and pull downward.
5. Discard the existing compressor inlet filter.
6. Check the label seal on the filter to ensure it is correct for the concentrator model.
NOTE: Filter p/n 1131249 is fully forward and backward compatible with all models. This filter
replaces 1108078 on Platinum 5 and XL models.
7. Do one of the following:
• For Platinum 5 and XL: Leave the entire label on p/n 1108078 (Detail “A” of
FIGURE 6.4).
• For Platinum 10: Remove the lower half of the label on p/n 1131249 (Detail “B” of
FIGURE 6.4).
8. Install new compressor inlet filter by inserting the filter opening into the rubber base
(Detail “C” of FIGURE 6.4).
9. Push the filter down until the rubber base touches the edge of the filter.
10. Reinstall the filter access and humidifier adapter storage plate.
Label
Seal
REMOVE TOP SEAL ONLY
ON NON-PLATINUM MODELS
Compressor
Inlet Filter
PN 1131249
REMOVE
FOR PLATINUM
10 MODEL
PE
EL
PN 1108078
PEEL
HERE
Label
Seal
HE
RE
REMOVE THIS SEAL ONLY ON
CONCENTRATOR MODELS
>>>>WITHOUT<<<<
A FILTER
ACCESS DOOR
Compressor
Inlet Filter
DETAIL “C” INSTALLING
COMPRESSOR FILTER
HE
RE
Compressor
Inlet Filter
DETAIL “B” FILTER 1131249 PLATINUM 10
PE
EL
DETAIL “A” FILTER 1108078 PLATINUM 5 & XL
NOTE: The HEPA filter shown here is
for units manufactured before 6/9/06.
FIGURE 6.4 Replacing the Compressor Inlet Filter
Replacing the Exhaust Canister/Exhaust Muffler
(Platinum 5 Models Manufactured before 7/24/03)
NOTE: For this procedure, refer to FIGURE 6.5.
NOTE: The following should be performed at 20,000 hour intervals although these procedures can
be performed as needed depending upon the environment the concentrator is exposed to.
1. Unplug unit.
2. Remove cabinet. Refer to Removing Cabinet on page 25.
Part No 1110538
29
Platinum™Series
SECTION 6—PREVENTIVE MAINTENANCE
3. Remove the two mounting screws from rear of sound box.
4. Disconnect and remove the manifold exhaust tubing from the barbed fittings on top
of the exhaust canister.
5. Unscrew the exhaust muffler located on the exhaust canister by turning
counterclockwise.
6. Inspect exhaust canister to ensure the barbed fittings are clear and do one of the
following:
• Replace exhaust canister and muffler if plugged or restricted.
• Install only new exhaust muffler if exhaust canister is in good condition.
7. Install new/re-install existing exhaust canister by reversing STEPS 3-5.
8. Reinstall cabinet. Refer to Removing Cabinet on page 25.
Manifold Exhaust Tubing
Exhaust Canister
Barbed Fittings
Exhaust Muffler
Mounting Screw(s)
Rear of Sound Box
FIGURE 6.5 Replacing the Exhaust Canister/Exhaust Muffler (Platinum 5 Models Manufactured
before 7/24/03)
Platinum™Series
30
Part No 1110538
SECTION 6—PREVENTIVE MAINTENANCE
Replacing the Throttling Muffler
NOTE: For this procedure, refer to
FIGURE 6.6.
1. Unplug unit.
2. Remove cabinet. Refer to Removing
Cabinet on page 25.
3. Cut tie-wrap.
4. Remove existing throttling muffler
Tie
Wrap
5. Install new throttling muffler and
secure with new tie-wrap.
6. Reinstall the cabinet. Refer to
Removing Cabinet on page 25.
Throttling Muffler
FIGURE 6.6 Replacing the Throttling Muffler
Cleaning the Heat Exchanger
DANGER
To prevent electrical shock, ALWAYS disconnect concentrator from electrical
outlet before servicing.
NOTE: For this procedure, refer to FIGURE 6.7.
1. Unplug unit.
2. Remove cabinet. Refer to Removing Cabinet on page 25.
CAUTION
Use care not to deform heat exchanger when installing, removing or cleaning.
3. Remove excess dirt using compressed air or vacuum.
4. Reinstall cabinet. Refer to Heat Exchanger on page 61.
Sound Box
Screw
Heat Exchanger
Standoff
Heat Exchanger
FIGURE 6.7 Cleaning the Heat Exchanger
Part No 1110538
31
Platinum™Series
SECTION 6—PREVENTIVE MAINTENANCE
PREVENTIVE MAINTENANCE RECORD INVACARE PLATINUM OXYGEN
CONCENTRATOR
Model No. IRC _______________________________
Serial No.____________________________________
On Each Inspection
Record Date Of Service
Record Elapsed Hours on
Hour Meter
Clean Cabinet Filters
Check Prescribed L/min.
Flow Rate
Every 180 Days FOR IRC5LX (EVERY 90 DAYS FOR IRC10LX)
Check oxygen
Concentration
(Units without SensO2)
Annually, During Preventive Maintenance Schedule, Or Between Patients
Clean/Replace Cabinet
Filters
Check outlet HEPA Filter*
Check Compressor Inlet
Filter*
Check Oxygen
Concentration (SensO2
models)
Check Power Loss Alarm
As Required
Clean Heat Exchanger
Replace Exhaust Muffler
Rebuild Top End
Compressor
*NOTE: Refer to Preventive Maintenance section of Service Manual.
Platinum™Series
32
Part No 1110538
SECTION 7—COMPRESSOR
SECTION 7—COMPRESSOR
DANGER
To prevent electrical shock, ALWAYS disconnect concentrator from electrical
outlet before servicing.
Replacing Compressor Assembly
NOTE: For this procedure, refer to FIGURE 7.1 on page 34 and FIGURE 7.2 on page 35.
1. Unplug unit.
2. Remove the cabinet. Refer to Removing Cabinet on page 25.
3. Loosen clamps and disconnect intake hose and compressor output hose (blue) from
compressor assembly.
4. Remove compressor wires from wire clamps or tie-wraps and disconnect motor
connector from the main harness connector.
NOTE: Motor connector goes through grommet before reaching the main harness connector.
5. Remove protective boot on capacitor.
6. Disconnect capacitor wires from the top of the capacitor.
NOTE: Re-use the protective capacitor terminal boot if the replacement parts DO NOT provide
one.
7. Remove the two mounting screws that secure the compressor restraint bracket and
remove the bracket.
8. Tilt compressor assembly toward front of unit and lift out.
9. Reverse STEPS 3-8 to install new compressor assembly.
10. Reinstall the cabinet. Refer to Removing Cabinet on page 25.
11. Run unit and inspect for leaks. Refer to Leak Test on page 89.
Part No 1110538
33
Platinum™Series
SECTION 7—COMPRESSOR
Grommet
Intake Hose
Wire Clamps or
Tie-wraps
Platinum 5 model is equipped with
Thomas Compressors
Mounting
Screws
Compressor
Output Hose
(BLUE)
Canister Muffler
Protective Boot
Capacitor
Compressor
Restraint Bracket
NOTE: Models with canister muffler manufactured before 7/24/03 shown.
FIGURE 7.1 Replacing Compressor Assembly - Platinum 5 Model with Canister Muffler
Platinum™Series
34
Part No 1110538
SECTION 7—COMPRESSOR
Intake Hose
Grommet
Platinum 5 and 10 models are
equipped with Thomas Compressors
Wire Clamps or
Tie-wraps
Mounting
Screws
Compressor
Output Hose
(BLUE)
Capacitor
Protective Boot
Platinum 5 XL model is equipped
with Gast Compressor
Compressor
Restraint Bracket
NOTE: Models with throttling muffler
manufactured after 7/24/03.
FIGURE 7.2 Replacing Compressor Assembly - Platinum 5 and 10 Models with Throttling
Muffler
Replacing Capacitor
5-Liter Models (Platinum 5 and Platinum XL)
NOTE: For this procedure, refer to Detail “A” in FIGURE 7.3 on page 36.
1. Unplug the unit.
2. Remove the cabinet. Refer to Removing Cabinet on page 25.
3. Remove protective boot to reveal capacitor wires.
Part No 1110538
35
Platinum™Series
SECTION 7—COMPRESSOR
4. Disconnect the spade connectors from the capacitor terminals (not shown).
5. Remove the screw that secures the capacitor clamp to the soundbox brace.
6. Remove the capacitor from the concentrator base assembly.
7. Install new capacitor by reversing STEPS 3-6.
8. Re-install the cabinet. Refer to Removing Cabinet on page 25.
10-Liter Model (Platinum 10)
NOTE: For this procedure, refer to Detail “B” in FIGURE 7.3.
1. Unplug the unit.
2. Remove the cabinet. Refer to Removing Cabinet on page 25.
3. Cut the two tie-wraps that secure the capacitor to the soundbox brace.
4. Rotate capacitor to horizontal position.
5. Remove protective boot to reveal capacitor wires.
6. Disconnect the spade connectors from the capacitor terminals (not shown).
7. Remove the capacitor from the concentrator base assembly.
8. Install new capacitor by reversing STEPS 3-7.
9. Re-install the cabinet. Refer to Removing Cabinet on page 25.
DETAIL “A” - PLATINUM 5 AND
PLATINUM XL MODELS
DETAIL “B” - PLATINUM 10 MODELS
Capacitor
Protective
Boot
Tie-Wraps
Capacitor
Clamp
Screw
Capacitor
Soundbox
Brace
Protective
Boot
Soundbox
Brace
FIGURE 7.3 Replacing Capacitor
Platinum™Series
36
Part No 1110538
SECTION 7—COMPRESSOR
Rebuilding the Thomas Model 2650 and 2660
Compressor - Platinum 5 and 10 Models
DANGER
To prevent electrical shock, ALWAYS disconnect concentrator from electrical
outlet before servicing.
NOTE: Platinum XL uses a Gast compressor. Refer to Platinum XL Model - Rebuilding the Gast
Compressor on page 45.
NOTE: Both compressor versions (models 2650 and 2660) use kit p/n 1109235.
NOTE: This kit is designed for rebuilding the Thomas Model 2650 and 2660 Series compressor.
The model number is located on the front of the compressor. Compressor numbers for this kit are
2650CE37, 2650CE44, 2660CE37, and 2660CE50. If the compressor has a different model number
than those listed, this kit will not work.
The Thomas 2650 and 2660 Series Compressor Rebuild Kit (p/n 1109235) contains the
following: DESCRIPTION QUANTITY
DESCRIPTION
QUANTITY
Teflon®Piston Cups
2
Aluminum Piston Sleeves
2
Flapper Valves - Intake and Exhaust
4
Valve Keepers
4
O-Ring - Sleeve
2
Valve Plate Gaskets
2
Head Mounting Screws
8
Valve Screws
4
Valve Restraints
2
Piston Cup Retainer Screws
2
Tools Required:
• Torque wrench that has an inch-pound scale (for head screws, set screws, flapper
valve screw, and pipe plugs)
• Torx® T-25 drive for torque wrench (for head screws)
• Torx T-27 drive for torque wrench (for retainer screws)
• 1/8-inch Allen wrench attachment for torque wrench (for eccentric set screw)
• 5/32-inch Allen wrench attachment for torque wrench
• Flat blade screwdriver attachment or 1/4-inch hex socket for torque wrench (for
flapper valve screw)
• Two flat blade screwdrivers
Part No 1110538
37
Platinum™Series
SECTION 7—COMPRESSOR
• Rubber Mallet
• Phillips screwdriver attachment for torque wrench (for retainer screws)
CAUTION
DO NOT lubricate or use oil on any moving parts. The compressor eccentric uses a
precision sealed bearing. Therefore, additional lubrication is not necessary.
Removing Compressor and Compressor Heads
Compressor
1. Unplug concentrator and carefully remove compressor from concentrator. Refer to
Replacing Compressor Assembly on page 33.
Compressor Head Plate
NOTE: For this procedure, refer to FIGURE 7.4.
1. Clean loose dirt from the outside of the
compressor.
Head Screws
Head
Screws
2. Use the Torx T-25 torque wrench and
loosen the eight head screws.
3. Note head placement before removing
compressor heads.
Compressor
Head Plate
4. Remove the compressor head plate.
Valve Plates
NOTE: For this procedure, refer to FIGURE 7
.4.
Valve
Plate
Valve
Plate
1. Note the position of the plates before
removing.
2. Lift off the valve plate on one side.
3. Repeat for the other side.
Compressor
NOTE: Note the position of the tab on valve
plate for reassembly.
NOTE: To avoid confusion, ONLY service one
(1) end of the compressor at a time.
FIGURE 7.4 Removing Compressor and
Compressor Heads - Rebuilding the
Compressor - Compressor - Compressor
Head Plate - Valve Plates
Platinum™Series
38
Part No 1110538
SECTION 7—COMPRESSOR
Fan
NOTE: For this procedure, refer to FIGURE 7.5.
1. Using two flat blade screwdrivers, pry the fan off of the motor shaft under the center
housing. DO NOT pry under the fan blades.
NOTE: Note position/orientation of fan for reassembly.
Connecting Rod and Eccentric Assembly
NOTE: For this procedure, refer to FIGURE 7.5.
1. Rotate shaft to align the eccentric's set screw with the access hole in the bottom of the
compressor housing.
2. Insert the 1/8-inch Allen wrench into the access hole in the bottom of the compressor
housing (Detail “A” of FIGURE 7.5).
3. Loosen the set screw ¼ turn.
4. Rotate connecting rod to top dead center (180°) and slide the connecting rod/eccentric
assembly off the shaft through the opening in the housing.
5. Secure the rod assembly in a fixture.
6. Remove the sleeve from the connecting rod and discard.
Piston Cup
NOTE: For this procedure, refer to FIGURE 7.5.
1. Remove the torque screw (discard) from the piston cup retainer (retain for reassembly).
2. Remove the piston cup (discard) and wipe debris from the top of the connecting rod
with a clean damp cloth.
NOTE: As the piston travels
up and down it will also rock
from side-to-side. This is a
feature of the WOB-L Piston.
Cylinder Sleeve
Torque Screw
DETAIL “A” - BOTTOM OF
COMPRESSOR
Eccentric Set Screw Access Hole
Retainer
Piston Cup
Rod Top
Eccentric
Fan
Connecting
Rod
Set Screw
(hidden)
FIGURE 7.5 Removing Compressor and Compressor Heads - Rebuilding the Compressor Fan - Connecting Rod and Eccentric Assembly - Piston Cup
Part No 1110538
39
Platinum™Series
SECTION 7—COMPRESSOR
O-ring, Intake Valve Keeper and Valve Keeper Strip
NOTE: For this procedure, refer to FIGURE 7.6.
1. Remove the O-ring, intake valve
flapper and valve keeper strip from the
bottom of the valve plate. Discard all.
Valve Flapper
Screw
2. Clean the bottom of the valve plate
with a clean, soft cloth.
Valve
Keeper Strip
O-Ring
Intake Valve
Flapper
FIGURE 7.6 Removing Compressor and
Compressor Heads - Rebuilding the
Compressor - O-ring, Intake Valve Keeper
and Valve Keeper Strip
Exhaust Valve Flapper, Valve Restraint and Valve Keeper Strip
NOTE: For this procedure, refer to FIGURE 7.7.
1. Remove the exhaust valve flapper,
valve restraint and valve keeper strip
from the top of the valve plate. Discard
all.
Gasket
Valve Flapper
Screw
2. Clean the top of the plate with a clean,
soft cloth.
Valve
Keeper Strip
Gasket
NOTE: For this procedure, refer to FIGURE 7
.7.
Exhaust Valve
Flapper
Valve
Restraint
1. Remove the old gasket from the top of
the valve plate and discard.
FIGURE 7.7 Removing Compressor and
Compressor Heads - Rebuilding the
Compressor - Exhaust Valve Flapper, Valve
Restraint and Valve Keeper Strip
2. Clean the valve plate with a clean, soft
cloth.
Platinum™Series
40
Part No 1110538
SECTION 7—COMPRESSOR
Rebuilding the Compressor
NOTE: Before reassembly, wipe any residue from all components with a clean soft cloth.
Gasket
NOTE: For this procedure, refer to FIGURE 7.7 on page 40.
1. Install new gasket; seating the gasket firmly in the groove at the top of the valve plate
with your finger or blunt object.
CAUTION
Make sure that the gasket is not twisted when seated in the groove of the top of the
valve plate.
Exhaust Valve Flapper, Valve Restraint and Valve Keeper Strip
NOTE: For this procedure, refer to FIGURE 7.7 on page 40.
1. Install the new exhaust valve flapper, valve restraint and valve keeper strip to the top
of the valve plate with the valve flapper screw.
NOTE: Torque flapper screws to 12 inch-lbs.
O-ring, Intake Valve Flapper and Valve Keeper Strip
NOTE: For this procedure, refer to FIGURE 7.6 on page 40.
1. Install the new valve keeper strip on top of the new intake valve flapper so that the
word "UP" is visible. Fasten with the valve flapper screw.
2. Install the new O-ring, seating it firmly into the groove with your finger or blunt
object.
NOTE: Torque flapper screws to 12 inch-lbs.
Piston Cup
NOTE: For this procedure, refer to FIGURE 7.5 on page 39.
1. Place cylinder sleeve over rod top with smooth edge facing up.
2. Place piston cup on rod top making sure it is centered.
3. Place retainer on top of piston cup and seat retainer in rod top pocket, making sure the
retainer and cup align properly along with screw holes.
4. Insert new screw into rod top and torque to 30 inch-lbs.
Connecting Rod/Eccentric Assembly
NOTE: For this procedure, refer to FIGURE 7.5 on page 39.
1. With gloved-hand or clean cloth, pre-form piston cup if necessary.
2. Gently slide cylinder sleeve up and over cup to fully form it.
Part No 1110538
41
Platinum™Series
SECTION 7—COMPRESSOR
CAUTION
DO NOT lubricate or use oil on any moving parts. The compressor eccentric uses a
precision sealed bearing.
DO NOT crimp the piston cup when you replace the sleeve. If the cup is crimped, it
MUST be replaced.
3. With bearing side of connecting rod/eccentric assembly facing the center (motor) of
the compressor, slide the assembly onto the shaft bringing it flush to the motor
bearing.
NOTE: Make sure the eccentric set screw is positioned over the flat of the shaft.
4. Using the access hole, tighten set screw to 40 inch-lbs (Detail “A” of FIGURE 7.5).
5. Hold the sleeve down to the housing with one hand and slowly rotate the eccentric
with the other hand to ensure all the components are aligned properly.
Fan
NOTE: For this procedure, refer to FIGURE 7.5 on page 39.
1. Reinstall the fan onto the shaft in original orientation. Secure into position using a
rubber mallet.
Valve Plate
NOTE: For this procedure, refer to FIGURE 7.4 on page 38.
1. With the sleeve located and firmly seated on the housing, replace the valve plate in the
same manner as it was.
2. Repeat step 1 for other valve plate.
NOTE: Make sure the top edge of the sleeve locates in the O-ring groove in the bottom of the valve
plate.
CAUTION
Make sure that the O-ring is not twisted when seated in the groove of the bottom of
the valve plate.
Compressor Heads
NOTE: For this procedure, refer to FIGURE 7.4 on page 38.
1. Place the heads on top of the valve plates.
2. Tighten the head screws in a criss-cross pattern to 40 inch-lbs.
Platinum™Series
42
Part No 1110538
SECTION 7—COMPRESSOR
Compressor
WARNING
To avoid personal injury or property damage, rotate the fan by hand prior to
connecting the unit to a power source. Check for suction at the air inlet by placing
your finger over the port as you rotate the fan. You should feel a slight suction with
each rotation of the fan. If you DO NOT feel a suction but you feel or hear a thump
as you turn the fan, DO NOT connect the unit to a power source. Review the
assembly procedure for possible error.
NOTE: For this procedure, refer to FIGURE 7.8 on page 44.
1. Reinstall compressor. Refer to Replacing Compressor Assembly on page 33.
2. Run unit and check for leaks around compressor hoses and compressor tubes. Refer
to Leak Test on page 89.
3. Take pressure readings to ensure proper system pressures. Refer to Installing the Sieve
Bed Pressure Tap-In Kit Installation and Checking Bed Pressure on page 96.
FIELD SERVICE PARTS LIST FOR THOMAS 2660 SERIES COMPRESSOR
ITEM
NO.
PART
NO.
QTY.
PER ASM
QTY.
PER UNIT
DESCRIPTION
1
See Chart
—
2
Connecting Rod, Eccentric & Bearing Assembly
2
624277
1
2
Piston Cup
3
625776
1
2
Screw - Piston Cup Retainer
4
626175
1
2
Piston Cup Retainer
5
618114
1
2
Cylinder Sleeve
6
See Chart
—
1
Head
7
623143
—
2
O-Ring - Head Gasket
8
625175
—
8
Screw - Head
9
621591
—
2
Valve Plate Assembly
638574
—
1
Valve - Pressure Relief-Not Shown (115 V)
10
617177
1
2
Valve Restraint
11
617562
2
4
Valve Keeper Strip
12
621485
2
4
Valve Flapper - Intake & Exhaust
13
621641
1
2
Valve Plate
14
625094
2
4
Screw - Valve Flapper
15
623137
—
2
O-Ring Valve Plate
16
638281
—
1
Fan - Gray
17
638282
—
1
Fan - Black
2660CE37-989 COMPRESSOR
ITEM
PART NO.
QTY.
DESCRIPTION
1
607731
2
Connecting Rod, Eccentric & Bearing Assembly
6
665167
1
Head
Part No 1110538
43
Platinum™Series
SECTION 7—COMPRESSOR
COMPRESSOR PARTS LEGEND
1. Connecting Rod, Eccentric & Bearing Assembly
2. Piston Cup
3. Screw - Piston Cup Retainer
4. Piston Cup Retainer
5. Cylinder Sleeve
6 Head
7. O-Ring - Head Gasket
8. Screw - Head
9. Valve Plate Assembly
10. Valve Restraint
11. Valve Keeper Strip
12. Valve Flapper - Intake & Exhaust
13. Valve Plate
14. Screw - Valve Flapper
15. O-Ring Valve Plate
16. Fan - Gray
17. Fan - Black
FIGURE 7.8 Platinum 5, 10 Model - Compressor Exploded View
Platinum™Series
44
Part No 1110538
SECTION 7—COMPRESSOR
Platinum XL Model - Rebuilding the Gast Compressor
NOTE: Compressor model no. 82637.
NOTE: This compressor uses kit p/n 1124028.
To ensure the safe and successful installation of the Gast compressor, these instructions
MUST be followed.
DANGER
To prevent electrical shock, ALWAYS disconnect concentrator from electrical
outlet before servicing.
After ANY adjustments, repair or service and before use, make sure that all attaching hardware is tightened securely.
NOTE: This kit is designed for rebuilding the Gast Compressor Model No. 82637. These
compressors use this rebuild kit. The model number is located on the front of the compressor. If the
model number does not begin with 82637, DO NOT install this kit.
This kit (p/n 1124028) includes the following items (FIGURE 7.9):
DESCRIPTION
QUANTITY
Leaf Valve
Valve Retainer
Valve Limiter
6-32 x.44 Hex Screws
6-32 x.31 Hex Head Screws
O-Ring Cylinder
Head Cover Gaskets
Retainer Plate Screws 10-24 x.500
Cups
Cylinders
4
2
2
2
2
2
2
4
2
2
Cylinder
Cups
.500 Retainer
Plate Screws
Head
Cover
Gasket
O-Rings
.44 Hex
Head
Screws
.31 Hex
Head Screws
Valve
Retainer
Leaf
Valve
Valve
Limiter
FIGURE 7.9 Kit Compenents
Tools Required:
• 1/8” Allen bit/wrench
• T-25 Torq bit/wrench
• T-27 Torq bit/wrench
• Small Flat Screwdriver
• Adjustable torque driver 0-50 inch-lbs.
• ¼-inch socket or nut driver.
Part No 1110538
45
Platinum™Series
SECTION 7—COMPRESSOR
Removing the Head Cover and Valve Plate Assembly
NOTE: For this procedure, refer to FIGURE 7.10.
1. Disengage the eight Torx bolts that secure the head cover and valve plate assembly to
the compressor (Detail “A”).
2. Remove the head covers and valve plate assembly (Detail “B”).
NOTE: Notice that the outside Torx screws are longer than the inside Torx screws.
DETAIL “A”
Torx Bolts
Torx Bolts
Compressor
DETAIL “B”
Valve Plate
Assembly
Head Covers
Head
Cover
Valve Plate
Assembly
FIGURE 7.10 Removing the Head Cover and Valve Plate Assembly
Removing Head Cover Gaskets, O-Ring Gaskets,
Exhaust Valves and Limiter
NOTE: For this procedure, refer to FIGURE 7.11, FIGURE 7.11, FIGURE 7.12 on page 47, and
FIGURE 7.13 on page 47.
1. Remove and discard the old head cover gaskets on the top of the valve plate assembly.
Head Cover Gasket
Head Cover Gasket
Valve Plate Assembly
FIGURE 7.11
Platinum™Series
Removing Head Cover Gaskets, O-Ring Gaskets, Exhaust Valves and Limiter
46
Part No 1110538
SECTION 7—COMPRESSOR
2. Turn the valve plate assembly over.
CAUTION
When removing the old O-ring gaskets ensure not to damage the grooves they sit in.
3. Using a small screwdriver, remove the old O-ring gaskets from the valve plate assembly.
O-Ring Gaskets
Valve Plate
Assembly
FIGURE 7.12 Removing the Old O-Ring Gaskets
4. Using a ¼-inch socket or nut driver, remove the screw, the valve retainer and intake
valves from the valve plate assembly.
¼-inch Socket or
Nut Driver
Intake Valves
Valve Plate
Assembly
Screw
Valve
Retainer
FIGURE 7.13 Removing the Intake Valves
5. Turn the valve plate assembly over.
6. Using a ¼-inch socket or nut driver, remove the screw, old exhaust valves and limiters
of the valve plate chambers.
Part No 1110538
47
Platinum™Series
SECTION 7—COMPRESSOR
Exhaust Valves
and Limiters
Screw
Valve Plate
Chamber
¼-inch Socket or
Nut Driver
FIGURE 7.14 Removing the Old Exhaust Valves and Limiters
Installing the New Intake Valves, Exhaust Valves With
Limiters
NOTE: For this procedure, refer to FIGURE 7.15, FIGURE 7.16 on page 48, and FIGURE 7.17
on page 49.
1. Find the new leaf valves, valve retainer,
valve limiters and screws from the
repair kit.
NOTE: Notice that the leaf valves and the valve
retainers have a notch that should be oriented
in the top left corner when installed (See Detail
“A” in FIGURE 7.15).
Limiters
Leaf
Valves
2. Install the new intake valves and valve
retainer, oriented as shown, on the
bottom side of the valve plate assembly.
3.
DETAIL
“A”
Center the intake valve over the port
hole, secure with .31 hex head screw
and tighten to 10-13 inch-lbs using a
Torque wrench.
Valve Retainer
.31 Hex
Head
Screw
Intake Valve
.31
Screws
.44
Screws
Leaf
Valves
Valve
Retainer
Valve Retainer
Notch
Leaf Valves
FIGURE 7.15 New Valves, Limiters, Screws
Valve Plate
Assembly
Valve Plate
Assembly
Torque
Wrench
Intake Valve
FIGURE 7.16 Installing New Intake Valves and Valve Retainer
4. Turn the valve plate assembly over and install the new exhaust valves with limiters in
the valve plate assembly (FIGURE 7.17).
Platinum™Series
48
Part No 1110538
SECTION 7—COMPRESSOR
CAUTION
NEVER install the limiters on the bottom, or cylinder side, of the valve plate
assembly - doing so will result in unit not working or damaging the unit.
5. Center the exhaust valve and limiter over the port hole secure with .44 hex head screw
and torque to 10-13 inch-lbs.
Valve
Plate
Chamber
Valve Plate
Assembly
Torque
Wrench
.44 Hex Head Srew
Exhaust Valve and Limiter
FIGURE 7.17 Installing New Exhaust Valves And Limiters
Removing the Existing Retainer Plate, Cups and
Cylinders
NOTE: For this procedure, refer to FIGURE 7.18 and FIGURE 7.19 on page 50.
1. Using a 1/8-inch Allen wrench, remove the two Allen head screws that secure the
retainer plate, cup and cylinder to the top of the compressor piston rod (Detail “A”).
Perform STEP 1 on both sides of the compressor.
2. Once the screws are removed, grasp the cylinder and lift up (Detail “B”).
NOTE: The cylinder, cup and retainer plate should all come off together. Refer to FIGURE 7.19 for
individual illustrations of cylinder, cup and retainer plate.
DETAIL “B”
DETAIL “A”
Allen Head Screws
Retainer Plate, Cup, and Cylinder
Retainer Plate, Cup, and Cylinder
FIGURE 7.18 Removing the Existing Retainer Plate, Cups and Cylinders
Part No 1110538
49
Platinum™Series
SECTION 7—COMPRESSOR
Installing the New
Retainer Plates, Cups and
Cylinders
Cylinders
Cups
NOTE: For this procedure, refer to FIGURE 7
.19, FIGURE 7.20, and FIGURE 7.21 on
page 51.
Retainer Plates
1. Find the new cylinders and cups in the
repair kit (FIGURE 7.19).
2. Place the new retainer plate into the
new cup (Detail “A” of FIGURE 7.20).
NOTE: Ensure that the lip of the cup is facing up.
FIGURE 7.19 Identifying the New Retainer
Plate, Cups and Cylinders
3. Push the new retainer plate with cup into the new cylinder (Detail “B”).
4. Place the new cylinder/retainer/cup assembly over the piston rod (Detail “A” of
FIGURE 7.21).
NOTE: Ensure that the cylinder sits on the bracket.
5. When properly installed, the cylinders extend slightly above the bracket surfaces
(Detail “B” of FIGURE 7.21).
6. Secure the new cylinder/retainer/cup assembly to the compressor piston with the new
retainer plate screws (Detail “C” of FIGURE 7.21).
7. Using a torque wrench, torque retaining plate screws to 36 inch-lbs (Detail “C”).
DETAIL “B”
DETAIL “A”
Retainer Plate
with Cup
Cylinder
FIGURE 7.20 Installing the New Retainer Plates, Cups and Cylinders
Platinum™Series
50
Part No 1110538
SECTION 7—COMPRESSOR
DETAIL “B”
DETAIL “A”
Cylinder/Retainer/Cup Assembly
Cylinder/Retainer/Cup Assembly
Bracket
Bracket
DETAIL “C”
Cylinder/Retainer/Cup Assembly
Piston Rod
(Rod is underneath
cylinder/cup)
Torque
Wrench
FIGURE 7.21 Installing the New the Cylinder onto the Compressor
Installing the New Head Cover Gaskets and O-Ring
Gaskets
NOTE: For this procedure, refer to FIGURE 7.22.
1. Install the new cylinder O-rings on the bottom side of the valve plate assembly,
pushing them into the groove (Detail “A”).
2. On the top side of the valve plate assembly, install the new head cover gaskets, making
sure they fit into the groove provided (Detail “B”).
DETAIL “A”
Valve Plate Assembly
DETAIL “B”
Head Gasket
O-Ring Gasket
Valve Plate Assembly
FIGURE 7.22 Installing the New Head Cover Gaskets and O-Ring Gaskets
Part No 1110538
51
Platinum™Series
SECTION 7—COMPRESSOR
Installing the Head Cover
NOTE: For this procedure, refer to FIGURE 7.23 and FIGURE 7.24.
1. Install the head cover onto the valve plate assembly.
NOTE: When installing the head cover onto the valve plate assembly, ensure the alignment pins,
located on the underside of the head cover, engage into the alignment holes on the valve plate
assembly.
Head Cover Plate
Alignment Pins
(Underside of Head Cover)
Valve Plate Assembly
Alignment Pin Holes
FIGURE 7.23 Install the New the Cylinder onto the Compressor
2. Install the head/valve plate assembly onto the unit.
3. Using a torque wrench, secure the head/valve plate assembly to the unit with the
existing eight Torx head screws. Tighten evenly and torque to 50 inch-lbs.
NOTE: Ensure that the cylinders fit into the O-ring grooves on both heads.
Torx Head Screw
6-32 x .44
Torx Head Screw
6-32 x .31
Torx Head Screw
6-32 x .44
Torque Wrench
Valve Plate
Assembly
FIGURE 7.24 Install The Head Cover And Valve Plate Assembly Onto Compressor
CAUTION
Slowly rotate compressor motor by grasping and turning one of the fans. The motor
shaft should rotate completely and freely. Any binding or stopping of the motor
indicates a problem in the assembly. If this occurs, disassemble, review steps and
reassemble. If problem persists, call Invacare at 1-800-832-4707.
Platinum™Series
52
Part No 1110538
SECTION 8—P.E. VALVE
SECTION 8—P.E. VALVE
Replacing P.E. Valve
DANGER
To prevent electrical shock, ALWAYS disconnect concentrator from electrical
outlet before servicing.
NOTE: For this procedure, refer to FIGURE 8.1.
1. Unplug unit.
2. Remove cabinet. Refer to Removing Cabinet on page 25.
3. Remove spade connectors from P.E. valve assembly.
4. Remove tie-wraps from P.E. valve tubing.
5. Remove P.E. valve assembly from tubing.
CAUTION
If P.E. valve is not to be installed IMMEDIATELY, plug the P.E. valve tubing to
prevent sieve bed contamination.
6. Install new P.E. Valve assembly IMMEDIATELY, by reversing STEPS 3-5.
NOTE: After replacing P.E. valve, retiming of the concentrator may be necessary. Refer to Timing
the Platinum 5, XL, and 10 Concentrators on page 85.
NOTE: To ensure proper orientation, the “out” port barb should face to the right side of the sieve
bed when viewing the back of the unit.
7. Run unit and check for leaks. Refer to Leak Test on page 89.
8. Reinstall cabinet. Refer to Removing Cabinet on page 25.
P.E. Valve
Tubing
OUT
Tie-Wraps
“Out” Port
Barb
P.E. Valve
Tubing
P.E. Valve
Assembly
Spade Connectors
Sieve Beds
(Shown for Reference)
FIGURE 8.1 Replacing P.E. Valve
Part No 1110538
53
Platinum™Series
SECTION 9—SIEVE BEDS
SECTION 9—SIEVE BEDS
Replacing Sieve Beds
DANGER
To prevent electrical shock, AWAYS disconnect concentrator from electrical
outlet before servicing.
NOTE: For this procedure, refer to FIGURE 9.1 on page 55.
NOTE: ALWAYS replace sieve beds in pairs to ensure that both beds are in optimum condition.
1. Unplug unit.
2. Remove cabinet. Refer to Removing Cabinet on page 25.
3. Remove tie-wraps and disconnect P.E valve and sieve bed tubing from top of sieve
beds.
4. Remove large tie-wraps.
5. Loosen adjustable clamps on sieve beds. Slide clamps down below the adjustable
clamp hangers.
6. Lift sieve beds up and rest sieve beds on top rear of base.
7. Remove tie-wraps and reinforced tubing from bottom of both sieve beds and remove
sieve beds.
CAUTION
DO NOT remove plastic caps from new sieve bed fittings until ready to install new
beds. Severe sieve contamination can occur if uncapped beds are exposed to air.
8. Remove plastic caps from the top and bottom fittings of the new sieve beds.
9. Install new sieve beds reversing STEPS 3-7.
NOTE: After replacing sieve beds, retiming is necessary. Refer to Timing the Platinum 5, XL, and
10 Concentrators on page 85.
10. Run unit and check for leaks. Refer to Leak Test on page 89.
11. Reinstall cabinet. Refer to Removing Cabinet on page 25.
Platinum™Series
54
Part No 1110538
SECTION 9—SIEVE BEDS
5 Liter Models (Platinum 5 and XL)
Tie-Wraps
P.E. Valve
Assembly
Sieve Bed Tubing
P.E. Valve
Tubing
Sieve Bed
Tie-Wraps
Regulator
Adjustable
Clamps
Adjustable
Clamp
Hanger
Large
Tie-Wraps
Reinforced Tubing attaches
HERE (not shown)
Tie-Wraps
(not shown)
10 Liter Model (Platinum 10)
Regulator
NOTE: Sieve Bed assembly for the
10 liter is the same as the 5 liter
model EXCEPT for the regulator
shown here.
FIGURE 9.1 Replacing Sieve Beds
Part No 1110538
55
Platinum™Series
SECTION 10—CHECK VALVES
SECTION 10—CHECK VALVES
Replacing Check Valves
DANGER
To prevent electrical shock, ALWAYS disconnect concentrator from electrical
outlet before servicing.
NOTE: For this procedure, refer to FIGURE 10.1 on page 57.
1. Unplug unit.
2. Remove cabinet. Refer to Removing Cabinet on page 25.
NOTE: Replace one or both check valves when performing this procedure. The check valves are oneway directional and can be checked by passing air through them. Air should flow in one direction
only.
3. Loosen adjustable clamp on product tank, slide clamp down below the adjustable
clamp hanger, and pull product tank forward to access check valve(s).
4. Remove tie-wraps from top and bottom of the check valve(s) and disconnect check
valve(s) from ¼-inch PVC tubing.
WARNING
The check valves are one-way directional and MUST be installed correctly. The
letters “VAC” are printed on the check valves. The check valves MUST be installed
with the “VAC” on the underside of the check valve. Low system pressures and
eventual bed contamination will result if check valves are not properly installed.
5. Install the new check valve(s) into the ¼-inch PVC tubing.
6. Make sure “VAC” is on the underside of the check valve to ensure proper orientation
of check valves when installing.
7. Secure the check valve(s) by installing new tie-wraps to the ¼- inch PVC tubing where
previously removed.
NOTE: If ¼-inch PVC tubing is damaged in any way, replace the section of ¼-inch PVC tubing
before installing check valve(s).
NOTE: Ensure check valves are not crossed. Left barb product tank check valve goes to left barb on
sieve bed. Right barb product tank check valve to right barb on sieve bed.
8. Run units and check for leaks. Refer to Leak Test on page 89.
9. Reinstall cabinet. Refer to Removing Cabinet on page 25.
Platinum™Series
56
Part No 1110538
SECTION 10—CHECK VALVES
5 Liter Models (Platinum 5 and XL)
PVC Tubing
Check Valves
Tie-wraps
(Two per
Check Valve)
PVC Tubing
Product Tank
Adjustable
Clamp
10 Liter Model (Platinum 10)
PVC Tubing
Check Valves
Tie-wraps (Two per
Check Valve)
Adjustable
Clamp
PVC Tubing
Product Tank
FIGURE 10.1 Replacing Check Valves
Part No 1110538
57
Platinum™Series
SECTION 11—REGULATOR
SECTION 11—REGULATOR
Replacing Regulator
DANGER
To prevent electrical shock, ALWAYS disconnect concentrator from electrical
outlet before servicing.
NOTE: For this procedure, refer to FIGURE 11.1 on page 59.
1. Unplug unit.
2. Remove cabinet. Refer to Removing Cabinet on page 25.
3. Loosen adjustable clamp on product tank and slide clamp down below the adjustable
clamp hanger (Detail “A”).
4. Pull product tank back and up to access regulator.
NOTE: On concentrator models with the SensO2 unit ONLY, remove the 1/8-inch tubing to
oxygen sensor housing.
5. Remove the four mounting screws that secure regulator to product tank cap (Detail
“B” and “C”).
6. Remove regulator from product tank lid ensuring that the O-rings are removed.
NOTE: Clean mounting surface of product tank cap. Ensure that the two "O" rings for the NEW
regulator are installed onto the ports (underside) of the NEW regulator before installation.
WARNING
Ensure proper installation of regulator. Note flow arrow on regulator. This MUST
face toward the front of unit or flow will be interrupted causing system shutdown.
7. Install new regulator onto product tank by reversing STEPS 5 and 6.
8. Torque mounting screws to 5 ± 1 inch-lbs.
9. Re-install product tank and secure with the adjustable clamp.
NOTE: On units with SensO2, reinstall 1/8-inch tubing to oxygen sensor housing.
10. Adjust regulator pressure if necessary. Refer to Adjusting Regulator on page 60.
11. Run unit and check for leaks. Refer to Leak Test on page 89.
12. Reinstall cabinet. Refer to Removing Cabinet on page 25.
Platinum™Series
58
Part No 1110538
SECTION 11—REGULATOR
DETAIL “A”
DETAIL “B” - 5 LITER
MODELS
Pressure
Regulator
(Top)
Sound Box
Adjustable
Clamp
Product
Tank Lid
Pressure
Adjustment Screw
(9/64-inch Allen
Wrench)
Pressure
Regulator
Mounting
Screws
Product
Tank
Product
Tank
NOTE: The adjustable clamp hanger is not
shown. It is located behind the product tank and
is attached to the sound box.
Pressure
Sensor Tubing
Adjustable Clamp
NOTE: Sieve Beds removed for clarity.
DETAIL “C” - 10 LITER MODELS
Pressure
Adjustment
Knob
Pressure
Regulator
(Top)
Mounting
Screws
Pressure
Regulator
Pressure
Sensor
Tubing
Product
Tank
Adjustable
Clamp
FIGURE 11.1 Replacing Regulator
Part No 1110538
59
Platinum™Series
SECTION 11—REGULATOR
Adjusting Regulator
NOTE: For this procedure, refer to Detail “C” in FIGURE 11.1.
1. Turn unit on (I/).
2. Install pressure gauge onto oxygen outlet.
NOTE: Use a 0 - 30 p.s.i. pressure gauge.
NOTE: Check O2 pressure at oxygen outlet. It should read a steady five p.s.i. ± 0.5 p.s.i. If pressure
is not in specification, proceed to STEP 3. If pressure falls within specification, no adjustment is
needed.
3. Unplug unit.
4. Remove cabinet. Refer to Removing Cabinet on page 25.
5. Move product tank back to access regulator. Refer to Replacing Regulator on page 58.
6. Plug unit in and turn power switch on (I/).
7. Locate the pressure adjustment screw for 5 liter models (adjustment knob for l0 liter
model) in center of pressure regulator top.
8. For five liter models only insert a 9/64-inch Allen wrench into the pressure adjustment
screw.
9. While reading pressure gauge, do one of the following:
• Turn pressure adjustment screw or adjustment knob, clockwise to increase output
pressure or,
• Turn pressure adjustment screw or adjustment knob, counterclockwise to decrease
output pressure.
10. Adjust until pressure reads:
• For 5 liter: a steady five p.s.i. ± 0.5 p.s.i.
• For 10 liter models built after 4/06: steady 9 p.s.i. ± 0.5 p.s.i.
11. Once required pressure is achieved, reinstall cabinet. Refer to Removing Cabinet on
page 25.
12. Refer to Troubleshooting on page 17 if you are unable to adjust or maintain five p.s.i.
± 0.5 p.s.i.
NOTE: After ten (10) minutes of run time, retest output pressure of concentrator to insure proper
operation and/or spec levels.
Platinum™Series
60
Part No 1110538
SECTION 12—HEAT EXCHANGER
SECTION 12—HEAT EXCHANGER
Replacing Heat Exchanger
DANGER
To prevent electrical shock, ALWAYS disconnect concentrator from electrical
outlet before servicing.
NOTE: For this procedure, refer to FIGURE 12.1.
1. Unplug unit.
2. Remove cabinet. Refer to Removing Cabinet on page 25.
CAUTION
Use care not to deform heat exchanger when installing, removing or cleaning.
3. Loosen the adjustable clamps on the compressor output hose (BLUE) and valve
manifold input hoses at the front and rear of the heat exchanger.
4. Remove screw securing heat exchanger standoff to the soundbox.
5. Move the heat exchanger out to access the hoses and remove them from the heat
exchanger.
6. Remove heat exchanger.
7. Reverse STEPS 3-6 to install new heat exchanger.
8. Run unit and check for leaks. Refer to Leak Test on page 89.
9. Reinstall cabinet. Refer to Removing Cabinet on page 25.
Sound Box
Screw
Heat Exchanger
Standoff
Heat Exchanger
Adjustable
Clamp
Compressor Outlet
Hose (BLUE)
Valve Manifold Input Hose
(from compressor)
FIGURE 12.1 Replacing Heat Exchanger
Part No 1110538
61
Platinum™Series
SECTION 13—CONTROL PANEL
SECTION 13—CONTROL PANEL
Removing Control Panel
DANGER
To prevent electrical shock, ALWAYS disconnect concentrator from electrical
outlet before servicing.
NOTE: For this procedure, refer to FIGURE 13.1.
Tools Required:
• Diagonal Cutters
• Flathead Screwdriver
• ¼-inch ratchet, ¼-inch socket, and ¼-inch extension
• Pliers
• Tie-wraps
1. Unplug unit.
2. Remove cabinet. Refer to Cabinet on page 25.
3. Remove the two upper mounting screws that secure the control panel.
4. Loosen the two lower mounting screws that secure the control panel.
WARNING
Use caution when removing the pressure sensor tubing from the product tank.
Injury could result when tubing disconnects from product tank.
5. Cut the tie-wraps that secure the 1/8-inch I.D. pressure sensor tubing to the product
tank connection and remove tubing.
6. Remove the ¼-inch I.D. tubing from the top and bottom barbed fittings of the
flowmeter.
7. Cut tie wrap and remove ¼-inch I.D. tubing from the patient outlet barbed fitting
behind the control panel.
NOTE: On SensO2 models the oxygen sensor tube attached to the side of the regulator MUST also
be released.
8. Disconnect the nine or ten pin connector from P.C. board.
9. Disconnect the eight pin connector from P.C. board.
10. Disconnect the transformer harness connector.
NOTE: Before performing STEP 10, code all wires to ensure correct reinstallation.
Platinum™Series
62
Part No 1110538
SECTION 13—CONTROL PANEL
11. Remove spade connectors from circuit breaker, hour meter and On/Off ( I/O ) switch.
(Jumper wire harness from On/Off switch to circuit breaker does not have to be
removed).
12. Remove control panel and reverse STEPS 3-10 to re-install control panel.
13. Run unit and check for leaks at pressure sensor tubing on product tank cap. Refer to
Leak Test on page 89
14. Reinstall cabinet. Refer to Removing Cabinet on page 25.
Circuit Breaker
(STEP 10)
Upper Mounting
Screws
Hour Meter
(STEP 10)
1/8” I.D. Pressure
Sensor Tubing (STEP 5)
ON/OFF
Switch ( I/O )
(STEP 11)
Oxygen Sensor Tube
(SensO2 Models Only)
Transformer
Harness
Connector
(STEP 10)
Patient Outlet
Barbed fitting
Top and Bottom
Barbed fittings
9 or 10-Pin
Connector
(STEP 8)
Control Panel
8-Pin
Connector
(STEP 9)
Lower Mounting Screws
FIGURE 13.1 Removing Control Panel
Part No 1110538
63
Platinum™Series
SECTION 14—COOLING FAN
SECTION 14—COOLING FAN
Replacing Cooling Fan
DANGER
To prevent electrical shock, ALWAYS disconnect concentrator from electrical
outlet before servicing.
NOTE: For this procedure, refer to FIGURE 14.1 on page 65.
1. Unplug unit.
2. Remove cabinet. Refer to Cabinet on page 25.
3. Remove control panel. Refer to Removing Control Panel on page 62.
4. Remove compressor assembly. Refer to Replacing Compressor Assembly on page 33
or Replacing Capacitor on page 35.
5. Remove heat exchanger. Refer to Replacing Heat Exchanger on page 61.
NOTE: Heat exchanger MUST be removed before removing the mounting screws.
6. Disconnect and remove spade connectors from fan terminals on back side of cooling
fan (not shown).
7. Remove four mounting screws securing the cooling fan to the sound box.
8. Remove existing cooling fan.
9. Install new cooling fan.
NOTE: Run the self-threading mounting screws through the fan housing holes to cut the threads
and remove them before mounting the fan for ease of installation.
CAUTION
Fan MUST be positioned properly so air from the fan blows DOWN onto the
compressor (see air flow arrow on back of fan) or damage to the unit will occur.
10. Reinstall heat exchanger. Refer to Replacing Heat Exchanger on page 61.
11. Reinstall compressor. Refer to Replacing Compressor Assembly on page 33 or
Replacing Capacitor on page 35.
12. Reinstall control panel. Refer to Removing Control Panel on page 62.
13. Plug unit in and check for leaks. Refer to Leak Test on page 89.
14. Run unit for at least 30 minutes. If unit runs properly, replace cover. If not, call
Invacare Technical Service.
15. Reinstall cabinet. Refer to Cabinet on page 25.
Platinum™Series
64
Part No 1110538
SECTION 14—COOLING FAN
Fan Terminals
(Hidden from view)
Cooling Fan
Spade Connectors
(Not shown)
Sound Box
Mounting Screws
Heat Exchanger
NOTE: Illustration depicts Platinum 5. Replacement of the cooling fan is the same for Platinum
5, XL, and Platinum 10.
NOTE: Heat exchanger MUST be removed before removing the mounting screws.
FIGURE 14.1 Replacing Cooling Fan
Part No 1110538
65
Platinum™Series
SECTION 15—P.C. BOARD
SECTION 15—P.C. BOARD
Replacing P.C. Board
DANGER
To prevent electrical shock, ALWAYS disconnect concentrator from electrical
outlet before servicing.
CAUTION
Only qualified service technicians should make any changes to this equipment.
Follow these pre-cautions to prevent damage to the P.C. boards:
Before handling any P.C. boards, you need to be properly grounded to prevent
static damage to the components of the board. A Static Cuff MUST be worn and
properly grounded using an alligator clip. Electrical conduit or a water pipe is
normally sufficient when a known good ground is not available. Care should be
taken to ensure that the alligator clip contacts with bare metal surface.
When removing quick disconnects terminals, DO NOT pull on wire itself as damage
to the connection may occur. Hold down the P.C. board with one hand and use an
upward force with a slight rocking motion to remove the terminals.
Before installing any P.C. boards, ensure that all insulators are in place.
NOTE: For this procedure, refer to FIGURE 15.1 on page 67.
1. Unplug unit.
2. Remove cabinet. Refer to Removing Cabinet on page 25.
3. Remove control panel. Refer to Removing Control Panel on page 62.
4. Disconnect the following:
A. Wiring Harness from nine or ten pin wiring harness connector
B. Wiring Harness from eight pin wiring harness connector
C. Transformer harness connector
WARNING
DO NOT remove sensor tubing from P.C. Board. Remove from tee fitting or
regulator ONLY. Damage to sensor assembly could occur. A faulty sensor may
result in improper oxygen delivery and harm to the user.
D. Pressure sensor tubing from product tank, not P.C. Board.
E. If applicable, Oxygen Sensor tubing from Regulator Fitting. Refer to Replacing
Regulator on page 58.
Platinum™Series
66
Part No 1110538
SECTION 15—P.C. BOARD
5. Remove the two mounting screws on top corners of P.C. board. Bend latching tab up
to release P.C. board from control panel.
6. Position new P.C. board.
7. Reverse STEPS 4 and 5. Be sure all tie-wraps removed from tubing connections are
replaced.
8. Reinstall control panel. Refer to Removing Control Panel on page 62.
9. Run concentrator to ensure unit operates to specifications.
10. After replacing P.C. board, retiming may be necessary. Refer to Timing the Platinum
5, XL, and 10 Concentrators on page 85.
11. Check for leaks at pressure sensor tubing on product tank cap. Refer to Leak Test on
page 89.
12. Reinstall cabinet. Refer to Removing Cabinet on page 25.
Control Panel
Oxygen Sensor
Tubing (SensO2
models only)
(STEP 4E)
Pressure Sensor
Tubing (STEP 4D)
Mounting
Screws (STEP 5)
Transformer
Harness Connector
(STEP 4C)
Nine or Ten
Pin Wiring
Harness
Connector
(STEP 4A)
Eight Pin Wiring Harness
Connector (STEP 4B)
P.C. Board
FIGURE 15.1 Replacing P.C. Board
Part No 1110538
67
Platinum™Series
SECTION 16—TRANSFORMER
SECTION 16—TRANSFORMER
Replacing Transformer Assembly
DANGER
To prevent electrical shock, ALWAYS disconnect concentrator from electrical
outlet before servicing.
NOTE: For this procedure, refer to FIGURE 16.1.
1. Unplug unit.
2. Remove cabinet. Refer to Removing Cabinet on page 25.
3. Remove control panel. Refer to Removing Control Panel on page 62.
4. Locate the transformer assembly in the upper left corner on the back of control panel.
5. Unplug the transformer connector from the P.C. board.
6. Remove the two keps screws that secure transformer to the back of the control panel.
7. Reverse STEPS 5-6 to install new transformer. Torque keps screw to 13.5 ± 1 inch-lbs.
8. Reinstall control panel. Refer to Control Panel on page 62.
9. Reinstall cabinet. Refer to Cabinet on page 25.
Control Panel
Transformer
Assembly
Keps Screws
P.C. Board
Transformer
P.C. Board
Connector
FIGURE 16.1
Platinum™Series
Replacing Transformer Assembly
68
Part No 1110538
SECTION 17—ON/OFF SWITCH
SECTION 17—ON/OFF SWITCH
Replacing On/Off Switch
DANGER
To prevent electrical shock, ALWAYS disconnect concentrator from electrical
outlet before servicing.
NOTE: For this procedure, refer to FIGURE 17.1.
1. Unplug unit.
2. Remove cabinet. Refer to Removing Cabinet on page 25.
3. Remove control panel. Refer to Removing Control Panel on page 62.
4. Remove and code the four spade connectors from back of existing on/off switch.
5. Compress retaining grips on back of existing on/off switch and push switch out
through front of control panel.
NOTE: Ensure proper orientation of the On/Off ( I/O ) switch and wiring connections before
installation. Refer to FIGURE 17.1, Detail “A” and Detail “B” below.
CAUTION
DO NOT install the On/Off (I/O) switch upside down. Universal Off (O) symbol
should be at bottom and Universal On (I) symbol should be at the top. Possible
damage to the concentrator may result if not properly installed.
6. Reverse STEP 4 to secure new On/Off ( I/O ) switch.
7. Reinstall control panel. Refer to Removing Control Panel on page 62.
8. Reinstall cabinet. Refer to Removing Cabinet on page 25.
DETAIL “A”
Control Panel
ON
ON/OFF
OFF
( I/O )
Front View
Switch
DETAIL “B”
Spade Connector
from Brown Wire
attached here
Brown Jumper
Wire (From
Circuit Breaker)
FIGURE 17.1
Part No 1110538
Back View
On/Off ( I/O )
Switch
Spade Connectors
from Black Wires
attached here
Replacing On/Off Switch
69
Platinum™Series
SECTION 18—FLOWMETER
SECTION 18—FLOWMETER
Replacing Flowmeter
DANGER
To prevent electrical shock, ALWAYS disconnect concentrator from electrical
outlet before servicing.
NOTE: For this procedure, refer to FIGURE 18.1.
1. Unplug unit.
2. Remove cabinet. Refer to Removing Cabinet on page 25.
3. Remove control panel. Refer to Removing Control Panel on page 62.
NOTE: Note the location of the PVC tubing for accurate replacement after new flowmeter is
installed.
4. Remove palnuts that secure flowmeter to the control panel.
5. Remove flowmeter from front of control panel.
6. Install new flowmeter reversing STEPS 4-5.
7. Reinstall control panel. Refer to Removing Control Panel on page 62.
8. Run unit and check for leaks where 1/4-inch PVC tubing engages flowmeter fittings.
Refer to Leak Test on page 89.
9. If replacing flowmeter on 10 L/min models, refer to Adjusting Regulator on page 60.
10. Reinstall cabinet. Refer to Removing Cabinet on page 25.
Platinum™Series
70
Part No 1110538
SECTION 18—FLOWMETER
10 Liter Models
Existing - 5 psi
Flowmeter
New 9 psi
Flowmeter
Palnuts
Flowmeter
NOTE: Note the extra hash mark
on the bottom of the new 9 psi
flowmeter.
Flowmeter
Barbed Fittings
(Back of
Flowmeter)
FIGURE 18.1
Part No 1110538
Control Panel
Replacing Flowmeter
71
Platinum™Series
SECTION 19—HOUR METER
SECTION 19—HOUR METER
Replacing Hour Meter
DANGER
To prevent electrical shock, ALWAYS disconnect concentrator from electrical
outlet before servicing.
NOTE: For this procedure, refer to FIGURE 19.1.
1. Unplug unit.
2. Remove cabinet. Refer to Removing Cabinet on page 25.
3. Remove control panel. Refer to Removing Control Panel on page 62.
4. Remove and code the two hour meter connectors and wires connected to back of hour
meter.
5. Spread retaining clips on hour meter housing that secure hour meter to control panel.
6. Remove hour meter by pushing meter through front of control panel.
7. Install new hour meter reversing STEPS 4-6.
8. Reinstall control panel. Refer to Removing Control Panel on page 62.
9. Reinstall cabinet. Refer to Removing Cabinet on page 25.
Hour Meter
Housing
Hour Meter
Connectors
Hour Meter
Back of
Control Panel
Wires
Retaining Clips (Hour
Meter Housing)
FIGURE 19.1 Replacing Hour Meter
Platinum™Series
72
Part No 1110538
SECTION 20—4-WAY VALVE
SECTION 20— 4-WAY VALVE
DANGER
To prevent electrical shock, ALWAYS disconnect concentrator from electrical outlet before servicing.
Replacing 4-Way Valve
NOTE: For this procedure, refer to FIGURE 20.1 on page 74.
1. Unplug unit.
2. Remove cabinet. Refer to Removing Cabinet on page 25.
3. Remove control panel. Refer to Removing Control Panel on page 62.
4. Remove the four mounting screws that secure the 4-way valve to the manifold
assembly.
5. Position new 4-way valve onto manifold assembly and loosely install mounting
screws through 4-way valve and into manifold assembly.
NOTE: Ensure the manifold gasket is in place on 4-way valve before installing.
CAUTION
Torque sequence and specification MUST be adhered to or possible damage to the
4-way valve could result.
6. Tighten mounting screws in the sequence described below.
7. Pre-torque the mounting screws to 10 ± 2 inch-lbs using the torque sequence.
8. The mounting screws can be now be torqued to 22 ± 2 inch-lbs in the same sequence.
CAUTION
This is a maintenance free valve. Opening the valve will void any and all warranties
applicable to the valve.
Part No 1110538
73
Platinum™Series
SECTION 20—4-WAY VALVE
4-Way Valve Face
4-Way Valve
Manifold
Assembly
NOTE: The Numbers above
indicate the MOUNTING SCREW
TORQUE SEQUENCE:
pre-torque to 10 + 2 inch-lbs.,
then torque to 22 + 2 inch-lbs.
Mounting
Screws
NOTE: Illustration depicts manifold assembly for Platinum 5 models. 4-Way valve is replaced in
the same manner for Platinum XL and Platinum 10 models.
FIGURE 20.1 Replacing 4-Way Valve
Replacing Manifold Assembly (Units Manufactured
before 7/24/03)
NOTE: For this procedure, refer to FIGURE 20.2 on page 76.
NOTE: This procedure applies to Platinum 5 units manufactured before 7/24/03. Units
manufactured before 7/24/03 are equipped with an exhaust canister with exhaust hose as shown in
FIGURE 20.2.
Tools Required:
• Diagonal Cutters
• Flathead Screwdriver
• ¼-inch ratchet, ¼-inch socket, and ¼-inch extension
• Pliers
• Tie-wraps
1. Unplug unit.
2. Remove cabinet. Refer to Removing Cabinet on page 25.
3. Remove control panel. Refer to Removing Control Panel on page 62.
4. Cut and remove the tie-wraps connecting the sieve bed hoses to top of manifold
assembly.
NOTE: When removing the sieve bed hose from the manifold assembly use a flat head screwdriver
to pry hose up while simultaneously pulling the hose upward.
5. Remove sieve bed hoses from manifold assembly.
6. Remove and code the two spade connectors from the valve pilot on top of the manifold
assembly.
Platinum™Series
74
Part No 1110538
SECTION 20—4-WAY VALVE
7. Remove the mounting screw(s) that secures exhaust canister assembly to rear of the
sound box. Refer to Replacing the Exhaust Canister/Exhaust Muffler (Platinum 5
Models Manufactured before 7/24/03) on page 29.
8. Remove muffler from exhaust canister by turning counter-clockwise.
9. Loosen the adjustable clamp that secures valve manifold input hose to heat exchanger.
NOTE: When removing the valve manifold input hose from the heat exchanger, use a flat head
screwdriver to pry hose outward while simultaneously pulling the hose outward.
10. Remove valve manifold input hose from end of heat exchanger.
11. Remove the two mounting screws, washers (1 per side) and bushings (2 per side)
securing the 4-way valve/manifold assembly to top of sound box.
12. The 4-way valve/manifold assembly can be removed from the concentrator by lifting
the assembly straight up through the cutout in the sound box.
13. Remove 4-way valve from manifold assembly. Refer to Replacing 4-Way Valve on
page 73.
14. Remove exhaust canister with hoses from manifold.
15. Loosen the adjustable clamp on valve manifold input hose to bottom center port of
manifold assembly.
16. Remove valve manifold input hose from bottom center port of manifold assembly. Use
screwdriver to pry at connection of tubing at barbed fitting while pulling tubing away
from manifold assembly.
17. Reverse STEPS 13-16 to re-assemble.
18. Slide 4-way valve/manifold assembly complete through the cutout in top of sound box
then install the two mounting screws, washer and four bushings into the manifold to
secure the 4-way valve assembly to the top of sound box.
19. Reverse STEPS 4-10.
20. Reinstall control panel. Refer to Removing Control Panel on page 62.
21. Plug unit in and turn power on (I/) .
22. Run unit and check for leaks at hose connections. Refer to Leak Test on page 89.
23. Check for proper system operation. Refer to Typical Product Parameters on page 9.
24. Re-install cabinet. Refer to Removing Cabinet on page 25.
Part No 1110538
75
Platinum™Series
SECTION 20—4-WAY VALVE
Tie-Wraps
(STEP 4)
Sieve Bed Hoses
(STEP 5)
Mounting
Screw
Bushing
(Two (2)
per side)
Washer
Valve Pilot
Spade Connectors
(STEP 6)
Sound Box
Top
Mounting Detail for Manifold
Assembly (STEP 11)
Adjustable Clamp
(STEP 15)
4-way Valve
(STEP 13)
Valve Manifold
Input Hose
(STEPS 9, 10 & 16)
Exhaust Canister
w/Exhaust Hose
(STEP 14)
Heat Exchanger
(Typical)
Valve
Input
Mounting Screw
Placement
Adjustable
Clamp
Compressor Output
Hose (BLUE) (STEP 9)
Exhaust
Muffler
NOTE: NEW Heat Exchanger does
NOT have fins.
FIGURE 20.2 Replacing Manifold Assembly (Units Manufactured before 7/24/03)
Platinum™Series
76
Part No 1110538
SECTION 20—4-WAY VALVE
Replacing Manifold Assembly (Units Manufactured after
7/24/03)
NOTE: For this procedure, refer to FIGURE 20.3 on page 78 and FIGURE 20.4 on page 80.
NOTE: Platinum XL and 10 Units manufactured after 7/24/03 are equipped with Y-tube muffler
assembly as shown in FIGURE 20.3. This procedure applies to Platinum 5 units manufactured
after 7/24/03.
Tools Required:
• Diagonal Cutters
• Flathead Screwdriver
• ¼-inch ratchet, ¼-inch socket, and ¼-inch extension
• Pliers
• Tie-wraps
1. Unplug unit.
2. Remove cabinet. Refer to Removing Cabinet on page 25.
3. Remove control panel. Refer to Removing Control Panel on page 62.
4. Cut and remove the tie-wraps connecting the sieve bed hoses to top of manifold
assembly.
NOTE: When removing the sieve bed hose from the manifold assembly, use a flat head screwdriver
to pry hose up while simultaneously pulling the hose upward.
5. Remove sieve bed hoses from manifold assembly.
6. Remove the two spade connectors from the valve pilot on top of the manifold
assembly.
7. Loosen the adjustable clamp that secures valve manifold input hose to heat exchanger.
NOTE: When removing the valve manifold input hose from the heat exchanger, use a flat head
screwdriver to pry hose outward while simultaneously pulling the hose outward.
8. Remove valve manifold input hose from end of heat exchanger.
9. Remove the two mounting screws, washers (one per side) and bushings (two per side)
securing the 4-way valve/manifold assembly to top of sound box (Detail “A” of
FIGURE 20.3).
10. Remove the 4-way valve/manifold assembly from the concentrator by lifting the
assembly straight up through the cutout in the sound box.
11. Loosen the adjustable clamp on valve manifold input hose to bottom center port of
manifold assembly.
NOTE: Note orientation of valve manifold input hose to Y-tube muffler assembly. It is imperative
that this input hose be installed in the same orientation in order to connect to the heat exchanger.
12. Remove valve manifold input hose from bottom center port of manifold assembly. Use
screwdriver to loosen the connection of the tubing at barbed fitting while pulling
tubing away from manifold assembly.
Part No 1110538
77
Platinum™Series
SECTION 20—4-WAY VALVE
13. Cut the tie-wraps that secure the Y-tube muffler assembly to the manifold assembly.
14. Remove the Y-tube muffler assembly from the manifold assembly. Use a screwdriver
to disengage the tubing connection at the barbed fitting while pulling the tubing away
from the manifold assembly.
Spade Connectors
Sieve Bed Hoses
Tie-Wraps
NOTE: Manifold assembly
shown is for 10 liter models.
Valve Pilot
Manifold Assembly
4-Way Valve
Bottom Center Port
Adjustment Clamp
Valve Manifold Input
Hose
Y-tube Muffler Assembly
NOTE: New Heat Exchanger
does not have fins.
Heat Exchanger
DETAIL “A” MANIFOLD ASSEMBLY
Tie-Wrap
Mounting
Screw
Muffler
without
Throttling
Insert
Bushing
(Two [2]
per side)
Adjustable
Clamp
Sound Box
Top
Compressor Output
Hose (BLUE)
FIGURE 20.3 Replacing Manifold Assembly (Units Manufactured after 7/24/03)
Platinum™Series
78
Part No 1110538
SECTION 20—4-WAY VALVE
15. Replace the manifold assembly by performing the following:
A. Remove the four mounting screws that secure the 4-way valve to the existing
manifold assembly.
B. Separate the two components and discard existing manifold assembly.
C. Position existing 4-way valve onto new manifold assembly and loosely install
mounting screws through 4-way valve and into manifold assembly.
CAUTION
Torque sequence and specification MUST be adhered to or possible damage to the
4-way valve could result.
D. Pre-torque the mounting screws to 10 ± 2 inch-lbs using the torque sequence
(FIGURE 20.4).
E. The mounting screws can be now be torqued to 22 ± 2 inch-lbs in the same
sequence.
CAUTION
DO NOT attempt to perform any maintenance on the 4-way valve. This is a
maintenance-free valve. Opening the valve will void any and all warranties
applicable to the valve.
16. On the Y-tube assembly, check the muffler and replace if necessary. Refer to Replacing
the Exhaust Canister/Exhaust Muffler (Platinum 5 Models Manufactured before 7/24/
03) on page 29.
17. Install Y-tube muffler assembly onto bottom of manifold assembly.
18. Install one tie wrap on each leg of the Y-tube muffler assembly to secure in place.
19. Install valve manifold input hose onto bottom center port of manifold assembly in the
orientation noted previously.
20. Secure valve manifold input hose with adjustable clamp.
21. Slide 4-way valve/manifold assembly complete through the cutout in top of sound box
then install the two mounting screws, washer and bushings into the manifold to
secure the 4-way valve assembly to the top of sound box.
22. Install valve manifold input hose onto end of heat exchanger and secure in place with
adjustable clamp.
23. Connect the two spade connectors to the valve pilot on top of the manifold assembly.
24. Connect sieve bed hoses to manifold assembly and secure in place with tie wrap.
25. Reinstall control panel. Refer to Removing Control Panel on page 62.
26. Plug unit in and turn power on (I/) .
27. Run unit and check for leaks at hose connections. Refer to Leak Test on page 89.
Part No 1110538
79
Platinum™Series
SECTION 20—4-WAY VALVE
28. Check for proper system operation. Refer to Typical Product Parameters on page 9.
29. Re-install cabinet. Refer to Removing Cabinet on page 25.
DETAIL “A” - MOUNTING SCREW
TORQUE SEQUENCE:
2
4
1
3
NOTE: The numbers indicate the
pre-torque to 10 ± 2 inch-lbs, then
torque to 22 ± 2 inch-lbs.
Mounting
Screws
FIGURE 20.4 Replacing Manifold Assembly (Units Manufactured after 7/24/03)
Replacing Pilot Valve Poppets and O-Rings
DANGER
To prevent electrical shock, ALWAYS disconnect concentrator from electrical outlet before servicing.
NOTE: For this procedure, refer to FIGURE 20.5.
1. Unplug unit.
2. Remove cabinet. Refer to Cabinet on page 25.
3. Remove control panel. Refer to Removing Control Panel on page 62.
4. Locate pilot valve on 4-way valve manifold assembly.
NOTE: Pilot valve can be accessed while the 4-way valve and sieve bed hoses are intact on the
concentrator.
5. Hold pilot valve stem with the flat blade screwdriver and turn the 9/16-inch locknut
counterclockwise one complete turn.
6. Unscrew the pilot valve stem assembly from the manifold while leaving the coil with
yoke and locknut intact on stem.
7. Remove pilot valve poppet from inside the pilot valve stem.
Platinum™Series
80
Part No 1110538
SECTION 20—4-WAY VALVE
CAUTION
DO NOT remove the coil yoke from the coil. The washer between the bottom of
the yoke and the bottom of the coil MUST not be removed. Otherwise, components
may be damaged in reassembly.
8. Set aside the coil with yoke and pilot valve stem assembly with the wires still intact.
WARNING
DO NOT use sharp tools to remove O-ring from plastic manifold opening. Damage
to the plastic manifold and/or plastic manifold airflow passage may occur. Damage
to airflow may result in improper oxygen delivery and harm to the user. Refer to
Detail “A” in FIGURE 20.5.
9. Remove poppet and O-ring from manifold opening (Detail “A”).
10. Discard old poppet and O-ring.
11. Install new O-ring into the opening in the plastic manifold housing (Detail “A”).
CAUTION
DO NOT overtighten pilot valve stem when installing it into plastic manifold.
Damage to the rubber "O" ring and/or plastic manifold may occur.
12. Install new slotted poppet into the bottom of the pilot valve stem with tapered end
facing to the bottom.
13. Install pilot valve stem and new slotted poppet with coil (with yoke and locknut
intact) into manifold opening.
14. Use a flat blade screwdriver, and tighten pilot valve stem clockwise until snug. Torque
to 25 inch-lbs. ± 5 inch-lbs.
15. Install new label onto pilot valve coil yoke.
NOTE: DO NOT remove spade connectors from pilot valve coils. Simply lay coils with spade
connectors aside while performing this installation.
16. Position pilot valve coil with yoke at an approximate 60° angle to the right (as viewed
from the front of valve) to ensure spade connectors are not pulled or tensioned after
reinstallation.
17. Use the flat blade screwdriver and hold the pilot valve-stem in place.
18. Tighten locknut clockwise with the 9/16-inch wrench until snug to secure the stem and
coil with yoke. DO NOT overtighten. Torque to 20 inch-lbs ± 3 inch-lbs.
CAUTION
DO NOT overtighten locknut when installing it onto pilot valve stem. Damage to
the plastic manifold may occur.
19. Reinstall control panel. Refer to Removing Control Panel on page 63.
Part No 1110538
81
Platinum™Series
SECTION 20—4-WAY VALVE
WARNING
Ensure that hoses behind control panel DO NOT contact cooling fan after control
panel reinstallation.
20. Plug power cord in and turn concentrator ON (I) to ensure proper operation.
21. Reinstall cabinet. Refer to Removing Cabinet on page 25.
22. If any difficulties are encountered in this installation, contact Invacare Technical
Service at (800) 832-4707.
Manifold
Opening
DETAIL “A”
O-Ring
Air Flow Passage
Platinum 5 and XL Models
Locknut
Spade Connectors attach here
(Leave Wire Connectors Intact)
NOTE: DO NOT
disassemble.
Coil
Pilot Valve
Stem
Valve Body
(Reference)
Pilot Valve
Stem
Slotted
Poppet
Tapered
End
Yoke
O-Ring
New
Label
Manifold
Opening
Manifold
Platinum 10 Models
Valve Body
(Reference)
Slotted
Poppet
NOTE: DO NOT disassemble.
Locknut
(hidden
from view)
Tapered
End
Coil
O-Ring
Pilot Valve
Stem
Manifold Opening
FIGURE 20.5 Replacing Pilot Valve Poppets and O-Rings
Platinum™Series
82
Part No 1110538
SECTION 21—PURITY INDICATORS
SECTION 21—PURITY INDICATORS
SensO2 Alarm Indicators
DANGER
To prevent electrical shock, ALWAYS disconnect concentrator from electrical outlet before servicing.
NOTE: For this procedure, refer to FIGURE 21.1 and FIGURE 21.2 on page 84.
Operation
The Platinum with SensO2 Concentrator is equipped with an oxygen purity indicator.
This feature monitors the purity level of the oxygen generated by the concentrator. If
purity falls below alarm thresholds, indicator lights on the control panel will illuminate.
NOTE: Concentrator may be used during the initial start warm-up time (approximately 30
minutes) while waiting for the O2 purity to reach maximum.
When the unit is turned on, the GREEN light will come on (SYSTEM OK/O2 greater than
85%). After five minutes, the oxygen sensor will be operating normally and will control
the indicator lights depending on oxygen concentration values. The explanation of the
indicator light functions are as follows:
Indicator Lights
NOTE: Indicator lights are visible only when lit.
GREEN light (O2) - Normal Operation.
YELLOW light ( )- Call supplier IMMEDIATELY. You may continue to use the
concentrator unless instructed otherwise by your supplier. Be certain that backup oxygen
is nearby.
RED light ( )- Total unit shutdown. Switch IMMEDIATELY to backup oxygen supply.
Call supplier IMMEDIATELY.
GREEN light - with YELLOW light flashing - Call supplier IMMEDIATELY. Oxygen
sensor malfunctioning; you may continue to use the concentrator.
OXYGEN PURITY
Auto Shut - Down
Use Backup
Below Normal
RED
Call
Supplier
Normal
YELLOW
GREEN
FIGURE 21.1 Indicator Lights
Part No 1110538
83
Platinum™Series
SECTION 21—PURITY INDICATORS
Indicators - If your unit does not feature the O2 Sensor
LX Models Indicator Light Explanation
RED light ( )- Total Unit Shut-Down. Switch IMMEDIATELY to a back-up oxygen
supply. Call Supplier IMMEDIATELY.
GREEN light ( I/O ) - ON/OFF. System okay.
Auto Shut - Down
Normal I/O
RED
Call Supplier
GREEN
FIGURE 21.2 Display Control Panel
Platinum™Series
84
Part No 1110538
SECTION 22—TIMING
SECTION 22—TIMING
Timing the Platinum 5, XL, and 10 Concentrators
DANGER
To prevent electrical shock, ALWAYS disconnect concentrator from electrical
outlet before servicing.
Use extreme care when making adjustments to the timing switch. DO NOT allow
screwdriver or your hands to contact the P.C. Board when unit is plugged in and/or
on. Turn unit off and unplug before adjusting timing switch. Electrical shock is
possible.
To accommodate the varying tolerances when replacing components, an adjustable timer
is used to control the shift time of the pressure equalization (P.E.) valve. The SensO2 board
allows for automatic (microprocessor controlled) adjustments of the P.E. shift times. NonSensO2 boards allow for manual adjustment.
Autotuning
NOTE: For this procedure, refer to FIGURE 22.1.
1. Turn power off (/O ) and unplug the unit.
2. Remove cabinet. Refer to Removing Cabinet on page 25.
3. Plug the unit in and turn the power on (I/) .
4. Wait for the main valve shift to indicate one of the following:
• If the board is new, the front panel RED indicator light will slowly blink, indicating
autotune has initiated.
• If the board is used and has performed autotuning before, press and release the
small push button switch near the pressure sensor.
• The front panel RED indicator light will slowly blink, indicating the unit is
autotuning and automatically adjusting the P.E. valve timing.
5. Set the output flow to 5.0 L/min. for 5 liter models and 10 L/min. for 10 liter model
during autotuning.
6. The GREEN (onboard) diagnostic light will flash the current value of the P.E. valve
timing number.
7. Place the cover back on the unit but DO NOT install the cover screws. Let the unit run
until autotuning is completed.
8. When autotuning is complete, the RED front panel indicator light will change from a
slow blinking to a flashing of the final P.E. valve timing number.
Part No 1110538
85
Platinum™Series
SECTION 22—TIMING
9. Turn the unit off and then back on. The timing value is stored in memory for future
use.
10. If the unit is turned off before an autotune cycle is completed, the P.E. valve timing will
not be stored or updated. If the board is new, autotuning MUST be successfully
completed before the unit can be placed into service.
11. After a successful autotune, run the unit for 30 minutes and verify that the oxygen
concentration output of the unit is within specification.
12. If the oxygen output concentration is not within specification, rerun the autotune
again.
13. Reinstall the cover screws.
P.C. Board
Pressure Sensor
Autotune
Push Button
Switch
FIGURE 22.1 Autotuning
Platinum™Series
86
Part No 1110538
SECTION 22—TIMING
Manual Tuning
NOTE: For this procedure, refer to FIGURE 22.2.
1. Turn power off (O ) and unplug the unit.
2. Remove cabinet. Refer to Removing Cabinet on page 25.
3. Plug unit in but DO NOT turn on (I/) until instructed to below.
4. Locate the timing switch on the upper right corner of the P.C. board near the pressure
sensor.
5. Insert a small common or flathead screwdriver into the adjustment screw of the timing
switch.
6. Set the timing switch initially at the number “7” position.
7. Turn unit on (I/) and wait 15 minutes for unit to stabilize.
8. If after 15 minutes of run time the concentration is below specification, change setting
to a number one position lower than the previous setting.
9. Let unit run ten minutes. If concentration is lower still, change the switch to number
two positions higher.
NOTE: You will find that the concentrator will perform better at either the higher or lower setting.
The normal adjustment range is between timing positions 3 and A.
10. Continue to change setting one step at a time (up or down) until the concentration is
the highest value achievable.
11. Once concentration has reached specification, retiming is complete.
12. Reinstall cabinet. Refer to Removing Cabinet on page 25.
Part No 1110538
87
Platinum™Series
SECTION 22—TIMING
P.C. Board
Timing
Switch
Adjustment
Screw
Pressure
Sensor
FIGURE 22.2 Manual Tuning
Platinum™Series
88
Part No 1110538
SECTION 23—LEAK TEST
SECTION 23—LEAK TEST
DANGER
To prevent electrical shock, ALWAYS disconnect concentrator from electrical
outlet before servicing.
Leak Test
NOTE: For this procedure, refer to FIGURE 23.1.
1. Unplug unit.
2. Remove cabinet. Refer to Removing Cabinet on page 25.
3. Plug in unit.
4. Turn the concentrator on (I/).
5. Let concentrator run for 20 minutes.
WARNING
Apply small amount of leak test solution to fittings only. Avoid all other
components. DO NOT leak test 4-way valve body. Carefully leak test for pressure
leaks around sieve bed hoses at 4-way valve. DO NOT allow leak test solution to
enter into 4-way valve and system.
6. With "leak-test” solution or equivalent soapy water, leak test the following:
A. The two (2) sieve bed hoses at the top of 4-way valve and hose to bottom center port
on 4-way valve (Detail “A”).
NOTE: Refer to Preventive Maintenance on page 26 for maintenance of heat exchanger and
filters.
B. Hose connections to top and bottom fittings of sieve beds.
C. P.E. valve hose connections on top of sieve beds (Detail “B”).
D. Hose fittings at product tank cap and check valves (Detail “B”).
E. The front and rear fittings on heat exchanger (Detail “C”).
7. Replace any tubing that appears cracked, worn, etc.
8. Re-install cabinet. Refer to Removing Cabinet on page 25.
9. Refer to Typical Product Parameters on page 9 for concentration levels. If low
concentrations are observed, refer to Troubleshooting on page 17.
Part No 1110538
89
Platinum™Series
SECTION 23—LEAK TEST
DETAIL “A” - 4-WAY VALVE HOSES
4-Way Valve
Platinum 5 with Canister Muffler
Sieve Bed Hoses to 4way Valve (STEP 6a)
Hose fitting on Bottom Center Port
of 4-way Valve (Located BEHIND
Exhaust Tubing)(STEP 6a)
Exhaust Tubing
4-Way Valve
Platinum 5, XL, and 10 with Y-Tube Muffler
4-Way Valve
Sieve Bed Hoses to 4way Valve (STEP 6a)
Hose fitting on Bottom Center Port
of 4-way Valve (Located BEHIND
Exhaust Tubing)(STEP 6b)
DETAIL “B” - SIEVE BED
AND PRODUCT TANK
HOSES
P.E. Valve Fittings
(STEP 6c)
Product Tank Cap
(Check all hoses/valves
attached)(STEP 6d)
Hose
Connections
to Top Fittings
of Sieve Beds
(STEP 6b)
Sieve Beds
Check Valve
Tubing (STEP 6d)
Hose Connections to Bottom
Fittings of Sieve Beds (STEP 6b)
DETAIL “C” - HEAT
EXCHANGER HOSES
Heat Exchanger (Typical) Hose
Connections (STEPS 6d)
NOTE: New heat exchanger
does NOT have fins.
Front and Rear Fittings (STEP 6e)
FIGURE 23.1 Leak Test - Heat Exchanger Hoses
Platinum™Series
90
Part No 1110538
SECTION 24—ALARM TEST
SECTION 24— ALARM TEST
Alarm and Sensor Tests
DANGER
To prevent electrical shock, ALWAYS disconnect concentrator from electrical
outlet before servicing.
Check alarms periodically for proper function.
Power Loss Alarm
With the unit running, remove the line cord from power source. The power loss alarm
mode should sound the audible alarm IMMEDIATELY or within 30 seconds.
NOTE: With the unit unplugged and inoperable for a short period of time, the battery free circuit
will be drained. If power failure alarm does not sound with unit unplugged and power switch on,
the battery free circuit is drained. It will recharge when unit is plugged in and switched on.
Low Pressure Test
NOTE: For this procedure, refer to FIGURE 24.1.
1. There are two separate failure modes for Low Pressure:
• Low product tank pressure. (Pressure in tank drops below a preset value, typically
7 p.s.i for 5 liter and 14 p.s.i for 10 liter).
• Failure to reach the set point pressure within a prescribed time limit, or Timeout
Failure.
Test One
1. With unit running, set flow at maximum rating.
2. When the main valve switches, pull the stem on the compressor relief valve out as far
as it will go and hold it.
3. The low pressure alarm should activate within 30 seconds. Refer to SensO2 Alarm
Threshold on page 94 for shutdown mode.
Test Two
1. With unit running, set flow at maximum rating.
2. Remove the pressure sensor tubing (tie-wrap) from the top of the product tank (not
shown).
3. The low pressure alarm should activate within 30 seconds. Refer to SensO2 Alarm
Threshold on page 94 for shutdown mode.
Part No 1110538
91
Platinum™Series
SECTION 24—ALARM TEST
4. Replace tubing and tie wrap.
Time-Out Test
NOTE: For this procedure, refer to FIGURE 24.1.
1. With unit off (O ), disconnect the compressor connector from the main wiring harness.
2. Plug unit in and turn power on (I/).
3. The Time-Out Failure alarm should activate within 40 seconds. Refer to SensO2 Alarm
Threshold on page 94 for shutdown mode.
4. Replace tubing and tie wrap.
NOTE: If any alarm fails to perform to specification, contact Invacare Technical Service.
Relief Valve (Pull Out
Stem to Simulate Leak)
Compressor
Compressor Connector
(Disconnect from Harness)
FIGURE 24.1 Low Pressure Test - Time-Out Test
High Pressure Test
NOTE: For this procedure, refer to FIGURE 24.2.
• High Pressure - Occurs when pressure in product tank rises beyond a preset value,
typically 23 p.s.i. ± 1 p.s.i. for 5 liter and 27 p.s.i. ± 1 p.s.i. for 10 liter.
• Main Valve Coil - Alarm sequence occurs when the main valve coil, connection or
P.C. board circuitry has failed.
1. With the unit running and flow set at 5 L/min., remove one orange wire from the main
valve coil.
2. The main valve coil alarm should activate within 40 seconds. Refer to SensO2 Alarm
Threshold on page 94 for shutdown mode (FIGURE 24.2).
3. Replace tubing and tie wrap.
NOTE: If any alarm fails to perform to specification, contact Invacare Technical Service.
Platinum™Series
92
Part No 1110538
SECTION 24—ALARM TEST
Main Valve
Coil
DETAIL “A” - PLATINUM 5
DETAIL “B” - PLATINUM XL
AND PLATINUM10
Orange Wires
(Only one wire
needs to be
removed)
Orange
Wire
FIGURE 24.2 High Pressure Test
Oxygen Sensor
NOTE: For this procedure, refer to FIGURE 24.3.
Alarm sequence occurs when concentration levels fall below a preset value, typically 73%
± 3% or 85% ± 2%. This failure indicates a catastrophic failure of any component
mechanical or electrical.
1. Turn unit on (I/). Set output flow at 5 L/min for 5 liter units and 10 L/min. for 10 liter
units.
2. Monitor the O2 level.
3. With the O2 level greater than 85% after five minutes, the GREEN panel indicator light
will remain illuminated.
4. Slowly adjust flow beyond maximum rated flow until you can achieve a concentration
level greater than 75% but less than 84%. Within 30 minutes the YELLOW panel
indicator light will illuminate and the unit will continue to run.
5. Clamp off the 1/8-inch oxygen sensor tubing between the oxygen sensor and the
product tank regulator.
WARNING
Use care not to cut oxygen sensor tubing when clamping the oxygen sensor tubing.
6. Within 30 minutes, the Oxygen Sensor Alarm should activate and the RED panel light
indicator will illuminate. The compressor will shut down with the alarm.
Part No 1110538
93
Platinum™Series
SECTION 24—ALARM TEST
1/8-inch I.D. Oxygen Sensor Tubing
(Clamp Off Flow)
RED light
YELLOW light
(5LXO2 and
10LXO2 only)
GREEN light
FIGURE 24.3 Oxygen Sensor
SENSO2 ALARM THRESHOLD
LABEL
SYMBOL
O2
STATUS
INDICATOR LIGHTS
SYSTEM OKAY
O2 over 85% (± 2%)
GREEN Indicator Light
O2 Between 73% (± 3%)
to 85% (±2%)
YELLOW Indicator light
A. YELLOW Solid
B. YELLOW Flashing Sensor Failure
Call a qualified technician.
SYSTEM FAILURE
O2 Below 73% (±3%)
RED Indicator light
Continuous Audible Alarm Sieve-GARD™Compressor
Shutdown
Call a qualified technician
P.E. Valve Coil Test
NOTE: For this procedure, refer to FIGURE 24.4.
NOTE: P.E. Valve Coil - Alarm sequence occurs when the P.E. Valve Coil, connection or P.C. Board
Circuitry has failed.
1. With the unit running and flow set at 5 L/min., remove one YELLOW wire from the
P.E. valve coil. The P.E. valve coil alarm should activate within 10 seconds.
2. Reinstall cabinet. Refer to Removing Cabinet on page 25.
NOTE: If any alarm fails to perform to specification, contact Invacare Technical Service.
Platinum™Series
94
Part No 1110538
SECTION 24—ALARM TEST
NOTE: If problems arise during test, contact Invacare Technical Service for further assistance.
P.E. Valve Coil
Yellow Wires
FIGURE 24.4
P.E. Valve Coil Test
Use the chart in Preventive Maintenance on page 30 to record date and number of hours
when preventive maintenance was performed on the concentrator, or any repairs made.
Part No 1110538
95
Platinum™Series
SECTION 25—SIEVE BED PRESSURE CHECK
SECTION 25— SIEVE BED PRESSURE
CHECK
Installing the Sieve Bed Pressure Tap-In Kit Installation
and Checking Bed Pressure
DANGER
To prevent electrical shock, ALWAYS disconnect concentrator from electrical
outlet before servicing.
Disassembly
NOTE: For this procedure, refer to FIGURE 25.1.
1. Turn power off (/O ) and unplug unit.
2. Remove cabinet. Refer to Removing Cabinet on page 25.
3. Turn unit so the back faces you.
4. Loosen and lower the adjustable clamp on the product tank.
5. Pull product tank up and back to access the check valve PVC tubing.
6. Locate the check valve and PVC tubing to your right.
7. Cut the PVC tubing below the check valve in half.
Check Valve
Cut PVC Tubing below
Check Valve to install
Tap-in Kit
Adjustable Clamp
Product Tank
FIGURE 25.1 Disassembly
Platinum™Series
96
Part No 1110538
SECTION 25—SIEVE BED PRESSURE CHECK
Installation
NOTE: For this procedure, refer to FIGURE 25.2.
1. Insert the "T" fitting into the ends of the PVC tubing.
2. Secure ¼-inch clamps to each end of the PVC tubing “T” fitting connection.
3. Attach the ¼ x 2-inch silicone tubing to the new “T” fitting and secure with a ¼-inch
clamp.
4. Insert plug into the open end of the ¼ x 2-inch silicone tubing.
5. Secure with a ¼-inch clamp.
¼-inch Clamp
“T” Fitting
¼ x 2-inch
Silicone Tubing
Plug
PVC
Tubing
¼-inch Clamp
FIGURE 25.2 Installation
Pressure Testing
NOTE: For this procedure, refer to FIGURE 25.3.
1. Remove plug and connect pressure gauge to the ¼ x 2-inch silicone tubing and secure
with a ¼-inch clamp.
2. Check each connection to make sure it is tight.
3. Turn the concentrator On ( I/) .
NOTE: Adjust the concentrator to MAXIMUM Rated liter flow (5 L/min. for 5 liter models and
10 L/min. for 10 liter models)
NOTE: Wait approximately five (5) minutes to allow system pressures to achieve proper
equilibrium before testing.
4. The pressure in the concentrator should rise within 20 seconds to 21 p.s.i.g. ± 0.3 for 5
liter models (25 p.s.i.g. for 10 liter models) and shift the 4-way valve to the opposite
sieve bed.
5. After the 4-way valve shift, the pressure in the concentrator will drop to 14 p.s.i.g. ± 2
before rising within 20 seconds to 21 p.s.i.g. ± 0.3 for 5 liter models (25 p.s.i.g. for 10
liter models) and shift the 4-way valve to the opposite sieve bed.
6. If pressure reading is 21 p.s.i.g. ± 0.3 for 5 liter models (25 p.s.i.g. for 10 liter models)
when both valve shifts are made, proceed to STEP 8.
Part No 1110538
97
Platinum™Series
SECTION 25—SIEVE BED PRESSURE CHECK
7. If pressure in the concentrator does not fall into the specifications listed above, refer
to Troubleshooting on page 17.
8. Turn the concentrator off (O).
9. Unclamp the pressure gauge and remove it from the "T" fitting.
¼-inch Clamp
(STEP 1)
Pressure
Gauge
Product
Tank
Adjustable
Clamp
FIGURE 25.3 Pressure Testing
After Testing
NOTE: For this procedure, refer to FIGURE 25.4.
1. Insert ¼-inch plug and ¼ x 2-inch silicone tubing onto the "T" fitting and secure with
¼-inch clamp.
2. Reinstall the cabinet. Refer to Removing Cabinet on page 25.
¼-inch Plug
¼-inch Clamp
FIGURE 25.4 After Testing
Platinum™Series
98
Part No 1110538
LIMITED WARRANTY
LIMITED WARRANTY
NOTE: THE WARRANTY BELOW HAS BEEN DRAFTED TO COMPLY WITH FEDERAL
LAW APPLICABLE TO PRODUCTS MANUFACTURED AFTER JULY 4, 1975.
This warranty is extended only to the original purchaser who purchases this product when new
and unused from Invacare Corporation or a dealer. This warranty is not extended to any other
person or entity and is not transferable or assignable to any subsequent purchaser or owner.
Coverage under this warranty will end upon any such subsequent sale or other transfer of title
to any other person. This warranty gives you specific legal rights and you may also have other
legal rights which may vary from state to state.
Invacare Corporation warrants its Platinum XL Oxygen Concentrators when purchased new
and unused to be free from defects in materials and workmanship for a period of five (5) years
from date of purchase from Invacare or a dealer, with a copy of the seller’s invoice required for
coverage under this warranty.
Invacare Corporation warrants its Platinum 10 Oxygen Concentrators when purchased new
and unused to be free from defects in materials and workmanship for a period of three (3) years
from date of purchase from Invacare or a dealer, with a copy of the seller’s invoice required for
coverage under this warranty.
DO NOT OPEN OR ATTEMPT TO SERVICE THE 4-WAY VALVE BODY. This will void any
and all warranty applicable to the valve body. If within such warranty periods any such product
shall be proven to Invacare Corporation's satisfaction to be defective, such product shall be
repaired or replaced, at Invacare Corporation's option. This warranty only applies to the labor
for repairs performed by the Invacare Service Department or Invacare Authorized Service
Centers. It does not apply to the labor performed by the purchaser or user. This warranty does
not include normal wear and tear or shipping charges. Invacare Corporation's sole obligation
and your exclusive remedy under this warranty shall be limited to such repair or replacement.
Routine maintenance items, such as filters, are excluded from this warranty.
For warranty service, please contact Invacare Corporation's Service Department at the toll
free number on the back cover. Upon receiving notice of an alleged defect in a product,
Invacare Corporation will issue a serialized return authorization. It shall then be the
responsibility of the purchaser to return the entire unit or remove, at purchaser's cost, the
defective component part(s) identified, pack the component part(s) in a manner to avoid
shipping damage and to ship the component part(s) to either Invacare Corporation's plant or
service center as specified by Invacare Corporation in advance. Defective component part(s)
MUST be returned for warranty inspection using the serial number as identification within
thirty (30) days of return authorization date. DO NOT return products to our factory without
prior consent. C.O.D. shipments will be refused; please prepay shipping charges.
LIMITATIONS AND EXCLUSIONS: THE FOREGOING WARRANTY SHALL NOT APPLY
TO PRODUCTS SUBJECTED TO NEGLIGENCE, ACCIDENT, IMPROPER OPERATION,
MAINTENANCE OR STORAGE, SOOT OR SMOKE-FILLED ENVIRONMENTS, OR OTHER
THAN NORMAL APPLICATION, USE OR SERVICE, OR TO PRODUCTS MODIFIED
WITHOUT INVACARE CORPORATION'S EXPRESS WRITTEN CONSENT (INCLUDING,
BUT NOT LIMITED TO, MODIFICATION THROUGH THE USE OF UNAUTHORIZED
PARTS OR ATTACHMENTS) OR TO PRODUCTS DAMAGED BY REASON OF REPAIRS
MADE TO ANY COMPONENT WITHOUT THE SPECIFIC CONSENT OF INVACARE
CORPORATION OR TO PRODUCTS DAMAGED BY CIRCUMSTANCES BEYOND
INVACARE CORPORATION'S CONTROL.
Part No 1110538
99
Platinum™Series
THE FOREGOING EXPRESS WARRANTY IS EXCLUSIVE AND IN LIEU OF ANY OTHER
WARRANTIES WHATSOEVER, WHETHER EXPRESS OR IMPLIED, INCLUDING THE
IMPLIED WARRANTIES OF MERCHANTABILITY AND FITNESS FOR A PARTICULAR
PURPOSE, AND THE SOLE REMEDY FOR VIOLATIONS OF ANY WARRANTY
WHATSOEVER, SHALL BE LIMITED TO REPAIR OR REPLACEMENT OF THE DEFECTIVE
PRODUCT PURSUANT TO THE TERMS CONTAINED HEREIN. THE APPLICATION OF
ANY IMPLIED WARRANTY WHATSOEVER SHALL NOT EXTEND BEYOND THE
DURATION OF THE EXPRESS WARRANTY PROVIDED HEREIN. INVACARE SHALL NOT
BE LIABLE FOR ANY CONSEQUENTIAL OR INCIDENTAL DAMAGES WHATSOEVER.
SOME STATES DO NOT ALLOW THE EXCLUSION OR LIMITATION OF INCIDENTAL OR
CONSEQUENTIAL DAMAGE, OR LIMITATION OF HOW LONG AN IMPLIED WARRANTY
LASTS, SO THE ABOVE EXCLUSION AND LIMITATION MAY NOT APPLY TO YOU.
THIS WARRANTY SHALL BE EXTENDED TO COMPLY WITH STATE/PROVINCIAL
LAWS AND REQUIREMENTS.
Invacare Corporation
www.invacare.com
USA
One Invacare Way
Elyria, Ohio USA
44036-2125
800-333-6900
Canada
570 Matheson Blvd E Unit 8
Mississauga Ontario
L4Z 4G4 Canada
800-668-5324
Invacare, SensO2, Yes, you can., the Medallion
Design are registered trademarks of Invacare
Corporation.
Platinum, HomeFill, PreciseRx, and Sieve-GARD
are trademarks of Invacare Corporation.
Teflon is a registered trademark of DuPont Corp.
Torx is a registered trademark of Textron, Inc.
© 2006 Invacare Corporation
Part No 1110538
Rev D - 08/09/06