1
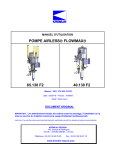
INSTRUCTION MANUAL FLOWMAX® PNEUMATIC TWO COMPONENT PROPORTIONING PUMP MODEL PU 2125 F Manual : 0810 573.190.112 Date : 1/10/08 - Supersede : Modif. : KREMLIN REXSON – 150, avenue de Stalingrad 93 245 - STAINS CEDEX - FRANCE Téléphone : 33 (0)1 49 40 25 25 Fax : 33 (0)1 48 26 07 16 INSTRUCTION MANUAL FLOWMAX® PROPORTIONING PUMP MODEL PU 2125 F SUMMARY 1. EC DECLARATION OF CONFORMITY ...................................................................................................... 2 2. WARRANTY................................................................................................................................................. 2 3. SAFETY INSTRUCTIONS ........................................................................................................................... 3 4. TECHNICAL FEATURES............................................................................................................................. 6 5. OPERATING PRINCIPLE ............................................................................................................................ 7 6. INSTALLATION ........................................................................................................................................... 8 7. OPERATING ................................................................................................................................................ 9 8. ADJUSTMENTS......................................................................................................................................... 12 9. CHANGING MIX RATIO ............................................................................................................................ 13 10. SHUTDOWN AT THE END OF WORK ..................................................................................................... 13 11. DAILY CARE .............................................................................................................................................. 13 12. TROUBLESHOOTINGS ............................................................................................................................ 14 13. DISASSEMBLY .......................................................................................................................................... 15 14. ASSEMBLY INSTRUCTIONS.................................................................................................................... 19 SPARE PARTS : KREMLIN REXSON PU 2125 F Assembly Motor (Doc. 573.396.110) (Doc. 573.023.050) Page 1 Manual : 573.190.112 Dear Customer, We thank you very much for purchasing our PU 2125 F Flowmax® pneumatic two-component pump. You are the owner of one of the most reliable pumping system available on the market. Special care has been taken during all designing and manufacturing process to make sure your investment will provide full satisfaction. To get the best result, safe and efficient operation of your equipment, we advice you to read and make yourself familiar with this instruction and service manual. Indeed, the non-compliance with this instructions and precautions stated in this manual could reduce the equipment working life, result in operating trouble and create unsafe conditions. 1. EC DECLARATION OF CONFORMITY The manufacturer : KREMLIN REXSON with assets of 6 720 000 euros Head office : 150, avenue de Stalingrad - 93 245 - STAINS CEDEX - FRANCE Tel. 33 (0)1 49 40 25 25 - Fax : 33 (0)1 48 26 07 16 Herewith declares that : proportioning pump, is in conformity with the provisions of : - Machinery Directive (Directive 98/37/EEC) and with national implementing legislation. - ATEX Directive (Directive 94/9/EEC) : II 2 G (group II, class 2, gas). Established in Stains, on January 21 st 2008, Daniel TRAGUS President 2. WARRANTY We reserve the right to make changes; these changes may be carried out after the receipt of our order. No claim will be accepted as a consequence of any change carried out in the instruction manuals or in the selection guides. Our equipment is checked and tested prior to shipment. In the case of a problem arising with the equipment, this must be in writing, within ten days from the delivery date. KREMLIN REXSON warrants all equipment manufactured bearing its name, to be free from defect in material or workmanship for a period of 12 months (one shift per day or 1800 hours - 1 term reached) from the date of delivery. Work life is based on single shift working - 8 hours per day. Warranty claims for defective items will only be accepted in writing and will be verified and confirmed by us. The warranty does not cover fair wear tear, damage or wear caused by mis use, improper maintenance or non-observance of our recommendations. KREMLIN REXSON will repair or replace parts (carriage paid to our plant and accepted as defective by us). We shall not be liable for any losses, resulting from a production breakdown. Upon request, we can carry out service work at your premises; all expenses (travelling and accommodation) for KREMLIN REXSON technicians will be chargeable. In the event that it is found that equipment has been tampered with, this will invalidate the warranty. Equipment that is bought in will be subject to the supplier's warranty. KREMLIN REXSON Page 2 Manual : 573.190.112 3. SAFETY INSTRUCTIONS GENERAL SAFETY INSTRUCTIONS CAUTION : The equipment can be dangerous if you do not use it according to the rules mentioned in this instruction manual. Read carefully all the instructions hereafter before operating your equipment. Only trained operators can use the equipment. (To acquire an essential training, please contact the 'KREMLIN REXSON University' training center - Stains). The foreman must ensure that the operator has perfectly taken in the safety instructions of this equipment as well as the instructions in the manuals of the different parts and accessories. Read carefully all instruction manuals, label markings before operating the equipment. Incorrect use may result in injury. This equipment is for professional use only. It must be used only for what it has been designed for. Never modify the equipment. The parts and accessories supplied must be regularly inspected. Defective or worn parts must be replaced. Never exceed the equipment components' maximum working pressure. Comply with regulations concerning safety, fire risks, electricity in force in the country of final destination of the material. Use only products or solvent compatible with the parts in contact with the material (refer to data sheet of the material manufacturer). PICTOGRAM S D A NIP HAZARD WARNING MOVING ELEVATOR J H RELIEF OR DRAIN VALVE WARNING HOSE UNDER PRESSURE N ELECTRICAL HAZARD P WARNING FIRE HAZARDS KREMLIN REXSON E F WARNING MOVING PARTS L WEAR GLASSES OBLIGATORY WARNING MOVING SHOVEL C DO NOT EXCEED THIS PRESSURE K M G HIGH PRESSURE HAZARD Q WEAR OF GLOVE IS OBLIGATORY PRODUCT VAPOR HAZARDS WARNING HOT PARTS OR AREAS GROUNDING WARNING (USER) WARNING SERIOUS INJURIES R EXPLOSION HAZARDS Page 3 Manual : 573.190.112 PRESSURE HAZARDS Current legislation requires that an air relief shut off valve is mounted on the supply circuit of the pump motor to let air off when closing the supply circuit. Without this precaution, the motor residual air of the motor may let the pump beat and cause a serious injury. Please ensure that, a material drain valve is mounted on the material circuit to drain it (after shutting down air to the motor and the pressure relief) before any servicing on the equipment. These valves must be closed for air and opened for product when processing. HIGH PRESSURE INJECTION HAZARDS When working with high pressure equipment, special care is required. Fluid leaks can occur. Then there are injection risks in exposed parts of body that may cause severe injuries or amputations : Medical care must be handled immediately if product is injected under the skin or in other parts of the body (eyes, fingers). Never point the spray gun at any one. Never try to stop the spray with your hands or fingers nor with rags or similars. Follow the shut down procedure and always depressurize air and fluid circuits before carrying out any servicing on the gun (cleaning, checking, maintenance of the material or cleaning of the gun nozzles). For the guns equipped with a safety device, always lock the trigger when you do not start the gun. FIRE - EXPLOSION - SPARKS - STATIC ELECTRICITY HAZARDS A poor earth connection, inadequate ventilation, sparks or static electricity can cause an explosion or fire. to avoid these risks when using or servicing KREMLIN REXSON equipment, the following safety procedures must be followed : ensure a good earth connection and ground the parts to be handled i.e. solvents, materials, components and equipment, ensure adequate ventilation, keep working area clean and free from waste solvents, chemicals, or solid waste i.e. rags, paper and empty chemicals drums, never use electrical switches / power if in an atmosphere of volatile solvent vapour, stop working immediately in case of electrical arcs, never store chemicals and solvents in the working area. TOXIC PRODUCT HAZARDS Toxic products or vapours can cause severe injury not only though contact with the body, but also if the products are ingested or inhaled. It is imperative : to know the material products and their risks, notified or hazardous materials must be stored in accordance with the regulations, the material must be stored in an appropriate container, never place materials in a container where there is a risk o spillage or leakage, a procedure must be applied for the safe disposal of waste material. It must comply with all prevailing regulations and legislations of the country where the equipment is to be used, protective clothing should always be worn in compliance with the material manufacturers' recommendations, depending on the application and chemical safety instructions, safety glasses, gloves, foot wear, protective masks and possible breathing equipment should be worn to comply with the regulations (Refer to chapter "Safety equipment of KREMLIN selection guide). KREMLIN REXSON Page 4 Manual : 573.190.112 CAUTION! It is forbidden using any solvent or with halogenated hydrocarbon base and also products with these solvents facing aluminium or zinc. The non-compliance with the instructions may cause explosion hazards causing serious or fatal injuries. EQUIPMENT REQUIREMENTS PUMP F A Before carrying out any work, it is imperative to get used with the compatibilities of motors with pumps before coupling. The operator shall understand the equipment and the safety instructions. These instructions are available in the manuals of the pumps. The air motor is designed to be mounted with a pump. Never modify any components or couplings. Where operating, please keep hands away from moving parts. Before starting up the equipment, please read the PRESSURE RELIEF instructions. Please ensure that any relief or drain valves fitted are in good working order. HOSES Keep hoses out of circulation areas, moving parts or hot surfaces, Never expose product hoses to temperature higher than + 60°C / 140° F or lower than 0°C / 32° F, Never pull or use the hoses to move the equipment, Tighten all fittings as well as the hoses before operating the equipment, Check the hoses regularly; change them if they are damaged, Never exceed the working pressure (WP) indicated on the hose. USED PRODUCTS Considering the variety of products that may be used by the users and the impossibility to check off all chemical data, of possible reactions of chemicals to each other and their long term evolution, KREMLIN REXSON can not be considered as liable for : the bad compatibility of wetted parts, risks for staff and surroundings, for worn or out of order parts, for wrong working of equipments or units, as well as for the qualities of final product, The user must know and prevent the possible risks as toxic vapours, fires or explosions due to used products. He shall determine the risks of immediate reac tions or pursuant to repeated exposures of the staff. KREMLIN REXSON shall not be liable for psychic injuries, direct or indirect material damages further to the use of chemicals. SPECIFIC SAFETY INSTRUCTIONS OF THE PU 2125F Use only air hose with static conductor to connect the pump with the spray gun. Ground the pump (use the connection on the pump). The compressed air supply must not be higher than 6 bar / 87 psi. Make sure the lubricant in the cup fluid section is compatible. Use the appropriate solvent for the material being sprayed to increase the equipment working life. KREMLIN REXSON Page 5 Manual : 573.190.112 4. TECHNICAL FEATURES The PU 2125 F pump is a fixed ratio two-component pump that enables to supply a pneumatic gun. The proportioning pump is mounted on a cart and consists of : - a mixer, - a MATERIAL/SOLVENT selection assembly, - a suction rod and a drain rod for the BASE, - a suction rod for the solvent, - a gravity container and an hose for the CATALYST. Mix ratio .............................................. 1/1, 2/1, 3/1, 4/1, 5/1 (depending upon CATA fluid section choice)) Viscosity.............................................. 180 s CA4 maxi Motor .................................................. model 340-2 TM The BASE fluid section is an Intensive technology. Proportioning ratio Delivery per cycle (cm3) version. The CATALYST fluid section is a FLOWMAX® A B Flow rate at 20 cycles (l / US gal) Pressure ratio Fluid Fluid pressure at pressure at 6 bar / 87 psi 4 bar / 58 psi (bar / psi) (bar / psi) 1/1 85 85 3.4 / 0.9 0.92/1 5.5 / 79.7 3.7 / 53.7 2/1 85 45 2.6 / 0.7 1.25/1 7.5 / 108.7 5 / 52.5 3/1 85 30 2.3 / 0.6 1.41/1 8.5 / 123.3 5.6 / 81.2 4/1 85 21 2.12 / 0.56 1.51/1 9 / 130.5 6 / 87 5/1 85 17 2.04 / 0.5 1.58/1 9.5 / 137.8 6.3 / 91.4 Air supply pressure Mini P : 3 bar / 43.5 psi - Maxi P : 6 bar / 87 psi Proportioning pump air consumption (Nm3/h) 1,2 x (mixed fluid output in l/mn) x pump ratio x (motor air pressure + 1 bar) x 60/1000 Wetted parts BASE and CATA fluid section : stainless steel CATA circuit : stainless steel Mixer : stainless steel, treated steel, polyethylene Bellows : PTFE Fittings Air inlet : F 3/8 BSP Spraying air : M 1/4 NPS Fluid outlet (manifold) : M 1/2 JIC Total weight 50 kg / 110.2 lbs Dimensions 110 x 55 x 50 cm Maximum operating temperature 50° C / 122° F Noise level (at 1m) 80 dB A (depending upon ISO 3746 standard) KREMLIN REXSON Page 6 Manual : 573.190.112 5. OPERATING PRINCIPLE 19 18 8 AC MP B 14 9 13 HA 20 15 12 11 17 HB S A This pump measures and mixes 2 components A and B to a single defined volume proportion (see data sheet of the product). The fluid sections HA and HB are coupled to an air motor MP. Their sizes have been calculated in order that each delivers the components A and B to the predetermined proportion. Fluid section HA draws and delivers the BASE A. Fluid section HB draws and delivers the CATALYST B. When pulling gun trigger (19), proportioning pump starts cycling and draws the BASE and the CATALYST. Simultaneously, they are delivered in valves (11 and 12), the check valves (13 and 14) and are mixed in the static mixer (15). The mixed material then goes towards the gun through hose (17). As soon as the trigger is released, the proportioning pump stops cycling : the regulator (9) regulates the air pressure on the pump, thus regulates the material pressure, the regulator (8) regulates the atomizing air pressure to the gun. Nota : The valve (11) is a three ways' valve : - handle horizontally fluid circulation (priming stage), - handle vertically fluid towards mixer (working stage, flushing stage). The valve (12) is a color changer fitted with 2 fluid valves. These valves are piloted pneumatically alternately, connecting the air tube on one or the other valve : Left connection fluid circulation (priming stage) Right connection fluid towards mixer (working stage). Nota : During the FLUSHING stage, - the BASE fluid section draws solvent; that solvent is exhausted towards the manifold, the mixer and the gun. the BASE circuit and the mixed circuit will be flushed. - the catalyst circulates. The CATALYST circuit is not flushed. KREMLIN REXSON Page 7 Manual : 573.190.112 6. INSTALLATION The pumps are designed to be installed in a spray booth. DESCRIPTION OF THE LABEL MARKING Marking in accordance with the ATEX directive KREMLIN REXSON 93240 STAINS FRANCE Name and address of the manufacturer II : group II 2 : class 2 Surface equipment meant to an area where explosive atmospheres due to gas, vapours, mists are liable to appear from time to time in usual operating. G : gas II 2 G TYPE Pump version: PU 2125 F RATIO Mixing ratio SERIE - SERIAL Number given by KREMLIN REXSON P air : 6 bar / 87 p si Air supply maximum pressure of the pump motor P prod : xx bar / xx psi Maximum fluid pressure at the pump outlet INSTALLATION DIAGRAM B A - Explosive zone zone 1 (Z1) or zone 2 (Z2) : spray booth Z2 1m 2 1 A MP AC B - Non explosive area B HA 1m Z2 HB 1 - PU 2125 F pump S Z1 KREMLIN REXSON A Page 8 2 - Pneumatic gun Manual : 573.190.112 INSTALLATION 19 18 8 B 14 13 9 AC MP HA 20 15 12 11 17 HB S A Interconnect hoses (18) and (17) between the pump and the gun : The hose (18) should be static proof (green band, ID 7mm / 9/32" or 8 mm / 5/16" for a gun, model HTi) The hose (17) should be a fluid hose (ID 7 mm / 9/32"). Connect the pump air supply to the compressed air network by means of an hose (ID 10 mm / 3/8 "). Nota : these hoses are not included in the equipment. The PU 2125F pump is fitted with an earth cable. Ground the pump. Fill with T lubricant or with an appropriate lubricant the BASE fluid section flange. Fill the cup to the 3/4. Unscrew the 2 air regulators (8 & 9), then supply the equipment with air (maximum P = 6 bar / 87 psi, clean air). Do not install isolating valve on the CATA supply system (between the tank and the FLOWMAX fluid section). It will damage the bellows. Do not install a system that will act as a non return valve. You must not create an overpressure in the CATA system. 7. OPERATING LABEL The label sticked on the pump explains the 3 operating stages of the pump : PRIMING - WORKING FLUSHING. The 3 operating stages are selected : - working the manifold valve (11) ( index A on the label), - operating one of the valves of the color changer (12) ( index B on the label), - working the valve (20) located at the base and solvent suction ( index S on the label). KREMLIN REXSON Page 9 Manual : 573.190.112 Stages : 1 - Priming 2 - Working 3 - Partial flushing The label indicates also the air pressure adjustment on the motor of the pump. : Low pressure : Higher pressure FIRST START UP CAUTION : This pump has been checked and tested with water in our factory. During the first start up, a flushing of the circuits with solvent is required to ensure a good operating of this pump. Be certain the gun trigger is released and hoses are properly interconnected. Insert BASE drain rod and CATA hose into waste containers. Insert suction rod of BASE fluid section into SOLVENT container. Fill up with SOLVENT the CATALYST container. Be certain the manifold hand levers are in the PRIMING position. Adjust the red regulator 'Air motor' (9) between 0.5 and 2 bar / 7 and 29 psi. Both components must flow freely from BASE drain rod and CATA hose into waste containers. Once drained the circuits, insert the drain rod into the solvent container and the CATALYST hose into the other container. Make the materials circulate until air bubbles are evacuated. Unscrew the air regulator (9), then empty the solvent of the CATA container. Prepare the materials : Fill up a container with Material A (BASE), Fill up the pump container (Maximum 6 liters / 1.6 US gal) with material B (CATALYST), Fill up a container with Flushing Solvent S. Insert BASE suction rod (Ø 16) into BASE container and the 'BASE' rod into a waste container. Insert SOLVENT rod into solvent container. Insert 'CATA' hose into a waste container. PRIME (Stage 1) to evacuate solvent into fluid sections, then insert BASE drain rod into BASE container and CATA hose into CATA container. KREMLIN REXSON Page 10 Manual : 573.190.112 MATERIAL PRIMING (STAGE 1) Move the valve (20) hand lever to supply the pump with material A (BASE). Move the valve (11) hand lever horizontally. Connect the air tube on the hole on the far left of the plate ( opening of the CTM valve to the container B). B 20 Screw the red regulator until pump begins to start up (pressure : from 1 to 2 bar / from 14.5 to 29 psi). The base A is drawn then delivered by the BASE fluid section. It passes through the valve (11) of the manifold and goes back to the container A. The catalyst flows from container B, is drawn by the CATA fluid section. It passes through the valve (12) of the manifold and goes back to the container B. Leave the materials circulate for a few minutes. When air bubbles are evacuated, the priming is over. 12 11 S A 1 WORKING (STAGE 2) Leave the valve (20) hand lever in the same position (the pump must be supplied with materials A and B). Position the valve (11) hand lever vertically. Connect the air tube on the hole on the far right of the plate ( opening of the CTM valve towards the AR valve). B 20 Screw the red regulator 'Pump pressure' until the pump begins to start up. The base A and the cata B are drawn then delivered by their respective fluid section. Each material comes to the manifold and is mixed at the outlet in the mixer. Point and trigger the gun into a waste receptacle. When material flows out regularly, screw the grey regulator "Spraying air". Adjust the 2 regulators to get a correct fan : - adjust the material pressure with the red regulator, - adjust the spraying air with the grey regulator. KREMLIN REXSON Page 11 12 11 S A 2 Manual : 573.190.112 PARTIAL FLUSHING (STAGE 3) If the working shutdown lasts longer than the material "working life", carry out a PARTIAL flushing. The FLUSHING stage enables to flush the BASE circuit and the mixed material. Move the valve (20) hand lever to supply the BASE fluid section with solvent. Position the valve (11) hand lever vertically. Conect the air tube on the hole on the far left of the plate (opening of the CTM valve towards the container B circulation of the catalyst). B A 20 Screw the red regulator 'Pump Pressure' until pump begins to start (pressure : from 1 to 2 bar / from 14.5 to 29 psi). The solvent S and the cata B are drawn and delivered via their respective fluid section. Each material comes to the manifold valves : the CATA is sent to the container, the solvent passes through the manifold, the mixer and comes to the gun. Remove aircap and tip from the gun and clean them carefully. Point and trigger the gun into a waster receptacle. When clean solvent flows out, the circuit is flushed. Leave the equipment until a next utilization. 12 11 S A 3 8. ADJUSTMENTS TROUBLE CAUSE SOLUTION Increase the material fluid pressure using red knob. Coating not thick enough Not enough material Spray slower or closer to part being painted. Use the next higher nozzle size. Decrease the material pressure using red knob. Too much material Sags, runs Spray faster or farther from part being painted. Use the next smaller size. Distorted spray fan KREMLIN REXSON Page 12 Refer to gun instruction manual Manual : 573.190.112 9. CHANGING MIX RATIO The PU 2125 F pump features a fixed ratio proportioning system (ratio : 1/1, 2/1, 3/1, 4/1, 5/1 according to the choice of the CATA fluid section). To change the ratio, the CATALYST fluid section must be changed with a fluid section of a different ratio (refer to PU 2125F spare parts' list). 10. SHUTDOWN AT THE END OF WORK COMPLETE FLUSHING : ONLY for material / color change or long duration shutdown. Carry out a partial flushing (refer to § 6). Empty the CATALYST container - replace CATALYST with CLEAN solvent. Insert SOLVENT suction rod into a container of CLEAN solvent. Remove gun aircap and clean it. Place the valve (11) hand lever vertically. Connect the air tube on the hole on the far left of the plate ( opening of the CTM valve towards the AR valve). Adjust the red regulator to 2 or 3 bar / 29 or 43.5 psi. Point the gun into a waste container and make the fluid flow out until you get solvent. Remove and clean the mixer (15). Remove and clean the CATA tank screen after having emptied the tank content. To get a perfect flushing, repeat this procedure twice using some CLEAN solvent. Install the aircap onto the gun. Shut off the main air supply. Leave the pump filled with clean solvent. 11. DAILY CARE SPRAY GUN Comply with the usual instructions of spray gun servicing (refer to spray gun instruction manual). PUMP Make sure the wetting cup of the BASE fluid section is filled up with T lubricant. Fill if necessary (level : 3/4 of the cup). Regularly change the lubricant (this lubricant will normally be coloured by the paint). Make sure the wetting cup is clean and regularly clean it with solvent after having drained the lubricant. Make sure the suction strainers and rods are clean and in good condition. Check the hoses. Flush the pump as often as necessary. Never inject oil into the compressed air supply. The CATALYST tank is fitted with a screen. Clean that screen regularly or change it, if necessary (filtration size : 50 MESH) When stopping the pump, always leave it filled up with material. For a short duration, if the flushing has not been carried out, leave the pump filled up with material. For a long duration, after flushing the pump, leave it filled up with solvent. KREMLIN REXSON Page 13 Manual : 573.190.112 Before cleaning or removing a component of the equipment, you must : 1 - stop the pump compressed air supply, 2 - place the manifold valves in 'circulation' position, 3 - trigger the gun to depressurize the hoses. 12. TROUBLESHOOTINGS 19 18 8 B 14 13 9 AC MP HA 20 15 12 11 17 HB S A THE PUMP DOES NOT OPERATE Check: It is supplied with air, The valves (11 & 12) are in 'WORK' position, The gauge (9) indicates a pressure between 2 and 6 bar / 29 to 87 psi, The mixer (15) and the hose (17) are not clogged, The gun filter, if there is one, is not clogged, The gun nozzle is not clogged. RATIO CHECKING From time to time, you must check the ratio : 1 - The CATALYST container is translucent. Mark on the CATALYST level, then add a CATALYST volume (for example 1 liter / 0.26 US gal), 2 - Determine the volume of the BASE, 3 - Operate the pump until the volume of catalyst falls to its initial level, 4 - Determine the volume of BASE used. In this case, the ratio is : Volume of BASE used (in liters) = Material mix ratio * 1 liter * Nota : The reading of the proportioning ratio is highly sensitive to the viscosity of the materials. KREMLIN REXSON Page 14 Manual : 573.190.112 13. DISASSEMBLY WARNING ! Before any intervention on the pump : - shut off the compressed air supply, - place the manifold valves in 'circulation' position, - trigger the gun to depressurize the circuits, - empty the CATALYST container. BASE FLUID SECTION - HA (refer to Doc. 573 396 050) To disassemble the BASE fluid section (HA), remove the lower part of the pump [the CATALYST fluid section (HB) and the suction kit (14)] removing the nuts (10), the tie-rods (9) and the fixing plate (12). MP 2+3+6 15 4+8 1+10 HA 9+10 12+13 16+17 11 7+8 14 HB KREMLIN REXSON Page 15 Manual : 573.190.112 SUCTION VALVE (27) Unscrew the suction valve body (28). The ball (29) is secured by means of a stop ring (30). Reinstall the suction valve assembly changing the seal (26). 35 21 EXHAUST VALVE (33) Unscrew the cylinder (25). Unscrew the seat (31) by holding the valve support (34) to remove the ball (32). Check the valve seal (33) condition, change it if necessary. Reinstall the parts in the reverse order of the disassembly sequence and tighten the seat (31) completely on the valve support (34). Change cylinder seal (26). 36 22+23 26 34 32 33 31 CARTRIDGE (20) Disassemble the BASE fluid section from the motor removing the tie-rods (1), the pin (3) and the connecting pin (2). Take off the circlips (21) located on the fluid section flange (36) and push the cartridge (22) downwards to remove it. Install a new cartridge (20). Carry out the disassembly in the reverse order of the disassembly sequence. Be careful not to damage the inner seal when inserting piston rod (35) into the cartridge (22). 20 24 25 26 30 27 29 28 CATALYST FLUID SECTION - HB (refer to Doc. 573 396 050) SUCTION VALVE (refer to base fluid section - suction valve) EXHAUST VALVE (refer to base fluid section - exhaust valve) CARTRIDGE Pull on the cartridge (43) by means of a hook to remove it from the flange (44) of the suction kit. Install a new assembly. Lubricate the seal (50). Slide the cartridge (43) on the piston rod (41) and insert it in its housing until the stop. Be careful not to damage the inner seal when inserting piston-rod into cartridge. KREMLIN REXSON Page 16 Manual : 573.190.112 SUCTION KIT ( Refer to Doc. 573 396 050) (14) BELLOWS (60) 4 Disassembly : Disassemble the whole (HB & 14) from the pump unscrewing the nuts (10) from the tie-rods (4) and removing the axis (7) and the pin (8) at the flange (11) level. Remove the cylinder and the exhaust valve from the CATALYST fluid section. On the suction kit (14) : Take off the nuts (71), remove the flange (65). Pull the suction bearing (64) upwards. The bellows (61), the skirt (62), the coupling rod (63) and the CATA piston rod (41) are drawn in by the suction bearing. Take off the ring (67) located on the flange (65). Take off the cylinder (69). Disassemble the CATA piston rod (41) from the coupling rod (63). Push the CATA fluid section cartridge to take off the flange (70). Assembly : Lubricate the seals and the ring (66 & 67) before installing them. Install new seals (66) into the fluid flange (70) and into the suction bearing (64). Install the ring (67) into the flange (65). Make it strain to insert it in its housing. Install the cylinder (69) into the flange (70) until to stop (overcome the stiffness of the seal (66) without damaging it). Slide the coupling rod (63) into the new bellows assembly (bellows, 61 and skirt, 62). Associate the coupling rod (63) and the CATA piston rod (41) after the application of glue (low strength - Aneorobic adhesive Loctite 222). Screw the 2 rods together (insert a metal rod on the holes located at each end and tighten). Locate the whole (bellows and rods) into the suction bearing (64). Place the whole on the tie-rods (68) as well as the flange (65). Install the nuts (71). 11 10 7+8 14 HB 71 67 65 61 63 62 64 66 69 Caution : Tighten them manually to get a play between the parts. 66 Mount the coupling rod (63) on the upper part of the pump by means of the axis (2) and the pin (3) - consult drawing of the previous page. 68 If necessary, orientate the coupling rod (63) with care to prevent from damaging the bellows (61). It is possible when the nuts (71) are not too tightened. When the parts are installed, tighten the nuts (71) with a wrench # 10. Install a new cartridge (43) before mounting the CATA fluid section. KREMLIN REXSON Page 17 70 Manual : 573.190.112 Before reassembling the different components : Clean the parts with the appropriate cleaning solvent, Install new seals if it is necessary after having lubricated them with PTFE grease, Install new parts if necessary. - MOTOR (Refer to doc. 573.023.050) MOTOR VALVE Disassemble the hood (15) by removing the 3 M6 nuts (26). Unscrew the motor valve (14) holding the driving rod (12). Install the new motor valve (14) and block it on the driving-rod (12) thanks to the two flat parts located at its end. Reinstall the hood (15) tightening the 3 nuts (26). Maximum screwing torque : 4mN / 2.95 ft/lbs 1 5 15 22 10 2 24 6 14 7 3 23 21 13 25 8 4 27 26 12 11 28 KREMLIN REXSON Page 18 Manual : 573.190.112 14. ASSEMBLY INSTRUCTIONS 35 A1 C1 21 36 20 22+23 26 34 A1 32 A1 C1 33 31 A1 24 25 26 30 27 A1 29 28 The above drawing represents the BASE fluid section. Transfer the same indications to the CATA fluid sections. Index Instruction Description Part number A1 PTFE grease 'TECHNILUB' grease (10 ml) 560.440.101 C1 Medium strength Anaerobic Pipe sealant Loctite 577 KREMLIN REXSON Page 19 Manual : 573.190.112