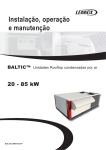
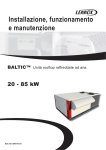
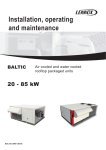
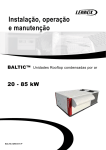
1
Installation, operating and maintenance BALTIC™ Rooftop units air cooled 20 - 85 kW BALTIC-IOM-0412-E TABLE OF CONTENTS BALTIC™ Installation, operating and maintenance Ref : BALTIC-IOM-0412-E INSTALLATION MANUAL 1 SERVICE MANUAL 28 CONTROL MANUAL 74 CERTIFICATES 84 All the technical and technological information contained in this manual, including any drawing and technical descriptions provided by us, remain the property of Lennox and must not be utilised (except in operation of this product), reproduced, issued to or made available to third parties without the prior written agreement of Lennox. BALTIC-IOM-0412-E TABLE OF CONTENTS BALTIC™ INSTALLATION MANUAL Ref : BALTIC_Installation-IOM-0412-E INSTALLATION MANUAL Safety codes & regulations 3 TRANSPORT & HANDLING Mandatory handling devices 5 LIFTING THE UNITS Machine dimensions and weights Minimum clearance around the unit installation Fork lifting the unit Removing the forklift protection located under the machine Lifting the unit with a crane Lifting the roof curbs 6 7 7 8 9 10 DELIVERY CHECKS Rating plate Storage Maintenance key Condensate drains Preliminary checks Installation requirements Connections 12 12 12 13 13 13 13 INSTALLATION ON A ROOF MOUNTING FRAME Roof opening dimensions Sealing checks Leveling adjustable roofcurbs Positioning the rooftop on adjustable roofcurbs 14 14 14 15 NON ADJUSTABLE NON ASSEMBLED ROOFCURB INSTALLATION Frame parts packing Installation Assembly Securing the frame Sealing checks 16 17 17 17 18 CURBING AND FLASHING 18 HEAT RECOVERY GENERAL DESCRIPTION 19 PLATE HEAT RECOVERY CONFIGURATIONS 20 PLATE HEAT RECOVERY INSTALLATION 21 THERMODYNAMIC HEAT RECOVERY CONFIGURATIONS 23 THERMODYNAMIC HEAT RECOVERY - SERVICE MANUAL 24 THERMODYNAMIC HEAT RECOVERY - CONTROL MANUAL 26 BALTIC-IOM-0412-E / Installation manual •1• INSTALLATION MANUAL The present manual applies to the following rooftop versions Item COOLING ONLY BAC 024 SNM 3M BAC 030 SNM 3M BAC 038 SNM 3M BAC 042 SNM 3M BAC 045 DNM 3M BAC 052 DNM 3M BAC 057 DNM 3M BAC 065 DNM 3M BAC 075 DNM 3M BAC 085 DNM 3M HEAT PUMP BAH 024 SNM 3M BAH 030 SNM 3M BAH 038 SNM 3M BAH 042 SNM 3M BAH 045 DNM 3M BAH 052 DNM 3M BAH 057 DNM 3M BAH 065 DNM 3M BAH 075 DNM 3M BAH 085 DNM 3M GAS ONLY - STD HEAT BAG 024 SSM 3M BAG 030 SSM 3M BAG 038 SSM 3M BAG 042 SSM 3M BAG 045 DSM 3M BAG 052 DSM 3M BAG 057 DSM 3M BAG 065 DSM 3M BAG 075 DSM 3M BAG 085 DSM 3M GAS ONLY - HIGH HEAT BAG 024 SHM 3M BAG 030 SHM 3M BAG 038 SHM 3M BAG 042 SHM 3M BAG 045 DHM 3M BAG 052 DHM 3M BAG 057 DHM 3M BAG 065 DHM 3M BAG 075 DHM 3M BAG 085 DHM 3M DUAL FUEL - STD BAM 024 SSM 3M BAM 030 SSM 3M BAM 038 SSM 3M BAM 042 SSM 3M BAM 045 DSM 3M BAM 052 DSM 3M BAM 057 DSM 3M BAM 065 DSM 3M BAM 075 DSM 3M BAM 085 DSM 3M DUAL FUEL - HIGH BAM 024 SHM 3M BAM 030 SHM 3M BAM 038 SHM 3M BAM 042 SHM 3M BAM 045 DHM 3M BAM 052 DHM 3M BAM 057 DHM 3M BAM 065 DHM 3M BAM 075 DHM 3M BAM 085 DHM 3M •2• Net cooling capacity (kW - Eurovent conditions) Heating capacity (kW - Eurovent conditions) HeatPump Heating capacity (KW) GAS 23,4 29,2 37,1 39,4 43,9 49,8 55,2 62,6 74,1 80,7 - - 23,4 29,2 37,1 39,4 43,9 49,8 55,2 62,6 74,1 80,7 20,7 26,2 34,8 38,0 40,8 46,2 54,4 62,2 73,5 80,1 - 23,3 28,9 36,8 39,1 43,7 49,5 54,7 61,9 73,4 79,8 - 20 20 20 20 33 33 33 33 60 60 23,3 28,9 36,8 39,1 43,7 49,5 54,7 61,9 73,4 79,8 - 46 46 46 46 60 60 60 60 120 120 23,3 28,9 36,8 39,1 43,7 49,5 54,7 61,9 73,4 79,8 20,8 26,5 35,1 38,4 41,0 46,6 54,9 62,8 74,2 81,0 20 20 20 20 33 33 33 33 60 60 23,3 28,9 36,8 39,1 43,7 49,5 54,7 61,9 73,4 79,8 20,8 26,5 35,1 38,4 41,0 46,6 54,9 62,8 74,2 81,0 46 46 46 46 60 60 60 60 120 120 BALTIC-IOM-0412-E / Installation manual INSTALLATION MANUAL Safety codes & regulations THE UNIT MUST BE INSTALLED IN ACCORDANCE WITH LOCAL SAFETY CODES AND REGULATIONS AND CAN ONLY BE USED IN WELL VENTILLATED AREA. PLEASE READ CAREFULLY THE MANUFACTURER’S INSTRUCTIONS BEFORE STARTING THIS UNIT. INSPECTIONS AND REQUALIFICATION ACCORDING PRESSURE EQUIPMENT DIRECTIVE MUST FOLLOW THE LOCAL REGULATIONS WHERE THE UNIT IS INSTALLED. Important note for unit fitted with gas burner: THIS MANUAL IS ONLY VALID FOR UNITS DISPLAYING THE FOLLOWING CODES: GB IR GR DA NO FI IS In case these symbols are not displayed on the unit, please refer to the technical documentation which will eventually detail any modifications required to the installation of the unit in a particular country. • If machine is including gas burner, minimum clearance around the unit must be at least 8 m to allow a proper gas flue dilution. If not possible, the fresh air intake must be ducted at least 8 m away from the gas burner exhaust. • The gas burner air intake and exhaust chimney must not be modified or ducted. • Before commissioning this type of unit, it’s mandatory to ensure that the gas distribution system is compatible with the adjustments and settings of the unit. • Gas module can only be used for outdoor installations. • Any work on gas module must be carried out by qualified engineer. All the technical and technological information contained in this manual, including any drawing and technical descriptions provided by us, remain the property of LENNOX and must not be utilised (except in operation of this product),reproduced, issued to or made available to third parties without the prior written agreement of LENNOX. The technical information and specifications contained in this manual are for reference only. The manufacturer reserves the right to modify these without warning and without obligation to modify equipment already sold. All units are compliant with the PED directive 97-23/CE The following note must be followed carefully All work on the unit must be carried out by a qualified and authorised employee. Non-compliance with the following instructions may result in injury or serious accidents. Work on the unit: • The unit shall be isolated from the electrical supply by disconnection and locking using the main isolating switch. • Workers shall wear the appropriate personal protective equipment (helmet, gloves, glasses, etc.). Work on the electrical system: • Work on electric components shall be performed with the power off (see below) by employees having valid electrical qualification and authorisation. Work on the refrigerating circuit(s): • Monitoring of the pressures, draining and filling of the system under pressure shall be carried out using connections provided for this purpose and suitable equipment. • To prevent the risk of explosion due to spraying of coolant and oil, the relevant circuit shall be drained and at zero pressure before any disassembly or unbrazing of the refrigerating parts takes place. • There is a residual risk of pressure build-up by degassing the oil or by heating the exchangers after the circuit has been drained. Zero pressure shall be maintained by venting the drain connection to the atmosphere on the low pressure side. BALTIC-IOM-0412-E / Installation manual •3• INSTALLATION MANUAL • The brazing shall be carried out by a qualified brazier. The brazing shall comply with standard NF EN1044 (minimum 30% silver). EMC DIRECTIVE COMPLIANCE WARNING: This equipment is an “A class“ according CEM Directive. In an industrial environment, this device can create radio electrical noise. In this case, the owner can be asked to take appropriated actions. This applies to all machine installed with nominal amps below <75A: • The short-circuit rate Rsce=33 is defined in the EN61000-3-12 standard relative to the harmonics readings on the supply network. The appliances compliant with the harmonic current limits equivalent to Rsce=33 can be connected in whatever connection point of the main supply system. • The maximal allowable impedance of the main supply system Zmax=0.051W is defined by EN 61000-3-11 standard relative to the voltage variation, fluctuation and flicker readings. The connection to the supply is a conditional connection submitted to the preliminary agreement of the power supply local provider. Replacing components: • In order to maintain CE marking compliance, replacement of components shall be carried out using spare parts, or using parts approved by LENNOX. • Only the coolant shown on the manufacturer’s nameplate shall be used, to the exclusion of all other products (mix of coolants, hydrocarbons, etc.). CAUTION: In the event of fire, refrigerating circuits can cause an explosion and spray coolant gas and oil. Transport – Handling- Access: • Never lift the unit without forklift protections • An approach ramp must be installed if the unit’s installation requirements tell that it's necessary to reach the main switch, the electrical cabinet, the compressor and the ventilation compartment. This recommendation is valid for all type of installations. • It is strictly forbidden to walk or store equipment or material on top of the rooftop unit Rooftop installation in heavy wind locations • The roofcurbs (vertical & horizontal) and rooftops installations are designed to withstand winds up to 80 km/h. Above this limit, it’s recommended to take appropriate actions to secure the installation. • Ensure the fresh air inlet does not face prevailing wind direction. Elbow or section changes in ductworks next to the rooftop • Whatever the supply configuration is, respect a minimal duct’s length of 2 m before any elbow or any duct’s section change. • Directional vanes must be fitted inside any elbow fitted in return or supply ductwork closer than 5 meter to the machine connection flanges. Filters: • Do the filters fire classification’s choice according to local regulations. Fan compartment: • Stop the power before accessing the fan compartment. Gas: • Any work on gas module must be carried out by qualified personnel • A unit with gas module must be installed in accordance with local safety codes and regulations and can only be used for outdoor installation. The technical information and specifications contained in this manual are for reference only. The manufacturer reserves the right to modify these without warning and without obligation to modify equipment already sold. •4• BALTIC-IOM-0412-E / Installation manual TRANSPORT & HANDLING Mandatory handling devices MANDATORY HANDLING DEVICES Handling slings to guide the unit toward the roof curb Vacuum lifting beam to position the unit COMPLIANT BALTIC-IOM-0412-E / Installation manual NON-COMPLIANT •5• LIFTING THE UNITS Machine dimensions and weights Machine Length Width Height Width with hood Transport lenght Transport Width Transport Height Cbox 2283+/-15 2250+/-15 1240+/-15 2683+/-20 2310 2309 1240 Dbox 2783+/-15 2250+/-15 1240+/-15 2683+/-20 2810 2309 1240 Ebox 3663+/-15 2250+/-15 1240+/-15 2683+/-20 3690 2309 1240 Base weight (kg) Unit 24 30 38 42 45 52 57 65 75 85 Cooling 696 711 726 726 937 952 967 982 1150 1150 HeatPump 701 716 731 731 947 962 977 992 1165 1165 Gas S 739 754 769 769 970 985 1000 1015 1225 1225 Gas H 758 773 788 788 992 1007 1022 1037 1285 1285 Dual S 744 759 774 774 980 995 1010 1025 1235 1235 Dual H 763 778 793 793 1002 1017 1032 1047 1295 1295 -12,1 -12,1 -12,1 -12,1 -18,9 -18,9 -18,9 -18,9 -23,2 -23,2 Horizontal return & vertical supply -7 -7 -7 -7 -10,3 -10,3 -10,3 -10,3 -13,6 -13,6 Vertical return & horinzontal supply -5,1 -5,1 -5,1 -5,1 -8,6 -8,6 -8,6 -8,6 -9,6 -9,6 Gravity exhaust damper 0,9 0,9 0,9 0,9 1,8 1,8 1,8 1,8 2,5 2,5 Power exhaust fan 11,2 11,2 11,2 11,2 20,8 20,8 20,8 20,8 30,3 30,3 F7 filter 22,8 22,8 22,8 22,8 30,9 30,9 30,9 30,9 39 39 F4 filter 3 3 3 3 4,5 4,5 4,5 4,5 6 6 Double skin 14 14 14 14 21,5 21,5 21,5 21,5 31,2 31,2 Electrical heater S 20,8 20,8 20,8 20,8 26,7 26,7 26,7 26,7 26,7 26,7 Electrical heater H 25,4 25,4 25,4 25,4 32,5 32,5 32,5 32,5 32,5 32,5 Electrical preheater S 37,4 37,4 37,4 37,4 45 45 45 45 62,3 62,3 Electrical preheater H 49,6 49,6 49,6 49,6 67,5 67,5 67,5 67,5 92,9 92,9 Hot water coil 36,2 36,2 36,2 36,2 54,9 54,9 54,9 54,9 86,4 86,4 Energy recovery coil 20,9 20,9 20,9 20,9 28,4 28,4 28,4 28,4 35,9 35,9 Non ajustable roofcurb 65 65 65 65 70 70 70 70 87 87 Ajustable roofcurb 139 139 139 139 156 156 156 156 195 195 Extraction curb vertical 272 272 272 272 295 295 295 295 440 440 Extraction curb horizontal 218 218 218 218 241 241 241 241 358 358 Multidirectional curb 174 174 174 174 209 209 209 209 239 239 Accessorie weight (kg) Option weight (kg) Horizontal return & supply •6• BALTIC-IOM-0412-E / Installation manual LIFTING THE UNITS Minimum clearance around the unit installation Figure below show the required clearances and service access around the unit. IMPORTANT note for unit clearances • Ensure the fresh air inlet does not face prevailing wind direction. • If machine is including gas burner, minimum clearance around the unit must be at least 8 m to allow a proper gas flue dilution. If not possible, the fresh air intake must be ducted at least 8 m away from the gas burner exhaust. • In case of extraction option, it is recommended to duct fresh air intake. A Drain pan clearance (A) C Box 1150 (1) D Box 1650 (1) E Box 2150 (1) Fork lifting the unit Do not lift the unit by the side (coil end side or drain pan outlet side). This will damage the unit. Lift the unit on the long side using a forklift with dimensions according to the figure below. Do not remove the unit plastic cover while lifting. Plastic cover must not be removed before lifting NO DO NOT LIFT THIS SIDE BALTIC-IOM-0412-E / Installation manual •7• LIFTING THE UNITS Removing the forklift protection located under the machine Before installation, remove the forklift protection which is located under machine desk. IMPORTANT note about forklift protection removal Take care not to hurt anybody when removing the forklift rails . Locate the machine on a safe area while removing the forklift rails from the machine. •8• BALTIC-IOM-0412-E / Installation manual LIFTING THE UNITS Lifting the unit with a crane Lifting lug dimensions Use lifting shackles located on each angle of the unit. Maximum diameter of the ring shaft = 20 mm. Lifting belts length The unit must be lifted using spacing beams to avoid the belts damages to the casing. Spacing beams must have a length equal to the machine width – i.e 2250 mm. 5m BALTIC-IOM-0412-E / Installation manual •9• LIFTING THE UNITS Lifting the roof curbs Ducting connection details The supply and return air ducts can be secured to the 30 mm flanges at the bottom of the roofcurb Any ducting weight above 100 kg must be fixed independently to other building frames. Minimum distance: 30.000 mm • 10 • BALTIC-IOM-0412-E / Installation manual LIFTING THE UNITS Non adjustable roofcurb Adjustable roofcurb Exhaust roofcurb Multidirectionnal roofcurb WARNING : all multidirectionnal flowcurb and horizontal extraction flow curb must be secured to the ground using existing fixing holes on the frame. BALTIC-IOM-0412-E / Installation manual • 11 • DELIVERY CHECKS On receipt of new equipment please check the following points. It is the customer’s responsibility to ensure that the products are in good working order: • The exterior has not been damaged in any way. • The lifting and handling equipment are suitable for the equipment and comply with the specifications of the handling instructions enclosed here-in. • Accessories ordered for on site installation have been delivered and are in good working order. • The equipment supplied corresponds to the order and matches the delivery note. If the product is damaged, exact details must be confirmed in writing by registered post to the shipping company within 48 hours of delivery (working days). A copy of the letter must be addressed to LENNOX and the supplier or distributor for information purposes. Failure to comply will invalidate any claim against the shipping company. Rating plate The rating plate provides a complete reference for the model and ensures that the unit corresponds to the model ordered. It states the electrical power consumption of the unit on start-up, its rated power and its supply voltage. The supply voltage must not deviate beyond +10/-15 %. The start-up power is the maximum value likely to be achieved for the specified operational voltage. The customer must have a suitable electrical supply. It is therefore important to check whether the supply voltage stated on the unit's rating plate is compatible with that of the mains electrical supply. The rating plate also states the year of manufacture as well as the type of refrigerant used and the required charge for each compressor circuit. Storage When units are delivered on site they are not always required immediately and are sometimes put into storage. In the event of medium to long-term storage, we recommend the following procedures: • Ensure that there is no water in the hydraulic systems. • Keep the heat exchanger covers in position. • Keep protective plastic film in position. • Ensure the electrical panels are closed. • Keep all items and options supplied in a dry and clean place for future assembly before using the equipment. Maintenance key On delivery we recommend that you keep the key which is attached to an eyebolt in a safe and accessible place. This allows you to open the panels for maintenance and installation work. The locks are ¼ turn + then tighter. • 12 • BALTIC-IOM-0412-E / Installation manual DELIVERY CHECKS Condensate drains The condensate drains are not assembled when delivered and are stored in the electrical panel with their clamping collars. To assemble them, insert them on the condensate tray outlets and use a screwdriver to tighten the collars. Preliminary checks Before installing the equipment, the following points MUST be checked: • Have the forklift protections been removed? • Is there sufficient space for the equipment? • Is the surface on which the equipment is to be installed sufficiently solid to withstand its weight? A detailed study of the frame must be made beforehand. • Do the supply and return ductwork openings excessively weaken the structure? • Are there any obstructing items which could hinder the operation of the equipment? • Does the electrical power available correspond to the equipment's electrical specifications? • Is drainage provided for the condensate? • Is there sufficient access for maintenance? • Installation of the equipment could require different lifting methods which may vary with each installation (helicopter or crane). Have these been evaluated? • Ensure that the unit is installed in accordance with the installation instructions and local applicable codes. • Check to ensure that the refrigerant lines do not rub against the cabinet or against other refrigerant lines. In general, make sure no obstacles (walls, trees or roof ledges) are obstructing the duct connections or hindering assembly and maintenance access. Installation requirements The surface on which the equipment is to be installed must be clean and free of any obstacles which could hinder the flow of air to the condensers: • Avoid uneven surfaces • Avoid installing two units side by side or close to each other as this may restrict the airflow to the condensers. Before installing a packaged rooftop unit it is important to understand: • The direction of prevailing winds • The direction and position of air flows. • The external dimensions of the unit and the dimensions of the supply and return air connections. • The arrangement of the doors and the space required to open them to access the various components. Connections • Ensure that all the pipe-work crossing walls or roofs are secured, sealed and insulated. • To avoid condensation problems, make sure that all pipes are insulated according to the temperatures of fluids and type of rooms. NOTE: The packaging protection fitted on the finned surfaces must be removed prior to start up. BALTIC-IOM-0412-E / Installation manual • 13 • INSTALLATION ON A ROOF MOUNTING FRAME Roof opening dimensions The roof opening dimensions & maximum slope are defined according mechanical drawings. Sealing checks IMPORTANT note: Prior to put the machine on the curbs make sure polyethylene foam is fitted on the curb upper flange side (must be delivered with the curb). Leveling adjustable roofcurbs Above all, ensure that all the adjustable returns are facing outward. They could be turned inside-out for transport. Place the roof mounting frame on the trimmer beam by first lining up the inlet and the outlet opening. After levelling the frame, secure the adjustable returns on the trimmer. IMPORTANT NOTE: Securing the curb When the frame is correctly positioned, it is essential to secure the assembly with a disconnected stitched welded seam (20 to 30 mm every 200 mm) or self taping screw diameter M6 along the outside or by using an alternative method. • 14 • BALTIC-IOM-0412-E / Installation manual INSTALLATION ON A ROOF MOUNTING FRAME Positioning the rooftop on adjustable roofcurbs IMPORTANT note: Prior to put the machine, make sure to put a polyethylene foam on the curb upper flange side (must be delivered in the curb package). BALTIC-IOM-0412-E / Installation manual • 15 • NON ADJUSTABLE NON ASSEMBLED ROOFCURB INSTALLATION Frame parts packing Different parts are used in the assembly of this roof mounting frame. There are delivered stacked on a pallet. Water foam - 5680255T • 16 • BALTIC-IOM-0412-E / Installation manual NON ADJUSTABLE NON ASSEMBLIED ROOFCURB INSTALLATION Installation The roof mounting frame provides support when the units are installed in down-flow configurations. The non adjustable, non assembled roof mounting frame can be installed directly on decks having adequate structural strength or on roof supports under deck. See page 24 for frame dimensions, location of supply and return air opening NOTE: frame assembly must be installed flat, levelled within 5mm per linear meter in any direction. Assembly The frame is supplied as a single package and shipped folded down for ease of transport and handling. It is easy field assembled as all parts required are supplied with the frame. Unit floor Unit floor insulation + gasket Air duct Unit support rail Roof curb Securing the frame To ensure proper mating with units, it is mandatory that the roof mounting frame be squared to roof structure as follows: • With frame positioned levelled in the desired location on roof trusses, tack weld corner of frame. • Measure frame diagonally from corner to corner as shown above. These Dimensions must be equal in order for the fame to be square. • It is extremely important to sight frame from all corner to ensure it is not twisted across. Shim frame under any low side. The maximum slope tolerance is 5mm per linear meter in any direction. • After the frame has been squared, straightened and shimmed, weld or secure the frame to the roof deck. NOTE: It must be securely fastened to the roof as per local codes and regulations. BALTIC-IOM-0412-E / Installation manual • 17 • NON ADJUSTABLE NON ASSEMBLIED ROOFCURB INSTALLATION Sealing checks IMPORTANT NOTE: After assembling the kit curb and prior to put the machine on it, make sure to put a polyethylene foam on the curb upper flange side (must be delivered in the curb package). CURBING AND FLASHING Outside of frame must be insulated with rigid type insulation. We recommend a minimum of 20 mm thick insulation. Check that the insulation is continuous, counter flash and seal around the frame as shown. CAUTION: To be effective, the upstream must end below the drop edge. Where pipes and electrical conduits extend through the roof, flashing must conform to local codes of practice Rooftop 50 Before installing the equipment, make sure that seals are not damaged and check that the unit is secured to the mounting frame. Once in position, the bottom of the equipment must be horizontal. The installer must comply with local authority standards and specifications. Sealing 400 Mini Roocurb Thermal • 18 • BALTIC-IOM-0412-E / Installation manual HEAT RECOVERY - GENERAL DESCRIPTION Heat recovery modules have following interests: • in winter season and heating mode, the heat in the extract air is exchanged with the fresh air ; • conversely, in summer season and cooling mode, the heat of the fresh air is transferred to the extract air. HRMV and HRMH are two plates heat exchanger modules, that differ from each other by their horizontal or vertical configuration. TRMO is a thermodynamic heat recovery module, included in the machine. Its main interests are: • a variable fresh air rate from 25 to 100%, • a high COP in winter when pre-heating the fresh air due to a favorable evaporating temperature, especially with high air flow rate ; • a high EER in summer when pre-cooling the fresh air due to a favorable condensing temperature, especially with high air flow rate. For those reasons, TRMO will be more suitable than HRMV/HRMH in areas where the difference between indoor temperature and outdoor temperature is low. For example, in Mediterranean areas, where winter temperatures are not very cold or summer temperatures are not very high. BALTIC-IOM-0412-E / Installation manual • 19 • PLATE HEAT RECOVERY CONFIGURATIONS ERVF + HRMV VRHS Fresh air VRVS Return EBHO + HRMH Return Return Fresh air HRHS HRVS • 20 • BALTIC-IOM-0412-E / Installation manual PLATE HEAT RECOVERY INSTALLATION - ERVF + HRMV 2c 1. Install the flowcurb according to previous section. 2. Before installing the rooftop: a. Fix the brackets (5 pieces) on the curb by 24 screws (6x16 mm); b. ADJUST the position of the attachment bracket so that it is 5 mm above the support surface (without the foam); c. Install the foam (25x10 mm) on the upper part of the flowcurb. x4 5 mm x6 2a 2b x2 3b 3. a. Fix the lower mounting bar of the heat recovery module using 4 screws (6x16 mm) and remove the side doors; b. Make sure that the foam is not damaged (20x15 mm). 4. Install the Rooftop and remove the lifting covers. 3a 5 5. Place the two upper mounting bars through the two top slots. 6. Install the heat recovery module on the bracket by taking care to position properly the lower mounting bar. Don't forget to remove the lifting covers from the module. 6 4 6 7 7 7. Slide the 'T' plate into the lifting lug and place the bolt through it. On the opposite side, place also the bolt (detail A). Detail A 8 8. Finally tighten the heat recovery module with the 4 bolts 8x60mm to compress the foam (2 bolts on the upper mounting bars (detail B) and the 2 bolts placed in step 7). Detail B BALTIC-IOM-0412-E / Installation manual • 21 • PLATE HEAT RECOVERY INSTALLATION - EBHO + HRMH 2b 1. Make sure that the support surface enables to install the rooftop and the heat recovery module perfectly horizontal. 2. a. Fix the lower mounting bar of the heat recovery module using 4 screws (6x16 mm) and remove the side doors; b. Make sure that the foam is not damaged (20x15 mm). 3. Install the rooftop and remove the lifting covers. 4. Place the two upper mounting bars through the two top slots. 2a 5. Install the heat recovery module by taking care to position properly the lower mounting bar. Don't forget to remove the lifting covers from the module. 5 5 6 6 6. Slide the 'T' plate into the lifting lug and place the bolt through it. On the opposite side, place also the bolt ( detail A). 7 7. Finally tighten the heat recovery module with the 4 bolts 8x60mm to compress the foam (2 bolts on the upper mounting bars ( detail B ) and the 2 bolts placed in step 6). Detail A Detail B PLATE HEAT ELECTRICAL CONNECTIONS Two components have to be connected in the space between the plate heat exchanger and the economizer: • For the air pressostat, connect and tighten the 2 spade-tips on terminal 1 and 3 (no polarity) : • 22 • • For the actuator, assembly the two parts of the connector: BALTIC-IOM-0412-E / Installation manual THERMODYNAMIC HEAT RECOVERY CONFIGURATIONS ERVF + TRMO Fresh air VRHS VRVS Return EBHO + TRMO Return Return HRHS Fresh air HRVS BALTIC-IOM-0412-E / Installation manual • 23 • THERMODYNAMIC HEAT RECOVERY - SERVICE MANUAL 1. REFRIGERATION CIRCUIT Frigorific components access: Compressor is located in the fix condenser part. Its access for electrical checking and pressure taps (HP and LP) is made through the screwed access door behind the hinged coil. 4-way valve, thermostatic expansion valve, dryer, and sensors are located on the e-Drive™ supply compartment. Electrical components: • For D and E-box, specific TRMO components are located in the electrical box. • For C-box, specific TRMO components are located on the back of the electrical box, and can be accessible from the supply e-Drive™ compartment. Circuit specifications: TRMO Compressors Thermostatic expansion valves Refrigerant load C-box D-box E-box ABA054 ARA073 ARA081 TGEL10-6.5 TGEL10-9 TGEL10-9 2.5 kg 3.5 kg 4.5 kg 2. COMMISSIONING Electrical connections: • All wire connections are factory made. Starting up: • CLIMATIC™ configuration: - Power the unit - Check the configuration of the CLIMATIC™ 60 with the DS60 in expert mode. See § Control Manual / Configuration • Flow rate settings: Make sure that both supply and exhaust air flow are balanced. See section EBHO or ERVF. Balancing is correctly set if: - with Test = 'B.Nom 100%': at 100% fresh air, set the exhaust Flow 3864 = supply flow 3333; - then switch Test = 'B.Nom 0%': 1. reduce coefficient 3866 until the louvers are closed; 2. then if the flow (supply and exhaust) is far from the previous flow settings, set coefficient 3335; 3. finally, repeat step 1 and 2 to obtain a constant flow whatever the fresh air mode. - same settings have to be realized for reduced flow - 3334 and 3865. WARNING! During the settings, wait until the economizer is fully closed or opened, since it takes 1-2 minutes to switch. • Start the TRMO circuit (circuit 3): switch Test='C3--Cool' - check the sense of rotation of the circuit 3 compressor; - check frigorific values (HP, LP, overheating and subcooling). • Repeat the last operations with Test='C3--Heat' • 24 • BALTIC-IOM-0412-E / Installation manual THERMODYNAMIC HEAT RECOVERY - SERVICE MANUAL 3. SERVICE DIAGNOSTIC Refrigeration Fault Possible causes and symptoms Solution Alarm 317: main frigorific issue Lack of charge, obstructed components Alarm 327: too low LP Freezing: wait that coil is defrosted by exhaust air; Air flow too low on evaporating side (too low speed rate / fouled filter or coil). Incorrect airflow rates Check fan (exhaust or supply) function of the mode (Amps) and also filter. Refrigerant charge too high Check the refrigerant charge load according to the refrigerant load table. Low LP and LP cut out HP problem and HP cut out See also frigorific diagnostic of BALTIC™ III section 'Refrigeration'. Indoor or exhaust fan blower: For both indoor supply fan and exhaust fan, same faults, causes and solutions than for BALTIC™ III are expected. See diagnostic of BALTIC™ III 'Indoor fan blower'. 4. SPARE PARTS LIST Refrigeration components R410a Compressor Indoor coil Exhaust coil Expansion valve 4 way valve 4 way valve coil HP pressostat Designation Family Code ARA054WAA Comp. 4220463P ARA073WAA Comp. 4220464R ARA081WAA Comp. 4220465T ID C-box TRMO Coil 4310508K ID D-box TRMO Coil 4310509L ID E-box TRMO Coil 4310510M Exhaust coil TRMO Coil 4310511N Exhaust coil TRMO Coil 4310512P Exhaust coil TRMO Coil 4310513R TGEL10-6.5 TRMO Refrig. 4720940L TGEL10-9 TRMO Refrig. 4720913W STF0413G Refrig. 4740100M 24V 50 Refrig. 4740103R HP 42bar OFF Refrig. 4730184H HP sensor HP 4/20mA -1/45bar Refrig. 4770207M LP sensor LP 4/20mA -1/20bar Refrig. 4770208N Designation Family Code BE60 Control 4770668P Connector for BE60 Control 4770709Z Electrical & control components CLIMATIC™ extension BALTIC-IOM-0412-E / Installation manual • 25 • THERMODYNAMIC HEAT RECOVERY - CONTROL MANUAL 1. CONFIGURATION Configuration of CLIMATIC™ 60 with the DS60 in expert mode for TRMO (with a modulating exhaust fan): 3813 RECOV. = Comp. for TRMO 3815 EXHAUST = Modulate for both ERVF & EBHO 3816 KIT 3817 Motor to be checked function of your need 3818 Fan 2. USE Protection: • Operating envelop Protection: compressor stopped during 6 minutes. - 328: min HP = 20.5°C condensation; - 329: max HP = 62°C condensation; - 319: min LP = between -24.5°C and 1.6°C (function of the condensation temperature) during 5 min => freezing or air flow on evaporator issue; - 327: max LP = 26°C. - 317: limit LP -27°C during 120 sec => frigorific failure (lack of refrigerant /closed components) • Anti freezing Protection consist in defrosting the exhaust coil in heating mode with the extract air. Control • No specific parameters have to be set for TRMO control. • Operation: - TRMO runs if there is heating or cooling needs; - above 50% fresh air, TRMO compressor has priority to start; - under 15°C return or under 20% fresh air, TRMO compressor is not authorized to start. • 26 • BALTIC-IOM-0412-E / Installation manual TABLE OF CONTENTS BALTIC™ SERVICE MANUAL Ref : BALTIC_Service-IOM-0412-E INSTALLATION MANUAL Safety codes & regulations 28 COMMISSIONING RECORD SHEET 30 REFRIGERANT TRANSACTIONS LOGBOOK: EUROPEAN REGULATION N° 842/2006 32 PRESSURE EQUIPEMENT DIRECTIVE INFORMATIONS 35 COMMISSIONING Before turning on the power Wire connection tightness checks CLIMATIC™ configuration Powering the unit 36 36 36 36 EDRIVE™ VENTILATION 37 FRESH AIR HOOD 41 FILTERS 42 REFRIGERATION CIRCUIT 43 HEATING OPTIONS Hot water coils Electric heater Electrical preheater 44 45 46 GAS BURNERS Preliminary checks before start-up Starting up the gas burner Standard start-up chronology Burner safety checks Gas module 47 47 48 51 55 MODULATING GAS BURNERS Modulating gas (under patent inpi mai 2004) Burner safety checks Gas burner troubleshouting Disassembling of gas burner for maintenance purposes Modulating gas 56 59 59 59 59 RECOVERY WATER COIL 60 SERVICE DIAGNOSTIC 61 SPARE PART LIST 64 WARRANTY 67 MAINTENANCE PLAN 68 BALTIC-IOM-0412-E / Service manual • 27 • INSTALLATION MANUAL Safety codes & regulations THE UNIT MUST BE INSTALLED IN ACCORDANCE WITH LOCAL SAFETY CODES AND REGULATIONS AND CAN ONLY BE USED IN WELL VENTILLATED AREA. PLEASE READ CAREFULLY THE MANUFACTURER’S INSTRUCTIONS BEFORE STARTING THIS UNIT. INSPECTIONS AND REQUALIFICATION ACCORDING PRESSURE EQUIPMENT DIRECTIVE MUST FOLLOW THE LOCAL REGULATIONS WHERE THE UNIT IS INSTALLED. Important note for unit fitted with gas burner: THIS MANUAL IS ONLY VALID FOR UNITS DISPLAYING THE FOLLOWING CODES: GB IR GR DA NO FI IS In case these symbols are not displayed on the unit, please refer to the technical documentation which will eventually detail any modifications required to the installation of the unit in a particular country. • If machine is including gas burner, minimum clearance around the unit must be at least 8 m to allow a proper gas flue dilution. If not possible, the fresh air intake must be ducted at least 8 m away from the gas burner exhaust. • The gas burner air intake and exhaust chimney must not be modified or ducted. • Before commissioning this type of unit, it’s mandatory to ensure that the gas distribution system is compatible with the adjustments and settings of the unit. • Gas module can only be used for outdoor installations. • Any work on gas module must be carried out by qualified engineer. All the technical and technological information contained in this manual, including any drawing and technical descriptions provided by us, remain the property of LENNOX and must not be utilised (except in operation of this product),reproduced, issued to or made available to third parties without the prior written agreement of LENNOX. The technical information and specifications contained in this manual are for reference only. The manufacturer reserves the right to modify these without warning and without obligation to modify equipment already sold. All units are compliant with the PED directive 97-23/CE The following note must be followed carefully All work on the unit must be carried out by a qualified and authorised employee. Non-compliance with the following instructions may result in injury or serious accidents. Work on the unit: • The unit shall be isolated from the electrical supply by disconnection and locking using the main isolating switch. • Workers shall wear the appropriate personal protective equipment (helmet, gloves, glasses, etc.). Work on the electrical system: • Work on electric components shall be performed with the power off (see below) by employees having valid electrical qualification and authorisation. Work on the refrigerating circuit(s): • Monitoring of the pressures, draining and filling of the system under pressure shall be carried out using connections provided for this purpose and suitable equipment. • To prevent the risk of explosion due to spraying of coolant and oil, the relevant circuit shall be drained and at zero pressure before any disassembly or unbrazing of the refrigerating parts takes place. • There is a residual risk of pressure build-up by degassing the oil or by heating the exchangers after the circuit has been drained. • 28 • BALTIC-IOM-0412-E / Service manual INSTALLATION MANUAL Zero pressure shall be maintained by venting the drain connection to the atmosphere on the low pressure side. • The brazing shall be carried out by a qualified brazier. The brazing shall comply with standard NF EN1044 (minimum 30% silver). EMC DIRECTIVE COMPLIANCE WARNING: This equipment is an “A class“ according CEM Directive. In an industrial environment, this device can create radio electrical noise. In this case, the owner can be asked to take appropriated actions. This applies to all machine installed with nominal amps below <75A: • The short-circuit rate Rsce=33 is defined in the EN61000-3-12 standard relative to the harmonics readings on the supply network. The appliances compliant with the harmonic current limits equivalent to Rsce=33 can be connected in whatever connection point of the main supply system. • The maximal allowable impedance of the main supply system Zmax=0.051W is defined by EN 61000-3-11 standard relative to the voltage variation, fluctuation and flicker readings. The connection to the supply is a conditional connection submitted to the preliminary agreement of the power supply local provider. Replacing components: • In order to maintain CE marking compliance, replacement of components shall be carried out using spare parts, or using parts approved by LENNOX. • Only the coolant shown on the manufacturer’s nameplate shall be used, to the exclusion of all other products (mix of coolants, hydrocarbons, etc.). CAUTION: In the event of fire, refrigerating circuits can cause an explosion and spray coolant gas and oil. Transport – Handling- Access: • Never lift the unit without forklift protections • An approach ramp must be installed if the unit’s installation requirements tell that it's necessary to reach the main switch, the electrical cabinet, the compressor and the ventilation compartment. This recommendation is valid for all type of installations. • It is strictly forbidden to walk or store equipment or material on top of the rooftop unit Rooftop installation in heavy wind locations • The roofcurbs (vertical & horizontal) and rooftops installations are designed to withstand winds up to 80 km/h. Above this limit, it’s recommended to take appropriate actions to secure the installation. • Ensure the fresh air inlet does not face prevailing wind direction. Elbow or section changes in ductworks next to the rooftop • Whatever the supply configuration is, respect a minimal duct’s length of 2 m before any elbow or any duct’s section change. • Directional vanes must be fitted inside any elbow fitted in return or supply ductwork closer than 5 meter to the machine connection flanges. Filters: • Do the filters fire classification’s choice according to local regulations. Fan compartment: • Stop the power before accessing the fan compartment. Gas: • Any work on gas module must be carried out by qualified personnel • A unit with gas module must be installed in accordance with local safety codes and regulations and can only be used for outdoor installation. The technical information and specifications contained in this manual are for reference only. The manufacturer reserves the right to modify these without warning and without obligation to modify equipment already sold. BALTIC-IOM-0412-E / Service manual • 29 • COMMISSIONING RECORD SHEET Controller Site details Site Model Unit Ref Serial No Installer Refrigerant (1) ROOF INSTALLATION Sufficient Access OK Yes No Condensate drain fitted Roofcurb Yes OK No Not OK (2) CONNECTIONS CHECK Phase check Yes 1/2 Voltage between Phases No 2/3 1/3 (3) CLIMATIC™ CONFIGURATION CHECK CLIMATIC™ 60 Configured according to the options and specifications Yes No (4) SUPPLY BLOWER SECTION Type N°1 Power displayed on plate kW Voltage displayed on plate V Current displayed on plate A Fan type Displayed coupling ref N°2 Forward Backward Forward Backward Yes No Yes No Yes No Yes No mm Alignment checked Fan speed rpm Averaged measured amps A Shaft mechanical mower (Refer to airflow balancing) W Operating point checked m /h Read airflow 3 (5) AIRFLOW PRESSURE SENSOR CHECK Set points adjusted Measured pressure drop Yes mBar No If yes enter new values 3410: 3411: 3412: (6) EXTERNAL SENSOR CHECKS Check electrical connections Yes No Check and record temp. in menu 2110 Yes 100% Fresh Air No 100% return Air Supply temperature °C °C Return temperature °C °C Outdoor temperature °C °C (7) MIXING AIR DAMPERS CHECKS Dampers open & close freely Yes • 30 • No Power exhaust checked % Minimum FA % Yes No Enthalpy sensor(s) checked Yes No BALTIC-IOM-0412-E / Service manual COMMISSIONING RECORD SHEET (8) REFRIGERATION SECTION Outdoor fan motor current Check rotation Motor 1 L1: A L2: A L3: A Yes No Motor 2 L1: A L2: A L3: A Yes No Motor 3 L1: A L2: A L3: A Yes No Comp1: V Motor 4 L1: A L2: A L3: A Yes No Comp1: V Motor 5 L1: A L2: A L3: A Yes No Comp3: V Motor 6 L1: A L2: A L3: A Yes No Comp4: V Compressor amps - COOLING Compressor voltage Pressures & temperatures Phase 1 Phase 2 Temperatures Phase 3 Suction Pressures Disch LP HP Comp1 A A A °C °C Bar Bar Comp2 A A A °C °C Bar Bar Comp3 A A A °C °C Bar Bar Comp4 A A A °C °C Bar Bar Check Reversing valves Valve 1: Yes No Valve 3: Yes No Valve 2: Yes No Valve 4: Yes No Compressor amps - HEATING Pressures & temperatures Phase 1 Phase 2 Temperatures Phase 3 Suction Pressures Disch LP HP Comp1 A A A °C °C Bar Bar Comp2 A A A °C °C Bar Bar Comp3 A A A °C °C Bar Bar Comp4 A A A °C °C Bar Bar HP cut out: Bar LP cut out: Refrigerant charge Bar C1: kg C2: kg C3: kg C4: kg (9) ELECTRIC HEATER SECTION Type Serial No AMPS 1 stage (BALTIC™) AMPS 2nd stage (BALTIC™) st 1 2 3 1 2 3 (10) HOT WATER COIL SECTION Check Three Way Valve Movement Yes No (11) GAS HEATING SECTION Gas Burner N°1: Gas Burner N°2: Size: Valve type: Size: Valve type: Pipe size: Gas type: G Pipe size: Gas type: G Line press: Drop test Line press: Drop test Yes No Yes Check manifold pressure: High fire Low fire High fire Pressure cut out airflow press switch Motor amps: °C Low fire mBar/Pa Pressure cut out airflow press switch CO2 %: Flue temp: A No Check manifold pressure: CO ppm: % Motor amps: % Flue temp: A mBar/Pa CO2 %: °C CO ppm: % % (12 REMOTE CONTROL BMS CHECK Type: Sensor type: Interconnect wiring checked: Yes BALTIC-IOM-0412-E / Service manual No • 31 • REFRIGERANT TRANSACTIONS LOGBOOK: EUROPEAN REGULATION N° 842/2006 General information Site name: Serial Number: Site address: Site operator: Cooling load : Refrigerant type: Refrigerant quantity (kg) Unit manufacturer Year of installation Refrigerant additions Date Engineer Quantity (kg) Reason for addition Engineer Quantity (kg) Reason for removal Engineer Test Result Follow up action required Refrigerant removal Date Leak tests (part 1) Date • 32 • BALTIC-IOM-0412-E / Service manual REFRIGERANT TRANSACTIONS LOGBOOK: EUROPEAN REGULATION N° 842/2006 Leak tests (part 2) Date Engineer Test Result Follow up Action Required Engineer Related to test dated Action taken Follow up actions Date Testing of automatic leak detection system (if fitted) Date Engineer BALTIC-IOM-0412-E / Service manual Test result Comments • 33 • REFRIGERANT TRANSACTIONS LOGBOOK: EUROPEAN REGULATION N° 842/2006 Refrigerant load according to model size Refrigerant Box C Model Number of circuit Cooling only units Load (kg) (BAC BAG) Heat pump units Load kg (BAH BAM) 24 1 6,1 6,1 30 1 6,1 6,1 38 1 8,1 8,1 42 1 8,1 8,1 1 6,5 6,5 2 6,5 6,5 1 6,5 6,5 2 6,5 6,5 1 8,0 8,0 2 8,0 8,0 1 8,0 8,0 2 8,0 8,0 1 10,5 10,5 2 10,5 10,5 1 10,5 10,5 2 10,5 10,5 45 52 R410A D 57 65 75 E 85 Comments: • 34 • BALTIC-IOM-0412-E / Service manual PRESSURE EQUIPEMENT DIRECTIVE INFORMATIONS CE marking compliance These units are CE marked according to Pressure Equipement Directive. Section Phase PS (bars gauge) Suction Vapor 29,5 Discharge Vapor 42 bar R410A Liquid Liquid / Vapor 42 bar R410A Name plate example Periodical visit according european pressure equipment directive According to Pressure Equipments Directive, periodical controls on site are expected on equipments equal or above category II. BALTIC-IOM-0412-E / Service manual • 35 • COMMISSIONING WARNING: commissioning must only be carried out by trained refrigeration engineers whom qualification certificates are compliant with the local regulation Before turning on the power WARNING: ensure that the power supply includes 3 phases with no neutral Ensure that the power supply between the building and the unit meets local authority standards and that the cable specification satisfies the start-up and operating conditions displayed on the name plate. Wire connection tightness checks WARNING: check the wire connection tightness Check the following wire connections for tightness: • Main switch connections, • Mains wires linked to the contactors and circuit breakers • Cables in the 24V control supply circuit. CLIMATIC™ configuration See CLIMATIC™ section Powering the unit Power up the unit by closing the isolator switch (if fitted). At this point the blower should start unless the CLIMATIC™ does not energise the contactor. Once the fan is running, check the rotation direction. Refer to the rotation arrow located on the fan. The fans and compressors direction of rotation is checked during the end of line test. They should therefore all turn in either the right or wrong direction. WARNING: a compressor rotating in the wrong direction will fail shortly. If the fan turns in the wrong direction (the right direction is shown below), disconnect the main power supply to the machine at the building's mains switch, reverse two phases and repeat the above procedure. Close all circuit breakers and power up the unit. If now only one of the components rotates in the wrong direction, disconnect the power supply at the machine's isolator switch (if fitted) and reverse two of the component’s phases on the terminal within the electrical panel. Check the current drawn against the rated values, in particular on the supply fan. If the readings on the fan are outside the specified limits, this usually indicates excessive air flow which will affect the life expectancy. In this case reduce rpm using eDrive™. • 36 • BALTIC-IOM-0412-E / Service manual eDrive™ VENTILATION eDrive™ assembly instructions & specification The flexible elastomeric tire is removable without removing the plates The material is natural rubber Temperature range from -42°C to + 82°C Easy to assemble BALTIC-IOM-0412-E / Service manual • 37 • eDrive™ VENTILATION eDrive™ mounting eDrive™ assembly is designed to have no adjustment to be made inside the machine In case of vertical misalignment one could use metallic washer located under the motor to adjust height Max angular misalignment 4° Max radial misalignment 3mm Max axial range 8 mm Vibration absorbtion eDrive™ coupling dimensions Coupling Machine size Motor size kW Motor shaft diameter mm Fan shaft diameter mm Coupling reference Coupling type PP Motor moteur Fan taper bushing Ref ref C box 1,5 24 25 PV40 2 x Taper lock bushing 28-20 al24 28-20 al25 C box 2,2 28 25 PV40 2 x Taper lock bushing 28-20 al28 28-20 al25 C box 3 28 25 PV40 2 x Taper lock bushing 28-20 al28 28-20 al25 C box 4 28 25 PV40 2 x Taper lock bushing 28-20 al28 28-20 al25 C box 5,5 38 25 PV60 2 x Taper lock bushing 40-25 a38 40-25 al25 D box 2,2 28 30 PV50 1 Taper lock bushing + D30 30-25 al28 30-25 al30 D box 3 28 30 PV50 1 Taper lock bushing + D30 30-25 al28 30-25 al30 D box 4 28 30 PV50 1 Taper lock bushing + D30 30-25 al28 30-25 al30 D&E box 5,5 to 7,5 38 30 PVP50 1 Taper lock bushing + D38 E box 9 to 11 38 40 PV 60 2 x Taper lock bushing 30-25 al30 40-25 al 38 40-25 al 40 eDrive™ airflow reading eDrive is controling the airflow within the operating range of each kit. Airflow rate calculation inputs are rpm and power absorbed output read on the inverter variable bus. The airflow rate calculation formula is calibrated according lab tests. • 38 • BALTIC-IOM-0412-E / Service manual eDrive™ VENTILATION eDrive™ is protecting the fan & motor against over-speed & over-amps eDrive™ is designed to keep motor and fan in its available operating range thanks to the kit configuration selected in CLIMATIC™ 60 control. The CLIMATIC™ control is limiting rpm & absorbed power. The table below shows the operating ranges per box and kit size. eDrive™ unit operating ranges Box C Box BAH BAC D Box BAH BAC E Box BAH BAC Fan type Motor kW AT 15-11 S 1,5 0,80 K1 553 962 3600 4800 3,6 AT 15-11 S 2 0,83 K2 610 1170 3750 6000 4,9 AT 15-11 S 3 0,85 K3 697 1330 4500 7050 6,6 AT 15-11 S 4 0,85 K4 78 1371 5550 8250 8,4 AT 15-11 S 5,5 0,87 K5 882 1417 7200 8400 12,2 ADH 355 L 2,2 0,83 K1 581 939 5500 6900 4,9 ADH 355 L 3 0,85 K2 660 1208 5500 8300 6,6 Efficiency Kit Comment rpm min rpm max Qv min Qv max Imax ADH 355 L 4 0,85 K3 738 1396 6100 9700 8,4 ADH 355 L 5,5 0,87 K4 823 1439 7100 11500 12,2 ADH 355 L 7,5 0,88 K5 938 1501 9500 13100 16,3 AT 15-11 G2L 5,5 0,87 K1 Fan shaft D30 648 1302 10000 13500 12,2 AT 15-11 G2L 7,5 0,88 K2 Fan shaft D30 774 1385 10000 16000 16,3 AT 15-11 G2L 9 0,88 K3 Fan shaft D40 880 1378 10000 17750 17,6 AT 15-11 G2L 9 0,88 K4 Fan shaft D30 880 1417 10000 19000 17,6 AT 15-11 G2L 11 0,89 K5 Fan shaft D40 911 1417 10000 19000 23 Comment rpm min rpm max 949 3600 4650 3,6 Gas unit eDrive™ operating ranges Box C Box BAH BAC D Box BAH BAC E Box BAH BAC Fan type Motor kW Efficiency Kit AT 15-11 S 1,5 0,80 K1 592 AT 15-11 S 2 0,83 K2 690 1155 3750 5700 4,9 AT 15-11 S 3 0,85 K3 788 1386 4500 6900 6,6 AT 15-11 S 4 0,85 K4 907 1449 5400 7950 8,4 AT 15-11 S 5,5 0,87 K5 1015 1533 6750 8400 12,2 ADH 355 L 2,2 0,83 K1 ADHE 355 651 929 5500 6500 4,9 ADH 355 L 3 0,85 K2 ADHE 355 727 1206 5500 7900 6,6 Qv min Qv max Imax ADH 355 L 4 0,85 K3 ADHE 355 826 1409 6100 9300 8,4 ADH 355 L 5,5 0,87 K4 ADHE 355 930 1499 7100 11100 12,2 ADH 355 L 7,5 0,88 K5 ADHE 355 1070 1578 8700 13100 16,3 AT 15-11 G2L 5,5 0,87 K1 Axe D30 760 1310 10000 13000 12,2 AT 15-11 G2L 7,5 0,88 K2 Axe D30 898 1431 10000 15250 16,3 AT 15-11 G2L 9 0,88 K3 Axe D30 994 1476 10000 17250 17,6 AT 15-11 G2L 9 0,88 K4 Axe D30 994 1476 10000 17250 17,6 K5 Axe D30 1072 1525 10000 19000 23 AT 15-11 G2L 11 BALTIC-IOM-0412-E / Service manual 0,89 • 39 • eDrive™ VENTILATION eDrive™ fan inverter configuration eDrive™ Inverter configuration is prepared in the factory to communicate with CAREL & to be configured specifically for the customer machine. eDrive™ Fan inverter parameters are configured via the CLIMATIC™ 60 unit configuration (See CLIMATIC™ Section). This configuration is selecting the proper parameters to run eDrive™ in its operating range depending on fan type & motor size. If ever, the Inverter loose fan control (No Fan or Wrong fan speed & Compressor or Heating stay on), one may check the Inverter configuration as below: “0.0” will be displayed in this case on the Inverter instead of the regular “0” or “xxx” rpm Switch to unlock mode: F700 = 0 F732 = 0 On Inverter, set the TYP parameter to 3 value. (reinitialize the Inverter to the default values) then configure the following setpoints: CMOD=2 FMOD=4 F800=1 F801=0 F802=11 F803=0 Then switch OFF the whole machine & then switch ON. Then the CLIMATIC™ is going to send all the proper machine configuration to Inverter (motor size, fan type, Imax, safety parameters) . • 40 • BALTIC-IOM-0412-E / Service manual FRESH AIR HOOD Installing The fresh air hood has to be opened and secured during commissioning. The 3 parts of the fresh air hood have to be assembled thanks to self taping screws delivered in the spare part box Check the proper position of the black seal on the top of the hood cover. Wind direction The prevailing wind has to be taken into account while choosing the machine position on the building roof. It’s highly recommended to avoid putting the fresh air hood in the prevailing wind direction to avoid water ingress risks. If this is not possible please contact us to require specific water droplet strainer in the hood section. WARNING: the fresh air hood cover can hurt your head if you don’t pay attention while turning around the unit. BALTIC-IOM-0412-E / Service manual • 41 • FILTERS Filter replacement After opening the filter access panel, lift the filter retaining log. The filters can then be removed and replaced easily by sliding the dirty filters out and clean ones in. The CLIMATIC™ 60 controller can monitor the pressure drop across the filter The following set points can be adjusted depeding on the installation. • “Airflow” in page 3343 = 25Pa by default • “No filter “ in page 3344 = 50Pa by default • “Dirty Filter” in page 3345 = 250Pa by default The actual pressure drop measured accross the coil can be read on the CLIMATIC™ Display in menu 3342. The following faults may be identified • Fault code 001 AIRFLOW FAILURE, if measured ΔP across the filter and coil is below the value set in page 3343 • Fault code 004 DIRTY FILTERS, if measured ΔP across the filter and coil is above the value set in page 3344 • Fault code 005 MISSING FILTERS, if measured ΔP across the filter and coil is below the value set in page 3345. • 42 • BALTIC-IOM-0412-E / Service manual REFRIGERATION CIRCUIT Electronic expansion valve 2 electronic valves types are fitted on BALTIC™: E2V & E3V Cbox Model designation Reference Dbox Ebox 24 30 38 42 45 52 57 65 75 85 E2V30 E2V30 E2V30 E3V45 E2V30 E2V30 E2V30 E2V30 E2V30 E3V45 EEV adjustments EEV allows the control of superheat in biflow operation (see CLIMATIC™ 60 sections). E2V welding instructions Electronic expansion valves are sensitive to dust – strainers must be used in case of replacing. E3V welding instructions BALTIC-IOM-0412-E / Service manual • 43 • HEATING OPTIONS Hot water coils The hot water coil is fitted with a three way proportional valve . Two spanners must be used to tighten the connections. One spanner must maintain the valve body when connecting the pipework to the main. Failure to do so may damage the pipes joints and invalidates the warranty. Filling up and starting the system • Adjust the control for Heating by reducing the simulated ambient temperature down to 10°C • Check that the red indicators located under the valve actuator are moving correctly with the signal.(Arrow on the picture) • Fill the hydraulic system and bleed the coil using the air vents. Check incoming hot water flow rate. • Check the various connections for possible leaks Maximum working pressure: 8 Bars Maximum working temperature: 110 °C Freeze protection Check the hydraulic system contains glycol for protection against freezing. Glycol is the only effective protection against freezing. The antifreeze must protect the unit against freezing under winter conditions. Warning: glycol based fluids may produce corrosive agents when mixed with air. Drain the installation You must ensure that the manual or automatic air vents have been installed on all high points in the system. In order to drain the system, check that all the drain valves have been installed on all low points of the system. Heating hot water coils frozen due to low ambient conditions are not covered by the warranty. Electrolytic corrosion Attention is drawn to the corrosion problems resulting from electrolytic reaction created by unbalanced earth connections. Any coil damaged by electrolytic corrosion is not covered by the warranty. • 44 • BALTIC-IOM-0412-E / Service manual HEATING OPTIONS Electric heater WARNING: electric heater is connected heater to mains power – risk of electrical shock – switch off the unit prior to open this section The BALTIC™ electric heaters are stand alone options which are fitted in the heating section of the unit. As for the hot water coil or the gas burner this option slides into the heating compartment located under the supply fan. In order to reduce the pressure drops the airflow is ducted around the shielded resistances. The resistances are made smooth stainless steel tubes with a capacity of 6W/cm2. It is protected as standard, against overheat via a high temperature overload protection set at 98°C and located less than 150mm after the heater itself. There are three sizes available for each size of unit: S: Standard heat H: High heat The standard heat electric heaters are staged control with 50% or 100%. The high heat version is controlled through a fully modulating triac. 380V 400V 415V Module size (kW) Current (A) Cap (kW) Current (A) Cap (kW) Current (A) Cap (kW) 12 16,3 10,8 17,0 11,8 17,8 12,8 24 32,6 21,5 34,0 23,5 35,6 25,6 27 36.7 24.3 38.3 26.6 40.1 28.8 36 48,9 32,3 51,1 35,3 53,3 38,4 45 61.1 40.5 63.8 44.3 66.8 48.0 48 65,2 43,0 68,1 47,0 71,1 51,3 54 73,4 48,4 76,6 52,9 80,0 57,7 BALTIC-IOM-0412-E / Service manual • 45 • HEATING OPTIONS Electrical preheater WARNING: electric pre-heater is connected heater to mainS power – risk of electrical Shock – switch off the unit prior to open this section Pre-heater is running only with high fresh air rate under low outdoor ambient temperature (see setpoint in CLIMATIC™ section). A metallic filter is installed between air filter & electrical resistance to protect against heat radiations. WARNING: electric pre-heater metallic filter must not be plugged by dust Amps per model size Size S / H S 18 kW D BOX 24 30 38 42 26 26 26 26 S 24 kW E BOX 45 52 57 65 35 35 35 35 S 36 kW H 36 kW H 48 kW H 72 kW • 46 • C BOX 52 52 52 75 85 52 52 104 104 52 69 69 69 69 BALTIC-IOM-0412-E / Service manual GAS BURNERS Preliminary checks before start-up Note: Any work on the gas system must be carried out by qualified personnel. This unit must be installed in accordance with local safety codes and regulations and can only be used in planed installation conditions for outdoor. Please read carefully the manufacturer’s instructions before starting a unit. Before commissioning a unit with gas burner, it is mandatory to ensure that the gas distribution system (type of gas, available pressure…) is compatible with the adjustment and settings of the unit. Check access and clearance around the unit • make sure one can move freely around the unit. • a minimum one-meter clearance must be left in front of the burnt gas exhaust flue. • combustion air inlet and burnt gas exhaust(s) must not be obstructed in any way. Supply network pipe sizing Male threaded connection for gas burner: 3/4” Check that the gas supply line can provide the burners with the pressure and the gas flow rate necessary to provide the heating nominal output. Number of male threaded connections (3/4”) Unit size 24 30 38 42 45 52 57 65 75 85 S power 1 1 1 1 1 1 1 1 1 1 H power 1 1 1 1 1 1 1 1 2 2 38 42 45 52 57 65 75 85 Gas flow - m3/h (for G20 at 20 mbar and 15°C) Unit size 24 30 S power 1,9 3,2 5,7 H power 4,5 5,7 11,5 For modulating gas we have just H power for c, d & e-box • the gas supply of a rooftop gas unit must be realized according to sound engineering practice and the local safety codes and rules. • in any case the diameter of pipe-work connected to each rooftop must not be smaller than the diameter of the connection on the rooftop unit. • make sure that a shut-off isolation valve has been installed before each rooftop. • check the supply voltage to the exit of the power supply's transformer t3 of the burner: it must be between 220 and 240v. Starting up the gas burner Purge the pipe-work near the connection on the ignition control valve for a few seconds. • check that the unit's treatment “fan” blower is running. • set the control to “on” this will priorities the gas burner. • increase the set temperature (room set point temperature) to a temperature higher than the actual room temperature. BALTIC-IOM-0412-E / Service manual • 47 • GAS BURNERS 401 400 399 398 46 45 44 43 42 41 40 39 38 37 36 35 34 33 32 31 30 29 11 9 10 8 7 6 5 4 3 2 Time in seconds 1 Standard start-up chronology Control operation sequence Extraction fan Smoke extraction fan "ON" Operations 30 to 45 seconds pre-ventilation Fire-up spark electrode 4s Opening of the gas valve "high heat" Flame propagation towards the ionisation probe If ionisation within 5sec:normal running Otherwise fault on gas ignition control block After 5 minutes, fault reported on the CLIMATIC™ controller If incorrect sequence, refer to the fault analysis table to identify the problem. • 48 • BALTIC-IOM-0412-E / Service manual GAS BURNERS Pressure adjustments on Honeywell pressure regulating valve type vk 4105 g Pressure regulator adjustment with 300mbar gas supply: High heat injection pressure checks • place the tube of the “accurate” manometer to the out port on the gas injector support bar after having loosened the screw by one turn. • the burner must run in high heat mode for this check. • place the tube of the “accurate” manometer on the inlet pressure port of the gas regulating valve after having loosened the screw by one turn Low heat adjustment Check and adjust if necessary the valve outlet pressure to 8,4 mbar (G20) / 12,3 mbar for groningue (G25) & 31,4 mbar for propane (G31) • Check and adjust if necessary the valve inlet pressure to 20 mbar (g20) or 25 mbar for groningue (g25) or 37 mbar for propane (g31). After gas burner ignition. BALTIC-IOM-0412-E / Service manual • 49 • GAS BURNERS Low heat injection pressure checks Valve electrical control • switch the control to low heat • check and adjust if necessary the outlet pressure to 3,5 mbar (G20) or 5 mbar for groningue(G25) & 14 mbar for propane (G31) 2,90 kΩ 1,69 kΩ • check these values with an ohmmeter. • after the adjustment of the low heat, re-verify the high heat • re-position the stoppers and close the pressure ports Pressure adjustments table for each type of gas (mbar) Category Supply pressure Low heat injection min, High heat injection G20 20,0 +/- 1 3,5 +/- 0,1 8,4 +/- 0,2 G25 (groningue) 25,0 +/- 1,3 5,0 +/- 0,1 12,3 +/- 0,2 G31 (GPL) 37,0 +/- 1,9 14,0 +/- 0,3 31,4 +/- 0,6 • 50 • BALTIC-IOM-0412-E / Service manual GAS BURNERS Burner safety checks Ionisation probe test • with the gas burner running, disconnect the terminal plug coming from the ionisation probe to the gas ignition control box. Smoke extractor pressure switch test • with the gas burner running, disconnect the flexible tube fitted to the pressure taping on the pressure switch. • the flame must disappear and the extraction fan must carry on running. • however, no fault will be displayed (gas ignition control block or CLIMATIC™). • after reconnecting of the tube, the burner will restart after a period of 30 to 45 seconds pre-ventilation. Gas pressure switch test • with the gas burner running, close the shut off valve located before the rooftop. • the flame disappears • the fan is still running and attempting to restart the burner (restart cycle 30 to 45 seconds). • if the ignition probe is not reconnected at the end of the ignition sequence the burner will stop completely. • the fault light on the gas ignition control block is on. • manually reset the gas ignition control block to eliminate the fault In case of problems refer to the start up sequence flowchart next page • the burner stops completely. • however, no fault light will be displayed on the gas ignition control block. After 6 minutes, the CLIMATIC™ will display a fault. • reset the CLIMATIC™. BALTIC-IOM-0412-E / Service manual • 51 • GAS BURNERS Gas burner fire-up sequence Operation from control Thermostat GAS =Closed Supply thermostat limit? (Auto Reset) NO YES Gas low pressure switch? NO YES Gas ignition control block signal Extraction fan ON AIR pressure switch ON backfire thermostat ON? NO YES Gas control valve closes BURNER STOPS Pre-ventilation 30 seconds Fire-up eectrode 4s Gas valve open Ionisation 1 second after the end of sparking? NO Gas control valve closes BURNER STOPS Fault on gas control block YES Gas valve remains open 6 minutes delay Normal operation NO Air press switch ON or backfire thermostat? Fault on CLIMATIC™ YES Signal from ionisation probe still ON? YES NO • 52 • BALTIC-IOM-0412-E / Service manual GAS BURNERS Gas burner troubleshouting If faults reported on CLIMATIC™ • reset the CLIMATIC™. • check voltage: 230v after circuit breaker. • check gas isolation shut-off valves are open. • check gas pressure at the inlet of the gas valves. It must be >20 mbar when the burners shut down. • adjust the set points to priorities the burner. Increase the value of the room temperature set point to a temperature higher than actual room temperature. Diagnostic table baltic gas burner Stage Heating requested L.e.d on Extraction fan is on Continuous ventilation and sparks from fire up electrode. Normal operation Green, yellow & red l.e.d. ON Possible fault Action Possible solution All l.e.d. OFF → fault on the blower thermostat Check connections on the blower thermostat. Replace thermostat Yellow & red l.e.d. OFF → lack of gas supply Check valve’s opening & supply pressure Restore gas supply Red l.e.d. OFF → fault on the superheat thermostat on the gas burner support bar Check thermostat’s operation after manual reset Replace thermostat After 10 seconds safety shutdown by the ignition control block Check connections of the repositioning of the control control block on the gas valve block on the valve Check impedance of electro Replace valve valve’s coils: (1) = 2.90kΩ; (2) = 1.69kΩ Nothing happens Check the free movement of the fan wheel Check electrical connection on the gas ignition control block and on ef connection board Check the fan supply voltage Replace fan Replace ef connection board if necessary Check the fire-up electrode Check the pressure drop at the pressure switch: it must be higher than 165 pa Continuous ventilation without +check the good operation of sparks from fire-up electrode the pressure switch using an ohmmeter and by artificially creating a depression in the tube. Re-position the pressure switch tube. Change the pressure switch. After 4 seconds the gas burner still not operating and safety shutdown by the ignition control block. Check injection pressure during start-up (value for high heat) Remove the control box from the gas block. Remove the air from the gas pipe-work Adjust the injection pressure to high heat value. Change the control box if the gas valve is ok. Within 4 seconds the gas burner fires-up but safety shutdown from the ignition control block. Check the position and connection of the ionisation probe. It must not be earthed (230v). Check that r.c circuit of the gas burner’s transformer is well connected to the neutral polarity Measure the ionisation current: it must be higher than 1.5 microamps. Check the type of gas. Check the whole electrical supply. Adjust the supply and injection pressure if gas is different from natural gas g20 :( g25 gas of groningue for example). Extraction fans are running After 30 to 45 seconds: pre-ventilation the fire-up electrode should spark. After a few seconds the gas burner fires-up BALTIC-IOM-0412-E / Service manual • 53 • GAS BURNERS Disassembling the gas burner for maintenance purposes Preliminary safety recommendations • isolate the unit using the main isolator switch. • close off the isolating gas valve located before the unit. • disconnect the pipe-work. Do not discard the seals. Disassembling the gas «burner support bar» • disconnect the electrical connector on the electric connection board BG50 • remove the two screws which hold the gas bar in place • carefully remove the gas « burner support bar » avoiding any damages to the electrodes. Disassembling the flue • electrically disconnect the fan and remove the screws holding it in place. • take care not to loose any cage nuts in the smoke box. Attention: check the correct position of the pressure tube used by the extraction pressure switch. Required equipment list for maintenance adjustment and start-up • an accurate manometer from 0 to 3500 pa (0 to 350 mbar): 0,1% full scale. • a multimeter with ohmmeter and micro-amps scale • an adjustable spanner • tube spanner set: 8, 9, 10, and 13. • flat screwdrivers diameter 3 and 4, fillips n°1 • vacuum cleaner • paint brush Gas burner support bar • 54 • BALTIC-IOM-0412-E / Service manual GAS BURNERS Gas module 1 2 3 4 5 14 6 13 10 7 9 8 12 1. Circuit breaker 2. Transformer 400/230V 3. Minimum gas pressure switch and inlet pressure plug 4. Gas valve and solenoid 5. Gas ignition control block and BG50 connection board 6. Ignition electrode 7. Ionisation probe 8. Gas inshot burner 9. Gas injectors support bar 10. Backfire thermostat 11. Air pressure switch 12. Outlet pressure plug 13. Smoke exhaust chimney 14. Supply safety thermostat BALTIC-IOM-0412-E / Service manual • 55 • MODULATING GAS BURNERS Modulating gas (under patent inpi mai 2004) The actuator Bearing surface of the actuator’s screw Minimum opening of the actuator The actuator receives an information 0-10v from the regulation for the positioning of the air shutter; then the actuator transmits its position to the printed-board which will order the valve. Check position and operation of the actuator Starting up the gas burner Purge the pipe-work near the connection on the ignition control valve for a few seconds. Disengaging for hand drive operation • check that the unit's treatment fan blower is running. • set the control to “on” this will priorities the gas burner. • increase the set temperature (room set point temperature) to a temperature higher than the actual room temperature. The start of the gas burner must be done at high heat injection. Manual rotation of the actuator • 56 • BALTIC-IOM-0412-E / Service manual MODULATING GAS BURNERS Pressure adjustments on honeywell pressure regulating valve type vk 4105 g Pressure regulator adjustment with 300 mbar gas supply: High heat injection pressure checks • place the tube of the “accurate” manometer to the out port on the gas injector support bar after having loosened the screw by one turn. • the burner must run in high heat mode for this check. • place the tube of the “accurate” manometer on the inlet pressure port of the gas regulating valve after having loosened the screw by one turn Low heat adjustment Inlet pressure Check and adjust if necessary the valve outlet pressure to 8,4 mbar (G20) (or 12,3 mbar for G25) High heat adjustment underneath • Check and adjust if necessary the valve inlet pressure to 20 mbar (G20) (or 25 mbar for G25) after gas burner ignition BALTIC-IOM-0412-E / Service manual • 57 • MODULATING GAS BURNERS Low heat injection pressure checks • switch the control to low heat • check and adjust if necessary the outlet pressure to 1,5 mbar minimum (G20) (or 2.25 mbar for G25) • after the adjustment of the low heat, re-verify the high heat • re-position the stoppers and close the pressure ports. Pressure adjustments table for each type of gas (mbar) Category Supply pressure Low heat injection mini. High heat injection G20 20,0 +/- 1 1,5 +/- 0,03 8,4 +/- 0,2 G25 25,0 +/- 1,3 2,25 +/- 0,05 12,3 +/- 0,2 G31 NA NA NA Valve electrical control 2,90 kΩ 1,69 kΩ • check these values with an ohmmeter. • after the adjustment of the low heat, re-verify the high heat • re-position the stoppers and close the pressure ports. • 58 • BALTIC-IOM-0412-E / Service manual MODULATING GAS BURNERS Burner safety checks Idem non-modulating gas burner Gas burner troubleshouting Idem non-modulating gas burner. If the valve’s flow is not correct, check the operation of the actuator and of the mechanical assembly. → Replace the actuator if necessary Disassembling of gas burner for maintenance purposes Idem non-modulating gas burner Modulating gas BALTIC-IOM-0412-E / Service manual • 59 • RECOVERY WATER COIL Heat recovery water coil is delivered with a loose 3 ways valve inside carton to be assembled on site by installer. The freeze protection is made via fresh damper safeties nevertheless for a full freezing protection has to be done using glycoled water • 60 • BALTIC-IOM-0412-E / Service manual SERVICE DIAGNOSTIC Refrigeration Fault Possible cause and symptoms Solution Refrigerant charge too low Measure the superheat and sub-cooling: Good if 5°c<sc<10°c and 5°c<sh<10°c Bad if sc>10°c and sh too low Check superheat adjustment and charge unit (a leak check must be carried out) In heat pump mode the temperature difference between t outdoor and tevap. (dew) is too high 5°c < delta t < 10°c excellent 10°c < delta t < 15°c acceptable 15°c < delta t < 25°c too high If too high check the coils are clean or check coil internal pressure drop between the liquid line and the suction line Good if < 3bar Too high if > 3bar (coil blocked) Refrigeration circuit blocked in distribution Stop the fan and create icing of the coil. Check all circuits freeze evenly across the whole surface of the coil If some parts of the coil do not freeze this could indicate a problem with the distribution Liquid line drier blocked. High temperature Change filter drier difference between inlet and outlet of the drier LP problems and LP cut outs Contaminant in the expansion valve Attempt to free the valve adjusting element by freezing the valve and then heating the thermostatic element. Replace the valve if necessary Expansion valve not adjusted properly Adjust the expansion valve Ice plug in the expansion valve. Heat the main body of the valve. If the LP increases and then decreases gradually, empty the circuit and replace the drier. Incorrect insulation of the thermostatic bulb of the expansion valve Superheat too low: adjust superheat Move the thermostatic element along the pipe Insulate the thermostatic element of the valve Low pressure switch cut out point too high Check the cut out pressure of the low pressure switch: it must be 0,7+/- 0,2bar and must closes at 2,24 +/- 0,2 bar LP cut out due to not enough defrost on heat pumps Adjust the CLIMATIC™ settings to extend the defrost cycles or shorten the time between defrosts Incorrect airflow rates Heat pump mode: check the filter before the indoor coil measure and estimate the airflow rate increase the speed of the fan Cooling mode: check the condenser fan (amps) Moisture or contaminants in the system Summer operation Several hours after the unit has stopped, check the correspondence between the measured pressure and the outdoor temperature HP problems and HP cut outs BALTIC-IOM-0412-E / Service manual • 61 • SERVICE DIAGNOSTIC Refrigeration (cont'd) Fault Possible cause and symptoms Solution Moisture or contaminants in the system If the circuit pressure is higher (<1 bar) than the saturated pressure corresponding to the measured outdoor temperature, there is possibility that some contaminants are present in the system. Reclaim the refrigerant, and vacuum the circuit (ensure very low and slow vacuum for R410A) Recharge the unit Condenser coil is obstructed Check the condenser coil and clean is necessary Recycled hot air Check clearance around the condenser Incorrect adjustment of the expansion valve Low refrigerant charge Filter drier obstructed with gas bubbles at the expansion valve inlet Moisture in the system Refer to LP problems and LP cut out section Very high superheat, very hot compressor Reduce the superheat on the electronic valve. Check the pressure drop on the filter drier in the suction line Four way reversing valve possibly blocked, abnormal noise from the valve, low LP and increasing HP Check operation of the valve by going through cycle inversions. Change if necessary. Refer to LP problems Fault Possible cause and symptoms Solution High amps on action fan motor Pressure drop in the ducting installation too low. Reduce the rotation speed of the fan Read the airflow and pressure and compare with the specification from customer. High amps on reaction fan motor Pressure drop in the ducting installation too high. Reduce the rotation speed of the fan Read the airflow and pressure and compare with the specification from customer. Unstable running and high vibration Fan jumping from one operating point to the other Change rotation speed of the fan. Possible cause and symptoms Solution HP problems and HP cut outs Strong variations of pressure ( 2 to 3 bar) expansion valve "hunting" Very high discharge temperature, High amps measured at compressor Indoor fan blower Outdoor axial fan Fault High amps due to a low voltage from the main Check the voltage drop when all components are running. supply Change the circuit breaker for one with a higher rating. Heat pump mode: circuit breaker open • 62 • High amps due to freezing of the coil Check the adjustable amps on the motor starter. Adjust the defrost cycle set points. FLEXY™: water ingress in the motor connection box. Change the component BALTIC-IOM-0412-E / Service manual SERVICE DIAGNOSTIC Electric heater Fault Possible cause and symptoms Solution Low airflow rate Measure and estimate the airflow and pressure and compare with the specification from customer. High temperature trip out on electric heater Incorrect position of the klixon Check that the klixon, is positioned in the airflow, relocate klixon if necessary Check that there is no heat transfer from the klixon support. Water leaks Fault Water found in the ventilation section Water ingress in the filter compartment Possible cause and symptoms Solution Cooling mode: water carried away from the coil because of excessive airflow and speed on the coil. Estimate the airflow rate and check the speed is lower than 2,8 m/s Low air pressure in the compartment due to a high airflow rate or a high pressure drop before the fan Check filter Reduce airflow rate Check seals around the ventilation section. Check the door seal Check for the presence of silicone seals in the corners of the door and at the bottom of the refrigeration section bulkhead. Water ingress through a leaking fresh air hood Check the seals and flanges in the fresh air hood or when running 100% fresh air Reduce the airflow rate if necessary CLIMATIC™ Displays Fault Possible cause and symptoms Solution Nothing is written on the screen but it’s enlightened Idem Press on the three right-hand side’s buttons at the same time during a few seconds then reconfigure display address setting at 32. Nothing occurs on the unit or an option disappeared Possible problem of units' configuration Check the instructions from 3811 to 3833 and reconfigure options if necessary. The message “no link” appears Problem of addresses’ recognition Disconnect the DS from the unit and then reconnect it. All the units are extinct Problem main board plan addressing Disconnect then re-plug; disconnect each unit from the others then change all the plan addresses BALTIC-IOM-0412-E / Service manual • 63 • SPARE PART LIST Refrigeration components R410A Designation Familly Code ABA054WAA Comp 4220463P ARA073WAA Comp 4220464R ARA081WAA Comp 4220465T ID Cbox size 24-30 Coil 4310501Y ID Cbox size 38-42 Coil 4310488F ID Dbox Coil 4310490J ID Ebox Coil 4310491K OD CDbox 2 rows size 24-30 -45-52 Coil 4310499W OD CDbox 3 rows size 38-42-57-65 Coil 4310489H OD ELeft Coil 4310492L OD Eright Coil 4310493M Electronic expansion valve E2V30 Refrig 4720927R E2V45 Refrig 4720928T Electronic expansion valve cable 3M Refrig 4720931X DMB165S Refrig 4720905K DML165S Refrig 4720907M Non return valve NRV16S Refrig 4720002H 4 way valve STF0715 Refrig 4740101N 4 way valve coil 24V 50 Refrig 4740103R HP 42.0 bars OFF 2X faston Refrig 4730184H Pressure sensor. ratio BP fréon 1 à 45 bar EMBASE DIN Control 4730185H Pressure sensor.4/20 HP fréon 1 à 45 bar EMBASE DIN Control 4770207M Valve body 1/4 flare Refrig 5660010W Valve body 5/16'' Refrig 5660226N Valve mecanism Refrig 5660012Y Valve Cap 5/16'' Refrig 5660228R Flexible INOX 5/8" DN15 600mm Hoses 4681022J Flexible INOX 1"1/8" DN25 800mm Hoses 4681030V Copper Tees 7/8" - 1"1/8 - 7/8" - F ODS Piping 5650174H Copper 2 en 1 5/8" - 5/8" - 7/8" - F ODS Piping 5320508 E Compressor INDOOR coil OUTDOOR coil Expansion valve Filter Drier Pressure switch Flexible inox • 64 • BALTIC-IOM-0412-E / Service manual SPARE PART LIST Casing Designation Economiser Fresh air hood grille C box Fresh air hood grille D box Fresh air hood grille E box Insulation Door sealing gasket Lock 1/4 T Familly Code 4921101P Sheet metal 4921102R 4921103T Rockwool Insulation isolene foam M1 5840166H 5840071R Gaskets 15 x 15 5680259Y 1000-U188-N2+18+990 5880190P 1000-U155D 5880164A Handle door 1091-103-02 Handle outdoor coil M443/140N 5880160W Charnieres clips 8576178 SNAP LINE 5880187L Sealant 0933015118 REF 933 Gaskets 5680251M Electrical & control components Designation Familly Code CLIMATIC™ Fixings BM060 small 4770701N BM060 medium 4770702P Connector for BM60 small 4770707X Connector for BM60 medium Sensors 5880109W Ntc -50+105 7 metres Control 4770708Y 4770721T Ntc -50+105 3 metres 4770720R Ambient sensors Ambient sensor 4770613K Pressure sensor Analog filter sensor 4730097A Inverter21 0.75 kW 4780468A Inverter21 1.5 KW 4780469E Inverter21 2.2 kW 4780417A Fan inverter Outdoor fans Inverter21 3 kW Inverter Inverter21 4 kW 4780418E Inverter21 5 kW 4780425N Inverter21 7.5 kW 4780419F Inverter21 9-11 kW 4780421J Designation Familly Vent cond C-D BOX small FL063 Vent cond C-D BOX big FN071 Vent cond E BOX FN080 BALTIC-IOM-0412-E / Service manual 4780470F Code 4921095H Axial fan 4921096J 4921097K • 65 • SPARE PART LIST Ventilation & Filtration components Designation Familly Code Filtration 500x530x50 G3 Filters 4960128J Filter G4 metal frame 500x530x50 4960129K Filter G4 rechargeable 500x530x50 4960134R Filter F7 500x530x100 4960130L Actuator NM 24SR + connection Damper AT15-11S Indoor fan Motor ADHE 355 4781286T 4910018R Supply fan 4910090X AT 15-11 G2L D30 4910080H AT 15-11 G2L D40 4910094E 1,5 kW 4520102L 2,2 kW 4520106R 3 kW 4520107T 4 kW 4520108V 5,5 kW 4520109W 7,5 kW 4520111Y 9 kW 4520113A 11 kW PNEUMABLOC PV40 H 4950761J PNEUMABLOC PV50 H 4950762K PNEUMABLOC PV60 H 4950763L PNEUMABLOC PP50 ALéS.38 PNEUMABLOC P40 Motor 4950768T 4950764M PNEUMABLOC P50 4950765N PNEUMABLOC P60 4950766P Cast Bush 40-25 alésage 40 4950769V Cast Bush 28-20 alésage 25 4950035P Cast Bush 28-20 alésage 24 4950040X Cast Bush 40-25 alésage 38 4950046H Cast Bush 28-20 alésage 28 4950050M Cast Bush 30-25 alésage 25 4950053R Cast Bush 30-25 alésage 28 4950054T Cast Bush 30-25 alésage 30 4950238N Elastic grummet fans M6x30 5680408T Earth connection M6x30 Miscillaneous Designation siphon Key Coupling • 66 • Supply fan 5480956H Familly Code Tube ep 5 mm noir Fixings 4680360K Double index Fixings 5880158T BALTIC-IOM-0412-E / Service manual WARRANTY Terms and conditions In the absence of any other written agreement, the guarantee shall only apply to design faults which occur within a 12 month period (warranty period). The warranty period starts on the date of commissioning and at the latest six months after the delivery of the Rooftop. Anti-corrosion warranty 10 year warranty terms and conditions for corrosion to the Rooftop casing: LENNOX shall guarantee the casing of its Rooftop units manufactured since May 1991 against corrosion for 10 years commencing from the date of delivery of the material. The warranty shall not apply in the following cases: 1. If the corrosion of the casing is caused by external damage to the protective layer such as scratches, projections, abrasion, impacts etc... 2. If the casing is not kept continually clean in the course of maintenance work or by a specialist company, 3. If the casing is not cleaned and maintained in accordance with regulations, 4. If the Rooftop units are installed on a site or in an environment which is known to be corrosive, unless a special protective coating has been applied by the owner for these applications, which has been recommended by a competent body not linked to the owner and after carrying out a study of the site. 5. Nevertheless the LENNOX coating is highly resistant to corrosion, the warranty will not be applied for rooftop installed at less than 1000 m away from the sea Note: With the exception of the casing, the rest of the machine is covered by the warranty of our general terms of sale. Do not confuse the warranty with maintenance The warranty will only apply if a maintenance contract has been signed, starting from the date of commissioning, and if the maintenance contract has actually been performed The maintenance contract must be made with a specialist, competent company. The sole effect of any repair, modification or replacement of an item during the warranty period must be to extend the material's warranty period. Maintenance must be carried out in accordance with regulations. If a spare part is supplied after the expiry of the warranty period, it shall be guaranteed for a period equal to the initial warranty period and will be subject to the same conditions. We recommend for a contract four inspections per year (every three months), before the start of each season, in order to check the operation of the equipment in the various operating modes. BALTIC-IOM-0412-E / Service manual • 67 • MAINTENANCE PLAN Rooftops are generally placed on the roof but can also be installed in technical rooms. These units are very robust but a minimum regular maintenance is required. Some moving parts in the units can suffer from wear and tear and must be checked regularly (belts). Other parts can get clogged by dirt carried in the air (filters) and must be cleaned or replaced. These units are designed to produce cooled or heated air through the use of a refrigeration vapour compression system, it is therefore imperative to monitor the refrigeration circuit operating pressures and check the pipe-work for leaks. The table below, details a possible maintenance plan, including the operations to be carried out and the periodicity at which they must be accomplished. It is recommended to follow such a plan to keep a rooftop unit in good working order. Regular maintenance of your rooftop will extend its operating life and reduce operating faults Symbols and Legend : X Operation which can be carried out by on-site maintenance technicians. █ Operation which must be carried out by qualified refrigeration personnel, trained to operate on this type of equipment. Note: • Times are given for information purpose only and may vary depending on the unit size and type of installation. • Coil cleaning must be carried out by qualified personnel using appropriate methods that won’t damage the fins or the tubes. • It is recommended to keep a minimum stock of common replacement parts in order to be able to carry out regular maintenance operations (i.e. filters). You can contact your local LENNOX representative which can assist you in establishing a parts list for each type of equipment. • The access ports to the refrigeration circuits MUST be leak checked every time gauges are connected to the service ports. • 68 • BALTIC-IOM-0412-E / Service manual MAINTENANCE PLAN Monthly Quarterly 6 monthly Yearly before winter Estimated time (min) Task Operating mode Clean or replace filters: Disposable, or metal frame. Replace filters with new ones if disposable. Vacuum clean or blow the dirt. Wash and dry carefully. Replace media if necessary Blocked filter will reduce the performance of the unit. THE UNIT MUST NOT OPERATE WITHOUT FILTERS o 20 Visual check of the oil level Visually check the oil level through the sight glass on the side of the compressor casing o 2 Centrifugal fan bearings check Isolate unit from the main power supply; Push the fan wheel manually and check for abnormal noises. Bearings are lubricated for life but may need replacement after 10000 hours o 10 Check absorbed Amps Check absorbed Amps on all three phases; compare with the nominal value given in the electrical wiring diagram. [] 15 Check Smoke detector Start the unit. Trigger the smoke detector by moving a magnet around the detector head. Reset unit and control. [] 5 Check CLIMATIC™ Refer to the commissioning sheet; Check control, set-points and all set points are set according to this variables document. [] 15 Check clock settings Check the time and date of the control o 5 Check the position and tightness of refrigeration components Check systematically all connections and fixings on the refrigeration circuit. Check for oil traces, eventually a leak test should be conducted. Check operating pressures correspond to the ones indicated on the commissioning sheet [] 30 eDrive™ elastomeric tire status Check the tire status. Replace weared tire if necessary. o Check Airflow rate Shut down supply fan. The fault must be safety switch (if fitted). detected within 5 seconds. o Check freeze protection on HWC [] BALTIC-IOM-0412-E / Service manual 10 5 • 69 • MAINTENANCE PLAN Check three way valve on HWC Increase room set-point 10°C above the actual room temperature. Check operation of the piston. It must move away from the valve head. Reset the control. [] 5 Check economiser actuator operation Check all fixings and transmission. Stop the unit using the control. The fresh air damper must close. Start the unit the fresh air damper should open [] 5 Check refrigeration 4way valve With the unit running in cooling mode increase the room set-point temperature by 10°C. The unit should switch to heat pump mode. Reset the control. [] 5 Check tightness of all electrical connections Power down the unit and check and tighten all screws, terminal and electric connections, taking a particular attention to the power lines and low voltage control wires o 30 Check HP / LP safety switches Install manifold gauges on the circuit to be checked. Shut down the axial fans and wait for the HP switch to shut down the compressor: 29 bar (+1 / -0) auto-reset 22 bar (+ - 0,7) Reconnect fans. Switch off the centrifugal supply fan and wait for the LP switch to cut out: 0.5bar (+ - 0,5) reset 1,5bar (+-0,5). [] 15 Check HP analogic sensor calibration Install calibrated manifold gauges on the circuit to be checked. o 30 Check outdoor fans and fan guards Check the fan blades conditions and all fan guards and protections o 5 Check position of all sensors Check the good positioning and operation of all sensors of all sensors. Check the values given in the control system. Replace sensor if necessary o 5 Check the fresh air grilles (if fitted). If dirty Check and clean if or damaged, remove them from unit and necessary all fresh air clean with high pressure water cleaner. grilles Refit on unit once clean and dry. o 5 o / [] 1h if cleaning Clean condensate drain, indoor and outdoor coils (following local regulations) • 70 • Quarterly 6 monthly Estimated time (min) Operating mode Visually check the coils for dirt. If not too dirty, cleaning with a light brush may be enough (WARNING: Fins and copper tubes are very fragile! Any damage WILL reduce the performances of the unit). If very dirty, deep industrial cleaning is required using de-greasing agents. (External contractors must be called). Monthly Yearly before winter Task BALTIC-IOM-0412-E / Service manual MAINTENANCE PLAN Yearly before winter Estimated time (min) Isolate the unit; Pull the electric heater Check electric heater out of the heater module box and check element for excessive the resistances of traces of corrosion; corrosion Replace resistance as required; o 1h if replacement Check anti-vibration mountings, for wear and tear. Visually check anti-vibration mountings on compressors and centrifugal fan. Replace if damaged. o 1h if replacement Check refrigeration circuit for traces of acid in the oil Take a sample of oil from the refrigeration circuit. [] Check Glycol concentration in the HWC circuit Check the glycol concentration in the pressurised water circuit. ( a concentration of 30% gives a protection down to aprox. -15°C) check the circuit pressure [] 30 Check defrost cycle with 4-way valve inversion. Switch the unit to heat pump mode. Change the set point to obtain the standard defrost mode and reduce the cycle time to the min value. Check the operation of the defrost cycle. [] 30 Gas burner module check for corrosion Pull out the burner to access the tubes (refer to Gas burner section in the IOM) [] 30 Sweeping and cleaning the gas burner Clean the in-shot burners and the blower wheel lightly with a brush. Sweep the flue and flue box. Wipe-off the dust from the housing of the motor. Clean combustion air inlet louvers Pull-out baffles from the tubes, sweep the tubes CHECK FLUE BOX GASKET [] 30 Gas supply pressures Refer to Gas burner section in the IOM for / connections checks details [] 15 Gas regulation valve settings Refer to Gas burner section in the IOM for details [] 30 Check gas burner safety switches Refer to Gas burner section in the IOM for details [] 30 Check gas fume combustion levels Refer to local regulation [] 10 Task Operating mode BALTIC-IOM-0412-E / Service manual Monthly Quarterly 6 monthly • 71 • • 72 • BALTIC-IOM-0412-E / Service manual TABLE OF CONTENTS BALTIC™ CONTROL MANUAL Ref : BALTIC_Control-IOM-0412-E DISPLAY DC60 INSTALLATION 74 CONNECTION 74 IMPORTANT WARNING 75 ONE 'DC60' FOR ONE, AND ONLY ONE, ROOFTOP 76 TEMPERATURE MEASUREMENT 76 RELATIVE HUMIDITY MEASUREMENT 76 CONFIGURATION 77 INITIALIZATION 78 PRESENTATION 78 USE Setting value 79 79 79 80 80 81 LEVEL 2 ACTIVATION 82 q On/Off unit Setting time Information available DC60 set in light mode DC60 set in full mode DISPLAY DM60 INSTALLATION 83 CONNECTION ON THE DT50 SPLITTER 84 DM60 AND COMMUNICATION MASTER/SLAVES 85 CONFIGURATION 86 FUNCTIONALITY OF THE DM60 86 BALTIC-IOM-0412-E / Control manual • 73 • DISPLAY DC60 The display DC60 is personalized for the user. It allows an overview of operation of the unit and allows access to certain parameters. The 'DC60 is designed to be remote connected of the rooftop. The 'DC60 is equipped with a temperature sensor. The temperature sensor allows the acquisition of room temperature to control. INSTALLATION The DC60 has been designed for flush mount assembly, on distribution boxes compliant with the standards in force. CONNECTION WARNING: Separate as much as possible probes, displays, logical input cables from power cables with strong inductive load, in order to avoid possible electromagnetic perturbations. • 74 • BALTIC-IOM-0412-E / Control manual DISPLAY DC60 IMPORTANT WARNING: Any wiring modification on the CLIMATIC™ 60 must be done by LENNOX technician or employees having valid electrical qualification and authorization. Power supply The power of the DC60 can be 24Vac (+10…-15%) 50/60Hz or 24Vdc (22…35Vdc), maximum current of 2VA. LENNOX recommends a 24Vac supply (provided by rooftop) for installation of the display less within 30 meters of rooftop. For connection of the display of over 30 meters, a power supply, close to the display, 24Vac must be provided by the installer. For an external connection to the rooftop (24V) using a transformer class 2 under 0,1A. For any modification of wiring on the 24V supply or on 4-20mA sensor, check the polarity prior to apply the power. Wrong polarity may cause serious damage and destroy the Plan network. LENNOX will not accept liability for damage caused by wrong power connection or any wiring modification done by people without valid training and qualifications. Communication The DC60 is controlled by a communication bus: RS485. Cable features The connection of power and communication must be made by the following cable: • LiYCY-P (0.34 mm ²), 2 pairs with general shield The cable length, with power, should not exceed 30m. The cable length without power (24V external) must not exceed 150m. For a better electromagnetic protection, Lennox recommends the use of LiYCY-P cable For extended networks fit a 120 Ohm resistor between RX/TX+ and RX/TX- on the first and last device, to avoid possible communication problems. BALTIC-IOM-0412-E / Control manual • 75 • DISPLAY DC60 ONE 'DC60' FOR ONE, AND ONLY ONE, ROOFTOP The DC60 displays only the values and information of the 'Roof-Top' on which the DC60 is connected. TEMPERATURE MEASUREMENT All LENNOX rooftop comes with a temperature sensor; it must be placed in the conditioned area. But if the DC60 is placed in the area conditioned by the rooftop, that display is connected, it is possible, in this case, to use the temperature measurement of the DC60. To indicate the CLIMATIC™ 60 your choice, set the point 3213: • ‘128' to use the measure of the 'DC60' • ‘1 BM-B12' or '2 BM-B1' to use the remote probe Note : • for rooftop with a 'medium' CLIMATIC™ 60: connect the remote sensor between points B12 and GND, terminal block J18. • for rooftop with a 'small' CLIMATIC™ 60: by default the CLIMATIC™ 60 control the return temperature measurement. If you want to control on a room temperature measure, disconnect the return probe between points B1 and GND, terminal block J13. Connect the remote sensor in place. RELATIVE HUMIDITY MEASUREMENT If the rooftop is designed to manage humidity, a box of combined sensors (temperature and humidity), supplied with the rooftop, it must be placed in the conditioned area. It's possible to use the temperature measurement DC60. • 76 • BALTIC-IOM-0412-E / Control manual DISPLAY DC60 CONFIGURATION To communicate with the CLIMATIC™ 60 this basic parameters of internal DC60 must to be settled. Setup menu To do this, when the 'DC60 is powered; Simultaneously press the keys and q. After some seconds, the text appears and the value '000' flashes. Turn the knob to change the value to select the number 022. Then validate the code by pressing the knob. If the code is wrong access the setup menu is not possible and the DC60 returns to the previous If the code is correct the display shows . dsipaly. (2 buttons on the right simultaneously) Parameter's choice By rotating of the knob , you can view and modify the following parameters: • : Address DC60 on the communication bus (Always set to value 31) • : Communication speed (always set to value 2) • : Backlight mode • : Backilght iIntensity • : Probe calibration • : Screen contrast • : Disabling 'Bip' keys • : Password (always set to value 22) • : Real time clock DC60; year • : Real time clock DC60; month • : Real time clock DC60; day • : Real time clock DC60; weekday (1 = Monday) • : Real time clock DC60; hour • : Real time clock DC60; minute • : Exits the settings mode Changing the parameters value To activate the modified mode value: • After selecting the desired parameter by rotating the knob . • Press the knob . • The symbol appears on the right side of the value. • Turn the knob to adjust the desired value. • Press again on the knob to confirm your choice. • The symbol is no longer displayed on the right side of the value. • The rotation of the knob is for select a new setting. Mandatory values • : 31 • : 2 • : 22 BALTIC-IOM-0412-E / Control manual • 77 • DISPLAY DC60 INITIALIZATION If the connection between the CLIMATIC™ 60 and the 'DC60 is not correct (Offline) screen displays only the symbol . In this case, check: : • the connection between CLIMATIC™ 60 and DC60 • the setting of the DC60 • the power of CLIMATIC ™ 60 If the connection between the CLIMATIC™ 60 and the 'DC60 is correct (Online) to power up the screen displays only the symbol . This phase allows the CLIMATIC™ 60 to set up the DC60 with options of rooftop. After some seconds, DC60 is operational. PRESENTATION Showing Control operating mode Fan operating mode Value Label or clock Staus Alarm Pump Compressor(s) Schedule mode Day Day I Defrost Day II Condenser(s) Night Heaters BMS Hidden : to stop Visible : running Blinking : in fault • 78 • BALTIC-IOM-0412-E / Control manual DISPLAY DC60 PRESENTATION Buttons Ventilation Not used Control Not used Standby Clock Viewing or setting the time Knob Select or set of values USE q On/Off unit By supporting a few seconds the button q, you can activate or not (On/Off) the rooftop connected. is displayed, the rooftop is stopped and the DC60 in sleep mode. If the symbol completed by the time To restart the unit, press the button q a few seconds. Setting time At initialization of the DC60, the CLIMATIC™ 60 are synchronized time and day of week with the clock DC60. To view the time, briefly, press the button . To set the time press the button a few seconds. The hour value flashes. Turn the knob to adjust the desired value. Press the knob to select your choice. Then the minute value flashes. Turn the knob to adjust the desired value. Press the knob to select your choice. | Monday | Tuesday | Wednesday | Thursady | Friday | Saturday | Sunday | Then the weekday value flashes. Turn the knob to adjust the desired value. Press the knob to select your choice. After a few seconds DC60 communicates the new time to the CLIMATIC™ 60. BALTIC-IOM-0412-E / Control manual • 79 • DISPLAY DC60 USE Information available By rotating the knob , you can view or modify the following values: DC60 set in light mode : Volatile temperature set point current mode (°C) - : Indoor (Room) temperature (°C) Volatile Temperature set point This item allows you to view and/or modify the control temperature required for the Roof-Top selected. If this point is changed, this value is used until the scheduling changes mode (A, B, C, D, BMS). At each change of the mode, the CLIMATIC™ 60 sets the value of this set point on the preset value in the mode concerned. Indoor (room) temperature This item indicates the measured air temperature in the room conditioning. The room temperature isn't available if the CLIMATIC™ 60 is configured to supply control. DC60 set in full mode Number of rooftop connected to the DC60 • • : Predetermined temperature set point current mode (°C) • : Volatile temperature set point current mode (°C) • : Alarms code • : Outdoor temperature (°C) • : Supply temperature (°C) • *: Indoor (Room) temperature (°C) • *: Indoor (Room) humidity (%hr) • *: Indoor (Room) Air quality (ppm) • *: Opening of fresh air damper (%) *: Available if the option is enabled. : Available if the level 2 is activated. : Adjustable with ‘DC60. Unit connected This item can know the number of rooftop connected to the DC60. • 80 • BALTIC-IOM-0412-E / Control manual DISPLAY DC60 USE Volatile temperature set point This item allows you to view and/or modify the control temperature required for the rooftop selected. If this point is changed, this value is used until the scheduling changes mode (A, B, C, D, BMS). At each change of the mode, the CLIMATIC™ 60 sets the value of this set point on the preset value in the mode concerned. Predetermined temperature set point If level 2 is active, this item allows you to view and/or change the preset temperature control for the active mode. Alarms code This item can see the code of different active alarms on the rooftop. If the rooftop isn't in alarm, this item is to 0. By this item it's possible to reset the alarm activated. To do this set the value of the item to the value 0. Outdoor temperature This item indicates the measure temperature of the air outside. Supply temperature This item indicates the measure of outlet air temperature of the rooftop. Indoor (Room) temperature This item indicates the measured air temperature in the room conditioning. The room temperature isn't available if the CLIMATIC™ 60 is configured to supply control. Indoor (Room) relative humidity This item shows the measured relative humidity of the air in the room conditioning. The room humidity isn't available if the option of humidity management isn't set. CO2 measurement This item indicates the measured rate of CO² in conditioning room, in ppm. The measurement of CO² isn't available if the option isn't set. Opening of fresh air damper This item indicates the measured value of the opening rate of the fresh air damper, in%, (mixture of outside air and return air) This value is only available if the rooftop is equipped with this option. Setting value If the value of the selected item is modified : • To activate the modified value, press the knob . • The symbol appears on the right side of the value. to adjust the desired value. • Turn the knob • Press again on the knob to confirm your choice. • The symbol is no longer displayed on the right side of the value. • The rotation of the knob allows to select a new item. BALTIC-IOM-0412-E / Control manual • 81 • DISPLAY DC60 LEVEL 2 ACTIVATION (2 buttons on the right simultaneously) and q. Simultaneously press the keys After some seconds the text appears and the value '000' flashes. Turn the knob to change the value to select the number 066. Then validate the code by pressing the knob. If the code is wrong access the setup menu is not possible and the DC60 returns to the previous display. If the code is correct the level 2 is actif, and symbol is displayed to the right of the value. The level 2 is turned off automatically every hour. • 82 • BALTIC-IOM-0412-E / Control manual DISPLAY DM60 The 'DM60' display is personalized for the user. It allows an overview of unit operation and allows access to certain parameters. The 'DM60' is designed for connection of remote roof-top. INSTALLATION WARNING : An error connecting to the display immediately causes the deterioration of this one or BM60. The optional delivered DM60 is designed to be wall mounted: • position the cable through the rear • fasten the rear wall using button head screws provided in the package • connect the cable from the main board on the jack on the back of the DM60 screen • attach the front panel on the back using provided countersunk screws • snap frame. The display is connected to CLIMATIC™ DM60 on the screw terminals of the card DT50. The connection must be wired as follows: • for a length of 0 to 300 m: AWG22 (0.34 mm ²), two crossed pairs with screen. • for a length of 0 to 500 m: LiYCY-P (0.34 mm ²), two pairs shielded general. The cable length should not exceed 500 m. For a better protection of electromagnetic disturbances LENNOX recommends the icable LiYCY-P installation. BALTIC-IOM-0412-E / Control manual • 83 • DISPLAY DM60 CONNECTION ON THE DT50 SPLITTER DT50 dispatcher installation guide The board is equipped with three RJ12 phone jacks and a screw connector (SC). Terminal Wire function Connections 0 Earth Shield 1 +VRL (≈30 Vdc) 1st pair A 2 GND 2nd pair A 3 Rx/Tx- 3rd pair A 4 RX/Tx+ 3rd pair B 5 GND 2nd pair B 6 +VRL (≈30 Vdc) 1st pair B Jumpers: The "displays" are directly supplied by the Climatic™ board with a 30 VDC power supply. Pay attention to the value of this voltage when multiple cards are used. J14 and J15 closed or cut the power supply: • J14 and J15 set between 1-2: connectors A, B, C and SC are in parallel. Power is available on all connectors. • J14 and J15 set between 2-3: B and C connectors are supplied in parallel but the connectors A and SC are not. Displays connected to these ports are not powered. If J14 and J15 are set differently, the DT50 dispatcher DOESN'T WORK and therefore connected displays don't work. Display's ferrites protection To avoid appearance of RF interference that may cause destruction of components in the displays, you need to equip the cable of a ferrite, during its installation (provided by LENNOX). • 84 • BALTIC-IOM-0412-E / Control manual DISPLAY DM60 DM60 AND COMMUNICATION MASTER/SLAVES If the master/slaves communication bus is connected between several rooftop (maximum 8). The 'DM60', connected on this bus, allows viewing, alternatively, information of all connected units. MASTER / SLAVES / DM60 The inter-bus boards (pLan) CLIMATIC™ connects to connector J8 on the BM60 cards. Connection with 'star' is not recommended for optimum performance it is advisable to connect a maximum of two cables per unit. The connection must be wired as follows: • For a length of 0 to 300 m: AWG22 (0.34 mm ²), a twisted pair shielded. • For a length of 0 to 500 m: LiYCY-P (0.34 mm ²), a pair overall shield. cable length should not exceed 500 m. For better protection of electromagnetic disturbances Lennox recommends the installation of cable LiYCY-P. WARNING : The BM60 24Vac cards should not be connected to the 'earth'. BALTIC-IOM-0412-E / Control manual • 85 • DISPLAY DM60 CONFIGURATION Brightness / Contrast The display is equipped with a contrast, but it can be adjusted manually. For manual adjustment of contrast, simultaneously press the 'alarm' and 'prg' keys and press 'arrow' or 'down arrow' buttons to increase or decrease the contrast. Configuring the terminal's address The termminal's address (DC60 or DM60) must be checked after putting the card to 'On': • access the setup mode by pressing the 'arrow', 'enter' and 'down arrow' keys for at least 5 seconds. • press 'enter' to place the cursor on 'setting' • with 'arrow' or 'down arrow' set the address of the display 31 of DM60, then confirm by pressing 'enter' The screen 'display address changed' is displayed. If after 5 seconds the display is not correct: • access, a second time, the setup mode by pressing the 'arrow', 'enter' and 'down arrow' keys for at least 5 seconds, up to the next screen. • press 'enter' to place the cursor on 'setting' • press 'enter' a second time to place the cursor on the I / O board address line • with 'arrow' or 'down arrow' replace '-' by the address of the BM60 connected and confirm by pressing 'enter' FUNCTIONALITY OF THE DM60 Rooftop selection A DM60 can be connected to 8 units per the pLan bus. DM60 screens connected, alternatively, to one of BM60. The next screen allows selection of the unit to display: Each of the 8 rooftops is represented by a number. The selected rooftop is indicated by its number which is framed. Each time you press the 'down arrow' button, it connects the display to the next rooftop. Pressing 'enter' key returns to the main screen. • 86 • BALTIC-IOM-0412-E / Control manual DISPLAY DM60 Main Top left : Control in heating mode or control in cooling mode • Small, numerical value: volatile set point temperature: View and/or modify the offset, or set point, of the desired temperature control for the selected rooftop. Pressing the 'arrow' button increases the set point value. Pressing the 'down arrow' button decreases the set point value. If the setpoint is changed, this value is maintained as long as the rooftop scheduling doesn't change modes (night, day, day I, day II, BMS). At each change of the mode the CLIMATIC™ 60 sets the value of this setpoint on the preset value in the mode concerned. • Big, numerical value: measured air temperature value in the conditioned space. Top right: Ventilation state Bottom right: State mode based on the schedule, hour, minute, of CLIMATIC™ : Night mode Day mode Day I mode Day II mode Bottom left: If the unit is in alarm, this symbol is displayed • • • • • • Pressing the 'alarm' button directs you to the alarm list display. Pressing the 'prg' button directs you to rooftop setup menus display. Pressing the 'esc' button takes you to the selected rooftop choice display. Pressing the 'arrow' button increases the set point value. Pressing the 'enter' button takes you to the rooftop operation display. Pressing the 'down arrow' button decreases the set point value. BALTIC-IOM-0412-E / Control manual • 87 • DISPLAY DM60 Rooftop off If the rooftop is Off, this screen is activated. • pressing the 'alarm' button directs you to the alarm list display. • pressing the 'prg' button directs you to the rooftop setup menus display. • pressing the 'esc' button takes you to the selected rooftop choice display. Rooftop operation • • • • pressing the 'alarm' button directs you to the alarm list display. pressing the 'esc' button takes you to the main display. pressing the 'arrow' button directs you to the previous screen. pressing the 'down arrow' button directs you to the next screen. View/edit, status of the unit (On/Off). Pressing the 'prg' button reverses the On/Off state of the unit. On the left of the house: • outdoor humidity value visualization (if enabled). • outdoor temperature value visualization. In the house: • indoor humidity value visualization(if enabled). • indoor temperature value visualization. • indoor air quality rate visualization(if enabled). • 88 • BALTIC-IOM-0412-E / Control manual DISPLAY DM60 Heating mode set point visualization Cooling mode set point visualization Fresh air damper opening percentage visualization Engaged compressor percentage visualization Engaged heaters percentage visualization • • • • pressing the 'alarm' button directs you to the alarm list display. pressing the 'esc' button takes you to the main display. pressing the 'arrow' button directs you to the previous screen. pressing the 'down arrow' button directs you to the next screen. Alarm list History used to store the last 99 alarms occurred on the unit. • each alarm is stored on the date and time the fault occurred. • an active alarm is signified by the 'bell' symbol. • an reseted alarm is signified by the '.' symbol. • each alarm is signified by a 3 digit code To have the text of fault code, position the cursor on the desired line, by using the 'up arrow' or 'down arrow' and then confirm by pressing 'enter' • • • • pressing the 'esc' button takes you to the main display. pressing the 'arrow' button positions you in the list. pressing the 'enter' button takes you to the clear display of failure code. pressing the 'down arrow' button positions you in the list. BALTIC-IOM-0412-E / Control manual • 89 • DISPLAY DM60 Setup menus Access to the setup menus is protected by a password. The password must be entered digit by digit. If the password is correct, the lock opens, and the selection of the function choice is active. • • • • • Pressing the 'alarm' button directs you to alarm list display. Pressing the 'esc' button takes you to the main display. Pressing the 'arrow' button increases the password digit value or selects the previous function. Pressing the 'enter' button it puts you on the next digit password, or directs you to the selected function screen. Pressing the 'down arrow' button decreases the password digit value or selects the next function. Setting; Temperature View/edit, the current schedule mode of the heating mode setpoint View/edit, the current schedule mode of the cooling mode setpoint • • • • • Pressing the 'alarm' button directs you to alarm list display. Pressing the 'esc' button directs you to rooftop menus setup display. Pressing the 'up arrow' button increases the set point value. Pressing the 'enter' button commits the changes then it puts you on the next or previous setpoint. Pressing the 'down arrow' button decreases the set point value. • 90 • BALTIC-IOM-0412-E / Control manual DISPLAY DM60 Setting; Reset Alarms View/edit, alarm and safety reset • • • • • Pressing the 'alarm' button directs you to alarm list display. Pressing the 'esc' button directs you to the rooftop menu setup display. Pressing the 'up arrow' button reverses the state. Pressing the 'enter' button resets alarm: if the 'reset' word is selected, then it directs you to the rooftop setup menus display. Pressing the 'down arrow' button reverses the state. Setting; rooftop On/Off View/edit, On/Off status of the unit. • • • • • Pressing the 'alarm' button directs you to the alarm list display. Pressing the 'esc' button 'Esc' directs you to the rooftop setup menus display. Pressing the 'up arrow' button 'Up Arrow' reverses the state. Pressing the 'enter' button validates the selection, then directs you to the rooftop setup menus display. Pressing the 'down arrow' button reverses the state. BALTIC-IOM-0412-E / Control manual • 91 • DISPLAY DM60 Setting; Clock of CLIMATIC™ View/edit, hour, minute, day of month, month and year of the CLIMATIC™ clock. • • • • • Pressing the 'alarm' button directs you to the alarm list display. Pressing the 'esc' button directs you to the rooftop setup menus display. Pressing the 'up arrow' button increases the selected value. Pressing the 'enter' button commits the change and it puts you to the next value. Pressing the 'down arrow' button decreases the selected value. Setting; CLIMATIC™ schedule View/edit, hour and minutes of each zone beginning. View/edit, the zone operating mode. The schedule is different each weekday. You must set a schedule for monday, tuesday, ..., and sunday. The visualization of another weekday is done by pressing the 'prg' button. • • • • • • Pressing the 'alarm' button directs you to the alarm list display. Pressing the 'prg' button displays the next weekday. Pressing the 'esc' button directs you to rooftop setup menus display. Pressing the 'up arrow' button increases and validates the selected value. Pressing the 'enter' button commits the change and it puts you to the next value. Pressing the 'down arrow' button decreases and validates the selected value. • 92 • BALTIC-IOM-0412-E / Control manual TABLE OF CONTENTS BALTIC™ CERTIFICATES Ref : BALTIC_Certificates-IOM-0412-E CE CONFORMITY DECLARATION 94 EUROVENT 96 CERTIGAZ 97 Certificates are given for information only. To get the uptodate certificates, please contact your local LENNOX reprensentative. BALTIC-IOM-0412-E / Certificates • 93 • CE CONFORMITY DECLARATION • 94 • BALTIC-IOM-0412-E / Certificates CE CONFORMITY DECLARATION BALTIC-IOM-0412-E / Certificates • 95 • EUROVENT EUROVENT CERTIFICATION COMPANY SCRL 53 rue Turbigo 75003 Paris FRANCE - RCS Paris B 393 363 460 - Code APE : 748K Certification Diploma N° : 09.04.422 EUROVENT Certification Company certifies that Rooftops from LGL France S.A. Located at Z.I. Les Meurieres - BP 71, 69780 Mions Cedex, France Trade name LENNOX EUROPE LENNOX have been assessed according the requirements of following standard OM-13-2011 The list of certified products is displayed at : http://www.eurovent-certification.com LGL France S.A. is authorised to use the EUROVENT Certification mark in accordance with the rules specified in the Operational Manual OM-13-2011 Erick MELQUIOND Approval date : 2009/04/03 Managing Director Re-checked on : 2012/03/15 Valid until : 2012/06/15 • 96 • BALTIC-IOM-0412-E / Certificates CERTIGAZ BALTIC-IOM-0412-E / Certificates • 97 • www.lennoxeurope.com SALES OFFICES : BELGIUM AND LUXEMBOURG + 32 3 633 3045 FRANCE +33 1 64 76 23 23 GERMANY +49 (0) 6071 3915919 ITALY + 39 02 495 26 200 RUSSIA +7 495 626 56 53 SPAIN +34 902 533 920 UKRAINE +380 44 461 87 79 UNITED KINGDOM AND IRELAND +44 1604 669 100 NETHERLANDS + 31 332 471 800 POLAND +48 22 58 48 610 PORTUGAL +351 229 066 050 BALTIC-IOM-0412-E OTHER COUNTRIES : LENNOX DISTRIBUTION +33 4 72 23 20 00 Due to Lennox’s ongoing commitment to quality, the specifications, ratings and dimensions are subject to change without notice and without incurring liability. Improper installation, adjustment, alteration, service or maintenance can cause property damage or personal injury. Installation and service must be performed by a qualified installer and servicing agency