1
RV8 Remote Ignition Module Kit STC 1856 Installation
Land Rover specialist, I decided that anything I could do to extend the module’s life
by placing it away from heat seemed like a good idea. For what it’s worth, the
module that came off my car was the original with a build date of 04/94 so it
certainly didn’t owe me anything. For an electronic component to go this long was
impressive. Unfortunately, the original module also contributed to rough idle
issues with my car so it was time for it to go.
Does it work?
Only time will tell. One would have to have two cars (one original and another with
the remote kit) in identical condition and driven in the same way for a number of
years to see how long their respective ignition modules might last. However during
my tuning issues with my RV8 (NNN 0590) after importing the car from Japan, I
replaced the original module manufactured in June 1994 and that made the
biggest difference to the rough idle issue the car had at that time. So the modules
will last a long time . . . hopefully. My local Land Rover specialist in Canada
www.rovalution.ca helped me sort out the issues and while talking to the owner
about these kits, he said Land Rover actually moved the module on later vehicles.
He agreed that anything that could be done to extend the module's life was a good
idea – getting the module away from heat helps. But I should add that moving the
module won't make the car run any better, just potentially add life to the
component. All this will be in my workshop note. I'm not saying all RV8 owners
Remote Ignition Module Kit: the Module is not visible in the photo as it is mounted
under the bracket below the plug shown on left side of bracket. (Photo: Simon
Austin)
Simon Austin offers this modification saying “you’re not likely to find any
reference to the remote ignition module kit in any RV8 manuals as the kit is
actually intended for use on Land Rover vehicles. Since the RV8 uses the same
ignition system as the mid-90s Land Rovers, this remote kit can be added to an
RV8. The main reason for the kit is to extend the life of the ignition module by
getting it away from heat. Since the original module is attached to the distributor,
heat transference through the metal is a concern. As we all know, heat is an
electronic component's worst enemy.”
Why install this kit?
The RV8 ignition system utilizes the same components used on Land Rover
vehicles of that time period. Incorporated into this system is an external Ignition
Amplifier Module mounted directly to the distributor. This module is wired into the
ignition circuit between the coil and the distributor. As we all know, heat is an
electronic component’s enemy. In order to prolong the life of the module, a kit is
available to “remotely” mount the module away from the distributor, usually onto
the nearside inner wing.
The installation of this kit is not a requirement for an RV8. The stock system was
designed by engineers who (I hope) can be trusted. Your car should provide years
of enjoyment without this kit. With that in mind and after chatting with my local
V8 Register – MG Car Club
120813 RV8 remote ignition module
The module is shown under my thumb. The bend in the bracket will be explained
shortly.
1
RV8 Remote Ignition Module Kit STC 1856 Installation
I have included the instruction sheet that comes with the kit so you will see it only talks about installing it in a Land Rover. However, with John Cumming’s help, I
managed to overcome some slight wiring issues and got my kit to work. It took a couple of tries and some time with the RV8 wiring schematic (which I’ll include in
these notes as well).
V8 Register – MG Car Club
120813 RV8 remote ignition module
2
RV8 Remote Ignition Module Kit STC 1856 Installation
V8 Register – MG Car Club
120813 RV8 remote ignition module
3
RV8 Remote Ignition Module Kit STC 1856 Installation
(continued from page 1)
need to install this kit. I'm just passing on my experience with it. I would be
interested to hear what the specialists in the UK have to say about the kit if anyone
wants to contact them about it.
How do you install the kit?
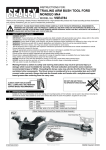
Since the kit is designed for use in a Land Rover truck, the instructions explain
how to mount it in such a vehicle – see page 2 above. I attempted to install this kit
some time ago but could not get it to work. I wired the kit as shown in the
instructions including disconnecting the existing coil wires (white and white/black).
I installed the kit with the bracket hanging loose. I wanted to test the system prior
to drilling holes. When I turned the key to start, the engine turned over fine but no
sign of ignition. Pondering this, I then realized the bracket must be grounded to
the car to complete the circuit. I added some ground wires (battery jumper cables
work well in this case) and then tried to start again . . . . . .nothing. So I reinstalled
the original wires and drove the car in stock form for a few more months.
This summer, I decided to have a go at it again and did some more research into
the installation. Angus Munro provided me with John Cumming’s contact
information as an owner who had the kit installed on his car. During emails, John
pointed out an item that is left out of the Land Rover instructions shown on page 3.
I hope he doesn’t mind but rather than type it all out again, here’s what he told me
in his first email:
I had a little problem sorting out the wiring for the new remote amplifier when I
fitted mine. I have just checked my wiring and it is as follows:
The long white terminal, marked 1, from the remote kit goes to the Coil + (positive)
terminal.
The white wire from the car loom also goes to the Coil + (Positive) terminal, was
connected to the coil with the old system.
The smaller terminal from the remote kit goes to the coil - (negative) terminal.
The white with black tracer wire also goes to the Coil (negative) terminal.
It doesn't tell you to fit the original wires from the car loom in the instruction
with the kit.
I added the “bold” to the last sentence to emphasize this fact. As I mentioned
earlier, I had removed the original wires from the coil and not connected them to
anything. It wasn’t until I researched the wiring that I discovered that the coil white
and white/black wires don’t just connect the coil to the distributor but also connect
the coil to the Ignition Resistor and the Electronic Fuel Control Unit.
By disconnecting the two original wires off the coil and leaving them hanging, I’d
disabled the Fuel ECU!
The service manual wiring diagram showing the connections between the coil,
module, resistor and ECU is on page 3.
Removing the existing module
Removal of this module requires patience, some dexterity and a 7/32” spanner.
Two screws hold it in place. Once the screws are removed, pry off the module
being careful not to bend the two tiny connections that remain on the distributor.
Because the module is mounted to an aluminium plate (heat-sink), you’ll likely find
remnants of “thermal grease” on the plate. This is commonly used in computers to
V8 Register – MG Car Club
120813 RV8 remote ignition module
Original ignition module attached to distributor. (Photo: Simon Austin)
aid a component's thermal dissipation. I don’t know if it’s required but I had some
thermal paste available so I applied some to the dummy module. I cleaned off the
distributor’s heat-sink plate and installed the dummy module. Again, patience and
dexterity are required to get the tiny screws in place. This is about the most
difficult job for this project.
The next order of business is to find a suitable mounting location for the kit’s
bracket. In the LR instructions, it states to use the coil’s mounting holes. Well, an
RV8 is shaped a little differently on the inner fenders (inner wings).
The second photo shown above shows the bracket after being modified to fit the
inner fender. Unfortunately, after placing the kit in its new home attaching the coil,
there was a conflict between the kit’s plugs and the coil. Two things cannot
occupy the same place at the same time.
So back to the drawing board. A more suitable location was found just above the
coil and below the fender line. In these two photos, disregard the pink wire at the
top. That’s for another component and not related to this project. The finned pipe
shown is part of the Air Conditioning system and connects to the compressor
shown just below the coil.
4
RV8 Remote Ignition Module Kit STC 1856 Installation
The location selected to mount the kit. It is the two coil mounting holes with the
paint removed to provide a good ground connection.
V8 Register – MG Car Club
120813 RV8 remote ignition module
5
RV8 Remote Ignition Module Kit STC 1856 Installation
I hope the information and photos are clear enough and provide enough insight
into installing this kit.
Is the kit worth the cost and time to install? As mentioned in the beginning, I felt
that anything I could do to prolong the life of an electronic component was worth it.
Land Rover themselves moved the module on later vehicles so that must mean
something. The other benefit to this kit is it uses a Rover ignition module, not an
aftermarket unit. I had a brand-new aftermarket unit fail after less than 400 miles.
I did install a Lucas module after this failure and although it’s worked well-enough
over the miles, the Rover module just seems to start the car a bit better. I’ll keep
the Lucas as a spare.
The kit I purchased came from JSF 4x4 in the UK. Angus Munro was kind
enough to accept delivery of the package and forward it to me in Canada. I did
find out later I can get the same kit from my local supplier but at higher cost.
My thanks go out to John Cumming for his technical advice and to Angus Munro
for being a great parts distributor.
This is the positive connection from the kit to the coil. It’s the white wire. The
“negative connection is not shown. It is the white/black wire.
Another view of the kit in relation to the coil showing wires connections. Photo #1
shows this connector along with the “negative” connector. The black module lower
right is not related to this kit. It’s a “Daytime Running Light” module required by
Canadian Law to be installed on our vehicles. The pink wire shown in the two
preceding photos is connected to this module.
Since I had to find a new location to mount the kit, I had to drill out holes in the
inner fender and then remove the paint around the holes to provide a good ground.
It can be a bit unnerving to drill holes on one’s car but once the first hole is drilled,
you’re committed and the nervousness goes away. I hope John doesn’t mind
again but here’s a photo of his kit mounting location. Similar to mine but a lot
straighter.
The actual wire connections are as follows:
Coil: original white and white/black wires from stock harness
White wire (labelled 1 in photos) from kit to + terminal
White/Black wire from kit to – terminal
Kit: long harness (~18”. Shown in Photo #1) connects dummy module mounted
on distributor to the black oval plug shown in John’s photo just above (with blue
and red wires showing).
The stock rectangular plug that was connected to the original distributor-mounted
module is no longer required but not to be removed. It is best tied off so as to
prevent getting caught in any moving parts. This is a photo from John showing this
V8 Register – MG Car Club
120813 RV8 remote ignition module
6