1
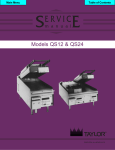
Models QS12 & QS24
Grills
Service Manual
050559- S
9/1/00
Table of Contents
Section 1: Introduction . . . . . . . . . . . . . . . . . . . . . . . . . . . . . . . . . . . . . . . . . . . . . . .
1
Safety . . . . . . . . . . . . . . . . . . . . . . . . . . . . . . . . . . . . . . . . . . . . . . . . . . . . . . . . . . . . .
2
Model QS Series Specifications . . . . . . . . . . . . . . . . . . . . . . . . . . . . . . . . . . . . . . .
4
Section 2: Controls and Systems . . . . . . . . . . . . . . . . . . . . . . . . . . . . . . . . . . . . . .
7
Control Operations . . . . . . . . . . . . . . . . . . . . . . . . . . . . . . . . . . . . . . . . . . . . . . . . . .
8
QS Series Control . . . . . . . . . . . . . . . . . . . . . . . . . . . . . . . . . . . . . . . . . . . . . . . . . . .
14
Maintenance Menu Flowchart . . . . . . . . . . . . . . . . . . . . . . . . . . . . . . . . . . . . . . . . .
15
Leveling Procedures . . . . . . . . . . . . . . . . . . . . . . . . . . . . . . . . . . . . . . . . . . . . . . . . .
16
Release Material Installation . . . . . . . . . . . . . . . . . . . . . . . . . . . . . . . . . . . . . . . . . .
19
Mechanical-Electrical Checkout . . . . . . . . . . . . . . . . . . . . . . . . . . . . . . . . . . . . . . .
20
Section 3: Troubleshooting . . . . . . . . . . . . . . . . . . . . . . . . . . . . . . . . . . . . . . . . . . .
21
General Troubleshooting Guide . . . . . . . . . . . . . . . . . . . . . . . . . . . . . . . . . . . . . . .
22
Control Board and Terminal Cleaning . . . . . . . . . . . . . . . . . . . . . . . . . . . . . . . . . .
23
Troubleshooting Flow Charts . . . . . . . . . . . . . . . . . . . . . . . . . . . . . . . . . . . . . . . . .
24
Product Quality Troubleshooting . . . . . . . . . . . . . . . . . . . . . . . . . . . . . . . . . . . . . .
30
Models QS12/QS24
Table of Contents
Table of Contents -- Page 2
Section 4: Parts . . . . . . . . . . . . . . . . . . . . . . . . . . . . . . . . . . . . . . . . . . . . . . . . . . . . . .
31
Warranty Explanation . . . . . . . . . . . . . . . . . . . . . . . . . . . . . . . . . . . . . . . . . . . . . . . .
32
QS12 Service Parts Exploded View . . . . . . . . . . . . . . . . . . . . . . . . . . . . . . . . . . . .
33
QS12 Operator Parts Exploded View . . . . . . . . . . . . . . . . . . . . . . . . . . . . . . . . . .
34
QS24 Service Parts Exploded View . . . . . . . . . . . . . . . . . . . . . . . . . . . . . . . . . . . .
35
QS24 Operator Parts Exploded View . . . . . . . . . . . . . . . . . . . . . . . . . . . . . . . . . .
36
QS 12 & QS 24 Carts . . . . . . . . . . . . . . . . . . . . . . . . . . . . . . . . . . . . . . . . . . . . . . . .
37
Box A.-Remote Key Pad (X78579) . . . . . . . . . . . . . . . . . . . . . . . . . . . . . . . . . . . .
38
Front of Lower Grill Assembly . . . . . . . . . . . . . . . . . . . . . . . . . . . . . . . . . . . . . . . . .
39
Box A.-Relay (X74036) . . . . . . . . . . . . . . . . . . . . . . . . . . . . . . . . . . . . . . . . . . . . . .
40
Pivot A.-Platen Complete (X78758) . . . . . . . . . . . . . . . . . . . . . . . . . . . . . . . . . . . .
42
Upper Platen Assembly (X78794) . . . . . . . . . . . . . . . . . . . . . . . . . . . . . . . . . . . . .
44
Heater Elements - Lower Grill . . . . . . . . . . . . . . . . . . . . . . . . . . . . . . . . . . . . . . . . .
46
Parts List . . . . . . . . . . . . . . . . . . . . . . . . . . . . . . . . . . . . . . . . . . . . . . . . . . . . . . . . . . .
47
Wiring Diagrams . . . . . . . . . . . . . . . . . . . . . . . . . . . . . . . . . . . . . . . . . . . . . . . . . . . .
53
Note: Continuing research results in steady improvements; therefore, information
in this manual is subject to change without notice.
CAUTION: Information in this manual is intended to be used by Taylor Authorized
Service Technicians only.
E September, 2000 Taylor
All rights reserved.
050559--S
The word Taylor and the Crown design
are registered trademarks in the United States
of America and certain other countries.
Table of Contents
Taylor
a division of Carrier Commercial Refrigeration, Inc.
750 N. Blackhawk Blvd.
Rockton, IL 61072
Models QS12/QS24
Section 1: Introduction
Models QS12/QS24
S
Safety
S
Model QS Series Specifications
1
Introduction
Safety
We at Taylor are committed to manufacturing safe
operating and serviceable equipment. The many
built-in safety features that are part of all Taylor
equipment are aimed at protecting operators and
trained service technicians alike.
S
This manual is intended exclusively for Taylor
authorized service personnel.
S
S
CAUTION!
To avoid personal contact with hot grill
surfaces or grease, always use extreme
caution when servicing, installing,
operating, and cleaning the grill.
S
S
S
Warning labels have been attached or
adhered to the grill to further stress
safety precautions. Please follow the
instructions indicated on such labels.
S
S
S
Stationary appliances which are not
equipped with a power cord and a plug or
other device to disconnect the appliance
from the power source must have an
all--pole disconnecting device with a contact
gap of at least 3 mm installed in the external
installation.
Failure to follow these instructions may result in severe
personal injury from electrical shock.
DO NOT operate the grill before reading the
Operator’s Manual.
DO NOT allow untrained personnel to
operate this machine.
Always follow general safety precautions
when servicing or operating the grills.
DO NOT use a water jet to clean or rinse the
grill. Failure to follow this instruction may result in the
following:
Failure to follow these instructions may result in
equipment damage, poor grill performance, health
hazards, or personal injury.
This unit is provided with a grounding lug that
is to be properly attached to the rear of the frame by
the authorized installer. The installation location is
marked by the symbol
and the frame.
DO NOT operate the grill unless it is
properly grounded.
DO NOT operate the grill with larger fuses
than specified on the data label.
DO NOT operate the grill unless all service
panels are restrained with screws.
DO NOT attempt any repairs unless the
power supply to the grill has been
disconnected.
DO NOT use the cord if it is frayed.
S
serious electrical shock
S
burns from hot steam
S
on the removable panel
liquid collecting inside the grill and
destroying electrical components.
070706
Introduction
2
Models QS12/QS24
S
S
DO NOT obstruct air intake and discharge openings:
4” (102 mm) minimum air clearance on the bottom and
3” (76 mm) at rear of the unit is required to allow for
adequate air circulation. Failure to comply will hinder
grill performance and cause damage to its
components.
DO NOT store flammable vapors, liquids, or
combustible material in the vicinity of the
grill.
The grills must be kept at least 3” (76 mm)
from combustible materials.
NOISE LEVEL: Airborne noise emission does not
exceed 70 dB(A) when measured at a distance of 1.0
meter from the surface of the machine and at a height
of 1.6 meters from the floor.
Failure to follow these instructions may result in a fire.
S
S
If the crossed out wheeled bin symbol is
affixed to this product, it signifies that this product is
compliant with the EU Directive as well as other similar
legislation in effect after August 13, 2005. Therefore,
it must be collected separately after its use is
completed, and cannot be disposed as unsorted
municipal waste.
DO NOT prepare or remove product without
the proper equipment.
USE EXTREME CAUTION when cleaning
the grill.
The grill is hot and can burn the operator if not handled
properly.
The user is responsible for returning the product to the
appropriate collection facility, as specified by your local
code.
For additional information regarding applicable local
laws, please contact the municipal facility and/or local
distributor.
DO NOT slide the grill with the legs attached.
Failure to follow this instruction may damage the grill
or cause personal injury.
050815
Models QS12/QS24
3
Introduction
Model QS Series Specifications
Electrical
Approximate Weights
QS12 Electrical
208-240/50/60/3
With Platen
QS24 Electrical
208-240/50/60/3
QS12 (One Platen)
Net:
265 lbs. (120.2 kgs.)
Crated: 306 lbs. (138.8 kgs.)
12.4 cu. ft. (0.35 cu. m.)
QS24 (Flat)
Net:
210 lbs. (95.3 kgs.)
Crated: 275 lbs. (124.7 kgs.)
QS24 (One Platen)
Net:
305 lbs. (138.3 kgs.)
Crated: 370 lbs. (167.8 kgs.)
QS24 (Two Platens)
Net:
400 lbs. (181.4 kgs.)
Crated: 465 lbs. (210.9 kgs.)
22.0 cu. ft. (0.62 cu. m.)
Cord Connected
Total Amps
Supplied With
KW
27.0
30 amp cord
NEMA L15-30P
9.6
Permanently Connected
Total Amps
Requires
KW
Flat
30.0
60 amp cord
IEC309-1 & -2
10.8
With one platen
42.0
60 amp cord
IEC309-1 & -2
15.0
With two platens
53.0
60 amp cord
IEC309-1 & -2
19.2
Air Clearance
Available in electric only. Other electrical
characteristics are available. (For exact electrical
information, always refer to the data plate of the unit.)
These grills require a minimum of 4” (102 mm)
on the bottom of the unit and 3” (76 mm) from the rear
of the unit to allow for adequate air circulation. Failure
to comply with these dimensions will hinder grill
performance and cause damage to its components.
Multiple QS Series grills may be stored side by side.
Disconnect Switch
If the unit has no plug, a separate disconnect switch
must be installed, or another alternate means to
disconnect power must be implemented.
Dimensions
QS12 Width:
QS24 Width:
Depth:
Height:
Introduction
The QS Series grills must be kept at least 3”
(76 mm) from combustible materials. Failure to comply
will result in a fire hazard.
12” (305 mm)
24” (609 mm)
35-1/2” (902 mm)
15-3/8” (391 mm) to the top of the
back splash shield.
20” (508 mm) with the optional
upper platen lowered.
These units are designed and constructed to meet
stringent safety and sanitation requirements for NSF
and other food service regulatory agencies.
Specifications are subject to change without notice.
4
Models QS12/QS24
Model QS12 Specifications
Model QS24 Specifications
040715
Models QS12/QS24
5
Introduction
Notes:
Introduction
6
Models QS12/QS24
Section 2: Controls and Systems
Models QS12/QS24
S
Control Operations
S
QS Series Control
S
Maintenance Menu Flowchart
S
Leveling Procedures
S
Release Material Installation
S
Mechanical-Electrical Checkout
7
Controls and Systems
Control Operations
Rocker (Power) Switch
(Note: The QS12 has one cooking zone and the QS24
has two cooking zones.)
The rocker (power) switch, when placed in the ON
position, allows control panel operation. The power
switches are located on the front panel next to the
keypad display.
3
Indicator Light
EXIT
The lights on the keypad display indicate when the
heaters are operating, per platen and plate. (See
Heating Zones.)
UF
TEMP
MENU
UP
DOWN
1
UM
4
UR
TIME
LR
I
LM
LF
Heating Zones
R
M A N U F A C T U R E D
B Y
R O C K T O N ,
Each half of the lower (12”) cook surface is referred to
as a zone. Each upper cook surface is referred to as
a platen. Within each zone and platen are three
independent electrical heating elements. The
elements operate independently to assure an even
temperature throughout the cooking surfaces.
T H E
I L L I N O I S
T A Y L O R
0
C O M P A N Y
U . S . A .
2
Figure 1
ITEM
1
2
3
4
5
Temperature Controls
Each 12” grill surface is equipped with individual
temperature controls. The lower cooking surface
temperatures can be set manually from 150_ - 400_F
(65_ - 204_C). The upper platen cooking surface
temperatures can be set manually from 150_ - 425_F
(65_ - 219_C). The left and right sides (zones) of the
grill operate independently.
DESCRIPTION
Power Switch
Keys
LED Display
Indicator Lights
Timer Button
The keys are illustrated with icons, descriptive of their
functions, and referred to in these instructions as
follows:
Control Board
= MENU
These units are equipped with one microprocessor
control per 12” of cook surface, which is programmable
by the operator. The QS12 has one 12” cook surface
and one control board. The QS24 has two 12” cook
surfaces and two control boards.
= TIME
= TEMP (Temperature)
= UP ARROW
Keypad and Display
= DOWN ARROW
Located on the front panel beneath each cooking zone
is an alpha-numeric LED display and a group of keys.
These are used for operating, programming, and
servicing the grill and its microprocessor control.
Controls and Systems
The display is a visual message center for the user,
operator (maintenance personnel or manager), and
the service technician.
8
Models QS12/QS24
Operating Screen and Controls
Cook Temperatures
The VERSION SCREEN is viewed when a grill is
powered for normal operation. It indicates the version
of software the microprocessor is using.
Each item has two programmable cook temperatures.
The first temperature is for the upper platen (SU1 400).
The second temperature is for the lower surface
(pertaining to that side on the QS24) (SL1 325).
VER 2.00
Note: Factory default settings are 400_F for the
upper platen, and 325_F for the lower platen. The
upper heater can be set from 150_F to 425_F. The
lower heater can be set from 150_F to 400_F.
Note: If the grill is not equipped with the upper platen
option, the words “NO PLTN” will appear on the display
for two seconds before the version screen appears.
To adjust the heaters for a particular item, scroll to that
item. Press and hold the TEMP keypad for five
seconds. Release the keypad and the message “SU1
400” will appear.
The MEMORY INITIALIZATION SCREEN appears if
the grill has never been used or in the rare event that
set-up parameter memory has been lost.
SU1 400
MEM INIT
Press the UP or DOWN arrows to adjust the
temperature for the upper surface. Once the desired
temperature is displayed, press the MENU keypad
and the message “SL1 325” will appear on the screen.
When this screen appears on the display, the
parameters previously programmed by the operator
will revert back to the factory default values. Pressing
any keypad will advance the display to the VERSION
screen.
SL1 325
Factory Defaults:
Upper 400_F
TM1
30
Lower 325_F
TM2
0
If set-up parameter memory is lost, programmed
names will revert back to the “ITEM” message.
Press the UP or DOWN arrows to adjust the
temperature for the lower surface.
After the VERSION SCREEN is displayed and a
keypad is pressed, the grill will enter the COOK mode
of operation.
Once the desired temperature is displayed, press the
MENU keypad and the screen will return to the normal
cook menu screen.
Models QS12/QS24
9
Controls and Systems
Cook Timers
Each item selection has two programmable cook
timers. The first timer is the cook cycle timer. This timer
measures the amount of time the product should be
cooked.
TM2 0
Step 3
Press the UP or DOWN arrows to adjust the time
setting for the alert timer (timer 2).
The second timer is an alert timer. This timer can be
set to alert the operator to add seasonings, to turn the
product, or to start warming buns for the cooked
product.
Step 4
Once the desired alert timer has been set, press the
MENU keypad, and the screen will return to the normal
cook menu screen. If timer 2 is not needed, set it at “0”.
For example, Item 1 has been programmed to cook for
30 seconds. The operator wishes to add salt in the
middle of the cook cycle. Timer 2 should then be
programmed for 15 seconds. When the cook cycle
starts, a tone will sound for two seconds to alert the
operator that the cook cycle has begun. Once the cook
cycle begins, a tone will sound 15 seconds after the
first timer starts. This tone alerts the operator to raise
the platen, season the product and lower the platen to
complete the cycle. Press the timer keypad to stop the
tone. The first timer will continue to measure the full 30
second cook cycle. A tone will sound 5 seconds before
the time elapses, and will continue to sound until the
timer keypad has been pressed.
Fault Screen
If the grill experiences a system failure, a fault
message will appear on the display and a tone will
sound.
FLT HTUM
An example of the FAULT SCREEN is illustrated in the
previous figure. The screen appears when the
controller has detected a fault in the system. The code
letters “FLT” is an abbreviation for “fault”. The next set
of code letters indicate the type of fault and the zone
affected. Following is a list of possible codes that may
appear on the screen:
Note: The factory default settings are 30 seconds for
the first (cook cycle) timer, and 0 seconds for the
second (alert) timer. The timers can be set from 0 to
3,600 seconds. The second timer cannot be
programmed for a longer time setting than the first
timer.
To adjust the timers for a particular item, scroll to that
item. Press and hold the TIME keypad for five
seconds. Release the keypad and the message “TM1”
will appear next to the current time setting.
HTUF High Temperature Upper Front zone
exceeded
HTUM High Temperature Upper Mid zone exceeded
HTUR High Temperature Upper Rear zone exceeded
HTLF High Temperature Lower Front zone
exceeded
HTLM High Temperature Lower Mid zone exceeded
HTLR High Temperature Lower Rear zone exceeded
TCUF Upper Front thermocouple fault
TCUM Upper Mid thermocouple fault
TCUR Upper Rear thermocouple fault
TCLF Lower Front thermocouple fault
TCLM Lower Mid thermocouple fault
TCLR Lower Rear thermocouple fault
The user must press the MENU and TEMP keypads
to acknowledge the fault. The fault description and
item name will appear alternately on the display. The
zone that has the fault will shut down while the rest of
the grill will be operational.
TM1 30
Step 1
Press the UP or DOWN arrows to adjust the time
setting for the total cook cycle.
Step 2
Once the desired cook time has been set, press the
MENU keypad and the message “TM2” will appear
next to the current time setting.
Controls and Systems
10
Models QS12/QS24
Maintenance Menu
Calibrating verifies proper temperatures of heating
elements.
The Maintenance Menu provides five screens to allow
managers and service technicians to monitor grill
performance.
Note: A calibrated pyrometer must be used for
calibration.
To enter the Maintenance Menu while any item is
displayed, press and hold the MENU keypad for
approximately 5 seconds and release. The following
screen will appear on the display:
Step 2
Place the pyrometer disc on the upper front heating
element of the grill. Using the arrow keypads, enter the
temperature shown on the pyrometer for the upper
front heating element.
Note: The indicating lights should be lit when
calibration adjustments are made.
CODE 0000
Press the TIME keypad until the first digit is “5”.
Example: CODE 5000.
Press the TEMP keypad until the next digit is “3”.
Example: CODE 5300.
Press the UP Arrow until the next digit is “7”.
Example: CODE 5370.
Press the DOWN Arrow until the last digit is “6”.
Example: CODE 5376.
Press the MENU keypad to accept the access code.
The following screen will appear on the display:
Note: If an incorrect code is entered, the display will
return to the COOKING screens.
Figure 2
Step 3
Press the MENU keypad to display the calibration
screen for the upper middle heating element. Place the
pyrometer on the upper middle heating element. Using
the arrow keypad, enter the temperature reflected on
the pyrometer for the upper middle heating element.
CALIBRAT
Step 1
Press the MENU keypad to enter the calibrate mode
and the following message will appear on the screen.
Note: Calibration is allowed only when the Item 1
temperatures are within 50_F (28_C) of the set point.
Step 4
Repeat this procedure for the remaining upper rear
and lower elements. When the last zone has been
calibrated, press the MENU keypad to return to the
CALIBRAT screen.
UFXXXF
Note: Calibration is allowed only when the Item 1
temperatures are within 50_F (28_C) of the set point.
Step 5
Press the UP arrow to display the SCALE message.
There are three lower heating elements in each cook
zone and three heating elements in the upper platen
(if applicable). The calibrating screens allow
calibration of each independent heating element.
Note: The CALIBRAT screen is the base
maintenance screen. All other maintenance
functions are accessible through the CALIBRAT
screen.
Models QS12/QS24
11
Controls and Systems
Step 6
Press the MENU keypad to display “SCALE F”.
ITM1
Step 7
Press the UP arrow keypad to choose the Fahrenheit
or the Celsius temperature scale:
Step 13
Using the UP and DOWN arrow keypads, enter the
desired letter (A - Z) or number (0 - 9) ( -- _ ). Once the
character letter is entered, press the MENU keypad to
move the cursor to the next position. Up to four
characters may be entered.
SCALE F or C
Step 8
If Fahrenheit is the desired temperature scale, press
the MENU keypad. If Celsius is desired, press the UP
arrow.
POM1
Step 9
Press the MENU keypad to return to the SCALE
message.
Step 10
If desired, the names of specific products can be
programmed to appear on the display instead of ITEM
numbers. While at the SCALE message display, press
the UP arrow to display the “NAMES” message.
PORK
NAMES
Step 14
After the last character has been entered, press the
MENU keypad to return to the message “NAME1”.
Step 15
Use the UP arrow keypad to display “NAME2”.
Step 11
While at the NAMES message display, press the
MENU keypad and the message “NAME1” will appear
on the display. This message indicates that the
operator can program a specific product name to
appear for the first item on the menu.
Repeat steps 6-9 until all item names have been
entered and the control will return to the message
“NAME1”.
Step 16
After entering the desired characters in the NAMES
screens, the control will return to “NAME1”.
NAME1
Press the DOWN arrow to display “NAMES”.
Step 17
Press the UP arrow to display “LANGUAGE”, and
press the MENU keypad to display “ENGLISH”.
Step 12
Press the MENU keypad again, and the message
“ITM1” will appear on the display. The letter “I” will be
flashing above the cursor.
Controls and Systems
Press the MENU keypad to return to the “LANGUAGE”
display.
12
Models QS12/QS24
Step 18
Press the UP arrow to display “MONITOR”.
Step 20
Press the UP arrow to display “CANCEL”, and press
the MENU keypad to display “MONITOR”.
Press the MENU keypad to display “UF XXX F” to
monitor the upper front temperature.
Pressing the MENU and TEMP keypads at the same
time will return the display to the item number or the
programmed name last displayed on the screen.
Step 19
Continue to press the UP arrow to monitor the
remaining five zones.
Models QS12/QS24
13
Controls and Systems
QS Series Control
040715
Controls and Systems
14
Models QS12/QS24
Maintenance Menu Flowchart
040715
Models QS12/QS24
15
Controls and Systems
Leveling Procedures
Figure 3
Step 1
The leveling adjustment needs to be performed while
the grill is at operating temperature. Remove the cook
surface shroud and release sheet.
Step 3
Raise or lower both gap pins on the front gap slide until
they are flush with the top edge of the gap slide.
Repeat this step for the rear gap slide. Slide the gap
slide to the right.
Step 2
To allow adjustment of the gap pins, loosen the two set
screws located on the side of the front and rear gap
slide.
Figure 4
Controls and Systems
Figure 5
16
Models QS12/QS24
Step 6
Wearing proper protection, carefully attempt to raise
the gap slide to evaluate which gap pin is in need of
adjustment.
Step 4
For each cook surface requiring adjustment, place 4
gap blocks on the cook surface, approximately 2”
(51 mm) in from each corner.
Figure 8
Figure 6
With the gap slide raised, slowly turn the gap pin
needing adjustment until it makes contact with the
cook surface. Repeat these steps for both gap
slides.
Step 5
Lower the cook surface assembly. Loosen and slowly
move the T-handle to the left until the gap pins in the
gap slides touch the cook surface, and tighten the
T-handle.
Figure 9
Step 7
Raise the upper cook surface and remove the four gap
blocks.
Figure 7
Models QS12/QS24
17
Controls and Systems
Step 8
Lower the upper cook surface into the COOK position.
Step 10
If the unit rocks, split the adjustment for gap pins
across the uneven corners, as shown in Figure 12.
Figure 12
Figure 10
Step 11
After adjusting, verify the unit for stability.
Step 9
Wearing proper protection, attempt to rock the cook
surface assembly. Apply pressure on the locating pins
at opposite corners to each other as shown in
Figure 11.
Step 12
If all adjustments on the cook surface are correct, and
no rocking occurs, tighten the two screws located on
the side of the front and rear gap slides to lock all
adjustments from moving.
It is highly recommended that the gap
slides and the gap slide retainers be
removed at least weekly for cleaning these
parts and the cook surface shroud behind
these parts.
These parts are easily removed by
removing the locating pins and holding
both parts, because they are not attached
together, and pulling them from the cook
surface.
Take the gap slides to the sink for
cleaning. (Be sure to re-install the gap
slides as they were removed, i.e., “F”
front.)
Figure 11
Note: Failure to wear proper protection could result in
injury.
Controls and Systems
18
Models QS12/QS24
Release Material Installation
Note: Release material is used on units with upper
platens only.
Step 3
Insert the second rod through the opposite hemmed
side of the release material sheet. Grasp both ends of
the rod, pull the release material up and around the
non-spring side of the upper cooking surface and
attach the rod ends to the retaining clips. Turn the rods
so that the hooked end is facing downward.
Step 1
Lay the release material sheet on the lower plate and
carefully lower the upper platen.
Step 2
Starting with the spring side, slide the straight end of
the release material rod through the front spring,
continue through the hemmed end of the release
sheet, and through the rear spring.
Models QS12/QS24
Step 4
Raise the platen and assure that the release material
sheet fits evenly and snugly on the upper platen.
Rotate the release material sheet on an every other
day basis.
19
Controls and Systems
Mechanical-Electrical Checkout
Step 1
Check the tightness of all screws and terminals on
electrical components.
Step 5
Verify cook timers (if active).
Step 6
Inspect all mechanical fasteners on the lift
mechanism. Make sure there are no loose nuts or
bolts. Secure the back panels and the grease plates.
Step 2
With the power switches off, record the voltage of all
supply circuits at the circuit breakers. Record the
voltage of all supply circuits at the terminal strip on the
front of the grill. The volt readings should match.
Step 7
Calibrate temperatures according to instructions on
page 11.
Step 3
With the unit properly connected to the supply circuit,
place one rocker (power) switch in the ON position and
record the voltage reading at the terminal strip. Repeat
this step for the second rocker (power) switch. The volt
readings should continue to match. If the volt reading
at the terminal strip drops significantly, the circuit
supply is inefficient or the power cord is undersized or
too long.
Step 8
Verify leveling adjustments according to instructions
on page 16.
Step 9
Secure all panels and note the condition of the
machine’s exterior.
Step 4
Start the grill. When operating temperatures have
been reached, lower each upper platen into the COOK
position. The control will display “ITEM1”.
Note: To conserve energy and for the grill to heat up
faster, have the upper platen in the COOK position.
Controls and Systems
20
Models QS12/QS24
Section 3: Troubleshooting
Models QS12/QS24
S
General Troubleshooting
S
Troubleshooting Flow Charts
S
Product Quality Troubleshooting
21
Troubleshooting
General Troubleshooting Guide
PROBLEM
1. The grill will not heat.
PROBABLE CAUSE
a. The power cord is not
connected.
a. Check the power connection.
b. The circuit breaker is tripped.
b. Reset the circuit breaker.
c. The power switch is in the
“OFF” position.
c. Place the power switch in the
“ON” position.
d. The power switch is faulty.
d. Replace the power switch.
e. The relay board is faulty.
e. Replace the relay board.
f. The relay is faulty.
f. Replace the relay.
2. One heater will not heat.
a. The control is not set correctly.
(Indicator light is not lit. The
display is flashing the message
“TOO COOL”.)
Troubleshooting
a. Check temperature setting.
b. The unit displays a fault.
b. Clear the fault. If action is
ineffective, evaluate the
thermocouple connections and
the relay board.
c. The relay board is faulty.
c. Replace the relay board.
d. The relay is faulty (lower).
d. Replace the relay.
3. One heater will not heat.
a. The heater is faulty.
(Indicator light is lit. The
display is flashing the message
“TOO COOL”.)
4. One heater is overheating.
(The display is flashing the
message “TOO HOT”.)
REMEDY
a. Replace the heater.
b. The thermocouple is faulty.
b. Replace the thermocouple.
c. The thermal overload is faulty.
c. Replace the overload.
d. The relay board is faulty.
d. Replace the relay board.
e. The unit displays a fault.
e. Clear the fault. If action is
ineffective, evaluate the
thermocouple connections and
the relay board.
f. The relay is faulty (lower).
f. Replace the relay.
a. The relay board is faulty.
a. Replace the relay board.
b. The unit displays a fault.
b. Clear the fault. If action is
ineffective, evaluate the
thermocouple connections and
the relay board.
c. The relay is faulty.
c. Replace the relay.
22
Models QS12/QS24
General Troubleshooting Guide (Continued)
PROBLEM
PROBABLE CAUSE
REMEDY
5. The upper platen will not stay
in the raised position.
a. Defective gas filled cylinder(s).
a. Replace the cylinder(s).
6. The product is under-cooked,
overcooked, or cooking
unevenly.
a. The release material sheet is
worn.
a. Replace the release material
sheet.
b. The cooking time is incorrect.
b. Adjust the cook time
accordingly.
c. The temperature setting is
incorrect.
c. Adjust the temperature setting.
d. The gap setting is incorrect.
d. Adjust the gap.
e. The heater is not heating.
e. Refer to Problem #2.
f. The upper platen surface has
carbon build-up.
f. Closing procedures must be
followed to remove carbon
build-up.
g. The incorrect item is selected.
g. Select the proper item.
h. The platen is not level.
h. Refer to the Leveling
Procedures on page 16.
a. Refer to the “fault screens”,
page 10.
a. Clear the fault. If action is
ineffective, evaluate the
thermocouple connections and
the relay board.
7. The control is displaying a
fault.
Control Board and Terminal Cleaning
Under several occasions we have found controls and
thermocouples replaced when faults such as TOO
COOL, TOO HOT, and thermocouple faults are
displayed. We have found that using contact cleaner
on the terminals, connectors, and board surfaces will
clear these problems. If contact cleaner is used,
please be sure all components are DRY before
restoring power to the unit.
This option is suggested prior to component
replacement.
Models QS12/QS24
23
Troubleshooting
Troubleshooting Flow Charts
Remote Key Pad Box Assembly
Troubleshooting
24
Models QS12/QS24
Platen
Models QS12/QS24
25
Troubleshooting
Lower Heater
Thermal Overload
Troubleshooting
26
Models QS12/QS24
Rocker Switch
Transformer
Models QS12/QS24
27
Troubleshooting
Relay Board
Troubleshooting
28
Models QS12/QS24
Thermocouple
Models QS12/QS24
29
Troubleshooting
Product Quality Troubleshooting
PROBLEM
1. Under-cooked product.
2. Overcooked product.
3. Improper sear.
Troubleshooting
CAUSE
REMEDY
a. Freezer burn.
a. Use fresh product.
b. Worn release material.
b. Reverse the release material
daily, and change material
when worn.
c. Improper cook times.
c. Set timer according to
instructions on page 10.
d. Incorrect gap setting.
d. Set gaps according to
instructions on page 16.
Choose the proper gap setting.
e. Improper cook temperature.
e. Program temperatures
according to instructions on
page 9.
f. Platen not level.
f. Level the platen according to
instructions on page 16.
g. Improper product removal.
g. Remove the product according
to the instructions in the
Operator’s Manual.
a. Incorrect cook times.
a. Program cook times according
to instructions on page 10.
b. Improper product removal.
b. Remove product according to
instructions in the Operator’s
Manual.
c. Incorrect gap setting.
c. Set gaps according to
instructions on page 16.
Choose the proper gap setting.
d. Improper cook temperature.
d. Program temperatures
according to instructions on
page 9.
e. Wrinkled release sheet.
e. Replace the release sheet.
f. Platen not level.
f. Level the platen according to
instructions on page 16.
a. Worn release material.
a. Rotate release material daily,
and change material when
worn.
b. Incorrect gap setting.
b. Set gaps according to
instructions on page 16.
Choose the proper gap setting.
c. Platen not level.
c. Level the platen according to
instructions on page 16.
30
Models QS12/QS24
Section 4: Parts
Models QS12/QS24
S
Warranty
S
Exploded Views
S
Complete Parts List
S
Wiring Diagrams
31
Parts
Warranty Explanation
Parts
Labor
Class 103 Parts:
The Taylor warranty is valid only if required service
work is performed by an authorized Taylor technician.
The warranty for new equipment parts is one year, with
a replacement parts warranty of 3 months.
For more details, see the warranty/check--out card.
Class 000 Parts:
Wear Items -- no warranty.
Class 212 Parts:
The warranty for new equipment parts is two years,
with a replacement parts warranty of 12 months.
Parts
32
Models QS12/QS24
QS12 Service Parts Exploded View
ITEM
DESCRIPTION
PART NO.
ITEM
DESCRIPTION
PART NO.
1
PLATE A.-LOWER
X79254
10
SHIELD-GREASE FRONT
079433
1a
CHUTE A.-GREASE
X78419
11
BRACKET A.-SHIELD LEFT
X79429
2
LEG-4”-3/8-16 STUD
036397
12
WIPER-REAR
079440
3
STANDOFF-FRONT
079289
13
COVER A.-REAR
X79444
4
COVER A.-BOTTOM
X79527
14
BRACKET-MTG SIDE RIGHT
079436
5
PANEL-REAR
079280
15
WIPER-SIDE RIGHT
079438
6
STANDOFF-REAR
079288
16
GUARD A.-FRONT
X79426-SP
7
SCREW-10-32X3/8 TRUSS HD
024298
17
WIPER-FRONT
079439
8
SHIELD-GREASE REAR
079434
18
BRACKET-MTG SIDE LEFT
079435
9
BRACKET A.-SHIELD RIGHT
X79431
19
WIPER-SIDE LEFT
079437
Models QS12/QS24
33
Parts
QS12 Operator Parts Exploded View
ITEM
DESCRIPTION
PART NO.
ITEM
DESCRIPTION
PART NO.
1
BAR-RELEASE SHEET
079930
6
STANDOFF-FRONT
079289
2
SHEET-SEAMED RELEASE
078804
7
SCRAPER-TROUGH
079726
3
STANDOFF-REAR
079288
8
SCRAPER-TEFLON WIPER
075887
4
SPRING-.438 OD X .046 X 1.75
079704
9
TRAY A.--GREASE
X79940-SER
5
BRUSH (GAP CLEANER)
074166
10
COVER--TOP
079969
Parts
34
Models QS12/QS24
QS24 Service Parts Exploded View
14
15
16
13
17
12
6
18
11
20
5
9
10
8
7
1a
1
19
UF
MEN
U
UM
EXIT
TIME
UR
TEM
P
LR
UP
LM
DOW
N
LF
M
A
N
U
F
A
C
T
U
R
R
E
O
C
D
K
T
O
B
N
Y
,
T
I L
L
H
E
I N
O
I S
T
A
Y
U
L
. S
O
. A
R
.
R
C
O
M
P
A
N
Y
ON
OFF
ON
OFF
2
3
4
ITEM
DESCRIPTION
PART NO.
ITEM
DESCRIPTION
PART NO.
1
PLATE A.-LOWER
X78748
11
BRACKET A.-SHIELD LEFT
X79429
1a
CHUTE A.-GREASE
X78419
12
BRACKET-MTG SIDE RIGHT
079436
2
COVER-ACCESS LINE VOLT.
078511
13
WIPER-SIDE RIGHT
079438
3
LEG-4”-3/8-16 STUD
036397
14
GUARD A.-FRONT
X79426-SP
4
COVER-BOTTOM
078535
15
WIPER-FRONT
079439
5
PANEL-REAR
079044
16
BRACKET-MTG SIDE LEFT
079435
6
COVER-LINKAGE
079441
17
WIPER-SIDE LEFT
079437
7
SHIELD-GREASE REAR
079434
18
WIPER-REAR
079440
8
BRACKET A.-SHIELD RIGHT
X79431
19
STANDOFF-FRONT
079289
9
SHIELD-GREASE FRONT
079433
20
STANDOFF-REAR
079288
COVER A.-REAR
X79423
10
051128
Models QS12/QS24
35
Parts
QS24 Operator Parts Exploded View
10
1
2
3
7
UF
ME
UM
NU
EXI
T
TIM
E
UR
TEM
LR
P
UP
LM
DO
LF
M
A
N
U
F
A
C
T
U
R
R
E
O
C
WN
D
K
T
O
B
N
Y
,
T
I L
L
H
E
I N
O
I S
T
A
Y
U
L
. S
O
. A
R
.
R
C
O
M
P
A
N
Y
ON
OF
F
ON
OF
F
6
9
5
4
8
ITEM
DESCRIPTION
PART NO.
ITEM
DESCRIPTION
PART NO.
1
BAR-RELEASE SHEET
079930
6
SCRAPER-TEFLON WIPER
075887
2
SHEET-SEAMED RELEASE
078804
7
COVER-TOP
079969
3
SPRING-.438 OD x .046 x 1.75
079704
8
BRUSH (GAP CLEANER)
074166
4
TRAY A.-GREASE
X79940-SER
9
STANDOFF-FRONT
079289
5
SCRAPER-TROUGH
079726
STANDOFF-REAR
079288
10
051128
Parts
36
Models QS12/QS24
QS 12 & QS 24 Carts
ITEM
DESCRIPTION
PART NO.
ITEM
DESCRIPTION
PART NO.
A
QS12 CART
B
QS24 CART
1
CART A.-GRILL
X79964
1
CART A.-GRILL
X79953
2
LEG-INSERT
079990
2
LEG-INSERT
079990
3
PIN-LEG HEIGHT ADJUST
079991
3
PIN-LEG HEIGHT ADJUST
079991
4
CASTER-SWV 3 IN WHEEL
074256
4
CASTER-SWV 3 IN WHEEL
074256
5
CASTER-3 IN WHEEL - LOCKING
074257
5
CASTER-3 IN WHEEL - LOCKING
074257
6
BRACKET A.-LEG SUPPORT
X79994
Models QS12/QS24
37
Parts
Box A.-Remote Key Pad (X78579)
QS12 & QS24
ITEM
DESCRIPTION
PART NO.
ITEM
DESCRIPTION
PART NO.
1
SCREW-4-40X1/2 RHM STEEL
030427
10
PCB A.-REMOTE GRILL-GREEN
X50412
2
BEEPER-WITH WIRE HARNESS
078617
11
STANDOFF-NYLON 6-32X1-3/4L
078913
3
BUSHING-SNAP .500ID X.625
075747
12
HARNESS-KEYPAD TIMER
074614
4
SCREW-6-32X3/8 BIN.HD SLOT
002201
13
STANDOFF-6 X 5/16
078499-005
5
WASHER-#6 SHAKEPROOF
024541
14
BLOCK-CONTACT W/ADAPTER
074621
6
WASHER-#4 SHAKEPROOF-SS
043075
15
SWITCH-MEMBRANE-5
044520
7
NUT-4-40 HEX -PLATED-
038623
16
PAD A.-KEY REMOTE *RETROF
X74618
8
COVER-CONTROL *QS24*
078572
17
DECAL-KEY PAD *RETROFIT*
074617
9
HARNESS-WIRE REMOTE
078614
18
PUSHBUTTON-RETROFIT QS
074620
040715
Parts
38
Models QS12/QS24
Front of Lower Grill Assembly
ITEM
DESCRIPTION
PART NO.
ITEM
DESCRIPTION
PART NO.
1
Screw-8-32 x 1/4 NP Slot Pan
078525
6
Plate-Terminal Block
078754
2
Transformer-Cont.-40VA 120/200
045754
7
Decal-Terminal Block (Left)
079046-23L
3
Switch-Rocker SPST Off-On
078418
8
Bushing-Snap 1-5/8 ID x 2 OD
043637
4
Block-Terminal 5P Screw 75A
079833
9
Decal-Terminal Block (Right)
079046-23R
5
Partition A.-Grease Tray
X79944
Panel A.-Control (QS24)
X78405
*5a
Gasket--Box A. (Partition)
074154
Panel A.-Control (QS12)
X79265
10
*Not Shown
Models QS12/QS24
39
Parts
Box A.-Relay (X74036)
040715
Parts
40
Models QS12/QS24
Box A.--Relay (X74036) Parts ID List
ITEM
DESCRIPTION
PART NO.
ITEM
DESCRIPTION
PART NO.
1
SCREW-10-32X3/8 TRUSS HD
024298
10
NUT-8-32 HEX
000969
2
COVER-CONTROL BOX
074002
11
SCREW-8-32 X 5/16 RD HD SS
017552
3
PCB A.-CONTROL
X53512-SER
12
BRACKET ’E’ RELAY
074040
4
BLOCK-TERMINAL-PLUG 6P
040322-002
13
RELAY 30A-277V-12VDC
074041
5
STANDOFF-NYLON 6-32X1L
078635
14
CONNECTOR-MATE LOK 6
029248
6
HARNESS-WIRE
074039
*
BUSHING-SNAP 3/8IDX1/20D
091254
7
SCREW-6-32X3/8 BIN. HD
002201
*
SOCKET-.084 OD/14-20 AWG
021625
8
BOX A.-CONTROL
X74037
*
GROUNDING A.-STRAP
X74123
9
WASHER-#8 SHAKEPROOF
000964
*NOT SHOWN
040715
Models QS12/QS24
41
Parts
Pivot A.-Platen Complete (X78758)
040715
Parts
42
Models QS12/QS24
Pivot A.-Platen Parts ID List
ITEM
DESCRIPTION
PART NO.
ITEM
DESCRIPTION
PART NO.
1
Arm-Platen
078520
22
Rod-Linkage 3/4” Diameter
079216
2
Screw-1/4-20x3/4 SS Truss Hd
078521
23
E-Ring 3/4
077046
3
Handle-Platen Lift
078592
24
Pin-Linkage Arm
078664
4
Spacer-1-1/2 IDx2-1/8 ODx.005
078524
25
Plate-Plated Linkage Pivot R
078559
5
Screw-1/4-20 x 3/8 Allen Set
001801
*26
Arm-Platen Linkage
079192
6
Pivot-Platen Arm
078556
27
Screw--1/4--20--1-1/4 Hex
027798
7
Washer-1/4 Shakeproof External
000656
28
Retainer-Bearing
079191
8
Screw-1/4-20x3/4 Hex Hd SS
029823
29
Bearing-Linkage Arm
079213
9
Screw-10-32 x 1/2 MF Hex Cap
020982
30
Nut-1/4-20 MF Lock
017523
10
Bracket-Wire Tube
078538
31
Pivot A.-Platen
X78759
Mount-Cylinder Lift
079193
11
Bearing-Platen Arm Pivot
078541
32
12
Linkage-Pivot Upper
078760
**
13
Rod-Platen Linkage Upper
078550
33
Bearing-Open End Needle
078652
14
E-Ring 1/2
024908
34
Plate-Plated Linkage Pivot L
078560
15
Rod-Platen Linkage Mid
078549
35
Screw-1/4-20 x 1-1/4 MF Hex
024351
16
Bearing-Open End Needle
078522
36
Rod-Platen Linkage Mid
079194
17
E-Ring 3/8
038958
*37
Cylinder--Compressed Gas
074313
18
Cap-Bearing Platen Arm
078548
38
Bead-Trimlock Edging
029885-325
19
Bearing-Open End Needle
078523
39
Bracket A.--Cylinder Stop
X74272
20
Bearing-Cylinder Mount
079214
40
E--Ring
038958
21
Rod-Cylinder Mounting
079195
Screw--1/4--20x5/8 MF Hex (4)
017522
*Starting with serial number K4024564, 079192 Arm and
074313 Cylinder were replaced with 070453 Arm and
070439 Cylinder. These parts can be installed on
existing units as a pair, NOT independently. Refer to
Service Bulletin #138SG dated 4/26/04.
**Not Shown
040715
Models QS12/QS24
43
Parts
Upper Platen Assembly (X78794)
Parts
44
Models QS12/QS24
Upper Platen Assembly Parts ID List
ITEM
DESCRIPTION
PART NO.
ITEM
1
Platen A.--Service 208V 4200W
X79629--23
11
Nut-10-32 MF Lock
020983
1a
Screw-10-32 x 3/8 Taptite Hex
039381
12
Retainer-Platen
078562
1b
Screw-10-32 x 3/8 Truss HD SS
024298
13
Bushing-Platen 4.015 ID Flat
078781
1c
Cover A.-Platen
X78776
14
Block-Anti Rotation
078515
Control--Hi Limit -- 475F
078410
15
Brace A.-Platen Arms
X79071
Control--Hi Limit -- 550F (50 hz)
074165
16
Tube-Wire
078493
1e
Bar-Gap Adj. Slide Mounting
078783
17
Screw-10-32 x 1/2 MF Hex Cap
020982
1f
Screw-1/4-20 x 5/8 MF Hex Cap
017522
18
Strap-Gap Bar
078583
1g
Screw-10-32 x 3/4 Slot
028641
19
Screw-Shoulder 10-32 x 3/4 L
078860
2
Retainer-Gap Slide
078792
20
Kit A.-T Handle
X74326--KIT
Cover A.-Platen
078799
20a
Washer-11/32 ID x 11/16 OD
078638
4
Screw-10-32 x 3/8 Truss HD SS
024298
21
Pointer-Gap Adj.
078637
5
Bar-Adjusting Gap
078779
22
Label-Product
079714
6
Pin-Locating 5/16-18
078544
23
Strap-Gap Adj.
078636
7
Washer-Teflon 4.032 ID x 5 OD
078555
*
Harness--Wire--Upper Power
078621
8
Slide A.-Gap Rear
X78864-R
*
Thermocouple--LW Front
074178
9
Slide A.-Gap Front
X78864-F
*
Thermocouple--LW Middle
074179
Screw-1/4-20 x 1/2 Flat HD
078526
*
Thermocouple--LW Rear
074180
1d
**3
10
DESCRIPTION
PART NO.
* Not shown
** Not part of X78794 Assembly
060102
Models QS12/QS24
45
Parts
Heater Elements - Lower Grill
ITEM
*1
2
*3
DESCRIPTION
PART NO.
Heater-Cast
079639--
Harness-T/C Lower
078643
Control--Hi Limit -- 475F
078410
Control--Hi Limit -- 550F (50 hz)
074165
4
Washer
075716
5
Nut-5/16-18 MF Lock
017327
*Specify Electrics when ordering heaters and hi--limit
controls; i.e., unit B.O.M. by serial number.
060102
Parts
46
Models QS12/QS24
PART
NUMBER
079930
078095
X79838
X79839--23R
079045
079045--23R
076943
X74036--SER
029248
021625
074039
X53512--SER
X53319--SER
X40788
074041
074040
X74123
X79678--SER
029248
021625
078616
X48604--SER
X40863
X49540--SER
079690
X74123
X78757
X78579
078617
079499
X74320--SER
079499
DESCRIPTION
BAR--RELEASE SHEET *QS24*
BLOCK--GAGE PLATEN KIT
BLOCK--TERMINAL--5P SCREW W/JUMPERS
BLOCK--TERMINAL--5P SCREW W/JUMPERS
BLOCK--TERMINAL--5P SCREW
BLOCK--TERMINAL--5P SCREW
BLOCK--TERMINAL--6P SCREW
BOX A.--RELAY *QS12/QS24* (NEW)
CONNECTOR--MATE LOK 6 CIR--SKT
SOCKET--084 OD/14--20 AWG--STRIP
HARNESS--WIRE (RELAY BOX)
PCB A.--CONTROL
PCB A.--CONTROL (BASE BOARD)
CHIP--SOFTWARE (VERSION 1.01)
RELAY--30A--277V--12VDC
+BRACKET ”E” RELAY
STRAP A.GROUNDING *QS24*
BOX A.--RELAY *QS12/QS24* (OLD)
CONNECTOR--MATE LOK 6 CIR--SKT
SOCKET--084 OD/14--20 AWG--STRIP
HARNESS--WIRE RELAY BOX *QS24*
PCB A.-- CONTROL GRILL
CHIP--SOFTWARE *QS24* CONTROL
PCB A.--INTERFACE GRILL
RELAY--SPDT--200/240 VAC
STRAP A.GROUNDING *QS24*
BOX A.--RELAY -- (OLD)
BOX A.--REMOTE KEY PAD *QS12 & QS24*
BEEPER--WITH WIRE HARNESS *QS
BUMPER--.500 DIA X .090 THK
DECAL--KEY PAD *QS24*
BUMPER--.500 DIA X .090 THK
Models QS12/QS24
1
1
2
9
1
1
1
1
6
6
1
1
1
3
1
1
1
1
3
1
1
1
1
1
1
1
2
4
QTY.
QS12
2
4
18
2
2
2
2
12
12
2
2
2
6
2
2
2
2
6
2
2
2
2
2
2
2
2
4
1
1
1
1
QTY.
QS24
103
103
103
103
103
103
103
212
103
103
103
212
212
103
103
103
000
212
103
103
103
212
103
212
103
000
212
212
103
000
000
000
WARR.
CLASS
47
122
143
Use X74036--SER in all applications
122, 143
143
137
PARTS
UPDATE
Use X74036--SER
J7100000--J9054572 (for 1800W heater)
Interface to keypad box
Use X74036--SER
Use X74036--SER in all applications
J9054573/up -- 50HZ & 60HZ
Left side -- J8050000/up (50HZ & 60HZ)
Right side -- J8050000/up (60HZ)
Left side -- prior to J8050000
Right side -- prior to J8050000
REMARKS
Parts List
* See Taylor Warranty Card
+ Available Separately
Parts List
* See Taylor Warranty Card
+ Available Separately
060102
Parts List
48
Models QS12/QS24
044520
079272
078527
074166
079896
078410
028594
021624
X79291
X79877
X78798
X79444
X74332
079441
074313
X74320--SER
079499
079061
079046--23L
079046--23R
074063-079691-078807-074059
078618
032567
074060
078614
X78573
X50412--SER
X40908
FILTER--CORCOM 2VR1
GASKET--BOX A.
HARNESS--WIRE REMOTE *QS24*
PAD A.--KEY REMOTE *QS24*
PCB A.-- REMOTE GRILL
CHIP--SOFTWARE QSDSP CONTROL
PCB A.-- REMOTE GRILL
SWITCH--MEMBRANE--5 POSITION--8”L
BRACKET--FRONT TRAY *QS12*
BRACKET--FRONT TRAY *QS24*
BRUSH--.625X1.500 QS12/24
CLEANER--SIZZLE #545A
CONTROL--HI LIMIT--475F
CONNECTOR--MATE LOK 6 CIR--PIN
+PIN--MALE .084”DIA--MATE--N--LOK
CORD A.--POWER
CORD A.--POWER
COVER A.--PLATEN *QS24*
COVER A.--REAR *QS12*
COVER A.--REAR *QS24*
COVER--LINKAGE *QS24*
CYLINDER--GAS DUEL SEAL QS24
DECAL A.--KEYPAD QS SERIES
+BUMPER--.500 DIA X .090 THK
DECAL--MIN CLEARANCE *QS24*
DECAL--TERMINAL BLOCK--LEFT
DECAL--TERMINAL BLOCK--RIGHT
DIAGRAM--WIRING
DIAGRAM--WIRING
DIAGRAM--WIRING
GASKET--ACCESS COVER
HARNESS--CONTROL TO REMOTE QS24
PART
NUMBER
DESCRIPTION
1
1
1
1
2
1
1
1
1
1
3
2
3
1
1
1
1
1
1
1
1
1
1
1
1
QTY.
QS12
1
1
1
1
1
1
1
2
1
1
2
1
1
1
1
1
6
4
6
2
2
2
2
2
2
2
QTY.
QS24
103
103
103
000
000
103
103
103
103
103
103
103
103
103
103
000
000
000
000
000
000
000
000
000
103
103
000
103
103
212
103
WARR.
CLASS
J9054573/up
J7100000 TO J9054573
Prior to J7100000
J9054573/up
Cntrl board to remote keypad box
Replaces 079215
Green (Replaces Old Red Decal -- 078612)
Replaces X79423
Grooved platen only
J9110000/up
Case of 6 Qts. W/Spray bottle
J6041232/prior -- update with X50412--SER PCB A.
& X74320--SER decal
J6041233/up
Prior to J9054573
J9054573/up
REMARKS
143
122
122
143
147
143
143
PARTS
UPDATE
* See Taylor Warranty Card
+ Available Separately
Models QS12/QS24
49
Parts List
079292
078643
078622--4
078622--5
078622--6
074006
078596
078620
074007
079639-078409-X74326--KIT
078638
X79897--SER
075717--SYM
079714
079894
074148--SYM
036397
050559--M
X79265
X78405
NONE
NONE
079280
079044
X79944
074154
078544
X78758--SER
HARNESS--T/C LOWER *QS24*
HARNESS--T/C UPPER #4
HARNESS--T/C UPPER #5
HARNESS--T/C UPPER #6
HARNESS--WIRE--LOWER POWER
+CONNECTOR--HOUSING 3 PIN
HARNESS--WIRE--LOWER POWER (OLD)
HARNESS--WIRE--UPPER POWER
HEATER--CAST -- 1800 WATT
HEATER--CAST -- 1400 WATT
KIT A.--T--HANDLE *QS12--QS24*
+WASHER
KIT A.--RELAY BOX A. (60HZ--OLD)
LABEL--CAUTION--HOT SYMBOL
LABEL--PRODUCT
LABEL--PRODUCT STOP BULLS EYE
LABEL--WARN--NO SPRAY SURFACE--SYM
LEG--4”--3/8--16 STUD
MAN--OPER QS24
PANEL A.--CONTROL *QS12*
PANEL A.--CONTROL *QS24*
PANEL A.--SIDE LEFT
PANEL A.--SIDE RIGHT
PANEL--REAR *QS12*
PANEL--REAR *QS24*
PARTITION A.--GREASE
GASKET--GREASE PARTITION
PIN--LOCATING
PIVOT A.--PLATEN COMPLETE *QS24
PART
NUMBER
HARNESS--T/C LOWER *QS12*
DESCRIPTION
1
1
4
1
1
1
1
1
1
4
1
1
1
1
1
1
1
1
1
3
3
1
1
1
QTY.
QS12
1
1
1
4
1
1
2
4
1
1
1
1
1
1
1
2
2
2
1
6
6
1
1
QTY.
QS24
103
103
103
000
103
103
103
103
103
103
103
103
103
103
103
103
103
000
103
000
000
000
000
103
000
103
103
103
WARR.
CLASS
Replaces X78402
J9101783/Up (Can adapt to existing models)
N/A for replacement--sealed unit to prevent grease
migration
Grooved platen only
J9110000/up
Use X74036--SER
J9080000 to K0100000
Power switch to interface board (prior to J9054573)
1 per upper platen
J7100000/up
Prior to J7100000
Same as above
Thermocouples (upper platen assembly)
Thermocouples (upper platen assembly)
Thermocouples (upper platen assembly)
J9054573/up
Thermocouples (6 lower cooking zones) replace
w/074178 -- T/C lower front QS, 074179 -- T/C
lower middle QS, 074180 -- T/C lower rear QS as
req’d or all 3 to replace harness
REMARKS
137
147
135/143
122
122
143
143
153
153
PARTS
UPDATE
* See Taylor Warranty Card
+ Available Separately
Parts List
50
Models QS12/QS24
ARM--PLATEN *QS24*
ARM--PLATEN LINKAGE *QS24*
BEARING--CYL MOUNT *QS24*
BEARING--LINKAGE ARM *QS24*
BEARING--OPEN END NEEDLE *Q524*
BEARING--OPEN END NEEDLE *Q524*
BEARING--OPEN END NEEDLE *QS24*
BEARING--PLATEN ARM PIVOT QS24
CAP--BEARING PLATEN ARM *QS24*
CYLINDER--GAS DUEL SEAL QS24
E--RING 3/4
E--RING 3/8
E--RING EXTERNAL 1/2
HANDLE--PLATEN LIFT *QS24*
LINKAGE--PIVOT UPPER *QS24*
MOUNT--CYLINDER LIFT *QS24*
PIN--LINKAGE ARM *QS24*
PIVOT A.--PLATEN *QS24*
PIVOT--PLATEN ARM *QS24*
PLATE--PLATED LINKAGE PIVOT LH
PLATE--PLATED LINKAGE PIVOT RH
RETAINER--BEARING *QS24*
ROD--LINKAGE 3/4 DIA *QS24*
ROD--PLATEN LINKAGE MID *QS24
ROD--PLATEN LINKAGE MID *QS24*
ROD--PLATEN LINKAGE UPPER *QS24
PLATEN ASSEMBLY 208V 1400W
PLATEN ASSEMBLY 208/230V 1400W
SCRAPER--TEFLON WIPER
SCRAPER--TROUGH
SCREW--10--32X1/2 THUMB STAINLES
SHEET--SEAMED RELEASE *QS24*
SHIELD--GREASE FRONT *QS24*
DESCRIPTION
078520
079192
079214
079213
078522
078523
078652
078541
078548
074313
077046
038958
024908
078592
078760
079193
078664
X78759
078556
078560
078559
079191
079216
079194
078549
078550
X79629--23
X79629--33
075887
079726
078651
078804
079433
PART
NUMBER
2
2
2
2
8
2
2
2
2
2
4
16
16
1
2
1
2
1
2
1
1
2
1
1
1
1
1
1
1
1
2
2
1
QTY.
QS12
2
2
2
2
8
2
2
2
2
2
4
16
16
1
2
1
2
1
2
1
1
2
1
1
1
1
1
1
1
1
2
2
1
QTY.
QS24
103
103
103
103
103
103
103
103
103
103
000
000
000
103
103
103
103
103
103
103
103
103
103
103
103
103
212
212
000
000
103
000
103
WARR.
CLASS
Thumb screws
208V -- 60HZ
208--230V -- 60HZ
Rod w/gear unit
Replaces 079215
REMARKS
123
123
PARTS
UPDATE
* See Taylor Warranty Card
+ Available Separately
Models QS12/QS24
51
Parts List
079434
X78864--F
078789
001801
078863
X78864--R
078789
001801
078863
079704
079127
079289
079288
078418
045754
X79940--SER
074178
074179
074180
051170--V
079437
079438
079439
079440
X79246
X79668
T/C LOWER MIDDLE QS
T/C LOWER REAR QS
VIDEO--TRAIN QS12 & QS24 OPERATIONS
WIPER--SIDE LEFT *QS24*
WIPER--SIDE RIGHT *QS24*
WIPER--FRONT *QS24*
WIPER--REAR *QS24*
ACCESSORIES:
SCRAPER A.--GROOVE -- RUBBER
SCRAPER A.--GROOVE--METAL
PART
NUMBER
SHIELD--GREASE REAR *QS24*
SLIDE A.--GAP -- FRONT
PIN--GAP--SLIDE--ADJ.
SCREW--1/4--20X1/4 ALLEN SET
SCREW--10--24 X 3/8 SET SS
SLIDE A.--GAP -- REAR
PIN--GAP--SLIDE--ADJ.
SCREW--1/4--20X1/4 ALLEN SET
SCREW--10--24 X 3/8 SET SS
SPRING .375 OD X .037 X 1.500
SPRING--3/16 BELLEVILLE DISC
STANDOFF--FRONT
STANDOFF--REAR
SWITCH--ROCKER SPST OFF--ON
TRANS.--CONT.--40VA 120/200/240V
TRAY A.--GREASE *QS24*
T/C LOWER FRONT QS
DESCRIPTION
1
1
1
1
1
1
1
1
1
1
1
2
2
2
1
2
2
2
2
2
4
2
1
1
1
1
QTY.
QS12
1
1
1
1
1
1
1
1
1
2
2
1
1
2
2
2
1
1
2
2
2
1
2
QTY.
QS24
103
103
103
103
000
103
103
103
103
103
103
103
000
000
103
103
000
000
103
103
103
103
103
103
103
103
WARR.
CLASS
Rubber -- for grooved platen
Metal -- for grooved platen
(Same as above)
(Same as above)
Replaces X78428
Thermocouple -- replaces 079292 or 078643
harness
Power
Prior to J8020000
Release bar (Replaces 078805)
Prior to J7010000
Prior to J8020000
1 per platen
1 per platen
REMARKS
137
125
PARTS
UPDATE
* See Taylor Warranty Card
+ Available Separately
060102
Parts List
52
Models QS12/QS24
X79994
021279
030307
079990
079991
X79916
X79689
X79873
X79900
X79902
079715
X79678--75
079690
X79839--62R
079045--62R
079454
079046--62L
079046--62R
074165
074063--75
079691--75
X79163
074065
079496
074007
079639--26
X79629--75
051170--PAL
50HZ
BOX A.--RELAY (OLD)
RELAY--SPST--200/240VAC (OLD)
BLOCK--TERMINAL--5P SCREW W/JUMPERS
BLOCK--TERMINAL--5P SCREW
DECAL--SWITCH *QS24* SYMBOL
DECAL--TERMINAL BLOCK *QS24
DECAL--TERMINAL BLOCK *QS24
CONTROL--HI--LIMIT 550F NO RESET
DIAGRAM--WIRING (NEW)
DIAGRAM--WIRING (OLD)
FILTER A.--*M22*
HARNESS--POWER LOWER *QS24* (NEW)
HARNESS--POWER LOWER *QS24* (OLD)
HARNESS--POWER UPPER (NEW)
HEATER--CAST 230V 1800W *QS24*
PLATEN ASSEMBLY 230/400V 1400W
VIDEO--TRAIN QS24 OPS
PART
NUMBER
OPTIONS:
CART--SEE BREAKDOWN
BRACKET A.--LEG SUPPORT
CASTER--SWIVEL 3/4--10
CASTER--LOCKING 3/4--10
LEG--INSERT
PIN--LEG HEIGHT
KIT A.--PRODUCT STOP
KIT A.--REAR COVER STOP BAR
KIT A.--REAR COVER STOP BAR
KIT A.--REAR COVER STOP BAR LH
KIT A.--REAR COVER STOP BAR RH
LEG--2--1/2 IN 3/8--16 STUD
DESCRIPTION
1
1
1
1
1
1
3
1
1
12
1
1
6
4
4
2
2
4
4
1
1
QTY.
QS12
1
1
1
2
2
1
6
1
1
2
6
1
1
2
1
1
12
1
1
1
4
2
2
4
4
1
QTY.
QS24
000
000
103
103
103
103
103
212
000
212
103
103
103
000
000
000
103
103
103
103
103
103
103
103
103
103
103
103
WARR.
CLASS
230/400V -- 50HZ
1 per platen (replaces 079497)
J9054573/up
J9054573/up
K0010000/ up (For units prior to K0010000, see
Parts Update 150.)
Right side -- J8050000/UP
Right side -- prior to J8050000
50HZ & 60HZ use X74036--SER
Hood stop
Hood stop -- 2 platens
Hood stop -- left platen
Hood stop -- right platen
Discontinued
REMARKS
123
143
150
143
PARTS
UPDATE
QS12/24
074063--22
Rev. 4/00
QS12/24
074063--23
Rev. 4/00
QS12/24
074063--75
Rev. 4/01
QS24
078807--23
Rev. 4/00