1
SERVICE MANUAL
EN
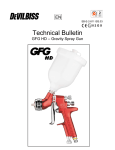
DEVILBISS SRi PRO SERIES:
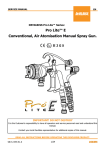
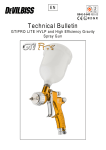
SRi PRO Lite Gravity Spray Gun for micro, smart
repairs and small areas.
II 2 G X
IMPORTANT! DO NOT DESTROY
It is the Customer's responsibility to have all operators and service personnel read and understand this
manual.
Contact your local DeVilbiss representative for additional copies of this manual.
READ ALL INSTRUCTIONS BEFORE OPERATING THIS DEVILBISS PRODUCT.
SB-E-2-512 R2.0
1/24
EN
FUNCTIONAL DESCRIPTION
The SRi PRO Lite spray gun is a professional quality gun designed with EPA compliant, high efficiency or high
volume, low pressure (HVLP) technology. HVLP technology reduces overspray and limits air cap pressure to 0.7
bar (10 psi). High efficiency complies with EPA by obtaining transfer efficiency above 65%.
IMPORTANT: This spraygun is suitable for use with both waterbased and solvent based coating materials. The
gun is not designed for use with highly corrosive and/or abrasive materials and if used with such materials it
must be expected that the need for cleaning and/or replacement of parts will be increased. If there is any doubt
regarding the suitability of a specific material, contact your DeVilbiss Distributor or DeVilbiss direct.
SPECIFICATIONS
AIR INLET PRESSURES
P1 =
Max Static Air Input Pressure
12 bar [175 psi]
Gun Air Inlet Pressure for High Efficiency and HVLP setups, with gun
triggered.
2.0 bar [29 psi]
ENVIRONMENTAL
Max Ambient Operating Temperature
40°C Nominal [104°F]
MATERIALS OF CONSTRUCTION
Gun Body, Air Cap Retaining Ring, Knobs
Anodised aluminium
Air Cap
Nickel plated brass
Fluid Tip, Fluid Needle and Trigger Stud
Stainless Steel
Springs, Clips, Screws
Stainless Steel
Seals, Gaskets
Solvent resistant
Trigger
Chrome plated steel
Air Inlet, Body Bushing, Spreader Valve Body, Air Valve Nut
Chrome plated brass
Air Valve Assembly
Stainless Steel, HDPE
CONNECTIONS
Air Inlet Size
Universal 1/4" BSP and 1/4" NPS male
Fluid Inlet Size
7/16" - 14 UNC
GUN WEIGHT
GUN ONLY
395g
WITH CUP
455g
DIMENSIONS (See page 21)
L x H x W mm
SB-E-2-512 R2.0
135 x 252 x 18
2/24
EN
Product Description:
SRi PRO LITE
This Product is designed for use with:
Solvent and water based materials
Suitable for use in hazardous area:
Zone 1 & 2
Protection Level:
II 2 G X
Vibration Level:
N/A
Sound Pressure Level:
Available on request
Sound Power Level:
Available on request
Manufacturer:
Finishing Brands UK,
Ringwood Road,
Bournemouth, BH11 9LH. UK
EU Declaration of Conformity
We: Finishing Brands UK, declare that the above product conforms with the Provisions of:
Machinery Directive 2006/42/EC
ATEX Directive 94/9/EC
by complying with the following statutory documents and harmonised standards:
BS EN 1953:2013 Atomising and spraying equipment for coating materials - Safety requirements
EN ISO 12100-1:2010 Safety of Machinery - Basic concepts, general principles for design - Basic terminology, methodology
EN ISO 12100-2:2010 Safety of Machinery - Basic concepts, general principles for design - Technical principles
EN 14462:2005+A1:2009 Surface treatment equipment - Noise test code for surface treatment equipment including its ancillary handling
equipiment - Accuracy grades 2 and 3
EN ISO 11201:1995 Acoustics - Noise by machinery and equipment - Determination of emission sound pressure levels at a work station and
at other specified positions in an essentially free field over a reflecting plane with negligible environmental corrections
EN ISO 20643:2008 Mechanical vibration - Hand held and hand guided machinery - Principles for evaluation of vibration emission
EN ISO 28662-1 Hand-held portable power tools - Measurement of vibrations at the handle
EN 12096:1997 Mechanical vibration - Declaration and verification of vibration emission values
EN1127-1: Explosive atmospheres - Explosion prevention - Basic concepts
EN 13463-1: Non electrical equipment for use in potentially explosive atmospheres - Basic methods and requirements
HVLP and Trans-Tech products comply with the requirements of PG6 from the EPA guidelines and offer greater than 65% transfer efficiency.
D Smith
02/03/15
SB-E-2-512 R2.0
3/24
(General Manager)
In this part sheet, the words WARNING, CAUTION and NOTE are used to emphasise important safety information as
follows:
WARNING
CAUTION
EN
NOTE
Hazards or unsafe practices which could result in Hazards or unsafe practices which could result in
Important installation, operation or maintenance
severe personal injury, death or substantial
minor personal injury, product or property
information.
property damage.
damage.
WARNING
Read the following warnings before using this equipment.
SOLVENTS AND COATING MATERIALS. Can be highly flammable or
combustible when sprayed. Always refer to the coating material supplier's
instructions and safety sheets before using this equipment.
INSPECT THE EQUIPMENT DAILY. Inspect the equipment for
worn or broken parts on a daily basis. Do not operate the
equipment if you are uncertain about its condition.
READ THE MANUAL. Before operating finishing equipment, read and
understand all safety, operation and maintenance information provided in the
operation manual. Users must comply with all local and national codes of
practice and insurance company requirements governing ventilation, fire
precautions, operation and house-keeping of working areas.
EQUIPMENT MISUSE HAZARD. Equipment misuse can cause
the equipment to rupture, malfunction or start unexpectedly and
result in serious injury.
FIRE AND EXPLOSION HAZARD. Never use 1,1,1-Trichloroethane, Methylene
Chloride, other Halogenated Hydrocarbon solvents or fluids containing such
solvents in equipment with aluminium wetted parts. Such use could result in a
serious chemical reaction, with the posibility of explosion. Consult your fluid
suppliers to ensure that the fluids being used are compatible with aluminium
parts.
STATIC CHARGE. Fluid may develop a static charge that must be dissipated
through proper grounding of the equipment, objects to be sprayed and all other
electrically conductive objects in the dispensing area. Improper grounding or
sparks can cause a hazardous condition and result in fire, explosion or elecrtic
shock and other serious injury.
GLOVES. Must be worn when spraying or cleaning the
equipment.
WEAR SAFETY GLASSES. Failure to wear safety glasses with
side shields could result in serious eye injury or blindness.
WEAR RESPIRATOR. The use of respiratory protective
equipment is recommended at all times. The type of equipment
must be compatible with the material being sprayed.
TOXIC VAPOURS. When sprayed, certain materials may be poisonous, create
irritation, or are otherwise harmful to health. Always read all labels, safety
sheets and follow any recommendations for the material before spraying. If in
doubt contact your material supplier.
NEVER MODIFY THE EQUIPMENT. Do not modify the
equipment unless the manufacturer provides written approval.
LOCK OUT / TAG-OUT. Failure to de-energise, disconnect, lock out and tagout all power sources before performing equipment maintenance could cause
serious injury or death.
PROJECTILE HAZARD. You may be injured by venting liquids or
gases that are released under pressure, or flying debris.
NOISE LEVELS. The A-weighted sound level of pumping and spray equipment
may exceed 85 dB(A) depending on equipment settings. Actual noise levels are
available on request. It is recommended that ear protection is worn at all times
while equipment is in use.
PRESSURE RELIEF PROCEDURE. Always follow the pressure
relief procedure in the equipment instruction manual.
KNOW WHERE AND HOW TO SHUT OFF THE EQUIPMENT IN
CASE OF AN EMERGENCY.
HIGH PRESSURE CONSIDERATION. High pressure can cause serious injury.
Relieve all pressure before servicing. Spray from the gun, hose leaks or
ruptured components can inject fluid into your body and cause extremely
serious injury.
OPERATOR TRAINING. All personnel must be trained before
operating finishing equipment.
IT IS THE RESPONSIBILITY OF THE EMPLOYER TO PROVIDE THIS INFORMATION TO THE OPERATOR OF THE EQUIPMENT.
SB-E-2-512 R2.0
4/24
EN
SRi PRO LITE GUN PART NUMBER FORMAT & PART SELECTION GUIDE
AIR CAP
FLUID TIP
TE5 High Efficiency
Size & construction
HV5 HVLP
See table 2
RS1 Round Spray
MC1 High Efficiency
See table 1
SRi PRO
L
L
-
TE5
-
10
Lite
TABLE 1 - SRi PRO LITE AIR CAP PERFORMANCE GUIDE
Air Cap & Type
Part Number
Air Consumption
Recommended
Air Inlet Pressure
Typical Fluid
Flow*
Typical Fan
Pattern Size**
(L/Min)
TE5
High Efficiency
SRIPRO-102-TE5-K
100 [3.5 cfm]
2 Bar [29 psi]
5 - 100 ml/min
180mm
HV5
HVLP
SRIPRO-102-HV5-K
135 [4.8 cfm]
2 Bar [29 psi]
5 - 80 ml/min
160mm
RS1
Round Spray
SRIPRO-102-RS1-K
55 [1.9 cfm]
2 Bar [29 psi]
5 - 50 ml/min
50mm
MC1
High Efficiency
SRIPRO-102-MC1-K
50 [1.8 cfm]
1 Bar [14.5 psi]
1 - 50 ml/min
60mm
*
Flow rates may vary according to paint/material and pressure used.
**
Fan pattern size @ 50 - 100mm distance.
TABLE 2 - SRi PRO LITE FLUID TIPS & NEEDLES
Stainless Steel
Fluid Tip Size
Fluid Tip
Needle
06
SRIPRO-210-06M-K SRIPRO-310-06M-K
08
SRIPRO-200-08-K SRIPRO-300-08-10-K
10
SRIPRO-200-10-K SRIPRO-300-08-10-K
12
SRIPRO-200-12-K SRIPRO-300-12-14-K
14
SRIPRO-200-14-K SRIPRO-300-12-14-K
TABLE 3 - SRi PRO LITE RECOMMENDED FLUID TIP / AIR CAP COMBINATIONS
Air Cap & Type
0.6mm
0.8mm
1.0mm
1.2mm
1.4mm
TE5
High Efficiency
-
S
S
S
S
HV5
HVLP
-
S
S
S
S
RS1
Round Spray
-
S
S
S
S
MC1
High Efficiency
S
-
-
-
-
S= High quality stainless steel tips & needles available in this type & size.
SB-E-2-512 R2.0
5/24
EN
EXPLODED VIEW
SB-E-2-512 R2.0
6/24
EN
PARTS LIST
DESCRIPTION
ASSEMBLY
QTY.
REF.
PART No.
1
-
RETAINING RING
1
2
-
SLIP RING
1
3
-
AIR CAP
1
4
-
RETAINING RING SEAL
1
5
SEE TABLE 1
AIR CAP & RETAINING RING
1
6
SEE TABLE 2
FLUID TIP & SEPARATOR
1
*7
SRIPRO-2-K5 SEPARATOR (KIT OF 5)
1
*8
-
BODY BUSHING SEAL
1
9
-
BODY BUSHING
1
10
SN-6-K
BODY BUSHING & SEAL
1
11
SEE TABLE 2
FLUID NEEDLE
1
*12
-
NEEDLE SPRING
1
*13
-
NEEDLE SPRING PAD
1
14
SN-81-K
FLUID ADJUSTING KNOB
1
15
SN-423-K3
SPRING & PAD (KIT OF 3)
1
16
-
CIRCLIP
1
17
-
SPREADER VALVE BODY
1
*18
-
SPREADER VALVE SEAL
2
19
-
SPREADER VALVE ADJUSTING KNOB
1
20
SRIPRO-402-K SPREADER VALVE ASSEMBLY
1
21
-
NEEDLE PACKING
1
22
-
PACKING SPRING
1
23
-
PACKING NUT
1
PACKING, SPRING & PACKING NUT KIT
1
*24
SN-404-K
25
-
AIR VALVE BODY
1
26
-
AIR VALVE CAGE
1
27
-
AIR VALVE POPPET
1
28
-
AIR VALVE SPRING
1
29
-
AIR VALVE SPRING PAD
1
30
-
AIR VALVE SEAL
1
AIR VALVE ASSEMBLY
1
31
SN-402-K
*32
-
TRIGGER STUD SCREW (T20 TORX)
1
33
-
TRIGGER
1
*34
-
TRIGGER STUD
1
35
SN-42-K
TRIGGER, STUD & SCREW KIT
1
36
SN-405-K5
STUD AND SCREW KIT (KIT OF 5)
1
37
-
AIR INLET KIT
1
38
-
COLOUR ID RING KIT (4 COLOURS)
1
*39
-
CIRCLIP
1
40
-
AIRFLOW VALVE BODY
1
SB-E-2-512 R2.0
7/24
EN
PARTS LIST (Continued)
DESCRIPTION
ASSEMBLY
QTY.
REF.
PART No.
41
-
AIRFLOW VALVE ADJUSTING KNOB
1
*42
-
VALVE PIN
1
43
PRO-408-K
AIRFLOW VALVE ASSEMBLY
1
44
GFC-2-K5
DRIP CHECK LID (KIT OF 5)
1
45
SRI-414-K2
GRAVITY CUP LID (KIT OF 2)
1
46
SRI-42-K3
FILTER (KIT OF 3)
1
GRAVITY CUP
1
47
-
48
SRI-510
GRAVITY CUP KIT
1
49
SPN-8-K2
TORX DRIVER (KIT OF 2)
1
50
SRI-50-K2
SPANNER (KIT OF 2)
1
51
SRI-51-K12
FUNNEL (KIT OF 12)
1
AIR VALVE SERVICE TOOL
1
52
-
SERVICE PARTS
PRO-415-1
SPRAY GUN REPAIR KIT (INCLUDES ITEMS MARKED *)
WARNING
The spray gun must be earthed to dissipate any electrostatic charges which may be created by fluid or
air flows. This can be achieved through the spray gun mounting, or conductive air/fluid hoses.
Electrical bond from the spray gun to earth should be checked and a resistance of less than 10⁶ Ohms
is required.
SB-E-2-512 R2.0
8/24
EN
START-UP SEQUENCE
1. Connect the gun to a clean, moisture and oil free air supply using a conductive hose.
2. Mix coating material to Manufacturer's instructions and strain material.
3. Turn fluid adjusting knob (14) clockwise to prevent fluid needle movement.
4. Turn spreader valve adjusting knob (19) counter clockwise to fully open.
5. Adjust inlet air pressure if required.
6. Turn fluid adjusting knob counter clockwise until first thread shows.
7. Test spray. If the finish is too dry, reduce airflow by reducing air inlet pressure.
8. If finish is too wet, reduce fluid flow by turning fluid adjusting knob (14) clockwise. If atomisation is
too coarse, increase air inlet pressure. If too fine, reduce inlet pressure.
9. The pattern size can be reduced by turning spreader valve knob (19) clockwise.
10. Hold gun perpendicular to surface being sprayed. Arcing or tilting may result in uneven coating.
11. The recommended spray distance is 50-100mm.
12. Spray edges first. Overlap each stroke a minimum of 75%. Move gun at a constant speed.
13. Always turn off air supply and relieve pressure when gun is not in use.
NOTE
Depending on hose length, larger I.D. hose may be required. Install an air gauge at the gun handle.
When gun is triggered on, adjust regulated pressure as required. Do not use more pressure than is
necesarry to atomise the material being applied. Excess pressure will create additional overspray and
reduce transfer efficiency.
SB-E-2-512 R2.0
9/24
EN
NOTE
If quick connect couplings are required, use only high flow quick connects. Other types will not flow
enough air for correct gun operation.
SPRAY GUN MAINTENANCE & CLEANING
To clean air cap and fluid tip, brush exterior with a stiff bristle brush. If necesarry to clean cap holes,
use a broom straw or toothpick if possible. If a wire or hard instrument is used, extreme care must be
taken to prevent scratching or burring of the holes which will cause a distorted spray pattern.
To clean fluid passages, remove excess material, then flush with gun wash solution. Wipe the gun
exterior with a dampened cloth. Never completely immerse in any solvent or cleaning solutions as this
is detrimental to the lubricants and life of the spray gun.
SPRAY GUN DISASSEMBLY / ASSEMBLY
#
#
SB-E-2-512 R2.0
KEY
Order for disassembly
- see over page
(reverse for assembly)
Item Number
- see over page
10/24
EN
DISASSEMBLY TIP & NEEDLE
NOTE
When replacing the fluid tip or fluid needle, replace tip, needle and fluid packing at the same time.
Using worn parts can cause fluid leakage. Do not overtighten.
CAUTION
To prevent damage to fluid tip or fluid needle, be sure to either:
1. Pull the trigger and hold while tightening or loosening the fluid tip, or,
2. Remove the fluid adjusting knob to relieve spring pressure against needle collar.
SB-E-2-512 R2.0
11/24
EN
DISASSEMBLY AIR VALVE
SB-E-2-512 R2.0
12/24
EN
DISASSEMBLY / ASSEMBLY AIR VALVE SEALS
SB-E-2-512 R2.0
13/24
EN
DISASSEMBLY PACKING
SB-E-2-512 R2.0
14/24
EN
TROUBLESHOOTING MECHANICAL PERFORMANCE
GENERAL FAULTS
CAUSE
No air pressure at gun.
CORRECTION
Check air supply and air line.
Will not spray.
Fluid needle adjustment knob not Open fluid needle adjustment
open enough.
knob.
Gun spits paint when triggering
on and off.
Gun spits paint when triggering
on due to paint build-up inside air
cap between spraying operations.
Incorrect needle fitted to gun.
Check fluid tip/needle selection
chart and fit correct item.
Excessive needle wear.
Replace with new needle.
Excessive fluid tip wear.
Replace with new fluid tip.
Fluid tip not fitted correctly in
gun head.
Tighten.
Fluid tip/needle leakage.
Check for damage or blockage.
Fluid tip not fitted correctly in
gun head.
Tighten.
Fluid tip/needle leakage.
Check for damage or blockage.
Damaged air cap holes.
Replace with new air cap.
Paint build-up on fluid tip.
Paint build-up on air cap.
Gradual build-up of bounce-back
Thoroughly clean.
on gun head.
Unable to get round spray
SB-E-2-512 R2.0
Fluid tip or sprayhead incorrectly Remove, check components for
fitted.
damage and refit correctly.
15/24
EN
When removing air cap from retaining ring, do not remove the ring seat from the retaining ring.
Damage to the parts may occur. Simply wipe parts clean and reassemble with new or clean air cap.
FLUID FAULTS
CAUSE
CORRECTION
Fluid tip internal seat scored
damaged or worn.
Replace.
Fluid needle external profile
damaged or worn.
Replace.
Contamination on needle or tip
mating surfaces preventing good Thoroughy clean.
seal.
Slow fluid leak from fluid tip and
needle seat.
Incorrect fluid tip for fluid needle Check tip/needle selection chart
fitted to gun.
and fit correct item.
Sluggish needle.
Lubricate packing. (GL-1)
Tight packing nut.
Adjust.
Contamination on needle or tip
Remove tip and needle and
mating surfaces preventing good
thoroughly clean.
seal.
Major fluid leak or fluid jetting
from fluid tip and needle seat.
Incorrect fluid tip for fluid needle Check tip/needle selection chart
fitted to gun.
and fit correct item.
Slow fluid leak from needle
packing.
SB-E-2-512 R2.0
Fluid needle packing worn or
loose.
16/24
Tighten or replace as necesarry.
EN
AIR FAULTS
CAUSE
Spindle contaminated and not
correctly seating.
CORRECTION
Remove spindle and thoroughly
clean valve shaft and seating
surfaces.
Small air leak from air cap when
gun is not triggered.
Spindle seal damaged or missing. Replace.
SB-E-2-512 R2.0
17/24
EN
TROUBLESHOOTING SPRAY PERFORMANCE
CONDITION
CAUSE
CORRECTION
Heavy top or bottom pattern.
Material build-up on air cap, plugged Soak cap or tip in suitable solvent
horn holes, centre holes or jets.
and thoroughly clean.
Material build-up on fluid tip exterior Replace fluid tip or air cap if
or partially plugged fluid tip.
necesarry.
Fluid tip or cap dirty or damaged.
Replace fluid tip or air cap if
necesarry.
Left or right side horn holes plugged.
Soak cap or tip in suitable solvent
and thoroughly clean.
Dirt or damage on left or right side
of fluid tip exterior.
Replace fluid tip or air cap if
necesarry.
Heavy right or left
side pattern.
Remedies for the top-heavy, bottom-heavy, right-heavy and left-heavy patterns.
Determine if the obstruction is on the air cap or the fluid tip. Do this by making a test spray pattern. Then, rotate
the cap one-half turn and spray another pattern. If the defect is inverted, obstruction is on the air cap. Clean the
air cap as previously instructed. Also check for dried paint just inside the cap centre hole opening, remove by
washing with solvent.
If the defect is not inverted, it is on the fluid tip. Clean tip. If problem persists, renew tip.
SB-E-2-512 R2.0
18/24
EN
Heavy centre pattern.
Intermittent or 'fluttering'
spray fan.
Pattern adjustment valve set too low.
Turn out counter clockwise to
achieve correct pattern.
Too much material.
Reduce fluid flow by turning fluid
needle adjusting screw clockwise.
Reduce fluid pressure.
Material too thick.
Thin to correct consistency.
Atomising air pressure too low.
Increase air pressure.
Loose fluid tip.
Tighten.
Fluid tip not seated correctly in gun
head.
Remove fluid tip, clean components,
check cone seating on tip and gun
for damage or contamination.
Partially obstructed fluid passage or
hose.
Clean or replace.
Not enough material flow.
Increase fluid flow by changing fluid
tip size, opening needle control knob
or increase fluid pressure on
pressure feed container.
Too high horn pressure.
Reduce air pressure by rotating
pattern control valve clockwise.
Split spray pattern
Too much air for fluid quanitity used. Reduce input air pressure.
SB-E-2-512 R2.0
19/24
EN
Ball end heavy
pattern.
Too much fluid flow.
Change fluid tip for smaller size or
change air cap for different
specification air cap.
Too much atomisation air pressure.
Reduce air pressure.
Gun too far from surface.
Check distance (normally 150200mm).
Too much fluid flow.
Adjust gun or reduce fluid pressure.
Material too thin.
Mix properly or apply light
coats/reduce fluid flow.
Gun tilted at an angle.
Mount gun at right angle to work.
Gun too far from surface.
Check distance.
Too much air pressure.
Reduce air pressure and check spray
pattern.
Fluid flow too low.
Increase fluid flow by changing fluid
tip size, supply pressure or turning
needle control knob counter
clockwise.
Excessive bounce-back.
Runs and sags.
Thin, sandy coarse finish drying
before it flows out.
SB-E-2-512 R2.0
20/24
EN
DIMENSIONS
SB-E-2-512 R2.0
21/24
EN
NOTES
SB-E-2-512 R2.0
22/24
EN
NOTES
SB-E-2-512 R2.0
23/24
EN
WARRANTY POLICY
DeVilbiss products are covered by Finishing Brands one year materials and workmanship
limited warranty. The use of any parts or accessories, from a source other than Finishing
Brands, will void all warranties. For specific warranty information please contact the closest
Finishing Brands location listed below.
Finishing Brands reserves the right to modify equipment specifications without prior notice.
DeVilbiss, Ransburg, BGK, and Binks are registered trademarks of Finishing Brands.
© 2015 Finishing Brands
All rights reserved.
DeVilbiss is part of Finishing Brands, a global leader in innovative spray finishing
technologies. For technical assistance or to locate an authorised distributor, contact one
of our international sales and customer support locations below.
USA/Canada
Mexico
Brazil
www.binks.com
[email protected]
Toll Free Tel: 1-800-992-4657
Toll Free Fax: 1-888-246-5732
www.finishingbrands.com.mx
[email protected]
Tel: 011 52 55 5321 2300
Fax: 011 52 55 5310 4790
www.devilbiss.com.br
[email protected]
Tel: +55 11 5641 2776
Fax: +55 11 5641 1256
United Kingdom
France
Germany
www.finishingbrands.eu
[email protected]
Tel: +44 (0)1202 571 111
Fax: +44 (0)1202 573 488
www.finishingbrands.eu
[email protected]
Tel: +33(0)475 75 27 00
Fax: +33(0)475 75 27 59
www.finishingbrands.eu
[email protected]
Tel: +49 (0) 6074 403 1
Fax: +49 (0) 6074 403 281
China
Japan
Australia
www.finishingbrands.com.cn
[email protected]
Tel: +8621-3373 0108
Fax: +8621-3373 0308
www.ransburg.co.jp
[email protected]
Tel: 081 45 785 6421
Fax: 081 45 785 6517
www.finishingbrands.com.au
[email protected]
Tel: +61 (0) 2 8525 7555
Fax: +61 (0) 2 8525 7575
SB-E-2-512 R2.0
24/24