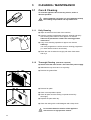
1
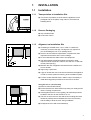
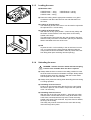
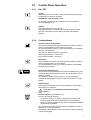
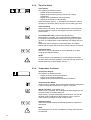
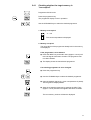
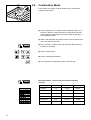
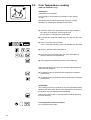
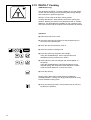
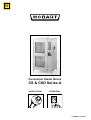
9
Convection Steam Ovens
CS & CSD Series A
INSTALLATION
OPERATION
A-VERSION 16/07/99
Instructions for Installation and Operation
of CS and CSD Series Hobart Convection Steam Ovens
Contents
1
Page
INSTALLATION
1.1 Installation ............................................................................................. 3
1.2 Water Connection ................................................................................. 4
1.3 Electrical Connection ............................................................................ 5
2
OPERATION
2.1 Getting acquainted with your HOBART Combi Oven ............................ 6
2.2 Control Panel Symbols.......................................................................... 8
2.3 Operation of the control panel ............................................................... 9
2.4 Programming & Storing Cooking Programmes ................................... 12
2.5 Convection Mode ................................................................................ 17
2.6 Combination Mode – Steam and Convection ...................................... 20
Convection Mode with variable quantities of added steam ................. 23
2.7 Steam Mode ........................................................................................ 24
2.8 Low-Temperature Cooking .................................................................. 27
2.9 Core Temperature Cooking ................................................................. 28
2.10 DELTA-T Cooking ................................................................................ 30
2.11 Faults ................................................................................................. 31
3
CLEANING / MAINTENANCE
3.1 Care and Cleaning .............................................................................. 32
3.2 Maintenance ....................................................................................... 33
Machine noise level is ≤ 70 dB (A)
Important Instructions for Use
● Use in Accordance with Regulations
Hobart Convection Steam Ovens are only intended for baking,
roasting, gratinating, steaming and stewing food products intended
for consumption.
● Safety
Do not wash down with a hose or a high pressure cleaner from outside.
The "danger" symbol is shown beside instructions that are essential for
the safe operation of the machine. Please read these passages with
particular care.
● Liability
Incorrect installation and repairs not carried out by Hobart Engineers
or their Authorised Service Agent and any technical modification
to the machine not authorised by the manufacturers may cancel the
manufacturers guarantee.
All examples given in these instructions with reference to cooking methods,
times and temperatures are dependant on the quality of the foodstuffs being
cooked and may therefore vary.
2
1
INSTALLATION
1.1
Installation
1.1.1
Transportation to Installation Site
● This should, if possible, be done while the appliance is still
packaged and on the pallet, using rollers or a mechanical
handling device.
1.1.2
Remove Packaging
● Snip off steel bands.
● Lift off outer carton.
≥ 20
1.1.3
Alignment on Installation Site
● If installing a CS/CSD 0612 / 1012 / 1022 on a stand it is
necessary to remove the legs. The legs are only required if
you are installing the unit on an existing bench.
● Check to ensure machine specification complies with order
requirements and that it is the correct voltage.
≥ 150
● Do not install with the sides close to hot equipment.
● The lateral distance between appliance and wall or other
≥ 50
≥ 430
objects must be at least 50 / 430 mm and 150 mm on side with
control panel (see fig.).
● Between the rear of appliance and wall must be a distance of
20 mm at least.
● Align using a spirit level.
● A gap of at least 300 mm must also be left above the appliance
in order to ensure optimal functioning of the ventilation system.
● For floor models CS/CSD 2012 / 2022 it may be necessary to
install the fixing plates provided to fix the oven to the floor.
Using the roll in / roll out trolley
(optional on CS/CSD 0612/2012)
● Ensure that the oven insert and/or tray trolley can easily be slid
into the cooking compartment.
● If the appliance has to cross a grating, flat metal strips should
be fitted to the floor for the wheels to run on.
● The site on which the oven sits and the surrounding floor area
should be perfectly level to facilitate the roll-in roll-out trolley
and the ability to level the oven during installation.
● Re-adjust the oven after it has heated up.
3
1.2
Water Connection
● Make the cold water connection to a supply of potable softened
water.
● Maximum permissible static pressure: 6 bar - Minimum 0.5 bar.
● Provide a suitable pressure hose 1/2", B.S.P. union nut 3/4",
stopcock,line strainer and a WRAS approved double check valve.
● If water hardness is greater than 6 Deg Clark, a water softener
must be provided by the customer.
● Maximum water requirement:
CS/CSD 1012 E = 30 l/h
CS/CSD 1022 E = 50 l/h
CS/CSD 0612 E = 18 l/h
CS/CSD 2012 E = 50 l/h
CS/CSD 2022 E = 80 l/h
During breaks in operation (eg. overnight), close
the stopcock.
● If the equipment is switched on with the water line turned off,
an audible signal is sounded after approximately 5 minutes
and the water failure symbol illuminates.
WRAS approved double check valve p/n 143450
1.2.1
Condensate / Discharge
● Connection:
B.S.P. 11/2" external thread for 0612, 1012, 1022, 2012 & 2022.
The oven must be installed with the trap provided.
● Provide a tundish at site.
min.
100 mm
Do not locate the tundish underneath the machine.
● Drain must fall towards discharge end and must be supported
to prevent sagging.
● Drain material must be suitable for water at a temperature of
100°C. Terminate the drain above the tundish.
1.2.2
Exhaust Air
● Exhaust air must be able to gain free access to a canopy.
● Do not cover up the exhaust air opening.
Danger of injury:
The exhaust air temperature can be as high as that
in the cooking compartment.
4
1.3
Electrical Connection
This should only be made by Hobart Engineers or
other authorised Service Agents and must be in
accordance with the installation requirements and
all relevant regulations.
● Place the main isolator close to the machine (provided by
customer). During prolonged breaks in operation, eg. overnight,
the main switch must be put in the off position.
1.3.1
Checking
● Compare the data given on the data plate with that for the
building’s power supply and the circuit diagram.
● Check that fuse protection and cables are adequate for the
current load.
1.3.2
Connection (see floor plan)
● Draw cable (suitable for current capacity of the oven) through
the entry bush joint on the underside.
● Connect cable to the terminal block.
● Tighten all screws in the control box (they may have loosened
off during transportation).
● Tighten the entry bush compression nuts.
● The appliance must be earthed. The terminal screw is located
directly beside the terminal block.
● This appliance is provided with a terminal for the connection of
an external equipotential conductor.
This terminal is located under the bottom of the oven close to
the electrical grommet.
5
2
OPERATION
2.1
Getting Acquainted with your Hobart
Convection Steam Oven
2.1.1
Door opening / closure
● The door of the appliance is fitted with an electrically powered
lock.
● The appliance is delivered with the door unlocked and can be
opened by firmly pulling the door handle.
● Push the door until it connects with the latch.
This is the safety position which should be used when the oven
is not in use, and also when the door is opened after cooking to
allow excess steam to safely escape before fully opening the
oven door.
● Push the handle until it is in line with the oven door.
If the power has been connected, the door will now lock
automatically, hermetically sealing the oven cavity.
● To release the door, pull the handle towards you, until it clicks
into the open position. The oven door will then automatically be
released to the safety position.
Allow a few seconds for the excess steam to escape before
pulling the door fully open.
2.1.2
Initial Operation
Only to be done by a Hobart Service Technician or an
Authorised Hobart Service Agent.
Before the appliance is used it must first be preheated
for at least one hour at a temperature of 250 Deg C.
(see Chapter 2.5, convection mode).
The aroma and smoke that are then developed are normal as
the oven is burning off oils and grease used in production.
● Allow appliance to cool down and then clean it thoroughly.
● Check the door and re-adjust if necessary.
Cooking programme can only be started with door closed.
6
2.1.3
Loading the oven
● Maximum load:
CS/CSD-0612 = 30 kg
CS/CSD-1012 = 50 kg
CS/CSD-1022 = 100 kg
CS/CSD-2012 = 100 kg
CS/CSD-2022 = 200 kg
● Place the cooking load in appropriate container or on grid in
accordance with the instructions for use and slide them into
the insert.
● Loading of 10 level ovens:
The insert may be left in the oven or can be used in conjunction
the optional roll in / roll out trolley.
● Loading of 20 level ovens:
With the door in fully open position – insert the tray trolley until
the levers connect with the oven cavity facia. Lift the trolley
handle until it stops.
This will lower the tray insert into the oven chamber. Now withdraw the trolley. The insert is now held in place by two brackets
fitted to the baffle at the rear of the oven.
● NB
Anytime the roll in / roll out facility in the 10 level oven is not in
use, you must ensure the insert retainer (delivered with the
oven) is fitted under the fan baffle in order to prevent the insert
from tilting when pans ere being removed (see fig.).
2.1.4
Unloading the oven
DANGER – beware of excess steam and heat escaping
from the oven chamber when the door is opened.
● Always allow the door to remain in the safety position for a few
seconds to allow excess hot air/steam to escape. Always stand
behind the door when fully opening it after the excess steam
has escaped from the oven chamber.
● Always wear protective clothing when attending the oven during
a cooking operation.
● Unloading of 10 level ovens:
Product can be removed either directly from the oven leaving
the insert in place or can be used in conjunction the optional
roll in / roll out trolley.
● Unloading of 20 level ovens:
With the door in the fully open position – insert the tray trolley
until the levers connect with the oven cavity facia and the two
hooks have connected with the tray insert. Lower the trolley
handle until it stops. This will lift the tray insert from its retainer,
securing it to the trolley.
The trolley may now be removed from the oven with the tray
insert securely held in place.
7
2.2
Control Panel Symbols
Appliance ON
Convection
Vent open / closed
Appliance OFF
Combination steaming
(Convection plus steam)
Steam
Start / Stop
Phase pre-select pad
Time or Core Temerature
display
Down
Timer selection
Core Temperature
selection
Up
Temperature or
DELTA-T display
Down
Set Temperature
DELTA-T selection
Up
Program number selector
Cooking program display
Down
Enter key
Up
HCPC function
Half fan speed
Humidifier / cool down
Diagnostic fault
8
2.3
Control Panel Operation
2.3.1
ON / OFF
On Key
When the green LED and the cooking compartment both light up,
the appliance is ready for operation.
ATTENTION: open the water cock.
To cancel a manual cooking programme of up to five phases
press the On key once.
Off Key
This is pressed at the end of the day.
After approximately 10 seconds the cooking compartment light
goes out, vent opens and the steam generator automatically
empties.
2.3.2
Cooking Modes
Convection Key / Vent Position
The green LED illuminates and the temperature display indicates
150°C. This temperature can be raised or lowered.
For low temperature cooking, the hot air temperature is adjustable
between 30°C and 99°C.
This key also allows to set the vent position:
upper LED illuminated – vent closed,
lower LED illuminated – vent open.
Steam Key
The green LED illuminates and the temperature display indicates
100°C This temperature can be lowered.
For low temperature cooking, the oven temperature is adjustable
between 30°C and 99°C.
Combination Steaming Key
The green LED and the first LED in the phase display light up, and
the temperature display indicates 150°C. This temperature can be
raised or lowered.
The quantity of steam can be set from 1 to 6 by pressing the
combination steaming key. The line of LED's indicates the current
setting.
Start/Stop Key
When this key is pressed, the cooking programme is started (the
LED lights up) or stopped.
If the door is not locked, the temperature display
flashes.
Phase Pre-Select (CSD-Model only)
This key has several functions:
– It permits a check to be made on the previous programmed
cooking phase and further programming of the next phase.
– During a cooking programme, the various phases are displayed
when this key is pressed.
The number of LED's that are illuminated indicates the number of
phases in a cooking programme.
The flashing LED indicates in which phase the cooking programme
is currently engaged.
9
2.3.3
Time Pre-Select
Time Display
This display has several functions:
– Display of the pre-selected time.
– Display of the remaining running time for the cooking
programme.
– Display of the preselected core temperature.
– Display of the actual core temperature.
When the display shows [- --], the appliance is working in manual
operation (no automatic switch-off at the end of cooking process).
Time Check Key
When this key is pressed, the pre-selected time is superimposed
for approximately 5 seconds. Pressing this key also cancels the
probe function.
Core Temperature Key (CSD and EK Models only)
When this key is pressed, the pre-selected time is disabled and
the desired core temperature can be input. The green LED lights
up when core temperature mode is selected. The display will read
60°C.
When the products reaches the core temperature, the display
flashes and the buzzer will sound every 45 seconds for 15 seconds.
Adjustment Keys
The timer or the core temperature can be adjusted up or down
using the two adjustment keys.
NOTE:
Time pre-select is not operational in core temperature operation.
To switch back to manual operation, press the Stop key. Press and
hold the down key until the display shows [- --].
2.3.4
Temperature Pre-Select
Temperature Display
This display has several functions:
– Display of the pre-selected temperature.
– Display of the actual temperature.
– Display of the pre-selected temperature for DELTA-T.
Temperature Pre-Select
When this key is pressed, the pre-selected temperature is displayed
in place of the actual temperature for approx. 5 seconds.
DELTA-T Cooking (CSD Model only)
When this key is pressed, the cooking temperature follows the core
temperature with a constant difference.
When this key is pressed the display will show 60°C. This can be
adjusted using the adjustment keys between 20°C to 120°C in
combi mode or from 20°C to 90°C in steam mode.
Adjustment Keys
These are pressed to adjust the desired temperature upwards or
downwards.
Note:
The temperature can be set only after the cooking mode has been
pre-selected.
10
2.3.5
Programming (CSD Models only)
Display of Programme Number
The display is blinking when the programme in use has been
altered. The alteration is effective for this programme run only,
the programme in memory remains unaltered.
When the programme function is not used the display shows [--]
for manual mode.
To clear a manual mode programme in order to input a new
cooking press the ON key once.
Programme Key
This permits the memory to be switched on or off for programming
or cooking operation purposes.
Programme Number Adjustment Key
Enter Key
When this key is pressed, a cooking programme that has just
been input, with up to 5 phases, can be saved under a specified
programme number.
Caution:
If a second programme is input under the same number, the
display flashes. The previously stored programme can now be
checked. Then:
– either the new programme is saved under a different number
– or the old programme is replaced by the new one. In this case,
it is sufficient to press the input key until the display goes out
(approx. 3 seconds) and two brief signals have been sounded.
2.3.6
Other Functions
Half Fan Speed Key (CSD and EK Models only)
Press once for 1/2 speed – LED flashes.
Press twice for full speed – LED on constantly.
This key is programmable.
Humidity
While this key is pressed, the humidifier is activated. Water is
injected intermittantly if the oven is above 150°C.
This key is not programmable.
HCPC:
Your oven is capable of operating with the HOBART Communication
Product Control system which enables the operator to download
cooking information for storage in line with HACCP regulations.
Contact your local HOBART Sales Office for more information on
HCPC.
Cool Down
For automatic cool down of the oven first press the stop key.
Press adjustment key ( ▼ ) until you clear the timer.
Keep pressed until you get the rain symbol.
The oven temperature will drop to a pre set 70°C.
11
2.4
Programming & Storing Cooking
Programmes
CSD models are programmable, i.e. they allow 99 programmes
of up to 5 phases each to be input and stored in memory.
Example:
1)
1.
Cooking Mode:
Steam
2.
Temperature:
100°C
3.
Time:
20 Minutes
4.
Fan:
Full Power
1.
Cooking Mode:
Convection
2.
Temperature:
160°C
3.
Time:
10 Minutes
1st Phase
2)
3)
3rd Phase
4)
5)
4th Phase
5th Phase
1 Programme
12
2nd Phase
1 Programme
2.4.1
Checking whether the target memory is
"unoccupied"
Programme field is inactiv.
Press the programme key.
The programme display is now in operation.
Use the UP/DOWN keys to select the desired programme.
1. Memory unoccupied:
- h -- min
The current temperature is displayed.
2. Memory occupied:
The input values of the programme already held in the memory
are displayed.
If the programme is to be deleted:
● Press the INPUT key and hold it down (approx. 3 secs) until
two brief signals have been sounded. The programme has
now been deleted.
● The display shows the last selected programme.
If an existing programme is to be changed:
● Press the programme key.
● Use the UP/DOWN keys to select the desired programme.
● Input the desired change (e.g. time or temperature of phase).
The Programme display flashes.
● Save the changed programme by pressing the INPUT key
(approx. 3 secs) until two brief signals have been sounded.
The next memory number will then be displayed.
13
2.4.2
Inputting a Programme
This can be done either in manual mode or directly under a
programme number.
● Select the desired cooking mode.
● Input the time.
● Input the temperature.
● Select half fan speed if needed.
End of input for the 1st phase.
● Press the PHASE key.
● Select the desired cooking mode for the 2nd phase.
● Press the core temperature key: the LED lights up.
Use the UP/DOWN keys to set the core probe temperature.
● Input the temperature.
● Select half fan speed if needed.
End of 2nd phase.
2.4.3
Programming
● Switch on the programme field if not already switched on.
● Use the UP/DOWN keys to select the desired programme.
● The programme display is now in operation.
If the memory is unoccupied:
● Press the INPUT key and keep it depressed until a signal
sounds.
The programme has been stored.
14
2.4.4
Checking
● The row of LED's above the phase key indicates the number
of phases in the programme.
The PHASE key also indicates the current phase by a
flashing LED.
● The Convection/Steam Cooker automatically adds up the total
time for the individual phases and shows it in the time display.
● The time remaining in the current phase can be ascertained
by pressing the key.
2.4.5
Calling a Programme
● The appliance must be in the STOP position (LED off).
● Press the PROGRAMME key.
● Use the UP/DOWN keys to select the programme.
● The programme can now be started.
2.4.6
Ending a Cooking Programme
● At the end of the programme press the STOP key.
● Press the PROGRAMME key.
The display shows manual mode [--].
Tips & Notes:
A new programme can also be input into a programme
memory that is already occupied by an old programme
(as long as the latter is no longer required).
Input the desired programme into the appliance as
described in Section 2.4.2.
Then by pressing the PROGRAMME and SELECT key,
select the programme to be changed.
Pressing the INPUT key and holding it down (until two
brief signals sound) causes the new programme to take
the place of the old one.
15
2.4.7
Samples of Programming
l. Apple Pie
● Select "Hot Air" mode and vent position.
● Input the time (40 minutes).
● Press the TEMPERATURE PRE-SELECT key and input 160°C.
● Press the PROGRAMME key.
● Use the UP/DOWN keys to select programme No. 2.
● Press the INPUT key = programme saved.
Checking:
Press PROGRAMME key and select programme No. 2.
Using the PHASE key, call up phase 1. The following are displayed:
Hot Air, Temperature 160°C, and Time 40 minutes.
II. Croissant for Crisping
● Hot Air.
● Temperature 180°C.
● Time 5 minutes.
● PROGRAMME key.
● Programme number.
● "Save".
● Check.
III. Gratin Dauphinoise
● Hot Air.
● Temperature 140°C.
● Time 30 minutes or somewhat longer, depending on the
thickness of the gratin.
● PROGRAMME key.
● Programme number
● "Save".
16
2.5
Convection Mode
For roasting, gratinating, baking and browning.
Hot air is made to circulate by the fan, without the addition of
moisture. In this way, browning is effected.
● Press convection key: the upper green LED lights up.
Select position of the vent.
● You should always preheat the oven to at least 30°C above the
required cooking temperature.
● Insert product and close the door. Push the handle until it is in
line with the oven door.
● Input desired time. The time can be reduced or increased using
these controls (and is displayed on the illuminated display).
● Input desired temperature. To help with this, a temperature of
150°C is pre-programmed (and is displayed on the illuminated
display).
● Start the programme by pressing the START key.
Tips & Notes:
Browning
● Browning can be done in the appliance for any dishes
requiring this as part of the recipe.
● To carry out browning, raise the temperature to
250°C.
● The grilling is effected by placing food directly onto
the hot shelves.
● Before being cooked, products for grilling should be
lightly brushed with oil or a mixture of oil, spices,
herbs, condiments, etc.
● GN shelf or 20 mm GN tin can be used.
Grilling
Toasting
● When portions are to be grilled intensely and fast,
● Pre-heat the appliance to 250°C.
the appliance must be heated to 250°C.
● Lay the slices of bread on the shelves.
● For grilling, shelves only are used. They should
already be inside the appliance during the pre-heating
phase.
CAUTION:
These shelves will be extremely hot and the operator
should take extreme care when loading the oven und
use suitable protective clothing.
17
Tips & Notes:
Browning
Roasting
● Pastries that do not require moisture at the beginning
● When roasting is to be intense and fast, pre-heat the
of the baking process can be baked in the appliance
using convection.
● If moisture is required, the baking process must begin
with the setting Convection/Steam. The setting may
be changed to convection again at any time.
● Before baking, pre-heat the appliance to the desired
baking temperature.
appliance to 250°C.
● Fast, intense roasting can be carried out on 20 mm
GN or on GN shelves. This applies also to all breaded
products.
● Any traditional or separately prepared breadcrumbs
can be used for the panade.
● The surface of breaded products must always be dry
● Care should be taken while baking with convection
to ensure that the baking temperature is approx.
20°C lower than in traditional baking ovens. If the
temperature is not lowered the products may be
unevenly baked.
● Bake small pastries with a reduced fan speed.
Only in this way can an optimal bake be achieved.
● Shape the dough and place it on the shelves.
● The grease filter is not required for baking.
● Slightly reduced baking times as compared with
traditional baking ovens are the rule.
before they are greased.
● Lightly oil (with a spray-gun) all breaded products
before roasting.
● When breaded foods are being cooked intensely and
fast on shelves, the under-side must also be coated
with oil.
● In the case of breaded products it is recommended
that some paprika be mixed into the breadcrumbs.
● To improve the browning effect in fast, intense
cooking, browning enhancing grease may also be
used.
Note: Rotation of the product will ensure an even
colouration of the product and an even bake.
Range of Applications: Convection
FISH
Processing Guide
Approx. Temp.
Display (°C)
Approx.
Time (Min)
Shelves /
Tins
Roast fresh fish,
cod & mullet
Season
Oil
Pre-heat to 200
Roasting Temp. 180
10 - 12
20 mm GN Tins /
Shelves
Sea-frozen
fish fillet
Thoroughly oil plate bottom and
upper side of fish fillet
Pre-heat to 250
Roasting Temp. 180
10 - 12
20 mm GN Tins
Pre-heat to 220
Roasting Temp. 180
10 - 12
20 mm GN Tins /
Shelves
After baking, leave dish to stand
approx. 2 min in order to avoid
clinging by the panade, this will
make portioning easier
Fresh trout
Season
Oil
Roasting time is extended by 5/10
mins for frozen trout
Fresh breaded
trout
Panade = flour / egg / breadcrumbs
Grease thoroughly
Pre-heat to 250
Roasting Temp. 220/230
15 - 20
Shelves or
20 mm Plates
Fresh sole
Season
Oil
Preheat to 220
Roasting Temp. 180
10 - 12
20 mm GN Tins /
Shelves
18
Range of Applications: Convection
FAST, INTENSE
COOKING
Processing guide
Approx. Temp.
Display (°C)
Approx.
time (Min)
Shelves /
Tins
Pork cutlet,
fresh
Panade = egg, breadcrumbs,
thoroughly oil the breaded surface
of the cutlets, avoid leaving dry
spots, lightly oil plate bottom
Pre-heat to 250
Roasting Temp. 220
10 - 12
20 mm GN Tins/
Shelves
Pork cutlet,
fresh, breaded
approx. 150 g
Oil both sides
Pre-heat to 220
Roasting Temp. 180 auf
10 - 12
Shelves
Frying sausage fresh,
coarse filling,
not blanched
Oil lightly
Pre-heat to 250
Roasting Temp. 220
8 - 10
Shelves or
20 mm GN Tins
Filet steak, fresh
approx. 180 g medium
Season
Oil lightly
Pre-heat to 250
Roasting Temp. 250
7
Shelves
Fillet steak, frozen
approx. 180 g medium
Oil
Season after roasting process
Pre-heat to 250
Roasting Temp. 220
10 - 12
Shelves
Rissoles, fresh
approx. 150 g
Grease plate and upper surface
of meat lightly
Pre-heat to 250
Roasting Temp. 220
10 - 15
40 mm GN Tins
Pork loin cutlet, fresh
approx. 2 mm high,
approx. 130 g
Do not season
Preheat to 250
Roasting Temp. 220
6-8
Shelves or
20 mm Tins
Liver
Oil
Season after roasting process
Preheat to 250
Roasting Temp. 220
4-6
20 mm GN Tin
each insertion
or Shelves
Rump steak, fresh
approx. 180 g medium
Season
Oil lightly
Pre-heat to 250
Roasting Temp. 180
6 - 10
Shelves
Pork chop, fresh
sauteed 150 g
Season
Oil lightly
Pre-heat to 250
Roasting Temp. 180
10 - 12
Shelves
Pork chop, frozen
sauteed 150 g
Oil lightly
Season after roasting process
Pre-heat to 250
Roasting Temp. 220
15
Grating
Pork liver
Oil
Season after roasting process
Pre-heat to 250
Roasting Temp. 220
4-6
Shelves
Pork medallion
approx. 100 g
Season
Oil lightly
Pre-heat to 220
Roasting Temp. 180
5-6
Shelves
Pork cutlet
approx. 130 g
Season
Oil lightly
Pre-heat to 250
Roasting Temp. 220
6-7
Shelves
Goods for baking
Pre-Heat appliance
Approx. Temp.
Display (°C)
Approx. Time
(Min)
Goods for baking
Pre-Heat appliance
Approx. Temp.
Display (°C)
Approx. Time
(Min)
Puff pastry
170
18 - 20
Yeast rolls with milk
200
10 - 12
Danish pastry
180
18 - 20
Plaited Load / 500 g
180
30 - 35
Flaky pastry
170 - 180
16 - 18
Almond Pastry Case
180
10 - 12
Savarin
190
12 - 14
Nut Pastry Case
180
10 - 12
Cake
180
Chocolate Pastry Case
180
10 - 12
(Christmas) Fruit Loaf
160
Biscuit Pastry Case
180
10 - 12
8
55 - 65
19
2.6
Combination Mode
In this mode, the quantity of steam added can be varied and is
indicated by the LED's.
● Heat the appliance up in steam mode for approximately 4 to 5
minutes in order to ensure that steam is produced at the start
of the programme (particularly important where the quantity of
steam added is small).
● Slide in the foodstuffs and close the door. Push the handle until
it is in line with the oven door.
● Input convection / steam mode and select the desired amount
of steam to be added.
● Input the desired time.
● Input the desired temperature.
● The programme is started by means of the start key.
Important data for correct selection of desired quantity
of steam:
20
Humidity
Steam On
Steam Off
1 x press
05 %
05 sec.
95 sec.
2 x presses
10 %
05 sec.
45 sec.
3 x presses
20 %
10 sec.
40 sec.
4 x presses
30 %
10 sec.
23 sec.
5 x presses
40 %
10 sec.
15 sec.
6 x presses
50 %
10 sec.
10 sec.
Tips & Notes:
Depending on the food stuffs being cooked, steaming
may be carried out first, followed by browning with
convection.
The amount of steam and convection can be varied
depending on the product being cooked.
● First steam, then convection for browning.
For browned fruit products, fennel, leek, tomatoes,
chicory.
● First steam, then convection/steam.
For stuffed cabbage leaf, peppers, pot roasts, joints,
belly of pork.
● First steam, then convection/steam, then convection.
For beef olive, goulash, roast beef, braised beef.
● Before roasting begins, season the pieces of meat
and grease them lightly, using an oil spray gun.
● The use of the core temperature probe substantially
simplifies checking on the stage the cooking has
reached.
● Preferred roasting temperatures lie between 140°C
and 160°C in this range, the minimum roasting loss
is achieved.
● If the browning required is insufficient after the end
of the roasting period, use convection only, at a high
temperature.
● Stand unfilled pies on GN shelves.
● Tureens can be cooked without the use of a water
bath in the convection steam mode at 100°C.
Tureens having sealable lids are advantageous.
Baking
● Any pastries that require moisture at the beginning
of or during the baking process can be baked.
Roasting
● GN dishes 65 mm deep are the most suitable for
puddings.
Braising
● The convection/steam combination is particularly
suitable for prolonged roasting (pork, beef, veal, lamb,
poultry, fish, pies, puddings).
● GN shelves should be used for cooking the products.
This eliminates any need to turn them during the
cooking process.
● In order to catch meat juices, an unperforated GN
dish should be inserted into the lower part of the
compartment.
● For roast beef, fish and roulades, use GN shelves or
GN tins.
● If the cooked products are prepared in GN tins, meat
juices can be poured over them.
● When beef is being braised, the temperature should
not exceed 130°C.
● The reduced fan speed also has beneficial effects,
less drying out of meat juices.
● More than one GN dish may be used in larger ovens.
Range of Applications: Convection with Added Steam
BEEF
Processing
Guide
Operation
1
Operation
2
Operation
3
Approx. Total
Time (Min)
Shelves/Tins/
Containers
Boned & rolled
roast beef
Season, oil
add carrots, leaks and
onions,
pour on some red wine
90 min.
steam
120 / 140°C
hotair
with steam
60 min.
–
150
65 mm
unperforated
Shelf
Roast beef
Season &
oil lightly
5 min.
hot air
with steam
140 / 160°C
hot air
15 min
–
20
Shelves
Roulades
Season, oil,
pour on some red wine
30 min.
steam
140 / 160°C
hot air
with steam
40 min
–
70
40 mm /
65 mm
Tins
90 min.
steam
160°C
hot air
with steam
60 - 70 min.
–
150 - 160
Shelves
15 - 20 min.
steam
140°C
hot air
with steam
60 - 70 min.
–
75 - 90
Shelf
Braised beef
VEAL
Stuffed brisket
of veal
Season,
oil lightly
21
Range of Applications: Convection with Added Steam
VEAL
Processing
Guide
Operation
1
Operation
2
Operation
3
Approx. Total
Time (Min)
Shelves/Tins/
Containers
Roast loin
of veal
Season, oil lightly.
Add vegetables as
basis of sauce
20 min.
steam
140 / 160°C
hot air
with steam
70 - 80 min.
–
90 - 100
Shelf
Knuckle of veal
Season, oil.
Add vegetables as
basis of sauce
30 min.
steam
140 / 160°C
hot air
with steam
60 min.
–
90
Shelf
Collar of veal
Season,
oil
20 min.
steam
140 / 160°C
hot air
with steam
70 - 80 min.
–
90 - 100
Shelf
Stuffed belly
of pork
Season
20 min.
steam
140 / 160°C
hot air
with steam
70 - 80 min.
–
90 - 100
Shelf
Pork collar
(grilled)
Season
10 min.
steam
140 / 160°C
hot air
with steam
70 - 80 min.
–
80 - 90
Shelf
Pork loin
without bones
Pour on some
red wine
10 min.
steam
140°C
hot air
with steam
30 - 40 min.
–
40 - 50
Shelf
Stuffed peppers
Place with its opening
on the plate bottom
40 - 45 min.
steam
170°C
hot air
with steam
15 min.
–
55 - 60
65 mm
Tin
Pie or
meatloaf
Filling weight
approx. 2 kg per dish
(aluminium)
10 min.
steam
120°C
hot air
with steam
60 - 70 min.
–
70 - 80
Shelf
Frying sausage
coarse
not blanched
5 - 6 min.
steam
180°C
hot air
with steam
5 - 6 min.
–
10 - 12
Shelf
Frying sausage
fine
5 min.
steam
200°C
hot air
with steam
5 - 7 min.
–
10 - 12
Shelf
PORK
SAUSAGE
POULTRY
Goose
Season
10 min.
steam
140 / 160°C
hot air
with steam
100 - 110 min.
–
110 - 120
Shelf
Turkey or
chicken
Season
10 min.
steam
140 / 160°C
hot air
with steam
90 - 100 min.
–
100 - 110
Shelf
Meat Loaf
Oil lightly in
baking tin
10 min.
steam
160 / 180°C
hot air
with steam
50 - 60 min.
–
60 - 70
40 mm
65 mm
Tin
Stuffed cabbage
leaf fresh
Season
sprinkle with caraway
and browned onions
40 - 45 min.
steam
180°C
hot air
with steam
10 min.
–
60-65
65 mm
Tin
MINCE DISHES
22
2.6.1
Convection mode with variable quantities
of added steam
Different processes can be carried out in sequence. There is no
requirement for replating of the foodstuffs.
In the case of foods that are steamed during the first process, it
is recommended that seasoning should not take place until the
steaming operation has ended.
● Insert the product and close the door. Push the handle until it is
in line with the oven door.
● Select the convection / steam mode, select the desired quantity
of steam.
● Input the desired time.
● Input desired temperature
(eg. for regeneration 120°C to 140°C)
● The programme is started by means of the START key.
Tips & Notes:
Regeneration / Preparation
● This setting of the appliance is mainly used for
regenerating dishes.
Humidity
● An a-la-carte volume preparation is substantially
ON
OFF
5%
5 sec.
95 sec.
10 %
5 sec.
45 sec.
20 %
10 sec.
40 sec.
facilitated with the convection setting.
● Put plates and dishes for regenerating onto GN
shelves.
Steam Input
● Pre-heat the appliance to the operating temperature
(120 Deg C. – 140 Deg C.).
● The formation of condensation on plates and dishes
during the warming up phase is prevented by the
variable addition of steam.
● Baking, roasting and braising can also be carried out
at this mode setting.
23
2.7
Steam Mode
For stewing, blanching, poaching and regeneration.
Steam flows without pressure into the cooking compartment and
permits the gentle cooking of fish, meat, vegetables, potatoes and
all products that otherwise are cooked in water.
The action of the fan distributes the steam evenly within the oven
cavity.
● Press the STEAM key, the green LED lights up.
● Heat the appliance up (approx. 4 to 5 min from cold).
● Slide the product in (only after the set cooking temperature has
been reached).
Close the door and push the handle until it is in line with the
oven door.
● Input the desired time.
● Input the desired temperature (max. 100°C).
● The programme is started by means of the START key.
Tips & Notes:
Stewing / Steaming
Regeneration
● Unperforated GN containers are used for stewing.
● The basic rule, all products that have been cooked
● Liquid, seasoning or fat is added to the product.
● When cooking rice, 1.5 times the quantity of liquid is
required.
● When setting the time, remember that stewed
products display a stronger after cooking effect.
● Vegetable products that are to undergo further
processing should be refreshed with iced water after
the steaming operation.
Defrosting
● Defrosting times for deep-frozen products are
substantially shortened by the use of steam.
with steam can be re-heated with steam.
● Warming-up periods depend on the depth to which
containers are filled.
● We recommend that regeneration be carried out in
un-perforated 65 mm high GN containers.
Cooking - Pulses & Rice
● The products are placed into GN containers and
covered with liquid.
Conserves
● Jars or tins should be used for making conserves.
● Meat and sausage conserves are placed in GN
shelves.
24
Tips & Notes:
Blanching
Use:
● Because of the immediate inflow of steam, the
● Perforated GN containers, 20 mm deep,
blanching of products in this appliance is very time
saving.
● Use perforated GN containers, 65/100 mm deep.
● All products that are required for further cooking
processes, eg. vegetables for salads and giblets
such as brain, liver, kidney, meat and fish, can be
blanched.
for dumplings, meatballs, portions of fish.
● Perforated GN containers, 65 mm deep,
for vegetables of all kinds, eggs, potatoes.
● Perforated GN containers, 65/100 mm deep,
for potatoes.
● Un-perforated GN containers for vegetables, meat
(fricassee), meat-balls whole fish.
● During the steaming process, a condensate forms in
Steaming
● All products can be steamed that were previously
cooked in water in a saucepan.
● Additional liquid is not required.
● For the optimal use of the appliance, different
products can be steamed at the same time.
● No transfer of flavour occurs.
● Products can be removed or added at any time during
the cooking process.
● The cooking can be checked up on at any time.
● The cooking time is always the same, independant
of the quantity being cooked.
unperforated containers that can be used as a juice
for making sauce.
● Use GN shelves for larger pieces of meat (boiled
fillet of beef, joints, ham) and for whole cabbages
(cauliflower, red cabbage, white cabbage).
● For making sauce, an un-perforated GN dish is placed
low in the appliance.
● Perforated GN containers shorten cooking times
10/15%.
Seasoning recommendations when steaming
Before steaming, sprinkle the products with a mixture of
seasoning and distribute it.
Potatoes must be seasoned before being steamed.
A mixture of butter/seasoning is put onto the products
after steaming.
Range of Applications: Steaming
VEGETABLES
Processing Guide
Aubergines
Container
Container
Contents
Approx.
Time (Min)
65 mm perforated
2 kg
10
Cauliflower, brussel
sprouts, fresh, frozen
Season after the cooking process
65 mm perforated
2 kg
15-18
Cauliflower head
fresh
Sprinkle with lemon drops
before the cooking process
Shelves
4-6 pieces
18-20
Broccoli
fresh
Season after the cooking process
65 mm perforated
2-3 kg
15-18
Peas
frozen
Season after the cooking process
65 mm perforated
2-3 kg
12-15
Green beans
frozen/fresh
Season after the cooking process
65 mm perforated
2-3 kg
18-20
Mushrooms, halved,
quartered, in slices
Sprinkle with lemon drops
before the cooking process
65 mm perforated
2 kg
18-10
65 mm perforated
2-3 kg
15-18
65 mm perforated
2-3 kg
18-20
Brussel sprouts
frozen/fresh
Celery in slices,
diced
Sprinkle with lemon drops
before the cooking process
25
Range of Applications: Steaming
VEGETABLES
Processing Guide
Spinach
fresh
Container
Container
Contents
Approx.
Time (Min)
100 mm perforated
65 mm perforated
2 kg
12-4
Potatoes
Place in a 10% salt solution for 15 min
before the cooking process, or salt dry
100 mm perforated
65 mm perforated
6-8 kg
30-35
Jacket potatoes
Can be sprinkled with caraway
before the cooking process
100 mm perforated
65 mm perforated
6-8 kg
35-40
Carrots, small
fresh or frozen
Season after the cooking process
65 mm perforated
2-3 kg
18-20
65 mm perforated
2-3 kg
15-18
Carrots, diced
fresh
Corn cobs
fresh
Sprinkle with lemon drops
before the cooking process
Shelves
8-12 pieces
15-18
Asparagus
fresh
Sprinkle with lemon drops
before the cooking process
40 mm perforated
65 mm perforated
3 kg
12-15
100 mm perforated
65 mm perforated
3 kg
15-18
White cabbage,
sliced,
fresh
SIDE DISHES
Pasta
Before cooking, cover pasta with
hot water and add some oil.
It is advisable to mix the pasta once
thoroughly during the steaming process.
65 mm unperforated
2,5 kg
20-25
Dumplings,
meatballs
Dumplings and meatballs are steamed
without additional water.
20 mm unperforated
20 pieces
15-20
Rice
Fill up the rice with 1 1/2 time
the quantity of water
65 mm unperforated
2,5 kg
20-25
EGGS
At room temperature
65 mm unperforated
Fricassee of veal
Add seasoning and vegetables
to the meat
65 mm unperforated
2 kg
45-50
Brisket
Add seasoning and vegetables
to the meat
65 mm perforated
Shelves
4 kg
90-120
Ox tongue
Shelves
4 pieces
60-80
Pig’s knuckle,
pickled
Shelves
6 pieces
60-80
Soft 8
Hard 10
MEAT
Calf’s brains
Blanch
40 mm unperforated
2 kg
14-6
Calf’s sweetbread
Season with onions, bay leaf,
juniper berries and vinegar
40 mm unperforated
2 kg
16-18
Cod, halibut,
fresh or frozen
In helpings
40 mm unperforated
12 helpings
10-12
Carp,
fresh
Halved
40 mm unperforated
Halved
4 pieces
12-14
Carp,
fresh
In helpings
40 mm unperforated
12 helpings
10-12
Crayfish tails,
frozen
Sprinkle with lemon drops and
if possible cover with fresh dill
40 mm unperforated
3 kg
12-15
Salmon,
fresh
Season helpings with lemon
40 mm unperforated
10 pieces
10-12
Mussels
Add some wine
40 mm unperforated
3 kg
18-10
Sole rolls,
frais
Season and add wine
40 mm unperforated
20 pieces
18-10
FISH & CRUSTACEANS
26
2.8
Low Temperature Cooking
For steaming, regenerating, blanching and pouch cooking.
Particularly sensitive dishes require temperatures below 100°C.
Here you have the ability to select the resultant temperature
between 30°C and 99°C.
● Press the STEAM key.
● Heat the appliance up (approx. 4 to 5 min from cold).
● Insert product and close the door. Push the handle until it is in
line with the oven door.
● Input the desired time.
● Input the desired temperature (maximum 99°C).
● Start the programme.
NOTE:
Pouch Cooking (Sous-Vide)
This allows vacuum packed products to be cooked gently at
low temperatures.
Afterwards, shock cool and store the product immediately.
When required, the product can also be "awakened" at
low temperatures in the Convection/Steam Cooker.
● Low temperature cooking is also possible in convection and
combination mode (30°C – 99°C) .
NB: lower cooking temperatures will require a longer cooking
NB: time than conventional cooking.
Advantages
– Reduction in weight loss.
– Higher nutritional content in the cooked products.
27
2.9
Core Temperature cooking
(CSD and EK Models only)
Advantages:
Overheating is not possible.
Loss of weight is minimized by the precision of the cooking
process.
The product will not require monitoring during the cooking
operation, so releasing the operator for other tasks.
● Insert the probe to the point where its tip is approximately in
the centre of the product. Probe must be cold.
Do not strain or overstretch the probe cable.
● Close the door. Push the handle until it is in line with the oven
door.
● Select one of the cooking modes.
In the combination steaming mode, the humidity can be varied.
● Input the desired cooking temperature.
● Press the Core Temperature Key, the green LED lights up.
Input the desired core temperature.
● The programme is started by means of the START key.
While the programme is running, the current actual temperature
of the probe is displayed.
● If a display of the pre-selected core temperature is desired,
please press.
● If a display of the pre-selected cooking temperature is desired,
please press.
ATTENTION:
The cooking process is monitored by the core temperature probe,
replacing the timer. When the set core temperature is achieved in
the product, the oven switches off automatically.
After cooking switch off the core temperature mode by pressing
the time check key.
Core Temperature Probe overheated
Let it cool down and re-start.
28
Core Temperatures Guidelines
Minor variations will occur due to meat quality and variance in eating preferences.
BEEF
Cooked Condition
Intended purpose
Core Temp.
(°C)
Roast beef
Pink
For Roasting
52
Pot Roasts
Fully Cooked
For Pot Roasting
78
Fillet Steak
Pink
For Roasting
55
Pork Loin Cutlet
Fully Cooked
For Roasting or Simmering
50-55
Leg
Fully Cooked
For Roasting for the various types
of Joints of Pork
75
Saddle Cutlet
Slightly Pink
For Roasting
70-75
Shoulder
Fully Cooked
For Roasting, mostly as
Collar or Blades
75
Neck Piece
Fully Cooked
For Roasting
75
Spare Ribs
Fully Cooked
For Roasting
75
Saddle
Slightly Pink
For Roasting or Simmering
70
Knuckles
Fully Cooked
For Roasting or Simmering
75-80
Ham
Very Juicy
For Simmering for
making Boiled Ham
80-85
Shoulder Ham
Very Juicy
For Simmering for
Boiled Ham
80-85
Belly
Fully Cooked
For Simmering
75
Saddle
Fully Cooked
For Roasting
80
Saddle
Slightly Pink
For Roasting
60-65
Leg
Fully Cooked
For Roasting
85
Leg
English Medium
For Roasting
55-60
Shoulder
Fully Cooked
For Roasting,
mostly as Collar
80
Breast
Fully Cooked
For Simmering
85
PORK
MUTTON
29
2.10 DELTA-T Cooking
(CSD Models only)
The advantage of DELTA-T cooking enables you to have greater
control over the cooking process providing both energy savings
and a reduction in product weight loss.
DELTA-T can be used on all three cooking modes.
Cooking with DELTA-T automatically controls the cooking temperature, following the product core temperature with a constant
difference. This eliminates the possibility of over cooking the outside of the product until the required core temperature is reached.
Operation:
● Place the product in the oven.
● Insert the probe into the product so that the probe top is in
the centre of the thickest part.
● Close the door and switch the oven on.
● Select the required cooking mode.
● Press the probe key, the green LED will light.
Using the UP/DOWN keys, set the required final core
temperature for the product (max. 100°C).
● Select DELTA-T (the LED will light and 60t will appear on
the panel).
Using the UP/DOWN keys adjust the temperature to the
required setting. We recommend 30°C difference in steam
mode and 60°C difference in convection mode.
● Press the start key.
During cooking the actual core temperature is displayed.
Generally DELTA-T cooking is for large product pieces and may
involve extended cooking times.
● Once the cooking process is over press this key to switch of
the DELTA-T operation.
30
2.11 Faults
2.11.1 Automatic display of fault conditions
In the event of a fault in the appliance, the LED in the
diagnostic corresponding to the defective part lights
up and a signal sounds. Operation is not possible.
Illuminates one of these 3 symbols, switch off the appliance
and re-start. If failure repeats, please do not attempt to restart
the appliance. Switch off at the main switch and call your
Regional Office Service Desk.
Water failure
If the boiler is starved of water, the buzzer will be activated after
approx. 4 minutes.
Ensure water control valve is open. If the valve was closed, switch
off the appliance, open the water valve and re-start the oven.
If there is no apparent reason for water starvation, please call your
HOBART Service Desk.
Temperature Sensor Failure
If this code is displayed:
0612/1012/1022: the temperature sensor of the cavity is defective.
2012/2022: the upper temperature sensor of the cavity is defective.
2012/2022: this code is displayed when the lower temperature
2012/2022: sensor of the cavity is defective.
This code applies for defective core temperature probe during
controled core temperature cooking.
In this cases call your HOBART Service Desk.
2.11.2 Door cannot be unlocked electrically
In the event of a prolonged power failure or a fault when
cooking foods are located within the appliance, the door may
be opened manually.
● Switch off the main switch.
● Pull the door handle firmly towards you while firmly pressing
against the oven facia with the other hand to stabilise the oven.
This procedure is only to be used in the case of an emergency
and not during normal operations.
● In case of trouble at the door lock, please call your
HOBART Service desk.
2.11.2 Appliance cannot be started
(The temperature display blinks.)
● Make sure that the door is fully closed.
31
3
CLEANING / MAINTENANCE
3.1
Care & Cleaning
To clean the appliance do not use any chloric, acidic or
abrasive products.
Greasy deposits can ignite. It is very important to keep
the cooking compartment and tray frame clean.
3.1.1
Daily Cleaning
● Wipe off solids from the base of the machine.
● Heat the cooking compartment to approx. 45/50°C and spray
with cleaning fluid. Leave to act for approx. 15 minutes.
Take note of precautions noted in the cleaning product
instructions.
● Carry out a steaming operation for approx. 20 minutes.
CSD only:
one of the programmes could be set as a cleaning programme
(i.e. 100°C steam mode for 20 minutes).
● Rinse the oven chamber thoroughly with clean fresh water
and dry it.
3.1.2
Thorough Cleaning (whenever required)
● Switch off at the main switch / disconnect the power supply.
● Withdraw the tray frame and / or tray trolley.
● Remove the grease filter.
2
1
● Remove fan plate.
1
● Clean core temperature probe.
● Clean all parts and the cooking compartment and dry
thoroughly.
● Replace the parts when dry.
2
● Clean the casing with a mild detergent and a damp cloth.
Do not wash down the exterior of the appliance
with a hose or a high pressure cleaner.
32
3.2
Maintenance
This appliance has been constructed using modern technology.
In order to ensure secure and trouble-free operation, we recommend
that a Maintenance Contract be arranged, with regular maintenance
by Hobart Service Engineers.
3.2.1
Descaling
Descaling should be carried out only by a trained
Service Engineer and in accordance with regulations
for safety and ventilation during work with acids. Protective
clothing must be worn.
Open the door.
Empty the steam generator by pressing the OFF key.
Following the makers instructions and using a hose and the funnel
supplied, feed in the decalcifying solution slowly via the steam
outlet aperture (see illustration).
Boiler capacity:
0612 = 3 Liter
1012 = 6 Liter
1022 = 8 Liter
2012 = 10 Liter
2022 = 20 Liter
After approx. 3 minutes, press the ON key.
Select the STEAM programme.
The steam generator will fill.
Input 2 minutes of time and a temperature of 60°C.
Do not extend this time as it may cause a health hazard!
Close door and press START key.
After the programme has run (a signal sounds), press the
STOP key.
Caution: Do not switch off the appliance.
Leave the heated solution in the steam generator to act for
approx. 1 hour.
Make sure that nobody uses the oven during that
period.
Switch off the appliance (the steam generator automatically
empties).
After approx. 3 minutes, switch the appliance on again and
allow a 10 minute steaming operation to run.
Then switch the appliance off again so that the steam
generator can re-empty.
Repeat the 10 minute steaming process.
Switch the appliance off again.
The appliance is once more ready for operation.
33
Notes:
34
35
HOBART reserve the right to make alterations and improvements to all products without prior notice.
Printed in Germany
AG-20760-C-07-99-TD