1
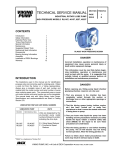
TECHNICAL SERVICE MANUAL INDUSTRIAL ROTARY LOBE PUMP STANDARD MODELS RL0167, 40167, 0257, 40257 SECTION TSM 270.1 PAGE 1 ISSUE B CONTENTS Introduction Safety Information Exploded Parts View Parts Description Torque Specifications Special Information Maintenance Suggested Repair Tools Mechanical Seal Information Disassembly Bearing Housing Information End Clearance Adjustment Assembly Installation of PEEK® Bushings Warranty 1 1 2 3 3 4 4 4 5 7 8 8 9 10 11 FIGURE 1 DANGER! Incorrect installation, operation or maintenance of equipment may cause severe personal injury or death and/or equipment damage. This information must be read fully before beginning installation, operation or maintenance and must be kept with the pump. It is suggested that suitably trained or qualified persons perform all installation and maintenance procedures. INTRODUCTION The illustrations used in this manual are for identification purposes only and cannot be used for ordering parts. Obtain a parts list from the factory or a Viking representative. When ordering repair parts always give a complete name of part, part number and material with the model number and serial number of pump. The unmounted pump or pump unit model number and serial number are on the nameplate. This manual deals only with Viking Industrial Rotary Lobe Pumps. Specifications and recommendations are listed in Catalog Section 270. UNMOUNTED PUMP AND UNIT MODEL NUMBERS UNMOUNTED PUMP PACKED RL0167 RL0257 MECHANICAL SEAL RL40167 RL40257 UNITS Units are designated by the un-mounted pump model numbers followed by a letter indicating the drive style. R = Viking Speed Reducer P = Commercial Speed Reducer PEEK®- Registered trademark of Victrex PLC DANGER ! Before opening any Viking pump liquid chamber (pumping chamber, reservoir, etc.) be sure: 1. That any pressure in the chamber has been completely vented through the suction or discharge lines or other appropriate openings or connections. 2. That the driving means (motor, turbine, engine, etc.) has been “locked out” or made nonoperational so that it cannot be started while work is being done on pump. 3. That you know what liquid the pump has been handling and the precautions necessary to safely handle the liquid. Obtain a material safety data sheet (MSDS) for the liquid to be sure these precautions are understood. 4. That the timing gearbox to cool before handling the pump. The oil will become very hot during normal operation. Allow the timing gearbox oil. Failure to follow above listed precautionary measures may result in serious injury or death. VIKING PUMP, INC. • A Unit of IDEX Corporation • Cedar Falls, IA 50613 USA SEALING OPTIONS FIGURE 2 EXPLODED PARTS VIEW SECTION TSM 270.1 ISSUE A PAGE 2 OF 12 TABLE 1 - Standard or Abrasive Option ITEM DESCRIPTION ITEM DESCRIPTION 1 Plug for Gear Case, 3/8” Square Head 34 Casing/Bushing Assembly 2 Capscrew for Gear Case Cover 3/8" NC x 1.00 Long (4 Req'd) 35 Capscrews for Head, 1/2" NC x 1.25 Long (8 Req'd) 3 Lipseal for Gear Case Cover 37 Casing Bushings (2 Req’d) 5 Gear Case Cover 40 Head 6 Pipe Plug for Fill Hole, 3/4” NPT 43 Retaining Ring for Bearing Housing Assembly (2 Req'd - 1 for each Bearing Housing Assembly) 7 O-Ring for Head and Gear Case Cover (2 Req'd) 44 Pressure Relief Fitting for Bearing Housing (2 Req’d) 8 Locknut W-08 (2 Req'd) 45 Capscrews for Bearing Housing Cover Plate (4 Req’d) 9 Lockwasher TW-108 (2 Req'd) 46 Cover Plate for Bearing Housing Bracket (2 Req’d) 10 Timing Gear for Driver Shaft 48 Grease Fitting for Bearing Housing, 1/8 NPT (2 Req'd) 11 Timing Gear for Driven Shaft 49 Packing Gland (2 Req’d) 12 Key for Timing Gears, 3/8" x 1.38" Long (2 Req'd) 50 Bolt-on Port (2 Req’d) 16 Lip Seal for Bearing Housing (2 Req'd - 1 for each Bearing Housing Assembly) 51 O-ring for Bolt-on Ports (2 Req’d) 18 Tapered Roller Bearing Set (2 Req'd - 1 for each Bearing Housing Assembly) 52 Capscrews for Bolt-on Ports, 1/2" NC x 1.25" Long (12 Req'd) 19 O-Ring for Bearing Set (2 Req'd - 1 for each Bearing Housing Assembly) 53 Circulation Line Assembly 20 Bearing Housing (2 Req'd - 1 for each Bearing Housing Assembly) 54 Pipe Plug 1/2" NPT square head 21 Labyrinth Seal (2 Req'd - 1 for each Bearing Housing Assembly) 55 Driver Shaft 23 Bearing Housing Assembly, Items 16, 18-21, 43 (2 Req'd) 56 Driven Shaft 24 Dowel Pin, 0.5" Dia. X 0.75" Long (4 Req'd) 57 Lobe (2 Req’d) 25 Bracket 58 Key, for lobe (2 Req’d) 28 Set Screw for Bearing Housing (4 Req’d) 59 Snap Ring for Lobe (2 Req’d) 29 Pipe Plug for Bearing Housing, 1/8 NPT, Allen Head (4 Req'd) 60 Pipe Plug 1/8" NPT Allen Head, to Seal Chamber 30 Capscrews for Seals or Packing Gland (8 Req’d) 61 Washer for Seals or Packing Gland (8 Req'd) 31 Sealing Option (2 Seals or 10 Packing Rings Req’d) 62 Packing Washer (2 Req’d) 32 Capscrew for Bracket, 1/2" NC x 1.75 L (4 Req'd) 63 Pipe Plug for Seal Gland TABLE 2 Torque Specifications Item Number RECOMMENDED TORQUE (ft-lb) 2 8 30 32 35 52 31-34 200 20-22 75-82 43-47 43-57 SECTION TSM 270.1 ISSUE A PAGE 3 OF 12 SPECIAL INFORMATION TAPERED ROLLER BEARINGS ROTATION Viking Industrial Rotary Lobe pumps may be operated in either a clockwise or counterclockwise rotation (clockwise rotation is standard). Rotation is determined by viewing the pump from the shaft end as shown in Figure 3. The circulation line provided vents the seal chamber to the inlet port. When reversing the rotation on the pump, the seal chamber will experience an increase in pressure, which may affect seal performance. Refer to seal manufacture’s specifications or contact the factory for recommended pressure limits. If rotation is reversed, this line should be switched to the opposite port. INLET FOR CLOCKWISE ROTATION (STD.) PACKING ADJUSTMENT R O TA C W T IO N GEAR CASE DRAIN PLUG GEAR CASE FILL PLUG INLET FOR COUNTERCLOCKWISE ROTATION FIGURE 3 PRESSURE RELIEF VALVES Viking Industrial Rotary Lobe pumps are positive displacement pumps and must be provided with some sort of pressure protection. An inline pressure relief valve, a torque limiting device or a rupture disk must be provided in the pumping system. MAINTENANCE LUBRICATION CAUTION: Pumps are supplied without gear case oil. Be sure to add the proper amount and type of lubricant before operating the pump. Do not overfill! GEAR CASE - Use a grade of gear lube oil with EP (Extreme Pressure) additive for the ambient temperature range. 0 - 32° F 32 – 85° F above 85° F Refer to Figure 3, remove the pipe plug from the fill hole and add 15 oz. of the specified lubricant. Fill to the bottom of the fill plug hole. After 100 hours of operation, drain and refill with new lubricant. Check the oil level regularly and add lubricant as necessary. Drain and refill with new lubricant every 12 months or 3000 hours of operation, whichever comes first. SECTION TSM 270.1 BUSHINGS The bushings used in this pump are lubricated with the product and do not require any external source of lubrication during operation. CIRCULATION LINE EP150 EP220 EP320 External lubrication must be applied slowly with a manual grease gun to both lubrication fittings every 500 hours of operation with multi-purpose grease, NLGI # 2. Do not overgrease. Applications involving very high or low temperatures will require other types of lubrication. Refer to ESB 515. Consult the factory with specific lubrication questions. Pumps supplied from the factory are packed with heavyduty grease. Upon disassembling the bearing housing, the bearings should be cleaned and repacked with heavy-duty multi-purpose grease. ISSUE A PAGE 4 OF 12 New packed pumps require initial packing adjustment to control leakage as the packing “runs in”. Make initial adjustments carefully and do not over-tighten the packing gland. After initial adjustment, inspection may reveal the need for packing gland adjustment or packing replacement. Refer to instructions under “Optional Packing Replacement, Installation”, page 6, regarding repacking the pump. CLEANING THE PUMP Keep the pump as clean as possible to facilitate inspection and repair work. STORAGE If a new pump is to be stored or not used for six months or more, add 5 oz. of non-detergent SAE 30 weight oil in the timing gear box. Viking suggests rotating the pump shaft by hand one complete revolution every 30 days to circulate the oil. SUGGESTED REPAIR TOOLS The following tools must be available to properly repair Viking RL pumps. These tools are in addition to standard mechanics’ tools such as open end wrenches, pliers, screw drivers, etc. Most items can be obtained from an industrial supply house. 1. 2. 3. 4. 5. 6. 7. 8. 9. 10. Soft headed hammer Allen wrenches Depth micrometer (0-1” Range) Bearing Locknut Spanner Wrench (Adjustable Face, Pin Style - 3/16 Dia Pin) Adjustable Hook Spanner Wrench, for 1-1/4” to 3” diameter. Jackscrews - 3/8 UNC by 3” length capscrew threaded the entire length (3 Required) Brass bar or wood block Arbor Press Packing hook, flexible (packed pumps) External Snap Ring Pliers MECHANICAL SEAL INFORMATION The Industrial Lobe series pump can be supplied with a variety of mechanical sealing configurations and materials. A cartridge mechanical seal is considered standard construction. Complete pump disassembly is not necessary if only the cartridge seals are being replaced. For seal replacement only, access to the seals from the head end of the pump is more efficient. General installation and replacement instructions for the sealing options are provided. It is also recommended to review the seal manufacture’s instructions. For complete pump disassembly and assembly instructions see pages 7 through 9. DANGER ! Before opening any Viking pump liquid chamber (pumping chamber, reservoir, etc.) be sure: 1. That any pressure in the chamber has been completely vented through the suction or discharge lines or other appropriate openings or connections. 2. That the driving means (motor, turbine, engine, etc.) has been “locked out” or made non-operational so that it cannot be started while work is being done on pump. 3. That you know what liquid the pump has been handling and the precautions necessary to safely handle the liquid. Obtain a material safety data sheet (MSDS) for the liquid to be sure these precautions are understood. 4. That the timing gearbox to cool before handling the pump. The oil will become very hot during normal operation. Allow the timing gearbox oil. FIGURE 4 Cartridge Mechanical Seal Replacement Only REMOVAL 1.Remove the cover plate capscrews and remove the cover plate from the bracket. 2.Loosen the seal setscrews and remove the seal gland capscrews and washers. 3.Remove the head capscrews and head. 4.Remove the lobe snap rings, lobes and keys. 5.Remove the capscrews connecting the bracket to the casing, and pull the casing from the bracket. 6.Remove the seals. INSTALLATION 1.Lubricate the seal ID and pump shaft with an appropriate lubricant. Slide each seal onto a shaft, and place about 5.25” past the step on the shaft. 2.Replace the casing, being careful not to damage the bushings on the steps of the shafts, and secure to the bracket with capscrews. 3.Install the keys and lobes, and secure with the snap rings. The flat side of the snap ring should face the lobe. 4.Install the O-ring, head and capscrews. Failure to follow above listed precautionary measures may result in serious injury or death. 5.Slide the seals towards the casing until the glands contact the stuffing box face. DANGER! 6.Secure the seal glands to the casing with washers and capscrews. Torque the bracket, head and finally the seal gland capscrews according to Table 2 on page 3. Before starting pump, be sure all drive equipment guards are in place. Failure to properly mount guards may result in serious injury or death. 7.Tighten the seal setscrews. For optional cartridge mechanical seals that have setting clips, remove them. 8.Replace the cover plate and capscrews on the bracket. WARNING: Do not use the circulation tubing to lift the pump or casing. Make sure the bracket is secured to a work bench or other stable work surface before working on the pump. SECTION TSM 270.1 ISSUE A PAGE 5 OF 12 FIGURE 6 FIGURE 5 Optional Cartridge Lipseal Seal Replacement Only NOTE: Good radial alignment is required for proper operation of the seals. This is accomplished by the use of centering tabs provided with each seal. Turn the tabs inward when installing or removing the seal. Turn them outward for normal operation of the pump. REMOVAL 1.Remove the cover plate capscrews and remove the cover plate from the bracket. 2.Loosen the seal setscrews and remove the seal gland capscrews and washers. 3.Remove the head capscrews and head. 4.Remove the lobe snap rings, lobes and keys. 5.Remove the capscrews connecting the bracket to the casing, and pull the casing from the bracket. 6.Remove the seals. INSTALLATION 1.Lubricate the seal ID and pump shaft with an appropriate lubricant. Slide each seal onto a shaft, and place 5.25” past the step on the shaft. 2.Replace the casing, being careful not to damage the bushings on the steps of the shafts, and secure to the bracket with capscrews. 3.Install the keys and lobes, and secure with the snap rings. The flat side of the snap ring should face the lobe. 4.Install the O-ring, head and capscrews. 5.Slide the seals towards the casing until the glands contact the stuffing box face. Turn the centering tabs inward. 6.Secure the seal glands to the casing with washers and capscrews. Torque the bracket, head and finally the seal gland capscrews according to Table 2 on page 3. 7.Tighten the seal setscrews and turn the centering tabs outward. 8.Replace the cover plate and capscrews on the bracket. SECTION TSM 270.1 ISSUE A PAGE 6 OF 12 Optional Packing Replacement Only REMOVAL 1. Remove the packing gland capscrews. 2. If the pump bracket is still assembled, there is enough room to slide the packing gland back and pull out the packing with a packing hook, without further disassembly. INSTALLATION 1. Clean the stuffing box thoroughly and check the shaft for smoothness. Scored shafts should be replaced. 2. Lubricate the packing rings with an appropriate lubricant. Install and seat each ring of packing one at a time, staggering the ring joints 90° apart. Push each ring in by hand using the packing gland or by tightening two opposite packing gland capscrews. 3. Install the packing gland washers and capscrews. Tighten the packing gland until it becomes snug. Do not over-tighten. 4. On start-up of the pump, carefully tighten the gland to reduce leakage until a desired leakage rate is obtained. Excess leakage during the break-in period is necessary to help lubricate and cool the packing. A maximum adjustment of approximately 1/8 turn at a time is recommended. If during this period heating occurs, back off the gland and allow to run until stuffing box cools. Then, begin readjustment. NOTE: Some leakage is required for packing lubrication. The amount will vary depending on the application. Consult your authorized Viking representative for more information. Labyrinth Seal All labyrinth seals contain 4 common parts: Stationary Element Stationary O-ring Rotating Element Rotating O-ring It is recommended to replace any O-rings that are removed from their initial seat. It is recommended to replace the entire seal if the stationary and rotating elements become separated. PUMP DISASSEMBLY DANGER ! Before opening any Viking pump liquid chamber (pumping chamber, reservoir, etc.) be sure: 1. That any pressure in the chamber has been completely vented through the suction or discharge lines or other appropriate openings or connections. 6. Slide the timing gears off the shafts. If the timing gears do not come off easily, use jackscrews (Suggested Repair Tools # 6) (figure 7). Bearing Lockwasher Tabs 2. That the driving means (motor, turbine, engine, etc.) has been “locked out” or made non-operational so that it cannot be started while work is being done on pump. 3. That you know what liquid the pump has been handling and the precautions necessary to safely handle the liquid. Obtain a material safety data sheet (MSDS) for the liquid to be sure these precautions are understood. 4. That the timing gearbox to cool before handling the pump. The oil will become very hot during normal operation. Allow the timing gearbox oil. Failure to follow above listed precautionary measures may result in serious injury or death. WARNING: Do not use the circulation tubing to lift the pump or casing. Make sure the casing is secured to a work bench or other stable work surface before working on the pump. 1.Remove the cover plate capscrews and remove the cover plate from the bracket. 2. Loosen the capscrews on the seal gland and the setscrews that hold the seal on the shaft sleeve. 3/8” Jackscrew Holes FIGURE 7 7. Loosen the setscrews (item 28) in the bracket that secures the bearing housings. 8. Remove the Bearing Housing Assemblies using the spanner wrench (Suggested Repair Tools # 4). For complete Bearing Housing Disassembly, see page 8. 9.Remove the capscrews (item 32) and the bracket. 10.Remove the four capscrews and washers that hold each cartridge mechanical seal in place and remove the seals. Refer to figure 4. For other optional sealing instructions refer to Mechanical Seal Information on pages 5 and 6. 11.Remove the lobe/shaft assemblies. 12.Remove the snap rings to pull the shafts from the lobes. NOTE: The loosening of the seal setscrews and gland capscrews should always be the first step whenever working on the pump. 3. Drain the oil from the timing gear case by removing the pipe plug (item 1). Remove the capscrews, then carefully slide the gear case cover off the driver shaft. 4. Remove the capscrews and head. 5. Straighten out the bearing lockwasher tab on both shafts (see figure 7). Place a wooden block or brass bar in between the lobes to block rotation of the shafts. Use the spanner wrench (Suggested Repair Tools # 5) to remove the locknut. Remove the wooden block and insert on the opposite side to restrict movement of the other shaft. Remove the second locknut. Remove both of the lockwashers. SECTION TSM 270.1 ISSUE A PAGE 7 OF 12 THE BEARING HOUSING ASSEMBLY END CLEARANCE ADJUSTMENT DISASSEMBLY 1. Remove the retaining ring. See Figure 8. 2.Remove the labyrinth seal and lipseal, and replace if needed. CAUTION: The tapered roller bearings and spacers are supplied as matched sets. Do not mix with cups, cones or spacers from other sets. CAUTION: If the tapered roller bearings are not being replaced, be sure to keep each cup with its respective cone, because they track to each other during operation. 3. The matched bearing set consists of two cups, two cones and a spacer. Remove the inner bearing cone and spacer and inspect for wear. Also inspect the inner bearing cup for wear. Do not remove the bearing cups unless they are to be replaced, as they are pressed in. Inspection of the outer bearing will be difficult since the outer bearing cone cannot be removed with the lip seal installed. To remove outer bearing cone, remove the lip seal, which will need to be replace with a new one for assembly. Inspect the outer cup and cone for wear. If any part of the bearing needs to be replaced, replace all five parts as a match set. DANGER ! Before opening any Viking pump liquid chamber (pumping chamber, reservoir, etc.) be sure: 1. That any pressure in the chamber has been completely vented through the suction or discharge lines or other appropriate openings or connections. 2. That the driving means (motor, turbine, engine, etc.) has been “locked out” or made non-operational so that it cannot be started while work is being done on pump. 3. That you know what liquid the pump has been handling and the precautions necessary to safely handle the liquid. Obtain a material safety data sheet (MSDS) for the liquid to be sure these precautions are understood. 4. That the timing gearbox to cool before handling the pump. The oil will become very hot during normal operation. Allow the timing gearbox oil. Failure to follow above listed precautionary measures may result in serious injury or death. ASSEMBLY 1. Press both bearing cups into the bearing housing. 2. Install the matching bearing cone closest to the labyrinth seal first. Apply a lubricant to the ID and into the groove on the face of the labyrinth seal and install. Install the retaining ring. 3. On the opposite side, install the spacer, remaining bearing cone and press in the lipseal. 1. Remove the pump head if it is not already off. 2. Remove the pipe plugs (item 29) from the bracket and loosen the setscrews (item 28) on the bearing housing. 3. Using the pin-style spanner wrench, turn the bearing housing counter clockwise (as viewed from shaft end), until the lobe is touching the bottom of the casing bore. 4. Using a depth micrometer, measure the depth from the front face of the casing to the face of the lobe; this is the total end clearance. LIPSEAL RETAINING RING TIMING GEAR 5. Multiply total end clearance by 0.6. Turn the bearing housing clockwise until the lobe is this distance from the front face of the casing. WARNING: The end clearance must be set while turning the bearing housing assembly clockwise. If it is set while turning counter-clockwise, the lobes may float and cause damage or galling. Recheck to make sure locknuts are tight. If left loose, the end clearance may be lost, resulting in pump seizure. LABYRINTH SEAL FIGURE 8 6. Evenly tighten the bearing housing setscrews on both sides of the bracket and reinstall the pipe plugs. 7. Repeat this procedure for the other lobe. SECTION TSM 270.1 ISSUE A PAGE 8 OF 12 PUMP ASSEMBLY WARNING: Do not use the circulation tubing to lift the pump or casing. Make sure the casing is secured to a work bench or other stable work surface before working on the pump. 1. If the casing bushings are worn or grooved, install new bushings. Refer to INSTALLATION OF PEEK® BUSHINGS, page 10. 2. Assemble the lobes and shafts. Insert the keys in the shafts, install the lobes and secure in place with the snap rings. The flat side of the snap ring should face the lobe. 3. Coat the bottom casing bushing bore with light oil, then gently slide the driven lobe/shaft assembly (shorter shaft) into place. Hold the shaft as horizontal as possible when installing; this helps to avoid damaging the bushing when the step on the shaft slides into the bushing bore. Slide the lobe/shaft assembly all the way into the casing. Repeat this process with the driver lobe/shaft assembly, again being careful not to damage the bushing on the shaft’s multiple steps. 4.Establish the initial shaft placement to accept the timing gears. Position the shafts so the driver timing gear keyway will be located at 6 o’clock and the driven at 3 o’clock as viewed from the input end of the shaft. 10.Apply a liberal coating of anti-seize or lubricating compound on the area of the shaft underneath the timing gear. Insert the keys into the shaft keyways. Install the timing gears, positioned with arrows meshed as shown in Figure 9. Rotate the driver shaft by hand, to be sure the timing gears are properly aligned. If not, check the arrows again. 11.Remove the pump head. 12.Adjust the bearing housing assembly to position the lobes slightly extended (approximately 1/8 inch )beyond the front face of the casing. Place a wooden block or brass bar in between the lobes to block rotation. Install lockwashers and locknuts and tighten with the spanner wrench. Locknuts must be tightened to 200 ft-lbs torque. This torque is required to obtain the proper bearing preload and ensure the bearing/timing gear assembly is locked securely on the shaft. This torque can be simulated by applying approximately 200 pounds of weight with a one foot wrench or 100 pounds of weight with a two foot wrench. 13.Set the end clearance; refer to End Clearance Adjustment on page 8. 14. Inspect the lipseal in the gear case cover and replace if needed. Put the O-ring in place, then install the gear case cover by visually centering the lipseal over the shaft. Install the capscrews, and torque evenly. Fill with gear oil to the bottom of the fill hole, approximately 15 ounces. 15. Place the O-ring and reinstall the head. Torque the head capscrews per Table 2. 5. Install the head with the capscrews – this is a temporary installation, but capscrews must be tight to properly set running clearance in a later step. Make sure the head is positioned properly over the locating pin. 16. Evenly torque the seal gland capscrews per Table 2 which is located on page 3. 6. To install the cartridge mechanical seal, lubricate the seal ID and pump shaft with an appropriate lubricant. Slide the cartridge mechanical seal onto the shaft until the gland contacts the stuffing box face. 18.Replace the cover plate and capscrews on the bracket. 17. Tighten the setscrews in each seal. For optional sealsremove the setting clips. 7.Secure the seal glands to the casing with washers and capscrews. NOTE: General installation instructions for other sealing options are located on page 6. FIGURE 9 8. Assemble the bracket to the casing, and torque the capscrews evenly per Table 2. 9. Refer now to Figure 8 on page 8. The bearing housing should already be assembled; if not see BEARING HOUSING ASSEMBLY. Install the O-rings onto the bearing housings; apply a lubricant to the O-ring to ease installation. Pack the bearings with a heavy-duty multi-purpose grease. Thread the bearing housing into the bracket on the lower shaft. Repeat for the upper bearing housing. Rotate each bearing housing assembly clockwise until the lobes hit the pump head, then back them off 1⁄4 turn. SECTION TSM 270.1 ISSUE A PAGE 9 OF 12 Installation of PEEK® Bushings When installing the bushings, extreme care must be taken to prevent breaking. The additional precautions listed below must be followed for proper installation: • A press must be used for installation. • Use Loctite® #4203 or #411 on the outside of the bushing to hold the bushing in the housing. • Be certain that the bushing is straight. The groove in the bushing should line up with the groove in the casing. • Do not stop the pressing operation until the bushing is in the proper position; starting and stopping may result in a cracked bushing. • Check the bushing for damage after installation. PEEK® is a trademark of Victrex PLC Loctite® is a trademark of Henkel Consumer Adhesives, Inc. SECTION TSM 270.1 ISSUE A PAGE 10 OF 12 TECHNICAL SERVICE MANUAL INDUSTRIAL ROTARY LOBE PUMP SECTION TSM 270.1 PAGE 11 ISSUE B STANDARD MODELS RL0167, 40167, 0257, 40257 WARRANTY Viking warrants all products manufactured by it to be free from defects in workmanship or material for a period of one (1) year from date of startup, provided that in no event shall this warranty extend more than eighteen (18) months from the date of shipment from Viking. If, during said warranty period, any products sold by Viking prove to be defective in workmanship or material under normal use and service, and if such products are returned to Viking’s factory at Cedar Falls, Iowa, transportation charges prepaid, and if the products are found by Viking to be defective in workmanship or material, they will be replaced or repaired free of charge, FOB. Cedar Falls, Iowa. Viking assumes no liability for consequential damages of any kind and the purchaser by acceptance of delivery assumes all liability for the consequences of the use or misuse of Viking products by the purchaser, his employees or others. Viking will assume no field expense for service or parts unless authorized by it in advance. Equipment and accessories purchased by Viking from outside sources which are incorporated into any Viking product are warranted only to the extent of and by the original manufacturer’s warranty or guarantee, if any. THIS IS VIKING’S SOLE WARRANTY AND IS IN LIEU OF ALL OTHER WARRANTIES, EXPRESSED OR IMPLIED, WHICH ARE HEREBY EXCLUDED, INCLUDING IN PARTICULAR ALL WARRANTIES OF MERCHANTABILITY OR FITNESS FOR A PARTICULAR PURPOSE. No officer or employee of IDEX Corporation or Viking Pump, Inc.. is authorized to alter this warranty. VIKING PUMP, INC. • A Unit of IDEX Corporation • Cedar Falls, IA 50613 USA 2004 Viking Pump Inc. All rights reserved TECHNICAL SERVICE MANUAL INDUSTRIAL ROTARY LOBE PUMP STANDARD MODELS RL0167, 40167, 0257, 40257 VIKING PUMP, INC. • A Unit of IDEX Corporation • Cedar Falls, IA 50613 USA SECTION TSM 270.1 PAGE 12 ISSUE A 2004 Viking Pump Inc. All rights reserved