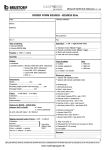
Download ORDER FORM B126 XL
Transcript
DEALER SERVICE MANUAL 05.1 GB
ORDER FORM B126 XL
Date:
Delivery address:
Name:
Address:
Ref. customer:
Tel n°:
Fax:
Quantity: ...........................
Type of switch:
o surface
o surface waterproof
o recess
o no switch
Type of awning:
o without extension
o with extension
Colour:
Electronic options:
* options with standard motor
** options with remote controlled motor
o white RAL 9010 (standard colour)
o brown RAL 8019 (standard colour)
o cream RAL 9001 (standard colour)
o RAL nr………………..
o Windsecurity (Kit Somfy Eolis box) *
o Wind/solar device (Soliris Uno) *
o Remote control *
Fabric:
(=Kit Somfy Centralis RTS) + telis 1 RTS
Collection:…………………....…………..
o Remote control + windsecurity *
Number:…………............……………….
(=Kit Somfy Eolis RTS) + telis 1 RTS
o Remote control + wind/solar device *
Determination:……………………………
(=Kit Somfy Soliris RTS) + telis Soliris RTS
Soltis 92 fabric is welded vertically.
Sotis 86 fabric is welded horizontally.
o Wireless windsecurity **
(=Sensor Eolis RTS)
o Wireless wind/solar device **
(=Sensor Soliris RTS) + telis Soliris RTS
Operation:
Standaardmotor
o Somfy SLT motor (Acrylic fabric)
o Somfy LT motor (Soltis fabric)
o Telis 4 (no telis 1)
o Relay box RI-2 (2motors) (not necessary for ELERO)
o Relay box RI-3 (3motors)
Remote controlled motor
o Somfy Orea RTS (Acrylic fabric) with telis 1
o Somfy Altus RTS (Soltis fabric) with telis 1
Done at:..............................................................................
Remarks:
Date:....................................................................................
..............................................................................................
..............................................................................................
Seller:..................................................................................
..............................................................................................
..............................................................................................
Purchaser:..........................................................................
..............................................................................................
..............................................................................................
1
DEALER SERVICE MANUAL © BRUSTOR SUNPROTECTION LOURDESSTRAAT 84 B-8940 GELUWE TEL:0032/56.53.18.53 FAX:0032/56.53.18.20
www.markisegruppen.dk
DEALER SERVICE MANUAL 05.1 GB
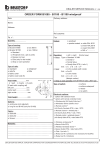
ORDER FORM B126 XL
Reference:
E
D2 : Flat
D : Adjust.
D1 : Straight
C
B
A
HOUSING SAME WIDTH AS THE GUIDES
Name:
2
DEALER SERVICE MANUAL © BRUSTOR SUNPROTECTION LOURDESSTRAAT 84 B-8940 GELUWE TEL:0032/56.53.18.53 FAX:0032/56.53.18.20
www.markisegruppen.dk
DEALER SERVICE MANUAL 05.1 GB
INSTALLATION INSTRUCTIONS CONSERVATORY AWNING B126
CONTENTS INSTALLATION KIT
- Guide supports
- Spacing plates
- Accessories:
Awning without extension
End piece for guide
End cap for guide
Bolt DIN 7982 4.2x9.5
Awning with extension
End cap for outer guide
End cap for inner guide
Plate screw DIN 7981 4.2x9.5
nr according to dimensions
on request
1 part
2
1L+1R
2
2 parts
4
2L+2R
4
1L+1R
1L+1R
4
2L+2R
2L+2R
8
PREPARATION
Compare the dimensions of B-126 to those of the conservatory.
Put wooden planks on the conservatory in order to be able to work on the roof.
INSTALLATION OF THE BOX
Install the box or parts of the box in the marked spot on the conservatory.
FOR COUPLED AWNINGS:
The box parts without logo are joined to together by their flat side.
Open the boxes.
Slide the two box profiles against each other with the square pin in the square hole (see fig 1). Make sure the gloves of
both roller axes are in the same line.
Insert the connection piece and fix with the supplied screws DIN 933 M6x20 and nuts. Keep in mind that the 2 box
parts meet in the middle of a conservatory guide.
Connect the motor temporarily to the circuit by using a switch:
* Phase 1 to the blue wire
* Phase 2 to the brown wire for IN (or OUT) or to the black wire for OUT (or IN)
* Make the earth connection to the yellow/green wire
Fig.1
3
DEALER SERVICE MANUAL © BRUSTOR SUNPROTECTION LOURDESSTRAAT 84 B-8940 GELUWE TEL:0032/56.53.18.53 FAX:0032/56.53.18.20
www.markisegruppen.dk
DEALER SERVICE MANUAL 5.1 GB
INSTALLATION OF THE GUIDES
Slide the guides onto the box. (with protectioncover to side box (fig.3)).
Determine the position of the supports.
* The back of the supports is equal to the back of the guide.
* Install the upper support at approx. 35cm of the upper wall.
* Install the lower support as far down as possible in order to have a good support of the conservatory awning,
especially when the awning is provided with an extension.
Remove the guide in order to install the supports.
FOR COUPLED AWNINGS
Place the two middle guides back to back.
In order to do this, place in the middle a double support (see fig.3).
Install the supports - according to the surface - by using the required screws (see fig.4) :
* For flat supports with platescrews DIN 7981 diameter 4,8 or 5,5 in aluminium (pre-drill diameter 4 or 4,5). Or with wood
screws diameter 5 or 6 mm.
* For straight supports use screw bolts DIN 933 M6 and nut.
* For the wall supports with woodbolts 8x60 and plug S12 or other adapted fixation material.
4
DEALER SERVICE MANUAL © BRUSTOR SUNPROTECTION LOURDESSTRAAT 84 B-8940 GELUWE TEL:0032/56.53.18.53 FAX:0032/56.53.18.20
www.markisegruppen.dk
DEALER SERVICE MANUAL 05.1 GB
Install the guide onto the bolts M8 and plates of the supports (fig 4.detail). Screw the nuts a little on the bolts.
Slide the guide over the pin of the box. Tighten the lock nut of the upper support.
Before tightening the lock nuts of the lower supports (see fig 5):
* Put the first guide at right angle to the box (e.g. by using the 3-4-5 rule) and tighten
* Check if the second guide is placed parrallel to the first one (size L1)
* Check the whole by measuring diagonally (size L2). The difference cannot be more than 2mm.
Fix all the nuts.
When you encounter bending conservatory guides use spacing plates between the guide and middle supports (see fig 6).
5
DEALER SERVICE MANUAL © BRUSTOR SUNPROTECTION LOURDESSTRAAT 84 B-8940 GELUWE TEL:0032/56.53.18.53 FAX:0032/56.53.18.20
www.markisegruppen.dk
DEALER SERVICE MANUAL 05.1 GB
FEEDING THE PULLING CORD
Open the box.
The pulling cords have all been attached to the flange and have been wound 2 or 3 rotations. Soltis/Sunworker fabric =
small flange, Acryl fabric = large flange.
Ensure the cord has been rolled onto the flange correctly.
If the pulling cords have frayed, burn the loose fibres with a match or tape the end with adhesive tape.
Unroll the fabric approximately 0,5 till 1m. (0 - 0,5 m with large projections 4 - 5 m, and the spring in the most pressure
position).
Slide the pulling cords in the outer guide until they come out underneath.
The cord needs to be located above the flange(A). (fig.7)
FOR A CONSERVATORY AWNING WITHOUT EXTENSION (see fig 7)
Pull the cord around the flange (B) of the endpiece of the outer guide;
Pull the cord in the frontprofile around the wheel (E) (see fig 9).
Tighten the cord and check if it follows the correct way and is situated correctly on the flanges.
FOR A CONSERVATORY AWNING WITH EXTENSION (see fig 8)
Put the cord around the flange (B) of the endpiece of the outer guide;
Put the cord at the back in the inner guide above the wheel (C) until it comes out.
Guide the cord around the flange (D) and feed the cord into the inner guide.
Carefully slide the inner guide into the outer guide. Keep some tension on the cord when sliding in.
Slide the endpiece (B) on the outside end of the outer guide. Keep some tension on the cord. Make sure the cord is
not crossed.
6
DEALER SERVICE MANUAL © BRUSTOR SUNPROTECTION LOURDESSTRAAT 84 B-8940 GELUWE TEL:0032/56.53.18.53 FAX:0032/56.53.18.20
www.markisegruppen.dk
DEALER SERVICE MANUAL 05.1 GB
CORD IN THE FRONTPROFILE
Open the awning about 0,5 meter.
Install the extensionspring (X) with the flange (Y) in the frontprofile around the spindle (G). The spindle (G) can be removed
(fig 10).
Put the cord around the flange (E) to the middleflange (W), and go back to the flange (Y). As well left and right hand side.
Cause that the moveable middleflange is placed about in the middle of the frontprofile.
Slide the 2 clamcleats (Z) about 20cm of the middleflange (W), and fix the bolts (with open-ended spanner 10 mm).
Pull the two cords at the same time to have an equal tension on the springs and the fabric. (REMARK for Soltis / Sunworker
fabric: maximum allowable deflection of the spring is 3 to 5 cm, then we have the minimum tension on the fabric!!! Acrylic
fabric: maximum 15 to 20 cm). As assistance use temporary a handscrew to fix the middleflange (fig 10 bis). Push the cord
ends in the clamcleats (Z). Make sure the cord is on all the flanges. If the extension springs do not have the same tension,
or if the fabric isn't tightened enough, it's possible to push the cords separately.
Close and open the awning, and check the tension of the fabric, the cords and the extensionsprings. If needed, adjust the
spring tension. If the awning is closed, the maximum allowable deflection of the spring is 5cm (Soltis fabric) = minimum tension
on the fabric. It is possible to pull the cords seperately, when there is a problem with unequal tension of the fabric.
For minimum large of ( <= 2 meter ) and max. extension ( >5 m ) , place the clamcleat ( Z ) so near as possible to
the middleflange (W), if needed against the middleflange. If needed modify the length of the extensionspring (X).
7
DEALER SERVICE MANUAL © BRUSTOR SUNPROTECTION LOURDESSTRAAT 84 B-8940 GELUWE TEL:0032/56.53.18.53 FAX:0032/56.53.18.20
www.markisegruppen.dk
DEALER SERVICE MANUAL 05.1 GB
CONNECTION OF THE MOTOR
The connection of the motor is done according fig 12.
ADJUSTMENT OF THE ENDSTROKE OF SOMFY SLT MOTOR
Press fully the blue and the yellow or white limit switch push button on the motor. Now all setting is turned off.
Roll out the awning till the required point of cease. Unlock the yellow or white limit switch push button by pressing it. Now the OUTposition is installed.
Roll up the awning untill about 10cm before reaching the required IN-position. Unlock the blue limit switch push button by pressing
it. Now the IN-position is installed. In fact, from the set position the motor will continu at reduced force during a few seconds. By
doing this the box will always stay completely closed.
ADJUSTMENT OF THE ENDSTROKE OF SOMFY LT MOTORS WITH SOLTIS (PVC) FABRIC
Press both the white and yellow switch push button on the motor. Now all setting is turned off.
Unroll the awning until the desired end position is reached. Unlock the first push button by pressing it once again. Now the OUT-position
is installed. Roll the awning completely in. Unlock the rear push button. Now the IN-position is installed.
A new pvc strip underneath the extension
guarantees an optimal gliding of the conservatory
awning.
8
DEALER SERVICE MANUAL © BRUSTOR SUNPROTECTION LOURDESSTRAAT 84 B-8940 GELUWE TEL:0032/56.53.18.53 FAX:0032/56.53.18.20
www.markisegruppen.dk
DEALER SERVICE MANUAL 05.1 GB
COMPLETION
FOR CONSERVATORY AWNING WITH EXTENSION
Tighten the end pieces of the outer guides with a screw DIN 84 - M6x12 (see fig 13).
For coupled screens, tighten the end pieces of the middle guides by using a screw DIN 963 M6x25.
Screw the end caps of the outer and inner guides by using 4.2x9.5 screws.
Close the frontprofile.
Close the box and tighten.
FOR CONSERVATORY AWNING WITHOUT EXTENSION
Screw the endcaps of the outer guides with 4.2x9.5 screws.
Close the frontprofile.
Close the box and tighten.
EXCHANGE OF THE MOTOR
Open the frontprofile
Loose the springs.
Open the cover of the box and remove the
upperpart of the motorsupport.
Lift the rollertube a bit.
Exchange the motor.
EXCHANGE OF THE PULLING CORD
Open the box and roll in the awning while
preventing the broken cord to turn loose.
Open the frontprofile.
Place the springs without tension.
Unleash the cord in the frontprofile.
Remove the broken cord but keep the broken cord
on the flange where it is.
Attach the new cord to the old cord on the flange
and pull it right through so that the cord is wound 2
turns around the flange. Make sure it is not crossed
and rolls up underneath the flange.
Put the new cord end through the hole of the flange.
Make a knot and pull it back.
Cut the remainder of the cord at the knob.
Make sure the cord is properly tightened on the
flange.
Continue following instructions 'Feeding the pulling
cord'.
9
DEALER SERVICE MANUAL © BRUSTOR SUNPROTECTION LOURDESSTRAAT 84 B-8940 GELUWE TEL:0032/56.53.18.53 FAX:0032/56.53.18.20
www.markisegruppen.dk
DEALER SERVICE MANUAL 05.1 GB
TROUBLE SHOOTING
Fabric is not tightened on one side.
Check whether the cord is not jammed in the frontprofile.
Fabric is not tightened.
Check if the cord is not jammed.
Check, while the awning is working, if the springs are always under tension, if so tighten the springs.
Fabric does not roll up in the right way.
Check if the guides are at right angle to the box. If not, rectify. After a few cycles, the fabric will come in the right place. If
this does not help, introduce a piece of fabric - sizes 5 cm x 40 cm - on the side that does not close properly when the
awning is opened and introduce it between fabric and rollertube. Rectify the size of the piece of fabric or add fabric if
necessary.
Awning makes noise when rolling in and out.
Check whether a flange hurts the wall , and if there's no dirt on the flanges . (to clean)
Check whether the end piece of the front profile hurts the guide. If so, check whether the guides are at right angle to the box.
Motor is out of order.
The motor is overheated by multiple use. Cool down necessary for 15-30 minutes.
Never connect two motors directly parallel.
EXTRA POINTS OF ATTENTION
· Do not allow the rope to rub against the edge of the profiles.
· Ensure ropes are not tangled.
· Make sure the rope sits within the flanges of the wheels.
· Open the awning 60 cm for tensioning.
· Check the position of the extension springs and make sure there’s always tension.
· Check the dimensions are equal diagonally.
· Do not use any lubricant .
10
DEALER SERVICE MANUAL © BRUSTOR SUNPROTECTION LOURDESSTRAAT 84 B-8940 GELUWE TEL:0032/56.53.18.53 FAX:0032/56.53.18.20
www.markisegruppen.dk
DEALER SERVICE MANUAL 05.1 GB
TECHNICAL DATA B126
Dimensions
Front profile
Colour of Box
Motor
Box frame
158 H x 184 D
Front profile
48 x 125
Lateral guide
67 x 80
Roller tube
dia 78 x 1.25 mm
extruded aluminium: better mechanical quality (torsion, bending)
is available in white (RAL 9010), brown (RAL 8019) and cream (RAL 9001)
Motor with end adjustment (Somfy SLT)
Extension
Fabric
Delivery
0.50, 0.75, 1.00 or 1.25m in option(only with projection 1,25, 1,75, 2,25 or 2.50m)
PVC-SOLTIS / SUNWORKER fabric; acryl fabric
in two cartons: frame with fabric and front profile assembled guide and assembly parts.
Assembly adapters
flat or straight supports for vertical adjustment
straight support for indirect adjustment
double supports as middle support for awning in 2 parts
adjustable supports for height (flat or straight version)
width 90
20° angle cut
E-support (Adjustable till 500 mm).
Number according to the extension
height setting by using skim plates
for adjustment on the side wall
minimum width
1700
maximum width
5000
minimum projection
500
(without extension) 2500 ( extention = 1250)
1250
(extension = 500)
1750
(extension = 750)
2250
( extension = 1000)
maximum projection
6000
+ fabric support from 5m length onwards
maximum surface 19 m≈ (for acryl+Soltis 86) and 18 m≈ (for Soltis 92)
Angle profiles
Limited dimensions
Numbre of supports
projection(*)
000
151
201
251
301
351
401
451
501
Minimum projection
extension min.
Projection
whithout extension
1250
1750
2250
2500
50
75
100
125
Type motor
cm
cm
cm
cm
Number of parts
1
2
Nm
55
85
-
150
200
250
300
350
400
450
500
600
cm
cm
cm
cm
cm
cm
cm
cm
cm
Type motor
Somfy SLT60
Somfy SLT60
2 pieces(*) extension not included !
3 pieces
3 pieces
4 pieces
4 pieces
4 pieces
5 pieces
5 pieces
5 pieces
Sawlength
inner guides
1000
1500
2000
2250
Ref.motor left
Orion S55/17L
Jupiter 85/17L
Min. sawlength
outer guides
1022
1522
2022
2272
Ref.motor right
Orion S55/17R
Jupiter 85/17R
power
320 W
450 W
11
DEALER SERVICE MANUAL © BRUSTOR SUNPROTECTION LOURDESSTRAAT 84 B-8940 GELUWE TEL:0032/56.53.18.53 FAX:0032/56.53.18.20
www.markisegruppen.dk
DEALER SERVICE MANUAL 05.1 GB
TECHNICAL DATA - INFORMARTION SUPPORTS B126
A. Flat support
C. L-profiles 100/50x5
B. Straight support
D. Adjustable Support
D. Double Adjustable Support
E. Adjustable Support XL
12
DEALER SERVICE MANUAL © BRUSTOR SUNPROTECTION LOURDESSTRAAT 84 B-8940 GELUWE TEL:0032/56.53.18.53 FAX:0032/56.53.18.20
www.markisegruppen.dk
DEALER SERVICE MANUAL 05.1 GB
TECHNICAL DATA - INSTALLATION SUPPORT B126
13
DEALER SERVICE MANUAL © BRUSTOR SUNPROTECTION LOURDESSTRAAT 84 B-8940 GELUWE TEL:0032/56.53.18.53 FAX:0032/56.53.18.20
www.markisegruppen.dk
DEALER SERVICE MANUAL 05.1 GB
14
DEALER SERVICE MANUAL © BRUSTOR SUNPROTECTION LOURDESSTRAAT 84 B-8940 GELUWE TEL:0032/56.53.18.53 FAX:0032/56.53.18.20
www.markisegruppen.dk
DEALER SERVICE MANUAL 05.1 GB
TECHNICAL DATA - MEASUREMENT
15
DEALER SERVICE MANUAL © BRUSTOR SUNPROTECTION LOURDESSTRAAT 84 B-8940 GELUWE TEL:0032/56.53.18.53 FAX:0032/56.53.18.20
www.markisegruppen.dk
DEALER SERVICE MANUAL 05.1 GB
16
DEALER SERVICE MANUAL © BRUSTOR SUNPROTECTION LOURDESSTRAAT 84 B-8940 GELUWE TEL:0032/56.53.18.53 FAX:0032/56.53.18.20
www.markisegruppen.dk
DEALER SERVICE MANUAL 05.1 GB
17
DEALER SERVICE MANUAL © BRUSTOR SUNPROTECTION LOURDESSTRAAT 84 B-8940 GELUWE TEL:0032/56.53.18.53 FAX:0032/56.53.18.20
www.markisegruppen.dk
DEALER SERVICE MANUAL 05.1 GB
SPARE PARTS DEALER KIT B126
(art. n° 32126000)
DESCRIPTION
Coupling plate white
Main housing end plate white L.H
Main housing end plate white R.H
Coupling plate brown
Main housing end plate brown L.H
Main housing end plate brown R.H
Coupling plate cream
Main housing end plate cream L.H.
Main housing end plate cream R.H.
Cable inlet bush diam.8
Rope
Endpiece extension with lock assy LH white
Endpiece extension with lock assy RH white
Endpiece extension with lock assy LH brown
Endpiece extension with lock assy RH brown
Endpiece extension with lock assy LH cream
Endpiece extension with lock assy RH cream
Endpiece outer guide with ext.assy LH
Endpiece outer guide with ext.assy RH
Endpiece outer guide without ext.assy
Endcap outer guide with ext.LH white
Endcap outer guide with ext.LH brown
Endcap outer guide with ext.RH white
Endcap outer guide with ext.RH brown
Endcap outer guide with ext.LH cream
Endcap outer guide with ext.RH cream
Endcap extension LH white
Endcap extension LH brown
Endcap extension RH white
Endcap extension RH brown
Endcap extension LH cream
Endcap extension RH cream
Endcap outer guide without ext.LH white
Endcap outer guide without ext.RH white
Endcap outer guide without ext.LH brown
Endcap outer guide without ext.RH brown
Endcap outer guide without ext.LH cream
Endcap outer guide without ext.RH cream
Guide support flat LH white
Guide support flat RH white
Guide support right LH white
Guide support right RH white
Guide support wall white
Guide support flat LH brown
Guide support flat RH brown
Guide support right LH brown
Guide support right RH brown
Guide support wall brown
Guide support flat LH cream
Guide support flat RH cream
Guide support right LH cream
Guide support right RH cream
Guide support wall cream
Adjustable flat support LH white
Adjustable flat support LH brown
Adjustable flat support LH cream
Adjustable flat support RH white
Adjustable flat support RH brown
Adjustable flat support RH cream
Adjustable right support LH white
Adjustable right support LH brown
Adjustable right support LH cream
Adjustable right support RH white
Adjustable right support RH brown
Adjustable right support RH cream
Endplate lead rail LH
Endplate lead rail RH
Set tension spring for soltisfabric
QUANTITY
1
1
1
1
1
1
1
1
1
2
100m
1
1
1
1
1
1
1
1
2
1
1
1
1
1
1
1
1
1
1
1
1
2
2
2
2
2
2
3
3
3
3
3
3
3
3
3
3
3
3
3
3
3
3
3
3
3
3
3
3
3
3
3
3
3
1
1
1
Price kit: 250 EURO net
18
DEALER SERVICE MANUAL © BRUSTOR SUNPROTECTION LOURDESSTRAAT 84 B-8940 GELUWE TEL:0032/56.53.18.53 FAX:0032/56.53.18.20
www.markisegruppen.dk
DEALER SERVICE MANUAL 05.1 GB
EXPLODED VIEW B126
without extension
19
DEALER SERVICE MANUAL © BRUSTOR SUNPROTECTION LOURDESSTRAAT 84 B-8940 GELUWE TEL:0032/56.53.18.53 FAX:0032/56.53.18.20
www.markisegruppen.dk
DEALER SERVICE MANUAL 05.1 GB
SPARE PARTS LIST B126
POS.
ART.N°
DESCRIPTION
1
1
1
1
1
1
2
2
2
2
2
2
3
4
4
4
4
4
4
5
5
5
5
5
5
6
6
6
6
6
6
7&8
7&8
7&8
7&8
7&8
7&8
7&8
7&8
7&8
7&8
7&8
7&8
9a
9a
9a
9b
9b
9b
10a
10a
10a
10b
10b
10b
11a
11a
11a
11b
11b
11b
12a
12b
13
14
6000059
6000059
6000059
6000060
6000060
6000060
6000061
6000061
6000061
6000062
6000062
6000062
6000063
6000064
6000064
6000064
6000065
6000065
6000065
6000066
6000066
6000066
6000067
6000067
6000067
6000068
6000068
6000068
6000069
6000069
6000069
6000070
6000070
6000070
6000071
6000071
6000071
6000072
6000072
6000072
6000073
6000073
6000073
6000074
6000074
6000074
6000207
6000207
6000207
6000075
6000075
6000075
6000208
6000208
6000208
6000076
6000076
6000076
6000338
6000338
6000338
6000077
6000078
6000079
6000080
Housing B126 4,50m ( white )
Housing B126 4,50m ( brown )
Housing B126 4,50m ( cream )
Housing B126 6,00m ( white )
Housing B126 6,00m ( brown )
Housing B126 6,00m ( cream )
Cover housing 4,50 m ( white )
Cover housing 4,50 m ( brown )
Cover housing 4,50 m ( cream )
Cover housing 6,00 m ( white )
Cover housing 6,00 m ( brown )
Cover housing 6,00 m ( cream )
Rollertube D78 (L=6467mm)
Lead rail 4,50m (white)
Lead rail 4,50m (brown)
Lead rail 4,50m cream
Lead rail 6,00m (white)
Lead rail 6,00m (brown)
Lead rail 6,00m (cream)
Cover lead rail 4,50m (white)
Cover lead rail 4,50m (brown)
Cover lead rail 4,50m (cream)
Cover lead rail 6,00m (white)
Cover lead rail 6,00m (brown)
Cover lead rail 6,00m (cream)
Outer Guide 4,40m (white)
Outer Guide 4,40m (brown)
Outer Guide 4,40m (cream)
Outer Guide 5,90m (white)
Outer Guide 5,90m (brown)
Outer Guide 5,90m (cream)
Innerguide (ext: 0,50m) LH + RH assy ( white )
Innerguide (ext: 0,50m) LH + RH assy ( brown )
Innerguide (ext: 0,50m) LH + RH assy ( cream )
Innerguide (ext: 0,75m) LH + RH assy ( white )
Innerguide (ext: 0,75m) LH + RH assy ( brown )
Innerguide (ext: 0,75m) LH + RH assy ( cream )
Innerguide (ext: 1,00m) LH + RH assy ( white )
Innerguide (ext: 1,00m) LH + RH assy ( brown )
Innerguide (ext: 1,00m) LH + RH assy ( cream )
Innerguide (ext: 1,25m) LH + RH assy ( white )
Innerguide (ext: 1,25m) LH + RH assy ( brown )
Innerguide (ext: 1,25m) LH + RH assy ( cream )
Side plate LH assy ( white ) Acryl
Side plate LH assy ( brown ) Acryl
Side plate LH assy ( cream ) Acyl
Side plate LH assy ( white ) Soltis
Side plate LH assy ( brown ) Soltis
Side plate LH assy ( cream ) Soltis
Side plate RH assy ( white ) Acryl
Side plate RH assy ( brown ) Acryl
Side plate RH assy ( cream ) Acryl
Side plate RH assy ( white ) Soltis
Side plate RH assy ( brown ) Soltis
Side plate RH assy ( cream ) Soltis
Coupling plate LH+RH assy (white) Acryl
Coupling plate LH+RH assy (brown) Acryl
Coupling plate LH+RH assy (cream) Acryl
Coupling plate LH+RH assy (white) Soltis
Coupling plate LH+RH assy (brown) Soltis
Coupling plate LH+RH assy (cream) Soltis
Corddisk (acryl fabric)
Corddisk (Soltis fabric)
Plastic fabric bar Diam. 6mm (leadrail)
Plastic fabric bar Diam. 5,6mm (box)
20
DEALER SERVICE MANUAL © BRUSTOR SUNPROTECTION LOURDESSTRAAT 84 B-8940 GELUWE TEL:0032/56.53.18.53 FAX:0032/56.53.18.20
www.markisegruppen.dk
DEALER SERVICE MANUAL 05.1 GB
17a
17b
18
19
20
22
22
22
23
23
23
24
24
24
25
25
25
26
26
26
27
27
27
28
28
28
29
29
29
30
30
30
31
32
34
35a
35b
36
37
37
37
39
39
40
40
40
41
41
41
42
42
42
43
43
43
44
44
44
45
45
45
46
6000081
6000340
6000082
6000083
6000084
6000085
6000085
6000085
6000086
6000086
6000086
6000087
6000087
6000087
6000089
6000089
6000089
6000090
6000090
6000090
6000092
6000092
6000092
6000106
6000106
6000106
6000107
6000107
6000107
6000113
6000113
6000113
6000114
6000116
6000117
6000118
6000339
6000119
6000121
6000121
6000121
6000122
6000123
6000125
6000125
6000125
6000127
6000127
6000127
6000128
6000128
6000128
6000129
6000129
6000129
6000131
6000131
6000131
6000132
6000132
6000132
6000134
Springassy. (clam.+mid.roll+springs)
Springassy. short (clam.+mid.roll+springs)
Endplate leadrail LH assy
Endplate leadrail RH assy
Alu. axle D8 ( L40 )
Support flat LH white (assy )
Support flat LH brown (assy )
Support flat LH cream (assy )
Support flat RH white (assy )
Support flat RH brown (assy )
Support flat RH cream (assy )
Support right LH white (assy )
Support right LH brown (assy )
Support right LH cream (assy )
Support right RH white (assy )
Support right RH brown (assy )
Support right RH cream (assy )
Support wall white (assy )
Support wall brown (assy )
Support wall cream (assy )
Adjustable support flat LH (white)
Adjustable support flat LH (brown)
Adjustable support flat LH (cream)
Adjustable support straight LH (white)
Adjustable support straight LH (brown)
Adjustable support straight LH (cream)
Adjustable support flat RH (white)
Adjustable support flat RH (brown)
Adjustable support flat RH (cream)
Adjustable support straight RH (white)
Adjustable support straight RH (brown)
Adjustable support straight RH (cream)
Rope
Coupling rollertube
Tube endcap assembly
Gliding profile (4m) for R9001 & R9010
Gliding profile (4m) for R8019 & Sp. colour
Endpiece outerguide without extentension
Endcap without extension. LH + RH ( white )
Endcap without extension. LH + RH ( brown )
Endcap without extension. LH + RH ( cream )
Endpiece outerguide with extentension LH
Endpiece outerguide with extentension RH
Endcap outer+ innerguide with ext. LH+RH (white)
Endcap outer+ innerguide with ext. LH+RH (brown)
Endcap outer+ innerguide with ext. LH+RH (cream)
Double right guide support (white)
Double right guide support (brown)
Double right guide support (cream)
Double flat guide support (white)
Double flat guide support (brown)
Double flat guide support (cream)
Double right adjustable support (white)
Double right adjustable support (brown)
Double right adjustable support (cream)
Double flat adjustable support (white)
Double flat adjustable support (brown)
Double flat adjustable support (cream)
Hinge adjustable support ( white )
Hinge adjustable support ( brown )
Hinge adjustable support ( cream )
Easy slider
21
DEALER SERVICE MANUAL © BRUSTOR SUNPROTECTION LOURDESSTRAAT 84 B-8940 GELUWE TEL:0032/56.53.18.53 FAX:0032/56.53.18.20
www.markisegruppen.dk


