Download Study Guide
Transcript
AUTO BODY REPAIR
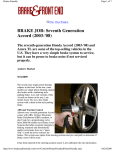
BRAKING SYSTEM REPAIR
TEACHER’S GUIDE
S H O P WA R E ®
INTRODUCTION
This Teacher’s Guide provides information to help you get the most out of Braking System
Repair. The contents in this guide will enable you to prepare your students before using the
program and present follow-up activities to reinforce the program’s key learning points.
Braking System Repair describes testing and diagnosing necessary repairs to braking systems. After viewing this video and completing some of the learning activities included in this
guide, students will be better prepared to bleed, flush, and pressure-test a brake hydraulic
system; remove a caliper assembly; and check parking brake system operation. Use the
Braking System Repair video and accompanying activities provided in this guide to teach
students basic braking system concepts and guidelines for performing basic brake maintenance and repairs.
LEARNING OBJECTIVES
After viewing the program, students will be able to:
■ Demonstrate a basic knowledge of braking system operations and safety procedures.
■ Identify procedures for testing and determining repairs to braking systems.
■ Describe procedures for performing common repairs to braking systems.
EDUCATIONAL STANDARDS
The primary certifying body for automotive technician training programs is the National
Institute for Automotive Service Excellence (ASE). ASE is a non-profit organization established in 1972 by the automotive industry to improve the quality of vehicle repair and service
through the voluntary testing and certification of automotive repair technicians. The National
Automotive Technicians Education Foundation (NATEF) is a separate non-profit foundation
within ASE. The mission of NATEF is to improve the quality of automotive technician training
programs nationwide through voluntary certification. The State Departments of Education in
all 50 states support ASE/NATEF certification of automotive programs.
National Standards
This program correlates with the Program Certification Standards for Automobile Technician
Training Programs from the National Institute for Automotive Service Excellence (ASE) and
the National Automotive Technicians Education Foundation (NATEF). The content has been
aligned with the following educational standards, which reflect the tasks in the ASE Program
Certification Standards for Automobile General Service Technician Programs.
Brakes
■ Inspect brake lines and fittings for leaks, dents, kinks, rust, cracks or wear; tighten loose
fittings and supports; replace brake lines (double flare and ISO types), hoses, fittings, and
supports.
Copyright © 2005 SHOPWAR E ®
2
■ Inspect flexible brake hoses for leaks, kinks, cracks, bulging or wear; remove and replace
hoses; tighten loose fittings and supports.
■ Identify, handle, store, and install appropriate brake fluids; dispose of in accordance with
federal, state, and local regulations.
■ Pressure test brake hydraulic system; determine needed repair.
■ Adjust brake shoes; remove and reinstall brake drums or drum/hub assemblies and wheel
bearings.
■ Identify and replace ABS wheel speed sensor components according to manufacturer’s
specifications.
■ Depressurize ABS hydraulic system according to manufacturer’s procedures.
■ Identify the proper procedures for handling brake dust.
■ Check for bent or damaged brake system components.
2002 Automobile Program Standards, by the National Automotive Technicians Education Foundation,
Copyright 2002 by the National Automotive Technicians Education Foundation. Reprinted with permission.
Language Arts and Communication Standards
According to ASE/NATEF standards, the automobile technician must be proficient in the following Language Arts and Communications related academic skills that are embedded in the
occupation. The activities and information presented in this program and accompanying
teacher’s guide are aligned to the following standards from the National Automotive
Technicians Education Foundation from the National Institute for Automotive Service
Excellence.
■ Request, collect, comprehend, evaluate, and apply oral and written information gathered
from customers, associates, and supervisors regarding problem symptoms and potential
solutions to problems.
■ Identify the purpose for all written and oral communication and then choose the most
effective strategies for listening, reading, speaking, and writing to facilitate the communication process.
■ Adapt a reading strategy for all written materials, e.g. customer’s notes, service manuals,
shop manuals, technical bulletins, etc., relevant to problem identification, diagnosis, solution, and repair.
■ Use study habits and techniques, i.e. previewing, scanning, skimming, taking notes, etc.,
when reviewing publications (shop manuals, references, databases, operator’s manuals,
and text resources) for problem solving, diagnosis, and repair.
■ Use prior knowledge learned from solving similar problems to diagnose and repair specific
problems.
■ Write clear, concise, complete, and grammatically accurate sentences and paragraphs.
■ Write warranty reports and work orders to include information regarding problem resolution and the results of the work performed for the customer or manufacturer.
■ Follow all oral/written directions that relate to the task or system under study.
■ Comprehend and apply industry definitions and specifications to diagnose and solve
problems in all automotive systems and components of the automobile and light truck.
■ Comprehend and use problem-solving techniques and decision trees that are contained in
service manuals and databases to determine cause-and-effect relationships.
3
■ Use the service manual to identify the manufacturer’s specifications for system parameters, operation, and potential malfunctions.
■ Interpret charts, tables, or graphs to determine the manufacturer’s specifications for systems operation to identify out-of-tolerance systems and subsystems.
■ Use English and metric angle and distance measurements and techniques to determine parallel lines, perpendicular lines, and angle variances from the manufacturer’s specifications.
■ Visually perceive the geometric relationship of systems and sub-systems that require
alignment.
■ Use formulas to indirectly confirm that systems are outside of the manufacturer’s
specifications.
■ Follow all safety regulations and procedures while performing any task.
Standards for the English Language Arts, by the International Reading Association and the National Council of
Teachers of English, Copyright 1996 by the International Reading Association and the National Council of
Teachers of English. Reprinted with permission.
Technology Standards
The activities in this Teacher’s Guide were created in compliance with the following National
Education Technology Standards from the National Education Technology Standards Project.
The content has been aligned with the following educational standards and benchmarks.
■ Use a variety of media and formats to communicate information and ideas effectively to
multiple audiences.
■ Use telecommunications to collaborate, publish, and interact with peers, experts, and
other audiences.
■ Use productivity tools to collaborate in constructing technology-enhanced models, prepare publications, and produce other creative works.
■ Use technology tools to enhance learning, increase productivity, and promote creativity.
■ Use technology to locate, evaluate, and collect information from a variety of sources.
The National Education Technology Standards reprinted with permission from the International Society
for Technology Education.
PROGRAM OVERVIEW
How do brakes work? Are all brakes the same? What types of repairs are necessary on braking systems? These are some of the questions answered in this compelling video, Braking
System Repair, which introduces basic braking system concepts, including types of braking
systems and components and how they work, safety requirements specific to brake repair,
and methods and guidelines for inspecting, repairing, and testing braking systems. Students
will see actual technicians bleed, flush, and pressure-test a brake hydraulic system; remove a
caliper assembly; and check parking/emergency brake system operation. After viewing this
video, students will have a more detailed understanding of the operation of braking systems
and performing basic brake maintenance and repairs.
4
MAIN TOPICS
Topic 1: Basic Principles of Brake Systems
This section of the program describes how a brake system works using three interdependent
systems—leverage, hydraulic pressure, and friction—to slow the speed of a car.
Topic 2: Types of Braking Systems and Components
This section begins by discussing the various braking systems components and how each
one functions when the brake pedal is pressed. The section also describes drum and disc
brakes, as well as anti-lock and power-assist brakes, the most common types of braking
systems found in new vehicles today.
Topic 3: Tools and Safety Requirements for Brake Repair
This section introduces by name the tools used to perform brake repairs, and safety requirements specific to brake repair, such as avoiding exposure to asbestos-containing brake dust
and proper disposal of contaminated brake fluid.
Topic 4: Inspecting Brake Systems
This section of the program describes the sequence of visually inspecting braking system
components, including the parking/emergency brakes, and guidelines for determining the
extent of brake damage or wear and assessing needed repairs.
Topic 5: Basic Brake Maintenance and Repair Guidelines
This topic describes guidelines and recommendations for repairing brake lines, replacing
brake fluid, bleeding the brake system, servicing wheel bearings, and removing a caliper
assembly. Students will learn the importance of testing brake repairs by test driving the vehicle and checking specific performance factors to ensure safe operation of the vehicle.
FAST FACTS
■ Braking systems create an incredible stopping force that is ten times more powerful than
the force putting the car in motion.
■ Braking systems use three different methods to slow the speed of a car: leverage,
hydraulic pressure, and friction.
■ The brake system allows a 90-pound person to stop a 5,000-pound vehicle simply by
pressing down on the brake pedal.
■ A typical automobile has disc brakes in the front, and drum brakes in the rear, although
some have disc brakes in both the front and rear.
■ The brake system is controlled by the master brake cylinder that holds brake fluid and
sends hydraulic pressure to each wheel through brake lines each time the operator
depresses the brake pedal.
■ For safety reasons, Anti-lock Braking Systems, or ABS, are becoming the most common
type of brakes in newer cars because wheels do not lock up during normal braking, and
the brake pressure in each wheel automatically adjusts according to speed during hard
braking while maintaining stability on slippery surfaces.
5
■ Do not use compressed air to clean brake components. Brake dust may contain
asbestos! To prevent the brake dust from becoming airborne while disassembling brake
systems, wash components down with brake cleaner.
■ Before doing any work on the brake system of a vehicle, you need to figure out the extent
of the damage or wear and assess what repairs or replacement parts are needed.
■ The parking or emergency brake uses a cable with direct force instead of a hydraulic system like regular brakes, thus providing the vehicle with a back up braking system in case
the hydraulic system fails.
■ One of the most common brake repairs an auto body professional will do is repairing
brake lines. Once the brake lines are repaired, new brake fluid must be added.
■ Bleeding brakes is done to remove air from the brake fluid. Air inhibits the proper functioning of a hydraulic system.
■ If the vehicle you are working on has collision damage around one of the wheels, chances
are you will need to remove the caliper assembly.
■ There are three general types of disc brakes: sliding caliper, floating caliper, and fixed
caliper. Sliding and floating are similar, and are the most common.
■ It is critical to thoroughly test brake work by taking the vehicle for a test drive before
releasing it to its owner.
VOCABULARY TERMS
anti-locking braking systems (ABS): Type of braking system that uses individually controlled
valves in each brake line and speed sensors located at each wheel to achieve maximum braking force, which prevent the wheels from stopping completely during a sudden stop.
brake: A device for stopping motion by means of friction caused by a clamping force from
a stationary caliper or shoe, against a rotating rotor or drum.
brake fluid: A special type of hydraulic fluid, designed specifically for brakes, that transfers
the motion of a driver stepping on a brake pedal directly to operate a brake caliper or
wheel cylinder.
brake lines: Seamless, steel-reinforced flexible rubber or nylon hoses that conduct brake
fluid from the master cylinder to the slave cylinders at each wheel.
brake pads: Components used specifically with disc brake systems that fit inside the
calipers and create friction and stopping power when pressed against the brake rotor.
brake shoes: Curved pieces of metal used specifically with drum brake systems that fit
inside the brake drum, and are pressed against the drum by a wheel cylinder when the
brakes are applied, thus slowing or stopping the car.
caliper: A c-shaped device used with disc brakes. When a driver presses on the brake
pedal, the caliper piston squeezes the brake pads against the rotor and causes the car to
slow down or stop.
control valves: Components that balance the braking force at each wheel and ensure that
the rear brakes are always activated before the front brakes.
disc brakes: Type of braking system that uses a disc (also called rotor) that is directly connected to the wheel, which is straddled by a caliper that holds the disc pads. When a driver steps on the brakes, hydraulic pressure is delivered to the caliper which presses the
brake pads against both sides of the disc to slow or stop the vehicle.
disc runout: Side-to-side warping of the brake disc friction surfaces.
6
drum brakes: Type of braking system that uses a drum-shaped (cylinder) housing that is
directly connected to the wheel. When a driver steps on the brake pedal, curved brake
shoes inside the drum press against the drum, creating friction to slow or stop motion of
the wheel.
friction: The measure of difficulty to slide one object over another. The method used to
slow the speed of a vehicle using resistance of one object that is moved in contact with
another; methods include pressing brake pads against a brake disc or drum, and a moving
vehicle’s tires contacting the road.
glazing: A term that refers to a brake lining that has become smooth and glossy due to
overheating.
hydraulic pressure: Method used to slow the speed of a vehicle using the pressure of
fluid for power.
leverage: Method used to slow the speed of a vehicle by multiplying the mechanical pressure, or force from the operator’s foot on the brake pedal, several times before passing it
on to the hydraulic system.
master brake cylinder: Primary brake system component that holds brake fluid and sends
hydraulic pressure to each wheel through brake lines each time the operator depresses
the brake pedal; primary component for pressurizing fluid in a hydraulic system.
power-assisted brakes (power brakes): Type of braking system, often vacuum-assisted,
that lessens the amount of force an operator has to apply to the brake pedal.
slave cylinder (wheel cylinder): Cylinders in which movable pistons convert hydraulic
brake fluid pressure into mechanical force, causing hydraulic pressure against the piston(s)
within the wheel cylinder to force the brake shoes or pads against the drum or rotor.
PRE-PROGRAM DISCUSSION QUESTIONS
1. What type(s) of braking system are you familiar with? Can you describe how it/they
work(s)?
2. How do you know when a vehicle needs brake repairs? What are some of the clues?
3. What do you think is the most common brake repair that you will perform?
4. Can you name some variables or causes of brake wear?
5. What are some safety measures that should be considered when performing brake
repairs?
6. What is the last thing you should do before releasing a repaired vehicle to its owner?
POST-PROGRAM DISCUSSION QUESTIONS
1. Now that you have seen the Braking System Repair video, can you name and describe
one of the three methods braking systems used to slow the speed of a car? Can you
name the two others?
2. In what way does the parking or emergency brake differ from conventional brakes?
3. If the vehicle you’re working on has collision damage around one of the wheels, what
assembly will you most likely remove, and why?
7
4. What hazardous material may be found in brake dust? Do you know when this material is
hazardous? How can you prevent exposure to it?
5. What is the final step after making braking system repairs? Why is this step critical to the
entire brake repair process?
GROUP ACTIVITIES
Tools of the Trade
The Braking System Repair video introduced by name various tools specific to brake work.
As a group, prepare a list of the tools that you will need to perform brake repairs. Consult the
Braking System Repair video, the Internet, and any other sources that you have available.
Divide the list into hand tools and power tools. Then, find or illustrate pictures of each tool.
Prepare a poster for each group of tools, labeling each with its name and its use. Be prepared to share your posters with the class. You can begin at by visiting the following website:
www.brakeandfrontend.com/tsbrake/9014.htm.
Design an Advertisement
Your group has just opened a new automotive service shop and has decided to advertise a
week-long brake repair special during the grand opening. Prepare an advertisement that will
be posted in the service shop waiting room. As a group, decide the nature of the repairs and
the related costs that are included in the actual special. Remember, your prices must be
highly competitive! Include other items in your advertisement such as a customer satisfaction
pledge, consumer’s Bill of Rights, or your shop’s commitment to safety. Design the advertisement to attract the attention of potential customers. Include your company’s logo or character
figure at the top of the ad.
Brake Repair Presentation
Your group needs to teach the class about an aspect of brake repair. As a group, decide
upon the specific topic that you think would generate the most interest. Then, research the
chosen topic. You may consider pursuing information that was not presented in the Braking
System Repair video. You may want to start at www.diynet.com and click on automotive-related links for ideas. Consider the following while researching information:
•
•
•
•
Specific areas of the selected topic to present
Step-by-step procedures if the chosen topic includes them
Safety alerts of which students should be aware
Photographs or illustrations
As a group, divide up the presentation sections. For example, if there are 8 main sections
and 4 group members, assign 2 sections to each group member. Then, each student will prepare their segment on poster board, which addresses the bulleted items above, whenever
possible. When it is time to present the topic to the class, all group members will line up in
front of the class to deliver their individual segment in sequential order, turning over their
poster board when prompted by the previous group member. After the presentation is completed, the instructor will conduct a debriefing session in question and answer format.
8
INDIVIDUAL STUDENT PROJECTS
Field Trip Reporter
Often you see advertisements for brake repair specials posted in newspapers and waiting
areas of auto repair shops. Do you think one price fits all? Do you think the advertised price
is close to the price consumers pay, or is the advertised price often misleading? Visit a minimum of three auto repair shops, particularly those that advertise a brake job special. Ask
each establishment the following questions:
• What repairs/parts are included in the advertised price?
• Are rear brakes included in the advertised price? What type of work is typically NOT
included in the advertised special?
• When is the price for actual repairs usually quoted?
• Is it unusual for consumers to pay more than the promotional price? If Yes, why is that
the case?
• In general, how much does the average preventive maintenance brake job cost?
After you have compiled your findings, report them collectively in the form of a newspaper
article or an editorial, including your own personal views. Conclude the article or editorial with
general advice about brake repair specials. Include a catchy headline that will grab the attention of readers.
Handle With Care
In brake repair, as in any other auto repair work, your personal safety while on the job is very
important. Bear in mind that working with braking systems requires additional safety measures both related and unrelated to the actual braking system. Reference the Braking System
Repair video, automotive magazines and books, or the Internet to discover safety Dos and
Don’ts when working on braking systems. Then, divide a piece of poster board into two
columns. Label the top of left column DOs and label the top right column DON’Ts. List safety
measures and tips all auto body repair professionals should follow when working with braking
systems. Include pictures or illustrations whenever possible. Here’s topic to get you started:
Consider guidelines for handling and disposing of brake fluid.
Braking System Check
Imagine for a moment that you are buying a used two-year old Chevrolet Corvette. The previous owner suggests you have the braking system looked at. Now imagine you have a clipboard with a checklist in hand to begin the initial brake inspection on the Corvette. But wait!
The checklist you thought you had is blank. Before you perform the brake inspection, you will
need to list all the things an auto body repair professional should inspect prior to beginning a
brake job, and tasks to perform in order to make the necessary repairs. You may research
checklist items using automotive magazines, auto repair manuals, or the Internet. While creating your checklist, include guidelines and recommendations for performing the repairs whenever possible.
Example:
❑ Check the backing plates to make sure they do not interfere with the drums. Look for unusual
amounts of moisture around the brakes that could signify leaking brake lines or rubber seals.
9
INTERNET ACTIVITIES
Brake Repair Tips
It’s been said that experience is the best teacher, but when you are just beginning to troubleshoot braking system problems, new technicians are at a disadvantage. However, one
way to learn about troubleshooting braking system problems without working side-by-side
with a mentor is to research this information on the Internet. Do squealing brakes mean a
brake job is in order? Why is bleeding the brakes necessary? What are the telltale signs
that a rotor or drum needs to be replaced? Research various Web sites for tips about troubleshooting and repairing brakes. After completing your research, create a 2-page Tech
Tips manual that contains at least 12 helpful tips about common issues that experienced
automotive technicians have resolved. Include pictures if possible. To get started, visit
autos.yahoo.com and click the “Maintain” tab in the upper right corner. Then, click the
“More…” link under the “Repair Tips & Advice” heading. Finally, click the “Brakes” link. You
can also visit www.autosite.com/garage/subsys/sysbrake.asp and
autorepair.about.com/cs/troubleshooting/a/bl302a.htm.
Trivia Expedition
Did you know that the modern car is made up of some 14,000 parts? Did you know that
one of those parts is the brake warning light that has been standard equipment since
1970? These are some of the interesting facts and trivia you will learn by visiting
www.innerauto.com/main.html and by clicking the upper left “Brake System” graphic. Click
the “Descriptions” button to generate an alphabetic “Description Index” on the right side of
the screen. Scroll down to the letter B section, where you will find a dozen or so of brakerelated links beginning with “Brake Animation.” As you click the links, write down ten facts
or trivia items you learned about brakes. After completing this activity, students may share
their findings with the class.
Give Yourself a Brake
The Braking System Repair video discussed disc brakes, drum brakes, and anti-lock and powerassist braking systems. Access auto.howstuffworks.com/brake.htm and click the applicable links
to learn more about how each type works. For this activity, prepare a poster that includes brief
descriptions and illustrations of the following items for each type of braking system:
• The main components
• How the braking system works
• The type of servicing required for the braking system
It may be necessary to click other related links within the How Stuff Works Web site to
obtain your information.
10
ASSESSMENT QUESTIONS
Q: When the ignition is turned on, the ABS system light on an ABS-equipped vehicle will
come on automatically and remain lit until the ignition is turned off. (True or False)
A: False
Feedback: If a vehicle is equipped with ABS, the ABS system light will come on automatically when the ignition is turned on. It will perform a self-check and then turn off if the ABS
system checks out okay. It will remain lit if something is wrong.
Q: Technician A says that bleeding the brake system should be done one wheel at a time,
starting with the wheel closest to the master cylinder. Technician B says that bleeding the
brake system should be done one wheel at a time, starting with the wheel furthest from the
master cylinder. Who is correct?
(a) Technician A
(b) Technician B
(c) Both A and B
(d) Neither A nor B
A: (c)
Feedback: Both Technician A and B are correct. The bleeding sequence begins by cleaning the bleeder screw, attaching the drain hose to the bleeder screw and submerging the
other end in a clear jar partially filled with brake fluid. Bleed one wheel at a time, starting
with the wheel closest to, or furthest from the master cylinder. Follow the manufacturer’s
guidelines to decide the order in which to bleed each wheel.
Q: Which of the following is NOT a feature of anti-lock braking systems (ABS)?
(a) During normal braking, the wheels do not lock up, regardless of the driving surface.
(b) During hard braking, brake pressure in each wheel is automatically adjusted
according to speed.
(c) During hard braking, rear wheels each receive the same pressure to maintain stability.
(d) During any braking situation, less force is needed to engage the brake pedal.
A: (d)
Feedback: The first three choices apply to anti-lock braking systems. The last choice
applies to power-assisted, or power brakes. Power-assisted, or power brakes, lessen the
amount of force an operator has to apply to the brake pedal. They also reduce the distance an operator’s foot has to travel to engage the brakes.
Q. When should shoes be replaced on drum brakes?
(a) When the pads are worn off and metal hits metal
(b) Whenever a wheel alignment is performed on the vehicle
(c) When they are worn to within one-eighth inch of the metal baking plate
(d) After every 15,000 to 20,000 miles, depending on whether the car does more
city driving or highway driving
A: (c)
11
Feedback: Before doing any work on the brake system of a vehicle, an auto body repair
technician must figure out the extent of the damage or wear and assess what repairs or
replacement parts are needed. When inspecting drum brakes, the technician will have to
remove the drums and measure the shoes. If the shoes are worn to within one-eighth inch
of the metal baking plate, they need to be replaced.
Q: Which of the following statements about handling brake fluid is FALSE?
(a) Brake fluid should not come in contact with painted surfaces because it will
corrode paint.
(b) Most vehicles can use any one of the different types of brake fluid.
(c) Immediately cover the brake fluid container and avoid opening the brake fluid
reservoir, because brake fluid absorbs moisture.
(d) Brake fluid drained from a system should not be reused because it may contain
contaminants.
A: (b)
Feedback: Brake fluid eats paint and absorbs water from the air; used brake fluid should
never be reused since it may contain contaminants. Be sure to use the right type of brake
fluid. Different types of brake fluid should not be mixed as they can react with one another.
Check the master cylinder for a label that will tell you the correct type for the car being
worked on.
Q: Technician A says that a typical automobile has disc brakes in the front and drum
brakes in the rear. Technician B says that some automobiles have drum brakes in both the
front and rear. Who is correct?
(a) Technician A
(b) Technician B
(c) Both A and B
(d) Neither A nor B
A: (a)
Feedback: Technician A is correct. A typical automobile has disc brakes in the front and
drum brakes in the rear. Some automobiles have disc brakes in both the front and rear.
Q: Compressed air should not be used to clean brake components because brake dust
may contain _______________.
A: asbestos
Feedback: Do not use compressed air to clean brake components. Brake dust may contain
asbestos. Asbestos is harmful once it becomes airborne. To prevent the brake dust from
becoming airborne while disassembling brake systems, wash components down with brake
cleaner. Asbestos brake linings are slowly being phased out in newly manufactured vehicles.
Q: What is the main difference between the parking or emergency brake and conventional
braking systems?
A: The parking or emergency brake uses a cable with direct force instead of a hydraulic
system.
12
Feedback: The parking or emergency brake uses a cable with direct force instead of a
hydraulic system like the regular brakes. This gives vehicles a back-up braking system in
case the hydraulic system fails. On most vehicles, parking brakes work on the rear wheels,
engaging one brake shoe on each wheel. When the parking brake is released, a spring on
the shoe returns it to its normal position.
Q: Technician A says that kinked brake lines can be repaired by replacing the kinked section. Technician B says that kinked brake lines should be replaced using generic copper or
aluminum parts . Who is correct?
(a) Technician A
(b) Technician B
(c) Both A and B
(d) Neither A nor B
A: (d)
Feedback: Neither Technician A nor B is correct. One of the most common brake repairs
an auto body repair technician will do is repairing brake lines. To service cut, kinked, or
bent brake lines, replace them with new lines from the original equipment manufacturer. Do
not use copper, aluminum, or rubber hoses. Do not attempt to repair nylon brake lines. Do
not use compression fittings. Route the brake lines in the same locations as they were
from the factory.
Q: After repairing and/or replacing pads or rotors, a technician should test drive the vehicle and make 8 to 10 stops from about 30 miles per hour. (True or False)
A: True
Feedback: A technician should make 8 to 10 stops from about 30 miles per hour to burnish, or seat, new pads or when a rotor has been replaced or resurfaced.
ADDITIONAL RESOURCES
WEB SITES
About.Com
autorepair.about.com
Advance Auto Parts
www.advanceautoparts.com
Auto Body Online
www.autobodyonline.com
Auto Body PI
www.autopi.com/frame.htm
Auto Body Pro
www.autobodypro.com
13
Automotive Body Repair News
www.abrn.com/abrn
Auto Channel
www.theautochannel.com
Automotive Learning Online
www.innerauto.com
Auto Glossary
www.autoglossary.com
Auto Inc. Online
www.autoinc.org
Automotive Information Center
www.autobytel.com/index.cfm
New Car Reviews by AutoSite
www.autosite.com/garage/subsys/sysbrake.asp
Automotive Service Association
www.asashop.org
Automotive Technical Library
hostingprod.com/@aa1car.com/library.htm
Automotive Youth Educational Systems (AYES)
www.ayes.org/index.asp
Collision Repair Industry Insight
www.collision-insight.com
Do-It Yourself Network—Automotive Repair
www.diynet.com
(www.diynet.com/diy/ab_brakes/0,2020,DIY_13682,00.html)
How Stuff Works—Auto Stuff Page
http: auto.howstuffworks.com/brake.htm
I-car
www.i-car.com
National Automotive Service Task Force
www.nastf.org
14
National Automotive Technicians Education Foundation—Program Standards
www.natef.org/program_standards/collision/index.cfm
OEM Listing: Auto Body Online
www.autobodyonline.com/industry/OEM/index.cfm
Tektips—Auto Body Pro Website
www.autobodypro.com/tektips.htm
BOOKS
Chilton Book Company. Chilton’s Guide to Auto Body Repair. Chilton Book Co., 1990.
ISBN: 080197898X
Duffy, James E. I-CAR Professional Automotive Collision Repair. Delmar Thomson
Learning, 2001. ISBN: 0766813991
Duffy, James E. Auto Body Repair Technology, 4th Edition. Thomson/Delmar Learning,
2003. ISBN: 0766862747
Killingsworth, Jeff, Eric Godfrey, and John H. Haynes. The Haynes Suspension, Steering
And Driveline Manual. Hayes North America, 1998. ISBN: 1563922932
Mississippi Curriculum Framework for Automotive Body Repair. Mississippi Department
of Education, Office of Vocational and Technical Information, 1996
Pfeil, Don, Curt Choate, and John H. Haynes. The Haynes Automotive Body Repair &
Painting Manual. Haynes Pub. Group, 1989. ISBN: 1850104794
Scharff, Robert, and James E. Duffy. Motor Auto Body Repair, 3rd Edition. Delmar
Publishers, 1998. ISBN: 0827368585
OTHER PRODUCTS
Brake Systems, VHS/DVD, Meridian Education
The design of master cylinders, wheel cylinders, lines, hoses, shoes, pads, springs, and
other components are explained. Computer graphics show what should be happening
inside the brake hydraulics during normal operation. Both drum and disc brakes are included. Computer-controlled anti-lock braking systems are also described. Part of the Chassis
and Front End series.
Order #: 24823, www.meridianeducation.com, 1-800-727-5507
15
Brake System Service, VHS/DVD, Meridian Education
Outlines the diagnosis of brake system problems. Inspection and maintenance are
detailed while service procedures on master cylinders, boosters, and disc and drum
brakes are examined. The importance of safety of brake systems on the car is emphasized throughout the video. Part of the Chassis and Front End series.
Order #: 24822, www.meridianeducation.com, 1-800-727-5507
Braking Systems, Software, Shopware
Lessons and quizzes are included on Brake System Basics, Drum Brake Systems, Disc
Brake Systems, Master Cylinder Systems, and Brake Maintenance. Part of the Auto
Mechanics series
Order #: 20980, www.shopware-usa.com,1-800-487-3392
16
S H O P WA R E ®
2572 Brunswick Pike, Lawrenceville, NJ 08648
w w w. s h o p w a r e - u s a . c o m
Call Toll Free: 800/487-3392
32784
AUTO BODY REPAIR
ELECTRICAL REPAIRS
TEACHER’S GUIDE
S H O P WA R E ®
INTRODUCTION
This Teacher’s Guide provides information to help you get the most out of Electrical Repairs.
The contents in this guide will enable you to prepare your students before using the program
and present follow-up activities to reinforce the program’s key learning points.
The Electrical Repairs video looks at common automotive electrical problems. It covers how to
use the digital multimeter device called a Digital Voltage Ohm Meter, or DVOM, to measure
current, voltage, and amperage, and to check resistance and continuity when testing electrical
circuits; inspect, test, and replace fusible links, circuit breakers, and fuses; and work on batteries and alternators. After viewing this video and completing some of the learning activities
included in this guide, students will be better prepared to properly work with automotive electrical systems, and incorporate industry terminology in order to communicate effectively with
coworkers, parts suppliers, and insurance adjusters. Use the Electrical Repairs video and
accompanying activities provided in this guide to prepare students for the most effective way
to approach automotive electrical system repairs, and to familiarize students with terminology
used in the auto repair industry.
LEARNING OBJECTIVES
After viewing the program, students will be able to:
■ Demonstrate a basic knowledge of electrical repair operations and safety procedures.
■ Identify the correct tools to use given the task to be performed.
■ Describe procedures used to check voltage, resistance, and amperage in electrical wiring
circuits and components.
■ List methods used to inspect, test, and replace fusible links, circuit breakers, and fuses.
■ Define procedures used to inspect, clean, and repair or replace battery cables, connectors,
and clamps.
■ Summarize the methods used to inspect, adjust, or replace the alternator drive belts,
pulleys, and fans.
EDUCATIONAL STANDARDS
The primary certifying body for automotive technician training programs is the National Institute
for Automotive Service Excellence (ASE). ASE is a non-profit organization established in 1972
by the automotive industry to improve the quality of vehicle repair and service through the voluntary testing and certification of automotive repair technicians. The National Automotive
Technicians Education Foundation (NATEF) is a separate non-profit foundation within ASE.
The mission of NATEF is to improve the quality of automotive technician training programs
nationwide through voluntary certification. The State Departments of Education in all 50 states
support ASE/NATEF certification of automotive programs.
2
Copyright © 2005 SHOPWAR E ®
National Standards
This program correlates with the Program Certification Standards for Automobile Technician
Training Programs from the National Institute for Automotive Service Excellence (ASE) and the
National Automotive Technicians Education Foundation (NATEF). The content has been
aligned with the following educational standards, which reflect the tasks in the ASE Program
Certification Standards for Automobile General Service Technician Programs.
Mechanical and Electrical Components: Electrical
■ Check voltages in electrical wiring circuits with a DMM (digital multimeter).
■ Check continuity and resistance in electrical wiring circuits and components with a DMM
(digital multimeter).
■ Repair electrical circuits, wiring, and connectors according to manufacturer’s specifications.
■ Inspect, test, and replace fusible links, circuit breakers, and fuses.
■ Perform battery state-of-charge test; determine needed service.
■ Inspect, clean, and replace battery.
■ Perform slow/fast battery charge in accordance with manufacturer’s recommendations.
■ Identify programmable electrical/electronic components; record data for reprogramming
before disconnecting battery.
■ Inspect, clean, and repair or replace battery cables, connectors, and clamps.
■ Inspect alignment, adjust, and replace generator (alternator) drive belts, pulleys, and fans.
■ Demonstrate the proper self-grounding procedures for handling electrical components.
2004 Automobile Program Standards, by the National Institute for Automotive Service Excellence (ASE),
Copyright 2004 Reprinted with permission.
Language Arts and Communication Standards
According to ASE/NATEF standards, the automobile technician must be proficient in the following Language Arts and Communications related academic skills that are embedded in the occupation. The activities and information presented in this program and accompanying teacher’s
guide are aligned to the following standards from the National Automotive Technicians
Education Foundation from the National Institute for Automotive Service Excellence.
■ Request, collect, comprehend, evaluate, and apply oral and written information gathered
from customers, associates, and supervisors regarding problem symptoms and potential
solutions to problems.
■ Identify the purpose for all written and oral communication and then choose the most effective strategies for listening, reading, speaking, and writing to facilitate the communication
process.
■ Adapt a reading strategy for all written materials, e.g. customer’s notes, service manuals,
shop manuals, technical bulletins, etc., relevant to problem identification, diagnosis, solution, and repair.
■ Use study habits and techniques, i.e. previewing, scanning, skimming, taking notes, etc.,
when reviewing publications (shop manuals, references, databases, operator’s manuals,
and text resources) for problem solving, diagnosis, and repair.
■ Write clear, concise, complete, and grammatically accurate sentences and paragraphs.
3
■ Write warranty reports and work orders to include information regarding problem resolution
and the results of the work performed for the customer or manufacturer.
■ Follow all oral/written directions that relate to the task or system under study.
■ Comprehend and apply industry definitions and specifications to diagnose and solve problems in all automotive systems and components of the automobile and light truck.
■ Comprehend and use problem-solving techniques and decision trees that are contained in
service manuals and databases to determine cause-and-effect relationships.
■ Use the service manual to identify the manufacturer’s specifications for system parameters,
operation, and potential malfunctions.
■ Supply clarifying information to customers, associates, parts supplier, and supervisors.
Standards for the English Language Arts, by the International Reading Association and the National Council of
Teachers of English, Copyright 1996 by the International Reading Association and the National Council of
Teachers of English. Reprinted with permission.
Technology Standards
The activities in this Teacher’s Guide were created in compliance with the following National
Education Technology Standards from the National Education Technology Standards Project.
The content has been aligned with the following educational standards and benchmarks.
■ Use a variety of media and formats to communicate information and ideas effectively to
multiple audiences.
■ Use telecommunications to collaborate, publish, and interact with peers, experts, and other
audiences.
■ Use productivity tools to collaborate in constructing technology-enhanced models, prepare
publications, and produce other creative works.
■ Use technology tools to enhance learning, increase productivity, and promote creativity.
■ Use technology to locate, evaluate, and collect information from a variety of sources.
The National Education Technology Standards reprinted with permission from the International Society for
Technology Education.
PROGRAM OVERVIEW
What tools are needed when making automotive electrical repairs? How do you inspect, test,
and replace electrical components? These questions and more are answered in the Electrical
Repairs video. This program begins by providing a basic overview of electrical concepts and terminology, followed by a review of safety procedures when working with automotive electrical
systems. Viewers will have the opportunity to see various electrical tests performed with automotive electrical equipment, and will learn how to test, clean, repair, and replace important automotive electrical components. After viewing this program, viewers will be better prepared to
properly make automotive electrical repairs, and will be able to incorporate industry terminology
in order to communicate effectively with coworkers, parts suppliers, and insurance adjusters.
4
MAIN TOPICS
Topic 1: Concepts and Electrical Terminology
This section of the program describes some concepts and electrical terminology that an auto
body repair technician needs to know in order to work with a vehicle’s electrical systems.
Knowledge of these concepts and terms is essential when making electrical repairs.
Topic 2: Safety Procedures
This section of the program describes the important safety procedures that must be followed
when making any kind of automotive electrical repairs. It is important to keep these procedures
in mind and follow them carefully to prevent nasty shocks, electrical fires, and damage to electrical components.
Topic 3: Performing Tests
This section of the program demonstrates the various tests that can be performed with a
DVOM. The information that can be gathered through these tests is the key to diagnosing and
fixing auto electrical faults.
Topic 4: Fuses and Circuit Breakers
Often when one of a vehicle’s electrical devices doesn’t work, the fix can be as easy as replacing a burned out fuse or defective circuit breaker. This topic describes the purpose of fuses
and circuit breakers, describes how to test them, and explains how to determine when a
replacement is needed.
Topic 5: Batteries and Alternators
The battery supplies the power to a vehicle’s electrical system. If it isn’t working properly, the vehicle’s electrical systems won’t work right either. This section describes how to inspect and test
the battery safely, as well as clean a battery properly. Charging and replacement of batteries is
also discussed, along with techniques for testing the alternator and fixing common problems.
FAST FACTS
■ The DVOM multimeter is recommended by vehicle manufacturers because it won’t damage
a vehicle’s sensitive electronic parts.
■ When making electrical repairs, always disconnect the negative battery terminal. This prevents an electrical fire and protects you from shock when you’re working on the vehicle’s
circuits.
■ When disconnecting the battery, the ignition should be off to prevent a voltage spike from
damaging any computer electronics.
■ A vehicle’s service manual is very helpful in locating the routing of circuits you’re testing.
■ If a car’s battery tests lower than 12.4 volts, your first course of action is to recharge it.
■ When in the Ohm measuring mode, there must be no power in the circuit being tested or
the ohmmeter will be damaged. Either disconnect the part being tested from the power
source or disconnect the negative battery terminal.
■ If you don’t calibrate a meter before testing, your measurements will be inaccurate.
5
■ Every component has a specified minimum resistance value, which can be found in the
service manual. If your test shows a value less than the specified minimum, the component
is defective and should be replaced.
■ Amperage is measured to test how much power is being used by a device or “load.”
■ Often when one of a vehicle’s electrical devices doesn’t work, the fix can be as easy as
replacing a burned out fuse or defective circuit breaker.
VOCABULARY TERMS
amperage: Unit of measure denoting the strength of an electrical current, measured to test
how much power is being used by a device or “load.”
autoranging: A feature of some meters which means a user does not have to set the value
range for the circuits he/she is testing.
battery: The power source in a vehicle’s electrical system is usually the battery. The battery
has positive and negative terminals. Electrical current flows out of the positive terminal of the
battery and returns to the negative terminal to create a circuit.
calibrate: To check, adjust, or determine the reading of a meter by comparison with a standard.
circuit: A flow of energy from a positive to a negative terminal. Electrical current flows out of
the positive terminal of the battery and returns to the negative terminal to create a circuit.
circuit breaker: Protect circuits from excess current. Unlike fuses that burn through, circuit
breakers heat up and open the circuit. Once cool, the circuit breaker will close and the circuit
will be operational again.
conductor: Carry the electrical current through a circuit. Conductors can be wires, or in the
case of computers, extremely small metallic traces on a computer board.
continuity: A complete circuit. If there is a break, or “open,” in a circuit, electricity cannot flow—
it does not have continuity. Continuity is measured with an ohmmeter.
corrosion: Typically green and white crystals that appear on a battery, corrosion is a state of
deterioration in metals caused by oxidation or chemical action. Corrosion is a normal part of
battery life, but if not cleaned away periodically, can damage clamps and cables and inhibit
battery operation.
current: The flow of electricity through a circuit. Current is measured in amperes, or “amps,”
using an ammeter. The number of amps tells how much current is flowing through the circuit.
digital multi-meter (DVOM): A device used to measure current, voltage, resistance, and continuity when testing electrical circuits.
fuse: A safety device that protects an electric circuit from excessive current. It includes a
metal element that melts when current exceeds a specific amperage, which opens the circuit.
The purpose of a fuse is to protect circuits and loads from excess current by burning in half
and severing the circuit.
load: A device on the circuit that converts electrical energy into another form of energy such
as light, heat, or movement.
ohmmeter: A meter used to measure continuity and resistance.
power source: Usually the battery in a vehicle’s electrical system, the power source is the
component that provides a charge that causes electrical components within the automobile to
function.
6
resistance: Resistance is a restriction that slows down current flow. A typical example of
resistance in an electrical circuit might be corrosion on a wire or connector. Resistance in a
circuit or electrical system component is measured in ohms using an ohmmeter.
resting state-of-charge test: An electrical test performed on a battery when the car is not
running and none of the electrical accessories are on.
voltage: The pressure that pushes electricity through a wire or circuit.
voltmeter: A meter used to measure the voltage of a circuit.
PRE-PROGRAM DISCUSSION QUESTIONS
1. Can you name the parts of a vehicle that make up an automobile’s electrical system?
2. What parts of an automobile’s electrical system are similar to those of a house’s electrical
system?
3. What tools do you think are used by auto body repair technicians when testing automotive
electrical systems?
4. What do you think is the easiest job involved in automotive electrical repair? Which is the
most difficult?
5. What safety procedures do you think need to be considered when making automotive
electrical repairs?
POST-PROGRAM DISCUSSION QUESTIONS
1. How are a vehicle’s power source, conductors, and load related? Why is it important to
understand how these work together when making automotive electrical repairs?
2. Why is a DVOM recommended by vehicle manufacturers? What makes it superior to other
types of meters?
3. Why is it important to calibrate the DVOM before testing? What could happen if the meter
is not calibrated?
4. What safety procedures would you recommend to someone learning about automotive electrical repairs? What, in your opinion, is the most important safety procedure to remember?
Why?
5. How are fuses different from circuit breakers? How are they similar? Why do you think both
are used in a vehicle’s electrical system?
7
GROUP ACTIVITIES
Electrical System Presentation
As a group, research the electrical systems found within the automobile of your choice. Then,
prepare a poster that illustrates these electrical systems, and a presentation that shows your
classmates how each electrical system is designed and depends upon other components
within the vehicle. Be prepared to compare the systems within the vehicle your group chose
with those of other groups.
You Be the Teacher
Select one electrical system within a car, such as the ignition system. As a group, prepare a
working model of this system, along with a five-question quiz about how to use a DVOM to
test your system. Your group will present your working system to the class and demonstrate
how to use a DVOM to test this system. Then, your group will distribute the quiz to your classmates in order to see if everyone learned how to test the system.
Safety Mistake Skit
As a group, prepare a skit that shows a group of auto body repair technicians testing, charging, and finally replacing a battery. In your skit, the technician should NOT follow proper safety
procedures. When your group performs your skit for the class, the class should note all of the
safety mistakes that your group makes in your skit. After your performance, ask your class to
identify all of the mistakes you made. Did they catch them all? Which safety procedures are
the hardest for your class to remember, and which mistakes are the easiest to miss?
INDIVIDUAL STUDENT PROJECTS
Electrical Systems Tests
Obtain a DVOM, and ask permission to use it on your family’s or another vehicle. Perform the
three tests described in the Electrical Repairs video (battery state-of-charge test, resistance
test, and amperage test) and record your readings. Prepare a written document that provides
each reading and contains your assessment of the state of the vehicle’s electrical system
based on those readings.
Fuse Test Photo Timeline
Bring your camera along as you test a fuse for resistance. Prepare a timeline of photos that
illustrate the sequence measuring a fuse for resistance with a multimeter. Include a photo that
demonstrates how to switch to ohmmeter and calibrate the meter, how to place the red and
black leads appropriately, and how to read the meter. Mount your timeline on poster paper and
prepare to share with the class.
Panel Removal Technique Demonstration
Create a tri-fold brochure for auto body repair technicians that shows safe automotive battery
handling techniques. Be sure to include tips for testing, battery handling, charging, dealing
with corrosion, cleaning, and replacement. Include photos or illustrations wherever possible.
8
INTERNET ACTIVITIES
Electrical Repair Web Quest
With your group, find three to five Web sites that deal with automotive electrical repairs. Write
four questions for each Web site that test knowledge of the concepts taught on the site, as they
relate to automotive electrical repairs. Be sure to prepare an answer key as well! Then, prepare a
handout for the rest of your class that contains the URLs of each Web site, along with your questions. Your teacher will distribute your handout to the rest of the class, and each group in your
class will complete your Web Quest. After each group has answered all the questions for each
site, your team will be responsible for grading each group’s work and providing feedback.
Electrical System Repair—Follow-Up Lesson Plan
Visit the Web site http://www.autoshop101.com. Starting at this site, and using others as well,
prepare a follow-up lesson for your class on automotive electrical systems. While the Electrical
Repairs video provided an overview of electrical systems, decide what other details your class
needs to know in order to properly repair electrical systems as an auto body repair technician.
Design a lesson plan, including purpose, learning objectives, materials, and instructions for the
teacher. Include a list of Web sites used to design your lesson. After review from your teacher,
prepare to present your lesson to the class.
Automotive Electrical History
How long have electrical systems been a part of car design? How have they changed since their
inception? Using a search engine, research the history of automotive electrical systems, and write
a report that describes how systems were initially used, how they have changed, and what they
look like today. Include illustrations wherever possible.
ASSESSMENT QUESTIONS
Q: Which of the following is not a component of an electrical circuit?
(a) Power source
(b) Conductor
(c) DVOM
(d) Load
A: (c)
Feedback: All electrical circuits have a power source, conductors and a load—a device that
converts electrical energy into light, heat, or movement.
Q: Which of the following is usually the power source for a vehicle?
(a) Battery
(b) Fuse
(c) Circuit breaker
(d) Conductor
A: (b)
Feedback: The power source in a vehicle’s electrical system is usually the battery. The battery
has positive and negative terminals. Electrical current flows out of the positive terminal of the
battery and returns to the negative terminal to create a circuit.
9
Q. The flow of electricity through a circuit is called ______________________.
(a) current
(b) voltage
(c) ampere
(d) conductor
A: (a)
Feedback: The flow of electricity through a circuit is called current. Current can be compared
to the flow of water through a garden hose. Current is measured in amperes, or “amps,” using
an ammeter. The number of amps tells you how much current is flowing through the circuit.
Q: Describe the effects of an “open” in a circuit.
A: If there is a break, or an “open,” in a circuit electricity cannot flow through that circuit. As a
result, an open within a circuit will cause the malfunction of any device connected to that circuit.
Feedback: If there is a break, or “open,” in the circuit, the electricity cannot flow because it
does not have continuity. If the circuit is complete, it has continuity.
Q: What safety procedures must be followed when disconnecting a battery?
A: Always make sure the ignition is off, disconnect the negative battery terminal, and don’t
smoke or weld near batteries, or expose them to sparks, flames, or heat sources.
Feedback: Disconnecting the negative battery terminal prevents an electrical fire and protects
you against shock when you’re working on the vehicle’s circuits. When disconnecting the battery, the ignition should be off to prevent a voltage spike from damaging any computer electronics. Finally, don’t smoke or weld near batteries or expose them to sparks, flames or heat
sources. Batteries emit hydrogen gas, which can produce an explosion if exposed to heat,
flames, or sparks.
Q: Which of the following carries the electrical current through the circuit?
(a) Conductors
(b) Load
(c) Voltage
(d) Current
A: (a)
Feedback: Conductors carry the electrical current through the circuit. Conductors can be
wires, or in the case of computers, extremely small metallic traces on a computer board.
Q: Where can a vehicle’s electrical requirements, including load and resistance, be found?
A: This information can be found in the electrical diagram section of the vehicle service manual.
Feedback: Before you walk up to a car with your DVOM and begin to test parts, you need to
know a little about their electrical requirements, including load and resistance. That’s the key to
diagnosing and fixing auto electrical faults. This information can be found in the electrical diagram section of the vehicle service manual. The service manual is also helpful in locating the
routing of circuits you’re testing.
10
Q: Most circuits and loads get positive power from the battery, and a return or ground from
__________________________.
A: the vehicle’s metal chassis
Feedback: Most circuits and loads you test will get positive power from the battery and a
return or ground from the vehicle’s metal chassis. The negative terminal of the battery is then
connected to the chassis and the engine block to complete the circuit.
Q: The minimum acceptable reading for a good battery is _______________ open circuit volts.
A: 12.4
Feedback: The acceptable minimum reading for a good battery is 12.4 open circuit volts, that
is, when all vehicle electrical devices are turned off and the engine is not running. If the battery
tests lower than 12.4 volts, the first course of action is to recharge the battery.
Q: If a meter is autoranging, it will automatically find the correct range when you begin the test.
(True or False)
A: True
Feedback: Autoranging meters automatically find the correct range when the auto body repair
technician begins the test. With a non-autoranging DVOM you’ll also have to select the proper
voltage range.
ADDITIONAL RESOURCES
WEB SITES
Auto Body Curriculum Guide
www.sasked.gov.sk.ca/docs/paa/autobody/index.html
Auto Body Online
www.autobodyonline.com
Auto Body P.I.
www.autopi.com/frame.htm
Auto Body Pro
www.autobodypro.com
Auto Body Tool Mart Repair and Restoration Tutorials
www.autobodytoolmart.com/restorations.html
Automotive Body Repair News
www.abrn.com/abrn
Auto Glossary
www.autoglossary.com
11
Automotive Learning Online
www.innerauto.com
Automotive Services Association®
www.asashop.org
Automotive Youth Educational Systems (AYES)
www.ayes.org/index.asp
Collision Repair Industry: Insight
http://www.collision-insight.com
Do-It Yourself Network—Automotive Body Work
www.diynet.com/diy/ab_auto_body_work/0,2020,DIY_13675,00.html
How Stuff Works—Auto Stuff Page
http://auto.howstuffworks.com
I-car
www.i-car.com
National Automotive Service Task Force
www.nastf.org
National Automotive Technicians Education Foundation
www.natef.org
OEM Tech Sites: Auto Body Online: A Portal for the Autobody Professional
www.autobodyonline.com/industry/OEM/index.cfm
Society of Collision Repair Specialists
www.scrs.com
Tektips—Auto Body Pro Website
www.autobodypro.com/tektips.htm
BOOKS
Duffy, James E., Auto Body Repair Technology, 4th Edition. Delmar Thomson Learning,
2004. ISBN: 0766862747
Chilton Book Company, Chilton’s Auto Repair Manual, 1998-2002 (Chilton’s Reference
Manuals). Chilton Book Company, 2003. ISBN: 0801993628
Duffy, James E., I-CAR Professional Automotive Collision Repair. Delmar Thomson Learning,
2001. ISBN: 0766813991
12
OTHER PRODUCTS
Auto Body Shop Safety, Software, Cambridge Educational
Safety procedures relevant to the auto body shop are outlined, along with lessons on First
Aid, Fire Safety and Prevention, Wire Feed MIG Welding, and Proper Use of Auto Body
Tools. 3.5” IBM version, Mac version also available. A Shopware Production.
Order #: 20941, www.cambridgeeducational.com, 1-800-468-4227
Electrical Systems, Software, Shopware
Complete lessons and quizzes on Electrical Systems, Starting Systems, Charging Systems,
and Ignitions Systems. 3.5” IBM version, Mac version also available. A Shopware Production.
Part of the series Auto Mechanics (order 24018).
Order #: 21000, www.shopware-use.com, 1-800-487-3392
Electrical Systems, VHS/DVD, Meridian Education
Using 3-D animation and live-action close-ups of electrical system components, these videos
examine and explain elements of various systems, troubleshooting, conducting basic tests, and
basic repair procedures for many system failures. Also provides detailed information about the
proper tools and how to use them. Topics covered include starting motors, solenoids, cables,
ignition switches, sensors, multimeters, voltage regulators, alternators, scopes, wiring diagrams, and high-voltage systems. A Meridian Production. The series includes Charging
System Operation; Charging System Service; Ignition System Operation; Ignition System
Service; Starting System Operation; Starting System Service; Using a Load Tester.
Order #: 25289, www.meridianeducation.com, 1-800-727-5507
Electronics GM Computer Command Control, Software, Shopware
The General Motors Computer Command Control system is examined along with the automotive electronics and control input/output devices associated with it. 3.5” IBM version, Mac version also available. A Shopware Production.
Order #: 20995, www.shopware-use.com, 1-800-487-3392
13
S H O P WA R E ®
2572 Brunswick Pike, Lawrenceville, NJ 08648
w w w. s h o p w a r e - u s a . c o m
Call Toll Free: 800/487-3392
32783


