1
Wilbur Curtis Company, Inc.
SERVICE MANUAL - CAFE POUROVER
SETUP STEPS
MODELS INCLUDED
• CAFE 1DB
• CAFE 2DB
• CAFE 3DB
• CAFE AP
• CAFE 0PP
CAUTION - This brewer is shipped with the thermostat turned ON. DO NOT plug in unit before
pouring 3 pots or 192 oz. of water into the opening (see step 4, below); damage to the heating
element or thermostat will result.
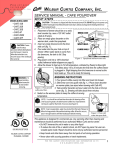
1. Place the brewer on a solid, level counter top,
near a 120 VAC outlet rated at 20 amps.
2. Place an empty glass decanter on the warmer
deck, under the sprayhead.
3. Insert an empty brewcone into the brew rails
unit (fig. 1.).
4. Slowly fill the tank with room temperature water
through the opening on the top cover until water
starts running in a steady stream from the brewcone
(3 pots or 192 ounces). The tank is full.
5. Plug power cord into a 120V electrical outlet.
6. Allow the brewer to heat up to full temperature,
indicated by the green Ready to Brew light. This
takes about 15 to 25 minutes the first time the
coffee brewer is plugged in. Slight dripping from the brewcone is normal as the tank heats up.
CAUTION: Please
use this setup
procedure before
attempting to use this brewer.
Failure to follow the instructions can result in injury or
the voiding of the warranty.
BREWING INSTRUCTIONS
1. Pour ground coffee evenly into the filter and place it into the brew
cone.
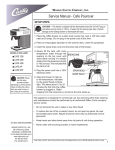
2. Slide brew cone into guide rails (fig. 1.). Place a clean empty
decanter on warmer plate (use an airpot with the Café AP).
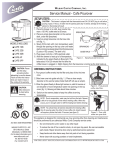
3. When the green Ready to Brew light comes on, add 64 ounces or
one decanter of room temperature water into opening on the top
cover (fig. 3.). Brewing will take about three minutes.
CAUTION:Allow
brewcone to
drain before
removing.
4. Switch on the warmer plates to keep the coffee at serving
temperature.
NOTE: Due to evaporation, water may be lost from the tank if brewer
is left on for long periods of time without making coffee. When this
occurs, pour in enough water to refill the heating tank before brewing.
NOTE: You should have at least two decanters for brewing coffee.
One for pouring water, the other to brew coffee into. Airpot brewers
will require a pitcher that holds 74 ounces (see figure 3).
This appliance is designed for commercial use. Any servicing other than cleaning and maintenance
should be performed by an authorized Wilbur Curtis Company service center.
C
ISO 9001 REGISTERED
WILBUR CURTIS COMPANY
Montebello, CA 90640
• Do NOT immerse the unit in water or any other liquid
• To reduce the risk of fire or electric shock, do NOT open top panel. No user serviceable parts inside. Repair should be done only by authorized service personnel.
• Keep hands and other items away from hot parts of unit during operation.
• Never clean with scouring powders or harsh implements.
1
PARTS
DIAGRAMS 14
15
16
17
18
19
20
Item Nº Part Nº
2
1
3
21
22
23
4
5
5A
24
6
7
10
11
12
13
8
8A
9
26
25
27
10A
10D
10B
10E
2
10C
10F
1
1A
2
2B
3**
4**
5
5A**
6
7
8**
8A**
9
10
10A
10B
10C
10D
10E
10F
10G
11**
11A
11B
12
12A
13
14**
15
16
17
18
18A
19
20
20A
21
21A
22**
23**
23A
24**
25
26
27
Description
WC-68101
TOP WARMER ASSY, 120V (CAFÉ 2DB)
WC-68103
TOP WARMER ASSY, 220V (CAFÉ 2DB)
WC-37135
WARMER ASSY 100W 120V w/PLATE
WC- 975
WARMER ASSY, COMPLETE 100W 220V
WC-54118
TRAY ASSY POUROVER
WC-54121
PAN, POUR CAFE’
WC- 517 THERMOSTAT (EXPORT MODELS)
WC- 735
THERMOSTAT, TEMP CONTROL 120V
WC-2962*
FITTING, SPRAYHEAD
WC-4213
NUT, 5/8-18 JAM BRASS
WC-2958*
SPRAYHEAD, BROWN
WC-29025
SPRAYHEAD, PURPLE ASF
WC-3502
LEG, SCREW BUMPER
WC-38099*
LABEL, SW PANEL CAFÉ 2DB (OLDER UNITS)
WC-38113*
LABEL, SW PANEL CAFÉ 1DB (OLDER UNITS)
WC-38114*
LABEL, SW PANEL CAFÉ 3DB (OLDER UNITS)
WC-38127*
LABEL, SW PANEL CAFÉ AP (OLDER UNITS)
WC-39373
LABEL, SW PANEL CAFÉ 2DB (ON/OFF SW)
WC-39372
LABEL, SW PANEL CAFÉ 1DB (ON/OFF SW)
WC-39374
LABEL, SW PANEL CAFÉ 3DB (ON/OFF SW)
WC-39371
LABEL, SW PANEL CAFÉ AP (ON/OFF SW)
WC- 165
SWITCH, WARMER RED 115V
WC- 166
SWITCH, WARMER (RED) 250V
WC- 137*
SWITCH, WARMER RED 220V (OLDER UNITS)
WC- 207
LIGHT, BREW 115V GREEN
WC- 208
LIGHT, BREW 250V GREEN
WC-3621-101 BREWCONE, 7⅛” BLK PLASTIC
WC-5310
TUBE, 5/16 ID X 1/8 W SILICONE
WC-29042
HOSE, VENTILATION HEATING TANK
WC-2627
GROMMET, COVER HEATING TANK
WC-2628
BUSHING, CONICAL.47 ID x .95 OD x .99L 8mm
WC-54125-101 COVER, TOP HEATING TANK
WC-54125*
COVER, TOP HEATING TANK (OLDER UNITS)
WC-43062
GASKET, TANK LID
WC-54117
TANK, COMPLETE 1450W 120V
WC-54145
TANK, COMPLETE 3500W 240V
WC- 917-04 ELEMNT, HEAT1.45KW 120V W/NUTS & WSHRS
WC- 906-04
ELEMENT, HEATING 2KW 220V W/NUT & WSHR
WC-1438-101 SENSOR, TEMPERATURE TANK
WC- 523*
THERMOSTAT, MANUAL RESET
WC- 521
THERMOSTAT, THERMOSTAT, AUTO RESET
WC-29054
TUBE, CAFÉ SPRAYHEAD/SYPHON
WC-3645
SPRING, DELIMING CAFE SERIES
WC-73106
COVER, BOTTOM
WC-68102
COVER ASSY, TOP (CAFÉ 1DB, 3DB, AP
* Component Used on Older Units
** Suggested Parts to Stock
DELIMING SPRING This spring
is for cleaning lime deposits from
within the siphon tube. Remove the
sprayhead. Insert spring into the
siphon tube.
Twist the spring clockwise as you
push inward. Once past the bend in
the tubing, you can slide it back an
forth to remove hard lime deposits.
NOTE: Items, called out in this illustration, are
specific to Cafe 1DB, Cafe 3DB & Café AP.
All other parts are common.
THERMOSAT ADJUSTMENT
The Cafe coffee brewer is factory set to 200ºF. The
brewer can be adjusted on the thermostat for a tank
temperature of either 200ºF or 190ºF.
To adjust:
1. Unplug the unit at the power cord.
2. Remove the back cover, held by four screws.
3. Locate the thermostat, attached to a bracket below
the top wrap. There will be a pair of contacts covered
with a black plug (see photo, right, 200ºF). This is
where the tank temperature selection is made. Removing the black plug changes the setting to 190ºF.
Covering the contacts will return the setting to 200ºF.
To avoid losing the small black cover, slip the cover
over one of the contacts as shown in photo at right.
4. Return cover to the back of the unit and plug electrical
cord into the power outlet.
CLEANING
Regular cleaning of your Curtis Cafe coffee brewer will maintain the highest quality coffee your equipment is capable of producing. Proper
cleaning is essential in maintaining the fresh and appealing appearance of your coffee service.
1. First turn off the brewer, unplugging the cord at the power outlet.
2. Avoid touching hot surfaces. Allow the warmer plates to cool.
CAUTION - Do not use cleansers, liquid bleach, powders or any other substance that contains chlorine. These products promote corrosion and will pit the stainless steel. THE USE OF THESE PRODUCTS WILL VOID YOUR WARRANTY.
3. Wipe all exterior surfaces with a damp cloth, removing spills and debris.
4. Slide the brewcone out and clean it. Thoroughly wipe sprayhead area with a damp cloth.
5. Wash the brewcone and wire brew basket, if applicable. Use a soft bristled brush for hard to clean areas. Wash both parts with a detergent
solution or put these parts through a dishwasher.
6. Wash glass decanters with dish soap. To remove mineral deposits, soak with vinegar.
7. Dry all exterior surfaces of the unit with a clean soft cloth to keep water from spotting the cabinet.
NOTE - Polish the outside stainless steel surfaces with stainless steel polish after drying. This will prevent surface scratches and result in a cleaner appearance.
De-liming
Every six months, more often in areas with extremely hard water, the inside of the heating tank should be de-limed.
CAUTION - The de-liming procedure must be performed by a qualified service technician.
3
ELECTRICAL LADDER DIAGRAM – 120V
Brewer Model Café 1DB, 2DB, 2DBS, 3DB & AP (All 120VAC Units)
N
WHT #14
BLK #14
L1
HI-LIMIT (220°F)
120/240VAC 25A
HEATING TANK
SEE TABLE FOR RATING
BREW LIGHT
120V (GREEN) NEON
BLK
BLU #14
YEL
1
2
WHT #14
WC-735
NO NC
COM
200°F SET POINT
WHT/YEL
WHT #14
BLK #14
A
WHT/YEL
BLK
HEATING TANK
TEMPERATURE
SENSOR
THERMOSTAT,
TEMPERATURE
120/220VAC
BLK #14
B
WHT #14
WARMER SW
120V NEON
2
3
1
BLK
WARMER ELEMENT
100W, 120VAC
1
2
BRN
C
WARMER SW
120V NEON
2
3
1
BLK
D
WHT
WHT
WARMER ELEMENT
100W, 120VAC
1
2
RED
WARMER SW
120V NEON
2
3
1
BLK
BOTTOM
WARMER
WHT
TOP/FRONT
WARMER
WHT
REAR
WARMER
WHT
RED STP
WARMER ELEMENT
100W, 120VAC
1
2
LD-CAFE-10 rev Q
WHT
Table 1. MODEL & ELECTRICAL (All 120VAC Units)
MODEL
HEATING
ELEMENT
WC-917
WC- 917
WC- 917
WC- 917
WC- 917
A
A+B
A+B+C
A+B+C
A+B+C+D
CAFE0PP10
CAFE1DB20
CAFE2DB20
CAFE3DB20
WC- 917
WC- 933
WC- 933
WC- 933
A
A+B
A+B+C
A+B+C+D
CAFE0AP10
CAFE1DB10
CAFE2DB10
CAFE2DBS10
CAFE3DB10
4
CIRCUIT
VOLTS WATTS AMPS HERTZ WIRE PHASE
120VAC
120VAC
120VAC
120VAC
120VAC
1450W
1550W
1650W
1650W
1750W
12.1A
12.9A
13.8A
13.8A
14.6A
50/60HZ
50/60HZ
50/60HZ
50/60HZ
50/60HZ
2W + G
2W + G
2W + G
2W + G
2W + G
1-PHASE
1-PHASE
1-PHASE
1-PHASE
1-PHASE
120VAC
120VAC
120VAC
120VAC
1450W
1250W
1350W
1450W
12.1A
10.4A
11.3A
12.1A
50/60HZ
50/60HZ
50/60HZ
50/60HZ
2W + G
2W + G
2W + G
2W + G
1-PHASE
1-PHASE
1-PHASE
1-PHASE
ELECTRICAL LADDER DIAGRAM – 220V
Brewer Model Café 1DB,
2DB, 3DB & AP (All 208240VAC Units)
Table 2. MODEL & ELECTRICAL (All 208-240VAC Units) “Export Only”
MODEL AND ELECTRICAL TABLE
MODEL
CAFE0AP30
CAFE1DB30
CAFE2DB30
CAFE3DB30
HEATING
ELEMENT
WCWCWCWC-
906
906
906
906
CIRCUIT
VOLTS
WATTS
AMPS
A
A+B
A+B+C
A+B+C+D
240VAC
240VAC
240VAC
240VAC
2000W
2100W
2200W
2300W
8.3A
8.8A
9.2A
9.6A
5
Product Warranty Information
The Wilbur Curtis Company certifies that its products are free from defects in material and workmanship under normal use. The following limited
warranties and conditions apply:
3 Years, Parts and Labor, from Original Date of Purchase on digital control boards.
2 Years, Parts, from Original Date of Purchase on all other electrical components, fittings and tubing.
1 Year, Labor, from Original Date of Purchase on all electrical components, fittings and tubing.
Additionally, the Wilbur Curtis Company warrants its Grinding Burrs for Forty (40) months from date of purchase or 40,000 pounds of coffee,
whichever comes first. Stainless Steel components are warranted for two (2) years from date of purchase against leaking or pitting and replacement parts are warranted for ninety (90) days from date of purchase or for the remainder of the limited warranty period of the equipment in which
the component is installed.
All in-warranty service calls must have prior authorization. For Authorization, call the Technical Support Department at 1-800-995-0417. Effective
date of this policy is April 1, 2003.
Additional conditions may apply. Go to www.wilburcurtis.com to view the full product warranty information.
CONDITIONS & EXCEPTIONS
The warranty covers original equipment at time of purchase only. The Wilbur Curtis Company, Inc., assumes no responsibility for substitute replacement parts installed on Curtis equipment that have not been purchased from the
Wilbur Curtis Company, Inc. The Wilbur Curtis Company will not accept any responsibility if the following conditions are not met. The warranty
does not cover and is void under the following circumstances:
1) Improper operation of equipment: The equipment must be used for its designed and intended purpose and function.
2) Improper installation of equipment: This equipment must be installed by a professional technician and must comply with all local electrical,
mechanical and plumbing codes.
3) Improper voltage: Equipment must be installed at the voltage stated on the serial plate supplied with this equipment.
4) Improper water supply: This includes, but is not limited to, excessive or low water pressure, and inadequate or fluctuating water flow rate.
5) Adjustments and cleaning: The resetting of safety thermostats and circuit breakers, programming and temperature adjustments are the
responsibility of the equipment owner. The owner is responsible for proper cleaning and regular maintenance of this equipment.
6) Damaged in transit: Equipment damaged in transit is the responsibility of the freight company and a claim should be made with the carrier.
7) Abuse or neglect (including failure to periodically clean or remove lime accumulations): Manufacturer is not responsible for variation
in equipment operation due to excessive lime or local water conditions. The equipment must be maintained according to the manufacturer’s
recommendations.
8) Replacement of items subject to normal use and wear: This shall include, but is not limited to, light bulbs, shear disks, “0” rings, gaskets,
silicone tube, canister assemblies, whipper chambers and plates, mixing bowls, agitation assemblies and whipper propellers.
9) Repairs and/or Replacements are subject to our decision that the workmanship or parts were faulty and the defects showed up under normal
use. All labor shall be performed during regular working hours. Overtime charges are the responsibility of the owner. Charges incurred by
delays, waiting time, or operating restrictions that hinder the service technician’s ability to perform service is the responsibility of the owner
of the equipment. This includes institutional and correctional facilities. The Wilbur Curtis Company will allow up to 100 miles, round trip, per
in-warranty service call.
RETURN MERCHANDISE AUTHORIZATION: All claims under this warranty must be submitted to the Wilbur Curtis Company Technical Support Department prior to performing any repair work or return of this equipment to the factory. All returned equipment must be repackaged
properly in the original carton. No units will be accepted if they are damaged in transit due to improper packaging. NO UNITS OR PARTS WILL
BE ACCEPTED WITHOUT A RETURN MERCHANDISE AUTHORIZATION (RMA). RMA NUMBER MUST BE MARKED ON THE CARTON
OR SHIPPING LABEL. All in-warranty service calls must be performed by an authorized service agent. Call the Wilbur Curtis Technical Support Department to find an agent near you.
WILBUR CURTIS CO., INC.
6913 Acco St., Montebello, CA 90640-5403 USA
Phone: 800/421-6150 Fax: 323-837-2410
Technical Support Phone: 800/995-0417 (M-F 5:30A - 4:00P PST)
Web Site: www.wilburcurtis.com
E-Mail: [email protected]
FOR THE LATEST SPECIFICATIONS AND INFORMATION GO TO WWW.WILBURCURTIS.COM
ECN 10648 . 10/21/9 @ 14.9 . EAR 7522
Printed in U.S.A. 10/09
F-3215-S Rev P