1
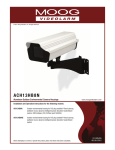
TM www.videolarm.com AC H 1 3 Aluminum Outdoor Environmental Camera Housings Installation and Operation Instructions for the following models: ACH13WM Outdoor Environmental hsg w/standard aluminum body, clear window, featuring hinged, flip-top opening plus metal wall mount ACH13HBWM Outdoor Environmental hsg w/standard aluminum body, clear window, featuring hinged, flip-top opening plus metal wall mount, and 24Vac heater/blower/thermostat ACH13HBN IP Network Ready Outdoor Environmental hsg with metal wall/pole mount, w/24Vac input, 12 or 24 output for camera, thermostatically controlled heater/blower, for an IP Network camera, 40vA transformer, MCL 10.5” ACH13HB12N IP Network Ready Outdoor Environmental hsg with metal wall/pole mount, 12Vdc input (ideal for solar and battery powered applications), thermostatically controlled heater/blower, for an IP Network camera, MCL 10.5” B e fo r e a t t e m p t i n g t o c o n n e c t o r o p e r a t e t h i s p r o d u c t , p l e a s e r e a d t h e s e i n s t r u c t i o n s c o m p l e t e l y. 81-IN5335R0 IMPORTANT SAFEGUARDS 1 Read these instructions. 2 Keep these instructions. 3 Heed all warnings 4 Follow all instructions. 5 Do not use this apparatus near water. 6 Clean only with damp cloth. 7 Do not block any of the ventilation openings. Install in accordance with the SAFETY PRECAUTIONS CAUTION RISK OF ELECTRIC SHOCK DO NOT OPEN manufacturers instructions. 8 Cable Runs- All cable runs must be within permissible distance. 9 Mounting - This unit must be properly and securely mounted to a supporting structure capable of sustaining the weight of the unit. Accordingly: a. The installation should be made by a qualified installer. b. The installation should be in compliance with local codes. c. Care should be exercised to select suitable hardware to install the unit, taking into account both the composition of the mounting surface and the weight of the unit. 10 Do not install near any heat sources such as radiators, heat registers, stoves, or other apparatus ( including amplifiers) that produce heat. 11 Do not defeat the safety purpose of the polarized or grounding-type plug. A polarized plug has two blades with one wider than the other. A grounding type plug has two blades and a third grounding prong. The wide blade or the third prong are provided for your safety. When the provided plug does not fit into your outlet, consult an electrician for replacement of the obsolete outlet. 12 Protect the power cord from being walked on or pinched particularly at plugs, convenience receptacles, and the point where they exit from the apparatus. 13 Only use attachment/ accessories specified by the manufacturer. 14 Use only with a cart, stand, tripod, bracket, or table specified by the manufacturer, or sold with the apparatus. When a cart is used, use caution when moving the cart/ apparatus combination to avoid injury from tip-over. 15 Unplug this apparatus during lighting storms or when unused for long periods of time. 16 Refer all servicing to qualified service personnel. Servicing is required when the apparatus has been damaged in any way, such as power-supply cord or plug is damaged, liquid has been spilled of objects have fallen into the apparatus, the apparatus has been exposed to rain or moisture, does not operate normally, or has been dropped. Be sure to periodically examine the unit and the supporting structure to make sure that the integrity of the installation is intact. Failure to comply with the foregoing could result in the unit separating from the support structure and falling, with resultant damages or injury to anyone or anything struck by the falling unit. UNPACKING Unpack carefully. Electronic components can be damaged if improperly handled or dropped. If an item appears to have been damaged in shipment, replace it properly in its carton and notify the shipper. Be sure to save: 1 The shipping carton and packaging material. They are the safest material in which to make future shipments of the equipment. 2 These Installation and Operating Instructions. SERVICE If technical support or service is needed, contact us at the following number: TECHNICAL SUPPORT AVAILABLE 24 HOURS 1 - 800 - 554 -1124 CAUTION: TO REDUCE THE RISK OF ELECTRIC SHOCK, DO NOT REMOVE COVER ( OR BACK). NO USER- SERVICEABLE PARTS INSIDE. REFER SEVICING TO QUALIFIED SERVICE PERSONNEL. The lightning flash with an arrowhead symbol, within an equilateral triangle, is intended to alert the user to the presence of non-insulated “dangerous voltage” within the product’s enclosure that may be of sufficient magnitude to constitute a risk to persons. Este símbolo se piensa para alertar al usuario a la presencia del “voltaje peligroso no-aisIado” dentro del recinto de los productos que puede ser un riesgo de choque eléctrico. Ce symbole est prévu pour alerter I’utilisateur à la presence “de la tension dangereuse” non-isolée dans la clôture de produits qui peut être un risque de choc électrique. Dieses Symbol soll den Benutzer zum Vorhandensein der nicht-lsolier “Gefährdungsspannung” innerhalb der Produkteinschließung alarmieren die eine Gefahr des elektrischen Schlages sein kann. Este símbolo é pretendido alertar o usuário à presença “di tensão perigosa non-isolada” dentro do cerco dos produtos que pode ser um risco de choque elétrico. Questo simbolo è inteso per avvertire I’utente alla presenza “di tensione pericolosa” non-isolata all’interno della recinzione dei prodotti che può essere un rischio di scossa elettrica. The exclamation point within an equilateral triangle is intended to alert the user to presence of important operating and maintenance (servicing) instructions in the literature accompanying the appliance. Este símbolo del punto del exclamation se piensa para alertar al usuario a la presencia de instrucciones importantes en la literatura que acompaña la aplicación. Ce symbole de point d’exclamation est prévu pour alerter l’utilisateur à la presence des instructions importantes dans la littérature accompagnant l’appareil. Dieses Ausruf Punktsymbol soll den Benutzer zum Vorhandensein de wichtigen Anweisungen in der Literatur alarmieren, die das Gerät begleitet. Este símbolo do ponto do exclamation é pretendido alertar o usuário à presença de instruções importantes na literatura que acompanha o dispositivo. Questo simbolo del punto del exclamaton è inteso per avvertire l’utente alla presenza delle istruzioni importanti nella letteratura che accompagna l'apparecchio. LIMITED WARRANTY FOR VIDEOLARM INC. PRODUCTS VIDEOLARM INC. warrants this Product to be free from defects in material or workmanship, as follows: PRODUCT CATEGORY PARTS LABOR All Enclosures and Electronics Three (3) Years Three (3) Years Pan/Tilts Three (3) Years **6 months if used in autoscan Three (3) Years **6 months if used in autoscan Poles/PoleEvators Three (3) Years Three (3) Years Warrior/Q-View/I.R. Illuminators/SView Five (5) Years Five (5) Years Controllers Three (3) Years Three (3) Years Power Supplies Three (3) Years Three (3) Years Accessory Brackets Three (3) Years Three (3) Years During the labor warranty period, to repair the Product, Purchaser will either return the defective product, freight prepaid, or deliver it to Videolarm Inc. an equal degree of protection with a Decatur GA. The Product to be repaired is to be returned in either its original carton or a similar package RMA # (Return Materials Authorization number) displayed on the outer box or packing slip. To obtain a RMA# you must contact our Technical Support Team at 800.554.1124, extension 101. Videolarm will return the repaired Product freight prepaid to Purchaser. Videolarm is not obligated to provide Purchaser with a substitute unit during the warranty period or at any time. After the applicable warranty period, Purchaser must pay all labor and/or parts charges. The limited warranty stated in these product instructions is subject to all of the following terms and conditions: 1. NOTIFICATION OF CLAIMS: WARRANTY SERVICE: If Purchaser believes that the Product is defective in material or workmanship, then written notice with an explanation of the claim shall be given promptly by Purchaser to Videolarm but all claims for warranty service must be made within the warranty period. If after investigation Videolarm determines that the reported problem was not covered by the warranty, Purchaser shall pay Videolarm for the cost of investigating the problem at its then prevailing per incident billable rate. No repair or replacement of any Product or part thereof shall extend the warranty period as to the entire Product. The warranty on the repaired part only shall be in for a period of ninety (90) days following the repair or replacement of that part or the remaining period of the Product parts warranty, whichever is greater. 2. EXCLUSIVE REMEDY: ACCEPTANCE: Purchaser’s exclusive remedy and Videolarm’s sole obligation is to supply (or pay for) all labor necessary to repair any Product found to be defective within the warranty period and to supply, at no extra charge, new or rebuilt replacements for defective parts. 3. EXCEPTIONS TO LIMITED WARRANTY: Videolarm shall have no liability or obligation to Purchaser with respect to any Product requiring service during the warranty period which is subjected to any of the following: abuse, improper use: negligence, accident, lightning damage or other acts of God (i.e., hurricanes, earthquakes), failure of the end-user to follow the directions outlined in the product instructions, failure of the end-user to follow the maintenance procedures recommended by the International Security Industry Organization, written in product instructions, for regular or recommended in the service manual for the Product. Furthermore, Videolarm shall have no liability where a schedule is replacement or maintenance or cleaning of certain parts (based on usage) and the end-user has failed to follow such schedule; attempted repair by personnel; operation of the Product outside of the published environmental and electrical parameters, or if such Product’s original (trademark, serial number) markings have been defaced, altered, or removed. Videolarm excludes from warranty coverage Products sold AS IS and/or WITH ALL FAULTS and excludes used Products which have not been sold by Videolarm to the Purchaser. All software and accompanying documentation furnished with, or as part of the Product is furnished “AS IS” (i.e., without any warranty of any kind), except where expressly provided otherwise in any documentation or license agreement furnished with the Product. 4. PROOF OF PURCHASE: The Purchaser’s dated bill of sale must be retained as evidence of the date of purchase and to establish warranty eligibility. DISCLAIMER OF WARRANTY EXCEPT FOR THE FOREGOING WARRANTIES, VIDEOLARM HEREBY DISCLAIMS AND EXCLUDES ALL OTHER WARRANTIES, EXPRESS OR IMPLIED, INCLUDING, BUT NOT LIMITED TO ANY AND/OR ALL IMPLIED WARRANTIES OF MERCHANTABILITY, FITNESS FOR A PARTICULAR PURPOSE AND/OR ANY WARRANTY WITH REGARD TO ANY CLAIM OF INFRINGEMENT THAT MAY BE PROVIDED IN SECTION 2-312(3) OF THE UNIFORM COMMERCIAL CODE AND/OR IN ANY OTHER COMPARABLE STATE STATUTE. VIDEOLARM HEREBY DISCLAIMS ANY REPRESENTATIONS OR WARRANTY THAT THE PRODUCT IS COMPATIBLE WITH ANY COMBINATION OF NON-VIDEOLARM PRODUCTS OR NON-VIDEOLARM RECOMMENDED PRODUCTS PURCHASER CHOOSES TO CONNECT TO PRODUCT. LIMITATION OF LIABILITY THE LIABILITY OF VIDEOLARM, IF ANY, AND PURCHASER’S SOLE AND EXCLUSIVE REMEDY FOR DAMAGES FOR ANY CLAIM OF ANY KIND WHATSOEVER, REGARDLESS OF THE LEGAL THEORY AND WHETHER ARISING IN TORT OR CONTRACT, SHALL NOT BE GREATER THAN THE ACTUAL PURCHASE PRICE OF ! English Español Français Deutsch Portuguese Italiano Electrical Specifications ACH13WM ACH13HBWM Input Power: Power Output: Camera: Tools Required: 24 VAC 27 Watts Heater/Blower Not Supplied Phillips Screwdriver 7/16 Wrench or Socket Energía De Entrada: De Salida De Energía: Cámara fotográfica: Herramientas Requeridas: 24 VAC 27 Vatios De Heater/Blower No provisto Destornillador Phillips 7/16 llave o zócalo Puissance D'entrée : 24 VCA De Rendement De Puissance : 27 Watts De Heater/Blower Appareil-photo : Non fourni D'Appareil-photo Les Outils Ont exigé : Tournevis Phillips 7/16 clé ou douille Zugeführte Energie: Abgabeleistung: Kamera: Werkzeuge Erforderten: 24 VAC 27 Watt Heater/Blower Nicht Geliefert Kreuzkopfschraubenzieher 7/16 Schlüssel oder Einfaßung Poder De Entrada: 24 VAC De Saída De Poder: 27 Watts De Heater/Blower Câmera: Não fornecido As Ferramentas Requereram: Chave de fenda Phillips 7/16 de chave ou de soquete Alimentazione in ingresso Di Entrata: 24 VCA Di Uscita Di Alimentazione: 27 Watt Di Heater/Blower Macchina fotografica: Non fornito Attrezzi Richiesti: Cacciavite "phillips" 7/16 chiave o di zoccolo ACH13HBN Input Power: Power Output: Tools Required: 24 VAC 40 Watts Heater/Blower Phillips Screwdriver 7/16 Wrench or Socket Energía De Entrada: De Salida De Energía: Herramientas Requeridas: 24 VAC 40 Vatios De Heater/Blower Destornillador Phillips 7/16 llave o zócalo English Español Français Puissance D'entrée : 24 VCA De Rendement De Puissance : 40 Watts De Heater/Blower D'Appareil-photo Les Outils Ont exigé : Tournevis Phillips 7/16 clé ou douille Zugeführte Energie: Abgabeleistung: Werkzeuge Erforderten: Deutsch Portuguese Italiano 24 VAC 40 Watt Heater/Blower Kreuzkopfschraubenzieher 7/16 Schlüssel oder Einfaßung Poder De Entrada: 24 VAC De Saída De Poder: 40 Watts De Heater/Blower As Ferramentas Requereram: Chave de fenda Phillips 7/16 de chave ou de soquete Alimentazione in ingresso Di Entrata: 24 VCA Di Uscita Di Alimentazione: 40 Watt Di Heater/Blower Attrezzi Richiesti: Cacciavite "phillips" 7/16 chiave o di zoccolo ! Electrical Specifications ACH13HBN English Español Français Deutsch Portuguese Italiano ACH13HB12N Input Power: Power Output: Camera: Tools Required: 12 VDC 22 Watts Heater/Blower Not Supplied Phillips Screwdriver 7/16 Wrench or Socket Energía De Entrada: De Salida De Energía: Cámara fotográfica: Herramientas Requeridas: 12 VDC 22 Vatios De Heater/Blower No provisto Destornillador Phillips 7/16 llave o zócalo Puissance D'entrée : 12 VDC De Rendement De Puissance : 22 Watts De Heater/Blower Appareil-photo : Non fourni D'Appareil-photo Les Outils Ont exigé : Tournevis Phillips 7/16 clé ou douille Zugeführte Energie: Abgabeleistung: Kamera: Werkzeuge Erforderten: 12 VDC 22 Watt Heater/Blower Nicht Geliefert Kreuzkopfschraubenzieher 7/16 Schlüssel oder Einfaßung Poder De Entrada: 12 VDC De Saída De Poder: 22 Watts De Heater/Blower Câmera: Não fornecido As Ferramentas Requereram: Chave de fenda Phillips 7/16 de chave ou de soquete Alimentazione in ingresso Di Entrata: 12 VDC Di Uscita Di Alimentazione: 22 Watt Di Heater/Blower Macchina fotografica: Non fornito Attrezzi Richiesti: Cacciavite "phillips" 7/16 chiave o di zoccolo Unpacking the Product 1 ACH13HBN ONLY Remove the tilt mechanism from the bracket. • Quite el mecanismo de la inclinación del • • • • soporte. Enlevez le mécanisme d'inclinaison de la parenthèse. Entfernen Sie die Neigungeinheit vom Haltewinkel. Remova o mecanismo da inclinação do suporte. Rimuova il meccanismo di inclinazione dalla staffa. 2 Attach the bracket to the wall and secure appropriately. • Una el soporte a la pared y asegúrelo apropia- damente. • Attachez la parenthèse au mur et la fixez conve- nablement. • Bringen Sie den Haltewinkel zur Wand an und sichern Sie passend. • Una o suporte à parede e fixe-o apropriadamente. • Fissi la staffa alla parete e fissi giustamente. 3 4 Remove the (2) screws on top of the housing and lift it open. Install the (2) cable strain relief plugs on the bottom of the housing and tighten with the locknuts. • Quite (2) los tornillos encima de la cubierta y levántelos abiertos. • Instale (2) los enchufes del retenedor de cable del cable en el fondo de la cubierta y apriete con las tuercas de fijación. • Installez (2) les prises de passe-fils de câble sur le fond du logement et serrez avec les contre-écrous. • Bringen Sie die (2) Kabelgummidurchführungsringstecker auf die Unterseite des Gehäuses an und ziehen Sie mit den Kontermuttern fest. • Instale (2) os plugues do protetor da fiação do cabo no fundo da carcaça e aperte-os com as contraporcas. • Installi (2) le spine di gommino di protezione del cavo sulla parte inferiore dell'alloggiamento e stringa con i contro dadi. • Enlevez (2) les vis sur le logement et soulevez-les ouvertes. • Entfernen Sie die (2) Schrauben auf das Gehäuse und heben Sie sie geöffnet an. • Remova (2) os parafusos no alto da carcaça e levante-os abertos. • Rimuova (2) le viti in cima all'alloggiamento ed alzile aperte. 5 6 Network Sled Screw Camera Sled Place camera on sled and align mounting holes on each. Adjust camera parallel to sled and tighten the bolt on the bottom. • • • • • Coloque la cámara fotográfica en el trineo y alinee los agujeros de montaje en cada uno. Ajuste la cámara fotográfica paralela al trineo y apriete el perno en el fondo. Placez l'appareil-photo sur le traîneau et alignez les trous de support sur chacun. Ajustez l'appareil-photo parallèle au traîneau et serrez le boulon sur le fond. Setzen Sie Kamera auf Schlitten und richten Sie Entlüftungslöcher auf jedem aus. Justieren Sie die Kamera, die zum Schlitten parallel ist und ziehen Sie den Schraubbolzen auf der Unterseite fest. Coloque a câmera no trenó e alinhe furos de montagem em cada um. Ajuste a câmera paralela ao trenó e aperte o parafuso no fundo. Disponga la macchina fotografica sulla slitta ed allinei i fori di montaggio su ciascuno. Registri la macchina fotografica parallela alla slitta e stringa il bullone sulla parte inferiore. Feed the wiring through the conduit plugs and make all connections to the camera and lens. • Alimente el cableado a través de los enchufes del conducto y haga todas las conexiones a la cámara fotográfica y a la lente. • Alimentez le câblage par les prises de conduit et établissez tous les rapports à l'appareil-photo et à l'objectif. • Ziehen Sie die Verdrahtung durch die Rohrstecker ein und stellen Sie alle Beziehungen zur Kamera und zum Objektiv her. • Alimente a fiação através dos plugues da canalização e faça todas as conexões à câmera e à lente. • Alimenti i collegamenti tramite le spine del condotto e faccia tutti i collegamenti alla macchina fotografica ed all'obiettivo. 12 8 7 ,5 22 ,75 20 1,0 18 1,5 16 2,5 14 4 12 6 10 MM2 AWG INPUT 24Vac Run 24VAC power through a conduit plug, and place the stripped power wire ends into the 24AC power board. • • • • • Funcione la energía 24VAC a través de un enchufe del conducto, y ponga los extremos pelados del alambre de la energía en el tablero de energía 24AC. Courez la puissance 24VAC par une prise de conduit, et placez les extrémités dépouillées de fil de puissance dans carte d'alimentation 24AC. Lassen Sie Energie 24VAC durch einen Rohrstecker, laufen und setzen Sie die abgestreiften Energie Leitung Enden in das Energie 24AC Brett. Funcione o poder 24VAC através de um plugue da canalização, e coloque as extremidades descascadas do fio do poder na placa de poder 24AC. Faccia funzionare l'alimentazione 24VAC tramite una spina del condotto e disponga le estremità messe a nudo del legare di alimentazione nel bordo di alimentazione 24AC. 9 MODELS: (ACH13WM, ACH13HBWM) These are recommended distances The beam angle may bemaximum adjusted on the for 24VAC with a 10% voltage drop. bottom of the unit. • Éstos se recomiendan las distancias máximas para 24VAC con una gota del voltage del 10%. • Ceux-ci sont recommandés des distances maximum pour 24VAC avec une chute de tension de 10%. • Diese werden maximale Abstände für 24VAC mit einem 10% Spannungsabfall empfohlen. • Estes são recomendados distâncias máximas para 24VAC com uma queda de tensão de 10%. • Questi sono suggeriti distanze massime per 24VAC con una differenza de potenziale di 10%. Model: (ACH13HB12N) 10 12 VDC (IN) + HEATER - BLOWER : (Black) 12 VDC (Camera/Wireless) BLOWER : (Red) + ACH13PCB J1 + THERM 1 Wiring connection for 24VAC models. Power consumption for Heater, blower 24VAC, 27VA (Excluding Camera). • Conexión del cableado para los modelos 24VAC. Consumo de energía para el calentador, soplador 24VAC, 27VA (excepto cámara fotográfica). • Raccordement de câblage pour les modèles 24VAC. Puissance d'énergie pour le réchauffeur, ventilateur 24VAC, 27VA (à l'exclusion de l'appareil-photo). • Verdrahtung Anschluß für Modelle 24VAC. Leistungsaufnahme für Heizung, Gebläse 24VAC, 27VA (ausschließlich der Kamera). • Conexão da fiação para os modelos 24VAC. Consumo de potência para o calefator, ventilador 24VAC, 27VA (excluding a câmera). • Collegamento dei collegamenti per i modelli 24VAC. Assorbimento di corrente di energia per il riscaldatore, ventilatore 24VAC, 27VA (a parte la macchina fotografica). - + - + - - + THERM 2 Wiring connections for 12VDC units only. Power consumption for heater, blower is 22VA (Excluding Camera). • Conexiones del cableado para las unidades 12VDC solamente. El consumo de energía para el calentador, soplador es 22VA (excepto cámara fotográfica). • Raccordements de câblage pour les unités 12VDC seulement. La puissance d'énergie pour le réchauffeur, ventilateur est 22VA (à l'exclusion de l'appareil-photo). • Verdrahtung Anschlüsse für nur Maßeinheiten 12VDC. Leistungsaufnahme für Heizung, Gebläse ist 22VA (ausschließlich der Kamera). • Conexões da fiação para as unidades 12VDC somente. O consumo de potência para o calefator, ventilador é 22VA (excluding a câmera). • Collegamenti dei collegamenti per le unità 12VDC soltanto. L'assorbimento di corrente di energia per il riscaldatore, ventilatore è 22VA (a parte la macchina fotografica). 11 YELLOW PURPLE 24 VAC (IN) HEATER BLOWER Model: ACH13HBN (+) (-) 12VDC - (Black) BLOWER - (Red) ACH13PCB J1 THERM 1 THERM 2 Connection for wiring 24VAC network unit. Power consumption for heater, blower camera (max) 40VA. Power output for camera 12VDC Maximum 1Amp (12 watts). • Conexión para la unidad de la red del cableado 24VAC. Consumo de energía para el calentador, cámara fotográfica del soplador (máximo) 40VA. Salida de energía para el 1Amp máximo de la cámara fotográfica 12VDC (12 vatios). • Raccordement pour l'unité de réseau du câblage 24VAC. Puissance d'énergie pour le réchauffeur, appareil-photo de ventilateur (maximum) 40VA. Rendement de puissance pour le 1Amp maximum de l'appareil-photo 12VDC (12 watts). • Anschluß für Verdrahtung 24VAC Netzmaßeinheit. Leistungsaufnahme für Heizung, Gebläsekamera (Maximum) 40VA. Abgabeleistung für Kamera 12VDC maximales 1Amp (12 Watt). • Conexão para a unidade da rede da fiação 24VAC. Consumo de potência para o calefator, câmera do ventilador (máximo) 40VA. Saída de poder para o 1Amp máximo da câmera 12VDC (12 watts). • Collegamento per l'unità della rete dei collegamenti 24VAC. Assorbimento di corrente di energia per il riscaldatore, macchina fotografica del ventilatore (massimo) 40VA. Uscita di alimentazione per il 1Amp massimo della macchina fotografica 12VDC (12 watt). 12 13 Close the top cover and tighten to the base with the hex screws. If desired, use the security screws in place of hex screws. • Cierre la cubierta superior y apriete a la base con los tornillos de la tuerca hexagonal. • Si está deseado, utilice los tornillos de la seguridad en lugar de los tornillos de la tuerca hexagonal. • Fermez la couverture supérieure et serrez à la base avec les vis de sortilège. • Si désiré, utilisez les vis de sécurité au lieu des vis de sortilège. • Schließen Sie die obere Abdeckung und ziehen Sie zur Unterseite mit den Hexagonschrauben fest. • Wenn Sie gewünscht werden, benutzen Sie die Sicherheit Schrauben anstatt der Hexagonschrauben. • Feche a tampa superior e aperte-a à base com os parafusos do hex. • Se desejado, use os parafusos da segurança no lugar dos parafusos do hex. • Chiuda la copertura superiore e stringa alla base con le viti del hex. • Se voluto, utilizzi le viti di sicurezza al posto delle viti del hex. 15 14 Adjust Lens Here Adjust the focus and focal length until the desired field of view and focus is obtained. If mounting to pole, attach assembly using 3/4” mounting straps (not provided). • Si monta al poste, una a asamblea usando las correas que montan del 3/4"(no proporcionadas). • Ajuste el foco y la longitud focal hasta que el campo visual • Si montant au poteau, attachez l'assemblée en utilisant les courroies de montage de 3/4"(non fournies). • Ajustez le foyer et la longueur focale jusqu'à ce que le champ • Bei der Befestigung zum Pfosten, bringen Sie Versammlung mit 3/4"den Befestigungsbügeln an (nicht bereitgestellt). • Justieren Sie den Fokus und die fokale Länge, bis gewünscht • Se montando ao pólo, una o conjunto usando as cintas de montagem de 3/4"(não fornecidas). • Ajuste o foco e o comprimento focal até que o campo de • Se montando al palo, fissi il complessivo usando le cinghie di montaggio di 3/4"(non fornite). • Registri il fuoco e la lunghezza focale fino ad ottenere il deseado y el foco se obtiene. visuel désiré et le foyer soit obtenu. von der Ansicht auffangen und Fokus erhalten wird. vista desejado e de foco esteja obtido. campo voluto di visibilità ed il fuoco. Replacement Parts List ACH13WM ACH13HBWM ACH13HBN ACH13HB12N # Part Number Description 1 RPACH010 ACH13 Front Endcap Assembly 2 RPACH020 ACH13 Lid Screws 3 ACH2 24V Heater & Thermostat Kit For ACH13 H12ACH12 12V Heater & Thermostat Kit For ACH13 5 RPACH050 ACH13 Camera Sled 6 RPACH060 ACH13 Top Extrusion 7 RPACH070 ACH13 Bottom Extrusion 8 RPACHPK ACH13 Packet Assembly 9 ACB2 24V Blower & Thermostat Kit For ACH13 ACB12 12V Blower & Thermostat Kit For ACH13 RPACHPC24 ACH13 Pcboard For 24V Models RPACHPCH24 ACH13 Pcboard For 24V Models (Heater Only) RPACHPC220 ACH13 Pcboard For 220V Models 10 1 2 3 5 6 7 8 9 10 11 11 RPACH110 ACH13 Rear Endcap Assembly 12 WM800 Medium Duty Wall Mount Bracket For ACH13 13 RPACH130 ACH13 Vent Hole Plugs N/S ACHHB N/S RPNET03 20VAC to 12VDC Board 24V Heater/blower Upgrade 14 WM1500 N/S RPTRAN02 WALL MOUNT (OPTIONAL) 24VAC to 12VDC AMP POWER SUPPLY 13 8 12 14 Product Registration/Warranty Thank you for choosing Videolarm. We value your patronage and are solely committed to providing you with only the highest quality products available with unmatched customer service levels that are second-to-none in the security industry. Should a problem arise, rest assure that Videolarm stands behind its products by offering some of the most impressive warranty plans available: 3 Years on all Housings, Poles, Power Supplies, and Accessories and 5 Years on all camera systems (SView, QView, Warriors), and InfraRed Illuminators. Register Your Products Option 1: Online Option 2: Mail-In Take a few moments and validate your purchase with our Online Product Registration Form www.videolarm.com/productregistration.jsp at or complete and mail-in the bottom portion of this flyer. Register your recent Videolarm purchases and benefit from the following: • Simple and Trouble-Free RMA process • Added into customer database to receive product updates / news • Eliminate the need to archive original purchase documents: Receipts, Purchase Orders, etc… Main Contact Info Cut at the dotted Line Place in envelope, affix stamp and mail to: Videolarm ATTN: Warranty 2525 Park Central Ave. Decatur, GA 30035 First Name: Last Name: Professional Title: Company: Address 1: Address 2: City: State / Province/Country: Zip / Postal Code: Phone Number: Product Information Please Circle One: Name & Location of Company / Store where Purchased: (City, State, Country) Videolarm Product ID Product Description Serial # (Available only for Camera Systems, IR Illuminators, Wireless Devices) PO# E-mail Address: Business Personal