1
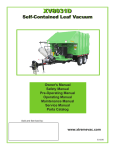
X-treme Vac
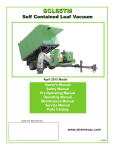
Vac -- SCL
SCL
X-treme
Self-Contained Leaf Vacuum
Owner's Manual
Safety Manual
Pre-Operating Manual
Operating Manual
Maintenance Manual
Service Manual
Parts Catalog
Sold and Serviced by:
Manufactured by:
ODB Company
5118 Glen Alden Drive
Richmond, VA 23231
800-446-9823
www.x-tremevac.com
DO NOT ATTEMPT TO OPERATE
OR REPAIR
THE LEAF COLLECTOR WITHOUT FIRST
READING AND UNDERSTANDING THIS
MANUAL
IF YOU HAVE ANY QUESTIONS CONCERNING THE
INSTALLATION OR OPERATION OF THIS UNIT, PLEASE CALL
ODB FOR ASSISTANCE BEFORE ATTEMPTING TO REPAIR OR
OPERATE THE UNIT.
IMPROPER USE OF ANY MACHINE CAN
RESULT IN INJURY!
STUDY AND FOLLOW ALL SAFETY
PRECAUTIONS BEFORE OPERATING OR
REPAIRING UNIT
THIS MANUAL IS AN INTEGRAL PART OF THE LEAF COLLECTOR AND
SHOULD BE KEPT WITH THE UNIT WHEN IT IS SOLD.
Registration
Please take the time to register you leaf collector and your engine for warranty purposes.
You may go to our website: www.xtremevac.com to register your unit or use the warranty sheet below and mail to:
Attn: Xtreme Vac Registration
ODB Company
5118 Glen Alden Drive
Richmond, VA 23231
You may also fax the form to: (804) 226-6914.
For engine registration, please use the forms provided in your engine owner’s manual.
(Register your leaf vacuum or RMB500 to start your warranty)
ODB LEAF COLLECTOR WARRANTY REGISTRATION
Purchaser’s Name
Department
MAILING Address
City
State/Province
Postal Code
Leaf Collector Serial Number ___ ___ ___ ___ - ___ ___ ___ ___
Date Delivered ______/______/______
(month) (day) (year)
ODB Leaf Collector/Sweeper Model Number (please circle one)
X-treme Vac
X-treme Vac-SCL
X-treme Sweep
LCT60C
LCT65
LCT600
LCT650
LCT6000
SKB650/700
SCL65
SCL800TM
SCL800SM
RMB500
Other __________
Engine Manufacturer: John Deere Kawasaki Cummins
other:_________________
Engine Serial Number ___ ___ ___ ___ ___ ___ ___ ___ ___ ___ ___ ___ ___
(example PE4045D123456, John Deere engines must have 13 characters)
Contact Name _______________________
Telephone (______) _______ - __________
THANK YOU FOR PURCHASING AN ODB!
Note: This form may be faxed to ODB at (804) 226-6914
or register online at www.odbco.com
The leaf collector owner’s and safety manual was
recieved. I understand that it is the responsibility of
each user and mechanic to carefully read and understand the safety and operating sections of the owner’s
manual.
Purchaser’s Signature
Date
TABLE OF CONTENTS
Read and understand this entire manual before operating, maintaining or repairing the leaf vacuum.
TABLE OF CONTENTS
1.0 GENERAL SAFETY
5.0 SERVICE SECTION
1.1 Safety Symbol Definitions
1.2 Do’s and Don’t’s
1.3 Training
1.4 Safety Decal Listing an
Part Numbers
2.0 PRE-OPERATING SECTION
2.1 Instruments and Controls
2.2 Safe Operations
2.3 Preparation for Operation
2.4 Pre-Transport Checks
2.5 Protective Equipment and Clothing
2.6 Worksite Preparation
3.0 OPERATING SECTION
3.1 Starting Engine
3.2 Engaging the Impeller
3.3 Dumping the Body
3.4 Vacuuming Leaves
4.0 MAINTENANCE SECTION
4.1 Maintenance Overview
4.2 Maintenance Interval Chart
4.3 Lubrication
4.4 Preventative Maintenance
4.5 Torque Values
4.6 Quick Reference Maint. Chart
5.1 Belt Drive Adjustment
5.2 Impeller Removal/Installation
5.3 Impeller Bearings Removal
5.4 Wiring Harness Diagram
5.5 Inst. Panel Wiring Diagram
5.6 Flow Control Valve Adjustment
5.7 Trailer Plug Diagram
5.8 Hoist Hydraulic Schematic
6.0 PARTS BREAKDOWNS
6.1 Blower Housing Group
6.2 Engine and Engine Base Group
6.3 Belt Drive Group
6.4 Belt Engagement Group
6.5 Tongue Group
6.6 Hydraulic Pump Group
6.7 Chassis and Axle Group
6.8 Hub and Brake Group
6.9 Box Container Group
6.10 LIght and Reflector Group
6.11 Rear Door Hardware Group
6.12 Intake Hose Group
PLEASE RECORD THE FOLLOWING INFORMATION BEFORE
PLACING THE UNIT INTO SERVICE:
Model Number:
Unit Serial No.:
Purchase Date:
Engine Serial No.:
Manufactured by
ODB COMP
ANY
COMPANY
1.0 GENERAL SAFETY
Read and understand this entire manual before operating, maintaining or repairing the leaf vacuum.
1.0
GENERAL
SAFETY
1.0 GENERAL SAFETY
1.1 Safety Symbol Definitions
1.2 Do’s and Don’t’s
1.3 Training
1.4 Safety Decal Listing and Part Numbers
Man
uf
actur
ed b
y
Manuf
ufactur
actured
by
ODB COMP
ANY
COMPANY
SAFETY PRECAUTIONS
Read and understand this entire manual before operating, maintaining or repairing the leaf vacuum.
If the decal above is missing or damaged call ODB immediately and we will send you a replacement free of charge.
Never operate a unit with damaged or missing safety decals.
DO NOT RIDE, SIT OR STAND ON UNIT
DO NOT MODIFY THE UNIT FOR RIDERS IN ANY
WAY. SERIOUS INJURY OR DEATH MAY OCCUR
ODB’s leaf collectors are NEVER to be used to accomodate riders. If your unit has been modified to
accomdate riders, remove these modifications immediately as this can result in serious injury or death.
ODB COMP
ANY
COMPANY
800-446-9823
SAFETY PRECAUTIONS
Read and understand this entire manual before operating, maintaining or repairing the leaf vacuum.
1.1 SAFETY SYMBOL DEFINITIONS:
This manual provides the owners/operator with procedures for safe operation, maintenance and repair of ODB’s leaf collectors. As with any machine, there are hazards associated with their operation. For this reason
safety is emphasized throughout this manual. To highlight specific safety
information the following safety definitions are provided to assist the
reader.
The purpose of safety symbols are to attract your attention to possible
dangers. The safety symbols, and their explanations, deserve your careful
attention and understanding. The safety warnings do not by themselves
eliminate any danger. The instructions or warnings they give are not
substitutues for proper accident prevention measures.
SYMBOL
!
MEANING
SAFETY ALERT SYMBOL: Indicates danger, warning or caution.
Attention is required in order to avoid serious personal injury. May be used
in conjuction with other symbols or pictographs.
Disregarding this safety warning WILL result in serious equipment
damage, injury or possible death.
Disregarding this safety warning CAN result in serious equipment
damage, injury or possible death.
Disregarding this safety warning MAY result in minor or moderate
injury or property damage.
Manufactured by
ODB COMP
ANY
COMPANY
SAFETY PRECAUTIONS
Read and understand this entire manual before operating, maintaining or repairing the leaf vacuum.
1.2 DO’S AND DO NOT’S:
This section contains some general safety precautions to do and not to do.
This is not an all inclusive list and and it is the responsibilty of the operator
to have proper training and use common sense in work situations.
DO NOT:
1. DO NOT operate, maintain or repair this unit without having fully read
and understood ALL the aspects of this manual.
2. DO NOT ride, sit or stand on unit at anytime.
3. DO NOT modify the leaf vacuum for any reasons to allow for riders.
4. DO NOT operate the unit in a state of disrepair.
5. DO NOT operate the unit with ANY guards or safety devices broken,
missing, or inoperable.
6. DO NOT operate the unit without wearing proper safety equipment.
7. DO NOT disconnect any suction assembly or get near the suction inlet
without first completely stopping the suction impeller and shutting down
and locking out the power source.
8. DO NOT operate this unit while under the influence of any alcohol or medication.
9. DO NOT operate this unit if you have a record of mental instability or
dizziness which could result in injury to yourself or others.
10. DO NOT operate this unit if you are under 18 years of age.
11. DO NOT operate this unit without fully inspecting the unit for any damage or leakage.
12. DO NOT operate if the unit has any excessive vibration.
13. DO NOT operate unit with the inspection door limit switch damaged or
missing.
14. DO NOT operate unit unless all hydraulic components such as hoses and
fittings have been checked for leakage or damage.
15. DO NOT operate unit unless it is properly attached to the tow vehicle.
16. DO NOT tow unit without using all the safety chains.
17. DO NOT tow unit with a damaged tongue.
18. DO NOT fill fuel tank with engine running. Allow engine to cool for 5 minutes before refueling.
19. DO NOT operate unit if fuel is spilled or with fuel cap off.
20. DO NOT smoke or weld near the unit.
21. DO NOT run engine in an enclosed area.
22. DO NOT place hands or feet near moving or rotating parts.
23. DO NOT operate engine with an accumulation of grass, leaves or other
debris on the engine.
ODB COMP
ANY
COMPANY
800-446-9823
SAFETY PRECAUTIONS
DO NOT, continued;
24.
25.
26.
27.
28.
29.
30.
31.
32.
33.
34.
DO NOT run engine with air cleaner removed.
DO NOT leave leaf machine unattended while in operation.
DO NOT park machine on steep grade or slope.
DO NOT vacuum a leaf pile without looking for foreign objects such as
metal, glass, plastic or large pieces of wood.
DO NOT go under raised body without body prop in place for any reason.
DO NOT collect leaves without the dump body lowered completely.
DO NOT collect leaves with the rear doors open.
DO NOT raise dump body near any power lines or low tree branches.
DO NOT raise dump body on an uneven or soft surface.
DO NOT lower dump body without a complete visual check of the body
area.
DO NOT raise dump body without wheel chocks placed under the wheels.
DO’s:
1.
DO completely read and understand the owner’s manual before operating, maintaining or repairing the leaf collector.
2. DO follow engine and PTO manufacturer operating and maintenance
instructions.
3. DO check fuel lines and fittings frequently for cracks or leaks. Replace
if necessary.
4. DO completely inspect the unit before leaving the service garage.
5. DO check the tow tongue each day for cracks.
6. DO inspect and be attentive to what is being vacuumed.
7. DO check the impeller, liners and blower housing for cracks or holes
daily.
8. DO remove the negative battery cable before doing any maintenance
on the unit.
9. DO wear proper safety equipment as described in this manual.
10. DO watch for pedestrians, animals and other foreign material when
vacuuming leaves.
11. DO replace any worn or missing safety stickers immediately.
12. DO insert the body prop before going under the raised body for any reason.
ODB COMP
ANY
COMPANY
800-446-9823
SAFETY PRECAUTIONS
1.3 TRAINING:
Improper use of the ODB leaf collector CAN result in severe personal injury or death. All personnel using this leaf vacuum must be
trained and qualified with all the operations, maintenance, repair
and safety procedures defined in this manual.
The warnings and procedures regarding safety in this manual are to be
used as a guideline only. It is impossible to cover all the events that could
happen in the vacuuming process. For this reason, it is vital that the
owner accept the responsibility to implement a training program that will
provide every operator or mechanic the basic skills and knowledge to
make good judgement in all situations.
This training program must include the entire scope of hazards, precautions and government regulations encountered in the vacuuming process.
The program should stress the need for regularly scheduled preventive
maintenance and detailed equipment safety checks.
ODB strongly recommends all training programs be documented to ensure
all operators and mechanics receive initial training on not just the operation but the safety features of the leaf collector.
Manufactured by
ODB COMP
ANY
COMPANY
SAFETY PRECAUTIONS
1.4 Decal Listing:
18
20
19
21
22
9
24
8
21
6
11
24
21
5
21
21
4
7
14
1
12
2
13
16
6
25,26,27
24
21
21
Manufactured by
ODB COMPANY
SAFETY PRECAUTIONS
1.4 SAFETY DECALS - Decal Layout for X-treme Vac
9
18
2
10
19
3
11
1
4
5
12
13
20
21
22
14
23
15
24
16
25
6
7
8
17
26
SAFETY PRECAUTIONS
1.4 Decal Listing: Part Numbers
Decals shown on previous page
ITEM
NO.
PART
NUMBER
1.
65.1801
2.
3.
4.
5.
6.
7.
8.
9.
10.
11.
12.
13.
14.
15.
16.
17.
18.
19.
20.
21.
22.
23.
24.
25.
26.
200189
200182
65.1902
65.1506
200179
200182
200177
200102
65.1803
200181
65.1800
200175
65.1802
65.1903
65.1901
200181
200185
200190
200109
200188
200178
200183
200187
200180
200104
Manufactured by
DESCRIPTION
Warning--Do Not Operate Unit Without
Hose Attached
Warning--Check Imp. and Blwr Housing ...
Warning--Do Not Open Cover ... Operation
X-treme Vac -small
Instrument Panel Sticker
Danger--Do Not Sit, Ride or Stand on unit.
Warning--Do Not Open Cover ... Operation
Warning--Flammable
Use Gasoline Only
Caution--Allow Engine to Idle ...
Warning--Head, Eye and Ear Protection
Warning--Do Not Operate ...Manual
Warning--Do Not Raise Hoist...
XV6527 Sticker
X-treme Vac - large, RH
Warning--Head, Eye, Ear Protection
XV6527 Sticker
Operation of Body Prop
Caution--Unload Body
Do Not Overlubricate
Danger--Do Not go under body...
Danger--Explosion Hazard
Warning - Rotating Parts
Caution--Body prop must be braced
Danger--Remove Tow Bar...
Warning--Driver check wheel lugs
ODB COMPANY
2.0 PRE-OPERATING SECTION
Read and understand this entire manual before operating, maintaining or repairing the leaf vacuum.
2.0
Pre-Operating
Section
2.0 PRE-OPERATING SECTION
2.1 Instruments and Controls
2.2 Safe Operations
2.3 Preparation for Operation
2.4 Pre-Transport Checks
2.5 Protective Equipment and Clothing
2.6 Worksite Preparation
Man
uf
actur
ed b
y
Manuf
ufactur
actured
by
ODB COMP
ANY
COMPANY
Pre-Operating Section
2.1 INSTRUMENTS AND CONTROLS:
Ignition Switch:
Used to power the accessories and start the unit.
ACCESSORIES - first position
STARTER ENGAGE - second position (springs return to
first position)
(Typical)
hour meter/tachometer
throttle
choke
oil press.
light
water temp
light
Ignition
Switch
charge indicator
light
Always make sure the intake
hose is connected properly and
make sure people and objects
are clear of the intake hose.
Choke:
Used to help start a cold engine. The choke control is in
the “on” position when it is pulled out and “off” when it is
pushed in.
Throttle:
The throttle is used to increase or decrease the engine
speed. Pulling the handle out increases the engine
speed and pushing the handle in decreases the engine
speed. The throttle can be locked at a desired speed by
turning the handle clockwise 1/4 turn.
Oil Pressure Indicator Light:
The light is a warning light that indicates that the engine’s
oil pressure is below the normal operating oil pressure.
When the light is ON, the engine should be stopped
immediately and a qualified technician should investigate
the cause of the low oil pressure condition. This light will
illuminate during startup for a few seconds.
Water Temperaure Indicator Light:
The light is a warning light that indicates that the engine’s
water temperature is above the normal operating temperature. When the light is ON, the engine should be
stopped immediately and a qualified technician should
investigate the cause of the overheating condition.
Charge Indicator Light:
The light is a warning light that indicates that the alternator is not charging the battery. When the light is ON, the
engine should be stopped immediately and a qualified
technician should investigate the cause of the alternator
not charging.
Hour Meter/Tachometer:
Indicates the accumulated hours of the the engine. This
should be used to schedule maintenance. The tachometer shows the engine’s speed.
Manufactured by
ODB COMP
ANY
COMPANY
Pre-Operating Section
2.2 SAFE OPERATIONS:
ALL personnel using, maintaining or servicing this unit must be
trained in all safety procedures outlined in this manual. Improper or
careless use of this equipment CAN result in personal injury or
death.
Operations shall be restricted to:
1. Properly trained, qualified and experienced operators and/or qualified
and experienced maintenance and test personnel.
2. Trainees under the direct supervision of qualified and experience
personnel.
3. Qualified and experienced maintenance and service personnel.
Operators who qualify to operate this equipment under the above
restrictions shall also comply with the following physical requirements:
1. Have good vision and the ability to read and understand this manual
as well as all safety and operational decals on the equipment.
2. Be capable of hearing, with or without a hearing aid, at a level
needed to safely operate this equipment.
3. A record of mental stability with no history of epileptic seizures, dizziness, or any other disability that may result in injury to himself or
others.
If any of these requirements are not satisfied at any time, the person
failing to meet these requirements MUST NOT OPERATE THIS
EQUIPMENT.
Manufactured by
ODB COMP
ANY
COMPANY
Pre-Operating Section
2.2 SAFE OPERATIONS (continued):
Additional Requirements:
1. Each operator must demonstrate competence to understand all safety
decals, operator’s manuals, safety codes, applicable government
regulations, and all other information applicable to the safe and
proper operation of the leaf vacuum.
2. Each operator must demonstrate the ability to recognize an emergency situation that may arise during vacuuming operations and the
knowledge and procedures to implement corrective action.
3. Each operator must demonstrate or provide evidence of
qualificatation and experience prior to operating the leaf vacuum.
4. Each operator must be able to recognize existing or potential problems regarding the mechanical integrity of the leaf vacuum and report
any maintenance requirements to the supervisor in charge.
5. Each operator must wear the proper personal clothing and safety
gear. (Refer to SAFETY PRECAUTIONS Section 2.5)
6. Operators must not be physically or mentally fatigued.
7. Operators must not be under the direct or indirect influence of alcohol
and/or drugs. This includes prescription drugs that could cause
drowsiness, dizziness, or any other condition that would impair their
ability to operate or use this equipment in a safe manner.
Manufactured by
ODB COMP
ANY
COMPANY
Pre-Operating Section
2.3 PREPARATION FOR OPERATION
Before your leaf vacuum is put into operation it is very important to
read and follow the procedures outlined in the engine owner’s
manual. (EOM).
For specific information regarding the following checks please refer to
the “Maintenance” section of this manual and the engine owner’s manual.
Shut off the engine and remove the lead spark plug wires before
performing the following checks.
NEVER place any part of the body under or behind guards or any
other area in which you cannot see.
IMPORTANT CHECKS:
NOTE: The following checks contained in the next three sections
should be performed prior to leaving the storage area.
Check engine fuel, coolant and oil levels. (see EOM)
Check engine air filter
Check all bolts and nuts to ensure they are tight.
Check all controls for free and proper operation.
Check main drive belt (if equipped) for proper adjustment.
Inspect the fan blades to ensure that they are not bent , deformed,
fatiqued or cracked.
7. Inspect the intake hose flange to make sure it is connected correctly
to the blower housing.
8. Inspect the leaf vacuum frame and structure for any bent, broken,
cracked, missing or loose parts.
9. Check all guards to ensure they are undamaged, in place and properly secured.
10. All decals must be in place and legible prior to operating the leaf
vacuum. See the decal section for decal replacement.
1.
2.
3.
4.
5.
6.
Manufactured by
ODB COMP
ANY
COMPANY
Pre-Operating Section
2.4 PRE-TRANSPORT CHECKS
Failure to properly hitch the leaf vacuum to the tow vehicle, verify
the road worthiness of the leaf vacuum and the tow vehicle and
verify all equipment is properly stowed, may cause serious injury or
death to yourself or others.
TOW VEHICLE MUST have proper towing capacity for the leaf
vacuum being towed. Check the tow vehicles operating manual for
rated capacity.
Do not tow the leaf vacuum unless all important checks listed below
are completed.
IMPORTANT CHECKS:
1. Hitch is properly secured to tow vehicle and hose boom secured.
a. Frame must be level or the tongue slightly lower than the rear
of the leaf vacuum while towing to ensure proper weight
distribution. The hitch may have to be adjusted when towing
with vehicles of varying tow hitch height.
2. Safety chains installed correctly.
a. Chains routed under trailer tongue in an “X” pattern between
tow vehicle and trailer.
b. Slack in chain should be adjusted to permit turning but should
not be dragging on the ground.
3. Connect trailer wiring (if equipped) to the tow vehicle and ensure that
all trailer lighting is operating properly.
4. Ensure that the safety breakaway switch (used only if unit has electric
brakes) is functioning properly and attached securely to the tow
vehicle. Allow enough slack to ensure that vehicle turns will not
activate the safety breakaway switch. NOTE: Follow manufacturers
procedure to ensure tow vehicles brake control box is properly adjusted.
5. Check the general condition of the tires, tire pressure and ensure that
all lugnuts are securely fastened.
ODB COMP
ANY
COMPANY
800-446-9823
Pre-Operation Section
2.4 PRE-TRANSPORT CHECKS (continued):
IMPORTANT CHECKS (continued):
6. Visual examination of the leaf vacuum frame, suspension and structure to determine if all components are correctly positioned and
secured for travel.
7. Check the intake hose boom to verify that it is securely fastened to
the leaf vacuum and can not swing free.
8. Verify there are no loose tools or materials on the trailer, inside the
intake and exhaust hoses, or inside the engine sheet metal.
9. Check all cones, wheel-chocks, signs or other support tools and
materials to ensure proper stowage.
ODB COMP
ANY
COMPANY
800-446-9823
Pre-Operating Section
2.5 PERSONAL PROTECTIVE EQUIPMENT AND CLOTHING
IMPORTANT CHECKS:
Anyone operating ODB’s leaf vacuums MUST wear appropriate
protective equipment and clothing to protect them from injury during
operations.
Always wear proper safety equipment as outlined below, not wearing such equipment CAN result in serious personal injury or possible death.
PROTECTIVE EQUIPMENT:
1. Head Protection: Hard hats without under-chin strapping.
2. Eye Protection: Wraparound goggle type eye protection held in
place with an elastic band around the head or a hard hat
mounted face shield, which provides full protection of the face.
Eye protection must meet ANSI Z87.1 standards.
3. Hearing Protection: plug type or “muff type” ear protection
should be worn at all times while operating the unit.
4. Breathing Protection: Paper filter type dust masks should be
worn to protect from dirt and dust particles during the vacuuming
process.
5. Reflective Vests: Highly visible vests should be worn so motorists can see see the operator in all weather and lighting conditions.
6. Work Gloves: Gloves should be worn to protect the hands and
wrists from debris.
7. Steel Toed Boots: should be worn to protect the feet.
Work clothes MUST be close fitting, but not restrictive of movement, without any loose parts that could be entangled in any parts
of the leaf vacuum. This includes items such as jewelry, chains
and backpacks.
Manufactured by
ODB COMP
ANY
COMPANY
Pre-Operating Section
2.6 WORK SITE PREPARATION
Never place any part of the body under or behind guards or any
other visually obscured area.
Making sure the leaves are clear of possible dangerous material is
critical to safe vacuuming. Vacuuming up metal, glass, rocks or
other dangerous material CAN cause serious damage to the equipment or personal injury.
The following guidelines must be followed to insure safety.
1. An inspection of the leaves to be vacuumed must be done prior to
the vacuuming process. We realize that it is impossible to completely inspect every inch of leaves being vacuumed, but it is
imperative that all leaves be inspected for obvious dangerous
material before vacuuming.
2. The operator should never be in the line of traffic, the operator
should work on the shoulder whenever possible.
3. The operators should place cones or other barriers to provide
adequate warnings to vehicles and pedestrians that vacuuming
is in progress.
4. Confirm that all operators are wearing proper clothes and personal protective equipment.
5. Restrict all personnel, except the operator from the area near the
leaf vacuum. DO NOT allow pedestrians, children or animals
near the work area.
6. Make sure that the exhaust hose fits properly into the box container so that all debris is blown into the box container.
Manufactured by
ODB COMP
ANY
COMPANY
3.0 OPERATING SECTION
Read and understand this entire manual before operating, maintaining or repairing the leaf vacuum.
3.0 OPERATING SECTION
3.0
OPERATING
SECTION
3.1 Starting Engine
3.2 Engaging the Impeller
3.3 Dumping the Body
3.4 Vacuuming Leaves
Man
uf
actur
ed b
y
Manuf
ufactur
actured
by
ODB COMP
ANY
COMPANY
Operating Section
3.1 Starting Engine
Make sure the intake hose is connected properly
and that people and objects are clear of the hose.
figure 3a
(Typical)
Tachometer
Thoroughly read and understand the safety and
pre-operating sections of this manual and the
engine owner’s manual before staring the engine.
DO NOT start the engine in an enclosed building.
Proper ventilation is required before starting the
engine.
Impeller shown disengaged
Review the Engine Operating Manual supplied with your
leaf vacuum for specific start-up, maintenance and operating instructions. It is especially important to review
break-in service procedures for brand new units.
Starting Procedure (refer to figure 3a):
Handle is horizontal when disengaged
Manufactured by
1.
Perform all the pre-starting, pre-operating checks
outlined in the EOM and in this manual, including
checking the engine oil and coolant level.
2.
Check that the intake hose is connected properly
and that people and objects are clear of the hose
before starting the engine.
3.
Make sure the Impeller is disengaged before
starting. The handle should be horizontal.
4.
Pull the choke out and hold it out when the engine is cold, but in hot weather or when the
engine is warm, use half choke or fully open the
choke by pushing the choke lever all the way in.
ODB COMP
ANY
COMPANY
Operating Section
3.1 Starting Engine, continued;
figure 3a
(Typical)
5.
Pull the throttle control (fig. 3a) to half throttle
position to start.
Tachometer
IMPORTANT: Do not operate the starter for
more than 5 seconds at a time. To do so may
overheat the starter. If the engine does not
start the first time, wait at least 15 seconds
before trying again. If the engine fails to start
after 4 attempts, see the trouble shooting
section of the EOM and this manual.
6.
IMPORTANT: If the ignition switch is released
before the engine starts, wait until the starter
and the engine stop turning before trying
again. This will prevent possible damage to
the starter and/or flywheel.
NEVER start the engine with the
impeller engaged. Doing so MAY
cause personal injury.
7.
NEVER run the engine with any of
the warning lights illuminated. Doing so MAY cause severe engine
damage.
Allow the engine to warm up sufficiently before collecting leaves.
Collecting leaves with a cold engine
WILL cause engine damage.
Manufactured by
Turn the ignition key all the way to the right, when
the engine starts release the key. It should
spring back to the first position.
Check all the indicator lights for illumination. If
any of the lights are illuminated, except the oil
light, stop the engine and determine the cause.
The oil light will stay on for a few seconds until
the engine builds up oil pressure.
IMPORTANT: To assure proper lubrication,
operate the engine at idle with no load for 1 -2
minutes. Extend this period 2 - 4 minutes
when operating at temperatures below freezing.
8.
After starting the engine, gradually push the
choke cable all the way in.
9.
Allow the engine to warm up by running the
engine 3 - 5 minutes with the throttle at idle
before collecting leaves.
ODB COMP
ANY
COMPANY
Operating Section
3.1 Starting Engine, continued;
figure 3a
(Typical)
STOPPING THE ENGINE:
Tachometer
Impeller shown disengaged
10.
Disengage the impeller by pulling the handle to a
horizontal position.
11.
Lower the engine speed to an idle. Keep running
at idle for one minute.
12.
Turn the ignition switch to the “off” position.
Reduce engine speed to idle for one minute
before shutting engine off. Engine damage can
occur from run-on or after-burning if engine is
stopped suddenly from high speed operation.
Handle is horizontal when disengaged
Manufactured by
ODB COMP
ANY
COMPANY
Operating Section
3.2 Engaging the Impeller
Make sure the intake hose is connected properly
and that people and objects are clear of the hose.
(Typical)
Tachometer
Thoroughly read and understand the safety and
pre-operating sections of this manual and the
engine owner’s manual before staring the engine.
DO NOT start the engine in an enclosed building.
Proper ventilation is required before starting the
engine.
figure 3.2a
Impeller shown disengaged
Review the Engine Operating Manual supplied with your
leaf vacuum for specific start-up, maintenance and operating instructions. It is especially important to review
break-in service procedures for brand new units.
Impeller Engagament Procedure (refer to figure 3.2a):
Handle is horizontal when disengaged
Manufactured by
1.
Perform all the pre-starting, pre-operating checks
outlined in the EOM and in this manual, including
checking the engine oil and coolant level.
2.
Check that the intake hose is connected properly
and that people and objects are clear of the hose
before starting the engine.
3.
Start the engine as detailed in section 3.1
4.
Run at idle for several minutes before engaging
the impeller
ODB COMP
ANY
COMPANY
Operating Section
3.2 Engaging the Impeller, continued;
Impeller shown engaged
5.
Raise the engine rpm to approximately 1,700
RPM.
6.
SLOWLY raise the handle toward the engine to
engage the belt and impeller. This must be done
SLOWLY so the engine will not stall.
IMPORTANT: Make sure the intake hose is
secured and is not going to vacuum something unintentional during engagement.
6.
Handle is vertical when engaged
IMPORTANT: To assure proper lubrication,
operate the engine at idle with no load for 1 -2
minutes. Extend this period 2 - 4 minutes
when operating at temperatures below freezing.
Be aware of the intake nozzle before
impeller engagement. Secure is
safely.
Engage the belt SLOWLY so the
engine will not stall.
Allow the engine to warm up sufficiently before collecting leaves.
Collecting leaves with a cold engine
WILL cause engine damage.
Manufactured by
Check for any vibration or irregular noise before
vacuuming leaves. If there is any vibration or
irregular noise, shut down the unit immediately
and investigate.
DISENGAGING THE IMPELLER
7.
Lower the engine RPM to idle and SLOWLY pull
the handle to a horizontal position.
8.
Run the engine for at least one minute before
shutting down the engine.
Reduce engine speed to idle for one minute
before shutting engine off. Engine damage can
occur from run-on or after-burning if engine is
stopped suddenly from high speed operation.
ODB COMP
ANY
COMPANY
Operating Section
3.3 Dumping the Body
Make sure all people and animals
are completely clear of the unit
during the dumping process.
Thoroughly read and understand the safety and
pre-operating sections of this manual before staring the engine.
Always operate the dump body
controls from the front of the unit,
standing beside the tongue.
Make sure the unit is properly attached to the tow
vehicle and the surface is level and solid before
raising the body .
figure 3.3a
Watch for any overhead obstacles such as power
lines and tree limbs before dumping.
Review the Engine Operating Manual supplied with your
leaf vacuum for specific start-up, maintenance and operating instructions. It is especially important to review
break-in service procedures for brand new units.
Dumping the body (refer to figures 3.3a and 3.3b):
1.
Perform all the pre-starting, pre-operating checks
outlined in the EOM and in this manual.
2.
Do a thorough inspection of the entire area around
and above the unit, looking for any object that could
get in the way of the body dumping.
3.
Make sure the surface is level and the ground is
solid before dumping.
4.
Open the rear doors and secure to the side of the
box container.
figure 3.3bc
ODB COMP
ANY
COMPANY
800-446-9823
Operating Section
3.3 Dumping the body, continued;
figure 3.3a
5.
Grasp the hand valve handle (fig. 3.3a) push the
handle to the right (toward the radiator) to raise the
body.
6.
Raise the body only as high as it is needed to
dump the load.
7.
Raise the body prop(s) (fig. 3.3b) to a free standing
position. Lower the body slowly until the the long
beam bracket contacts the prop arm saddle (fig.
3.3c). DO NOT POWER HOIST DOWN.
Lowering the body:
1.
Before lowering the body, walk completely around
the unit and thoroughly inspect the area between
the body and the unit’s frame. Look for any object,
person or animal that could potentially get between
the dump body and the frame. DO NOT go under
the body while inspecting.
2.
Slowly raise the body just enough to clear the body
prop saddle, lower the body prop to the storage
position (fig 3.3c) and slowly lower the body.
3.
The dump body may stop approximately 12” from
the bottom due to the safety check valve. If it does,
slowly raise the body a few inches and SLOWLY
lower the body down. The body needs to be lowered extremely slow the last 12 inches or the check
valve will stop the body.
4.
Once the body is completely down, close the rear
doors and prepare the unit for travel as detailed in
this manual.
figure 3.3b
figure 3.3c
ODB COMP
ANY
COMPANY
800-446-9823
Operating Section
3.3 Dumping the Body, continued;
Make sure all people and animals
are completely clear of the unit
during the dumping process.
Thoroughly read and understand the safety and
pre-operating sections of this manual before staring the engine.
Always operate the dump body
controls from the front of the unit,
standing beside the tongue.
Make sure the unit is properly attached to the tow
vehicle and the surface is level and solid before
raising the body .
figure 3.3a
Watch for any overhead obstacles such as power
lines and tree limbs before dumping.
Please Note:
The hoist hydraulic pump (figure 3.3a) is powered
by the battery and is only capable of dumping the
hoist 3 - 4 times before the battery needs to be
recharged.
At the end of EVERY day the battery needs to be
recharded by plugging the battery charger (figure
3.3d) into an electrical outlet.
figure 3.3d
ODB COMP
ANY
COMPANY
Do not try to operate the hoist with a discharged
battery as it may damage the hydraulic pump.
800-446-9823
Operating Section
3.4 Vacuuming Leaves
Thoroughly read and understand the safety, pre-operating and operating sections of this manual before vacuuming. Wear the proper
safety equipment as outlined in this manual.
Make sure the exhaust hose is connected to the box container
properly before vacuuming leaves. Visually inspect the leaves
before vacuuming for any material that could be harmful to the leaf
vacuum or people. This includes bottles, wood, steel, glass, stone
or other hard or breakable objects.
Vacuuming Leaves:
1.
Start the engine using the procedures stated earlier in this manual.
2.
Set the engine throttle to around 2000 rpm.
NOTE: Always vacuum leaves using the lowest rpm as possible.
This saves fuel and decreases the amount of dust escaping the box
container.
3.
Lower the intake hose to a few inches above the leaf pile. Hold the
intake nozzle at a 45 degree angle to allow proper air flow. This
should allow the leaves to be vacuumed. DO NOT bury the intake
nozzle into the leaf pile, this will cut off the air flow and will make
vacuuming much more difficult and increase the chance of clogging.
4.
If the leaves are not vacuuming, increase the rpm to 2200 and try
vacuuming at this setting.
NOTE: Wet leaves will need higher rpm’s to vacuum whereas dry
leaves will only need minimal rpm’s.
5.
Manufactured by
Continue moving the nozzle in a sweeping motion above the leaves
while vacuuming.
ODB COMP
ANY
COMPANY
4.0 MAINTENANCE SECTION
Read and understand this entire manual before operating, maintaining or repairing the leaf vacuum.
4.0 MAINTENANCE SECTION
4.1 Maintenance Overview
4.2 Maintenance Interval Chart
4.3 Lubrication
4.4 Preventative Maintenance
4.5 Torque Values
4.6 Quick Reference Maintenance Chart
Man
uf
actur
ed b
y
Manuf
ufactur
actured
by
4.0
MAINTENANCE
SECTION
ODB COMP
ANY
COMPANY
Maintenance Section
4.1 MAINTENANCE OVERVIEW:
Only properly trained personnel should perform maintenance or
repair on this equipment. Consult ODB before performing any
maintenance procedures that is not specificially covered in this
manual. Improper maintenance or repair may void any and all warranties on this equipment.
Improper maintenance or repair CAN result in equipment damage
and/or personal injuries.
BEFORE CONTINUING, please read and understand the Safety, Preoperating and Operating sections of this manual before doing any
prodcedures in this section.
A properly maintained leaf vacuum will dramatically extend the life of the
unit and will create a safer work place as well. For the general safety and
welfare of all personnel it is important to create a scheduled maintenance
program that covers all the elements in this manual as well as the engine,
PTO and axle owner’s manuals provided with this unit.
Use the chart on the following page as a guide for your scheduled maintenance program. If there are any questions concerning any ot these procedures please call ODB.
Manufactured by
ODB COMP
ANY
COMPANY
Maintenance Section
4.2 MAINTENANCE AND LUBRICATION CHART
This chart is only a reference, always consult the Owners Manual of the Engine, PTO, etc for actual recommendations
(Use Hour Meter as a Guide)
INTERVAL
MAINTENANCE
Daily
First
8
Hours
Every
25
Hours
Every
50
Hours
Every
100
Hours
Every
200
Hours
Check and add engine oil, coolant and fuel*
Check for loose nuts or bolts
Check for fuel, oil and coolant leakage
Check or clean air intake screen*
Lubricate Impeller Shaft Flange Bearings
Check Lug Nuts and Tire Pressure / Condition
Check Trailer Safety Chains and Hitch
Check Tow Bar for Damage or Wear
Clean air cleaner foam element*
Clean air cleaner paper element*
Change engine oil*
Clean and Check Battery and Connections
Check Power Band Tension
Check Power Band Condition
Check Impeller for Damage, Cracks or Wear
Lubricate Throttle and Choke Cables
Check Blower Housing Interior for Cracks or
Wear
Inspect Intake and Exhaust Hoses for Damage
Clean and regap spark plug*
Replace oil filter*
Replace air cleaner paper element*
Inspect radiator and hoses*(k)
Check fan belt conditions and tension*(k)
Inspect all Duct Work for Cracks, Holes or Wear
Grease / Inspect Wheel Bearings for Corrosion
Change coolant*(k)
Check Fuel Tank for Corrosion / Cracks
* = see the engine owner's manual for complete details
k = have an authorized Kawasaki engine dealer perform those services
Manufactured by
ODB COMP
ANY
COMPANY
Maintenance Section
4.3 LUBRICATION:
Remove the lead spark plug wires before attempting any lubrication procedures.
Figure 4.3A
Thoroughly read and understand the safety and
pre-operating sections of this manual before performing any lubrication procedures.
1
The following are general lubrication procedures for our
standard units. Any special or custom built units may
have other lubrication procedures not directly mentioned
in this manual. Please consult ODB before any lubricating procedures not specifically mentioned in this manual.
Proper lubrication of your unit correlates directly to how long
your unit will last. A properly maintained unit will last much
longer than a unit that is not maintained properly. NOTE:
Always lubricate bearings at the end of each work day.
This will displace any moisture in the bearings. Also lubricate thorougly before extended shutdown or storage.
Lubrication Points:
1.
NOTE;
DO NOT mix different types of
grease. The old grease MUST BE
purged before a different type of
grease is used. Mixing grease WILL
cause premature failure to the bearings.
Manufactured by
Drive Bearings (figure 4.3a): These bearings
are critical components of the belt-driven units.
These bearings should be greased every 10 hours
with approximately two strokes from the average
hand pump grease gun. The type of grease used
in these bearings are also critical to the performance of the bearings. A multi-purpose, heavyload, high-temperature, moisture resistant #2
grease is required for the drive bearings. ODB
recommends LubeMaster Premalube 4234 grease.
Other premium quality grease that matches the
above requirements may be used but after years of
testing ODB recommends the Premalube grease.
ODB COMP
ANY
COMPANY
Maintenance Section
4.3 LUBRICATION, continued;
Lubrication Points, continued;
2.
Figure 4.3b
Trailer Wheel Bearings (figure 4.3b): Most of
ODB's units are equipped with "EZ-Lube" grease
fittings. This allows the operator to grease the
bearings without removing the hubs. The "EZLube" feature consists of axle spindles that have
been specially drilled and fitted with a grease zerk
in their ends (fig. 4.3c). When grease is pumped
into the zerk, it is channelled to the inner bearing
and then flows back to the outer bearing and
eventually back out the grease cap hole. The
trailer wheel bearings should be checked and
greased after the first 30 days of service then at
the beginning of every season.
Grease specifications:
Grease fitting is behind rubber plug
Figure 4.3c
Thickener Point............................Lithium Complex
Dropping Point......................230 degr. C minimum
Consistency............................................NLGI No.2
Additives.........................EP,Corrosion & Oxidation
Inhibitors
Base Oil...................Solvent refined Petroleum Oil
Base Oil Viscosity............@40 deg. C 150cSt Min.
Viscosity Index.....................................80 Minimum
Pour Point...................................-10 deg. Minimum
Approved Sources:
Mobil Oil........................................Mobilgrease HP
Exxon/Standard......................................Ronex MP
Kendall Refining...............................Kendall L-427
Ashland Oil Co........Valvoline Val-plex EP Grease.
Penzoil.......Premium Wheel Bearing Grease 707L
For any questions concerning wheel lubrication
please consult the axle owner's manual supplied
with your leaf collector or contact ODB.
Manufactured by
ODB COMP
ANY
COMPANY
Maintenance Section
Figure 4.3d
4.3 LUBRICATION, continued;
Lubrication Points, continued;
Grease
inside of
tube
3.
Boom Socket (figure 4.3d): The socket should
be greasedonce a week to keep the boom mast
moving smoothly. Grease the boom socket once
every week with a multi-purpose moisture resistant
#2 grease.
4.
Hinge and Friction Points: Leaf vacuum operation and longevity can be improved by keeping
hinges and friction points lubricated. ODB recommends that lubricaton be performed weekly. Use
SAE30 weight oil on hinges and a premium grade,
high temperature lithium based EP#2 grease on
friction points.
5.
Boom Extension (figure 4.3e):
Grease the extension tube once every week with a
multi-purpose lubricant.
Figure 4.3e
Boom Extension
Never go under the dump body unless the body is
empty and the body prop(s) is in the proper position.
The body prop is designed and intended to support an EMPTY truck body in the raised position.
Unload the body before using the body prop(s).
Manufactured by
ODB COMP
ANY
COMPANY
Maintenance Section
4.3 LUBRICATION, continued;
Figure 4.3f
Lubrication Points, continued;
Never go under the dump body unless the body is
empty and the body prop(s) is in the proper position.
6.
Hydrauilc Hoist Fittings (figure 4.3f): Raise and
support the dump body as detailed in section 3.2.
Lubricate the fittings at least every 200 hours of
operation with a #2 high grade grease. There are
tremendous forces on the bearing sufaces within the
hoist frame. It pays to be generous with the grease
gun, to insure proper operation and long life.
7.
Hoist Hinge and Body Prop Fittings (figure
4.3g):
Each hinge pivot has a grease fitting that needs
lubrciating every 200 hours. The body prop has a
fitting at the pivot area as shown in figure 4.3g.
Figure 4.3g
The body prop is designed and intended to support an EMPTY truck body in the raised position.
Unload the body before using the body prop(s).
Manufactured by
ODB COMP
ANY
COMPANY
Maintenance Section
4.4 PREVENTATIVE MAINTENANCE
Remove the lead spark plug wires before attempting any maintenance procedures.
Thoroughly read and understand the safety and pre-operating sections of this manual before performing any maintenance procedures.
The following are general preventative maintenance procedures for our standard units. Any special or custom built units may have other preventative
maintenance procedures not directly mentioned in this manual. Please consult ODB before doing any preventative maintenance procedures not specifically mentioned in this manual.
Proper preventative maintenance of your unit, just like lubrication, correlates
directly to how long your unit will last. A properly maintained unit will last
much longer than a unit that is not maintained properly.
Preventative Maintenance:
1.
Engine Oil: Change the oil and oil filter according to schedules provided in your engine's owner's manual (EOM). The engine oil level
should be checked every day. The level should be checked after the
engine has been stopped for a period of time. This will allow the oil to
drain back into the oil pan, allowing a better indication of the true oil
level. If the level is low, see the engines owner's manual for the correct
type of oil.
2.
Engine Coolant: Check the coolant level before starting the unit each
day. The coolant level should not be less than one inch below the top
of the radiator.
NEVER check the engine coolant when the engine is hot. Allow the
engine to cool at least one hour before checking the coolant. Check
the engine owner's manual for instructions. ALWAYS wear eye and
hand protection when working with the radiator.
Manufactured by
ODB COMP
ANY
COMPANY
Maintenance Section
4.4 PREVENTATIVE MAINTENANCE, continued;
Preventative Maintenance, continued;
Engine Radiator: The engine radiator on a leaf vacuum becomes
clogged with dust and debris frequently because of the nature of the
job. If the radiator is not cleaned properly it WILL cause improper
cooling and WILL eventually cause serious damage to your engine.
The debris accumulating on the radiator can be lessened by lowering
the RPM on the engine to a level just enough to vacuum the leaves.
The higher the RPM the more dust that is put into the air. Also, it may
be necessary to put mesh or tarps on the top of the leaf box container
to reduce the debris and dust. If this is done, make sure there is
enough air ventilation on the box so the box is not blown apart.
Proper belt condition and coolant mix-ratio, as well as coolant conditioners, are all critical to proper engine cooling. See the engines
owner's manual for specifics on coolant mixture ratios and conditioners.
The radiator should be inspected and cleaned with compressed air everyday at the very least.
3.
NEVER attempt to clean or inspect the radiator with the engine
running or while the engine is HOT. Allow the engine to cool at least
one hour before mantaining the radiator. Check the engine owner's
manual for instructions. ALWAYS wear eye and hand protection
when working with the radiator.
4.
5.
Manufactured by
Engine Air Cleaner: Due to the large amounts of dust generated in
collection leaves, it is critical to your engine's life that the pre-cleaner
and air filter be maintained properly. The pre-cleaner (if equipped) should
be cleaned at least daily of any debris that has accumulated. If conditions
warrant it should be cleaned more. The air filter should be checked daily
and should be replaced at the first sign of it being dirty. See the engine's
owner's manual for detailes. It is a good idea to clean out the air filter
housing once a week to clean any dust debris that may have accumulated.
Tires and Wheels: Tires and wheel lug nuts should be checked on a
daily basis. Tires should be checked for excessive wear and proper air
pressure. Check the side wall of the tire for proper inflation pressure.
Torque all 1/2" diameter lug nuts from 90 to 120 foot pounds. Torque
all 5/8" diameter lug nuts from 175 to 225 foot pounds. Consult the
axle manufacturers owner's manual for more detailed information.
ODB COMP
ANY
COMPANY
Maintenance Section
4.4 PREVENTATIVE MAINTENANCE, continued;
Preventative Maintenance, continued;
6.
Trailer Brakes (if equipped): Most of the newer ODB leaf vacuums
have electric brakes on the axle(s). It is critical that these brakes work
properly. The trailer's brakes should be checked daily, before leaving
the equipment yard, for proper operation. The trailer brakes are designed to work in synchronization with your tow vehicles brakes. Never
use your tow vehicle or trailer brakes alone to stop the combined load.
The synchronization between the tow vehicle and the leaf vacuum is
accomplished through the brake controller and needs to be set correctly. Please read the brake controllers manual and the axle owner's
manual for these procedures.
DO NOT tow the leaf vacuum with damaged or non-operating brakes.
Check the brakes daily for proper operation.
The brakes should be adjusted after the first 200 miles of operation
when the brake shoes and drums have "seated" and at 3,000 mile intervals, or as use and performance requires. The adjustment procedures are
beyond the scope of this manual, please see the axle owners/service
manual for specific instructions.
The trailer brakes should be inspected and serviced at yearly intervals
or more often as use and performance requires. Magnets and shoes
must be changed when they become worn or scored thereby preventing adequate vehicle braking. Again, see the axle owner's/service manual
for specific procedures.
7.
Manufactured by
FUEL TANK: Fill the fuel tank at the beginning of the work shift leaving a gap of at the top of the tank for expansion of fuel. A full fuel tank
will reduce the possibility of condensation forming in the tank and
moisture entering the fuel lines. Check the fuel lines daily for cracks,
holes or tightness.
ODB COMP
ANY
COMPANY
Maintenance Section
4.4 PREVENTATIVE MAINTENANCE, continued;
Preventative Maintenance, continued;
ALWAYS wear eye and hand protection when working with the battery.
8.
BATTERY: ODB's units are supplied with "maintenance free" batteries
so there is no need to check fluid levels but the battery terminals should be
checked daily for corrosion. Remove any corrosion with a wire brush and
coat the terminals with light grease or petroleum jelly to reduce the possibility of corrosion. Also check the battery cable for wear all cable connections and battery tie downs to be certain that they are not loose.
9.
DRIVE BELT (if equipped): The main drive belt should be checked
daily for cracks and for proper tension. If the belt shows any sign of
Remove the lead spark plug wires before removing the belt guard.
cracking it should be replaced immediately. The proper tension of the
belt should be approximately 1/2" deflection when applying a 8 pound
pull.
10.
Manufactured by
FASTENERS: Fasteners should be checked weekly for the first 30
days and monthly thereafter. They must be in place at all times and
properly torqued. For general torque values see the torque chart at the
end of this section.
ODB COMP
ANY
COMPANY
Maintenance Section
4.5 TORQUE VALUES
RECOMMENDED TORQUE IN FOOT POUNDS
TYPE
SAE GRADE
HEX HEAD CAP SCREWS
8
5
HEAD MARK
SIZE
1/4"
9
9
5/16"
18
18
3/8"
33
33
7/16"
52
52
1/2"
80
80
9/16"
115
115
5/8"
160
160
3/4"
280
280
7/8"
450
450
1"
675
675
DO NOT use these values if a different torque value or tightening procedure is
given for a specific application. Torque values listed are for general use only.
Check tightness of fasteners periodically.
Make sure fastener threads are clean and that you properly start thread engagement. This will prevent them from failing when tightening.
Manufactured by
ODB COMP
ANY
COMPANY
Maintenance Section
4.6 QUICK REFERENCE MAINTENANCE CHART:
Only properly trained personnel should perform maintenance or
repair on this equipment. Consult ODB before performing any
maintenance procedures that is not specificially covered in this
manual. Improper maintenance or repair may void any and all warranties on this equipment.
NOTE: THIS CHART IS FOR REFERENCE ONLY, CONSULT THE ENGINE’S OWNERS
MANUAL FOR SPECIFIC DETAILS. FOR KAWASAKI FD750D ENGINES ONLY.
ITEM
Fuel Requirement
Fuel Capacity
Low / High Idle Speed
Engine Oil:
Grade
Viscocity
Unleaded regular grade gasoline, min. 87 octane
8 gallons
1,550 rpm / 3,600 rpm
API service classicfication; SF,SG,SH or SJ class.
SAE40, SAE30, SAE10W-30 / SAE10W-40, or SAE 5W-20 (see EOM
manual for details)
1.9 US qt (filter is not removed); 2.1 US qt. (when filter is removed)
Capacity
Coolant:
Type
Mixture
Freezing Point
Amount
Spark Plug:
Gap
Thermostat
Beginning Opening
Full Open
Permanent type of antifreeze; green in color
Water 50%; Antifreeze 50%; (1:1)
-35 degrees C (-31 degrees F)
2.7L (2.9 US qt.)
NGK BPR2ES
0.75mm (.030 in)
80.5 to 83.5 degrees C (177 to 182 degrees F)
95 degrees C (203 degrees F)
Improper maintenance or repair CAN result in equipment damage
and/or personal injuries.
BEFORE CONTINUING, please read and understand the Safety, Preoperating and Operating sections of this manual before doing any
prodcedures in this section.
Manufactured by
ODB COMP
ANY
COMPANY
5.0 SERVICE SECTION
Read and understand this entire manual before operating, maintaining or repairing the leaf vacuum.
5.0 SERVICE SECTION
5.1 Belt Drive Adjustment
5.2 Impeller Removal / Installation
5.3 Impeller Bearings Removal
5.4 Wiring Harness Diagram
5.5 Instrument Panel Wiring Diagram
5.6 Flow Control Valve Adjustment (hoist)
5.7 Trailer Plug Wiring Diagram
5.8 Hoist Hydraulic Schematic
Man
uf
actur
ed b
y
Manuf
ufactur
actured
by
5.0
SERVICE
SECTION
ODB COMP
ANY
COMPANY
Service Section
5.1 Belt Adjustment / Removal
Make sure the engine is OFF and the lead
spark plug wires have been removed before attempting any service procedures.
Thoroughly read and understand the
safety and pre-operating sections of this
manual before proceding.
The engine may be HOT, use caution when
working around the engine and muffler
area.
Before removing any safety guards make
sure the engine has been disabled by removing the lead spark plug wires.
Belt adjustment / Removal is made easy by the using the engine adjustment brackets and bolts. Be
careful when working around the engine and muffler area, as it may be hot. On a new unit, the belt
should be adjusted after the first 30 hours of use and every 100 hours thereafter.
figure 5.1A
Belt Adjustment / Removal Procedure :
1.
Disengage the impeller by pulling the handle to a
horizontal postion. (see figure 5.1A)
2.
Remove the belt guard cover by removing the
bolts around the cover plate (Item A on FIG.
5.1B).
3.
Loosen the engine base bolts (Item B on FIG
5.1B), there are 2 in the front and 2 in the rear.
figure 5.1B
remove bolts (A)
remove engine base bolts (B)
Manufactured by
remove engine base bolts (B)
ODB COMPANY
Service Section
5.1 Belt Drive Adjustment, continued;
figure 5.1C
Belt Adjustment / Installation Procedure :
1.
Then drive the adjuster bolts (Item C on FIG.
5.1C and FIG. 5.1D) counter-clockwise to move
the engine toward the impeller shaft. This will
loosen the belt.
2.
If you are removing the belts, the belt keepers
must be removed also. There are 4 belt keepers,
2 on each pulley.
Belt Keepers
Adjuster Bolts (C)
figure 5.1D
Belt Keepers
3.
To tighten or install the belt, make sure the two
pulleys are lined up. Use a straight edge to make
sure (FIG 5.1E). If the pulleys are not lined up
loosen one of the pulleys and move the pulley in
or out until the two pulleys line up.
4.
Tighten the belt by turning the adjuster bolt clockwise until the belt is tight. The correct tension is
when the belt deflects 1/2” using an 8 pound pull.
DO NOT OVERTIGHTEN.
5.
Re-install the belt guard cover exactly as you
removed it.
Manufactured by
Adjuster Bolts (C)
figure 5.1E
ODB COMPANY
Service Section
5.2 Impeller Removal / Installation
Make sure the engine is OFF and the lead
spark plug wires have been removed
before attempting any service procedures.
Thoroughly read and understand the
safety and pre-operating sections of this
manual before proceding.
The engine may be HOT, use caution when
working around the engine and muffler
area.
Before removing any safety guards make
sure the engine has been disabled by
removing the lead spark plug wires.
Impeller Removal :
1.
Disconnect the the spark plug wires from the
spark plug before attempting to open the blower
housing face.
2.
Remove the blower housing face by removing the
bolts that hold the face on to the blower housing
back (FIG 5.2A).
3.
Once the blower housing face has been removed, look at the condition of the inside of the
housing (FIG 5.2B). Check for any holes or wear.
If any damage is found, REPLACE the housing
immediately. Do not try to repair.
4.
figure 5.2A
figure 5.2B
Remove the center bolt in the impeller by turning
it counter-clockwise (Item A FIG 5.2C) Remove
the washer and the the impeller should come out.
In some instances it may be necessary to connect a gear puller to the threaded holes in the
impeller hub (Item B FIG 5.2C)in order to remove
the impeller.
figure 5.2C
Manufactured by
ODB COMP
ANY
COMPANY
Service Section
5.2 Impeller Removal / Installation, continued;
Make sure the engine is OFF and the lead
spark plug wires have been removed
before attempting any service procedures.
Thoroughly read and understand the
safety and pre-operating sections of this
manual before proceding.
The engine may be HOT, use caution when
working around the engine and muffler
area.
Before removing any safety guards make
sure the engine has been disabled by
removing the lead spark plug wires.
Impeller Installation :
figure 5.2A
1.
Coat the inside of the impeller hub with anti-sieze
compound to allow for an easier removal the next
time.
2.
To install put the impeller hub on the shaft. Overhang the hub over the shaft by about 1/8”. Then
apply the washer and the bolt (Figure 5.2C). This
will “squeaze” the hub onto the shaft to create a
tight fit.
3.
Torque the impeller bolt to 90 lbs/ft.
4.
Install the blower housing face as it was taken off.
(Figure 5.2A)
figure 5.2B
figure 5.2C
Manufactured by
ODB COMP
ANY
COMPANY
Service Section
5.3 Impeller Bearings Removal / Installation
Before removing any safety guards make
sure the engine has been disabled by
removing the lead spark plug wires.
Thoroughly read and understand the
safety and pre-operating sections of this
manual before proceding.
The engine may be HOT, use caution when
working around the engine and muffler
area.
Make sure the engine is OFF and the lead
spark plug wires have been removed
before attempting any service procedures.
Bearings Removal / Installation :
1.
Disconnect the the spark plug wires from the
spark plug before attempting to open the blower
housing face.
2.
Remove the impeller using the procedure outlined in section 5.2.
3.
Remove the drive belt using the procedure outlined in section 5.1.
4.
Remove the bearing cover by removing the 4
bolts that hold the cover (item A, FIG 5.3A)
5.
Loosen the locking collars (Item A, FIG 5.3B)
using an Allen wrench, turn the collars counterclockwise to loosen from the shaft.
6.
Remove the nuts (Item B, FIG 5.3B) from the
bearings.
7.
Slide the entire shaft out. The pulley can stay on
the shaft while doing this.
8.
Pull the bearings from the bolts.
9.
To install, reverse the above procedure.
Manufactured by
figure 5.3A
figure 5.3B
ODB COMP
ANY
COMPANY
Service Section
5.4 Wiring Harness Diagram
PIN
1
2
3
4
5
6
7
8
9
16
11
COLOR
DESCRIPTION
Red
Black
Orange
Red w/blue stripe
White
Yellow
Purple
Green w/yellow stripe
Grey
Pink
Brown
Fused Alternator
Coil Packs
Charge Alternator
Oil Switch
Carb Fuel Shut Off
Water Switch
Starter Solenoid
“+” from starter cable
“+” Fuel Pump
Tachometer
Ground
Red
Black
ENG. PLUG
Red with Blue Stripe
Grey
Yellow
FUEL PUMP
PLUG
Orange
Grey
SPARK PLUG
Brown
Purple
Green w/yellow stripe
Pink
Engine
Ground
STARTER
BREAK AWAY
SWITCH (on tongue)
Red
Black
Battery
Charger
Black
Red
SOLENOID
Red
Yellow
Fuse
Fuse
Black
+
Battery
Hoist
Hydraulic
Pump
Service Section
5.5 Insturment Panel Wiring Diagram
LIGHTS
OIL
TEMP
Yellow
Red w/blue
stripe
CHARGE
Red w/green
stripe
Red w/green
stripe
Brown
Orange
TACH/HOUR
2500
Green w/yellow
stripe
Black
Red
Red w/green
stripe
Pink
B
Grey
White
PIN
M
M
A
S
Purple
IGN. SWITCH
COLOR
Oil Light
Red w/green stripe
4 Red w/blue stripe
Temp Light
Red w/green stripe
6 Yellow
Charge Light
3 Orange
11 Brown
Tachometer
Pink
Ignition Switch
8 (B) Green w/yellow stripe
1 (B) Red
2 (M) Black
11 (M) Brown
(A) Red w/green stipe
9 (A) Grey
5 (A) White
7 (S) Purple
DESCRIPTION
“+” From ACC on Ign. Switch
“-” From Oil Switch
“+” From ACC on Ign. Switch
“-” From Water Switch
“+” Alternator
“-” Ground to Switch
Tachometer (no pin)
“+” From Starter Cable
Fused Alternator
From Coil Packs
Ground
“+” From Oil light
“+” From Fuel Pump
Carb. Fuel Shut off
From Starter Solenoid
Service Section
5.6 Flow Control Valve Adjustment Instructions
Before attempting to go under the dump body, make sure the body is completely DOWN. If you
must go under a raised body be sure to use the body prop, an overhead crane and sufficient
supports rated above the dump container max load rating. These supports must be positioned
in a way to assure that the body can not come down. Failure to follow these safety guidelines
can result in death or severe personal injury.
Down
Up
Flow Control
Valve
The hoist hydraulic system is equipped with a safety check flow
control valve. This valve is used to prevent the body from
“crashing” down in the event of a hose failure. The valve may be
adjusted if the body becomes difficult to lower. Please note that
it is critical that the body is a little difficult to lower the last 12
inches. This is the check valve working properly. Only adjust the
check valve if the unit is not lowering at all. The unit is designed
to lower slowly for safety reasons.
Adjustment Instructions:
1. Install valve in system, downstream of any safety relief valve. USE WRENCH ONLY ON BODY HEX.
2. Loosen set screw and turn sleeve away from body hex as far as possible.
3. Operate system at anticipated flow rate, but with pressure reduced to allow sleeve to be turned by hand.
4. Slowly turn sleeve towards body hex until valve “trips” and stops flow.
5. Relieve inlet pressure, allowing valve to re-open.
6. Turn sleeve away from body hex 1/4 turn. Valve is now adjusted to close when subjected to excessive flow.
7. If valve “trips” during normal operating conditions, re-adjust using 1/2 turn instead of 1/4 turn. See step 6.
8. After final adjustment, tighten set screw on sleeve.
Service Section
5.7 Trailer Plug Wiring Diagram
Black
Black
White
Red
LED
Strobe
Black
White
Black
COLOR CODES
Strobe
Red
Marker
Black
Right Turn
Green
Left Turn
Yellow
Electric Brake
Blue
Ground
White
Black
Black
LED
Strobe
Red
Black
Red
Blue
White
Black
Yellow
Blue
Black
Brake
Lights
Yellow
switch for
strobe
Green
Red
Green
Blue
Black
White
TRAILER
PLUG
Black
(running lights)
Blue
(brakes)
unfused batt. on
circuit board
Black
Yellow
Green
Red
Red
(not used)
Green
(right turn signal)
Blue
Plugs into
socket bolted to
chassis
BREAK
AWAY
SWITCH
Red
White
(ground)
Yellow
(left turn signal)
Service Section
5.8 Hoist Hydraulic Schematic
Hydraulic Pump
(OD-80.1550)
Raise
Lower
Handle
Down
Up
Manufactured by
ODB COMP
ANY
COMPANY
6.0 PARTS BREAKDOWNS SECTION
Read and understand this entire manual before operating, maintaining or repairing the leaf vacuum.
6.0 PARTS BREAKDOWNS
6.1 Blower Housing Group
6.2 Engine and Engine Base Group
6.3 Belt Drive Group
6.4 Belt Engagement Group
6.5 Tongue Group
6.6 Hydraulic Pump Group
6.7 Chassis and Axle Group
6.8 Hub and Brake Group
6.9 Box Container Group
6.10 Light and Reflector Group
6.11 Rear Door Hardware Group
6.12 Intake Hose Group
6.0
PARTS
BREAKDOWNS
Man
uf
actur
ed b
y
Manuf
ufactur
actured
by
ODB COMP
ANY
COMPANY
Parts Breakdown Section
6.1 Blower Housing Group- 2005
11
10
6
9
13
7
5
4
3
2
1
8
12
ITEM
NO.
1.
2.
3.
4.
5.
6.
7.
PART
NUMBER
DESCRIPTION
65.1002C
65.1005C
65.1005
65.1005B
65.1004
65.1002D
65.1002M
Blower Housing Face, 2003
Bolt, Impeller
Washer, Impeller
Key, Impeller
Impeller
Blower Housing Back
Curved Liner
Manufactured by
ITEM
NO.
PART
NUMBER
8.
9.
10.
11.
12.
13.
65.1002L
80.1006
80.1007
80.1007G
65.1606
65.1002L1
DESCRIPTION
Larger Liner
Exhaust Duct
Exhaust Duct Flange
Gasket
Limit Switch
LIner Bolt and Nut
ODB COMP
ANY
COMPANY
Parts Breakdown Section
6.2 Engine and Engine Base Group - 2005
3
5
4
12
1
9
10
2
11
6
8
15
7
16 17
13
18
14
19
20
ITEM
NO.
PART
NUMBER
1.
2.
3.
4.
5.
6.
7.
8.
9.
10.
80.1000B
65.1011B
80.1008
65.1101
65.1102B
65.1200
NLU
80.1300
80.1301
80.1303
DESCRIPTION
Engine Skid, 2005
Pedistal Lid
Blwr Housing Support Bar
Fuel Tank
Fuel Cap
Engine, Kawasaki 27HP
No Longer Used
Battery
Battery Tray
Battery Holddown Bar
Manufactured by
ITEM
NO.
PART
NUMBER
11.
12.
13.
14.
15.
16.
17.
18.
19.
20.
65.1302
80.1306
65.1509C
65.1500
65.1505
65.1503B
65.1501
65.1504B
65.1502
DESCRIPTION
Battery J-Hooks
Battery Charger
Muffler Guard, 2005
with #13 above now
Instrument Panel, complete
Tach/ Hour meter
Throttle Cable
Ignition Switch
Choke Cable, 2005
Indicator Light
ODB COMP
ANY
COMPANY
Parts Breakdown Section
6-3 Belt Drive Group - 2005
15
14
16
19
1
2
3
4
17
18
1
5
12
6
13
7
11
5
9
10
ITEM
NO.
1
2
3
4
5
6
7
8
9
PART
NUMBER
65.1406
65.1005B
65.1405
65.1403B
65.1402
65.1408
65.1403
65.1409
65.1401B
DESCRIPTION
Drive Bearings, 2 req'd
Key, impeller
Shaft
Key, pulley bushing
Pulley, 2 req'd
Belt Keeper, top-imp. side
Bushing, bushing imp. side
Belt Keeper, bottom-imp. side
Drive Belt, 3 req'd
ITEM
NO.
10
11
12
13
14
15
16
17
18
19
8
PART
NUMBER
65.1411
65.1404
65.1404B
65.1410
65.1400G
65.1400D
65.1400H
65.1011B
65.1400F
65.1412
DESCRIPTION
Belt Keeper, bottom-eng. side
Bushing, engine side
Key, bushing- engine side
Belt Keeper, top-engine side
Belt Guard
Guard Back Cover
Guard Front Cover
Pedistal Cover
Belt Guard Support
Shaft Bolt- engine
Parts Breakdown Section
6-4 Belt Engagement Group 2005
13
12
4
2
11
6
5
1
7
8
9
10
10
6
ITEM
NO.
1
2
3
4
5
6
7
8
9
10
11
12
13
PART
NUMBER
65.1003C
65.1003B
65.1003D
SCL670.5
65.1003H
65.1003E
65.1003G
65.1003I
65.1003J
65.1003F
65.1003L
65.1003K
65.1003M
5
DESCRIPTION
Motor Mount, adjustable
Motor Mounts, top plate
Engagement Handle
Handle Grip
Cam Follower, 1"
UHMW Block
Cam Follower, 1.25"
UHMW Slide Shim
Side Shim Plate
Cap Plate
Tension Spring Eye Bolt
Tension Spring
Motor Adjust Bolt
3
Parts Breakdown Section
6.5 Tongue Group - 2005
9
1
6
8
2
3
4
5
7
ITEM
NO.
PART
NUMBER
1.
2.
80.1099
LCT622.623D
3.
4.
5.
6.
7.
8.
9.
LCT622.623A.2
LCT622.623
200012
LCT622.626B
SCL800.625
80.1103
MP-M310
Manufactured by
DESCRIPTION
Tongue
Pintle Eye Assembly
Consists of:
Block
Ring
Pins (qty-3)
Power Cord
Safety Chains
Parking Jack
Hydraulic Pump (please see next section
for a complete pump breakdown)
ODB COMP
ANY
COMPANY
Parts Breakdown Section
6.6 Hydraulic Pump Group - 2005
Entire Pump Assembly:
OD-80.1550
Manufactured by
ODB COMP
ANY
COMPANY
Parts Breakdown Section
6.6 Hydraulic Pump Group - 2005
ITEM
PART
NO. NUMBER
DESCRIPTION
ITEM
PART
NO. NUMBER
DESCRIPTION
Entire Pump Assembly: OD-80.1550
1
07120
VALVE ASSEMBLY COMPLETE 1
2
04202
• PARTS KIT, Switch Assembly
3
04343
• • SWITCH, Start
4
07908
• • SCREW, Mach, pan head 2
5
04344
• • COVER, Start Switch 1
6
04342
• • CAM, Start Switch 1
7
07909
• • SCREW, Socket Set, 5/16-18 1
8
04322
• • CABLE 1
9
07780
• WASHER, Flat, (bore 5/16") 2
10
00016
• BUSHING, Torsion Spring 1
11
00018
• SPRING, Torsion 1
12
01077
• HANDLE ASSEMBLY 1
13
00172
• HANDLE ASSEMBLY 1
14
01157
• • BALL, Plastic 1
15
01326
• • ROD, Handle 4" 1
16
01327
• • EYEBOLT, Rod Control
17
07790
• • NUT, 5/16-18 1
FOR FURTHER BREAKDOWN OF VALVE, SEE VALVE
SECTION
18
08111
MOTOR, Electric, 12 VDC 1
19
02318
• BEARING, Base, motor 1
20
07625
• NUT, Hex, 5/16-24 1
21
07781
• WASHER, Lock, 5/16" 1
22
07737
• WASHER, Star, 1/4" 4
23
07738
• SCREW, Hex Head Cap
FOR FURTHER BREAKDOWN OF MOTOR, SEE
MOTOR SECTION
Manufactured by
24
25
26
27
28
29
30
31
32
33
34
35
01225
13065
01231
01318
12450
07526
02159
03766
00120
02352
K12171-250
07818
36
04559
04560
07592
13059
13058
01134
01209
06102
03171
07900
37
38
39
40
41
42
43
44
ELBOW ASSEMBLY, 90 Deg
TUBE, Return 1
CONNECTOR ASSEMBLY 1
ADAPTER, Pump/Valve
BASE ASSEMBLY, Modular 1
• PARTS KIT, Check Valve (main) 1
• SEAL 1
• PARTS KIT, Relief Valve 1
• O-RING, Industrial
• O-RING, Industrial
PUMP ASSEMBLY, Modular 1
• SCREW, 1/4-20 x 3 S Head Cap 4
(For Pump Assembly -250)
BRACKET, Plate Mount 5" C to C 1
BRACKET, Plate Mount
SCREW, Skt Hd Cap, 3/8-16 x 1 2
TUBE, Return (1/8" NPT) 1
TUBE, Return (1/8 NPT) 1
SCREEN, Filter (suction) 1
TUBE, Filter Suction 3/8" NPT
RESERVOIR, 4-1/2" Dia. x 8",
PLUG, Vent, 3/8" NPT 1
CLAMP 1
ODB COMP
ANY
COMPANY
Parts Breakdown Section
6.7 Chassis and Axle Group - 2005
9
2
3
8
1
4
6
5
7
1
ITEM
NO.
Manufactured by
PART
NUMBER
1.
80.1104
2.
3.
4.
5.
6.
7.
8.
9.
LCT622.619
LCT622.619T
LCT622.619R
021.042.01
085.001.00
LCT622.619N
80.0057
80.1651
DESCRIPTION
Axle (for brake and drum parts please see
the Axle Brake Section)
Tire and Rim Assembly
Tire only
Rim only
Grease Cap, no plug
Rubber plug
Lug Nut
Mud Flap
Chassis Wiring Harness
ODB COMP
ANY
COMPANY
Parts Breakdown Section
6.8 Hub and Brake Group - 2005
Hub Breakdown
Electric Brake Assembly
ITEM
*
NO.
PART
NUMBER
*
*
1.
2.
2.
3.
4.
5.
6.
7.
8.
9.
10.
11.
12.
13.
023.105.00
023.106.00
036.089.05
047-107-00
047-108-00
027-005.00
046.009.00
k71.048.00
043.004.00
046.018.00
k71.105.00
046.007.00
046.016.00
005.067.00
005.004.00
006.010.00
DESCRIPTION
Complete Brake Assembly LH
Complete Braek Assembly RH
Backing Plate Assembly
Actuating Lever Arm Assembly LH
Actuating Lever Arm Assembly RH
Wire Clip
Retractor Spring
Shoe and Lining Kit
Adjuster Assembly
Adjusting Screw Spring
Magnet Kit
Plug
Wire Grommet
Anchor Post Washer
Lockwasher
Brake Mounting Nut
Manufactured by
ITEM
NO.
14.
15.
16.
17.
18.
19.
20.
21.
22.
23.
24.
25.
26.
27.
28.
PART
NUMBER
DESCRIPTION
10.10
031.030.02
031.030.01
023.105.00
023.106.00
008.201.09
007.122.00
031.032.01
031.032.02
005.023.00
006.001.00
N/A
005.101.00
021.042.01
085.001.00
LCT622.619N
Grease Seal
Inner Bearing Cone
Inner Bearing Cup
Electric Brake Assembly LH
Electric Brake Assembly, RH
Grease Hub & Drum
Wheel Stud
Outer Bearing Cup
Outer Bearing Cone
Sprindle Washer
Spindle Nut
Not Used
Tang Washer
Grease Cap, without plug
Rubber Plug
Lug Nut
ODB COMP
ANY
COMPANY
Parts Breakdown Section
6.9 Box Container Group
1
2
3
5
ITEM
NO.
1.
2.
3.
4.
5.
Manufactured by
PART
NUMBER
SCL805.810
SCL800.811
80.0059
80.0058
200008
4
DESCRIPTION
Exhaust Screen
Deflector Rubber Flap
Deflector Liner
Cover Plate
Spring Clip
ODB COMP
ANY
COMPANY
Parts Breakdown Section
6.10 Light and Reflector Group
6
6
5
6
4
4
1
2
3
ITEM
NO.
1.
2.
3.
4.
5.
6.
Manufactured by
PART
NUMBER
STD.2414
660700
LCT60.615B
LCT600.010
SCL.26302.R
SCL.26302
SCL800.014
SCL.26302.R
DESCRIPTION
Tail Light, LED, 2005
Oval Grommet for tail light
License Plate Light
License Plate Bracket
Corner Light, Red - rear of unit
Corner Light, Yellow - front of unit
Door Hinge
Double Bulls Eye Light
ODB COMP
ANY
COMPANY
Parts Breakdown Section
6.11 Rear Door Hardware
4
3
10
1
2
8
9
11
ITEM
NO.
PART
NUMBER
1.
2.
3.
4.
5.
6.
7.
8.
9.
10.
11.
80.0052
80.0052A
7502.2
7502.3
1969.7X
1969.39
1969.4X
1969.5
1969.6X
7502.1
7502.99
Manufactured by
6
7
5
DESCRIPTION
Door Rod, LH (includes #8)
Door Rod, RH (includes #8)
Rod Bracket
Rod Bracket Back
Seal Pin
Bushing
Seal Plate
Handle Clip
Handle
Keeper
Lock Down Bracket
ODB COMP
ANY
COMPANY
Parts Breakdown Section
6.11 Intake Hose Group
2
2
3
1
4
7
5
6
8
ITEM
NO.
1.
2.
3.
4.
5.
6.
7.
8.
Manufactured by
PART
NUMBER
STD.1602.12
STD.1605
65.1607
65.1608
65.1600
80.1601
80.1605
80.1602
DESCRIPTION
Intake Hose, 12" x 120" L
Support Band
Hose Clamp with Limit Switch Bracket
Hose Clamp, nozzle
Intake Nozzle
Hose Boom
Lockdown Knob
Boom Slide
ODB COMP
ANY
COMPANY
Parts Breakdown Section
Parts Index 2005
Description
Section
Description
Section
Description
Section
Axle
6.7
Corner Light, Red- rear of unit
6.10
Ignition Switch
6.2
Back, Blower Housing
6.1
Corner Light, Yellow-front
6.10
Impeller
6.1
6.2
Band, Support
6.12
Cover Plate
6.9
Indicator Light
Battery
6.2
Cover, Guard
6.3
Instrument Panel, complete
Battery Charger
6.2
Deflector Liner
6.9
Intake Hose, 12” x 120” L
6.12
Battery Hold-down Bar
6.2
Deflector Rubber Flap
6.9
Intake Nozzle
6.12
Battery J-Hook
6.2
Door Hinge
6.10
Keeper
6.11
Battery Tray
6.2
Door Rod, LH
6.11
Key, bushing-engine side
6.3
Bearing, Drive
6.3
Door Rod, RH
6.11
Key, Impeller
6.1
Belt Guard
6.3
Double Bulls Eye Light
6.10
Key, Impeller
6.3
Belt Guard Support
6.3
Drive Bearings, 2 req’d
6.3
Key, Pulley Bushing
6.3
Belt keeper, bottom-eng. Side
6.3
Drive Belt, 3 req’d
6.3
Knob, Lock Down
6.12
Belt keeper, top-eng. Side
6.3
Engagement Handle
6.4
Lens (Red)
6.10
Belt Keeper, top-imp. side
6.3
Engine Skid, 2005
6.2
License Plate Bracket
6.10
Block
6.5
Engine, Kawasaki 27HP
6.2
License Plate Light
6.10
Block, UHMW
6.4
Exhaust Duct
6.1
Lid, Pedestal
Blower Housing Back
6.1
Exhaust Duct Flange
6.1
Light
6.10
Blower Housing Face
6.1
Exhaust Screen
6.9
Light Socket with Bulb
6.10
Blower Housing Support Bar
6.2
Eye Bolt, Tension Spring
6.4
Light, Corner - Red
6.10
Bolt, Impeller
6.1
Face, Blower Housing
6.1
Light, Corner - Yellow
6.10
Bolt, Liner
6.1
Flange, Exhaust Duct
6.1
Light, Double Bulls Eye
6.10
Bolt, Shaft
6.3
Fuel Cap
6.2
Light, Indicator
Boom Slide
6.12
Fuel Tank
6.2
Light, License Plate
Boom, Hose
6.12
Gasket
6.1
Limit Switch
6.1
Bracket, Switch
6.12
Grease Cap, no plug
6.7
Line, Large
6.1
Bracket. License Plate
6.10
Grip, Handle
6.4
Liner Bolt and Nut
6.1
Bushing
6.11
Grommet, Light
6.10
Liner, Curved
6.1
Liner, Deflector
6.9
6.2
6.2
6.2
6.10
Bushing, bottom-imp side
6.3
Grommet, tail light
6.10
Bushing, bushing imp. side
6.3
Guard Back Cover
6.3
Lock Down Bracket
6.11
Bushing, engine side
6.3
Guard Front Cover
6.3
Lockdown Knob
6.12
Cable, Throttle
6.2
Guard, Muffler
6.2
Lug Nut
6.7
Cam Follower, 1”
6.4
Handle
6.11
Motor Adjust Bolt
6.4
Cam Follower, 1.25”
6.4
Handle Clip
6.11
Motor Mount, adjustable
6.4
Cap Plate
6.4
Handle Grip
6.4
Motor Mounts, top plate
6.4
Cap, Fuel
6.2
Handle, Engagement
6.4
Mud Flap
6.7
Chains, Safety
6.5
Hinge, Door
6.10
Muffler Guard, 2005
6.2
Chassis Wiring Harness
6.7
Hinge, Door
6.10
Nut, Lug
Chassis Wiring Harness
6.7
Hose Boom
6.12
Oval Grommet for tail light
Choke Cable, 2005
6.2
Hose Clamp with Limit
6.12
Panel, Instrument
6.2
6.7
6.10
Clamp, Hose
6.12
Hose Clamp, nozzle
6.12
Parking Jack
6.5
Clip, Handle
6.11
Hose, Intake
6.12
Pedestal Cove
6.3
Clip, Spring
6.9
Pedestal Lid
6.2
Hydraulic Pump
6.5
Parts Breakdown Section
Parts Index 2005 -continued
Description
Pin, Seal
Section
Description
6.11
UHMW Block
6.4
Section
Pins, 3 req.’d
6.5
UHMW Slide Shim
6.4
Pintle Eye Assembly
6.5
Washer, Impeller
6.1
Plate, Seal
6.11
Plate, Side
6.4
Plug, Rubber
6.7
Power Cord
6.5
Pulley, 2 req’d
6.3
Pump, Hydraulic
6.5
Rim only
6.7
Ring
6.5
Rod Bracket
6.11
Rod Bracket Back
6.11
Rod, Door
6.11
Rubber Flap, Deflector
6.9
Rubber Plug
6.7
Safety Chains
6.5
Screen, Exhaust
6.9
Screen, Exhaust
6.9
Seal Pin
6.11
Seal Plate
6.11
Shaft
6.3
Shaft Bolt- engine
6.3
Shim. Slide
6.4
Side Plate
6.4
Skid, Engine
6.2
Slide, Boom
6.12
Slide, Shim UHMW
6.4
Spring Clip
6.9
Spring, Tension
6.4
Support Band
Support, Belt Guard
6.12
6.3
Switch Bracket
6.12
Switch, Ignition
6.2
Tach/ Hour meter
Tail Light
6.2
6.10
Tension Spring
6.4
Tension Spring Eye Bolt
6.4
Throttle Cable
6.2
Tire and Rim Assembly
6.7
Tire only
6.7
Tongue
6.5
Tray, Battery
6.2
SAFETY PRECAUTIONS
Read and understand this entire manual before operating, maintaining or repairing the leaf vacuum.
If the decal above is missing or damaged call ODB immediately and we will send you a replacement free of charge.
Never operate a unit with damaged or missing safety decals.
DO NOT RIDE, SIT OR STAND ON UNIT
DO NOT MODIFY THE UNIT FOR RIDERS IN ANY
WAY. SERIOUS INJURY OR DEATH MAY OCCUR
ODB’s leaf collectors are NEVER to be used to accomodate riders. If your unit has been modified to
accomdate riders, remove these modifications immediately as this can result in serious injury or death.
ODB COMP
ANY
COMPANY
800-446-9823
DO NOT ATTEMPT TO OPERATE
OR REPAIR
THE LEAF COLLECTOR WITHOUT FIRST
READING AND UNDERSTANDING THIS
MANUAL
IF YOU HAVE ANY QUESTIONS CONCERNING THE
INSTALLATION OR OPERATION OF THIS UNIT, PLEASE CALL
ODB FOR ASSISTANCE BEFORE ATTEMPTING TO REPAIR OR
OPERATE THE UNIT.
IMPROPER USE OF ANY MACHINE CAN
RESULT IN INJURY!
STUDY AND FOLLOW ALL SAFETY
PRECAUTIONS BEFORE OPERATING OR
REPAIRING UNIT
THIS MANUAL IS AN INTEGRAL PART OF THE LEAF COLLECTOR AND SHOULD
BE KEPT WITH THE UNIT WHEN IT IS SOLD.
ODB COMPANY
5118 Glen Alden Drive
Richmond, VA 23231
800-446-9823