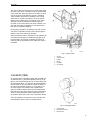
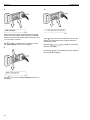
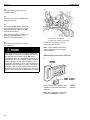
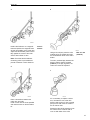
1
Service Manual
Trucks
Group
250-610
VOLVO Engine Brake
VE D12, D12A, D12B
PV776-TSP0250610/2
Foreword
The descriptions and service procedures contained in this manual are based on designs and methods studies carried out up to February 2000.
The products are under continuous development. Vehicles and components produced
after the above date may therefore have different specifications and repair methods.
When this is believed to have a significant bearing on this manual, supplementary service bulletins will be issued to cover the changes.
The new edition of this manual will update the changes.
In service procedures where the title incorporates an operation number, this is a reference to an V.S.T. (Volvo Standard Times).
Service procedures which do not include an operation number in the title are for general information and no reference is made to an V.S.T.
The following levels of observations, cautions and warnings are used in this Service
Documentation:
Note: Indicates a procedure, practice, or condition that must be followed in order to
have the vehicle or component function in the manner intended.
Caution: Indicates an unsafe practice where damage to the product could occur.
Warning: Indicates an unsafe practice where personal injury or severe damage to the
product could occur.
Danger: Indicates an unsafe practice where serious personal injury or death could occur.
Volvo Trucks North America, Inc.
Greensboro, NC USA
Order number: PV776-TSP0250610/2
© 2000 Volvo Trucks North America, Inc., Greensboro, NC USA
All rights reserved. No part of this publication may be reproduced, stored in
retrieval system, or transmitted in any forms by any means, electronic, mechanical, photocopying, recording or otherwise, without the prior written
permission of Volvo Trucks North America, Inc..
Contents
General .................................................................................................... 3
VOLVO Engine Brake (VEB) ................................................................. 3
Tools ........................................................................................................ 5
VOLVO Engine Brake, Special Tools ..................................................... 5
Other special equipment ..................................................................... 6
Design and Function ............................................................................. 7
Engine Brake ......................................................................................... 7
Exhaust Brake ..................................................................................... 7
Compression Brake ............................................................................. 7
Control Valve (VEB) ............................................................................ 8
Camshaft (VEB) .................................................................................. 9
Exhaust Rocker Arms (VEB) ............................................................. 10
Non-Return Valve (VEB) ................................................................... 10
Rocker Arm Plunger .......................................................................... 11
Engine Operation ............................................................................ 11
Compression Braking ...................................................................... 11
Engine Braking .................................................................................. 12
Control System, D12 and D12 A .................................................... 12
Exhaust Brake ................................................................................. 13
Compression Brake ......................................................................... 14
Induction Phase .............................................................................. 14
Decompression pPhase .................................................................. 14
Troubleshooting ...................................................................................
Engine Brake, Fault Tracing ................................................................
VEB Diagnosis and Troubleshooting .................................................
Electrical Troubleshooting .................................................................
Special tools: J–41132 ....................................................................
Connecting test equipment .............................................................
Voltage measurement .....................................................................
Resistance measurement ...............................................................
Mechanical Troubleshooting ..............................................................
Conditions .......................................................................................
VEB Troubleshooting, Order to Follow ..............................................
1 ......................................................................................................
2 ......................................................................................................
3 ......................................................................................................
4 ......................................................................................................
VEB Fault Symptoms ........................................................................
Fault symptom 1 ..............................................................................
Fault symptom 2 ..............................................................................
Fault symptom 3 ..............................................................................
Fault symptom 4 ..............................................................................
Fault symptom 5 ..............................................................................
Fault symptom 6 ..............................................................................
Fault symptom 7 ..............................................................................
Low Engine Braking Effect (VEB) .....................................................
Check Before the Test: ....................................................................
Test Equipment, Installation ............................................................
Test-driving and Measuring .............................................................
Brake Test .......................................................................................
Evaluation of the Brake Test ...........................................................
Engine Brake, Checking ......................................................................
15
15
15
16
16
16
17
17
18
18
19
19
19
19
19
20
20
20
20
20
20
20
20
21
21
21
21
22
26
27
1
Solenoid Valve, Compression Brake, Checking ..................................
Exhaust Brake, Electronic Checking ...................................................
Exhaust Brake, Mechanical Checking .................................................
Oil Pressure, Compression Brake, Checking ......................................
Exhaust Temperature, Checking .........................................................
Rocker Arm Roller, Checking ..............................................................
29
30
32
36
40
46
Service Procedures .............................................................................
Rocker Arm, Overhaul .........................................................................
Solenoid Valve, Compression Brake, Replacement ............................
Control Valve, Engine Brake, Replacement ........................................
49
49
51
53
Operation Numbers
2
Group 25
General
General
VOLVO Engine Brake (VEB)
Successful troubleshooting of the VOLVO engine brake system requires information regarding system design and knowledge of how the different components function in
relation to each other.
W2002155
1
2
3
Camshaft
Shutter
Exhaust pressure governor
4
5
6
Rocker arm
Control valve
Oil pipe
The description, operation and service of the Volvo Engine Brake is detailed as follows:
The Troubleshooting section is subdivided into Electrical
Troubleshooting and Mechanical Troubleshooting.
Refer to this information along with the description and
operation information when performing troubleshooting.
3
4
Group 25
Tools
Tools
VOLVO Engine Brake, Special Tools
Servicing the Volvo Engine Brake (VEB) requires the following special tools. The tools
are available from the Parts Department of Volvo Truck North America, Inc. Unless otherwise noted, all tool numbers are preceded by ”999.” Please specify the complete part
number when ordering. Tools with part numbers beginning with ”J” are available only
from Kent-Moore.
W2002194
9996465
Pressure gauge, 0 –10 bar (0 – 145 psi)
9998338
Connector for checking oil pressure in the
rocker arm shaft
9812327
Memory cassette
9989876
Dial indicator
9996716
Drift
9998339
Pressure gauge, 0 – 6 bar (0 – 90 psi)
9996956
Cranking tool for flywheel
9998342
Temperature sensors for measuring exhaust gas temperature
9998190
Measuring instrument
9998344
Drift, used when changing ball seating in
the rocker arm
9998333
Union, used together with pressure gauge
9996465
9998364
Collation unit for temperature measuring
9808001
Bolt
9999696
Magnetic base
5
Group 25
Tools
W2003381
1
J-38500–1 Pro-Link® 9000
2
J-38500–1000 Cartridge
3
J-38500–60A Adapter
4
9510060 Multimeter
Other special equipment
Tools with part numbers beginning with the letter “J” are available from your local Kent
Moore dealer.
W2002195
J-35616-20
Jumper wires
9999708
Torque wrench 0 – 17.5 Nm (0 – 15 ft-lb)
J-42472
2-pin breakout harness
J- 39200
Fluke 87 digital multimeter
1159794
Torque wrench 10 – 100 Nm
(7.5 – 75 ft-lb)
J- 41132
36-pin breakout box
6
Group 25
Design and Function
Design and Function
Engine Brake
W2000702
1
2
Camshaft
Shutter
3
4
Exhaust Pressure Governor
Rocker arm
5
6
Control valve
Oil pipe
The Volvo Engine Brake consists of two different systems, the exhaust brake and the compression brake.
In the VEB, both systems operate at the same time.
Exhaust Brake
The exhaust pressure governor includes a shutter,
mounted in the exhaust side of the turbocharger. This
shutter, which is connected to the exhaust pressure governor plunger, restricts the exhaust gas flow when
activated. Braking is achieved during the exhaust stroke
by the backpressure created when the exhaust gas flow
is blocked.
Compression Brake
The compression brake controls the opening of exhaust
valves during the engine compression and combustion
(operating) stroke. This creates backpressure in the
combustion chamber which, in turn, has a braking effect.
On engines with compression brakes, the camshaft has
two extra lobes on each exhaust cam profile. The lift
height of the extra lobes is very low compared to that of
normal exhaust lobes. To enable the extra lobes to open
the exhaust valves, the exhaust rocker arms are arranged in a manner which reduces valve clearance
during the braking sequence.
7
Group 25
Design and Function
Control Valve (VEB)
T2007789
Fig. 1: Engine in operation, the control valve solenoid valve not activated
T2007788
Fig. 2: VEB engine braking, the control valve solenoid valve activated
8
Group 25
Design and Function
The control valve is mounted on the cylinder head under
the valve cover and is connected to the oil system ahead
of the rocker arm shaft. Its purpose is to reduce oil pressure to the rocker arms while the engine is operating.
There is always full system oil pressure to the control
valve inlet (1). A pipe connects the inlet to the lube oil
gallery in the cylinder block. Oil pressure to the rocker
arm shaft can be increased by a solenoid valve (2)
mounted on the control valve, from about 100 kPa (14.5
psi) while the engine is operating to over 200 kPa (29
psi) during compression braking.
During engine operation, the springs’ force and oil pressure in the oil chamber hold the control valve plunger in
balance. This action reduces oil pressure.
When the solenoid valve is activated, the oil chamber (6)
is drained and the spring (4) presses the plunger (3) to
its end position. The plunger completely opens the oil
outlet (5) and the oil pressure to the rocker arm shaft is
increased.
T2006835
Fig. 3: Control valve
1
2
3
4
5
6
Oil inlet
Solenoid valve
Plunger
Spring
Oil outlet
Oil chamber
Camshaft (VEB)
On engines with a compression brake, the camshaft has
an induction lobe (1) and decompression lobe (2) in addition to the normal exhaust lobe (3) on each cam profile
for the exhaust valves. The induction and decompression
lobe lift height is 0.8 mm (0.032 in.) above the basic circle, which is equivalent to about 1.1 mm (0.043 in.) at
the valve bridge. The induction lobe is positioned to
open the exhaust valves at the end of the intake stroke
and hold them open at the beginning of the compression
stroke. The decompression lobe is positioned to open
the exhaust valves at the end of the compression stroke.
The valve clearance must be zero for the induction and
decompression lobes to open the exhaust valves.
T2006826
Fig. 4: Camshaft section
1
2
3
Induction lobe
Decompression lobe
Exhaust lobe
9
Group 25
Design and Function
Exhaust Rocker Arms (VEB)
The exhaust rocker arms on an engine with a compression brake are larger than those of a conventional
engine.
The rocker arm is equipped with a non-return valve and
a plunger with a pressure-limiting valve. Its purpose is to
regulate oil flow during compression braking.
Spring-tab pressure holds the rocker arm at the rest position against the valve bridge.
Valve clearance is greater on an engine without a compression brake, as the induction and decompression
lobes must not open the exhaust valves while the engine
is operating.
Shims are placed on the valve bridge to adjust valves.
Note: Do not use more than two shims to obtain proper
valve clearance.
T2006827
Fig. 5: Exhaust rocker arm
1
2
3
4
Spring tab
Non-return valve
Rocker arm plunger
Shims
Non-Return Valve (VEB)
There is a non-return valve, consisting of a plunger (1),
spring (2) and ball (3) in the rocker arm. When oil from
the rocker arm shaft is forced into the valve, the spring
force and the oil pressure determine movement of the
plunger.
When the oil pressure is low, about 100 kPa (14.5 psi),
the control valve is in its engine operating position. During this time, the plunger (1) will not move out of its rest
position because the oil pressure cannot overcome the
spring force. The plunger pin prevents the ball (3) from
seating and the oil can flow freely through the valve in
both directions.
W2000704
Fig. 6: Non-return valve during engine operation
When the control valve takes up the position for compression braking, oil pressure to the non-return valve
increases. The spring force in the non-return valve is
such that when the oil pressure exceeds about 200 kPa
(29 psi), it overcomes the spring force and moves the
plunger (1) to where it no longer controls the ball (3).
The spring (5) forces the ball against its seat and the oil
contained above the plunger (4) cannot flow past the ball
(3). As a result, high oil pressure is formed above the
plunger (4).
T2006834
Fig. 7: Non-return valve during VEB operation
1
2
3
4
5
10
Plunger
Spring
Ball
Rocker arm plunger
Spring
Group 25
Design and Function
Rocker Arm Plunger
The purpose of the plunger is to zero-set the valve clearance during compression braking.
Engine Operation
When the engine is operating, there is reduced oil pressure through the control valve to the rocker arm shaft,
and the rocker arm non-return valve (1) is open. Oil can
flow freely through the non-return valve in both directions. Therefore, no oil pressure is built up between the
rocker arm plunger (2) and the rocker arm.
The set valve clearances are great enough to prevent
the cam shaft induction and decompression lobes from
opening the exhaust valves.
The valve mechanism operates as it would on an engine
without a compression brake. That is, only the exhaust
lobe opens the exhaust valves.
T2006828
Fig. 8: Rocker arm plunger during engine operation
1
2
Non-return valve
Rocker arm plunger
Compression Braking
During compression braking, an oil pressure of at least
200 kPa (29 psi) is delivered to the rocker arm shaft as
the control valve does not reduce the oil pressure.
The pressure in the rocker arm non-return valve (1) increases enough to move the plunger in the non-return
valve from its rest position, and the ball now functions as
a non-return valve. Pressure builds up between the
rocker arm plunger (2) and the rocker arm. The plunger
moves out and forces the rocker arm roller against the
lobes on the camshaft. The valve clearance is eliminated
and the lift height on the induction and decompression
lobes is sufficient to open the exhaust valves. The rocker
arm plunger is equipped with a pressure-limiting valve
(3). When oil pressure between the rocker arm plunger
and the rocker arm becomes too high, the pressurelimiting valve opens and oil can exit through the hole in
the bottom of the plunger. The opening pressure of the
pressure-limiting valve is governed by the force of the
valve spring.
T2006836
Fig. 9: Rocker arm plunger during compression braking
1
2
3
Non-return valve
Rocker arm plunger
Pressure-limiting valve
11
Group 25
Design and Function
Engine Braking
Control System, D12 and D12 A
With the complete release of the accelerator pedal, the
engine brake is activated according to the selection made
on the dash board, but only if certain conditions are met:
•
Accelerator pedal must be fully released (fuel injection must not occur).
•
•
•
•
Engine speed must be greater than 1100 rpm.
•
Engine brake disabled, input must not be activated
(ABS).
•
Vehicle speed must be greater than 3.2 km/h (2
mph).
•
Engine temperature must be higher than the following:
Clutch pedal must not be depressed.
Boost pressure must be lower than 150 kPa (22 psi).
Constant engine speed mode (PTO) must not be
activated.
Part number of Temperature Switch
Temperature measured at
outlet of cooling pump
p/n 8155799
43 C (110 F)
p/n 3985349
67 C (158 F)
As an additional option, the engine brake may be enabled automatically if the vehicle exceeds a specified
cruise control limit. If this option is selected, the engine
brake may be applied at a selectable speed from 6.4 to
32 km/h (4 to 20 mph) above the cruise control set
speed.
12
W2000877
Fig. 10: Engine brake logic schematic, D12 and D12 A.
Group 25
Design and Function
Switches
On the dash the switches for the engine brake have different configurations. With the two dual-position
switches, the brake system is activated by placing one of
the switches in ON position. The HI/LO switch, in the HI
position, selects both the exhaust brake and the compression brake (Volvo engine brake or VEB). In the LO
position, only the exhaust brake is selected.
W3002827
Fig. 11: Dual-position switches for Engine brake
The engine brake switches are on some truck models replaced by a single three-position switch. As with the
switches above it also regulates the engine brake for the
cruise control.
The three position switch has the following selection:
1
2
3
No engine brake engaged
Exhaust brake, EPG
Exhaust brake and compression brake
T2006953
Fig. 12: Three-position switch for engine brake
Exhaust Brake
During exhaust braking, control pressure of about 752
kPa (109 psi) activates the exhaust pressure governor.
The exhaust pressure governor plunger is activated and
the shutter connected to the plunger restricts the flow of
exhaust gases out of the cylinders.
Restricting the flow of exhaust gases creates a back
pressure between the shutter and the piston crowns.
This provides a braking effect on the pistons as the exhaust valves open.
The higher the engine speed during exhaust braking, the
greater the braking effect.
T2006832
Fig. 13: Exhaust pressure governor
13
Group 25
Design and Function
Compression Brake
The exhaust brake is always engaged with the compression brake. This is because the compression brake
induction phase fully utilizes the backpressure created
by the exhaust brake in the exhaust manifold.
Induction Phase
The induction phase begins at the end of the intake
stroke and continues slightly into the compression stroke.
The piston travels downward toward bottom dead center
and the camshaft induction lobe opens the exhaust
valves long enough to fill the cylinder with the backpressure created by the exhaust brake in the exhaust
manifold.
When the induction lobe closes the exhaust valves, the
cylinder has a backpressure at the start of the compression stroke. This backpressure increases compression
considerably during the compression stroke which, in
turn, creates a powerful braking effect when the piston
moves upward.
T2006830
Fig. 14: Induction phase
Decompression pPhase
At the end of the compression stroke, as the piston approaches top dead center, the camshaft decompression
lobe opens the exhaust valves and releases the pressure
from the cylinder. Shortly before bottom dead center, the
ordinary exhaust lobe opens the exhaust valves. During
the exhaust stroke, a backpressure is created in the exhaust manifold. This has a braking effect because the
exhaust pressure governor shutter is closed.
T2006831
Fig. 15: Decompression phase
14
Group 25
Troubleshooting
Troubleshooting
Engine Brake, Fault Tracing
Before working on a vehicle, set the parking brakes,
place the transmission in neutral, and block the
wheels. Failure to do so can result in unexpected vehicle movement and can cause serious personal
injury or death.
Basic knowledge of the system description and operation
is necessary to perform the troubleshooting procedures
in this manual. For basic system knowledge, refer to:
Service
Manuals
V776–200–820SM
Specifications, VE D12
284–610, PV776–TSP128229
Engine Control System, VE D12
VEB Diagnosis and Troubleshooting
When operating a vehicle on streets and highways,
during data collection procedure, it is mandatory to
have a second person drive while a technician collects the data.
Never disconnect an air system component unless all
system pressure has been depleted. Failure to deplete system pressure before disconnecting hoses or
components may result in their violent separation and
can cause serious bodily injury.
WARNING
HOT ENGINE! Keep yourself and your test equipment
clear of all moving or hot engine parts. A hot engine
can cause serious burns or can permanently damage
test equipment.
The D12 engine is equipped with a diagnostic system to
simplify troubleshooting.
The first step to take with all troubleshooting should be
to check whether the diagnostic system indicates any
fault codes.
If fault codes are present, these should be corrected before proceeding further with the troubleshooting, even if
the fault codes do not indicate a fault that would affect
the engine brake system.
If the truck is equipped with ABS, verify that information
code 61 is not displayed during the check.
For details about how the fault codes and information
codes are interpreted, refer to:
Service
Manual
280–600, PV776–TSP105620/1
Fault Codes, Engine Electronic Control
Unit
WARNING
Always wear appropriate eye protection to prevent the
risk of eye injury due to contact with engine debris or
fluids.
CAUTION
Always clean the engine before servicing and keep
the compression brake components clean during all
service and repair procedures. Lack of cleanliness
during service and repair work could result in a fault
or malfunction of the compression brake system.
15
Group 25
Troubleshooting
Electrical Troubleshooting
W2002196
Special tools: J–41132
Connecting test equipment
1
Make sure that the ignition key is in the ”OFF” position.
2
Clean the area around the EECU and harness connectors.
3
Disconnect the EB harness (lower harness). Inspect
the harness for corrosion and damage to the connector housing, terminals, and seal. Repair as
required.
4
Connect the 36–pin breakout box to the EB harness
only.
Make sure the harness connectors are properly
pressed together. Do not force connectors together.
Note: Do not connect the breakout box to the
EECU.
16
Group 25
Troubleshooting
Voltage measurement
Conditions:
•
•
•
•
Engine running
Engine brake switch in the ON position
Selector switch in the HI position
Throttle pedal in idle position
Voltage Measurement
36-Pin Box Selection
•
•
•
•
•
Clutch pedal released
ABS not activated
PTO not activated
Vehicle speed greater than 3.2 km/h (2 mph)
Sufficient coolant temperature, see table page 12.
Intended Value
Probable Cause
Faulty connection
Engine brake supply (if all
conditions are met)
2:9
Faulty engine brake
switches
B+
Faulty harness
Resistance measurement
•
Ignition off
Note: Values in table apply to solenoid valve with
part no 1610563 and 1610567.
For solenoid valves with part numbers 8143014 and
8143018, please refer to:
•
Engine not running
Service
Manual
•
Engine brake switch in the ON position
Conditions for Resistance Measurements:
Resistance Measurement
36-Pin Box Selection
Intended
Value
PV776–280–600SM
Electronic Controls, VE D12, D12 A,
D12 B
Probable Cause
Faulty connection
Faulty harness
Solenoid valve, exhaust brake (engine
brake selector switch in LOW position
2:9
13 – 16
Solenoid valve (exhaust brake)
Faulty exhaust brake
Faulty engine brake switches
Faulty connection
Solenoid valve exhaust brake and
compression brake (engine brake selector in HI position)
Faulty harness
2:9
7.5 – 9.5
Solenoid valve (compression brake)
Faulty engine brake switches
Faulty VEB coolant temperature switch
Note: If the multimeter shows 20–22 when the engine
brake select switch is in the HI position, the exhaust
brake solenoid valve is damaged.
17
Group 25
Troubleshooting
Mechanical Troubleshooting
Conditions
• The electrical troubleshooting has been carried out,
•
•
•
or any possible faults in the electrical system can be
completely eliminated.
The truck has full pressure [827 kPa (120 psi)] in
the air system.
The engine has normal oil pressure.
The engine coolant temperature is at operating temperature.
Exhaust brake
Compression brake
Test 1
Test 2
Test 1
Test 3
Test 4
Test 5
Carry out the tests on the exhaust brake and compression brake in numerical order according to the
above diagram, when either one of the brake systems does not work.
If both brake systems work, but give poor braking effect, see “Low Engine Braking Effect (VEB)” page 21.
18
Service procedures not contained in this information are to be found in the service information for
the VOLVO D12 engine under the respective group.
Test 2
Group 25
Troubleshooting
VEB Troubleshooting, Order to
Follow
If the fault remains after correcting any indicated fault
codes, and the engine and electrical system function
normally, troubleshooting should be performed in the following order:
1
Begin troubleshooting by attempting to establish which of
the brake systems is faulty (exhaust brake, compression
brake, or both systems).
2
Verify that the following preconditions for exhaust braking are satisfied, with the switch(es) on the instrument
panel in the ON/LOW (exhaust brake only) positions.
•
•
•
•
•
•
•
Accelerator pedal position at 0% (idle position)
Clutch pedal not depressed
Engine speed should be greater than 1100 RPM
PTO not activated
Vehicle speed should be greater than
3 km/h (2 mph).
Anti-lock Braking System (ABS) not activated.
Boost pressure less than 150 kPa (22 psi).
Note: The exhaust brake will engage only when all of
these preconditions are satisfied.
Note: When the exhaust pressure governor (EPG) is activated in conjunction with starting, running the engine
warm, and keeping the engine warm, other preconditions
apply.
3
Verify that the following preconditions for VEB (exhaust
braking and compression braking) are satisfied, with
the switches on the instrument panel in the ON/HI (exhaust brake and compression brake, VEB) positions.
•
•
•
•
•
•
•
•
Accelerator pedal position at 0% (idle position)
Clutch pedal not depressed
Engine speed should be over 1100 RPM
PTO not activated
Vehicle speed should be greater than 3 km/h
(2 mph).
Anti-lock Braking System (ABS) not activated.
The coolant temperature should be over 43 C
(110 F), otherwise only the exhaust brake will be
engaged.
Boost pressure less than 150 kPa (22 psi).
Note: An additional option is to have the VEB enable automatically if the vehicle exceeds a specified cruise
control limit. If this option is selected, the VEB will automatically engage at a selectable speed approximately
6.4 to 32 km/h (4 to 20 mph) above the set cruise control speed.
4
Always begin with electrical troubleshooting, unless
a fault in the electrical system can be completely
ruled out.
19
Group 25
VEB Fault Symptoms
Troubleshooting
Fault symptom 5
Poor braking effect from the exhaust brake
Fault symptom 1
Probable fault:
The engine will not start
Probable fault:
•
The control valve plunger may be stuck in its rest
position. If this is the case, oil is fed to the rocker
arm shaft with full pressure and the plungers in the
rocker arm shafts will be pressed out. This will eliminate the valve clearance and the decompression
lobes will open the exhaust valves. This impairs the
compression build-up and the engine cannot start.
Carry out mechanical troubleshooting.
Fault symptom 2
Neither the exhaust brake nor the compression
brake functions
This indicates a fault in the electrical system. The control
signal is not reaching the exhaust pressure governor and
the control valve solenoid valves.
Carry out electrical troubleshooting.
Fault symptom 3
The exhaust brake functions, but not the compression brake
Probable fault:
•
•
•
•
•
No control signal to the compression brake control
valve
Defective temperature sensor or diode
Defective control valve or control valve plunger stuck
No ground at coolant temperature switch
Drain channel is clogged
•
•
•
•
Low control pressure supplied to the EPG
Leaks in the exhaust manifold gaskets
Exhaust pressure governor seizing
Defective or leaking exhaust pressure governor
Carry out mechanical troubleshooting.
Fault symptom 6
Poor braking effect from the engine brake (exhaust
brake and compression brake)
Probable fault:
•
•
•
•
•
•
Low control pressure supplied to the EPG
The control valve gives too low oil pressure
Defective non-return valve in one or more of the
rocker arms
Defective pressure limiting valve in one or more of
the rocker arm plungers
The exhaust brake functions poorly or not at all
Exhaust valve clearance is too large
See the procedures in “Low Engine Braking Effect
(VEB)” page 21.
Fault symptom 7
The compression brake engages but will not disengage
If the compression brake remains engaged with full effect even though the accelerator pedal is depressed, this
is due to the control valve plunger remaining in the”VEB
position”and directing full system oil pressure out to the
rocker arms.
Carry out electrical troubleshooting.
If the fault remains:
Carry out mechanical troubleshooting.
Fault symptom 4
The compression brake functions, but not the exhaust brake
Probable fault:
•
•
•
•
•
•
No or low air pressure supplied to the EPG
No control signal to the exhaust pressure governor
solenoid valve
Defective solenoid valve
Defective exhaust pressure governor
Defective quick-release valve
Air leakage
Do not depress the clutch pedal unless necessary.
Engine may stop if compression brake stays engaged.
This will result in loss of power steering assistance.
If the compression brake only partly disengages, it is
most probable that one of the rocker arm plungers has
locked in its outer position. With this fault, the engine
runs unevenly due to low compression pressure in the
cylinder where the rocker arm plunger has stuck.
The fault generates one of the fault codes 31–36, as the
control unit compensates for the loss of power in the
cylinder by increasing the amount of fuel delivered to the
cylinder through the unit injector. When the maximum
amount of fuel delivered by the unit injector can not compensate for the loss of power in the cylinder, the fault
code is generated.
Carry out electrical troubleshooting.
Carry out mechanical troubleshooting.
If the fault remains:
Carry out mechanical troubleshooting.
Note: Fault codes 31–36 can also be generated by an
electrical fault in the fuel system.
20
Group 25
Troubleshooting
Low Engine Braking Effect (VEB)
Test-driving and Measuring
Note: Before carrying out the following procedure, read
the troubleshooting general information in “Engine Brake,
Fault Tracing” page 15.
To obtain good test results, the exhaust pressure governor should be disabled when checking the function of
the compression brake.
Check Before the Test:
• That the conditions for exhaust braking and com•
•
•
pression braking are satisfied.
That the general condition of the engine is good.
That the engine has normal oil pressure.
That both the engine brake systems are functioning.
•
Route the 36-pin breakout box into the cab and secure.
•
Make sure the engine brake switch is OFF.
•
Bridge terminals 2 and 11 of the 36-pin breakout
box.
Check that both the exhaust brake and engine brake are
functioning by test-driving the truck.
•
Set the engine brake switch to OFF.
•
Drive the truck downhill, fully release the accelerator
pedal and set the switches to ON/LOW positions.
If the engine sound does not alter and/or there is no
braking effect, the exhaust brake does not function.
If the engine sound changes and there is a noticeable braking effect, the exhaust brake does function.
Set the switches to ON/HI positions.
•
If no difference can be noted in the sound or in the
braking effect, the compression brake does not
function.
•
If the engine sound changes and there is a noticeable braking effect, the compression brake does
function.
Check that the valve clearances are within the tolerance
range.
Test Equipment, Installation
1
Install the equipment for measuring the oil pressure in
the rocker arm shaft according to the instructions in “Oil
Pressure, Compression Brake, Checking” page 36.
2
Set the control switches to the OFF position (VEB disabled). Start the engine and measure the rocker arm
shaft oil pressure. The pressure should be approximately
1 bar (14.5 psi).
If the pressure fluctuates or is under 0.5 bar (7.25 psi) or
over 1.5 bar (21.75 psi), the control valve is faulty.
Note: Low oil pressure in the rocker arm shaft may also
be due to excessive wear in the rocker arm bushings and
/or the rocker arms which result in excessive oil pressure
loss. See “Rocker Arm Roller, Checking” page 46.
3
Install the equipment for measuring the exhaust gas
temperature, including the 36-pin breakout box. See
“Exhaust Temperature, Checking” page 40.
When terminals 2 and 11 of the 36-pin breakout box
are bridged, the compression brake will activate anytime the VEB control switch is in the ON position,
regardless of status. The compression brake will remain ON until the control switch is moved to the OFF
position. While the engine brake is activated, do not
depress the accelerator or clutch. If the accelerator is
depressed, engine damage may result. If the clutch is
depressed a loss of power steering assist may occur.
Be prepared to switch off the engine brake at any time.
Failure to do so may result in personal injury or death.
When operating a vehicle on streets and highways,
during data collection procedure, it is mandatory to
have a second person drive while a technician collects the data.
When engine braking, the exhaust gas temperature increases on those cylinders where the compression brake
functions.
On the cylinder(s) where there is little or no braking effect there is very little exhaust gas temperature increase,
thus, the cylinder which gives a very low or no braking
effect can be identified.
Note: The temperature difference between cylinders is
not important when performing this test. Only note the
difference in temperature at the beginning and end of the
engine braking function on each individual cylinder.
For the measurement to be valid, select gears, speed
and section of road where the braking procedures can
be carried out continuously and without interruption.
Select a long, at least 1.2 mile (2 km), downhill section
of road, where the engine braking procedures can be
carried out without reducing the speed of the truck.
The truck should be loaded and the road conditions
clear.
Make sure that the engine brake switch(es) on the instrument panel are in the OFF position, until ready to
perform the test at the test location.
21
Group 25
Troubleshooting
Voltage supply to the measuring instrument is provided
by the cigarette lighter socket and the purpose of the instrument back-up mode is to prevent stored information
being lost if the external voltage supply is temporarily
broken.
3
When the external voltage supply is broken, the display
lighting goes out and the text begins to flash. If this occurs during measuring, the stored values are retained
and the measurement procedure can continue when the
instrument voltage supply is restored.
The instrument can store 10 measurement values.
The first measurement value is stored as value A, the
second measurement value is stored as value B, the
third as value C etc.
The instrument can also calculate the difference between
two measurement values, for example B – A, D – C, etc.
T2008019
Note: It is not possible to carry out measurements or
store measurement values when the instrument is in the
back-up mode.
Press
one more time.
The display should now show six temperature values,
one for each cylinder, with no. 1 cylinder shown on the
extreme left of the display.
The instrument will now measure temperature continuously.
Brake Test
4
1
Accelerate the truck and select a gear that enables you
to hold a stable engine speed of approximately 1400
RPM when the accelerator pedal is completely released
(idle position).
(Use the service brakes as an aid in holding a stable engine speed, as this procedure is to be performed with
the engine brake OFF.)
T2008010
Check that the measurement instrument display shows
the text Temperature.
2
T2008011
once.
Press
The display should now show the text Temp. Display.
*
22
*
Group 25
Troubleshooting
5
7
T2008013
T2008012
•
•
•
Completely release the accelerator pedal (idle position).
While viewing the measurement instrument, wait for
the exhaust gas temperature to drop and begin to
stabilize.
Press
*
once.
The measurement value designation A is shown for
approximately 1 second on the display and is a confirmation that the value is registered and stored.
•
View the measurement instrument, wait for the temperature to rise and begin to stabilize.
•
Press
*
once.
The measurement value designation B is shown for
approximately 1 second on the display and is a confirmation that the value is registered and stored.
The measurement instrument then returns automatically
to continuous measurement.
The measurement instrument then returns automatically
to continuous measurement and shows six measurement values, one for each cylinder.
Carry out the brake test and measurements at least
three times to obtain a valid result.
6
Note: Remember the engine brake will remain active until switched OFF.
Store the measurement values by pressing
When terminals 2 and 11 of the 36-pin breakout box
are bridged, the compression brake will activate anytime the VEB control switch is in the ON position,
regardless of status. The compression brake will remain ON until the control switch is moved to the OFF
position. While the engine brake is activated, do not
depress the accelerator or clutch. If the accelerator is
depressed, engine damage may result. If the clutch is
depressed a loss of power steering assist may occur.
Be prepared to switch off the engine brake at any time.
Failure to do so may result in personal injury or death.
*
.
The instrument can store 10 measurement values (the
results from 5 measurements of Low / High temperatures per cylinder).
Set the engine brake switches to ON/HI. Read the rocker
arm shaft oil pressure on the pressure gauge when the
pressure has stabilized.
Note the value.
23
Group 25
Troubleshooting
8
10
T2008011
When a sufficient number of measurements have been
carried out, set the engine brake switch(es) to the OFF
position and remove the bridge between terminals 2 and
11 at the 36-pin connector.
pressed in (approximately 2 seconds) until the
Hold
text Temp. Display is shown on the display.
*
9
T2008021
Press
and the first stored measurement value is displayed. The identification letter A appears before the
measurement value.
*
or
By pressing
values on the display.
it is possible to view all the
again, the measurement value stored afBy pressing
ter the letter B is displayed.
*
T2008014
Press
until the text Temp. Evaluation is shown on
the display.
24
Group 25
Troubleshooting
11
13
The results from the third, and if necessary, the fourth
and fifth measurements are produced in the same way
as with measurements one and two.
By pressing , it is possible to move between 10 measurement values and 5 differences.
*
14
Note the measurement results and remember that a fully
charged back-up battery retains the stored measurement
values in the instrument for max. 20 minutes after the
external voltage supply has been broken. If possible, do
not break the voltage supply to the instrument before all
the measurement results have been noted.
T2008022
By pressing
again, the difference between measurement values B and A is shown.
*
or
By pressing
values on the display.
15
it is possible to view all the
Note: If the first measurement value is greater than the
second, the difference between the values will be shown
as a minus value on the display.
12
T2008015
Hold
pressed in (approx. 2 seconds), when all measurement results have been noted, until the text Temp.
Evaluation is shown on the display.
*
16
T2008020
Press
*
once.
The first stored value from the second measurement
(value C) is shown on the display.
one more time, the measurement value
By pressing
stored after the letter D is displayed.
*
again, the difference between measureBy pressing
ment values D and C is shown.
*
T2008023
Press
play.
until the display shows the text Temp. Dis25
Group 25
Troubleshooting
Evaluation of the Brake Test
17
When the switch(es) are moved from position OFF to positions ON/HI, the oil pressure in the rocker arm shaft
should rise to min. 2 bar (29 psi).
If the oil pressure does not exceed 2 bar (29 psi), the
control valve is faulty.
Note: Low oil pressure in the rocker arm shaft may also
be due to excessive wear in the rocker arm bushing
and/or rocker arms which result in excessive oil pressure
loss. See “Rocker Arm Roller, Checking” page 46.
The temperature increase for each individual cylinder
should be between 90 C and 130 C (194 F and 266 F)
in order to be certain that the compression brake on
each cylinder is functioning properly.
T2008024
By holding
pressed in for approximately 2 seconds
until the display shows the text Temperature, the instrument leaves the back-up mode and all the stored
measurement values are cleared.
If there is no temperature increase, or if the temperature
increase is less than 80 C (176 F) on any individual
cylinder, the compression brake on that cylinder is not
functioning properly.
Note: Make sure that the values are noted before
the instrument is set in position Temperature.
If the result of a test is not clear, the test must be
repeated. At least three tests should be carried out in order to obtain valid results.
*
18
Disconnect the electrical plug for the external voltage
supply.
Note: Switch the instrument off by holding
pressed in
for approx. 2 seconds when the display shows the text
Temp. Evaluation or Temp. Display, after the external
supply contact has been broken.
*
Do not leave the instrument in battery back-up mode.
The battery will discharge very quickly if the external
voltage supply is broken and the instrument has to rely
on battery back-up.
19
Evaluate the test.
The measured exhaust gas temperature varies between
the cylinders, depending on the position of the cylinders.
The cylinders that are positioned nearest the turbocharger will have a higher measured value than those
at either end of the cylinder block. This is due to the
temperature sensors also being influenced by the passing air flow from the cylinders furthest away from the
exhaust manifold outlet.
When evaluating the test, this point should also be taken
into consideration.
For example, when comparing cylinders 1 and 6, the
temperature increase should more or less be the same,
providing that the compression brake is functioning properly on both cylinders.
The same comparison can be made between cylinders 2
and 5 and cylinders 3 and 4.
It should be pointed out that it requires repeated brake
testing to be able to obtain an indication that the braking
effect on a cylinder is reduced.
In instances where there is no braking effect on a cylinder, there is also no reference to compare an equivalent
cylinder with.
The less the braking effect is reduced on a cylinder, the
greater the difficulty in identifying the cylinder.
26
Group 25
Troubleshooting
2531-06-02-01
Engine Brake, Checking
Before working on a vehicle, set the parking brakes,
place the transmission in neutral, and block the
wheels. Failure to do so can result in unexpected vehicle movement and can cause serious personal
injury or death.
WARNING
HOT ENGINE! Keep yourself and your test equipment
clear of all moving or hot engine parts. A hot engine
can cause serious burns or can permanently damage
test equipment.
Note: Before carrying out the following procedure, read
the troubleshooting general information in “Engine Brake,
Fault Tracing” page 15.
Special tools: J–39200 Fluke 87 Multimeter
Measurement 1
3
Set Multimeter to measure Amps and
connect it to terminals 2 and 11 on the
36–pin breakout box. This supplies
battery voltage and measures current
draw to the brake circuit (exhaust
brake only).
4
An audible ”click” should be heard
from the exhaust brake solenoid valve
when the multimeter is connected.
5
If no ”click” is heard from the exhaust
brake solenoid valve, and the exhaust
brake measurement 1 results were
OK, replace the HI/LO switch. Otherwise, proceed to step 6.
6
Disconnect the connector on the exhaust brake solenoid valve.
7
Bridge terminals 3 and 10 on the
breakout box.
1
8
Set Multimeter to measure Amps and
connect it to terminals 2 and 11 on the
36–pin breakout box.
9
A faint ”click” should be heard from the
compression brake solenoid valve
when the multimeter is connected.
W2002218
Move the switch(es) on the instrument
panel to ON/HI (exhaust brake and
compression brake, VEB) positions.
2
Bridge terminals 3 and 10 on the
breakout box. Doing so energizes the
EECU power supply relay by providing
a ground to the coil side of the relay.
Note: Coolant temperature should be
above 43 C (110 F), otherwise VEB
coolant switch must have a jumper
wire installed.
10
The multimeter should show 0.525
Amp.
11
If no ”click” is heard from the compression brake solenoid valve, or if the
multimeter does not show the value
0.525 Amp, carry out Measurement 2.
27
Group 25
Troubleshooting
Measurement 2
Measurement 4
1
Bridge terminals 2 and 11 on the 36–
pin breakout box.
1
Set Multimeter to measure Voltage.
2
Disconnect the 2-pin connector at the
exhaust brake solenoid valve and connect the J–42472 breakout harness
between the solenoid valve and the
wiring harness.
3
Set multimeter to measure Voltage
and connect it to pins 1 and 2 on the
compression brake connector at the
upper timing gear cover.
Intended value: B+
4
If the intended value is correct, remove the valve cover and carry out
Measurement 3.
5
If the intended value is not correct,
carry out Measurement 4.
Measurement 3
1
Set multimeter to measure Ohm ( ).
2
Measure between 1 and 2 on the compression brake solenoid valve.
Intended value: 20± 2
3
If the intended value is correct, check
the cables between the compression
brake solenoid valve and the connector at the upper timing gear cover.
4
If the intended value is not correct, replace the compression brake solenoid
valve.
28
2
Measure between alternate ground
and pin 1 in the connector for the control valve solenoid valve at the upper
timing gear cover.
Intended value: B+
3
If the value is not correct, check the
wire to pin 1 in the connector for the
control valve at the upper timing gear
cover and to pin 2 at the EB connector
including the engine brake switch(es).
Make repairs and retest.
4
If the value is correct, measure between alternate battery supply and pin
2 in the connector for the control valve
solenoid at the upper timing gear
cover.
Intended value: B+
5
If the value is correct, clean and inspect both pins and sockets at the
connector for the control valve solenoid. Repeat measurement 1.
6
If the value is not correct, check the
wire from pin 2 in the connector for the
control valve at the upper timing gear
cover to its ground location, including
compression brake coolant temperature switch.
Group 25
Troubleshooting
2533-06-02-01
Solenoid Valve, Compression
Brake, Checking
Test 1
1
Before working on a vehicle, set the parking brakes,
place the transmission in neutral, and block the
wheels. Failure to do so can result in unexpected vehicle movement and can cause serious personal
injury or death.
Never disconnect an air system component unless all
system pressure has been depleted. Failure to deplete system pressure before disconnecting hoses or
components may result in their violent separation and
can cause serious bodily injury.
T2007704
Remove the valve cover and check
that the plugs in the front and rear end
of the rocker arm shaft are in position.
2
WARNING
HOT ENGINE! Keep yourself and your test equipment
clear of all moving or hot engine parts. A hot engine
can cause serious burns or can permanently damage
test equipment.
WARNING
Always wear appropriate eye protection to prevent the
risk of eye injury due to contact with engine debris or
fluids.
Note: Before carrying out the following procedure, read
the troubleshooting general information in “Engine Brake,
Fault Tracing” page 15.
Special tools: 9998338, 9998339
T2007740
Remove the control solenoid valve and
check that the drain holes in the solenoid valve are not clogged.
3
Check that the drain channel in the
control valve is not clogged.
4
Check that the valve clearances are
within tolerance.
29
Group 25
Troubleshooting
2531-06-02-02
Exhaust Brake, Electronic
Checking
Test 2
1
Note: Before carrying out the following procedure, read
the troubleshooting general information in “Engine Brake,
Fault Tracing” page 15.
Special tools: J–3920 Fluke 87 Multimeter
W2002231
Install the equipment for measuring
the oil pressure in the rocker arm shaft
according to the instructions in “Oil
Pressure, Compression Brake, Checking” page 36.
W2002218
2
Test-drive the vehicle and allow it to
reach operating temperature.
3
Activate the engine brake by making
sure the switch(es) on the instrument
panel are in the ON/HI position and
the conditions for engine braking are
satisfied.
4
When the oil pressure has stabilized
record the gauge reading during engine brake operation.
The pressure should be at least 2 bar
(29 psi).
5
Repeat the test a number of times to
confirm the measurement reading.
6
Replace the control valve if the measured pressure is below 2 bar (29 psi)
and the rocker arms, nozzles for lubricating the ball sockets, bushings and
other components on the rocker arm
bridge are not damaged.
30
Measurement 1
1
Move the switch(es) on the instrument
panel to ON/LOW (exhaust brake only)
positions.
2
Bridge terminals 3 and 10 on the
breakout box. Doing so energizes the
EECU power supply relay by providing
a ground to the coil side of the relay.
3
Set Multimeter to measure Amps and
connect it to terminals 2 and 11 on the
36–pin breakout box. This supplies
battery voltage and measures current
draw to the brake circuit (exhaust
brake only).
4
An audible ”click” should be heard
from the exhaust brake solenoid valve
when the multimeter is connected.
5
The multimeter should show 0.7 ± 0.1
Amp.
Group 25
Troubleshooting
6
If no ”click” is heard from the exhaust
brake solenoid valve, or if the multimeter does not show the value 0.7 ± 0.1
Amp, proceed to the next measurement.
4
If the intended value is not correct,
check the wire between pin 1 in the
connector for the exhaust brake solenoid valve and pin 2 at connector EB,
including the engine brake switch(es).
Measurement 2
Measurement 4
1
Bridge terminals 2 and 11 on the 36–
pin breakout box in addition to the
connections in measurement 1.
1
Note: A functional diode allows current to flow in one direction only.
Connect the J-42472 2-pin breakout
harness to the exhaust brake solenoid
only.
2
Disconnect the 2-pin connector at the
exhaust brake solenoid valve and connect the J–42472 breakout harness
between the solenoid valve and the
wiring harness.
3
Set multimeter to measure Voltage.
Measure between pins 1 and 2 on the
breakout harness. Intended value: B+
(battery positive voltage ~12V).
4
If the intended value is correct, replace
the exhaust brake solenoid valve.
5
If the intended value is not correct,
carry out Measurement 3.
Measurement 3
1
Set multimeter to measure Voltage.
2
Measure between alternate ground
and pin 1 in the breakout harness.
Intended value: B+
3
If the intended value is correct, check
the cable from pin 2 in the connector
for the exhaust brake solenoid valve to
ground.
Note: Do not connect to the engine
harness.
2
Select the diode test on the Fluke 87
or equivalent multimeter.
3
Touch the red probe to the positive
side of the diode (pin 1 of the J-42472
breakout harness) and the black probe
to the negative side of the diode (pin 2
of the breakout harness).
4
If the diode is good, the voltage drop
should typically be 0.5 V to 0.8 V.
5
Reverse the probes and measure the
voltage across the diode again. If the
diode is good, the display will show
OL (overload).
6
If the display shows 0.00 in both directions, the diode is shorted. If the
display shows OL in both directions,
the diode is open. Replace the
solenoid. See “Solenoid Valve, Compression Brake, Replacement” page
51.
31
Group 25
Troubleshooting
2531-06-02-03
Exhaust Brake, Mechanical
Checking
Before working on a vehicle, set the parking brakes,
place the transmission in neutral, and block the
wheels. Failure to do so can result in unexpected vehicle movement and can cause serious personal
injury or death.
2
Verify correct air regulator valve is
used with the proper system. The exhaust brake requires the 7.5 bar
regulator, while the EPG utilizes a 2.3
bar regulator.
3
WARNING
HOT ENGINE! Keep yourself and your test equipment
clear of all moving or hot engine parts. A hot engine
can cause serious burns or can permanently damage
test equipment.
WARNING
W2002198
Always wear appropriate eye protection to prevent the
risk of eye injury due to contact with engine debris or
fluids.
Note: Before carrying out the following procedure, read
the troubleshooting general information in “Engine Brake,
Fault Tracing” page 15.
Special tools: 9996465, 9998333
Test 1
VN solenoid location — other vehicles have
solenoids located on bulkhead
Connect the J–42472 2-pin breakout
harness to the exhaust brake solenoid
valve, using 2 jumper wires with
“alligator” type ends, supply the solenoid with an alternate ground and B+
and listen to hear if the exhaust pressure governor shutter moves.
Note: Make sure that pin 1 of the J–
42472 is connected to B+ and pin 2 is
connected to B-.
1
4
W2002234
1 EPG solenoid (cold mode)
2 Exhaust brake solenoid
Verify proper wiring to solenoids. Wire
628 to the exhaust brake solenoid and
wire 636k to the exhaust pressure
governor (EPG) solenoid.
32
T2007700
If the exhaust pressure governor shutter moves, carry out test 3.
Group 25
Troubleshooting
Test 2
5
1
Check that the air hoses are not
twisted or blocked.
Replace damaged hoses.
2
T2007701
If the exhaust pressure governor shutter does not move, remove the air
hose from the exhaust pressure governor and activate the exhaust brake
solenoid valve again.
T2007953
6
If no air comes out of the hose, carry
out Test 2.
If air comes out of the hose, carry out
Test 3.
Remove the air hose from the quick
release valve and activate the exhaust
brake solenoid valve.
If air comes from the hose, the quick
release valve is faulty and should be
replaced.
3
If no air comes out of the hose, check
that air reaches the exhaust brake solenoid valve.
If air reaches the exhaust brake solenoid valve, the valve is faulty and
should be replaced.
4
If no air reaches the exhaust brake solenoid valve, check that air reaches the
regulator valve for the exhaust brake
solenoid. If no air reaches the air regulator valve, check or replace the air
supply hose. If air reaches the air regulator valve, then the air regulator
valve is faulty and should be replaced.
33
Group 25
Troubleshooting
Test 3
Test 4
1
1
Check that the hoses are not twisted
or blocked.
Replace damaged hoses.
999 6465
999 8333
2
T2007707
Connect the pressure gauge to the exhaust pressure governor hose and
activate the exhaust brake solenoid
valve.
Note: The pressure in the hose should
be 7.5 ± 0.3 bars (109 ± 4.4 psi).
2
If the
carry
If the
carry
pressure is too high or too low,
out Test 4.
pressure is within the tolerances,
out Test 5.
999 6465
999 8333
W2002211
1 EPG solenoid (cold mode)
2 Exhaust brake solenoid
Solenoids are located on the bulkhead; VN vehicles
have solenoids mounted on the engine
Remove the hose from the exhaust
brake solenoid valve and measure the
output pressure. The pressure should
be 7.5 ± 0.3 bars (109 ± 4.4 psi).
Never disconnect an air system component unless all
system pressure has been depleted. Failure to deplete
system pressure before disconnecting hoses or components may result in their violent separation and can
cause serious bodily injury.
3
If the pressure is within the tolerances,
the quick release valve is faulty and
should be replaced.
34
Group 25
Troubleshooting
Test 5
4
1
Remove the exhaust pipe from the
shutter housing.
2
W2002212
If the pressure is too high, go to step 4.
If the pressure is too low, go to step 5.
Note: Trucks with a higher system
pressure than 7.5 bar (109 psi) are
equipped with an adjustable reduction
valve to reduce the pressure to the exhaust pressure governor.
5
Adjust the valve setting to specified
pressure. If pressure will not respond
to adjustment, replace regulator. After
adjustment, the knob on the valve
should be sealed or made tamper
proof.
6
Check the outlet pressure of the regulator going to the exhaust brake
solenoid.
Intended value: 752 ± 30 kPa (109 ±
4.4 psi)
7
Pressure OK:
•
•
Restriction in line from regulator
valve to exhaust brake solenoid.
(VN series)
Faulty solenoid.
W2002189
Measure the opening between the
shutter disk and shutter housing (A),
to check that the EPG shutter has not
jammed in the closed or half-closed
position.
The value (measurement A) should
be 30 ± 2 mm (1.18 ± .08 in).
3
If the value is correct, replace or overhaul the EPG in accordance with the
procedures found in:
Service
Manual
V776–250–600SM
Intake and Exhaust
Systems, VE D12
4
Activate the exhaust brake solenoid
valve.
8
Pressure not OK:
•
•
Regulator valve out of adjustment
or faulty.
Insufficient supply pressure.
35
Group 25
Troubleshooting
2533-06-02-02
Oil Pressure, Compression
Brake, Checking
5
Before working on a vehicle, set the parking brakes,
place the transmission in neutral, and block the
wheels. Failure to do so can result in unexpected vehicle movement and can cause serious personal
injury or death.
T2007703
Check if the exhaust pressure governor shutter seals against the shutter
housing.
6
If the shutter does not seal against the
housing, replace or overhaul the exhaust pressure governor according to
the procedures found in:
Service
Manual
V776–250–600SM
Intake and Exhaust
Systems, VE D12
7
If the shutter seals against the housing, remove the exhaust pressure
governor and check the shutter and
shutter housing.
36
Never disconnect an air system component unless all
system pressure has been depleted. Failure to deplete system pressure before disconnecting hoses or
components may result in their violent separation and
can cause serious bodily injury.
WARNING
HOT ENGINE! Keep yourself and your test equipment
clear of all moving or hot engine parts. A hot engine
can cause serious burns or can permanently damage
test equipment.
WARNING
Always wear appropriate eye protection to prevent the
risk of eye injury due to contact with engine debris or
fluids.
Group 25
Troubleshooting
(Measured at rocker shaft.)
4
Special tools: 9998338, 9998339, J–41203
(Kent Moore)
Installation
1
Set the parking brake.
2
T2008278
T2006731
Remove the valve cover.
Note: With older engines avoid
damage to the valve cover and internal
injector cable harness by making sure
the mounting screws do not unscrew
from the cylinder head during removal.
Do not use impact tools to remove the
nuts securing the valve cover.
Reinstall the front bolt without the
spring washer. Install bolt 9808001
with connector 9998338 into the rear
bolt hole and tighten both bolts.
9998338
Note: Bolt 9808001 must be used. It
has been modified and is shorter than
the previous version and does not use
a sleeve.
5
3
Remove the valve cover stud located
between no. 4 and 5 injector solenoids.
J-41203
Note: Use Kent Moore tool J–41203 to
remove the stud on earlier D12 engines.
T2008279
Remove the bolts retaining the rocker
arm bridge between cylinders 4 and 5.
Remove the spring washer.
37
Group 25
Troubleshooting
6
9
W2002200
Install the seal for the oil pressure
hose into the hole in the valve cover.
Make sure the seal fits into the stud
hole in the valve cover.
W2002199
Route the oil pressure hose through
the hole in the valve cover where the
stud has been removed. Connect the
oil pressure hose to connector
9998338.
10
Note: Check that connector 9998338
and the oil pressure hose do not obstruct the rocker arms. If necessary,
use cable ties to prevent the oil pressure hose from being damaged by the
rocker arms.
7
Install the valve cover and make sure
the oil pressure hose does not interfere
with any part of the valve mechanism.
8
W2002213
Route the oil pressure hose into the
cab as shown. Install pressure gauge
9998339
Note: Secure the oil hose with cable
ties to prevent kinks that would restrict
flow.
T2007003
Tighten the valve cover nuts to
30 ± 3 Nm (22 ± 2 ft-lb). Follow the
tightening sequence shown.
38
30 ± 3 Nm
(22 ± 2 ft-lb)
9998339
Group 25
Troubleshooting
Testing
Removal
1
Set the control switches to the OFF
position (VEB disabled). Start the engine and measure the rocker arm shaft
oil pressure. The pressure should be
approximately 1 bar (14.5 psi).
1
Set the parking brake. Remove the
pressure gauge and oil pressure hose
from the cab. Cut the oil hose free
from the cable ties and disconnect the
pressure gauge.
2
If the pressure fluctuates or is under
0.5 bar (7.25 psi) or over 1.5 bar
(21.75 psi), the control valve is faulty.
2
Note: Low oil pressure in the rocker
arm shaft may also be due to excessive wear in the rocker arm bushings
and/or the rocker arms which result in
excessive oil pressure loss. See
“Rocker Arm Roller, Checking” page
46.
T2006731
Remove the valve cover.
3
Install the equipment for measuring
the exhaust gas temperature, including
the 36-pin breakout box. See “Exhaust
Temperature, Checking” page 40.
CAUTION
With older engines avoid damage to the valve cover
and internal injector cable harness by making sure the
mounting screws do not unscrew from the cylinder
head during removal. Do not use impact tools to remove the nuts securing the valve cover.
3
Remove the oil pressure hose from
connector 9998338. Pull the oil pressure hose through the valve cover and
remove the oil seal.
4
T2007708
Remove connector 9998338 and bolt
9808001 from the rocker arm shaft. Install the spring washer and the two
rocker arm bridge bolts.
39
Group 25
5
Tighten the rocker arm bridge bolts in
two steps:
1 Torque to 15 Nm (11 ft-lb).
2 Tighten both bolts an additional
90 .
6
Clean the threaded hole in the cylinder
head where the valve cover stud was
removed. Clean the valve cover stud
bolt and apply locking fluid. Torque the
stud to 48 ± 8 Nm (35 ± 6 ft-lb).
Troubleshooting
15 Nm
(11 ft-lb)
2515-06-02-01
Exhaust Temperature, Checking
Before working on a vehicle, set the parking brakes,
place the transmission in neutral, and block the
wheels. Failure to do so can result in unexpected vehicle movement and can cause serious personal
injury or death.
J-41203
48 ± 8 Nm
(35 ± 6 ft-lb)
Carefully remove any excess locking
fluid after the stud bolt has been tightened.
WARNING
HOT ENGINE! Keep yourself and your test equipment
clear of all moving or hot engine parts. A hot engine
can cause serious burns or can permanently damage
test equipment.
Note: Use Kent Moore tool J-41203 on
early D12 engines to torque the stud.
7
Press the electronic cable clamp onto
the stud bolt.
WARNING
Always wear appropriate eye protection to prevent the
risk of eye injury due to contact with engine debris or
fluids.
Note: The electronic cable must be
positioned on the outside of the valve
cover studs.
Special tools: 9998190, 9998342, 9998364,
J–41132
8
Install the valve cover.
Installation
9
1
Set the parking brake.
2
T2007003
Tighten the valve cover nuts to
30 ± 3 Nm (22 ± 2 ft-lb). Follow the
tightening sequence shown.
30 ± 3 Nm
(22 ± 2 ft-lb)
10
Test run engine and check for oil leaks.
W2002214
Disconnect the pipe from the air compressor and remove the intake pipe
between the air cleaner and turbocharger.
40
Group 25
Troubleshooting
3
Remove bolts and spacers fastening
the heat shield to the exhaust manifold.
7
4
Disconnect the air compressor discharge line and lay aside.
5
Unbolt the oil supply line at the turbo
only.
T2008047
6
Insert the temperature sensors between the exhaust manifold and the
cylinder head.
Insert the temperature sensors far
enough that the guide pins are against
the edge of the exhaust manifold.
9998342
Note: The temperature sensors are
numbered from one to six for the respective cylinders.
Make sure that the sensors are installed to the correct cylinders.
The sensors can be installed on either
side of the gasket.
(The gaskets are replaced after the
test.)
T2007719
Loosen the exhaust manifold bolts just
enough so that some threads remain
in the cylinder head.
8
Tighten the exhaust manifold bolts.
9
Tighten the oil supply line at the turbo.
10
Connect the air compressor discharge
line.
11
Secure the temperature sensor cables
with cable ties away from the exhaust
manifold and to avoid damage during
testing.
Route the cables into the cab for connection to the measuring instrument.
12
Install the intake pipe between the air
cleaner and the turbocharger. Connect
the pipe to the air compressor.
41
Group 25
13
Make sure that the ignition key is in
the OFF position.
Troubleshooting
17
14
Clean the area around the EECU and
harness connectors.
15
Disconnect the EB harness (lower harness) from the EECU and connect the
36-pin breakout box between the EB
harness and the EECU.
Make sure the harness connectors are
properly pressed together. Do not
force the connectors together.
16
Route the 36-pin breakout box into the
cab and secure.
W2002215
1 EPG solenoid wiring harness
2 Exhaust brake solenoid wiring harness
Remove the connector from the exhaust brake solenoid valve.
Note: A more reliable measurement
result is obtained when the exhaust
brake is disabled.
When terminals 2 and 11 of the 36-pin breakout box
are bridged, the compression brake will activate anytime the VEB control switch is in the ON position,
regardless of status. The compression brake will remain ON until the control switch is moved to the OFF
position. While the engine brake is activated, do not
depress the accelerator or clutch. If the accelerator is
depressed, engine damage may result. If the clutch is
depressed a loss of power steering assist may occur.
Be prepared to switch off the engine brake at any time.
Failure to do so may result in personal injury or death.
Measurement instrument 9998190
1
T2008016
Check that the correct program unit is
installed in measurement instrument
9998190.
Note: When temperature measuring,
program unit 9812327 is required.
42
9998190
9812327
Group 25
Troubleshooting
2
2
T2008010
T2008017
Connect the collation unit electrical cable to the cigarette lighter socket and
turn the ignition key to ”ON” position.
Make sure that a back-up battery is installed in measurement instrument
9998190.
The back-up function is there to make
sure that the stored information is not
lost in the event of a temporary loss of
supply voltage.
Note: Check that the text Temperature is shown on the measurement
instrument display.
The measurement instrument automatically selects the temperature
measurement function when the collation unit is connected.
With a fully charged battery, the stored
values in the instrument are retained
for max. 20 minutes after the external
voltage supply has been broken. Always make sure that the battery is
fully charged when temperature measurement is to be carried out.
Note: Only use a 9 Volt rechargeable
nickel-cadmium battery in the measurement instrument.
Collation unit 8364
1
T2008018
Connect the collation unit to the measurement instrument and plug in the
numbered electrical connectors from
the temperature sensors to the numbered positions in the collation unit
connection panel.
9998364
43
Group 25
Troubleshooting
Removal
1
Set the parking brake. Take the measurement instrument and temperature
sensor electrical cables out of the cab.
2
Remove the cable ties and the electrical sensor cables.
CAUTION
In order to prevent personal injury, always wear safety
glasses when working with compressed air.
10
Remove the 2 bolts fastening the oil
drain back tube to the turbo.
3
Disconnect the pipe from the air compressor and remove the intake pipe
between the air cleaner and turbocharger.
11
Remove the 4 bolts mounting the
turbo to the exhaust manifold and lift
off the turbo.
4
Remove the 4 mounting bolts and lift
away the air filter housing.
12
Remove the exhaust manifold mounting bolts and lift the manifold away
from the engine.
5
Disconnect the oil supply line to the air
compressor at the oil filter housing
and remove the line clamp.
13
Remove all of the temperature sensors.
Note: Cover the fitting and the end of
the line to keep out any debris.
14
6
Remove the 2 bolts attaching the
lower charge air cooler pipe to the
turbo and the bolt supporting the lower
end of the pipe.
7
Pry the charge air cooler pipe away
from the turbo and remove the end
adapter for more clearance.
8
Remove the shutter housing turbo
clamp. Move the shutter housing away
from the turbo and let it rest on the
frame.
9
Blow all debris away from the area
where the turbocharger oil supply line
enters the oil filter base. Remove the 2
bolts fastening the supply line to the
turbocharger and remove the line.
Note: Cover the open hole in the oil
filter base to prevent debris from
entering.
44
T2007717
Clean the cylinder head and exhaust
manifold contact surfaces.
Blow clean with compressed air.
Group 25
Troubleshooting
15
17
W2002224
Tighten all the exhaust manifold bolts
to a torque of 48 ± 8 Nm
(35 ± 6 ft-lb).
48 ± 8 Nm
(35 ± 6 ft-lb)
Use the torque tightening sequence
shown.
T2007718
Glue the new gaskets onto the exhaust manifold with the correct side
facing the manifold.
Note: The marking ”MANIFOLD SIDE”
should be turned toward the exhaust
manifold.
16
18
Note: Make sure that all gasket surfaces on the turbocharger are free of
gasket material and clean. Make sure
that there is nothing inside the exhaust
manifold or air piping e.g. debris from
a previous failure.
Install the turbocharger with a new
mounting gasket onto the exhaust
manifold. Torque mounting nuts to
48 ± 8 Nm (35 ± 6 ft-lb).
19
Position the shutter housing and
exhaust piping onto the rear of the turbocharger. Install clamp and torque to
24 ± 2 Nm (18 ± 2 ft-lb).
20
Connect the oil return tube (using a
new gasket) to the turbocharger.
Torque bolts to 24 ± 4 Nm
(18 ± 3 ft-lb).
48 ± 8 Nm
(35 ± 6 ft-lb)
24 ± 2 Nm
(18 ± 2 ft-lb)
24 ± 4 Nm
(18 ± 3 ft-lb)
T2007724
Install 2 alignment dowels in the cylinder head to help position the manifold.
Install the exhaust manifold and the
corresponding bolts.
Note: Make sure that the sleeves are
properly positioned in the counterbore
of the manifold flange.
21
Install the oil supply tube with a new
seal and gasket. Torque bolts to
24 ± 4 Nm (18 ± 3 ft-lb).
24 ± 4 Nm
(18 ± 3 ft-lb)
Note: Make sure the port in the oil filter housing for the oil supply tube and
seal assembly is clean and smooth,
also before installing the supply tube,
pre-lubricate the turbo with clean engine oil.
45
Group 25
22
Connect the lower charge air cooler
pipe and adapter with new O-ring
seals to the turbo. Install and torque
the 3 charge air cooler pipe support
bolts to 24 ± 4 Nm (18 ± 3 ft-lb).
Troubleshooting
24 ± 4 Nm
(18 ± 3 ft-lb)
2145-06-02-02
Rocker Arm Roller, Checking
Before working on a vehicle, set the parking brakes,
place the transmission in neutral, and block the
wheels. Failure to do so can result in unexpected vehicle movement and can cause serious personal
injury or death.
Note: To make installation easier, apply a soapy solution to the O-rings
prior to installation.
23
Connect the air compressor oil supply
line and support clamp. Torque the
clamp bolt to 24 ± 4 Nm (18 ± 3 ft-lb).
24
Install the heat shield and all of the air
compressor discharge line support
brackets. Connect the discharge line
to the air compressor. Torque the heat
shield bolts to 48 ± 8 Nm (35 ± 6 ft-lb).
24 ± 4 Nm
(18 ± 3 ft-lb)
Special tools: 9996956
Other special equipment: 9989876, 9999696
1
48 ± 8 Nm
(35 ± 6 ft-lb)
25
Install the air filter housing and all air
piping.
26
T2006672
Install the cranking tool and rotate the
flywheel around until the camshaft is
in a position where the rocker arm
roller is not resting on any of the
camshaft lobes.
2
Check that there is a gap between the
rocker arm roller and the camshaft.
3
W2002216
Attach the connector to the exhaust
pressure governor solenoid valve.
27
Remove the 36-pin breakout harness
and reconnect the EB harness connector to the EECU.
T2007948
Rotate the roller a number of turns to
disperse the oil film between the bushing and shaft.
Note: If the roller seizes, the rocker
arm must be replaced.
46
9996956
Group 25
Troubleshooting
4
6
T2007949
Install a dial indicator on a magnetic
base and position the magnetic base
as level as possible on the rocker arm.
Adjust the dial indicator probe horizontally against the center of the roller.
Set the dial indicator to zero.
Note: Check that the dial indicator
measuring probe is pre-loaded and
permits movement in both directions.
5
9999876
9999696
T2007951
Using a blunt object, press the roller
inwards as far as possible and read
the measurement value on the dial indicator.
Max. 0.1 mm
(0.004 in)
The max. permitted play between the
bushing and the shaft is 0.1 mm
(0.004 in). If the play is greater, the
rocker arm should be replaced.
7
T2007950
Place a screwdriver between the
rocker arm and roller.
Press out the roller as far as possible
and read the value on the dial indicator.
T2007792
If it is necessary to replace a rocker
arm, lubricate the new rocker arm
bushing with engine oil. Use a manual
pump oil can and insert the nozzle in
the oil channel hole.
Rotate the roller while pumping oil into
the channel hole. Continue until oil
runs out both sides of the roller.
47
48
Group 25
Service Procedures
Service Procedures
2145-04-04-02
Rocker Arm, Overhaul
3
Special tools: 9996716, 9998344
Repair kit: 8148353
1
T2007725
Remove the plunger from the rocker
arm.
T2007727
Press out the ball seat with drift
9998344.
Note: The plunger and rocker arm are
a matched pair and are punch-marked
for identification. They are not to be
mixed when reassembled.
9998344
Note: Press the ball seating out in the
direction as shown.
2
4
Clean and check the rocker arm.
Make sure that all dirt is removed before assembling.
Note: If the rocker arm shaft bushing
or roller is damaged, the complete
rocker arm must be replaced.
T2007726
Carefully heat the rocker arm plugs.
Remove the plugs and take the
springs, plunger, ball and spring guide
out of the rocker arm.
49
Group 25
Service Procedures
5
7
T2007730
Lubricate the non-return valve plunger
with engine oil, check that the plunger
moves easily in the rocker arm and install the spring. Apply one drop of
locking fluid to the threads of the new
plug and install the plug.
T2007728
Use drift 9996716 as a counter-hold in
the hole for the non-return valve
plunger. Lubricate the new ball seat
with gear oil and press in the seat
with drift 9998344 until it bottoms
against the counter-hold.Check the
measurement for the ball seat position
in the rocker arm.
Note: Make sure that the ball seat is
positioned with the ring groove
towards the ball and that no metal particles remain after pressing in the seat.
9996716,
9998344
0± 0.1 mm
(0± 0.003 in.)
Note: Make sure that the plug and
rocker arm threads are clean and dry
before the locking fluid is applied.
Carefully wipe off any excess locking
fluid after the plug is installed.
8
6
T2007725
T2007729
Lubricate the components with engine
oil and install the ball, spring guide
and spring. Apply one drop of locking
fluid to the threads of the new plug
and install the plug.
Note: Make sure that the plug and
rocker arm threads are clean and dry
before the locking fluid is applied.
Carefully wipe off any excess locking
fluid after the plug is installed.
50
Make sure the rocker arm and rocker
arm plunger punch marks are the
same. Lubricate the rocker arm
plunger with engine oil and install it in
the rocker arm.
Note: Place a rubber band around the
rocker arm and plunger to prevent the
plunger from falling out.
Group 25
Service Procedures
2533-03-02-05
Solenoid Valve, Compression
Brake, Replacement
9
Before working on a vehicle, set the parking brakes,
place the transmission in neutral, and block the
wheels. Failure to do so can result in unexpected vehicle movement and can cause serious personal
injury or death.
WARNING
HOT ENGINE! Keep yourself and your test equipment
clear of all moving or hot engine parts. A hot engine
can cause serious burns or can permanently damage
test equipment.
T2007792
Lubricate the journaling for the rocker
arm roller with engine oil. Use a manual pump oil can and insert the nozzle
in the oil channel hole. Rotate the
roller while pumping oil into the channel. Continue until oil runs out both
sides of the roller.
WARNING
Always wear appropriate eye protection to prevent the
risk of eye injury due to contact with engine debris or
fluids.
1
Set the parking brake.
2
T2006731
Remove the valve cover.
51
Group 25
Service Procedures
5
CAUTION
With older engines, avoid damage to the valve cover
and injector cable harness by making sure the mounting screws do not unscrew from the cylinder head
during removal. Do not use impact tools to remove
the nuts securing the valve cover.
3
Clean the area round the solenoid
valve.
T2007732
Remove the mounting bolt and flange.
Lift off the old solenoid valve.
Note: Check that the drain channel in
the VEB control valve is not clogged.
4
6
T2007731
Remove the electrical connections
from the solenoid valve.
T2007736
Install the new solenoid valve, flange,
and mounting bolt.
Note: The solenoid mounting angle is
important. The terminals of the sole
noid should be at a 0 to 45 angle to
the VEB control valve oil pipe.
Torque the solenoid mounting screw to
12.2 Nm (9 ft-lb).
52
12.2 Nm
(9 ft-lb)
Group 25
Service Procedures
2531-03-02-02
Control Valve, Engine Brake,
Replacement
7
Before working on a vehicle, set the parking brakes,
place the transmission in neutral, and block the
wheels. Failure to do so can result in unexpected vehicle movement and can cause serious personal
injury or death.
WARNING
HOT ENGINE! Keep yourself and your test equipment
clear of all moving or hot engine parts. A hot engine
can cause serious burns or can permanently damage
test equipment.
T2007733
Connect the electrical cables to the
solenoid valve and tighten the nuts to
a torque of 1.4 Nm (1 ft-lb).
1.4 Nm
(1 ft-lb)
WARNING
Always wear appropriate eye protection to prevent the
risk of eye injury due to contact with engine debris or
fluids.
8
Install the valve cover.
1
Set the parking brake.
9
2
T2007003
Tighten the valve cover nuts to 30 ± 3
Nm (22 ± 2 ft-lb). Follow the tightening
sequence shown.
30 ± 3 Nm
(22 ± 2 ft-lb)
T2006731
10
Test run engine and check for oil leaks.
Remove the valve cover.
Note: With older engines, avoid
damage to the valve cover and injector
cable harness by making sure the
mounting screws do not unscrew from
the cylinder head during removal. Do
not use impact tools to remove the
nuts securing the valve cover.
3
Clean the area around the solenoid
valve.
53
Group 25
Service Procedures
6
4
T2007731
Remove the electrical connections
from the solenoid valve.
T2007734
Loosen the attaching bolts and remove the control valve.
Also remove the oil pipe and seals between the control valve and rocker
arm shaft.
5
7
T2007722
Remove the valve cover stud located
beside the VEB control valve.
Note: Use Kent Moore tool J–41203 to
torque the studs on early D12 engines.
J–41203
T2007794
Transfer the solenoid valve to the new
control valve, if it is to be re-used.
Torque the solenoid mounting screw to
12.2 Nm (9 ft-lb).
Note: Check that the drain holes in the
VEB solenoid valve are not clogged.
The solenoid mounting angle is important. The terminals of the solenoid
should be at a 0 to 45 angle to the
VEB control valve oil pipe.
54
12.2 Nm
(9 ft-lb)
Group 25
Service Procedures
8
10
T2007734
Install new seals on the pipe between
the control valve and rocker arm shaft.
Press the pipe (together with the seal)
into the control valve. Install a new
seal in the control valve oil inlet hole
where it mates with the cylinder head.
20 ± 3 Nm
(15 ± 2 ft-lb)
T2007733
Connect the electrical cables to the
solenoid valve and tighten the nuts to
a torque of 1.4 Nm (1 ft-lb).
Install and bolt down the control valve.
Make sure that the seals against the
cylinder head and rocker arm shaft are
positioned correctly.
Torque the control valve mounting
bolts to 20 ± 3 Nm (15 ± 2 ft-lb).
1.4 Nm
(1 ft-lb)
11
Press the electrical cable clamp onto
the stud bolt.
9
Note: The electrical cable must be positioned on the outside of the valve
cover stud.
12
Install the valve cover.
13
T2007723
Clean the threaded hole in the cylinder
head located beside the VEB control
valve. Clean the valve cover stud bolt
and apply locking fluid. Torque the
stud to 48 ± 8 Nm (35 ± 6 ft-lb).
Note: Use Kent Moore tool J–41203 to
torque the studs on early D12 engines.
Carefully remove any excess locking
fluid after the stud bolt has been tightened.
J–41203
48 ± 8 Nm
(35 ± 6 ft-lb)
T2007003
Tighten the valve cover nuts to 30 ± 3
Nm (22 ± 2 ft-lb). Follow the tightening
sequence shown.
30 ± 3 Nm
(22 ± 2 ft-lb)
14
Test run engine and check for oil leaks.
55
56
Operation Numbers
2145-04-04-02
2145-06-02-02
2515-06-02-01
2531-03-02-02
2531-06-02-01
2531-06-02-02
2531-06-02-03
2533-03-02-05
2533-06-02-01
2533-06-02-02
Rocker Arm, Overhaul . . . . . . . . . . . . .
Rocker Arm Roller, Checking . . . . . . . . . .
Exhaust Temperature, Checking . . . . . . . . .
Control Valve, Engine Brake, Replacement . . . .
Engine Brake, Checking . . . . . . . . . . . . .
Exhaust Brake, Electronic Checking . . . . . . .
Exhaust Brake, Mechanical Checking . . . . . .
Solenoid Valve, Compression Brake, Replacement
Solenoid Valve, Compression Brake, Checking . .
Oil Pressure, Compression Brake, Checking . . .
.
.
.
.
.
.
.
.
.
.
.
.
.
.
.
.
.
.
.
.
.
.
.
.
.
.
.
.
.
.
.
.
.
.
.
.
.
.
.
.
.
.
.
.
.
.
.
.
.
.
.
.
.
.
.
.
.
.
.
.
.
.
.
.
.
.
.
.
.
.
.
.
.
.
.
.
.
.
.
.
.
.
.
.
.
.
.
.
.
.
.
.
.
.
.
.
.
.
.
.
.
.
.
.
.
.
.
.
.
.
.
.
.
.
.
.
.
.
.
.
.
.
.
.
.
.
.
.
.
.
.
.
.
.
.
.
.
.
.
.
.
.
.
.
.
.
.
.
.
.
.
.
.
.
.
.
.
.
.
.
49
46
40
53
27
30
32
51
29
36
Volvo Trucks North America, Inc.
P.O. Box 26115, Greensboro, NC 27402-6115
Volvo Trucks Canada, Ltd.
6490 Vipond Drive, Mississauga, Ontario L5T 1W8
http://www.volvotrucks.volvo.com
PV776-TSP0250610/2 () 2.2000 © Volvo Trucks North America, Inc., 2000