1
Operating Instructions
Series SD10000 Spring Driven Reels
SD13035 OLP
SD13050 OLP
SD13000 OLP
SD14035 OLP
SD14050 OLP
SD14000 OLP
SD14005 OLP
SD13035 OMP
SD13050 OMP
SD13000 OMP
SD13035 OVP
SD13050 OVP
SD13000 OVP
SD14035 OVP
SD14050 OVP
SD14000 OVP
SD14005 OVP
FSD13035 OLP
FSD13050 OLP
FSD13000 OLP
FSD14035 OLP
FSD14050 OLP
FSD14000 OLP
FSD14005 OLP
SD13050 OLP
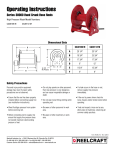
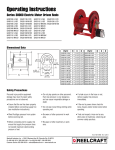
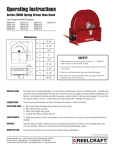
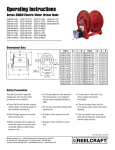
Dimensional Data
Model
w/ hose
SD13035 OLP
SD13050 OLP
SD14035 OLP
SD14050 OLP
FSD13035 OLP
FSD13050 OLP
FSD14035 OLP
FSD14050 OLP
Model
w/o hose
SD13000 OLP
SD13000 OLP
SD14000 OLP
SD14005 OLP
FSD13000 OLP
FSD13000 OLP
FSD14000 OLP
FSD14005 OLP
A
B
C
18 3/4
18 3/4
18 3/4
20 3/4
18 3/4
18 3/4
18 3/4
20 3/4
8
8
8
10
8
8
8
10
11 1/4
11 1/4
11 1/4
13 1/4
11 1/4
11 1/4
11 1/4
13 1/4
Model
w/ hose
SD13035 OMP
SD13050 OMP
SD13035 OVP
SD13050 OVP
SD14035 OVP
SD14050 OVP
Model
w/o hose
SD13000 OMP
SD13000 OMP
SD13000 OVP
SD13000 OVP
SD14000 OVP
SD14005 OVP
A
B
C
18 3/4
18 3/4
18 3/4
18 3/4
18 3/4
20 3/4
8
8
8
8
8
10
11 1/4
11 1/4
11 1/4
11 1/4
11 1/4
13 1/4
*All dimensions are in inches.
Form# 1222-611 Rev: 6/2015
Reelcraft Industries, Inc. • 2842 E Business Hwy 30, Columbia City, IN 46725
Ph: 800-444-3134 / 260-248-8188 • Fax: 800-444-4587 / 260-248-2605
Customer Service: 855-634-9109 • [email protected] • www.reelcraft.com
Series SD10000 Spring Driven Reels
Safety
Read all instruction manuals, tags, and labels before operating this equipment. Personal injury and/or equipment damage
may result if proper safety precautions are not observed.
•
•
•
•
•
•
•
•
•
•
•
•
•
•
This hose reel is for professional use only. Use the hose reel only for its intended purposes. If you are unsure call
your Reelcraft distributor.
Check the hose reel and related equipment daily. Repair or replace worn or damaged parts immediately.
Do not alter or modify this hose reel in any way. Use only genuine Reelcraft parts and accessories.
Ensure that the hose reel is securely mounted before connecting the input and output hoses.
Ensure that the reel, hose, and equipment being serviced are properly grounded. Use an ohmmeter to check ground
continuity.
Before connecting the hose reel to the supply line, ensure that the pressure does not exceed the maximum pressure
of the lowest rated component within the system.
Only use fluids, gases or solvents that are compatible with the exposed parts of the hose reel.
If a leak occurs in the hose or reel, relieve the system pressure immediately. Bleed the fluid or gas pressure before
servicing the hose reel.
A high tension drive spring in contained within the hose reel. Exercise extreme caution.
If the hose reel ceases to unwind or rewind, relieve the system pressure immediately. Do not pull or jerk on the hose.
Be aware of machinery and personnel in the work area. Route hoses away from traffic areas, sharp edges, moving
parts, and hot surfaces.
Pull the hose from the reel by grasping the hose itself, not the control valve.
Treat and respect the hose reel as you would any other piece of machinery, observing all common safety practices.
Never allow hose to retract unassisted, always walk the hose back to the reel until the bumper engaged the guide
roller. Failure to do so can result in damage to the hose, hose reel and any surrounding equipment or personnel.
Warnings
Hazardous fluid or toxic fumes can cause serious injury or death if inhaled, swallowed, splashed in the eyes, or splashed
on the skin.
•
•
•
Know the specific hazards of the fluid you are using.
Store hazardous fluid in an approved container. Dispose of hazardous fluid according to all local, state and national
guidelines.
Always wear protective eyewear, gloves, clothing, and a respirator as recommended by the fluid and solvent manufacturer.
Improper grounding, poor ventilation, open flames, or sparks can cause a hazardous condition and result in a fire or explosion and serious injury.
•
•
•
•
•
For fueling applications, be sure the entire fluid system is properly grounded. The hoses installed with these hose
reels must be electrically conductive. The hose reel is grounded by connecting electrically conductive supply hoses to
a properly grounded system.
If there is any static sparking or you feel an electric shock while using this equipment, stop dispensing immediately.
Do not use the equipment until you identify and correct the problem.
Provide fresh air ventilation to avoid the buildup of flammable fumes from solvents or the fluid being dispensed.
Keep the dispensing area free of debris, including solvent, rags, and spilled gasoline.
Do not smoke while dispensing flammable fluids.
Page 2
www.reelcraft.com
Series SD10000 Spring Driven Reels
Installation Instructions
Unless the hose reel was specified differently when ordering, the maximum installation height is 16 feet. Do not exceed
this distance. This reel is of a compact design and is intended for mounting where the operator can guide the hose onto
the reel to avoid piling in any one area on the spool. Ceiling mounting is not recommended.
1. Unpack and inspect the hose reel for damage. Turn by hand to check for smooth operation. Check for completeness.
2. Secure the hose reel into place using 4 customer supplied bolts. Hose reel has 4 – 1/2” diameter holes for mounting.
Secure the hose reel with a 3/8” – 1/2” bolts with washers.
Installing the Input Hose
Ensure that the supply line pressure does not exceed the maximum working pressure of the hose reel. Apply pipe thread
sealant to all threads. Use a flexible hose connection at the input connection. Do not use rigid plumbing.
1. Connect supply line hose (inlet hose) to the swivel as indicated in Fig. 1.
Installing the Output Hose
Warning: Use extreme caution; reel under tension. Avoid releasing latch mechanism. Apply pipe thread sealant to
all threads.
1. Relieve the pressure and bleed the line of all fluid. It is recommended that the supply line be removed from the supply
source to eliminate the possibility of pressurized fluid injuries and/or accidental spills.
2. Ensure that the hose reel has been mounted securely, following the steps listed above under Installation Instructions.
3. Place a piece of tape on the side of the reel flange as a visual reference point for counting spool rotations.
4. Unlatch the hose reel spool, and allow it to slowly rotate until all the spring tension has been released. Then rotate the
spool in the direction of the arrow shown in Fig. 1 to achieve the proper amount of spring tension for the hose you are
installing. Important: Release the reel only at points where it is securely latched. See the chart below for the proper
number of turns for your length of hose.
Hose I.D.
(Inches)
3/4”
3/4”
Hose Length
(Feet)
35’
50’
Number of
Turns
13
17
Hose I.D.
(Inches)
1”
1”
Hose Length
(Feet)
35’
50’
Number of
Turns
12
16
5. As a safety precaution, attach a C-clamp to the reel flange, as shown in Fig. 1, to help prevent the spool from unintentionally becoming unlatched and spinning freely.
6. Uncoil and extend the new hose, and loosely install the hose bumper near the outlet end of the hose.
7. Attach the other end of the new hose to the gooseneck, securing it with pipe sealant compatible with the fluids being
used in the hose reel.
8. Remove the C-clamp from the reel flange.
9. Pull the hose firmly enough to release the latch, and then slowly allow the hose to retract.
10. Ensure that the hose can be pulled out all the way and that it fully retracts. If it does not pull out or retract properly,
see Adjusting Spring Tension on the next page.
11. Position the hose bumper so that the hose extends far enough for all operators to reach the dispensing valve.
12. Pressurize the reel assembly and check all connections for leaks. Repair any connections showing signs of leakage.
www.reelcraft.com
Page 3
Series SD10000 Spring Driven Reels
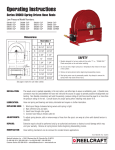
Fig. 1
Adjusting Spring Tension
If the hose cannot be pulled all the way out, or if it does not retract all the way back onto the hose reel, you may need to
adjust the spring tension. To do so follow these steps:
1. Relieve the pressure and bleed the line of all fluid. It is recommended that the supply line be removed from the supply
source to eliminate the possibility of pressurized fluid injuries and/or accidental spills.
2. Pull the hose out and engage the latch.
3. Remove the dispensing valve (not shown) and hose bumper.
4. Pull the loose end of the hose back in through the hose rollers, and manually wrap the hose onto the reel.
5. Rotate the reel in the direction of the appropriate arrow shown in Fig. 2, keeping the hose wrapped on the reel.
6. Check the spring tension after each rotation. The hose must pull out and retract fully.
7. Repeat steps 4 and 5 until you have the proper amount of spring tension.
Caution: Do not increase the spring tension to the point that the spring winds up tightly before the hose is fully extended. A spring that is wound up too tightly stops the reel from rotating before the hose is fully extended, which puts
excessive strain on the hose and reel drive spring and could damage the reel.
8. Reroute the hose through the hose rollers, and reinstall the hose bumper and dispensing valve
Page 4
www.reelcraft.com
Series SD10000 Spring Driven Reels
Fig. 2
Service Instructions
Spring Canister
To replace the spring canister, follow the steps below. Do not attempt to service the spring inside the spring canister.
Warning: The only service you should perform on the reel spring is replacing the spring canister. The spring is under
extreme tension and could be propelled out of the opened canister and cause serious injury.
1. Relieve the pressure and bleed the line of all fluid. It is recommended that the supply line be removed from the supply
source to eliminate the possibility of pressurized fluid injuries and/or accidental spills.
2. Remove dispensinge valve and hose bumper.
3. Unlatch reel and let the reel unwind fully to a free state before beginning disassembly. Do not allow the reel to unwind
unassisted. You risk damage to the hose threads, reel and personnel.
4. Remove the four 1/4”-20 nyloc nuts holding the spring and case assembly to the side frame.
5. Pull the spring and case assembly free from the side frame as shown in Fig.3.
6. Locate the new spring case and take note of the location of the “hook” on the end of the spring as shown in Fig.4.
7. Attach new spring and case assembly to side of the reel aligning the female hook of the drive spring to the male hook
on the arbor.
8. Replace four 1/4”-20 nyloc nuts and tighten securely.
9. Follow adjusting spring tension instructions above to properly tension the spring for your application after replacing
the spring.
www.reelcraft.com
Page 5
Series SD10000 Spring Driven Reels
Fig. 3
Fig. 4
A
Page 6
www.reelcraft.com
Series SD10000 Spring Driven Reels
Fluid Path Static Seal
Your hose reel is suited to be used with Air, Water, Oil, and Various Fuels. If a substance incompatible with the seal inside
the fluid path is pumped through the reel, the o-ring seal between the gooseneck and spindle may degrade and cause the
fluid path to leak. Verify with Reelcraft Engineering Department for hose reel compatibility with questionable substances.
If a leak should occur, contact Reelcraft to establish proper o-ring replacement and follow the steps below for o-ring replacement.
1. Relieve the pressure and bleed the line of all fluid. It is recommended that the supply line be removed from the supply
source to eliminate the possibility of pressurized fluid injuries and/or accidental spills.
2. Pull the hose assembly completely from the spool and latch the reel.
3. Attach a C-clamp to the reel flange to help prevent the reel from unintentionally becoming unlatched and spinning
freely.
4. Remove the outlet hose from the gooseneck (optional).
5. Remove the four bolts attaching the gooseneck to the spindle.
6. Remove the gooseneck and o-ring from the fluid path spindle. Check the o-ring groove for debris and remove any residual fluid that may be present. All surfaces of the gooseneck and spindle should be clean and free of debris.
7. Replace appropriate o-ring by placing it in the groove of the spindle.
8. Replace the gooseneck and secure it in place with four socket head cap screw.
Fig. 5
www.reelcraft.com
Page 7
Parts Drawing
Series SD10000 Spring Driven Reels
Page 8
www.reelcraft.com
Series SD10000 Spring Driven Reels
Parts Common to all Models
Item No.
2
3
4
6
7
8
9
10
11
12
13
15
17
18
19
20
21
22
23
24
25
Part No.
262526
S260399-3
262525-35
S280-8
300107
262530
262118
S140-6
1-114901-2
261616
262529
262455-1NPT
S85-7
S85-7
S44-2
262520
S376-59
S200-324
S7-51
S281-6
S390030-1
No. Req’d
1
2
1
1
2
1
1
1
1
1
1
1
1
8
4
1
1
1
4
4
4
Description
Latch ratchet
Spool flange
Head insert
Hex flange nut
Lock nut
Latch pawl stud
Latch pawl
Snap ring
Wear washer
Torsion spring
Latch pawl bracket
Fluid path gooseneck
Nylock nut
Nylock nut
Machine screw
Fluid path spindle
Machine screw
O-ring
Socket head cap screw
Hex flange nut
Spacer
Item No.
26
27
29
30
31
32
33
35
36
37
38
39
40
41
42
43
44
45
47
49
51
Part No.
S44-6
S140-34
300007
261274
261275
S140-34
602453
S44-10
S281-6
261304
261305
262527
S140-34
S600682
S44-2
300107
S44-10
S270014
270110-3.000
262436-2.468
300070
No. Req’d
4
1
1
1
1
1
1
8
8
2
2
1
1
1
4
8
4
4
2
2
4
Description
Machine screw
Snap ring
Snap ring
Spring arbor
Spring arbor key
Snap ring
Side frame & stud assembly
Machine screw
Hex flange nut
Bearing flange
Sealed ball bearing
Side frame (inlet side)
Snap ring
Swivel assembly
Machine screw
Lock nut
Machine screw
Guide roller post
Guide roller pin
Guide roller
Nyloc nut
Model Specific Parts - Air / Water Dispensing
Item
No.
1
5
14
16
28
34
46
48
50
N/A
N/A
-----
No.
SD13000 OLP
Req’d
Drive shaft
1
262536-8
Tie rod
4
260402-170
Drum
1
262524-8
Reducing bushing
1
270025
Spring & case ass’y
1
602455-1
Tie plate
1
262532-8
Guide roller pin
2
270110-8.750
Guide roller
2
262436-8.218
Tie plate
1
262531-8
Hose assembly
1
NONE
Hose bumper ass’y
1
NONE
Maximum pressure
500 PSI
Maximum temperature
210 °F
Description
SD13035 OLP
SD13050 OLP
SD14000 OLP
SD14035 OLP
SD14005 OLP
SD14050 OLP
262536-8
260402-170
262524-8
270025
602455-1
262532-8
270110-8.750
262436-8.218
262531-8
601034-35
A3-HR1005
250 PSI
150 °F
262536-8
260402-170
262524-8
270025
602455-1
262532-8
270110-8.750
262436-8.218
262531-8
601034-50
A3-HR1005
250 PSI
150 °F
262536-8
260402-170
262524-8
270025
602455-1
262532-8
270110-8.750
262436-8.218
262531-8
NONE
NONE
500 PSI
210 °F
262536-8
260402-170
262524-8
270025
602455-1
262532-8
270110-8.750
262436-8.218
262531-8
601027-35
A4-HR1005
250 PSI
150 °F
262536-10
262536-10
260402-140
260402-140
262524-10
262524-10
NONE
NONE
602455-1
602455-1
262532-10
262532-10
270110-10.750 270110-10.750
262436-10.218 262436-10.218
262531-10
262531-10
NONE
601027-50
NONE
A4-HR1005
500 PSI
250 PSI
210 °F
150 °F
Model Specific Parts - Oil Dispensing
Item
No.
1
5
14
16
28
34
46
48
50
N/A
N/A
-----
www.reelcraft.com
No.
SD13000 OMP SD13035 OMP SD13050 OMP
Req’d
Drive shaft
1
262536-8
262536-8
262536-8
Tie rod
4
260402-170
260402-170
260402-170
Drum
1
262524-8
262524-8
262524-8
Reducing bushing
1
270025
270025
270025
Spring & case ass’y
1
602455-2
602455-2
602455-2
Tie plate
1
262532-8
262532-8
262532-8
Guide roller pin
2
270110-8.750 270110-8.750 270110-8.750
Guide roller
2
262436-8.218 262436-8.218 262436-8.218
Tie plate
1
262531-8
262531-8
262531-8
Hose assembly
1
NONE
601037-35
601037-50
Hose bumper assy
1
NONE
A3-HR1005
A3-HR1005
Maximum pressure
3000 PSI
1250 PSI
1250 PSI
Maximum temperature
210 °F
210 °F
210 °F
Description
Page 9
Series SD10000 Spring Driven Reels
Model Specific Parts - Fuel Dispensing
Item
No.
1
5
14
16
28
34
46
48
50
N/A
N/A
-----
No.
FSD13000 OLP FSD13035 OLP FSD13050 OLP FSD14000 OLP FSD14035 OLP FSD14005 OLP FSD14050 OLP
Req’d
Drive shaft
1
262536-8
262536-8
262536-8
262536-10
262536-8
262536-8
262536-10
Tie rod
4
260402-170
260402-170
260402-170
260402-140
260402-170
260402-170
260402-140
Drum
1
262524-8
262524-8
262524-8
262524-10
262524-8
262524-8
262524-10
Reducing bushing
1
None
270025
270025
None
270025
None
NONE
Spring & case ass’y
1
602455-1
602455-1
602455-1
602455-1
602455-1
602455-1
602455-1
Tie plate
1
262532-8
262532-8
262532-8
262532-10
262532-8
262532-8
262532-10
Guide roller pin
2
270110-8.750 270110-8.750 270110-8.750 270110-10.750 270110-8.750 270110-8.750 270110-10.750
Guide roller
2
262436-8.218 262436-8.218 262436-8.218 262436-10.218 262436-8.218 262436-8.218 262436-10.218
Tie plate
1
262531-8
262531-8
262531-8
262531-10
262531-8
262532-8
262531-10
Hose assembly
1
None
600160-4
600160-2
None
600451-35
None
600451-50
Hose bumper ass’y
1
None
A3-HR1005
A3-HR1005
None
A4-HR1005
None
A4-HR1005
Maximum pressure
500 PSI
50 PSI
50 PSI
500 PSI
50 PSI
500 PSI
50 PSI
Maximum temperature
210 °F
150 °F
150 °F
210 °F
150 °F
210 °F
150 °F
Description
Model Specific Parts - Vacuum Recovery
Item
No.
1
5
14
16
28
34
46
48
50
N/A
N/A
-----
Page 10
No.
SD13000 OVP SD13035 OVP SD13050 OVP SD14000 OVP SD14035 OVP
Req’d
Drive shaft
1
262536-8
262536-8
262536-8
262536-8
262536-8
Tie rod
4
260402-170
260402-170
260402-170
260402-170
260402-170
Drum
1
262524-8
262524-8
262524-8
262524-8
262524-8
Reducing bushing
1
270025
270025
270025
270025
270025
Spring & case ass’y
1
602455-1
602455-1
602455-1
602455-2
602455-2
Tie plate
1
262532-8
262532-8
262532-8
262532-8
262532-8
Guide roller pin
2
270110-8.750 270110-8.750 270110-8.750 270110-8.750 270110-8.750
Guide roller
2
262436-8.218 262436-8.218 262436-8.218 262436-8.218 262436-8.218
Tie plate
1
262531-8
262531-8
262531-8
262531-8
262531-8
Hose assembly
1
NONE
601102-35
601102-50
NONE
601103-35
Hose bumper ass’y
1
NONE
A3-HR1005
A3-HR1005
NONE
A4-HR1005
Maximum pressure
28 Hg~300 PSI 28 Hg~300 PSI 28 Hg~300 PSI 28 Hg~300 PSI 28 Hg~300 PSI
Maximum temperature
210 °F
210 °F
210 °F
210 °F
210 °F
Description
SD14050
OVP
262536-10
262536-10
260402-140
260402-140
262524-10
262524-10
NONE
NONE
602455-2
602455-2
262532-10
262532-10
270110-10.750 270110-10.750
262436-10.218 262436-10.218
262531-10
262531-10
NONE
601103-50
NONE
A4-HR1005
28 Hg~300 PSI 28 Hg~300 PSI
210 °F
210 °F
SD14005 OVP
www.reelcraft.com