1
MGM Brakes Service Manual
MODEL LTR-T - 2.50
MODEL LTR-T - 2.50
MODEL LTR-L3 - 3.00
Pre 6/1/98
Post 5/31/98
For: Long Life Integral Release Bolt Double Diaphragm Spring Brakes
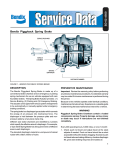
Several design improvements and specification changes have been made to the LTR-T 2.50 inch
stroke model. These changes were effective on June 1, 1998. They impact the LTR2430T and
LTR3030T. Those improvements and changes are:
Figure 1
A
1. The END CAP and RETAINER are eliminated on all LTR-T models.
2. The NECK on top of the brake is slightly longer, and MACHINED GROOVES at the top of the neck
are eliminated because the END CAP and RETAINER are no longer necessary.
3. New DACROMET COATING on the release bolt mechanism ensures complete corrosion
protection and less required effort for caging the brake.
4. New 8-gauge Non-Pressure Chamber.
5. New O-RING SEAL design keeps contamination out of the spring chamber.
The new LTR2430L3 and LTR3030L3 (3 inch stroke) models include all of these design features
llisted above, with the exception of the external breather tube.
!
WARNING: Your MGM brakes tamper resistant spring brake has been factory sealed for your
protection. There are no user-serviceable parts inside the spring brake chamber. If you experience
any damage or failure of your spring brake chamber, remove either the entire actuator as in
Section (3) of this manual, or the single (piggyback) as in Section (5) of this manual. See Section (8)
of this manual for disposal instructions. Never attempt to disassemble the spring brake chamber
as serious personal injury could result from accidental sudden release of the high energy spring.
Model LTR-T Pre 6-1-98
2.50 Inch Stroke
SECTION (1): RECOMMENDED INSPECTION POINTS
A
The END COVER CAP on the LTR-T model, pre 6/1/98 , requires no positioning or maintenance, but must be
snapped tightly into place. Inspect the cap for damage and replace as necessary. Operating units
equipped with the BREATHER TUBE, without the END COVER CAP securely in place, will void the
MGM Brakes Warranty without remedy.
B
Visually inspect the exterior surfaces of the unit for signs of damage from outside sources, corrosion and/
or rust. If any of these are seen or suspected, cautiously remove the complete combination chamber by
following the directions in Section (3) of this manual. Per CVSA out of service criteria any unmanufactured
hole or crack will place the vehicle out of service. (Not Shown)
C
D
E
Inspect SERVICE BRAKE CLAMP BAND to be sure it is securely in place and damage free. If any damage
is seen or suspected, cautiously remove the complete piggyback/spring brake chamber by following
directions in Section (5) of this manual. MGM Brakes recommends 30-35 Lbs.-Ft. torque on CLAMP
BOLTS.
C
I
E
Check to ensure the MOUNTING STUD NUTS are tightened to 133-155 Lbs.-Ft. torque (clockwise) and
washers are in place between the nut and the bracket.
Inspect air lines, hoses and fittings attached to chamber. Replace any damaged or leaking parts. MGM
Brakes recommends the fittings be tightened to 25 Lbs.-Ft. torque into the chamber air inlet
ports.
IMPORTANT - Inspect the air ports to determine the model of brake. Round ports denote (2.50 inch)
standard stroke model, square ports denote (3.00 inch) long stroke model. This information is
important when replacing the service diaphragm and determining the chamber’s rated stroke.
F
Inspect the PUSH-ROD to be sure it is working free, not bent, not binding and is square to the chamber
bottom within ±3° in any direction at any point in the stroke of the chamber. If the PUSH-ROD is not square,
make corrections by repositioning the chamber on the mounting bracket and/or by shimming the slack
adjuster to the right or left on the camshaft as required.
G
Inspect the YOKE ASSEMBLY being sure YOKE PIN is installed and locked into place with a COTTER PIN.
Replace any damaged, worn or missing parts. MGM Brakes recommends the YOKE LOCKNUT be
tightened to 25-35 Lbs.-Ft. torque. (Not Shown)
H
On units equipped with a DUST BOOT, check the BOOT for damage and replace as necessary. (Not
Shown).
I
Figure 2
On units equipped with an external BREATHER TUBE (Figure 1 & 2) check elbows for damage and replace
as necessary. Ensure both ends of the connector tube are engaged a minimum of 1/2-inch into each of the
flexible elbows. The tube must be glued to both of the elbows with a high quality rubber adhesive or
secured with a clamp that may be purchased with an MGM Brakes BREATHER TUBE KIT. These units must
be mounted with the BREATHER TUBE in the upper half of the non-pressure chamber facing away from the
road surface (Figure 9).
D
F
Model LTR-T
Post 6/1/98
2.50 Inch Stroke
Figure 3
C
E
D
F
Model LTR-L3
3 Inch Stroke
Page 1
IMPORTANT: Failure to operate the “LTR-T” 2.50 inch stroke chamber with the EXTERNAL
BREATHER TUBE securely in place and in good condition will void the MGM Brakes Warranty
without remedy.
Figure 4
SECTION (2): MANUAL RELEASE - PARKING BRAKES
(a) Before releasing brakes, chock wheels of the vehicle to prevent a runaway.
(b) For the LTR-T, pre 6/1/98, remove the end cover cap (figure 4). The post 6/1/98 LTR-T and
new LTR-L3 do not have an end cover cap.
(c) Turn the integral release bolt counter-clockwise using 15/16-inch wrench (figure 5) until the
power spring is fully caged and make sure the push-rod is retracted (DO NOT USE AN
IMPACT WRENCH). When the brake is fully caged the release bolt should be extended out
as tabulated below (figure 6):
LTR-T pre 6/1/98
LTR-T post 6/1/98
LTR-L3
!
2.50 inch minimum
3.24 inch
3.24 inch
Type 24 and 30 Chambers
Type 24 and 30 Chambers
Type 24 and 30 Chambers
Figure 5
WARNING: Do not exceed these lengths and do not exceed 50 Lbs.-Ft. torque on release-nut
at any time or damage may occur which could prevent any further correct manual releasing
of the piggyback spring brake chamber.
NOTE: For easier manual caging and releasing, apply 90-100 psi air pressure to inlet port
marked “Spring Brake” before Step (c) above.
SECTION (3): REMOVAL AND INSTALLATION INSTRUCTIONS FOR “COMBINATION
CHAMBERS”
NOTE: Refer to Section (4) before removing existing air brake chamber to ensure that the brake
chamber was properly installed with the correct rod length.
(a) Determine the manufacturer of the single (piggyback) spring brake or combination chamber
to be removed from the vehicle and, following that manufacturer’s instructions exactly, manually
release the spring brake completely. Instructions for the LTR-T and LTR-L3 with integral
release bolt are given in Section (2) of this manual. Service Manuals for all other
design series of MGM Brakes piggyback/spring brakes are also available upon request to
MGM Brakes.
(b) Remove the cotter pin from the yoke pin, knock out the yoke pin, and remove both air lines
from the assembly.
IMPORTANT - Be sure to mark the air line from the inlet port marked “SPRING BRAKE” for
later re-installation reference.
Figure 6
(c) Using a 15/16-inch wrench, unscrew hex nuts on mounting bolts and cautiously remove the
old chamber from the mounting bracket.
(d) Follow procedure to cut the service push-rod to proper length (Refer to Section 4).
(e) Remove the hex nuts and the flat washers on the mounting bolts of the new chamber, clean
the face of the mounting bracket and install the chamber on the bracket with close attention
given to positioning the chamber air inlet ports for correct alignment to the vehicle air lines.
Then install one flat washer and hex nut on each mounting bolt and using a 15/16-inch hand
wrench (DO NOT USE AN IMPACT WRENCH), tighten nuts to MGM Brakes recommended
133-155 Lbs.-Ft. torque.
IMPORTANT - If it is required to reposition the air inlet ports to assure proper mating and
alignment with vehicle air lines, refer to Section (5) of this manual and follow Steps (c)
through (f) very carefully.
(f)
Reconnect yoke to the slack adjuster, making sure that the correct diameter and length of
yoke pin is installed into the correct hole in the slack adjuster. Secure the yoke pin with a new
cotter pin.
(g) Inspect the push-rod to be sure that it is working free, not bent, not binding and is square to
the chamber bottom within ±3° in any direction at any point in the stroke of the chamber. If the
push-rod is not square, make corrections by repositioning the chamber on the mounting
bracket and/or by shimming the slack adjuster to the right or left on the camshaft as required.
Page 2
Measure
(h) Apply a non-hardening sealing compound to the hose fittings and re-install both of the air
lines to the chamber making sure each is mated to the correct air inlet port according to
markings made earlier. MGM Brakes recommends the fittings be tightened to 25-30
Lbs.-Ft. torque into the chamber air-inlet ports.
Figure
Figure
8 7
Y
X
(i)
Using vehicle system air, charge the spring brake with full line pressure (minimum 100
psi). Using only soapy water or leak detection solution (NEVER ANY TYPE OF OIL!)
inspect for air leaks at the air lines and fittings. If bubbles appear, tighten fittings slightly,
but not over 30 Lbs.- Ft. torque.
IMPORTANT - If the service brake clamp band was loosened to reposition air inlet ports in
Step (e) above, apply air to the spring brake and then apply and hold foot brake treadle
valve down to charge the service brake chamber. Test for air leaks around the circumference
of the service clamp band. If bubbles appear, firmly tap the circumference of the clamp
band with a hammer and retighten the clamp nuts until leaks cease (Figure 17). MGM
Brakes recommends 30-35 Lbs.-Ft. torque on clamp hex nuts. Completely exhaust air
from both of the chambers when complete.
(j) With air pressure applied to spring brake section, activate power spring by turning the
release bolt clockwise until the bolt is fully engaged into the unit and the slotted nut bottoms
out on the head insert. Tighten to 45-50 Lbs.-Ft. torque (DO NOT USE AN IMPACT WRENCH).
Figure 8
(k) Replace the END CAP properly on LTR-T models, pre 6/1/98 (Figure 11). Operating units
equipped with the EXTERNAL BREATHER TUBE, without the END CAP securely in place,
will void the MGM Brakes Warranty without remedy.
IMPORTANT - If chamber is fitted with an external breather tube be sure both ends of
the connector tube are engaged a minimum of 1/2-inch into each of the flexible elbows.
The tube must be glued to both of the elbows with a high quality rubber adhesive or
secured with a clamp that may be purchased with an MGM Brakes BREATHER TUBE KIT.
These units must be mounted with the breather tube facing away from the road surface
(Figure 9).
Figure 9
Yes
Breather Tube
Yes
WARNING - After replacement of any brake chamber, the chamber push-rod stroke and
actuating alignment must be checked to assure correct installation and foundation brake
adjustment. It is very important to recognize that no foundation brake adjustments can be
made at either the spring brake chamber, or at the service brake chamber, and that all
“stroke adjustments” must be made at the slack adjuster according to the specific
recommendations of the foundation brake manufacturer or of the vehicle manufacturer.
!
SECTION (4): PROCEDURE TO CUT THE SERVICE PUSH-ROD TO PROPER LENGTH
No
Road Surface
No
WARNING: Do not attempt to service or disassemble the spring chamber on any spring
brake actuator. A large spring in the spring chamber having extreme force could cause
serious bodily injury if it were suddenly released due to inadvertent removal of this clamp
or tamper resistant head.
IMPORTANT - Place blocks under wheels to prevent vehicle rollaway before removing air
brake actuators.
Figure 10
(a) REMOVE WORN OR NON-FUNCTIONAL UNIT FROM VEHICLE: Determine manufacturer
and model of unit to be replaced. Refer to that manufacturer’s service manual for caging
and removal instructions.
(b) Make sure the spring chamber of the removed actuator is fully released (power spring
caged) and the service brake push-rod is fully retracted to zero stroke position (i.e. brake
fully released).
(c) Measure and record the “X” and “Y dimensions (See Figure 7).
“X” Dimension - The dimension from bottom of actuator to end of push-rod.
“Y” Dimension - The dimension from bottom of actuator to centerline of yoke pin.
NOTE: If for some reason the spring chamber power spring cannot be caged and fully released,
then the “X” and “Y” dimensions will need to be measured from another actuator of the exact
type from the same vehicle provided it is retracted to its zero stroke position (brake fully released)
and was operating correctly.
Page 3
!
(d) Before marking push-rod to be cut on a new unit, be sure the spring chamber and pushrod are fully retracted to the zero stroke position. (This may be done with the integral
caging bolt or by applying 90-100 psi air pressure to the spring chamber air inlet port).
Figure 11
(e) Take measured “X” dimension from the removed unit and mark push-rod of new unit from
the bottom of the actuator.
(f)
Thread yoke jam nut past mark on push-rod. Align bottom edge of nut with mark.
(g) Use a sharp hacksaw and cut push-rod on the mark (Figure 8).
(h) After cutting rod, thread jam nut off to clean up cut thread.
(i)
Thread jam nut back onto the push-rod a sufficient length to allow assembly of the yoke.
(j)
Thread yoke onto the push-rod. Yoke from removed unit may be reused provided yoke pin
hole is not worn. Adjust yoke to the same “Y” dimension as measured from the removed
unit.
(k) Hold yoke to prevent it from turning and tighten jam nut against yoke to 25-35 Lbs.-Ft.
torque.
TO INSTALL NEW UNIT ON VEHICLE: Refer to MGM Brakes Service Manual for the model that
is being installed. Refer to Section (3) of this manual for LTR-T and LTR-L3 Models.
IMPORTANT - When installing any MGM Brakes model with the breather tube it is mandatory
to position the breather tube away from the road surface (Figure 9). Failure to comply will void
the MGM Brakes Warranty on these models.
IMPORTANT - When making a reconnection to an automatic slack adjuster follow the
vehicle manufacturer’s recommendations for installation and set-up.
Figure 12
SECTION (5): REMOVAL AND INSTALLATION INSTRUCTIONS FOR SINGLE
(PIGGYBACK) SPRING BRAKES
! Warning: Installation of any MGM Brakes LTR-T or LTR-L3 model must be made only on an
MGM Brakes heavy duty 8 gauge non-pressure chamber or weld reinforced non-pressure
chamber. Failure to comply will void the MGM Brakes Warranty for these models.
Apply
Adhesive
Here
The removal and installation of a single spring brake chamber (without removal of the service
brake chamber) can be made easier by “locking off” the service chamber push-rod. To do this
apply the service brake by applying the driver’s foot brake treadle valve and, while applied,
clamp vise-grip pliers on push-rod to prevent rod from retracting when air pressure is released
(Figure 13).
(a) Manually release the spring brake completely. Instructions for the LTR-T and LTR-L3 with
integral release bolt are given in Section (2) of this manual. Service Manuals for all other
design-series of MGM Brakes single spring brakes are also available upon request to
MGM Brakes.
(b) Remove both air lines from the chamber.
1/2 - inch
Minimum
Engagement
Into Elbow
IMPORTANT - Be sure to mark the air line from the inlet port marked “SPRING BRAKE” for
later re-installation reference.
(c) On all MGM Brake Models fitted with external breather tubes (Figures 1 & 2), disconnect
the tube and elbow from the service chamber housing (Figure 16).
(d) Using a 9/16-inch wrench or socket, remove the clamp nuts on the service clamp band.
Then, while holding the single spring brake securely in place, remove the clamp band to
allow removal of the single spring brake from the service chamber (Figure 14).
IMPORTANT - At this time take the opportunity to inspect and replace all parts in the
service chamber which may be damaged or worn, especially the diaphragm and return
spring. Use only genuine MGM Brakes engineered replacement parts!
IMPORTANT: Make sure that the existing non-pressure chamber is either an MGM Brakes
heavy-duty 8-gauge NPC or weld reinforced NPC. Replace the non-pressure chamber if
not equipped as recommended above. Failure to comply will void the MGM Brakes Warranty
for these models.
(e) Make sure the new single (piggyback) spring brake is fully released as outlined in
Section (2) of this manual. Position the diaphragm in the bottom recess of the chamber
(Figure 15). Assure all mating parts are aligned straight. Position the inlet ports to mate
with the vehicle air supply lines and replace the service clamp band (Figure 14).
Page 4
Figure 13
(f)
Figure 14
Re-install the clamp bolts and nuts. Alternately tighten each nut in 5-10 Lbs.-Ft. torque
increments while constantly rechecking mating parts alignment. If re-alignment is required,
loosen clamp nuts and repeat Step (e) above. Firmly tap around circumference of the
clamp band with a hammer to assure the full seating of the clamp (Figure 17) and tighten
the nuts to 30-35 Lbs.-Ft. torque.
(g) Apply a non-hardening sealing compound to the hose fittings and re-install both of the air
lines to the chamber, making sure each is mated to the correct air inlet port according to
markings made earlier. MGM Brakes recommends the fittings be tightened to 25-30
Lbs.-Ft. torque into the chamber air inlet ports.
(h) Using vehicle system air, charge the parking brake with full line pressure (minimum 100
psi). Using only soapy water or leak detection solution (NEVER ANY TYPE OF OIL!) inspect
for air leaks at the air lines and fittings. If bubbles appear, tighten fittings slightly, but not
over 30 Lbs.-Ft. torque.
(i)
With the spring brake still fully charged with full line pressure, apply and hold foot brake
treadle valve down to charge the service brake chamber.
IMPORTANT - At this time, remove the vise-grip pliers (Figure 13) from the service push-rod
so that the push-rod can return to a normal position in the chamber. Now test for air leaks
around the circumference of the service clamp band. If bubbles appear, firmly tap the
circumference of the clamp band with a hammer and retighten the clamp nuts until leaks
cease (Figure 17). MGM Brakes recommends 30-35 Lbs.-Ft. torque on the clamp hex nuts.
Figure 15
IMPORTANT - On all MGM Brakes models fitted with an EXTERNAL BREATHER TUBE,
remove and replace elbow in NPC if damaged or worn. Remove by carefully pulling on
elbow. Install elbow by pinching end and inserting through elbow hole in head or NPC. Then
pull back until it snaps securely in place.
(j)
Wipe the open end of the connector tube clean to be sure that no oil is present, apply a high
quality rubber adhesive to the tube and re-insert tube into flexible elbow with minimum
1/2-inch engagement into both elbows (Figure 12).
If the old single unit was not equipped with an EXTERNAL BREATHER TUBE, drill a
1/2-inch diameter hole 1 inch from the top of the non-pressure chamber (Figure 16), at a
point closest to the centerline between the air-inlet ports (Figure 12). Remove any burrs
around the hole and install a new rubber elbow in the non-pressure chamber (see
installations above). Wipe the open end of connector tube clean to be sure no oil is present.
Apply a high quality rubber cement to the tube and insert the tube into the flexible elbow
with a minimum 1/2-inch engagement into the elbow (Figure 16).
Figure 16
IMPORTANT - These units must be mounted with the BREATHER TUBE facing away from
the road surface and the tube glued or clamped securely into the rubber elbows (Figure 9).
Failure to comply with these installation instructions will void the MGM Brakes Warranty
without remedy.
(k) If replacing with the LTR-L3 in place of the LTR-T, the addition of the breather tube is not
necessary.
(l)
1 inch
With air pressure applied to spring brake section, activate power spring by turning the
release bolt clockwise until the bolt is fully engaged into the unit and the slotted nut bottoms
out on the head insert. Tighten to 45-50 Lbs.-Ft. torque (DO NOT USE AN IMPACT WRENCH).
(m) Replace the END CAP properly on LTR-T models, pre 6/1/98 (Figure 11). Operating these
units without the END CAP securely in place will void the MGM Brakes Warranty without
remedy.
Figure 17
SECTION (6): REMOVAL AND INSTALLATION INSTRUCTIONS FOR “SERVICE
BRAKE DIAPHRAGM”
(a) Follow all instructions given in Section (5) of this manual and install the new diaphragm
at Step (5-e). Use only genuine MGM Brakes engineered replacement diaphragms!
WARNING - When servicing a 3-inch “long stroke” model brake, be sure to replace with the
correct diaphragm. Installation of a standard (2.50 inch) stroke diaphragm in a 3-inch “long
stroke” chamber could result in catastrophic failure of the unit.
IMPORTANT- It may not be necessary to disconnect the air lines from the spring brake
during this proceure as long as correct and straight parts alignment can be obtained
during the reassembly operations.
Page 5
!
SECTION (7): LONGSTROKE SPRING BRAKE & SERVICE CHAMBER IDENTIFICATION
IMPORTANT - Inspect the ports to determine the model of brake. Round ports denote (2.50 inch) standard stroke model, square
ports denote (3.00 inch) longstroke model.
‘LONG-STROKE”
SPRING BRAKE
IDENTIFICATION
‘LONG-STROKE”
SERVICE CHAMBER
IDENTIFICATION
SECTION (8): RECOMMENDED SPRING BRAKE ACTUATOR DISARMING PROCEDURE
!
WARNING: This procedure must be strictly adhered to. Never attempt to remove the spring chamber clamp band from a double
diaphragm actuator or the spring chamber retaining ring from a piston actuator. Both actuators employ a high energy power
spring that could cause serious bodily injury if the spring were suddenly released due to improper disassembly.
All retired spring brake actuators must be safely disarmed before they are disposed of to prevent serious personal injury from
accidental sudden release of the high energy spring (as much as 2700 Lbs.) in the parking chamber. To disarm the unit, remove it
from the vehicle following the instructions in Section (3) for combination chambers, or Section (5) for single piggyback chambers. Be
sure to release the parking brake per Section (2) of this manual. Never attempt to remove the head, which contains the power spring.
Observe all safety precautions. Place the unit in a steel container (*) and use an acetylene torch to cut a hole through the head housing
the power spring. Cut completely through at least two spring coils. The steel containers must have openings to expose the head
where it is to be cut with the acetylene torch and it must be strong enough to prevent parts from hurtling out should the unit suddenly
separate before it is safely disarmed. It is the users responsibility to ensure the steel container is safe.
*Information concerning a suitable container is available through your MGM Brakes Representative.
MGM
Brakes
A Division of Indian Head Industries, Inc.
8530 Cliff Cameron Drive • Charlotte, NC 28269-9786
(704) 547-7411 • (800) 527-1534 • (704) 547-9367 Fax
www.MGMBrakes.com
Page 6
Form # 5042
© 2000 MGM Brakes
All Rights Reserved
Printed in U.S.A.