1
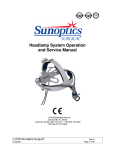
SSX-300ST
SolarMaxx 300 Illuminator
Service Manual
6018 Bowdendale Avenue
Jacksonville, FL 32216
Customer Service: 904 731 5869 FAX 904 733 0012
Toll Free 800 684 6404
LIT045Sunoptics Surgical
®
(English)
Rev. A
SolarMaxx 300 Illuminator Service Manual
TABLE OF CONTENTS
Page
INTRODUCTION………………………………………………………………….. 3
TECHNICAL SUPPORT SERVICES…………………………………………..… 3
GENERAL THEORY OF OPERATION ………………………………………… 4-5
CIRCUIT BREAKER REPLACEMENT……………………………………………6
SHUTTER REPLACEMENT………………………… …………………………… 6
I.R. FILTER ASSEMBLY REPLACEMENT……………………………………… 7
LAMP BASE REPLACEMENT …………………………………………………… 7
POWER SUPPLY REPLACEMENT ………………………………………………8
COOLING FAN REPLACEMENT…………………………………………………. 8
LAMP REBUILD PROCEDURE ………………………………………………… 9-10-11
REPLACEMENT PARTS ………………………………………………………… 12
Figure 1. ……………………………………………………………… …………… 13
Figure 2 ……………………………..……………………………………………… 14
Figure 3 …………………………………………………………………………….. 15
LIT045Sunoptics Surgical
®
(English)
Rev. A
Page 2 of 15
SolarMaxx 300 Illuminator Service Manual
INTRODUCTION
This manual has been prepared to aid in the repair and maintenance of the
SolarMaxx 300 illuminators.
The procedures and instructions contained in this document are to be used by
qualified technical personnel only. Some procedures may have live exposed
circuitry and wiring which could be hazardous if contacted with. Use extreme
caution when working on equipment that has power applied to it.
TECHNICAL SUPPORT SERVICES
In the event that you experience difficulty or need technical assistance, please
contact our technical support staff at (800) 684-6404 or by fax at (904) 733-0012.
Please have the following information ready when you call:
•
MODEL NUMBER
•
SERIAL NUMBER
•
DETAILED DESCRIPTION OF THE PROBLEM
LIT045Sunoptics Surgical
®
(English)
Rev. A
Page 3 of 15
SolarMaxx 300 Illuminator Service Manual
GENERAL THEORY OF OPERATION
The SolarMaxx 300 Illuminator general operation is as follows. Please consult
Fig. 1 for wiring information.
A.C. POWER DISTRIBUTION
The SolarMaxx 300 Illuminators are based around a universal input power
supply. Input line voltages of 100-120V ˜ and 220-240V ˜ at 50/60 Hz are applied
at the Power Input Model via a Hospital grade power cord. The input power is
then filtered by a low leakage current EMI Filter. Over-current protection is
provided by two 7.5 amp circuit breakers. A double-pole interlock switch
provides operator safety, which is located on the back left side of the lamp heat
shield.
DC POWER DISTRIBUTION
DC power for the other system components is generated by the lamp power
supply. In addition to the 15 volts DC lamp power, it generates +12 VDC. The 12
VDC is used to power cooling fan and the elapsed lamp hour meter.
INTENSITY CONTROL
A rotating stainless steel disc that is placed in front of the lamp controls intensity.
The disc contains holes in varying sizes and patterns. Manual lamp intensity
control is made via a front panel mounted knob.
LAMP POWER AND IGNITION SYSTEM
The lamp used in the SolarMaxx 300 illuminators is a 300 watt ceramic arc lamp.
For ignition of the lamp to occur, it takes a high voltage pulse of approximately 20
KV. The power supply generates a pulse of approximately 400-600 volts, which
is then stepped up to the 20 KV pulse by the igniter module circuitry. Connection
to the lamp is made via two jumbo banana jacks.
LIT045Sunoptics Surgical
®
(English)
Rev. A
Page 4 of 15
SolarMaxx 300 Illuminator Service Manual
The lamp power and ignition system consists of the lamp power supply, lamp
base assembly, and the lamp cartridge assembly. In the event you have a power
supply failure, it is recommended that the power supply be returned to
®
SUNOPTIC TECHNOLOGIES for servicing. When power supply is switched on,
the DC supplies come up to voltage immediately. The lamp power supply has a
built in delay of 1 to 2 seconds before it will attempt to start the lamp. If the lamp
is unsuccessful at igniting, the power supply will try 6 to 10 times in rapid
succession before ceasing. After successful ignition, the supply switches to a 15
VDC output at approximately 20 amps of current.
COOLING SYSTEM
Cooling is provided by a 100 CFM, 12 VDC fan. Air is drawn through the sides of
the unit, across the power supply and lamp, and exhausted through the rear
mounted exhaust louver. An infrared filter which is located between the lamp
lens and the lamp housing provides additional cooling of the light. This filter
blocks the infra-red “heat” from the output turret while passing the visible light,
thus lowering the temperature of the instruments and cables. Caution should still
be used as there are still potentially hazardous temperatures at the turret.
PARTS REPLACEMENT PROCEDURES
The following procedures are meant to aid the technician/engineer in replacing
defective or damaged components. These procedures are meant to be used by
qualified personnel only. Extreme caution should be used and all necessary
safety precautions taken when working on this equipment.
LIT045Sunoptics Surgical
®
(English)
Rev. A
Page 5 of 15
SolarMaxx 300 Illuminator Service Manual
CIRCUIT BREAKER REPLACEMENT
1.
2.
3.
4.
5.
6.
7.
Disconnect the illuminator from the power source.
Remove the 8 cover screws on the sides of the unit.
Open lamp access door and lift the top cover straight up and off the unit.
Set aside.
Using an ohmmeter, verify which circuit breaker is defective.
Remove the defective circuit breaker and replace with the new one.
Replace the top cover making sure the lamp access door is over the lamp
cartridge.
Replace the 8 cover screws and secure.
SHUTTER REPLACEMENT
1.
2.
3.
4.
5.
6.
7.
8.
9.
10.
11.
Disconnect the illuminator from the power source.
Remove the 8 cover screws in the sides of the unit.
Open lamp access door and lift the top cover straight up and off the unit.
Set aside.
Remove the 3 screws on the bottom of the unit with hold the front panel to
the bottom housing. Remove the 2 screws on the side of the front panel.
Remove the screw holding the shutter to the front panel.
Pull off the shutter assembly.
Replace the shutter assembly with the new one.
With the control turned fully clockwise, align the shutter in such a way that
it does not cover the hole in the front panel. Replace the screw and tighten
the screw until it holds the shutter in place and still allows for free
movement of the shutter. Do not over tighten the screw.
Replace the front panel and secure to the bottom housing with the 5 screws.
Replace the top cover making sure the lamp access door is over the lamp
cartridge.
Replace the 8 cover screws and secure.
LIT045Sunoptics Surgical
®
(English)
Rev. A
Page 6 of 15
SolarMaxx 300 Illuminator Service Manual
I.R. FILTER ASSEMBLY REPLACEMENT
CAUTION:
1.
2.
3.
4.
5.
6.
7.
Before performing this procedure, be sure the unit has cooled
to room temperature. The lamp cartridge and IR filters operate
at very high temperatures.
Disconnect the illuminator from the power source.
Open the lamp access door and remove the lamp, gently rocking from
front to back. Set lamp aside.
Place unit on its right side. Reach in the lamp access door and hold onto
the IR filter assembly while removing the 2 mounting screws from the
bottom.
Remove the assembly through the lamp access door.
Replace the new assembly into the unit through the lamp access door.
Note that the IR filter is facing toward the back of the unit.
Secure with the 2 mounting screws from the bottom.
Place the unit back on its feet. Install the lamp, being sure it has totally
seated, and close the access door.
LAMP BASE REPLACEMENT
CAUTION:
1.
2.
3.
4.
5.
6.
7.
8.
9.
10.
11.
12.
13.
Before performing this procedure, be sure the unit has cooled
to room temperature.
Disconnect the illuminator from the power source.
Remove the 8 cover screws in the sides of the unit.
Open lamp access door and lift the top straight up and off the unit. Set
aside.
Remove the lamp cartridge assembly, gently rocking from front to back.
Set lamp cartridge aside.
Disconnect the power supply lamp wires from the lamp base igniter
module at the + and – terminals on the igniter circuit board.
Place the unit on its side.
From the bottom, remove the 4 screws that hold the lamp base to the
bottom panel.
Remove the lamp base from the unit. Place the new lamp base igniter
assembly into the unit with the banana jacks in the heat shield area.
Secure with the 4 screws to the bottom of the unit.
Place the unit back on its feet.
Reconnect the lamp power supply wires to the igniter module terminals.
Install the lamp cartridge, being sure it is totally seated.
Replace the top cover making sure the lamp access door is over the lamp
cartridge.
Replace the 8 cover screws and secure.
LIT045Sunoptics Surgical
®
(English)
Rev. A
Page 7 of 15
SolarMaxx 300 Illuminator Service Manual
POWER SUPPLY REPLACEMENT
1.
2.
3.
4.
5.
6.
7.
8.
9.
10.
11.
Disconnect the illuminator from the power source.
Remove the 8 cover screws in the sides of the unit.
Open lamp access door and lift the top cover straight up and off the unit.
Set aside.
Disconnect the fan lead connector, the AC power input connectors, and
the lamp output power wires from the power supply.
Set the unit on its side.
While holding the power supply with one hand, remove the 4 mounting
screws from the bottom of the unit.
Place the new power supply in the unit so all 4 holes line up with the
power supply standoffs. Secure with the 4 mounting screws from the
bottom.
Place the unit back on its feet.
Reconnect the fan lead connector, the AC power input connectors, and
the lamp output power wires to the power supply.
Replace the top cover making sure the lamp access door is over the lamp
cartridge.
Replace the 8 cover screws and secure.
COOLING FAN REPLACEMENT
1.
2.
3.
4.
5.
6.
7.
8.
9.
10.
11.
12.
Disconnect the illuminator from the power source.
Remove the 8 cover screws in the sides of the unit.
Open lamp access door and lift the top cover straight up and off the unit.
Set aside.
Disconnect the fan lead connector and the hour meter wiring harness
connector from the power supply.
Remove the 3 screws holding the back panel to the bottom housing and
lay down the panel.
Remove the fan mounting screws and nuts. This will free the fan louver
also.
Replace the fan assembly with the airflow blowing out the back of the unit.
The fan leads should be coming out of the fan at the tip and against the
back panel.
Secure the fan mounting screws with the nuts.
Slide the back panel into the mounting slots.
Reconnect the fan lead connector and the hour meter wiring harness
connector to the power supply.
Replace the top cover making sure the lamp access door is over the lamp
cartridge.
Replace the 8 cover screws and secure.
LIT045Sunoptics Surgical
®
(English)
Rev. A
Page 8 of 15
SolarMaxx 300 Illuminator Service Manual
LAMP REBUILD PROCEDURE
See Fig. 2 and Fig. 3 (PFC units) for reference.
When rebuilding the Xenon lamp cartridge, it is recommended to replace several
key components of the cartridge assembly. These components are included
®
when you purchase a replacement rebuild kit from Sunoptic Technologies .
CAUTION:
Before performing this procedure, be sure the unit has cooled
to room temperature.
WARNING: Lamps are under high pressure and must be handled with
care. A face shield should be worn when handling this lamp.
The following procedure will guide you through rebuilding your Xenon lamp
cartridge.
Tool required:
1.
2.
3.
4.
5.
6.
7.
8.
9.
10.
11.
12.
Be sure lamp has cooled to room temperature.
Remove the 2 jumbo banana plugs from the bottom of the unit. Press the
lamp assemblies from the back, out of the lamp housing.
Set the lamp face down on its front Heatsink.
Remove the 3 Phillips screws and lock washers from the back heatsink.
Gently pull the lamp out of the back heatsink.
Remove the Allen head screw in the side of the front heatsink.
Gently pull the lamp out of the front heatsink.
With the needle nose pliers, remove the cooling ring and from the inside of
each lamp heatsink the metal spring gaskets.
Clean off all the parts with a rag or paper towel, alcohol may help in
heatsink compound removal.
Remove the new lamp from its package. Record its serial number and
date installed in the illuminator manual.
Set the lamp face down with its protective cap on its lens. If the lamp has
a rubber cap on the fill tube on the rear of the lamp, remove it.
Apply a thin film of heatsink compound to the back of surface of the lamp,
and the inside contact area of the front and back heat sinks.
CAUTION:
13.
14.
#2 Philips screwdriver, 7/64” Allen wrench,
Needle nose pliers and ½ “nut driver.
Only apply a thin layer of heatsink compound to areas.
Install the new metal spring gasket into the front groove of the back
heatsink. Place the fingers so they are toward the back.
Press the lamp into the back heatsink making sure the fill tube is aligned
with the fill tube relief hold.
LIT045Sunoptics Surgical
®
(English)
Rev. A
Page 9 of 15
SolarMaxx 300 Illuminator Service Manual
LAMP REBUILD PROCEDURE (continued)
15.
16.
17.
18.
19.
20.
21.
22.
23.
Secure with 3 lock washers and 6-32 Phillips head screws.
Apply a thin film of heatsink compound to the inside contact area of the
front heat sink.
Install the new metal spring gasket into the back groove of the front
heatsink. Place the fingers so they are toward the front.
Remove the end cap from the front of the lamp. Use care not to touch the
window of the lamp.
Apply heatsink compound to the front outside diameter of the lamp. Be
careful not to get compound on the lamp glass surface. If you do, clean
the lamp with a clean alcohol wipe.
Press the cooling ring onto the front of the lamp.
Press the front heatsink assembly onto the lamp/cooling ring assembly.
Align the threaded holds in the bottom of the 2 heatsinks with each other.
Secure the front heatsink onto the lamp with the lock washer and Allen
head screw.
Align the threaded holes in the bottom of the heatsink with the bottom of
the lamp housing, and press the entire lamp assembly into the lamp
housing, so that when the lamp is pointing toward you, the housing handle
is on the top. Install the 2 banana plugs into the bottom of the lamp
assembly and tighten.
PFC LAMP REBUILD PROCEDURE FIG.3
The following procedure will guide you through rebuilding your PFC Xenon lamp
cartridge.
Tool required: Screw driver and adjustable wrench.
1.
2.
3.
4.
5.
6.
7.
8.
9.
10.
Be sure lamp has cooled to room temperature.
Remove the Brass plugs from the bottom of the unit. Press the lamp
assemblies from the back, out of the lamp housing.
Set the lamp face down on its front Heatsink.
Remove the copper clips from both heatsink.
Gently pull the lamp out of the heatsinks.
Remove the cooling ring from the lamp.
Clean off all the parts with a rag or paper towel, alcohol may help in
heatsink compound removal.
Remove the new lamp from its package. Record its serial number and
date installed in the illuminator manual.
Set the lamp face down with its protective cap on its lens. If the lamp has
a rubber cap on the fill tube on the rear of the lamp, remove it.
Apply a thin film of heatsink compound to the metal surface of the lamp
and the inside contact area of the front and back heat sinks. Be careful
LIT045Sunoptics Surgical
®
(English)
Rev. A
Page 10 of 15
SolarMaxx 300 Illuminator Service Manual
not to get compound on the lamp glass surface. If you do, clean the lamp
with a clean alcohol wipe.
CAUTION:
11.
12.
13.
14.
15.
16.
17.
18.
Only apply a thin layer of heatsink compound to areas.
Press the lamp into the back heatsink making sure the fill tube is aligned
at six O’CLOCK.
Install copper clips.
Remove the end cap from the front of the lamp. Use care not to touch the
window of the lamp.
Apply heatsink compound to the front outside diameter of the lamp.
Press the cooling ring onto the front of the lamp.
Press the front heatsink assembly onto the lamp/cooling ring assembly.
Align the threaded holes in the bottom of the 2 heatsinks with each other.
Secure the front heatsink onto the lamp with the copper clips.
Align the threaded holes in the bottom of the heatsink with the bottom of
the lamp housing, and press the entire lamp assembly into the lamp
housing, so that when the lamp is pointing toward you, the window of the
lamp is pointing to the front panel. Install the 2 brass plugs into the bottom
of the lamp assembly and tighten.
LIT045Sunoptics Surgical
®
(English)
Rev. A
Page 11 of 15
SolarMaxx 300 Illuminator Service Manual
REPLACEMENT PARTS
DESCRIPTION
PART NUMBER
Replacement Lamp Cartridge
EMI Filter
300-Watt Xenon Power Supply
Hour meter
Circuit Breaker
IR Filter Assembly
Power Input Module
Shutter Assembly
Lamp Base Assembly
Cooling Fan
Reset Switch Assembly
Xenon Lamp Rebuild Kit
SSR-001
SSR-002
SSR-003
SSR-004
SSR-005
SSR-006
SSR-007
SSR-008
SSR-009
SSR-010
SSR-011
SSR-012
For parts not listed here, call our Technical Service Department listed at the front of the
manual.
LIT045Sunoptics Surgical
®
(English)
Rev. A
Page 12 of 15
SolarMaxx 300 Illuminator Service Manual
FIGURE 1
LIT045Sunoptics Surgical
®
(English)
Rev. A
Page 13 of 15
SolarMaxx 300 Illuminator Service Manual
FIGURE 2
LIT045Sunoptics Surgical
®
(English)
Rev. A
Page 14 of 15
SolarMaxx 300 Illuminator Service Manual
FIGURE 3
LIT045Sunoptics Surgical
®
(English)
Rev. A
Page 15 of 15