1
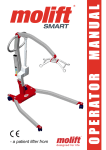
- a patient lifter from
Innhold
General advice.................................................. 3
Explanation of symbols................................ 3
Before using the patient lifter....................... 3
Responsibility............................................... 3
Safety precautions........................................... 4
General........................................................ 4
If defects or faults occur............................... 4
Lift and transfer............................................ 4
About the product............................................ 5
Main parts.................................................... 5
Safety devices.............................................. 5
Mounting.................................................... 20
Mounting Molift Scale................................. 20
Operator panel........................................... 20
Diodes........................................................ 21
Battery and power saving........................... 21
Accessories..................................................... 22
Lifting sling................................................. 22
Maintenance. ................................................... 24
Daily maintenance...................................... 24
Monthly maintenance................................. 24
Fault finding................................................ 24
Service / yearly maintenance .................... 24
Technical data................................................... 6
Assembly / disassembly................................. 7
Assembly and use of charger....................... 7
Unpacking.................................................... 7
Assembly...................................................... 7
Checklist before use..................................... 7
Disassembly................................................. 7
Operation............................................................ 8
Battery care.................................................. 8
Battery capacity............................................ 8
Battery types and chargers.......................... 8
Operating the hand control........................... 9
Emergency stop and lowering...................... 9
Lift and transfer............................................ 9
Use of spread legs....................................... 9
Using lifting slings...................................... 10
Lift and movement to and from bed........... 10
Lift and transfer to and from floor............... 12
Lift and transfer to and from (wheel)chair.. 13
Bathing....................................................... 14
Toileting...................................................... 14
IMPORTANT!
The patient lifter is only meant to be used by
qualified personnel.
The manual shall not be handed over, or made
available to, any unauthorised third party, without a prior written consent from Molift AS.
Exciting laws, conventions and agreements
protects all documents. No extract of this documentation can be reproduced, used or transferred without prior written consent from Molift
AS. Violation of these regulations may lead to
judicial repercussions and economic responsibility. Industrial rights are reserved.
Supplementary equipment .......................... 16
Active Raiser - raising equipment.............. 16
Mounting the Active Raiser Arm I............... 16
Mounting the Active Raiser Arm II............. 17
Active Walker - walking aid........................ 19
Mounting Active Walker.............................. 19
Molift Scale - weighing system................... 20
Molift AS
Ole Deviksvei 44
0668 OSLO, Norway
Teleph:(+47) 40001004
Fax: (+47) 40001008
www.molift.com
[email protected]
E Rev. D/ 08/2006
General advice
Responsibility
Please read these operating instructions carefully
This user manual contains important safety instruc- before putting the product into operation. We astions and information regarding the use of the lifter. sume no liability for damage or malfunctions reCarefully read the manual before using the lifter in sulting from failure to comply with the instrucorder to be familiar in the function and use of the tions. Warranty claims must be made immediately
lifter.
on detecting the defect. Remember to quote the serial number. Consumable parts are not subject to the
Explanation of symbols
warranty.
This symbol is used to point out instructions
and information related to work place safety
where injury may occur if the information is
disregarded or ignored. Follow these instructions, be careful and attentive at all times.
This symbol indicates important information
regarding the use of the equipment. If not
taken into consideration, it may lead to damage or functional defects to the lifter or other
equipment.
This symbol indicates important and useful
information. If taken into consideration, it
will help the operator of the lifter to work efficiently. It may help to simplify routines and
to explain complicated facts.
Before using the patient lifter
Before using a patient lifter, the operator must be
trained accordingly. Practice lifting a colleague, and
be lifted by others. It is important not only to know
how to move another person using the lifter, but also
how it is to be lifted. Try out and practice using all
the relevant slings for the different types of lifter and
movement you may encounter. Before lifting a person, you should explain the procedure.
When using the lifter, it’s also important to use the
correct sling and accessories according to:
•
•
•
•
type of disability
size
weight
type of movement
All technical information, data and instructions for
operation contained in these operating instructions
were up-to-date at time of print and are compiled
on the basis of our experience and to the best of our
knowledge. We reserve the right to incorporate technical modifications within the scope of further development of the product described in this manual.
No claims can be derived from the information, illustrations or descriptions contained in these instructions. We assume no liability for any damage or
malfunction caused by operating errors, non-compliance with these operating instructions or inappropriate maintenance. We expressly point out that only
genuine Molift AS spare parts and accessories approved by us may be used. For safety reasons, the
fitting and use of spare parts or accessories, which
have not been approved, and unauthorised modification or conversion of the product, are not permitted. Molift AS will accept no liability for damages
resulting from such acts.
With the exclusion of product liability, Molift AS
is liable for faults or omissions on its part within
the scope of the warranty obligations stated in the
purchase contract. Claims for damages are excluded, irrespective of the legal reason from which such
claims are derived. Only documentation belonging
to the actual equipment is valid.
Any failure to comply with the safety regulations
and precautionary measures stated in these operating instructions renders the declaration of conformity supplied with the system in accordance with
Council Directive (93/42/EEC) concerning medical
devices invalid.
Safety precautions
• covers are removed by unauthorised personnel
• used incorrectly
• insufficient maintenance
General
Before putting a Molift PARTNER into operation, • load exceeds maximum limit. The Safe Workthe operator must ensure that the lifter and accessoing Load (SWL) stated in this manual and on the
ries are in good working order, especially with relifter is the maximum load
gards to safety. All instruction and information in • unauthorised repair of electrical devices or cables
this manual regarding safety and general precautions must be read, understood and followed care- Lift and transfer
fully. Any disregard to these precautions may result
in personal injury or damage to the equipment. The
The patient lifter may tip over if used incorrectly! Ignorance of warnings and instruclifter must be taken out of service immediately, or
tions may lead to personal injury. Read innot returned to service, if faults and/or irregularistructions carefully before attempting to lift
ties that may have influence on the safety are discovered.
anyone.
Safety devices and -equipment must not be re- Several factors have to be considered during movemoved, disabled or in any other way altered. A ment of the lifter:
Molift PARTNER shall only be used when all safety devices and equipment is in place and fully op- • the user shall sit as low as possible facing the
erational.
lifting column
• the user should rest their feet on the chassis
The lifter is designed for use in room temperature, +10 to +40 °C. This should be Stand to the side of the user when lifting. Ensure that
taken into consideration when transporting arms and legs are clear of the lift, chair, bed etc. Try
the lifter, and therefore keeping it in a tem- to maintain eye contact with the user - this will help
perate part of the vehicle. Alternatively, the the user feel safe and comfortable.
lifter must rest in a temperate room until the
equipment has achieved proper working tem Pay close attention to your actions. Ensure
that all four loops of the sling are securely
perature.
fastened to avoid the user slipping or falling.
Do not fasten the sling using the head supIf defects or faults occur
port tightening strap.
The lifter must be switched off immediately if one
of the following conditions occur;
Molift slings shall ONLY be used to lift persons. NEVER use the sling to lift and/or move
• damage to electrical devices or cables, or damage
objects of any kind.
to parts of electrical insulation
• damage or failure on safety devices
If the lifting movement does not start when
the corresponding button is pressed, please
consult the fault finding table in the maintenance chapter to locate the fault.
Injury to personnel or equipment may occur if Molift
PARTNER is used in an incorrect manner and if:
E Rev. D/ 08/2006
About the product
Safety devices
Molift PARTNER 3 is equipped with several safeMolift PARTNER 3 is a mobile lifter intended for ty devices, which are intended to prevent damage
lifting and transferring personnel. The lifter is made to personnel and equipment in the case of incorrect
out of light materials, it has castors, adjustable legs use.
and a battery. It is therefore ideal for use in institutional care.
• The lifter has an overload sensor preventing the
lifter to be operated with more than Safe WorkMain parts
ing Load. If the load exceeds the maximum limit,
The lifter is built around a chassis unit comprising a
the lifter will stop the movement.
lifting column fixing unit, rear castors and spreading • The lifting arm is hinged to prevent the arm and
mechanism for legs. There is also a connection for
suspension from squeezing the patient if it is
the hand control and an emergency stop button.
lowered too much. The lifting arm will not produce any force when moving downwards.
On the lifting column there is a drive handle and a • The suspension has safety hooks to prevent the
battery holder. The adjustable legs are operated by
sling loops to fall off.
an electrical motor and gives the operator a possibil- • When activating the emergency stop button, the
ity to adjust the width of the lifter to different needs
power supply will be disconnected, and the lifter
and situations.
will stop.
• If an error occurs on the lifter, it is possible to
On the lifting column there is a trolley on which the
lower the lifting arm manually by operating the
lifting arm is attached. The suspension is attached to
emergency lowering switch.
the lifting arm, and the suspension rotates freely, allowing the Molift PARTNER to be used at any angle.
Allen wrench 4 and 8 mm
Emergency lowering
Lifting column
Lifting arm
Trolley
Drive handle
Suspension
Hand control
Battery holder
Control electronics
Chassis
Emergency stop
Adjustable legs
Technical data
Safe Working Load (SWL):
Weight, totally:
Lifting height:
Material:
Height of legs:
Motor:
Measurements:
excl. battery; 30 kg / incl. battery: 30,8 kg
Battery:
Steel and aluminium
12 V DC
14,4 V NiCd 1,9 Ah or 14,4 V NiMH 2,2
Ah, Molift PowerPac
160 kg
1200 mm
Max 80 mm
1140 x 680 x 1710 mm (LxBxH)
Measurements in illustrations below are in millimetres.
E Rev. D/ 08/2006
Assembly / disassembly
To be able to operate the Molift PARTNER, the operator must have good knowledge of the lift, including assembly, disassembly and preparation before
use.
Assembly and use of charger
The battery charger shall be mounted on a vertical
wall surface close to a power outlet. The charger
shall be connected to the power outlet at all times.
Molift AS tests and charges all batteries before packing and shipment. However, all batteries must be charged before use.
Unpacking
• The lifter comes in two cardboard boxes. Verify that the boxes have no apparent damages. If
damaged, - check the content and contact your
dealer for assistance if components are damaged.
• One of the boxes contains chassis, suspension,
drive handle, hand control, battery and battery
charger. The other box contains the lifting column including 2 Allen wrenches placed on the
top of the column.
Assembly
• Check that the two screws on the back of the
chassis are loosened enough to allow the bracket to have a clearance to the chassis on 4 mm.
Guide the steel rail, on which the screws are attached, into the T-groove on the column when
mounting the column on the chassis.
• Mount the drive handle on the lifting column by
guiding the steel-rail on the drive handle into the
T-groove on the top of the lifting column. Point
the open part of the drive handle up.
• Guide the cables from the hand control through
the ring on the drive handle, mount the chord anchorage and connect the contact on chassis. The
hand control has a hook that makes it possible to
hang it on the drive handle.
• Mount the lifting arm with suspension in the
trolley on the lifting column. The lifting arm is
mounted when the hook is placed around the two
bolts in the trolley.
Be careful not to put fingers or similar under
the lifting arm between arm and trolley. Danger of personal injury.
• Place the battery holder with the connectors facing down. Run each function of the lifter a couple of times without load to verify proper function.
Molift AS tests all lifters with and without
load before shipment. The control is an extra
precaution to uncover any shipment damage
and/or incorrect assembly.
Checklist before use
• Check that the lifter has no apparent damage or
other faults
• Check that you have sufficiently charged batteries to complete the task you have planned
• Ensure that the lifting arm and lifting column are
properly fixed.
The battery must not be in the battery holder
during assembly!
Disassembly
• Remove the battery.
• Remove the lifting arm.
• Place the column in the attachment on the chassis, and the column will find the correct position. • Loosen the hexagon screw on the chassis, and
If the column does not place itself correctly, rothen lift off the lifting column.
• Loosen the drive handle if necessary.
tate the drive and try again until the column has
found the correct position. Make sure that the
red arrow on the lower part of the column corresponds with the edge on the chassis.
• Tighten the screws with the allen wrench found
on the top of the column.
Operation
Battery care
Molift PowerPac system is a battery with a 14,4 V
cell unit that is placed in the battery holder on the
lift. A charger is also supplied to charge the battery
whenever needed. This battery system is the same
on all of Molift’s mobile lifts. The power cable of
the charger should be connected to the power outlet
at all times (verify that the charger is suitable for the
local power system voltage). Place the battery in the
holder according to the arrow markings. Press the
battery gently down to ensure good contact between
battery and charger.
Battery capacity
A LED (Light Emitting Diode) is situated on the
chassis of the lifter. If the voltage of the battery falls
below a certain level, the diode will change to orange, indicating the need for charging. There is still
enough capacity to perform 3-5 lift cycles (75 kg) at
this point. If the battery is discharged during a working session, it’s recommended to have two batteries, so a second charged battery is available when
needed.
If the battery is discharged during a lift, it is
always enough power to lower the user down
again.
It’s not possible to overcharge the batteries,
but to ensure optimal performance throughout the lifetime of the battery, we recommend
that the battery is allowed to rest for a couple of minutes after charging to cool down
before use. It is also important that fully
charged batteries are not charged without
being used.
The chargers have different ways of showing the
status of the charging process.
NiCd-charger
•
The charger has a LED indicating the status of the
battery as described below:
LED
Yellow
Yellow
Orange
Green/yellow
Green
Orange/green
Mode
No battery
Initalization (10 sec)
Fast charge
Top-off charge
Trickle charge
Error
Output
25 V
100 mA
1,8 A
270 mA
100 mA
100 mA
It is recommended that NiCd batteries are
placed in the charger when not in use. Regularly (each 10 times) the battery should be
used until the charging indicator on the lifter
glows, before charging the battery.
Battery types and chargers
Molift PowerPac can be used with two kinds of batteries; NiCd and NiMH.
• NiMH-charger
The charger has two diodes - a green and a red. The
red diode will glow as soon as the battery is placed
in the charging unit and maximum charging current
The battery and charger types must not be is applied. The green diode will start to glow when
mixed. Use of wrong charger to battery type the battery is fully charged and the charger switchmay cause overheating and damage to the es to maintenance charging. If the charger can’t
PowerPac
detect fully charged battery after about 8 hours, a
built in timer will force the charger to maintenance
Be aware that these two batteries have differ- mode to avoid overcharging.
ent chargers. Follow the instructions printed
on the battery.
E Rev. D/ 08/2006
Operating the hand control
When using slings intended for two point suspension, the suspension shall be used diagoThe hand control to PARTNER 3 has four butnally, i.e. loops from the sling shall be fastons, two buttons for up and down, and two
tened on hooks diagonally opposite.
buttons for adjusting the adjustable legs.
In addition there is a green diode which illuminates
when the buttons are activated.
Try to position the user as low as possible (preferably resting the feet on the chassis) when transferring
Diode
Lift up
the lifter with a suspended user. In this way, the cenLift down
tre of gravity will be as low as possible and therefore reducing the risk of instability. The lifter should
be manoeuvred with spread legs in outer position to
Legs out
achieve the highest possible stability.
Legs in
Be careful during movement - the suspended user
Emergency stop and lowering
may swing somewhat during turns, stops and starts.
All of the Molift patient lifts are equipped with Be particularly careful when manoeuvring close to
emergency stop and lowering. The emergency stop furniture to prevent the suspended user from collidwill cut the power to the motor, and is situated on the ing with these objects.
right side of the chassis. Turning it clockwise until it
pops up will reset the emergency button.
The lifter shall not be used to lift or move users on sloping surfaces.
It is possible to perform an emergency lowering
in case of a general malfunction. An allen wrench Avoid deep pile carpets, high thresholds, uneven
comes with the lifter for this purpose (situated on the surfaces or other obstacles that may block the castop of the column). Push the allen wrench through tors. The lifter may become unstable if forced over
the sticker on the top of the column, and turn until such obstacles increasing the risk of tipping over.
the patient is lowered down.
Contact the Molift service partner if the
reason for the failure causing an emergency lowering is unknown or if it is a result of
failed components or parts.
Lift and transfer
The suspension shall always be positioned across
the user as shown left in the illustration below.
The lifter shall only be used for movement
over short distances. It is not a replacement
for wheelchair or similar.
Use of spread legs
Use wide legs wherever appropriate, for instance to
position the lifter around wheelchairs, toilets etc.
Using lifting slings
Molift Easy Sling with head support
The Molift Easy lifting slings are comfortable padded slings and, as the name indicates, easy to use.
Molift Basic slings have the same design with no
padding. They are washable at 80º C and autoclave
at 85 ºC for 30 minutes. The plastic insert of the
head support on Molift Basic slings should be removed before washing.
Torn, cut, frayed or broken slings can fail,
resulting in serious injury to the user. Use
slings in good condition only. Destroy and
discard old, unusable slings.
It is recommended to use Molift slings. Slings
from other manufacturers may have other
specifications leading to unexpected instability and possible injury to personal.
Lift and movement to and from bed
Lift from bed
Fold the Molift Easy sling as indicated above be- Roll user onto her side. Put the folded sling behind
fore use. The grey side should be facing away from her back. The centre of the sling should be parallel
the user when putting the sling in place. The sling with the users spine. Roll her then onto her back.
should be held by one hand, leaving the other free to
move and support the user.
Molift Easy Sling without head support
Pull the leg loops forward and under the thighs as
shown in illustration above.
10
E Rev. D/ 08/2006
When all four loops are hooked onto the suspension,
raise the user carefully.
When using a sling with head support, the
head support can be tightened to support the
head in correct position. Make sure that the
sling is fastened in the loops, not the head
support tightening straps.
If the user is in a hospital bed, it will help to
raise the head of the bed
Cross the loops one through the other.
Repositioning of the user may be needed to ensure
that a safe and comfortable sitting position is attained as the user is raised. Reposition using the
handle on the back of the sling.
If the user has a bed which enables raising
and lowering, it should be lowered before the
lifting starts.
Raise the user until the buttocks are just above the
Position the legs under the bed with the suspension mattress. Lift the user’s legs and turn her so she facover the user. Be careful not to lower the suspen- es the lifting column. When clear of bed, and if pracsion too low touching the user. Make sure that the tical, lower the user so that her feet rest on the chassuspension is centred over the user before you start sis. If possible, lower the bed before lifting. Move
the lifting. Remember - the castors should not be the lifter away from bed.
locked.
Beware of obstructions under the bed that
can cause castors to stop or tip.
11
Lift to bed
Lift and transfer to and from floor
Lift and transfer from the floor is almost identical to
a lift and transfer from bed - please read this section.
There are two ways to lift from the floor.
Alternative lift 1
Raise the user until the buttocks are just above the
mattress. Position the lifter under the bed.
Beware of obstructions under the bed that
can cause castors to stop or tip. Take care
not to squeeze the users legs.
Place the users head on the chassis. Use a pillow if
appropriate to protect the head and neck of the user.
The suspension shall be centred over the user.
Lower the suspension enough to allow the sling
loops to be hooked up.
Raise the user from the floor. Position user in the
sling by pulling the handle on the back of the sling.
Turn the user to face the lifting column, and place
the feet on the chassis.
Alternative lift 2
Centre the user over the bed and turn her/him so that
the feet point to the end of the bed. Lower the user
carefully. Remove the loops from the suspension.
Removing the sling
Gently pull the leg section to the side, out from the
user’s thighs and towards yourself. Pull the shoulder
section under the neck of the user and roll her gently
onto her side. Pull the sling away and roll her onto
her back.
Be careful when rolling the user onto her
side. Make sure you have control over the
movement to prevent her from rolling completely over and out of the bed.
12
A floor based lift can also be performed by positioning the lifting column between the legs of the user as
shown above. Otherwise as alternative 1.
E Rev. D/ 08/2006
Lowering to floor
Place a pillow on the chassis or on the floor to pro- The leg sections of the sling are pulled forward and
tect the users head and neck (not necessary if you beneath the user’s thighs by the loops. The loops are
are using a sling with head support). Otherwise as then crossed, one through the other, as shown.
described above.
Lift and transfer to and from (wheel)chair
Lift and transfer from (wheel)chair
Fold the sling as described in “Using lifting slings”.
The gray side should be turned away from the user
when placing the sling.
Move the lifter around the chair, and let the user rest
her feet on the chassis.
If the transfer is from a wheelchair, the
brakes must be locked to prevent the wheelchair from rolling away.
If the users physique and ability allows it,
the user should be encouraged to take active
part in fitting the sling. The user can lean
forward, lift her thighs and help placing the
leg section.
Lift/raise the user above seat height, and perform
the transfer. It is not necessary to lift the person very
high.
Lean the user forward gently, but ensure you continue to support her. Place the folded sling behind
the user’s back and push it down until it touches the
seat of the chair.
13
Lift and transfer to (wheel)chair
Manoeuvre the lifter so that the user is as far back in
the (wheel)chair as possible.
If the users physique and ability allows it,
the user should be encouraged to take active
part in fitting the sling. The user can lean
forward, lift her tights and help placing the
leg section.
If the transfer is from a wheelchair, the
brakes must be locked to prevent the wheelchair from rolling away.
Bathing
The procedure for lifting to/from the bath is in prinWhen lowering, you can use the following tech- ciple the same as for to/from bed. A Molift Basic
niques or a combination of them to position and get Bathing sling is designes for this purpose. This sling
the user seated far back in the chair:
dries quickly and may be washed at 80 ºC.
• push gently on the knees
• pull the loop on the back of the sling
• tilt the chair slightly backwards
Toileting
Lower the user into the chair, unhook sling from
suspension and remove the lifter.
Removal of sling
Gently pull leg section to the side, out from the user’s thighs. Standing by the side of the user, lean her
forward - supporting with one hand. Pull sling up
from behind her back.
The Molift Easy Toilet Sling is used with the standard 4-point suspensions.
Molift Easy Toilet sling is a toilet sling with a
thicker and wider upholstery. It is also available with head-support. The Molift Easy Toilet Comfort sling is easier to fit in narrow environments, and is available with a separate
head support
The toilet sling can be washed at 80 ºC, and is fitted
as follows:
Pulling sharply on sling may cause user to • Insert the sling behind the users back with the
fall forward resulting an injury. Always supgrey side away from user.
port the user by keeping one arm around the
user’s shoulder when fitting or removing the
sling (see illustration).
14
E Rev. D/ 08/2006
• Fasten the belt firmly around the user’s body.
• Place the leg section under the front part of the
thighs and pull the loops up between the thighs.
• Hook the four loops on the suspension as for other slings.
• Position the lifter around the toilet and lower the
user.
• Pull the leg sections out of the way. The sling
can be left on during bathroom use.
Alternative
By pulling the leg sections from the outside
and in, you will achieve a wider leg position.
• On Molift Easy Toilet Comfort, place the leg section over and down between the thighs and pull
outwards from the inner part of the thighs.
The leg sections of Molift Easy Toilet Comfort
Sling are fitted to separate the legs, therefore
they should not be crossed as the other Easy
slings.
15
Supplementary equipment
Active Raiser - raising equipment
For people with some strength in arm and legs, the
Active Raiser is a good alternative for toilet access
or for other quick transfers. The accessories are
quick and easy to use as there is no need for ordinary slings. Another advantage is that the user actively participate in the transfer.
Molift have 2 types of raiser equipment; Active
Raiser I and Active Raiser II. Both types raises the
patient to a standing position. The Raiser I arm raises the patient with a straight movement upwards.
With the Raiser II arm the patient is raised up and
forwards at the same time.
Mounting the Active Raiser Arm I
The Active Raiser Arm I consists of
• Active Raiser arm
• Platform with knee support
Raiser Arm
Hook
Trolley
Knee support
U-bracket
Platform
In addition, Active Raiser is used together with Easy
Raiser strap.
• To be able to use the Active Raiser, the lifting
arm must be dismounted.
• The Active Raiser arm is mounted on the trolley
in the column. The Active Raiser arm is mounted
when the hook is placed around the two bolts in
the trolley.
Be careful not to put fingers or similar under
the lifting arm between arm and trolley. Danger of personal injury.
• Place the battery in the battery holder with the
connectors facing down. Run each function of
the lifter a couple of times without load to verify
proper function.
16
Mount the platform on the U-bracket, and the Active
Raiser Arm is now ready for use.
Always drive the screws on the mounting
plate well home. The button on the platform
must be locked. You will hear a “click” when
the platform is being pushed into the bracket.
Checklist before use
• Verify that the Active Raiser Arm is properly
mounted.
• Verify that knee support and platform are properly mounted.
E Rev. D/ 08/2006
Mounting the Active Raiser Arm II
Active Raiser Arm II consists of:
Raiser Arm
• Active Raiser arm
• Platform with knee support
In addition, Active Raiser is used together with Easy
Raiser strap.
Remember to attach the U-bracket for the platform
on the column below the battery holder, before
mounting the drive handle and the Active Raiser
Arm. Dismount the column and attach the U-bracket. Mount the column and place the U-bracket to
lean on the chassis.
Be careful not to put fingers or similar under
the Active Raiser Arm between the arm and
trolley. Danger of personnel injury.
Hook
Trolley
Knee support
U-bracket
Platform
Attach the hook onto the upper bolt on the trolley.
Adjust the height of the trolley with the hand control to be able to attach the Active Raiser Arm on the
back of the lifting column. The arm is to be fixed at
eye level of user.
Mount the platform on the U-bracket, and the Active
Raiser Arm is now ready for use.
The mounting plate holding the Active Raiser Arm
to the column has an anti-skid surface to prevent it
Always drive the screws on the mounting
plate well home. The button on the platform
from sliding on the column. In addition, a securing
must be locked. You will hear a “click” when
bolt is to be mounted above the mounting plate in
the platform is being pushed into the brackthe t-slit of the lifting column
et.
Securing bolt
Checklist before use
• Verify that the Active Raiser Arm is properly
mounted.
• Verify that knee support and platform are properly mounted.
Operation
Adjust the height of the arm individually. The arm is
This securing bolt will eliminate the safety risk of to be fixed at eye level of the user when the user is
the Active Raiser Arm II slipping over the top of the sitting with a straight back. For toileting/quick transcolumn.
fer, it is not required to bring the user to an upright
position. Please note that the general safety rules for
transfer always applies.
17
How to use both types Active Raiser I and II
Place the users feet on the platform of the lifter and
continue moving the lifter forward until the knee
support is in contact with the users upper shins just
below the knees. The knee support are adjustable in
height and width.
To perform a comfortable lift for the patient,
it is recommended that the patient is sitting
in a normal upright position with near 90° in
ankles, knees and hips/torso. It is also recommended that the patient is wearing suitable
shoes or socks with good friction towards the
floor
If the patient is sitting in a wheelchair, it is
necessary to put on the wheel chair brakes.
It’s also recommended to lock the wheels of
the Active Raiser when performing the lift.
Patients with an extremely high or displaced
centre of gravity (i.e. lameness on one side of
the body or high weight on the upper body)
may cause the lifter to tip over. Such patients
should be lifted in a passive lifter, and not
with a semi-active lifter as Active Raiser.
Raise the patient carefully until the buttocks are
Lock the castors on the lifter. Place the Molift Easy clear from the seating. Unlock the wheels on the
Raiser sling under the arms and around the back of lifter and move the patient to the next location.
the patient as far down as possible. Connect the belt
and tighten firmly. Fasten the sling to the lifting Please note that it is not necessary to raise the user
arm by pulling the ropes firmly into the rope locks completely into a standing position. The raiser acfrom the inside and out. When lifting the patient, the cessories are especially designed for quick transfers
ropes will lock even tighter due to the weight of the between, for instance, wheelchair and toilets.
patient. The patient should grab and hold the handlebars of the lifting arm if possible.
18
E Rev. D/ 08/2006
Active Walker - walking aid
Molift Partner may be used as a walking aid by
mounting Active Walker.
Mounting Active Walker
• To be able to use the Active Walker, the lifting
arm must be dismounted.
• The Active Walker arm is mounted on the trolley
in the column. The Active Walker arm is mounted when the hook is placed around the two bolts
in the trolley.
How to use Active Walker
The handles may be adjusted according to the length
of the users forearm, and the Walker Arm support
can be adjusted in width.
Be careful not to put fingers or similar under
the lifting arm between arm and trolley. Danger of personal injury.
• Place the battery in the battery holder with the
connectors facing down. Run each function of
the lifter a couple of times without load to verify
proper function.
Handle
Walker Arm support
The user is lifted into a standing position using a
strap / securing belt and the arm supports.
Make sure that the strap/securing belt are
safely attached during use!
A security belt with groin strap is recommended for
users requiring extra support.
Hook
Trolley
• Verify that the Active Walker arm is properly
mounted.
Active Walker provides the user with a good and
comfortable support while training and is appropriate for people with some strength in arms and legs.
19
Molift Scale - weighing system
With Molift Scale it is possible to weigh the patient. The scale is intended for weights up to 160 kg.
Smallest weight possible is 2 kg and e is 100 g.
Operator panel
Mounting
Remove the standard suspension from the lifter and
attach the scale system correspondingly. Ensure that
the arm is properly attached to the carriage., ref. operator manual for your lifter.
Mounting Molift Scale
• To be able to use the Molift Scale, the lifting arm
must be dismounted.
• Molift Scale with lifting arm is mounted on the
trolley when the hook is placed around the two
bolts in the trolley.
Be careful not to put fingers or similar under
the lifting arm between arm and trolley. Danger of personal injury.
• Place the battery in the battery holder with the
connectors facing down. Run each function of
the lifter a couple of times without load to verify
proper function.
Checklist before use
• Verify that Molift Scale with lifting arm is properly attached.
20
On / Zero / Off
Press the key to turn the scale on. The scale will reset
and the indicator ”Zero” will illuminate. The scale is
now ready for use.
It is possible to reset the scale with sling, by attaching the sling onto the suspension. Be sure that the
sling is hanging freely and press “Zero” once. Wait
until the display shows zero, them remove the sling
and prepare for a normal lift. If the scale is not activated it will turn off after two minutes.
To turn off, press and hold the key for approx. 3 seconds (until OFF shows in the display).
E Rev. D/ 08/2006
Body Mass Index (BMI)
The scale can calculate BMI. Please observe that
this function only applies for weights above 35 kg.
• Press and hold the BMI-key with the patient suspended in the scale
• The display invites you to enter the persons
height in meters. Do so by using the up and
down arrows. Then press the BMI key once and
the display will show the patients BMI.
BMI
< 20
20 - 24,9
25 - 29,9
30 - 34,9
> 35
Description
Underweight
Healthy weight
Overweight
Fat
Grossly obese
Diodes
Zero
Shall be lit before lifting. The display may show
0,0, but the scale is not calibrated to zero unless
this diode is lit.
Motion
Will be lit if the scale is in motion.
Body Mass Index
To indicate that the display is showing BMI and
not the patients weight.
Battery and power saving
A replaceable 9V battery type PP3 runs the unit. The
system will shut down automatically if not used for
2 minutes. The battery can be replaced after removing the black cover on the back of the scale. If all diodes are lit or the scale does not function properly,
try to remove and replace the battery.
21
Accessories
Molift Easy Toilet Sling
Lifting sling
Molift Easy Paediatric Sling
Size
XXS
XS
No head support
Art. no 3005050
Art. no 3005000
With head support
Art. no 3006050
Art. no 3006000
Easy Toilet Sling and Basic Bathing Sling for kids,
see the tables below, size XXS and XS.
Molift Easy Sling
Size
XS
S
M
L
XL
XXL
No head support
Art. no 3025000
Art. no 3025100
Art. no 3025200
Art. no 3025300
Art. no 3025400
Art. no 3025500
With head support
Art. no 3026000
Art. no 3026100
Art. no 3026200
Art. no 3026300
Art. no 3026400
Art. no 3026500
Molift Basic Sling
Size
XXS
XS
S
M
L
XL
XXL
No head support
Art. no 3021050
Art. no 3021000
Art. no 3021100
Art. no 3021200
Art. no 3021300
Art. no 3021400
Art. no 3021500
With head support
Art. no 3022050
Art. no 3022000
Art. no 3022100
Art. no 3022200
Art. no 3022300
Art. no 3022400
Art. no 3022500
Molift Basic Bathing Sling
Size
XXS
XS
S
M
L
XL
XXL
22
No head support
Art. no 3023050
Art. no 3023000
Art. no 3023100
Art. no 3023200
Art. no 3023300
Art. no 3023400
Art. no 3023500
With head support
Art. no 3024050
Art. no 3024000
Art. no 3024100
Art. no 3024200
Art. no 3024300
Art. no 3024400
Art. no 3024500
Size
XXS
XS
S
M
L
XL
XXL
No head support
Art. no 3032050
Art. no 3032000
Art. no 3032100
Art. no 3032200
Art. no 3032300
Art. no 3032400
Art. no 3032500
With head support
Art. no 3033050
Art. no 3033000
Art. no 3033100
Art. no 3033200
Art. no 3033300
Art. no 3033400
Art. no 3033500
Molift Easy Toilet Sling Comfort
Size
No head support
XXS
XS
S
M
L
XL
XXL
Art. no 3016050
Art. no 3016000
Art. no 3016100
Art. no 3016200
Art. no 3016300
Art. no 3016400
Art. no 3016500
Separate
head support
Art. no 3016055
Art. no 3016001
Art. no 3016111
Art. no 3016222
Art. no 3016333
Art. no 3016444
Art. no 3016555
Molift Easy Amputee Sling
Size
XXS
XS
S
M
L
XL
XXL
No head support
Art. no 3027050
Art. no 3027000
Art. no 3027100
Art. no 3027200
Art. no 3027300
Art. no 3027400
Art. no 3027500
With head support
Art. no 3028050
Art. no 3028000
Art. no 3028100
Art. no 3028200
Art. no 3028300
Art. no 3028400
Art. no 3028500
Bag for slings - Art. no 3048000
E Rev. D/ 08/2006
Sling size guide
A
C
B
Easy and Basic Slings
Size
Color
code
XXS Pink
Recomm.
A
B
C
weight
(cm) (cm) (cm)
(Kg)
12-17
41
55
56
XS
Light blue 17-25
46
65
58
S
Red
25-50
51
75
60
M
Yellow
45-95
56
85
62
L
Green
90-160
66
100
64
XL
Blue
160-240
76
115
66
230-300
86
130
68
XXL White
Choice of sling size depends on both user weight
and shape/size of user.
23
Maintenance
Daily maintenance
Detergents must be pH-neutral. Do not use
solvents or strong liquids - this may damage
surfaces on the lifter. For disinfection when
needed; use isopropyl alcohol. Avoid abrasive cleaning products.
Clean surfaces with a damp cloth using an appropriate detergent.
Monthly maintenance
• Remove hair and pile from the castors and verify
that the castors rotates without abnormal friction
• Verify that the contacts of the hand control and
charger is firmly in place
• Clean contact and hand control with spirit or
similar to remove grease and dirt
• Verify that the cables for the hand control and
charger are intact
• Run the lifter up and down to verify that it runs
normally and without any abnormal noise.
Fault finding
If you have access to other similar lifters, it might
be an advantage to “switch parts” in order to locate
the error.
Symptom
The lifting column is wobbly.
The lifter only
moves in one
direction/ adjustable legs
only moves in
one direction
24
Possible cause/action
The locking bolts have loosened or the lifting column is out
of position in chassis / verify
position of lifting column and
tighten bolts
Hand control has failed / test
with another hand control and
change if defective.
The control electronics has
failed / change control electronics / contact local representative for service
The lifter
moves uncontrolled / adjustable legs
moves uncontrolled
The lifting arm
does not move
/ adjustable
legs does not
move
Short circuit between hand control and lifter / clean the contact
to hand control with spirit to remove grease
Hand control has failed /
change hand control / contact
local representative for service
Defective control electronics
/ change control electronics /
contact local representative for
service
Battery is empty / change to a
new battery or charge battery
The motor connection is not in
contact / clean contact points
on column and chassis - position the lifting column correctly
and tighten the bolts
Emergency stop activated (button is pressed in) / turn knob
counter clockwise to reset
The cable/contact to hand control has disconnected / reconnect contact
Hand control has failed / test
with another hand control and
change if defective / contact local representative for service
Defective control electronics
/ change control electronics /
contact local representative for
service
Motor is defective / change motor / contact local representative for service
Service / yearly maintenance
If you are not able to solve the fault or problems by
yourself using this manual, please contact local authorised service representative. If you do not know
whom to contact locally, please contact your dealer
or Molift AS to get help.
Yearly service is done according to procedures in the
service manual included with the lifter. The owner
is responsible to ensure proper logging and written
verification performed by authorised service partner.
The service manual has dedicated pages for logging
and signature, and follows each lifter delivered by
Molift AS.
E Rev. D/ 08/2006
Notes:
25
WARRANTY
Molift AS hereby declares that this product is awarded up to 5 - five - year extended manufacturer’s
warranty.
It is very important to our customers and to Molift AS that our products meet all relevant quality and safety requirements according to both customer and authority demands. Molift AS develops and manufactures products with high standards of safety, quality and design, and we are continuously in a process of
keeping our products in position among the market leaders.
To make our products quality level more explicit Molift AS have introduced extended warranty time on
all of our patient lifters. A 5 - five - year* warranty against defects which might be traced back to manufacturing is offered. The extended warranty period is offered under the condition that the regulations
described here are completely fulfilled and that the product has been used according to its intentions.
The extended warranty is valid for a period of 5 - five - years starting at the date of purchase limited to
3 months after the production year/week. The extended warranty is offered in addition to the local sale
of goods act. It is mandatory that the product undergoes safety control and maintenance performed by
an authorised service partner at least every 12 months according to this service manual made by Molift
AS.
• Yearly maintenance and safety control must be performed within a maximum interval of 12 months
and for the first time maximum 12 months after date of purchase or maximum 15 months after year/
week of production.
• Molift AS will cover the cost of spare parts and labour in the warranty period for all necessary repairs caused by product defects that can be traced back to manufacturing. The repair must be performed by an authorised service partner or at Molift AS’ own workshop during the warranty period.
• All warranty repairs must be approved by your Molift supplier or by Molift AS prior to the repair.
• The owner of the product is responsible for establishing the service agreement, and the cost for the
annual safety control and maintenance.
• The service manual has one page for every 12 months containing checkpoints for maintenance and
safety control. The extended warranty is valid only with signature and/or stamp by authorised service
partner including service partner’s signed label with authorisation no. on product.
* Normal warranty is 12 months. This still applies for slings, hand control, batteries and paint.
Gjøvik 28.08.2006
Molift AS
__________________
Geir Olav Farstad
Managing Director
26
E Rev. D/ 08/2006
DECLARATION OF CONFORMITY
Molift AS
Ole Deviksvei 44
0668 OSLO
NORWAY
Telephone: + 47 40 00 10 04
hereby declare that:
Molift PARTNER 3 patient lifter
and that the accessoires used only together with this product
Year: 2006
are in conformity with:
• The Council Directive concerning medical devices (93/42/EØF)
and according to this classified as medical equipment class 1
Molift PARTNER 3 is manufactured in conformity with the following national or
international standards that also might implement a harmonised standard:
• ISO10535 Hoists for the transfer of disabled persons - Requirements and test methods
• ISO 14971 Medical equipment - Risik analysis
Notified fody:
Hjelpemiddelinstituttet
Gregersensvej
DK-2630 Taastrup
Denmark
Tel: + 45 43993322
Title:
Name:
Company:
NEMKO AS
Gaustadalleen 30
N-0314 OSLO
Norway
Tel: + 47 22960342
Managing Director
Geir Olav Farstad
Molift AS
28.08.2006
Date
Signature
27
At times with increasing demand for efficiency in the healthcare sector and growing
focus on patients needs, it is easy to neglect the needs of the carer. The need to give
better help and caring avoiding heavy lifting situations, avoiding putting your own
back at risk, without being completely exhausted after work and still have some surplus energy when the workday is over.
This is the insight that drives us at Molift. The company was started 20 years ago by a
man who through his own experience saw the need for lifting and moving patients in
an effective and comfortable way - for both patient and carer.
We have since then delivered products that compliments the natural movements of the
body, that is both simple and intuitive to use. Products designed to give the patient
a better life in addition to providing the carer with real support and optimum work
enjoyment.
This is the true meaning of; Molift - designed for life
Molift AS
Ole Deviksvei 44
N - 0668 OSLO
Norway
Telephone: (+47) 4000 1004
Fax: (+47) 4000 1008
www.molift.com
[email protected]