1
A REGAL-BELOIT COMPANY
ttVelvel Smooüh,, . Velvet
Quiete
"
., ;ts$%etrr
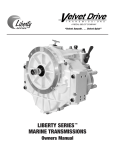
TIBERTY SERIES'"
MARI II E TRA]ISMISSIONS
0wners Manual
Table of Gontents
Section
I
il
ilt
IV
V
VI
Page
lnformation
LaunchMaintenance....
Operation
WinterStorage
Troubleshooting..
Maintenance Record
Warranty
General
.
...1-2
.....3-5
........6
.........7
.......8
.....9
......BackCover
Owner's Responsibilities
It is the responsibility of the owner or operator to perform necessary safety checks to ensure that all lubrication, cooling
maintenance and recommended practices are followed for safe, enjoyable operation.
Proper care and maintenance will help ensure trouble-free operation and long service life from your Velvet Drive marine
transmission.
Section I
General lnformation
Every Liberty SeriesrM Velvet Drive marine transmission is
self-contained with its own sump and hydraulic pump
separate from the engine; however, connection
external oil (transmission fluid) cooler is required.
to
an
The Velvet Drive Liberty SeriesrM transmission is available
with gear ratios (refer to table 1-1) suitable for inboard
pleasure and work boats.
There are two Liberty SeriesrM transmission designs:
1. Model Liberty A is a down angle design.
2. Model Liberty V is a V-drive design with a hollow
output shaft. The propeller shaft passes through
the transmission in this design allowing better
flange to coupler assembly. Both designs require a
left hand engíne (turning counter clockwise at the
flywheel) and will turn a right or left propeller with
equal efficiency.
The identification tab (see figure 1), located on top of the
ansmission's mounting boss (see figure 2), shows the
model number, serial number and gear ratio for the unit:
-
Model number appears below the words Velvet Drive.
Serial number appears just below the model number, to
the right.
-
-
Figure 1: ldentification Tag
Ratio appears just below the model number, to the left.
Transfer the information on the identification tag to the
Maintenance Record Chart found on page 10 of this
manual so that you will have it available without having to
look at the transmission.
The model number and serial number are required on all
correspondence regarding warranty or service.
ts s toN
TRANS
RATIo
I
s¡RlRr_ruo
1.00:11 1001
s
ì
\ Ilvzr
ASSEMBLY NO.
General lnformation
(contd)
Figure 2: Liberty SeriesrM Marine Transmission
TO COOLER
TEMPERATURE SENSOR PORT
NEUTRAL SAFETY SWITCH
SHIFT
LEVER
FLUID
LEVEL
DIPSTICK
COOLER
RETURN
DOWN ANGLE
TEMPERATURE
SENSOR PORT
PORT-SIDE
TRANSMISSION
MOUNTING
BOSS
STARBOARD-SIDE
TRANSMISSION
MOUNTING
BOSS
V.DRIVE
Table 1-1: General Specifications
Down Angle
V-Drive
3001-000-001
3001 -000-002
1.00:1
2.011.9
114152
1.25:1
2.011.9
114152
3001-000-003
3001 -000-004
1.50:1
2.01',t.9
114152
2.O0:1
2.011.9
114152
2.45:1
z.Ol't.9
114152
2.80:1
2.011.9
114152
1.25:1
3.0128
135162
3001-000-005
3001-000-006
3002-000-002
3002-000-003
3002-000-004
3002-000-005
1.50:1
3.0t28
135162
2.O0:'l
3.0128
135/62
2.50:1
3.0128
135162
Approximate, depending on the angle of transmission installation, for transmission only. Capacity given does not include fluid required to fill oil cooler
and oil cooler hoses.
+
2
Section ll
Launch Maintenance
Îhe following maintenance shall be performed immediately (ÃCAIIIIõN I Do not lift or pry against transmission
after launching your boat. This will give you optimum output flange to move engine.
performance and service life from your Velvet Drive
Liberty SeriesrM
transmission.
Coupling Alignment
7. When alignment is satisfactory install the
coupling flange bolts and nuts. Torque to 2S-¿tO lb-ft
Gheck
fÃcatlrõtr|
(34-sB Nm).
Vibration, gear noise, toss of RpM and
premature oil seal and bearing failures may be
by misalignment of shaft flanges.
caused
Figure 3: Coupling Flange Alignment
The propeller shaft and transmission output flange alignment must be checked after launching your boat. lt should
also be checked any time your boat strikes a heavy object
or has been pulled from the water.
.OO3 MAXIMUM
FEELER
GAUGE
PILOT
Before removing your boat from the
water, unbolt and separate the transmission and
propeller shaft flanges.
fÃcAlrnotrl
Check the alignment of the transmission output flange
,h¿ tne propeller shaft flange with the boat in the water
and fully loaded. The fuel and water tanks should be full.
Proceed as follows:
1. Disconnect the battery
2. Unbolt the coupling flanges (see figure 3)
3. W¡th the flange pilot engaged, check the clearance
around the coupling flange using a 0.003 inch
feeler gage.
4. Rotate the transmission flange through one
complete revolution, stopping each g0 degrees to
check the clearance with the feeler gage. Repeat
this procedure with the propeller shaft flange.
5. The alignment is satisfactory when the f_langes are
within 0.003 inch (0.076 mm) of parallel.
6. lf the alignment is unsatisfactory adjustment is
required. This adjustment is accomplished at the
boat motor and transmission mounts ONLY. This
procedure should be accomplished by a skilled
marine mechanic.
PROPELLER
SHAFT
TRANSMISSION
OUTPUT
FLANGE
FLANGE
Launch MaintenancG
<i
(cont'd)
Sh¡ft Linkage Check
Transmission Bolt Check
Check that all exterior transmission bolts and
lncorrectly adiusted shift linkage mav
result in transmission damage.
including those in the coupling flange, are tight. Tghten
loose bolts to specifications.
The transmission shift lever forward and reverse positions
depend on whether the transmission drives a right hand
or left hand propeller (see figure 4). The shift linkage
Gooler and Electrical Connections
fÃGAIInoÑì
must position the shift lever on the transmission exactly in
forward, neutral and reverse positions. The shift lever at
the helm must agree with that on the transmission. Adjust
the shift linkage if required'
Figure 4: Transmission Shift Lever Positions
LEFT.HAND PROPELLER
- 'l
PROPELLER
nevEnse FoRwARDT
RTGHT.HAND
',
.,
|
3Oo4¡c3Oo
/
/
/
nuts,
Visually check the transmission pofts, oil (fluid) cooler,
connecting lines and fittings for fluid leaks, loose
connections, or broken or loose fasteners' Replace worn
or damaged hydraulic hoses.
Visually inspect all electrical connections to the transmission for loose terminals or worn wires' Replace all worn or
broken wires to U.S. Coast Guard specifications. Ïghten
all loose connections.
Ghanging Transmission Fluid
A seasonal change of the transmission fluid is recommended for all pleasure boats' Work boats require
transmission fluid change every 1000 hours. ln addition,
SHIFT
LEVER
the transmission fluid must be changed any time
becomes overheated, contaminated, changes color,
becomes rancid smelling.
if.
(
(ÃwÑì
Do not use gasoline or any other
volatile or highly combustible liquid as a cleaning
solvent when changing the transmission fluid'
1. Place a suitable container under the oil drain plug.
BALL DETENT
Figure 5: DiPstick Removal
2. Remove the dipstick (see figure 2).
3. Remove the oil drain plug' Drain allfluid from the
transmission into the container.
4. Reinstall drain plug and torque to 20-25 lb-ft
(27-34 Nm).
5. Fill the transmission with the proper type (refer to
Type of Transmission Fluid, following) and
quantity of transmission fluid. Table 1 lists fluid
capacity, depending on angle of installation, for the
transmission only' Additional fluid may be required
to allow for oil cooler and cooler line capacity'
t
6. Replace dipstick and check fluid level (refer to
Ghecking Fluid Level, following)'
launch MaintenanGe (cont'd)
fype of Transmission Fluid
Dexron ttlor any transmission fluid which meets
Detroit Dieset Allison C4 or Gaterpillar TO-4 specifi'
cation is recommended.
Do not mix different brands or types of transmission
fluid.
lf transmission fluid temperature exceeds 190"F' the
fluid must be changed,
Any additions to the boat that will change the installed
angle of the transmission at rest may require an oil
level adjustment.
Cold Fluid Level Gheck
For ease of checking the fluid level prior to stañ-up, a cold
fluid level mark can be made on the dipstick. First make
the warm fluid level check as described above and adjust
the fluid level to the dipstick full mark' Shut down the
engine and allow the transmission to cool overnight'
Before operating the engine, with the transmission cold,
check the fluid level as described above and put a cold full
mark on the dipstick.
Additional Maintenance and Seruice
lnformation
A service manual for the Liberty SeriesrM marine transmission can be obtained by contacting your Velvet Drive
distributor.
Checking Fluid Level
The transmission should be at operating temperature
to get an accurate fluid level reading' The fluid will
expand when heated and significantly atfect the level in
the transmission.
[wÄÑl
Hot transmission fluid can cause
burns.
fÃffi|
Do not enter the engine compartment
with the engine running.
Warm Fluid Level Gheck
Transmission fluid will drain back into
the transmission from the cooler and connecting lines
tÃcAIInoNì
after engine shutdown. Fluid level must be checked
immediatety after engine shutdown othe¡ruise the dipstick reading will not be accurate and transmission
could be operating with insufficient fluid.
With the engine at operating temperature, place control
lever in neutral and shut down the engine' Remove the
dipstick by holding the base and turning the T-handle
counter clockwise (see figure 5). Wipe the dipstick clean
and insed the dipstick fully into the transmission, withdraw, and check the fluid level. Add or remove fluid as
necessary to bring the fluid level to the full mark on the
ipstick. Replace dipstick and tighten by holding the base
and turning the T-handle securely clockwise'
Section lll
0peration
System-Related Torsional Vibrations
System-related noises or vibrations can occur at
Freewheeling
low
engine speeds. They can cause gear rattle and result in
damage to the boat engine as well as the transmission.
Velvet Drive is not responsible for total system-related
torsionals of this type.
Start Up
Make sure the transmission is in neutral before starting
the engine. At the helm, move the shift lever back and
forth and stop at the detent in the central position of shitt
lever travel. With the shift lever in this position, no power
is transmitted through the transmission output shaft to the
propeller shaft. The neutral safety switch will not allow the
engine to be started unless the transmission is in neutral.
Start the engine and set the throttle at idle speed to warm
up the transmission and the engine for a few minutes. Be
aware of any unusual noises or vibrations and investigate
to determine the cause.
Shifting the Transmission
Shifts to and from any position can be made at any time
with the engine operating below 1000 RPM.
fÃCAtInON I Shifting the transmission at engine
speeds above 10(þ RPM can severely damage the
boat, transmission and engine.
Forward
From neutral, move the shitt lever to the forward position.
When the transmission is engaged in forward, you will
feel the detent. The propeller should move the boat in a
forward direction.
Reverse
From neutral, move the shift lever to the reverse position.
When the transmission is engaged in reverse, you will
feel the detent. The propeller should move the boat in a
backwards direction.
It has been determined by tests and practical experience
that Velvet Drive marine transmissions can be freewheeled during sailing or trolling with one engine without
risking damage. Be cefiain to maintain the proper fluid
level in the transmission for freewheeling as well as power
operation.
Section IU
The following steps are necessary to properly prepare the
transmission for winter storage:
1. Disconnect the battery.
2. Separate the transmission and propeller shaft
flanges before removing the boat from the water.
Unbolt the flanges and move the propeller shaft to
the rear untilthe flange pilot clears.
3. Drain the water from the transmission's oil
cooling system. lt is not necessary to drain the
transmission fluid unless the transmission is due
for a fluid change.
4. Wipe the transmission free of dirt, grime and
grease.
5. Check the transmission for evidence of external
damage or leaks. Take corrective action before
placing the transmission back in service.
Winter Storage
Section U
The trouble analysis chart lists operating problems which may be encountered, the causes and the recommended
corrective action. Procedures involving power train alignment or transmission repair should be performed by a qualified
marine mechanic.
Trouble Analysis Chart
No forward or reverse
Fillto
level
Remove valve and pump assembly
pump
and
and repair leak. lf
IS
remove &
transmission
Remove and
transmission
Adjust shift linkage
shift
Use lower engine speed or change
Clean or replace screen
No forward
Adjust shift linkage
Remove and
transmission
Remove and
transmission
Remove and repair transmission
No reverse
.
Transmission control valve incorrectly
Adjust shift linkage
Remove and
transmission
Remove and
transmission
Remove and repair transmission
No neutral
Valve buzz or noise
shift
.
Forward or reverse clutch not releasing
.
Air in hydraulic system
Transmission overheats
Cooler transmission fluid flow
restricted
.
Cooler water flow restricted
and repair transmission
Normal operation should bleed air from
hydraulic system. lf not, continue
trouble
Add fluid to full mark
Remove and
transmission
Remove transmission, disassemble and
clean or repair as required
Reverse flush cooler and transmission
fluid lines. Replace components that
cannot be cleaned out.
Reverse flush cooler and water línes.
Replace components that cannot be
cleaned out.
Clean or
Replace fluid pump
Noisy in forward or reverse
.
Misalignment of flywheel housing or
adapter with engine or transmission
Misalignment of propeller shaft and
Align coupling flanges
Damaged gear orgears
Remove and repair transmission
Align power train components
Maintenance Record
Section Ul
Record the assembly number, serial number, and ratio of your transmission, as well as date placed in operation and
propeller size for future reference. Record maintenance as performed.
Assembly Number
Serial Number
Ratio
Date placed in operation
Propeller Size
Boat
Winterization
PeÉormed
ö
Every 1000 hours for work boats.
Velvet Drive Liberty SeriesrM Marine Transmission Warranty
Seller warrants to engine manufacturers and to seller's distributors only that all Velvet Drive marine transmissio/
manufactured or furnished by seller shall be free from defects in materialand workmanship under normal use and service
for a period of twelve months for pleasure craft installations or çix months for commercial craft installations from
date placed into operation by the original owner/operator or twenty-four months from date of shipment to the engine
manufacturer or to seller's distributor, whichever occurs first.
This warranty shall not apply to any product or part which has been subjected to misuse, negligence, damage in handling
or shipment, modification or alteration, improper maintenance, or use beyond the product's rated capacity or in any other
improper manner.
Seller's obligation under this warranty is expressly limited to the repair or replacement, at its option, of Velvet Drive marine
transmissions which are returned f.o.b. seller's factory Liberty, South Carolina, and which are determined by seller to be
defective.
THIS IS THE SOLE AND ONLY WARRANW OF SELLER AND NO OTHER WARRANTY tS APPLICABLE, ETTHER
EXPRESS OR IMPLIED, IN FACT OR BY LAW, INCLUDING ANY WARRANW AS TO MERCHANTABILIW OR
FITNESS FOR A PARTICULAR USE OR PURPOSE.
The sole and only remedy in regard to any defective Velvet Dríve marine transmission shall be the repair or replacement
thereof as herein provided, and seller shall not be liable for any consequential, special, incidental, or punitive damages
resulting from or caused by any such defects.
Velvet Drive Transmissions
Effective Date
January 1,2005
DOWNLOAD THE LATEST WARNINGS AND CAUTIONS FROM THE VELVET DRIVE TRANSMISSION WEBSITE A1':
WWW.VELVETDRIVE.COM
I/elretDrire
fTAANSMISSIONS
1208 Old Norris Road
Telephone: 864/843-9234
Liberty, SG 29657
Fax=8É4,lü3-1276
E-mail: [email protected]
A REGAL-BELOIT COMPANY
www.velvetdrive.com
s129R-NP/1M/05-06/BP