1
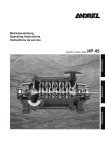
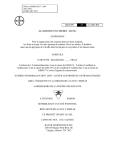
475
Outperforms
Operator’s Manual, Parts List & Service Manual
STOP!
If you are missing parts, instructions or have questions, DO NOT
take this unit back to the store. Call 1-800-888-4897 and MasterLine
will send the missing parts/information to you promptly
MAINTENANCE TIP: Cap gasket is prelubricated for improved sealing. Occasional lubrication
is recommended, use petroleum jelly or non-water soluble grease.
SAFETY PRECAUTIONS
1.
2.
Before using sprayer with chemicals, fill sprayer with fresh water
to assure that you have it properly assembled; pressurize and
practice spraying. Also, check for any leaks at this time. When
thoroughly familiar with the sprayer operation, follow normal
operating procedures.
3.
Avoid contact with chemicals.
4.
Always wear rubber gloves, safety goggles, appropriate
protective clothing.
5.
Work in a well ventilated area.
Ensure all pressure in the sprayer is relieved by locking the shutoff valve in the open position.
6.
Individuals should be trained in the proper use of this sprayer,
chemical handling procedures, and first aid/emergency care.
Where training is not available, individuals should study and
follow the procedures detailed in this menual.
WARNING:
Chemicals can be harmful to individuals and the environment if improperly used. In addition, some chemicals are caustic, corrosive or poisonous
and should be avoided. Read warnings and chemical manufacturers’ instructions. MASTERLINE high density polyethylene sprayers are fitted
with Viton® seals which are resistant to a wide variety of agricultural and household chemicals; however, care should be exercised to ensure that
sprayer components are clean, functioning properly, and in a good state of repair before and during use. If in doubt about a particular chemical,
check with the manufacturer. If you suspect or observe indications that the material may be unsafe in a MASTERLINE sprayer....STOP. Do Not
Use or Apply Chemical. Always wear rubber gloves, safety goggles, and appropriate protective clothing.
•
•
•
•
•
•
•
•
•
Read and follow operating instructions.
Do not fill with, use or spray flammable materials.
Do not modify sprayer.
Never spray in the direction of humans, animals or property
which might be injured or damaged by spray formula.
Do not use disinfectants, solvents or impregnating agents unless
first tested to ensure they are not harmful to the environment or
sprayer.
Do not use liquids with a temperature above 110°F (43°C).
Rinse and clean sprayer thoroughly after using. Chemicals can
be dangerous and cause serious injury to persons, animals,
plants and environment.
Wear appropriate protective clothing to prevent contact with
chemical agents.
Disposal of contaminated rinse should be in accordance with
applicable ordinances. Observe the precautionary instructions of
the chemical manufacturer.
ASSEMBLY INSTRUCTIONS:
SPRAY TIP ASSEMBLY
Spray tips should be assembled as
shown. O-rings are used in place of
gaskets in some sprayers.
1.
2.
3.
4.
5.
•
•
•
•
•
All servicing personnel should be trained and familiarized with
chemical handling procedures, first aid/emergency care, and
chemical liquid disposal regulations.
DO NOT USE ANY ACID (INCLUDING CITRUS) OR CAUSTIC
CHEMICALS INCLUDING BLEACH.
Remember that a sprayer with liquid is a significant amount of
weight (8 lbs. per gallon). Use caution when bending, leaning or
walking. Do not bend at the waist when wearing the backpack.
Bend only at the knees and support yourself as required to
ensure personal safety.
Keep in mind that the sprayer tank is vented at the cap and was
intended to be operated upright.
Do not climb or mount any equipment from which you might fall.
Flat Spray Nozzle
Filter
Jet Stream Nozzle
Swirl Plate
Brass Adjustable Nozzle
5
3
4
1
2
2
2
See Page 11 for Handle Installation.
MasterLine Manual 2007.indd 1
3/20/2007 4:27:21 PM
REGULATING THE PRESSURE
The MASTERLINE backpack sprayer is equipped with a
built-in regulator to control output pressure. This regulator is
operator adjustable. Make adjustments prior to filling tank.
To adjust the regulator, remove the tank cap and the filter
basket. Look inside the spray tank; you will see the top of the
regulator. There are 4 fingers sticking out of the cap. They
are numbered 1,2,3,4. 1=15 psi, 2=30 psi, 3=45 psi, 4=60
psi. The higher the pressure, the more chemical applied from
the sprayer in a given amount of time, but the droplets will
be smaller and tend to drift. The lower the pressure, the less
chemical applied in a given amount of time, but the droplets
will be larger with less drift. If the spray pressure must be
changed, excess pressure in the pressure cylinder must be
released back into the tank through the spray tube.
FILLING
of liquid in formula tank will appear to decrease as the
pressure cylinder is filled. Liquid will flow through the top of
the pressure regulator when the cylinder is completely full.
Add the remaining formula mix to the tank. Remember that
it’s not necessary to fill the sprayer tank each time. Mix only
the amount needed to get the job done.
Mix the spray formula and the proper volume of water in a
separate container. Pour the mix through the filter basket in
the tank opening. This keeps debris from entering sprayer.
Note: To fill the sprayer to its full 4 gallon capacity, set the
pressure regulator to the 3 or 4 setting. (Pressure regulator
is mounted on top of the pressure cylinder inside formula
tank. See Above: Regulating the Pressure.) Add 2 or 3
gallons of spray formula mix. Pump the sprayer handle to
prime the pump and fill the pressure cylinder. The volume
Always read and follow manufacturer’s instructions printed
on the spray product label. This can save money and help
prevent crop and environmental damage.
SPRAYING
Prime the pump with rapid pump strokes. When you feel very
firm resistance, the pressure chamber is filling with liquid.
With repeated strokes, the air in the pressure chamber is
slowly compressed. By pressing the hand lever, the valve
opens, and liquid is forced through the nozzle. The shutoff valve has a retaining clip which keeps the valve in the
“OPEN” position for continuous operation. Pump using the
end of the pump handle as it is less fatiguing. The volume
of liquid delivered varies with the working pressure which
should be as high as needed to ensure an adequate spray
pattern for each individual application.
NOTE: Should the pressure drop very quickly, drain the tank
completely and pump without liquid. By this procedure, the
air chamber is refilled with the required volume of air. It is
advisable to pump the tank completely empty from time to
time.
CLEANING
•
•
•
After spraying, clean the tank thoroughly. If some spray
liquid is left inside, drain tank completely.
Follow the recommendations of the chemical
manufacturer for disposal of waste water and storage
of chemicals.
Pumping causes air to be taken in and the remaining
liquid to be discharged. Pump until liquid and air are
coming out through the nozzle.
•
•
•
•
•
Refill tank with a few quarts of clean water and pump the
water out as explained above (if necessary, repeat this
procedure several times).
If the shut-off valve is removed, the pump can be flushed
quickly. Improper spray distribution is the result of a
clogged nozzle, which is easily removed and cleaned.
Soap and water may also be used to clean tank.
Do not use aggressive cleaning agents or abrasives.
Activated charcoal in liquid or other form may be used to
absorb chemicals in tanks or spills.
NOTE: When cleaning the sprayer after working with hormone weedkillers, follow the instructions of the herbicide producers.
Neutralize with activated charcoal. (Example: add 0.35 oz. 1 g. of activated charcoal to 1.7 imp. pint 1 liter of water and leave this
in the tank and the lines for approximately 24 hours. This is very important if other chemicals should be sprayed as the residues of
the herbicide may damage susceptible plants. Cleaning after application of products containing carbolineum, if they are not water
soluble, should be done with a 5% soda lye having a temperature of 104°F (40°C). Rinse with plenty of clean water.
2
MasterLine Manual 2007.indd 2
3/20/2007 4:27:22 PM
CALIBRATION OF MASTERLINE BACKPACK SPRAYERS
The output of the sprayer should be checked by collecting and
measuring the spray liquid emitted during one minute. Maintain
steady pumping on the pump handle while measuring. Having
determined the output from the nozzle in gallons/minute, the rate
per unit area treated can be calculated knowing the swath width and
walking speed.
WILL THE PLASTIC MATERIAL LAST?
Only high-density polyethylene is used. The material is chosen for
high molecular weight, high impact strength, and excellent resistance
to chemicals and stress. Ultraviolet inhibitors are used in the material
to reduce deterioration caused by sunlight.
HOW HEAVY IS THE UNIT?
When empty, Model 475 weighs only 9.5 lbs.
IS THE SPRAYER COMFORTABLE TO CARRY?
MASTERLINE sprayers are probably the most comfortable spraying
equipment on the market. The tank rests comfortably against the
operator’s back and the straps are made from a nylon web and are
padded where they rest on the shoulders. The pump lever is positioned
at the most convenient height and can be varied with adjustment of
the straps.
CAN I USE WEEDKILLER AND INSECTICIDE IN THE SAME SPRAYER?
In theory you can, if the sprayer is thoroughly cleaned out with an
ammonia: water solution of 1:25. In practice, the use of both types
of chemicals in the same unit is not recommended as the risk to the
plants can be high. Use caution when handling any type of chemicals
and when cleaning your sprayer.
Gal/Acre = (Gal./min of nozzle) x 43560 Sq. ft./acre
(Sq. ft./min.)
Note: Gal/min for standard nozzles
WHAT SPRAY NOZZLE SHOULD I USE?
A brass adjustable spray nozzle is supplied for varying the spraying
pattern from a fine mist to a jet stream. A flat spray nozzle is supplied
for spraying paths, garden beds, and general area spraying. A cone
nozzle is also supplied for spot spraying and for treatment of bushes
and small trees. For spot spraying, simply remove swirl plate from
behind cone. Save the swirl plate for future use. Standard is a reflux
filter with a built-in check valve which opens at 5 psi and closes at
4 psi. This virtually eliminates dripping of fluid still contained in the
spray wand. A wide selection of nozzles such as the drift guard and
no-drift nozzles are available
15 PSI = .22 Gal./min.
29 PSI = .33 Gal./min.
44 PSI = .40 Gal./min.
Hollow Cone Nozzle
15 PSI = .17
29 PSI = .24
44 PSI = .29
Sq. ft., min. = Speed (ft./min.) x Swath Width (ft.)
1.
Determine the nozzle’s rated capacity. See page 5 of
MASTERLINE parts list for nozzle ratings. Get the capacity in
gallons/minute at the desired pressure. Test the delivery of the
nozzle. Spray for one minute and collect the spray.
Gal/min = oz. collected/minute
128 oz. = 1 gal.
CAN I DO SPOT SPRAYING?
The shut-off valve on the MASTERLINE sprayer is well suited for spot
spraying. It’s almost effortless! The shut-off valve handle incorporates
a clip which holds the trigger valve open for area spraying without
tiring the operator’s hand. A pressure gauge may be added with
increments from 5 psi up to 60 psi.
DOES THE UNIT REQUIRE CONSTANT PUMPING?
NO! The well-designed lever action greatly reduces the pumping
effort. The pressure cylinder within the tank has a hydraulic effect.
Liquid from the pump compresses air in the pressure chamber which
allows irregular pumping action, yet results in steady spray at the
nozzle.
2.
Compute the area covered in square feet per minute. Select a
comfortable walking speed and figure how many feet per minute
you walk. A convenient fast walk for some is 2.5 mph, but this
may vary. One mile per hour equals 88 feet per minute. An easy
way to calculate is to simply measure the distance you walk in
one minute.
3.
Compute the gallons per acre. The above information is used to
compute the gallons of spray that will be applied per acre.
WARNING: Remember that a sprayer with liquid is a significant
amount of weight (8 lbs. per gallon). Use caution when bending,
leaning or walking. Bend only at the knees and support yourself as
required to ensure personal safety.
CAN THE SPRAY TANK STAND THE PRESSURE?
Although quite strong, the spray tank itself is intended only as
a container for the spray solution. Pressure is maintained in a
separate pressure chamber. This chamber is injection molded and
built to withstand normal operating pressure. Additionally, an internal
pressure control valve has been fitted to the cylinder (see item A). It
has four pressure settings adjustable to specific spraying needs (see
diagram).
Setting #1
#2
#3
#4
Flat Spray Nozzle
POSSIBLE USES OF SPRAYER:
Plant Feeding and Protection – A variety of spray tips enables user
to perform foliar feeding or apply fungicides and pesticides effectively.
Herbicides – May be applied to reduce pesky weeds and plants;
however, avoid using same sprayer for plant feeding or protection
without first thoroughly cleaning. (See “Cleaning”.)
15 psi
30 psi
45 psi
60 psi
Indoor Use – Sprayers may be used to apply detergents, vinegar,
cleaning solutions, warm water up to 110°F (43°C) and other nontoxic
household cleaning and maintenance liquids. Carpets, walls, glass,
floors, ceilings and other surfaces can be treated. Do not use sprayer
which has previously been used with herbicides, pesticides or other
toxic chemicals.
Outdoor Use – Window cleaner, detergent, general purpose
cleaning solutions, certain wood preservatives, waxes, waterproofing
are among the many things MASTERLINE sprayers can apply. Avoid
using sprayer for cleaning and other applications once it has been
used for plant protection or herbicide spraying. If sprayer was used
for herbicide or other spraying first, clean the sprayer as described on
page 2 before using.
3
MasterLine Manual 2007.indd 3
3/20/2007 4:27:22 PM
ASSEMBLY INSTRUCTIONS FOR WAND
Wand
Screw Cap
1. Insert wand into shut-off valve, as shown.
2. Tighten the screw cap clockwise onto the shut-off valve.
OPERATING FEATURES:
Nozzles – Your MASTERLINE sprayer is standard with nozzle arrangements which provide a variety of spray patterns.
Item
Application
Part #
Flat Spray Nozzle
Row treatment
4074263
Jet Stream Nozzle
Spot & longer range
4074758
Jet Stream Nozzle and
Swirl Plate = Hollow Cone
Shrubs and bushes
4074756
4074758
Brass Adjustable Nozzle
4900207
Spot, shrubs & bushes
ACCESSORIES:
The following accessories are not standard. Order them from your
MASTERLINE dealer.
Pressure Control Gauge (#4900356):
Displays spraying pressure so operator can maintain desired pressure
level.
Pressure Limiting Valve (#4900183):
Limits pressure to 5 psi, 10 psi or 15 psi as needed for low pressure
applications.
Drift Guard (#4900430):
Helps control application of formula under breezy conditions.
4-Nozzle Spray Boom (#4900298):
Mounted on the back part of the sprayer frame with 4 hollow cone jets
for area treatment (total width 49-3/4”; distance between nozzles 16”).
2-Nozzle (#4900514):
Handheld spray boom mounts on end of spray wand (total width 33”;
distance between nozzles 24”). Includes 2 flat spray nozzles.
Twin Nozzle (#4900477):
This is a multi-purpose nozzle that attaches to the end of spray wand
for double row application.
Carbon Fiber Wand (# 4900445)
The telescoping adjustable 4’ to 8’ carbon fiber wand is ideal for small fruit
trees, large shrubs, and “formerly” impossible places.
Brass Spray Wand (#4900528):
The spray wand is 60” (150cm) long and replaces the standard spray tube
for treating trees up to heights of 16 ft. (5 meters). Additional extension tube
available in 20” length (#4900421)
21” Stainless Steel Wand (# 4900645-P)
Bendable Extension (# 4900450)
This 6” extension can be easily bent to any direction. When finished spraying,
straighten or leave in position. Can be repeatedly bent and straightened to
meet user needs.
#4900356
#4900183
#4900430
#4900298
#4900514
#4900477
#4900528
# 4900450
# 4900445
# 4900645-P
In the best interest of continued technological progress, we reserve the right to change design and configuration of any product
without prior or other notice. Therefore, please note that text and illustrations of this manual are not to be considered binding and
do not constitute a basis for legal or other claims.
4
MasterLine Manual 2007.indd 4
3/20/2007 4:27:23 PM
Specification of Nozzle Tips
Specification
Order Number
Delivery
Pressure
1/min US gal
/min
atu
atm
psi
Angle
Applications
Area and row treatment
Flat Spray Tip
4074263*
0.88
1.25
1.53
.23
.33
.40
1.0
2.0
3.0
15
29
44
120°
120°
120°
Flat Spray Nozzle
0065210
0065132
0.46
0.64
0.78
.12
.17
.21
1.0
2.0
3.0
15
29
44
80°
80°
80°
Adjustable Nozzle-Brass
4900207
Full Cone Nozzle
0065212
30°-50°
Game repellants of high viscosity
Full Cone Nozzle
0065213
30°-50°
Game repellants of low viscosity
Full Cone Nozzle
0065214
Hollow Cone Nozzle 1 mm orifice
4900209
0.4
0.55
.10
.15
1.0
2.0
15
29
Hollow Cone Jet 1.4 mm orifice
4900252*
0.64
0.91
1.11
.17
.24
.29
1.0
2.0
3.0
15
29
44
50°
65°
65°
Hollow Cone Jet 1.8 mm orifice
4900322
0.88
1.25
1.53
.23
.33
.40
1.0
2.0
3.0
15
29
44
55°
70°
72°
No-Drift AN 0.5
4074383
0.23
.06
1.0
15
90°
No-Drift AN 1.0
4074385
0.28
0.38
0.46
.07
.10
.12
0.4
0.7
1.0
6
10
15
100°
100°
100°
No-Drift AN 2.0
4074386
0.55
0.76
0.91
.15
.20
.24
0.4
0.7
1.0
6
10
15
100°
100°
100°
No-Drift AN 2.5
4074514
0.72
0.95
1.14
.19
.25
.30
0.4
0.7
1.0
6
10
15
110°
110°
110°
No-Drift AN 5.0
4074513
1.80
1.90
2.28
.48
.50
.60
0.4
0.7
1.0
6
10
15
120°
120°
120°
Foam Nozzle
4900397
0.76
0.90
1.01
1.10
.20
.23
.26
.29
3.0
4.0
5.0
6.0
45
60
75
90
Tree Spraying (adjustable spraying pattern)
Game repellants
Shrubs, bushes
Mainly for herbicides at low pressure
The XAN 2 nozzle is suited for low dirt and
water saving application of herbicides which
tend to foam
*Standard Equipment
5
MasterLine Manual 2007.indd 5
3/20/2007 4:27:24 PM
SPARE PARTS LIST
Liste de pièces de rechange
Lista de piezas de recambio
SPECIAL PARTS AND ACCESSORIES (Not shown in parts list)
Order No. Description
0610406-K Diaphragm Pump Repair Kit includes 8, 11-13, 20 (2 ea), 24, 25, 66
0610411-K Wand Repair Kit includes 7-10, 22, 26, 34, 49, 103
4400221
Pump Assembly (does not include #69 and #72)
6
MasterLine Manual 2007.indd 6
3/20/2007 4:27:24 PM
Order Nr.
DESCRIPTION
FRANCAIS
ESPAÑOL
2
3
4
6
7
8
10
11
12
13
14
15
16
17
18
20
21
22
23
24
25
26
27
28
29
30
31
32
33
34
35
36
37
38
39
0010165
0012185
0030131
0012185
0610402-K
0062258
0062115
0062291
0062139
0062140
0064234
0066388
0066394
4043123
4035111
4061257
4200242
4074148
4074323
4074350
0070260
4074337
7047344
7074410
4074263
4074756
4074283
4074755
4900527
4074500
4074527
4200162
4200166
4300315
4400240
Vis T.C.
Vis T.C.
Rondelle
Vis T.C.
Pochette robinet d’ arrét
Joint de connection
Joint bague
Joint bague
Joint bague
Joint bague
Tuyau
Collier cpl.
Collier cpl.
Butêe
Tuyau
Joint de soupape
Couvercle
Ecrou de raccord
Pièce de règlage
Joint
Ressort de compréssion
Ecrou de raccord
Pièce de règlage
Coussinet
Tornillo cil.
Tornillo cil.
Arandela
Tornillo cil.
Juego rep. grifo de cierre
Junta de conexion
Anillo O
Anillo R
Anillo R
Anillo R
Manguera
Abrazadera
Abrazadera
Pieza de apoyo
Tubo
Place de valvula
Tapa del depôsito
Tuerca de manguito
Pieze de ajuste
Junta
Resorte de presion
Tuerca de manguito
Tapa de ajuste
Cohinete
40
41
42
43
44
45
46
47
48
49
51
52
53
54
55
60
61
63
4400168
4074409
4074262
4073558
4400189
4800170
4800173
4900230
4061342
0031356
4074677
0010110
0020101
4074408
4074412
4073411
4073410
4400222
4400222-T
0018257
4074247
4074245
4074233
4031130
4074234
4074243
0010141
4074833
4900252
Fill. Head Screw
Fill. Head Screw
Washer
Fill Head Screw
Shut-Off Valve Repair Kit
Gasket
O-Ring
O-Ring
O-Ring
O-Ring
Hose (48’’ length)
Hose Clamp
Clamp
Stop Plate
Pump Shaft
Valve Plate
Tank Cap w/Valve Assy. (incl. 48)
Retaining Nut
Valve Body
Seal Ring
Compression Spring
Screw Cap
Control Knob
Bushing
Adj. Spray Nozzle
Swirl Plate
Jet Filter
Jet Cap
Flat Spray Jet
Clamp
Elbow
Tank and Frame Assy.
Filter Basket
Carrying Strap (item 73 incl.)
Pressure Cylinder
(item 10, 23-25, 27 incl.)
Cylinder, assy.
Connecting Rod without Stud
Lever
Piston
Viton® Collar
Shut-off Valve, assy.
Fold Away Handle
Spray Tube (20”)
Gasket
Washer
Protective Cover
Fill. Head Screw
Hex. Nut
Connecting Rod with Stud
Buckle
Housing (Diaphragm)
Flange
Valve, assy (item 12, 20 incl.)
Valve tool
Fill. Head Screw
Plunger
Diaphragm
Lever
Wrist Pin
“R” connecting Bracket
“L” connecting Bracket
Fill. Head Screw
Hook
Hollow Cone Jet Nozzle
(item 30,32 incl.)
Grip
Plastic Pin
Vent Plate
Vent Cap
Lock Clip
Retaining Nut
Hand Lever
O-Ring
O-Ring
Pièce girafoire
Tamis de gicleur
Capuchon de gicleur
Buse a diffusion large
Pièce de serrage
Coude
Support de rèservoir, 151
Entonnoir
Bretelle (Pos. 73 incl.)
Corps de pompe
(Pos. 10, 23-25, 27 incl.)
Cylindre cpl.
Bielle sand tèton
Levier
Piston
Manchette Viton
Robinet d’arrêt
Levier de pompe (pos. 75 incl.)
Tuyau pulvèrisateur (500 mm)
Joint bague
Rondelle
Coiffe protectrice
vis T.C.
Ecrou. hex.
Bielle avec teton
Porte-bretelle
Carter de membrame
Joint bague
Siège soupape (Pos. 12, 20 incl.)
Pieze de rayado
Piltro de tobera
Tapa de tobera
Tobera de chorro ancho
Pieze de retencion
Code
Soporte de depôsito, 151
Embudo Filtro
Correaje (Pos. 73 incl.)
Camara de aire
(Pos. 10, 23-25, 27 incl.)
Cilindro mont
Biela
Palanca
Piston
Manguito Viton
Grifo de cierre, mont.
Palanca de bomba (Pos. 75 incl.)
Tubo atomizador (500 mm)
Anilio de junta
Arandela
Tapa protectora
Tronillo cil.
Tuerca hex.
Biela
Hebilla para correa
Carter membrana
Anillo O
Pieza rosada (Pos. 12, 20 incl.)
Vis T.C.
Plaque à membrane
Membrane
Bielle
Goujon
Levier 1
Levier 2
Vis T.C.
Accroche
Jet conique, cpi
(Pos. 30, 32 incl.)
Tornillo cil.
Chapa de membrana
Membrana
Biela
Perno
Palanca 1
Palanca 2
Tornillo cil.
Gancho
Tobera, cono hueco, mont.
(Pos. 30, 32 incl.)
Pos. No.
64
65
66
67
68
69
70
72
73
74
75
97
98
99
100
101
102
103
106
4074392
4074295
4061464
4074123
4074329
4074336
4074355
0062271
0062324
Accessories - Accessories - Los Accessorios
1
9
80
81
90
91
92
93
94
95
--47
----96
4200215
0062106
4900477
4900528
4900356
0065186
4900513
2700316
4074338
0062249
4900430
4900319
4300314
4200205
4900258N
Plug (item 10 incl.)
Gasket
Twin Nozzle
Extension Wand (1250 mm) 60”
Pressure Gauge w/Connection Parts
Pressure Gauge
Extension Wand (500 mm) 20”
No Drip Check Valve
Screw Cap
O-Ring
Drift Guard
Spray Wand (690 mm) 27”
Shoulder Saver Harness
Reduction Insert, Gaskets incl.
Elbow Nozzle Assy.
Bouchon (Pos. 10 incl.)
Joint de sorteJoint bague
Buse Double
Rallonge (1250 mm)
Manomètre avec raccords
Manomètre
Rallonge (500 mm)
Clapet anti-retour
Ecrou de raccord
Joit bague
Bouchier
Tuyau Pulverisateur
Accessoire bio
Pochette joints
Tapón (Pos. 10 incl.)
Junta
Tobera doble
Tubo de extenison (1250 mm)
Manometro con piezas de conexxion
Mandometro
Tuba alargador (500 mm)
Valvula de retencion
Tuerca de manguito
Anillo O
Pantalla rociadora
Tubo Atomizador
Agregado bio
Empaquetaduras
Juego Empaquetaduras
7
MasterLine Manual 2007.indd 7
3/20/2007 4:27:24 PM
SERVICE AND REPAIR SECTION
HOW THE PUMPS WORK
During the upward stroke of the handle on the diaphragm, liquid is drawn from the formula
tank through the intake channel into the space above the pump. The lower valve plate opens
the intake channel while the upper valve plate closes the transfer ports. During subsequent
upward strokes the previously siphoned liquid is forced through the four transfer ports and into
the pressure cylinder. During this compression phase, the upper valve plate opens the transfer
ports and the lower valve plate closes, sealing the intake channel. The transfer ports cannot be
sealed by the lower valve plate.
Through repetition of these diaphragm strokes, the air in the pressure cylinder is being slowly
compressed by the forced-in liquid. A prerequisite for this condition is a closed shut-off valve.
These pumping strokes can be carried out until the required pressure is reached.
After opening the shut-off valve, continue to pump slowly and steadily in order to maintain a
consistent rate of discharge.
Type 475
BACKPACK SPRAYER TROUBLE SHOOTING GUIDE
PROBLEM
CAUSE Difficulty in Moving Pump
Lever
• Dirty Bushing
• Remove Pump Lever, Clean & Grease Bushings
Insufficient Resistance
During Repeated Pumping and
No Pressure
• Damaged/Dirty Valve Plates
• Clean or Replace Valve Plate or Cylinder
• Damaged O-Ring at Valve Seat
• Replace O-Ring
• Seal in Pressure Regulator is Leaking
• Check Seal and Valve Seat
SOLUTION
High Resistance After Just a few
• Little or No Air Cushion
Pumping Strokes, Pressure Lasts
in Pressure Cylinder
Only Briefly
• Remove PVC Hose, Drain Pressure Cylinder,
Reconnect Hose, Preventive Measure - Release
Pressure After Each Use
During Spraying, Upward Pumping
Becomes More & More Difficult and
Tank Walls May Indent Inwards
• Wrong Formula Tank Cap
(No Vent Hole)
• Replace with Vented Cap
• Vent Hole Clogged
• Clean Vent Hole
• Lower Valve Plate Sticks
• Replace Valve Plate
• Intake Channels Clogged
• Clean Channels & Tank
When Handle is Pulled Up It Wants to
Move Itself Forcibly Back Down
• Inlet Screen at Base of Pressure Cylinder
Clogged
• Clean Intake Screen with a Small Brush and
Detergent
Leaks on Diaphragm Pump (475)
• Damaged Diaphragm
• Replace Diaphragm
• Damaged O-Ring on Diaphragm Housing
• Replace O-Ring
• Damaged O-Ring on Pressure Cylinder
• Replace O-Ring
Leaks From End of Spray Wand
• Worn or Damaged Shut-off Valve
• Inspect and Rebuild Shut-off Valve.
Leaks from Tank Opening
• Improper Lubrication
• Lubricate cap gasket with petroleum jelly or non-water soluble
grease.
Note: Always wear rubber gloves, safety goggles and appropriate protective clothing when repairing a sprayer. Once a repair
is completed, fill the unit with clean water, pressurize, and check for leaks. If the sprayer leaks, Do Not Use. Repair leaks and
recheck.
8
MasterLine Manual 2007.indd 8
3/20/2007 4:27:25 PM
DIAPHRAGM PUMP DISASSEMBLY AND REPAIR
1)
2)
3)
4)
5)
6)
3/16”
Loosen the stop plate (A)
and remove the two allen
head screws (B) that hold
the connecting pieces to the
pump rod. Figure 13.
Remove the pump rod (C)
and the hose (D). Next,
loosen the clamp at the base
of the sprayer (E). Figure 14.
Push the pressure cylinder
approximately 1” out of the
bottom of the tank. Then turn
the pump assembly 180°.
Next, remove the 12 torx
screws that hold the flange
in place. The flange and
diaphragm can then be
removed. Figure 15. Note:
For clarity of this information
the pressure cylinder is shown
removed from the tank.
To replace the diaphragm,
remove the connecting rod
retaining screw (G) from
the plunger and lever (F).
Replace the diaphragm and
reassemble. See Figure 16.
The valve assembly (H) is
removed using a
locally
made tool. See tool drawing
for measurements. Remove
valve plate retaining pin and
insert tool into slots. See
Figure 18. Use a screwdriver
to rotate tool counterclockwise.
3/8” diameter
centered 3/4”
from top
4”
Tool can be made locally
using the following
dimensions or can be
ordered from MasterLine
(part # 4400222-T)
Figure 13
1-5/8”
Figure 14
7)
Once the valve assembly is
removed, the valve plates
and O-rings can be replaced.
Figure 18.
8)
The pump housing (I) is separated from the pressure cylinder (J) by pulling it off. Figure
19. The O-ring can then be
replaced.
9)
Figure 15
F
When reassembling the pump
housing to the pressure cylinder, be sure the square tab on
the pump housing (K) is aligned
in the notch. See arrows (L) on
the pressure cylinder in Figure
20. Be careful not to pinch or
nick the O-ring.
10) Screw the valve assembly
into the cylinder. Be sure that
the two square holes on the
threaded portion of the valve
assembly are aligned with the
holes in the pressure cylinder.
If the pressure cylinder was
removed, look through the inlet
screen to check alignment.If
the pressure cylinder was not
removed, the four holes of the
valve assembly must be centered on and facing the hose
nipple.
G
Figure 16
H
Figure 17
Figure 18
J
I
Figure 19
Figure 20
11) Re-install the diaphragm and the flange with the twelve
screws. Note: The rib on the lever should be facing and
in line with the hose nipple. Tighten the large clamp and
re-install other parts.
9
MasterLine Manual 2007.indd 9
3/20/2007 4:27:25 PM
PRESSURE CYLINDER DISASSEMBLY & REPAIR
The pressure cylinder should be removed only if the screen is clogged or there is a
leak from where the pressure cylinder and tank meet.
1)
2)
Loosen the screw holding the black clamp around the pressure cylinder
and remove clamp. Set the tank on the floor, remove the control knob
(B) from the top of the pressure cylinder. To do this, push the control
knob down and rotate it counter-clockwise, then lift off. Now unscrew
the valve body and set aside. With one hand holding onto the neck
of the tank, grasp the pressure cylinder with your other hand. While
moving the pressure cylinder from side to side, push down using your
body weight to free the cylinder from the tank. Figures 22 and 23. If the
cylinder will not push out by hand, use a 12” - 18” piece of 2” x 4” and a
heavy hammer. Place a rag on top of the pressure cylinder, then place
the piece of wood on the rag. With a few forceful blows the cylinder will
come out of the tank. With diaphragm pumps, once the cylinder drops
an inch out of the tank, rotate the pressure cylinder 180°. Put the tank
aside for now.
Once the pump cylinder is removed, the large O-ring (A) can be replaced.
Figure 21. Note: The new O-ring should be slid onto the pressure cylinder
from the top to the recess. It should not be stretched over the flange at
the bottom.
3)
Remove the O-rings on the valve body and replace with new ones. Apply
a small amount of grease to the O-rings and threads and reassemble.
Figure 24. Note: The adjustment piece has been painted white for clarity
of the O-rings in photo.
4)
The spring and the sealing piece on the control knob are removed by
pulling them apart. The new ones push together. See Figure 24.
5)
If the inlet screen on the pressure cylinder is clogged, it should be cleaned
with a small hard bristle brush and detergent before reassembling.
Figure 25. Note: If the pump handle tends to spring to the down position
when you lift up, the inlet screen is clogged.
6)
Place the tank upside down on the floor and apply grease to the lip of the
pressure cylinder (C) and O-ring (D). Place the pressure cylinder in the
tank, lining up the tab on the tank with the notch in the pressure cylinder.
(For diaphragm pumps, the notch on the pressure cylinder should be
180° out of alignment with the tab on the tank.) Rock the cylinder back
and forth while pushing down forcefully. (Once the diaphragm pump
is 1” from the tank, rotate the cylinder to align the tab and notch.) If
necessary, use a 12” - 18” piece of 2” x 4” to apply downward force on
the pressure cylinder for final seating. Be sure to use a rag to protect
the pressure cylinder.
Figure 21
A
Figure 22
B
Figure 23
Figure 24
Figure 25
C
D
Figure 26
10
MasterLine Manual 2007.indd 10
3/20/2007 4:27:26 PM
SHUT-OFF VALVE DISASSEMBLY & REPAIR
1)
Complete Shut-off Valve. Figure 27.
2)
Remove the retaining pin (A). Press the split end of the pin on a hard
surface (such as a table) and push. Once the retaining pin pops up,
remove the pin. Now slide the handle off the valve body.
3)
With the handle off, remove the screw cap, spring, and valve body. Replace
worn parts. Lubricate the O-rings and reassemble in reverse order. Note:
The valve body (B) depicted is white for clarity. Figure 29. Next, place the
handle groove into the slotted part of the valve body, making sure that the
locking clip is positioned correctly. Insert the retaining pin. Push down on
the handle and release repeatedly so the grease distributes evenly.
Figure 27
Figure 28
A
Figure 29
B
FOLD-AWAY PUMP HANDLE INSTALLATION
1)
Remove bolt and nut (A) from pump rod (B).
B
A
2)
Slide handle assembly over the pump rod and align the holes so that the
rear (elbow) portion of the handle points up and slightly forward and away
from the MASTERLINE logo. Reinstall bolt and locknut. Pump handle
can be installed on the opposite side of the spayer for right hand pumping.
(Stop plate will need to be relocated to the left side.)
3)
The handle can be rotated to either the down (pumping) or up (storage)
positions. Note: The handle swings away from the sprayer, then up or
down as desired. The spray wand attaches to the clamps on the handle
assembly for storage.
STORAGE TIPS
•
•
•
•
•
After operation, the sprayer should be stored in a dark place to prevent UV damage.
Before winter, drain all liquid in tank, lines and air chamber. (See “Cleaning”).
Leave shut-off valve locked in the “open” position.
Regularly inspect hose, wand, pump, tank and shut-off valve for wear, damage or leaks. Repair promptly.
For service, call your nearest MASTERLINE dealer. Always insist on original MASTERLINE spare parts.
11
MasterLine Manual 2007.indd 11
3/20/2007 4:27:27 PM
Equipment One-Year Limited Warranty
1.
What Is Covered By This Warranty. MASTERLINE warrants, to the original purchaser only, that the Equipment that is the
subject of this sale (a) conforms to MASTERLINE’s published specifications, and (b) is free from defects under normal service,
for a one-year period from the original date of delivery. This warranty does not include damage to the Equipment resulting from
occurrences set forth hereinafter in (2). If the purchaser discovers within this period a failure of the Equipment to conform to
specifications or a defect in material or workmanship, they must promptly notify MASTERLINE in writing of such claim. Any
claims under this warranty must be received in writing by MASTERLINE within 13 months from the date of original delivery.
Within a reasonable time after such notification, MASTERLINE will replace any defective component of the Equipment or part
thereof. MASTERLINE will provide the components or parts at MASTERLINE’s expense. Labor is to be performed by the original
purchaser. (MASTERLINE will provide purchaser a labor allowance at MASTERLINE’s current flat rate schedule.) MASTERLINE
will make the final determination as to the amount of hours to be reimbursed to the purchaser for labor. All defective parts shall be
returned to MASTERLINE if requested. These remedies are the original purchaser’s exclusive remedies for breach of warranty.
2.
What Is Not Covered By This Warranty. MASTERLINE does not warrant (a) any product, components or parts not manufactured
by MASTERLINE; (b) defects caused by failure to provide a suitable installation environment for the Equipment; (c) damage
caused by use of the Equipment for purposes other than those for which it was designed; (d) damage caused by accident or
disasters such as fire, flood, wind and lightning; (e) damage caused by unauthorized attachments or modification; or (f) any other
abuse or misuse of the Equipment.
3.
EXCLUSIVE WARRANTY. THE FOREGOING WARRANTY IS EXCLUSIVE AND IN LIEU OF ALL OTHER WARRANTIES OR
REMEDIES, WHETHER WRITTEN, ORAL OR IMPLIED. ANY AND ALL IMPLIED WARRANTIES OR MERCHANTABILITY,
FITNESS FOR A PARTICULAR PURPOSE, COURSE OF DEALING OR USAGE OF TRADE ARE HEREBY EXPRESSLY
DISCLAIMED AND EXCLUDED.
4.
LIMITATION OF REMEDIES. UNDER NO CIRCUMSTANCES, EXCEPT TO THE EXTENT PROHIBITED BY APPLICABLE
LAW, SHALL MASTERLINE BE LIABLE FOR ANY LOSS OR DAMAGE, DIRECT OR INDIRECT, SPECIAL, INCIDENTAL
OR CONSEQUENTIAL ARISING OUT OF THE USE OF OR INABILITY TO USE THIS EQUIPMENT INCLUDING BUT NOT
LIMITED TO ANY CLAIM FOR LOSS OF PROFITS, LOSS OF SAVINGS OR REVENUE, LOSS OF USE OF THE EQUIPMENT
OR ANY ASSOCIATED EQUIPMENT, FACILITIES OR SERVICE, DOWNTIME, THE CLAIMS OR COSTS OF THIRD PARTIES
INCLUDING CUSTOMERS, AND INJURY TO PROPERTY.
Some states do not allow limitations on how long an implied warranty lasts or the exclusion or limitation of incidental or
consequential damages, so the above limitations or exclusion may not apply to you. This warranty gives you specific legal rights,
and you may also have other rights which vary from state to state.
1.
2.
3.
4.
5.
Time Limit For Claims. Any claim for breach of warranty or claims under this warranty must be received by MASTERLINE within
13 months following delivery of the equipment.
6.
No Other Warranties. Unless modified in writing signed by both parties, this agreement is understood to be the complete and
exclusive agreement between the parties, superceding all prior agreements, oral or written, and all other communications between
the parties relating to the subject matter of this agreement. No employee or representative of MASTERLINE or any other party is
authorized to make any other Warranty or to assume any other liability in connection with the sale of its Equipment.
7.
Future Changes. MASTERLINE reserves the right to reserve, change or modify the construction and design of its Equipment
or any component part or parts thereof without incurring the obligations to make such changes or modifications in present
equipment.
8.
Allocation Of Risks. This agreement allocates the risks of equipment failure between MASTERLINE and the original purchaser.
This allocation is recognized by both parties and is reflected in the price of the goods. THE PURCHASER ACKNOWLEDGES
THAT IT HAS READ THIS AGREEMENT, UNDERSTANDS IT, AND IS BOUND BY ITS TERMS.
9.
How To Contact MASTERLINE. If during the warranty period, the MASTERLINE equipment does not function properly due to
defect, simply contact the MASTERLINE Service Department at (800) 888-4897.
HOW TO ORDER PARTS
Your account number if available.
Your name and address and the address where you want the part to be shipped.
The Model/Serial No. of the equipment.
The MASTERLINE Part No. and the quantity desired. (Please do not use reference numbers.)
NOTE: Inspect all shipments on receipt for damage or missing parts. File a claim with the carrier before accepting a damaged shipment.
We reserve the right to change designs, specifications and equipment at any time without notice and without incurring any obligations.
MasterLine Manual 2007.indd 12
3/20/2007 4:27:27 PM