1
SERVICE MANUAL
Supplement
SERVICE MANUAL
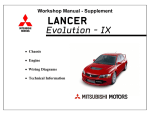
LANCER
EVOLUTION VIII
MR
FOREWORD
This manual contains details of the main changes to
the 2004 model Lancer Evolution VIII MR. Only
differences to the current Lancer Evolution VIII are
included, so please use this manual in conjunction with
the related information specified on the next page.
Please ensure that proper servicing is carried out
promptly, and that the information contained in the
relevant manuals is carefully read and understood
before doing any servicing work.
This information relates to the current vehicle (February
2004). Since specifications will change, some of the
information contained here will inevitably be
superseded.
Note that SI units are used in this manual. Old units are
not shown alongside them.
(However, old units are used for some figures we have
taken from existing documents).
Any opinions, requests, or questions concerning
this manual, should be written on the ‘Servicing
Comments Form’ at the end, and sent to us by fax.
February 2004
MITSUBISHI MOTOR CORPORATION
This manual is printed on recycled paper.
CONTENTS
General..........................................
00
Fuel................................................
13
Intake, Exhaust.............................
15
Manual Transmission ...................
22
Front Suspension.........................
33
Rear Suspension..........................
34
Exterior..........................................
51
Related information
Title
New model manuals
Mirage, Lancer
•
No.
Issue date
1036F30
10/1995
•
•
Mirage, Lancer
Mirage, Lancer
1036F31
1036F32
1/1996
8/1996
•
Mirage, Lancer
1036F33
7/1997
•
Lancer
1036F34
1/1998
•
•
•
•
•
•
Mirage, Lancer
Lancer
Lancer
Lancer Sedia
Lancer Sedia
Lancer Evolution VII
1036F35
1036F36
1036F37
1036K30
1036K31
1036K32
10/1998
1/1999
12/1999
5/2000
7/2000
1/2001
•
•
Lancer Sedia
Lancer Sedia
1036K33
1036K34
5/2001
5/2001
•
Lancer Evolution VII
•
Lancer Sedia
•
Lancer Evolution VIII
•
Lancer
•
Lancer
•
Lancer Evolution VIII MR
Service Manuals
•
Lancer Sedia
•
Lancer Sedia
•
Lancer Evolution VII
(supplement)
•
Lancer Sedia (supplement)
•
Lancer Sedia (supplement)
1036K35
1036K36
1036K37
1036K38
1036K39
1036K40
1/2001
5/2002
1/2003
2/2003
12/2003
2/2004
1036K00
1036K01
1036K02
5/2002
7/2000
1/2001
1036K03
1036K04
5/2001
10/2001
Lancer Evolution VII
(supplement)
Lancer Sedia (supplement)
1036K05
1/2002
1036K06
5/2002
Lancer Evolution VIII
(supplement)
Lancer (supplement)
Lancer (supplement)
1036K07
1/2003
1036K08
1036K09
2/2003
12/2003
•
•
•
•
•
Title
Body Service Manuals
Mirage, Lancer
•
(supplement)
Lancer Sedia
•
•
Lancer Sedia
(supplement)
Lancer Evolution VII
•
(supplement)
•
Lancer Sedia
(supplement)
•
Lancer Evolution VIII
MR (supplement)
Wiring layout diagram
Service Manuals
•
Lancer Evolution VIII
•
Lancer Evolution VIII
MR (supplement)
Engine Service Manuals
•
4G6 Engine
•
4G6 Engine
Transmission Service
Manuals
•
W5M51 Manual
Transmission
•
W5M51Manual
transmission
(Supplement)
•
W6MAA Manual
transmission
No.
Issue date
1036F52
8/1996
1036K50
1036K51
5/2000
7/2000
1036K52
5/2001
1036K53
10/2001
1036K54
2/2004
1036K77
1036K80
1/2003
2/2004
1039G46
1039G63
1/2001
1/2003
1039M17
1/2001
1039M22
1/2003
1039M23
1/2003
Precautions to be taken when servicing vehicles with seatbelts fitted with SRS Airbag and Pretensioners:
1. Incorrect inspection or servicing of SRS airbag and pretensioner fitted seatbelt parts, as well as any related
components, could lead to major damage or non-operation as a result of sudden, unintentional operation of SRS
airbag and pretensioner fitted seatbelts (incorrect deployment).
2. In cases where heating from painting processes occurs, the SRS-ECU, driver side airbag module, passenger side
airbag module, pre-tensioner fitted seatbelts, and cross springs, should be removed.
• 93°C and above: SRS-ECU, driver side airbag module, passenger side airbag module, cross springs
• 90°C and above: pretensioner fitted seatbelts
3. Inspections and servicing of SRS airbag and pretensioner fitted seatbelt parts and any related components must,
without fail, be done by a Mitsubishi Motors authorized dealer.
4. Inspections and servicing of SRS airbag and pretensioner fitted seatbelt parts and any related components must be
done paying scrupulous attention to the relevant service manual (particularly in the case of Group 52B – SRS
airbags).
00-1
GENERAL – MODEL COMPOSITION, APPLIED VEHICLE NUMBERS
SECTION 00
GENERAL
CONTENTS
Model composition ....................................1
Applied vehicle numbers ..........................1
Model line-up
Model
Version
’04 Model Grade
GH-CT9A
SNDFZ
¡
RS
SJDFZ
¡
RS
SJGFZ
¡
GSR
Note
¡ = Continued model
Applied vehicles
GH-CT9A: CT9A-0300001 ~
Engine Model
Transmission
Fuel System
4G63
(2 000 DOHC 16 valve
intercooler turbo)
W5M51 (4WD, 5M/T)
MPI
W6MAA (4WD, 6 M/T)
13A-1
SECTION 13A
MPI (Multi-point Fuel Injection)
CONTENTS
General........................................................2
Troubleshooting .........................................3
MPI- General
13A-2
General
Service information issued contains the changes noted below. Other service details remain unchanged.
• Change from one to two wastegate solenoid valves. However, the No.2 wastegate solenoid valve on the 5 M/T is not
functional.
• Diagnosis code No. P1500 changed to P0622. <6M/T>
MPI system diagram
Power supply
Ignition switch IG
Ignition switch ST
Vehicle speed sensor
A/C switch
A/C load signal
Power steering fluid
pressure switch
• Alternator FR signal
• Intercooler water spray
switch (auto)
• Intercooler water spray
switch (manual)
•
•
•
•
•
•
•
★1. O2 sensor
★2. Air flow sensor
★3. Air intake sensor
★4. Throttle position
sensor
★5. Cam position sensor
★6. Crack angle sensor
★7. Barometric pressure
sensor
★8. Water temperature
sensor
★9. Knock sensor
✩1. Injector
✩2. ISC servo (stepper
motor)
✩3. Fuel pressure control
solenoid valve
✩4. No.1 wastegate solenoid
valve
Engine ECU
✩5. No.2 wastegate solenoid
valve
✩6. Purge control solenoid
valve
✩7. Secondary air control
solenoid valve
•
•
•
•
•
•
•
•
•
•
•
•
Engine control relay
Fuel pump relay 2, 3
A/C relay
Ignition coil
Fan controller
Condenser fan relay (HI)
Condenser fan relay
(LOW)
Engine warning lamp
Diagnosis output
Alternator G terminal
Intercooler water spray
relay
Intercooler water spray
lamp
Canister
From fuel tank
✩2. ISC servo
✩6. Purge control
solenoid valve
Check
valve
✩7. Secondary air
control solenoid valve
Vacuum
tank
★4. Throttle
By-pass
valve
position
sensor
✩3. Fuel pressure
control solenoid valve
Secondary
air valve
★1. O2 sensor
To fuel
tank
★7. Barometric pressure
★2. Air flow sensor sensor
Fuel pressure
regulator
From fuel
pump
★3. Air intake
sensor
Air
intake
✩1. Injector
★5.Cam position sensor
★8.Water temperature sensor
★9.Knock sensor
Wastegate actuator
Crack angle sensor
✩4. No.1
wastegate
solenoid valve
✩5. No.2 wastegate
solenoid valve
Only operates on 6M/T
Catalytic converter
13A-3
MPI – Troubleshooting
TROUBLESHOOTING
1. Inspection procedures for different types of malfunction
Inspection procedure 37
No.2 Wastegate solenoid valve system <6M/T>
Assumed cause of concern
The No.2 wastegate solenoid valve controls excess pressure
introduced via the turbocharger wastegate actuator.
• No.2 wastegate solenoid valve malfunction
• Engine ECU malfunction
Connector inspection : B-32
Repair
OK
B-32 No.2: measure at wastegate solenoid valve NG
connector
• Undo connector and take measurement on
solenoid valve side
• Resistance between 1 and 2
OK: 29 - 35Ω (at 20˚C)
Change No.2 wastegate solenoid valve.
OK
Measure at B-32 No.2 waste gate solenoid valve NG
connector.
• Undo connector and take measurement on
harness side.
• Ignition switch ON:
• Resistance between 1 – earth
OK: battery voltage
Check connector: B-19X
NG
Repair
OK
Inspect, repair harness between No.2 wastegate
solenoid valve and engine control relay.
• Check for broken wire and shorting.
OK
Measurement at C-49 engine ECU connector
• Engine ECU terminal voltage measurement
• Ignition switch: ON
• Voltage between 6 – Earth
OK: battery voltage
NG
NG
Check connector: C-49
Check harness between No.2 wastegate
NG
solenoid valve and engine ECU.
• Check output wire to see if broken or shorting.
OK
OK
Check connector: C-49
OK
NG
Replace engine ECU
Repair
Check harness between No.2 wastegate
solenoid valve and engine ECU.
• Check for damage to output wire.
OK
NG
Repair
Check harness between No.2 wastegate
solenoid valve and engine control relay.
• Check for damage to power supply cable.
OK
Replace engine ECU.
Repair
OK
NG
Repair
Repair
MPI – TROUBLESHOOTING
13A-4
2. ENGINE ECU CHECKS
2-1 List of terminal voltages
Terminal No.
Check item
Check item (engine condition)
Normal value
41
No.1 wastegate
solenoid valve
Ignition switch ON
Battery voltage
Engine: warm, idling (using premium petrol)
1V or less
Ignition switch: ON
Battery voltage
Accelerating in 2nd gear with throttle full open (at least 3500 rpm)
Voltage decrease
6
No.2 wastegate
solenoid valve
<6M/T>
2-2 List of resistances and conductance between harness side connector – terminal
Terminal No.
Check item
Standard value, normal condition (check condition)
41-47
No.1 wastegate solenoid valve
29-35Ω (at 20˚C)
6-47
No.2 wastegate solenoid valve <6 M/T>
29-35Ω (at 20˚C)
13B-1
FUEL SUPPLY GENERAL, FUEL TANK
SECTION 13B
FUEL SUPPLY
CONTENTS
General........................................................1
Fuel tank .....................................................1
General
As well as changing the filler neck hose clamp from an M6 x 39 to M6 x 49, the mounting position has been changed. There
were no changes other than the following.
Fuel Tank
Removal and fitting
Cross section A – A
Rear cross member
NOTE
Fit the filler neck hose clamp so that it does not interfere with the rear cross member.
INTAKE, EXHAUST GENERAL, SERVICING STANDARD VALUES, VEHICLE SERVICING
15-1
SECTION 15
INTAKE, EXHAUST
CONTENTS
General........................................................1
Servicing standard values ........................1
Vehicle Servicing .......................................1
1. Turbocharger boost pressure check ..................1
2. Checking boost pressure control system ..........2
Air cleaner ..................................................3
General
The important service points were added as a result of the following changes. Other service points remain the same.
• Change to the turbocharger boost pressure (on 6M/T)
• Change from one to two wastegate solenoid valves. However, the No.2 wastegate on the 5M/T is not functional.
Servicing Standard Values
ITEM
STANDARD VALUE
Turbocharger boost pressure kPa <6M/T>
97-144
Air cleaner
Vehicle servicing
1. Checking turbocharger boost pressure
No.1 Wastegate
solenoid valve
No.2 Wastegate
solenoid valve
<5M/T>
Since the No.2 wastegate solenoid valve does not function, the
same check of the No.1 wastegate solenoid valve as before is
carried out.
6M/T
Note
The driving test, which is done with the throttle fully open,
must be done in a safe place with two people in the vehicle.
The person sitting in the passenger seat should take the
reading of the values on the pressure gauge.
(1) Remove the hose (black) from the No.1 wastegate solenoid
valve, and fit the pressure gauge to this hose. Fit a plug to
solenoid valve nipple from which the hose (black) has been
removed.
(2) Remove the No.2 wastegate solenoid valve connector.
(3) Accelerate at full throttle in 2nd gear, and then take the boost
pressure measurement when engine speed gets to at least
3,000rpm.
Standard value: 97 – 144kPa
(4) When the boost pressure is lower than the standard value, the
cause could be one of the following:
1. Wastegate actuator misoperation
2. Boost pressure leak
3. Turbocharger NG
(5) When boost pressure is higher than standard value, the boost
pressure control may be faulty, so please check the following
points.
15-2
INTAKE – EXHAUST – VEHICLE SERVICING
1) Wastegate actuator misoperation
2) Wastegate valve misoperation
3) Wastegate actuator rubber hose detachment, cracking.
2. Boost pressure control system inspection <6M/T>
Note
The driving test, which is done with the throttle fully open,
must be done in a safe place with two people in the vehicle.
The person sitting in the passenger seat should take the
reading of the values on the pressure gauge.
(1) Remove hose (black) from No.1 wastegate solenoid valve, then
connect a three-way coupling between the hose and the
solenoid valve.
(2) Connect a hand vacuum pump to the three-way coupling.
Air cleaner
No.1 Wastegate
solenoid valve
No.2 Wastegate
solenoid valve
(3) Remove boost hose from the wastegate actuator control boost
nipple on the air outlet fitting, and fit a plug over the nipple.
(4) Apply a vacuum whilst covering and releasing the tip of the
hose to check the vacuum condition.
Wastegate
actuator
Boost hose
Engine condition
Boost hose tip
Normal condition
Stop (ignition
switch: “ON”
position)
Released
Vacuum leaks
Covered
Vacuum is maintained
Idle running after
warming up.
Vacuum leaks
(5) Ignition switch to “LOCK” (OFF) position.
(6) Remove wastegate solenoid valve connector.
(7) Apply a vacuum whilst covering and releasing the tip of the
hose, to check the vacuum condition (stop the hose tip with a
plug when driving).
Engine condition
Boost hose tip
Normal condition
Stop (ignition switch:
“ON” position)
Released
Vacuum leaks
Covered
Vacuum is maintained
Accelerating with
throttle full open in
2nd gear (at least
3500rpm)
Vacuum leaks
Note
When vacuum condition is not normal, it may be assumed that
there is a problem with the wastegate actuator, wastegate solenoid
valve, or hose.
INTAKE, EXHAUST – AIR CLEANER
15-3
Air Cleaner
Removal and Fitting
Note
The parts marked with a ★ symbol are plastic components which contain recycled paper. Please note the following:
• When fixing or removing, or after fitting parts, be careful not to knock or apply force to these components.
• When assembling, fix the air cleaner body ASSY securely to the air cleaner cover using the clamp on the body.
Remarks
Parts marked with a ★ symbol use plastic that may contain recycled paper, so when scrapped are burnable.
Removal procedure
1. Battery
2. Air duct
3. Air flow sensor connector
4. Air cleaner assembly
5. Air flow sensor
6. Gasket
7. Air cleaner cover
8. Air cleaner element
9. Air cleaner body assembly
10. Vacuum hose
Air pipe E, air hose D, air by-pass valve
assembly, air by-pass hose.
• Oil level gauge assembly
11. Air intake hose
12. Wastegate solenoid valve connector
13. Vacuum hose connection
14. Wastegate solenoid valve assembly
15. Air cleaner bracket
•
<Memo>
MANUAL TRANSMISSION – GENERAL, TROUBLESHOOTING
22-1
SECTION 22
MANUAL TRANSMISSION
CONTENTS
General........................................................1
Troubleshooting .........................................1
General
The following troubleshooting items have been changed along with the changes to the wiring. Troubleshooting points other than
those mentioned below remain unchanged, and are the same as on the existing Lancer Evolution VII/VIII.
Troubleshooting
1. Diagnosis Code List
Diagnosis code no.
Diagnosis item
12
Power supply voltage (valve power supply) system
Broken wire or short
22-2
21
Vehicle wheel speed sensor <FR> system <ACD fitted vehicles>
Broken wire or short
22-3
22
Vehicle wheel speed sensor <FL> system <ACD fitted vehicles>
Broken wire or short
22-3
23
Vehicle wheel speed sensor <RR> system <ACD fitted vehicles>
Broken wire or short
22-3
24
Vehicle wheel speed sensor <RL> system <ACD fitted vehicles>
Broken wire or short
22-3
25
Abnormal diameter tyres <ACD fitted vehicle>
22-5
26
Vehicle wheel speed sensor system (output signal abnormal) <ACD fitted vehicles>
22-6
41
TPS system
Broken wire or earthing
22-7
Short
22-7
Broken wire or earthing
22-8
46
Earth wire broken
22-8
47
Abnormal power supply
22-9
Broken wire or short
22-10
Sensor malfunction
22-11
Broken wire or short
22-12
Sensor malfunction
22-13
42
45
51
Pressure sensor system
Longitudinal G sensor system
52
56
Lateral G sensor system
57
Page ref.
61
Stop lamp switch system
Broken wire
22-14
62
ACD mode switch system
Sticking
22-15
63
Parking brake switch system
Short or failing to return
22-16
65
ABS monitor system <ACD+AYC fitted vehicles>
Broken wire or ABS failure
22-17
74
Proportional control valve <ACD> system
Broken wire or short
22-18
81
Electrical pump relay system
Broken wire or short
22-18
22-2
MANUAL TRANSMISSION - TROUBLESHOOTING
2. Check procedures by diagnosis code
Code No.12 Power supply voltage (valve power supply) system
Assumed cause of concern
If the 4WD-ECU power supply voltage drops below 9V or rises
above 18V, Code No.12 is output, indicating either a broken wire in
the power supply circuit, a short, or a drop in the battery voltage.
• battery malfunction
• harness, connector malfunction
• 4WD-ECU malfunction
Remarks
In cases where other diagnosis codes are output, please refer to the relevant item.
Battery inspection
NG -> replace
OK
MUT-II/III Service data
• No.10 Battery voltage
OK: battery voltage
OK -> Intermittent malfunction
NG
Measurement at C-38 4WD-ECU connector
• ECU terminal voltage measurement
• Ignition switch: ON
• Voltage 13 – earth
OK: battery voltage
OK
Connector check: C-38
NG -> repair
OK
MUT-II/III Service data
• No.10 battery voltage
OK: battery voltage
NG -> replace 4WD-ECU
OK -> intermittent malfunction
NG
Connector check: C-38, C-133, C212, C-210
NG -> repair
OK
Check harness between ignition switch – 4WD-ECU
• Check to see if power supply wire broken, short, or
damage
NG -> repair
MANUAL TRANSMISSION - TROUBLESHOOTING
Code
Code
Code
Code
No.21 Vehicle
No.22 Vehicle
No.23 Vehicle
No.24 Vehicle
wheel
wheel
wheel
wheel
speed
speed
speed
speed
sensor
sensor
sensor
sensor
<FR> systems
<FL> systems
<RR> systems
<RL> systems
When one of the vehicle wheel speed sensors detects a
vehicle speed of 15kph or more, and when even one of the
remaining 3 sensors cannot detect vehicle speed, the
diagnosis code for wheel speed sensor broken wire or short is
output.
22-3
Assumed cause of concern
• Wheel speed sensor malfunction
• Rotor malfunction
• Wheel bearing malfunction
• Harness, connector malfunction
• 4WD-ECU malfunction
<ACD fitted vehicle>
Remarks
*1: refer to ’00-5 Lancer Sedia Service Manual (No.1036K00)
*2: refer to ’01-1 Lancer Evolution VII Service Manual (No.1036K02)
Vehicle speed sensor fitting check
NG -> repair
OK
MUT-II/III Service Data
• No.01 Vehicle speed sensor <FR>
• No.02 Vehicle speed sensor <FL>
• No.03 Vehicle speed sensor <RR>
• No.04 Vehicle speed sensor <RL>
OK: Speed shown on speedometer and MUT-II/III agree
OK -> Intermittent malfunction
NG
Measurement at C-38 4WD-ECU connector
• Undo connector and take measurement on harness
side
(1) Resistance between 9 – 22 (vehicle speed sensor <FR>)
(2) Resistance between 6 - 19 (vehicle speed sensor <FL>)
(3) Resistance between 7 - 20 (vehicle speed sensor <RR>)
(4) Resistance between 8 – 21 (vehicle speed sensor <RL>)
OK: 1.2 – 1.6 kΩ
OK
NG
Vehicle wheel speed sensor check
(Refer to Group 35B – Vehicle wheel speed sensor)*1
NG -> Replace
OK
Connector checks: C-38, A-05, A-31, D-11, D-05,
D-12, C-131, C-20, C-115, C-34
NG -> Repair
OK
To next page
Harness check between 4WD-ECU – each vehicle
wheel speed sensor
• Check output wire for broken wire, earthing, short
• Check earth wire to see if broken or damaged
NG -> Repair
OK
MUT-II/III Service data
• No.1 Vehicle speed sensor <FR>
• No.2 Vehicle speed sensor <FL>
• No.3 Vehicle speed sensor <RR>
• No.4 Vehicle speed sensor <RL>
OK: Speed shown on speedometer and MUT-II/III agree
NG -> Replace 4WD-ECU
OK -> Intermittent malfunction
22-4
MANUAL TRANSMISSION - TROUBLESHOOTING
From previous page
Check vehicle wheel speed sensor output voltage (ref.
p.22-41)*2
OK
NG
Vehicle speed sensor and rotor check
(Refer to Group 35B – Vehicle wheel speed sensor)*1
NG -> Repair
OK
Check connector: C38
NG -> Repair
OK
MUT-II/III Service data
• No.1 Vehicle speed sensor <FR>
• No.2 Vehicle speed sensor <FL>
• No.3 Vehicle speed sensor <RR>
• No.4 Vehicle speed sensor <RL>
OK: Speed shown on speedometer and MUT-II/III
agree
NG -> Replace 4WD-ECU
OK -> Intermittent malfunction
Wheel bearing check (Refer to Group 26 – Vehicle
Servicing, Group 27B – Rear Hub Assembly)*2
NG -> Repair
MANUAL TRANSMISSION - TROUBLESHOOTING
22-5
Code No.25 Abnormal tyre diameter
Assumed cause of concern
Abnormal tyre Code No. 25 is output in cases where, when
the steering wheel is in a central position, and vehicle speed
is 20kph or more, there is a discrepancy between one of the
vehicle wheel speed sensors and the average of the 4 wheel
speed sensors, in that it is outside the specified range.
However, the warning lamp does not come on.
• Tyre malfunction
• Vehicle speed sensor malfunction
• Rotor malfunction
• Wheel bearing malfunction
• Harness, connector malfunction
• 4WD-ECU malfunction
<ACD fitted vehicles>
Remarks
*1: refer to ’00-5 Lancer Sedia Service Manual (No.1036K00)
*2: refer to ’01-1 Lancer Evolution VII Service Manual (No.1036K02)
Vehicle speed sensor fitting check
NG -> repair
OK
MUT-II/III Service Data
• No.01 Vehicle speed sensor <FR>
• No.02 Vehicle speed sensor <FL>
• No.03 Vehicle speed sensor <RR>
• No.04 Vehicle speed sensor <RL>
OK: Speed shown on speedometer and MUT-II/III agree
OK -> Intermittent malfunction
NG
Measurement at C-38 4WD-ECU connector
• Undo connector and take measurement on harness
side
(1) Resistance between 9 – 22 (vehicle speed sensor
<FR>)
(2) Resistance between 6 - 19 (vehicle speed sensor
<FL>)
(3) Resistance between 7 - 20 (vehicle speed sensor
<RR>)
(4) Resistance between 8 – 21 (vehicle speed sensor
<RL>)
OK: 1.2 – 1.6kΩ
NG
Connector checks: C-38, A-05, A-31, D-11, D-05,
D-12, C-131, C-20, C-115, C-34
NG: Repair
OK
OK
Check vehicle wheel speed sensor output voltage (ref.
p.22-41)*2
OK
Check connector: C-38
NG -> repair
OK
MUT-II/III Service data
• No.1 Vehicle speed sensor <FR>
• No.2 Vehicle speed sensor <FL>
• No.3 Vehicle speed sensor <RR>
• No.4 Vehicle speed sensor <RL>
OK: Speed shown on speedometer and MUT-II/III
agree
NG -> Replace 4WD-ECU
OK -> Intermittent malfunction
Vehicle wheel speed sensor
(Refer to Group 35B – Vehicle wheel speed sensor)*1
NG -> Repair
OK
NG
Harness check between 4WD-ECU – each vehicle
wheel speed sensor
• Check output wire for broken wire, earthing, short
• Check earth wire to see if broken or damaged
NG: repair
OK
MUT-II/III Service data
• No.1 Vehicle speed sensor <FR>
• No.2 Vehicle speed sensor <FL>
• No.3 Vehicle speed sensor <RR>
• No.4 Vehicle speed sensor <RL>
OK: Speed shown on speedometer and MUT-II/III
agree
NG -> Replace 4WD-ECU
OK -> Intermittent malfunction
Vehicle wheel speed sensor and rotor check
(Refer to Group 35B – Vehicle Wheel Speed Sensor)*1
NG -> Repair
OK
Wheel bearing check (Refer to Group 26 – Vehicle
Servicing, Group 27B – Rear Hub Assembly)*2
NG -> Repair
22-6
MANUAL TRANSMISSION - TROUBLESHOOTING
Code No.26 Vehicle wheel speed sensor system (output
signal abnormal)
Assumed cause of concern
Abnormal vehicle wheel speed sensor Code No. 26 is output
in cases where, when the vehicle speed is 20kph or more,
one of the vehicle wheel speed sensors is outside the
specified range. However, the warning lamp does come on.
• Tyre malfunction
• Vehicle speed sensor malfunction
• Rotor malfunction
• Wheel bearing malfunction
• Harness, connector malfunction
• 4WD-ECU malfunction
<ACD fitted vehicles>
Remarks
*1: refer to ’00-5 Lancer Sedia Service Manual (No.1036K00)
*2: refer to ’01-1 Lancer Evolution VII Service Manual (No.1036K02)
Vehicle speed sensor fitting check
NG -> repair
OK
MUT-II/III Service Data
• No.01 Vehicle speed sensor <FR>
• No.02 Vehicle speed sensor <FL>
• No.03 Vehicle speed sensor <RR>
• No.04 Vehicle speed sensor <RL>
OK: Speed shown on speedometer and MUT-II/III agree
OK -> Intermittent malfunction
NG
Measurement at C-38 4WD-ECU connector
• Undo connector and take measurement on harness
side
(1) Resistance between 9 – 22 (vehicle speed sensor
<FR>)
(2) Resistance between 6 - 19 (vehicle speed sensor
<FL>)
(3) Resistance between 7 - 20 (vehicle speed sensor
<RR>)
(4) Resistance between 8 – 21 (vehicle speed sensor
<RL>)
OK: 1.2 – 1.6kΩ
NG
Connector checks: C-38, A-05, A-31, D-11, D-05,
D-12, C-131, C-20, C-115, C-34
NG -> Repair
OK
OK
Check vehicle wheel speed sensor output voltage (ref.
p.22-41)*2
OK
Check connector: C-38
NG -> repair
OK
MUT-II/III Service data
• No.1 Vehicle speed sensor <FR>
• No.2 Vehicle speed sensor <FL>
• No.3 Vehicle speed sensor <RR>
• No.4 Vehicle speed sensor <RL>
OK: Speed shown on speedometer and MUT-II/III
agree
NG -> Replace 4WD-ECU
OK -> Intermittent malfunction
Vehicle wheel speed sensor
(Refer to Group 35B – Vehicle wheel speed sensor)*1
NG -> Repair
OK
NG
Harness check between 4WD-ECU – each vehicle
wheel speed sensor
• Check output wire for broken wire, earthing, short
• Check earth wire to see if broken or damaged
NG -> repair
OK
MUT-II/III Service data
• No.1 Vehicle speed sensor <FR>
• No.2 Vehicle speed sensor <FL>
• No.3 Vehicle speed sensor <RR>
• No.4 Vehicle speed sensor <RL>
OK: Speed shown on speedometer and MUT-II/III
agree
NG -> Replace 4WD-ECU
OK -> Intermittent malfunction
Vehicle wheel speed sensor and rotor check
(Refer to Group 35B – Vehicle Wheel Speed Sensor)*1
NG -> Repair
OK
Wheel bearing check (Refer to Group 26 – Vehicle
Servicing, Group 27B – Rear Hub Assembly)*2
NG -> Repair
MANUAL TRANSMISSION - TROUBLESHOOTING
Code No.41, 42 TPS system
Assumed cause of concern
If, when idling, TPS output is 0.2V or less, code No.41 is
output, indicating that output is too low.
If, at 10kph or less, TPS output is 4.8V or more for a period
of 2 minutes or more, code No.42 is output, indicating output
is too high.
• TPS malfunction
• Harness, connector malfunction
• 4WD-ECU malfunction
Remarks
*2: refer to ’01-1 Lancer Evolution VII Service Manual (No.1036K02)
YES
MUT-II/III Diagnosis code
• Has MPI diagnosis code No.P0120 been output?
Refer to Group 13D – Troubleshooting*2
NO
MUT-II/III Service Data
• No.13 TPS voltage
OK: P.22-32 (Refer to Service Data List)*2
OK -> Intermittent malfunction
NG
NG
Measurement at C-37 4WD-ECU connector
• Measure ECU terminal voltage
• Ignition switch: ON
• Voltage between 39 – earth
(1)Throttle pedal fully open
OK: 535 – 735 mV
(2)Throttle pedal fully open
OK: 4500 – 5500 mV
OK
Check connector: C-37
NG -> Repair
OK
MUT-II/III Service data
• No.13 TPS voltage
OK: P.22-32 (Refer to Service Data List)*2
NG -> replace 4WD-ECU
OK -> intermittent malfunction
TPS adjustment (Refer to Group 13D – Vehicle
Servicing)*2
OK
Connector check: C-37, B-06, C-23
NG -> repair
OK
Check harness between TPS – 4WD-ECU
• Check to see if output wire is broken, short, or
damaged
NG -> repair
22-7
22-8
MANUAL TRANSMISSION - TROUBLESHOOTING
Code No.45 Pressure sensor system (broken wire or earth)
Assumed cause of concern
Code No.45 is output when output signal from pressure sensor
is 0.2V or less.
• Harness, connector malfunction
• Pressure sensor malfunction
• 4WD-ECU malfunction
Remarks
*2: refer to ’01-1 Lancer Evolution VII Service Manual (No.1036K02)
MUT-II/III Service data
• No.18 pressure sensor
OK: P.22-32 (Refer to Service Data List)*2
OK -> Intermittent malfunction
NG
Measurement at C-37 4WD-ECU connector
• Measure ECU terminal voltage
• Ignition switch: ON
• Voltage between 32 – earth
OK: 0.5V – 1.5V
NG
Check connector: C-37, C-20, C-30, F-22, F-27
NG -> Repair
OK
Check harness between pressure sensor – 4WD ECU
• Check to see if power supply line is broken, earth, or
damaged.
• Check for broken output wire, earth, or damage
NG -> Repair
OK
OK
Check connector: C-37
NG -> Repair
OK
Replace pressure sensor
MUT-II/III Service data
• No.18 Pressure sensor
OK: P.22-32 (Refer to Service Data List)*2
NG -> replace 4WD-ECU
OK -> intermittent malfunction
Code No.46 Pressure sensor system (earth wire broken)
Assumed cause of concern
Code No.46 is output when output signal from pressure
sensor is 2.0V or more.
• Harness, connector malfunction
• Pressure sensor malfunction
• 4WD-ECU malfunction
Measurement at F-27 pressure sensor connector
• Undo connector, take measurement on harness side
• Resistance between 3 – earth
OK: 2Ω or less
OK
Check connector: F-27
NG: repair
NG
Connector check: C-37, C-20, F-22, F-27
NG -> repair
OK
Check harness between pressure sensor – 4WD-ECU
• Check to see if earth wire is broken or damaged
NG -> repair
OK
OK
Replace 4WD-ECU
Replace pressure sensor
MANUAL TRANSMISSION - TROUBLESHOOTING
22-9
Code No.47 Pressure sensor system (abnormal power supply)
Assumed cause of concern
Code No.47 is output when, with pressure sensor power supply OFF, the pressure
sensor power supply voltage is 4.0V or more, and when pressure sensor power supply
is ON, the pressure sensor power supply voltage is 4.0V or less.
• Harness, connector malfunction
• Pressure sensor malfunction
• 4WD-ECU malfunction
MUT-II/III Service data
• No.19 pressure sensor power supply
OK: 5V
OK -> Intermittent malfunction
NG
Measurement at C-37 4WD-ECU connector
• Measure ECU terminal voltage
• Ignition switch: ON
• Voltage between 43 – earth
OK: 4.9V – 5.1V
OK
NG
Connector check: C-37, C-20, C-30, F-22, F-27
NG -> repair
OK
Check harness between pressure sensor – 4WD-ECU
• Check to see if power supply wire is broken, earth, or
damaged
NG -> repair
Check connector: C-37
NG -> Repair
OK
OK
MUT-II/III Service data
• No.19 Pressure sensor
OK: 5V
NG -> replace 4WD-ECU
OK -> intermittent malfunction
Replace pressure sensor
22-10
MANUAL TRANSMISSION - TROUBLESHOOTING
Code No.51 Longitudinal G sensor system
Assumed cause of concern
Code No.51 is output when the longitudinal G sensor signal
falls below 0.5V or rises above 4.5V.
•
•
•
•
Harness, connector malfunction
Longitudinal G sensor malfunction
ABS-ECU malfunction <AYC fitted vehicles>
4WD-ECU malfunction
Remarks
*2: refer to ’01-1 Lancer Evolution VII Service Manual (No.1036K02)
MUT-II/III Service data
• No.14 longitudinal G sensor power voltage
OK: P.22-32 Refer to (Service Data List)*2
OK -> Intermittent malfunction
NG
Measurement at D-29 longitudinal G sensor connector
• Undo connector and measure on harness side
• Ignition switch: ON
(1) Voltage between 1 - earth
OK: battery voltage
(2) Resistance between 3 – earth
OK: 2Ω or less
OK
(1) NG
(2) NG
Check harness between longitudinal G sensor –
ignition switch.
• Check for broken power supply wire, earth, damage
• NG -> repair
Connector check: D-29, C-20, B-109 <ACD + AYC
fitted vehicles> D-29, C-20, C-38, <ACD-fitted vehicles>
NG -> repair
OK
label
label
Check harness between longitudinal G sensor – ABSECU <ACD+AYC fitted vehicles>
• Check to see if earth wire broken or damaged
NG -> repair
Check harness between longitudinal G sensor – 4WDECU <ACD fitted vehicles>
• Check to see if earth wire broken or damaged
NG -> repair
OK
D-29
Harness side
connector
• Remove longitudinal G sensor
• Connect the special tool between D-29 longitudinal
G sensor connector harness side connector and
longitudinal G sensor.
• Ignition switch: ON
• Voltage between 2 – body earth (when longitudinal
G sensor is set on a flat surface)
OK: 2.4 – 2.6V
• Voltage between 2 – body earth (when longitudinal
G sensor is placed so that the label surface faces
sideways)
OK: 3.3 – 3.7V
Connector check: D-29, C-212, C-210
NG -> repair
OK
MUT-II/III Service data
• No.14 longitudinal G sensor voltage
OK: Refer to P.22-32 (Service Data List)*2
NG -> Refer to Group 35C – Troubleshooting*2
<ACD+AYC fitted vehicles> or 4WD-ECU <ACD fitted
vehicles> Replace
OK -> intermittent malfunction
NG
Replace longitudinal G sensor
OK
Connector check: D-29, C-38, C-20, B-109 <ACD +
AYC fitted vehicles> D-29, C-20, C-38 <ACD fitted
vehicles>
NG -> repair
OK
Check harness between longitudinal G sensor – 4WDECU
• Check for broken output wire, earth, damage
Check harness between longitudinal G sensor – ABSECU <ACD+AYC fitted vehicles>
• Check output wire for earth, damage
NG -> repair
OK
MUT-II/III Service data
• No.14 longitudinal G sensor voltage
OK: Refer to P.22-32 (Service Data List)*2
NG -> Refer to Group 35C – Troubleshooting*2
<ACD+AYC fitted vehicles> or 4WD-ECU <ACD fitted
vehicles> Replace
OK -> intermittent malfunction
MANUAL TRANSMISSION - TROUBLESHOOTING
Code No.52 Longitudinal G sensor system
Assumed cause of concern
At 10kph or over, with ABS and brakes not applied, code No.
52 is output in cases where G sensor indicates higher than
specified value.
•
•
•
•
22-11
Harness, connector malfunction
Longitudinal G sensor malfunction
ABS-ECU malfunction <ACD+AYC fitted vehicles>
4WD-ECU malfunction
Remarks
*2: refer to ’01-1 Lancer Evolution VII Service Manual (No.1036K02)
MUT-II/III Service data
• No.14 longitudinal sensor voltage
OK: P.22-32 Refer to (Service Data List)*2
OK -> Intermittent malfunction
NG
Longitudinal G sensor check (refer to P.22-32)*2
NG -> replace
OK
Measurement at C-38 4WD-ECU connector
• ECU terminal voltage measurement
• Ignition switch: ON
• Voltage between 23 – earth
OK: 2.4 – 2.6V (when vehicle is standing on flat
ground)
OK
Connector check: C-38
NG -> repair
OK
MUT-II/III Service data
• No.14 longitudinal sensor voltage
OK: P.22-32 Refer to (Service Data List)*2
NG -> Replace 4WD-ECU
OK -> Intermittent malfunction
NG
Connector check: C-38, D-29, C-20, B-109
<ACD+AYC fitted vehicles> C-38, C-20, D-29 <ACD
fitted vehicles>
NG -> repair
OK
Check harness between longitudinal G sensor – 4WDECU
• Check to see if output wire is broken, earth, or
damaged
Check harness between longitudinal G sensor – ABSECU
<ACD+AYC fitted vehicles>
• Check to see if output wire earth or damaged
NG -> repair
OK
MUT-II/III Service data
• No.14 longitudinal G sensor voltage
OK: Refer to P.22-32 (Service Data List)*2
NG -> Refer to Group 35C – Troubleshooting*2
<ACD+AYC fitted vehicles> or replace 4WD-ECU
OK -> intermittent malfunction
22-12
MANUAL TRANSMISSION - TROUBLESHOOTING
Code No.56 Longitudinal G sensor system
Assumed cause of concern
Code No.56 is output when the longitudinal G sensor signal
falls below 0.5V or rises above 4.5V.
•
•
•
•
Harness, connector malfunction
Longitudinal G sensor malfunction
ABS-ECU malfunction <ACD+AYC fitted vehicles>
4WD-ECU malfunction
Remarks
*2: refer to ’01-1 Lancer Evolution VII Service Manual (No.1036K02)
MUT-II/III Service data
• No.15 longitudinal G sensor power voltage
OK: P.22-32 Refer to (Service Data List)*2
OK -> Intermittent malfunction
NG
(1) NG
Measurement at D-31 lateral G sensor connector
• Undo connector and measure on harness side
• Ignition switch: ON
(1)Voltage between 1 - earth
OK: battery voltage
(2)Resistance between 3 – earth
OK: 2Ω or less
OK
(2) NG
Check harness between lateral G sensor – ignition
switch.
• Check for broken power supply wire, earth, damage
NG -> repair
Connector check: D-31, C-20, B-109 <ACD + AYC
fitted vehicles> D-31, C-20, C-38, <ACD-fitted
vehicles>
NG -> repair
label
label
OK
Check harness between lateral G sensor – ABS-ECU
<ACD+AYC fitted vehicles>
• Check to see if earth wire broken or damaged
Check harness between lateral G sensor – 4WD-ECU
<ACD fitted vehicles>
• Check to see if earth wire broken or damaged
NG -> repair
OK
D-29
Harness side
connector
• Remove longitudinal G sensor
• Connect the special tool between D-31 longitudinal
G sensor connector harness side connector and
longitudinal G sensor.
• Ignition switch: ON
• Voltage between 2 – body earth (when longitudinal
G sensor is set on a flat surface)
OK: 2.4 – 2.6V
• Voltage between 2 – body earth (when longitudinal
G sensor is placed so that the label surface faces
sideways)
OK: 3.3 – 3.7V
Connector check: D-31, C-212, C-210
NG -> repair
OK
MUT-II/III Service data
• No.15 lateral G sensor voltage
OK: Refer to P.22-32 (Service Data List)*2
NG -> Refer to Group 35C – Troubleshooting*2
<ACD+AYC fitted vehicles> or 4WD-ECU <ACD fitted
vehicles> Replace
OK -> intermittent malfunction
NG
Replace lateral G sensor
OK
Connector check: D-31, C-38, C-20, B-109 <ACD +
AYC fitted vehicles> D-31, C-20, C-38 <ACD fitted
vehicles>
NG -> repair
OK
Check harness between lateral G sensor – 4WD-ECU
• Check for broken output wire, earth, damage
Check harness between lateral G sensor – ABS-ECU
<ACD+AYC fitted vehicles>
• Check output wire for earth, damage
NG -> repair
OK
MUT-II/III Service data
• No.15 longitudinal G sensor voltage
OK: Refer to P.22-32 (Service Data List)*2
NG -> Refer to Group 35C – Troubleshooting*2
<ACD+AYC fitted vehicles> or 4WD-ECU <ACD fitted
vehicles> Replace
OK -> intermittent malfunction
MANUAL TRANSMISSION - TROUBLESHOOTING
Code No.57 Lateral G sensor system
Assumed cause of concern
At 10kph or over, with ABS and brakes not applied, code No.
57 is output in cases where G sensor indicates higher than
specified value.
•
•
•
•
22-13
Harness, connector malfunction
Longitudinal G sensor malfunction
ABS-ECU malfunction <ACD+AYC fitted vehicles>
4WD-ECU malfunction
Remarks
*2: refer to ’01-1 Lancer Evolution VII Service Manual (No.1036K02)
MUT-II/III Service data
• No.15 longitudinal sensor voltage
OK: P.22-32 Refer to (Service Data List)*2
OK -> Intermittent malfunction
NG
Lateral G sensor check (refer to P.22-20)*2
NG -> replace
OK
Measurement at C-38 4WD-ECU connector
• ECU terminal voltage measurement
• Ignition switch: ON
• Voltage between 11 – earth
OK: 2.4 – 2.6V (when vehicle is standing on flat
ground)
OK
Connector check: C-38
NG -> repair
OK
MUT-II/III Service data
• No.15 lateral sensor voltage
OK: P.22-32 Refer to (Service Data List)*2
NG -> Replace 4WD-ECU
OK -> Intermittent malfunction
NG
Connector check: C-38, D-31, C-20, B-109
<ACD+AYC fitted vehicles> C-38, C-20, D-31 <ACD
fitted vehicles>
NG -> repair
OK
Check harness between lateral G sensor – 4WD-ECU
• Check to see if output wire is broken, earth, or
damaged
Check harness between lateral G sensor – ABS-ECU
• Check to see if output wire earth or damaged
NG -> repair
OK
MUT-II/III Service data
• No.15 lateral G sensor voltage
OK: Refer to P.22-32 (Service Data List)*2
NG -> Refer to Group 35C – Troubleshooting*2
<ACD+AYC fitted vehicles> or replace 4WD-ECU
OK -> intermittent malfunction
22-14
MANUAL TRANSMISSION - TROUBLESHOOTING
Code No.61 Stop lamp switch system
Assumed cause of concern
In cases where, at 15kph or over, the stop lamp switch stays
ON for 15 minutes or longer, code No.61 is output.
• Brake pedal malfunction
• Stop lamp switch malfunction
• Harness, connector malfunction
• 4WD-ECU malfunction
Remarks
*1: Refer to ’00-5 Lancer Sedia Service Manual (No.1036K00)
Check height of brake pedal
(Refer to Group 35A – Vehicle Servicing)*1
NG -> Adjust
OK
MUT-II/III Service data
• No.56 Stop lamp switch
(1)Depress brake pedal
OK: ON
(2)Release brake pedal
OK: OFF
OK -> Intermittent malfunction
NG
Check connector: C-118
NG -> repair
OK
Check stop lamp switch
(Refer to Group 35A – Brake pedal)*1
NG -> replace
OK
Measurement at C-118 stop lamp switch connector
• Undo connector, measure on harness side
• Voltage between 2 – earth
OK: battery voltage
OK
Measurement at C-37 4WD-ECU connector
• ECU terminal voltage measurement
• Voltage between 38 - earth
(1)Depress brake pedal
OK: battery voltage
(2)Release brake pedal
OK: 1V or less
NG
Connector check: C-118, C-22, C-23, C-37
NG -> repair
OK
Check harness between 4WD-ECU - stop lamp
switch
• Check for broken or damaged output wire
NG -> repair
OK
Check harness between stop lamp switch – stop lamp.
• Check for broken or damaged output wire
NG -> repair
NG
Connector check: C-118, C-31
NG -> repair
OK
Check harness between stop lamp switch – battery
• Check power supply wire to see if broken or
damaged
NG -> repair
OK
Connector check: C-37
NG -> repair
OK
MUT-II/III Service data
• No.56 Stop lamp switch
(1)Depress brake pedal
OK: ON
(2)Release brake pedal
OK: OFF
NG -> replace 4WD-ECU
OK -> Intermittent malfunction
MANUAL TRANSMISSION - TROUBLESHOOTING
Code No.62 ACD mode switch system
Assumed cause of concern
In cases where the ACD mode switch remains ON for 60
seconds or more, code No.61 is output.
• ACD mode switch malfunction
• Harness, connector malfunction
• 4WD-ECU malfunction
22-15
Remarks
*2: refer to ’01-1 Lancer Evolution VII Service Manual (No.1036K02)
MUT-II/III Service data
• No.63 ACD mode switch
(1)Press ACD mode switch
OK: ON
(2)Release ACD mode switch
OK: OFF
OK -> intermittent malfunction
NG
Check ACD mode switch (refer to P.22-53)*2
NG -> replace
OK
Measurement at C-134 ACD mode switch connector
• Undo connector, take measurement on harness side
• Ignition switch: ON
• Voltage between 2 – earth
OK: battery voltage
NG
Check harness between ACD mode switch – ignition
switch
• Check for broken power supply wire, damage
NG -> repair
OK
Check harness between junction block – combi. Meter
• Check power supply wire for earth, damage
NG -> repair
OK
Measurement at C-37 4WD-ECU connector
• Measure ECU terminal voltage
• Ignition switch: OFF
• Voltage between 47 – earth
(1)Press ACD mode switch
OK: battery voltage
(2)Release ACD mode switch
OK: 1V or less
OK
Connector check: C-37
NG -> repair
OK
MUT-II/III Service data
• No.63 ACD mode switch
(1)Press ACD mode switch
OK: ON
(2)Release ACD mode switch
OK: OFF
NG -> replace 4WD-ECU
OK -> intermittent malfunction
Connector check: C-134, C-209, C-210
NG -> repair
OK
NG
Connector check: C-134, C-133, C-37
NG -> repair
OK
Check harness between 4WD-ECU – ACD mode
switch
• Check to see if output wire is broken or damaged
NG -> repair
22-16
MANUAL TRANSMISSION - TROUBLESHOOTING
Code No.63 Parking brake switch
Assumed cause of concern
In cases where, at 15kph or over, the parking brake switch
remains ON for 15 minutes or more, code No.63 is output.
• Parking brake switch malfunction
• Harness, connector malfunction
• ABS-ECU malfunction, <ACD+AYC fitted vehicles>
• 4WD-ECU malfunction
Remarks
*1: Refer to ’00-5 Lancer Sedia Service Manual (No.1036K00)
MUT-II/III Service data
• No.62 Parking brake switch
(1)Apply parking brake lever
OK: ON
(2)Release parking brake lever
OK: OFF
OK -> intermittent malfunction
NG
When parking brake lever is
released, does the brake
warning lamp go off?
YES
Connector check: C-37, D-25,
C-20
NG -> repair
OK
NO
NG
Measurement at D-25, parking
brake switch connector
• Undo connector, take
measurement on harness side
• Ignition switch: ON
• Voltage between 1 – earth
OK: battery voltage
Connector check: D-25, C-37,
C-20, B-109 <ACD + AYC fitted
vehicles>
D-25, C20, C-37 <ACD fitted
vehicles>
NG -> repair
OK
OK
OK
Connector check: D-25
NG -> repair
OK
Check, and if necessary adjust,
the play in the parking brake
lever
(refer to Group 36 – Vehicle
Servicing)*1
NG -> Adjust
OK
Check parking brake switch
(refer to Group 36 – Vehicle
Servicing)*1
NG -> adjust
(1)Check harness between
parking brake switch – 4WDECU
• Check output wire for
earth, damage
(2)Check harness between
parking brake switch –
combi. meter
• Check power supply wire
for earth, damage
(3) Check harness between
parking brake switch – ABSECU.
<ACD-AYC fitted vehicles>
• Check output wire for
earth, damage
NG -> repair
(3) OK
Replace hydraulic unit, ABSECU
Check harness between
parking break switch – 4WDECU
• Check output wire to see if
broken or damaged
NG -> repair
(1) OK
(2) OK
MUT-II/III Service data
• No.62 Parking brake switch
(1)Apply parking brake lever
OK: ON
(2)Release parking brake lever
OK: OFF
NG -> replace 4WD-ECU
OK -> intermittent malfunction
Check brake warning lamp bulb
NG -> replace
OK
Replace combi. meter
MANUAL TRANSMISSION - TROUBLESHOOTING
22-17
Code No.65 ABS monitor system
Assumed cause of concern
In cases where the ABS is detected to have been operating
continuously for at least 1 minute, code No.65 is output.
• Harness, connector malfunction
• ABS-ECU malfunction <ACD-AYC fitted vehicles>
• 4WD-ECU malfunction
<ACD-AYC fitted vehicles>
MUT-II/III Service data
• No.61 ABS monitor
(1)ABS-ECU connector: undo
OK: ON
(2)ABS-ECU connector: connect
OK: OFF
OK -> intermittent malfunction
(1) NG
Connector check: C-37, B-109
NG -> repair
OK
Check harness between 4WD-ECU and ABS-ECU
• Check output wire for shorting, damage
NG -> repair
(2) NG
Measurement at C-37 4WD-ECU
• Undo connector, take measurement on harness side
• Voltage between 48 – body earth
OK: battery voltage
OK
Connector check: C-37
NG-> repair
OK
MUT-II/III Service data
• No.61 ABS monitor
(1)Press ACD mode switch
OK: OFF
NG -> replace 4WD-ECU
OK -> intermittent malfunction
NG
Connector check: C-37, B-109
NG -> repair
OK
Check harness between 4WD-ECU and ABS-ECU
• Check output wire to see if broken, shorting, or
damaged
NG -> repair
OK
B-109 Measurement at ABS-ECU connector
• ECU terminal voltage measurement
• Voltage between 3 – body earth
• Carry out ABS actuator test (no.05: ABS signal)
OK: For 10 seconds during test, 1V or less, after
which battery voltage
NG -> replace hydraulic unit, ABS-ECU
22-18
MANUAL TRANSMISSION - TROUBLESHOOTING
Code No.74 Proportional valve <ACD> system
Assumed cause of concern
In cases where the proportional valve <ACD> control circuit
is shorting, code No.74 is output.
• Proportional valve <ACD> malfunction
• Harness, connector malfunction
• 4WD-ECU malfunction
Remarks
*2: refer to ’01-1 Lancer Evolution VII Service Manual (No.1036K02)
MUT-II/III Service data
• No.11 Proportional valve current <ACD>
OK: P.22-32 Refer to (Service Data List)*2
OK -> Intermittent malfunction
OK
Measurement at F-25 proportional valve <ACD>
connector
• Undo connector, take measurement on proportional
valve side
• Resistance between 2 -3
OK: 4.7Ω or less
OK
NG
Replace hydraulic unit
Measurement at F-25 proportional valve <ACD>
connector
• Undo connector, take measurement on harness side
• Resistance between 2 – body earth
OK: 2Ω or less
NG
OK
Connector check: F-25, F-22, C-30, C-133, C-38
NG -> repair
OK
Check harness between 4WD-ECU and Proportional
valve <ACD>
• Check output wire to see if broken, shorting, or
damaged
NG -> repair
OK
Connector check: F-25, F-22
NG -> repair
OK
MUT-II/III Service data
• No.11 Proportional valve current <ACD>
OK: refer to P.22-32 (Service Data List) *2
NG: replace 4WD ECU
OK -> Intermittent malfunction
Check harness between proportional valve <ACD> body earth
• Check earth wire to see if broken or damaged
NG -> repair
Code No.81 Electric pump relay system
Assumed cause of concern
Output when the circuit on the pump relay coil side is broken
or shorting.
• Electric pump relay malfunction
• Harness, connector malfunction
• 4WD-ECU malfunction
Remarks
*2: refer to ’01-1 Lancer Evolution VII Service Manual (No.1036K02)
MUT-II/III actuator test
• No.04 Electric pump operation
OK: the electric pump operating sound is audible
OK -> Intermittent malfunction
NG
Check electric pump relay (refer P.22-53)*2
OK
Measurement at B-127 electric pump relay connector
• Undo connector, take measurement on harness side
• Resistance between 1 – body earth
OK: 2Ω or less
NG
Connector check: B-127
NG -> repair
OK
Check harness between electric pump relay - body earth
• Check earth wire to see if broken or damaged
NG -> repair
NG
Replace electric pump relay
OK
Connector check: B-127, C-38
NG -> repair
OK
Check harness between 4WD-ECU and electric pump relay
• Check power supply wire to see if broken, shorting,
or damaged
NG -> repair
OK
MUT-II/III Actuator test
• No.04 Electric pump operation
OK: the electric pump operating sound is audible
NG: replace 4WD ECU
OK ->
MANUAL TRANSMISSION - TROUBLESHOOTING
22-19
3. Fault classification
Fault
Check procedure No.
Page ref.
No communication between MUT-II/III and 4WD-ECU
2
22-19
When ignition switch is ON, (engine stopped), ACD mode indicator lamp does not come on.
3
22-20
Even after engine starts, at least 2 ACD mode indicator lamps remain lit
4
22-20
4. Fault classification procedure
Checking procedure 2
No communication between MUT-II/III and 4WD-ECU
Assumed cause of concern
Diagnosis output circuit, 4WD-ECU power supply circuit,
earth circuit or 4WD-ECU malfunctions are possible.
• Harness, connector malfunction
• 4WD-ECU malfunction
Measurement at C-122, diagnosis code connector and
C-37 4WD-ECU connector.
• Resistance between C-122 1 and C-37 46
• Resistance between C-122 7 and C-37 35
OK: 2Ω or less
OK
NG
Connector check: C-37, C-23, C-22, C-20, C-122,
C-110, C-06
NG -> repair
OK
Fault confirmation
NG
Harness check between 4WD-ECU and diagnosis
connector
• Check output wire to see if broken or damaged
• NG -> repair
Measurement at C-38 4WD-ECU connector
• Measure ECU terminal voltage
• Ignition switch ON
• Voltage between 13 – body earth
OK: battery voltage
OK
NG
Connector check: C-38, C212, C-210, C133
NG -> repair
OK
Fault confirmation
NG
Check harness between ignition switch and 4WD-ECU
• Check power supply wire to see if broken or
damaged
NG -> repair
Measurement at C-37, C-38, 4WD-ECU connector
• Undo connector, take measurement on harness side
• Resistance between C-38 26 and body earth
• Resistance between C-37 42 and body earth
• OK: 2Ω or less
OK
NG
Connector check: C-37, C-38
NG -> repair
OK
Fault confirmation
Connector check: C-37, C-38
NG -> repair
OK
Fault confirmation
NG
Replace 4WD-ECU
NG
Check harness between 4WD-ECU – earth
• Check earth wire to see if broken or damaged
NG -> repair
22-20
MANUAL TRANSMISSION - TROUBLESHOOTING
Checking procedure 3
The ACD mode injector lamp does not come on when the ignition
switch is ON (engine stopped)
Assumed cause of concern
ACD mode indicator lamp circuit or 4WD-ECU malfunctions are possible.
• Harness, connector malfunction
• ACD mode indicator lamp ASSY malfunction
• 4WD-ECU malfunction
Measurement at C-106, combi. meter connector.
• Undo connector, take measurement on harness side
• Ignition switch ON
• Voltage between 9 – body earth
OK: battery voltage
NG
Connector check: C-106, C-212, C-210
NG -> repair
OK
Fault confirmation
NG
OK
Check harness between ignition switch – ACD mode
indicator lamp ASSY
• Check power supply wire to see if broken or
damaged
• NG -> repair
Measurement at C-37 4WD-ECU connector
• Undo connector, take measurement on harness side
• Ignition switch ON
• Earth 40, 51, 52 to body earth
OK: indicator lamp on
OK
NG
Check ACD mode indicator lamp ASSY
NG -> replace
OK
Connector check: C-37, C-133, C-106
NG -> repair
OK
Connector check: C-37
NG -> repair
Fault confirmation
OK
NG
Fault confirmation
Check harness between ACD mode indicator lamp
ASSY - 4WD-ECU
• Check output wire to see if broken or damaged
NG
Replace 4WD-ECU
Checking procedure 4
Even after engine starts, at least 2 ACD mode indicator lamps
remain lit
Assumed cause of concern
ACD mode indicator lamp output circuit malfunction is possible.
• Harness, connector malfunction
• 4WD-ECU malfunction
• ACD mode indicator lamp ASSY malfunction
Remarks
This phenomenon is limited to when communication with MUT-II/III is possible (4WD-ECU power supply normal), and diagnosis
code is normal/correct.
When C-37 4WD-ECU connector is undone, do all
ACD mode indicator lamps all go out?
YES
Replace 4WD-ECU
NO
Check connector: C-37, C-133, C-106
NG -> repair
OK
Fault confirmation
NG
Check harness between ACD mode indicator ASSY 4WD-ECU
• Check output wire for earthing, shorting
NG -> repair
OK
Replace ACD mode indicator ASSY
FRONT SUSPENSION – GENERAL, SPECIAL TOOLS
33A-1
SECTION 33A
FRONT SUSPENSION
CONTENTS
General........................................................1
Special tools...............................................1
Strut Assembly...........................................2
General
Important servicing information has been added along with the adoption of Bilstein shock absorbers. However, apart from the
information below, other servicing information remains unchanged.
Special Tools
Tool
Number
Name
Details
MB991367
Special spanner
Dismantling and assembly of strut ASSY.
Vehicles fitted with Bilstein shock absorbers
MB991385
Pin
33A-2
FRONT SUSPENSION – STRUT ASSEMBLY
STRUT ASSY
Vehicles fitted with Bilstein shock absorbers
Dismantling and Assembly
NOTE
When applying grease, ensure that
none of it is left on the insulator
rubber as this could lead to insulator
rubber damage.
Dismantling procedure
3A4 4A3 2. Self-locking nut
1. Dust cover
3B4
3. Strut insulator ASSY
4. Upper spring seat
5. Bumper rubber
6. Dust cover
7. Coil spring
8. Lower spring pad
9. Strut ASSY
Important note on dismantling
3A4 Removal of self-locking nut
Procedure remains unchanged, apart from the following point:
1.
Compress the coil spring using the following special tool
• Spring compressor body (MB991237)
• Arm set (MB991238)
FRONT SUSPENSION – STRUT ASSEMBLY
33A-3
CAUTION
(1) To compress the coil spring securely, ensure that the
special tool is extended as far as the spring will allow,
then fitted evenly to the coil spring.
(2) There is a danger of special tool damage, so do not use
an impact wrench.
2. Using the following special tools, release the self-locking nut.
• Special spanner (MB991367)
• Pin (MB991385)
CAUTION
There is a danger of the lock nut inside the strut piston rod
working loose, so when loosening the self-locking nut, do
not use an impact wrench.
4A3Fitting self-locking nut
Important note on assembly
1. With the coil spring compressed with the special tool,
temporarily tighten the self-locking nut.
2. Match up strut assembly hole in lower spring seat, and hole in
upper spring seat.
Remarks
Using a lever to align the holes can make this job easier.
3. Match both tips of coil spring precisely with the slots on the
spring seats, and release the special tool.
4. Using the special tool, tighten the self-locking nut to the
specified torque.
Tightening torque: 60 ± 10N·m
CAUTION
There is a danger of the lock nut inside the strut piston rod
working loose, so when loosening the self-locking nut, do
not use an impact wrench.
34-1
REAR SUSPENSION GENERAL – SHOCK ABSORBER ASSY
SECTION 34
REAR SUSPENSION
CONTENTS
General........................................................1
Shock Absorber Assy................................1
General
Important servicing information has been specified along with.the adoption of Bilstein shock absorbers.
Shock Absorber Assy
Vehicles fitted with Bilstein shock absorbers
Dismantling and Assembly
Dismantling procedure
3A4 4D31. Self-locking nut
2. Washer
3. Bush B
4C34. Bracket ASSY
4B35. Spring upper pad
Remarks
Carry out dismantling and assembly following existing servicing instructions
4A3
6. Collar
7. Bush A
8. Cup ASSY
9. Dust cover
10. Coil spring
11. Bumper rubber
12. Shock absorber
EXTERIOR – GENERAL
51-1
SECTION 51
EXTERIOR
CONTENTS
General........................................................1
Front bumper..............................................2
Front bumper.........................................................2
Markings .....................................................4
Adhesives..............................................................2
General
Important servicing information has been specified, along with the following changes and additions. Other servicing information,
however, remains the same as the information relating to the Lancer Evolution VIII.
• Changes and additions to front bumper components
• Changes to the position of the 3 diamonds badge, and addition to the EVOLUTION MR mark.
51-2
EXTERIOR – FRONT BUMPER
Front bumper
Adhesives
Locations used
Brand
Three diamonds badge
Double-sided tape: ordinary tape, widely available on the market (width 20mm, thickness 0.8mm)
Front Bumper
Dismantling · Assembling
Locations where double-sided tape is applied
Double-sided tape: ordinary tape, widely available
on the market (width 20mm, thickness 0.8mm)
Cross-section A-A
Cross-section B-B
Clip
Clip
EXTERIOR – FRONT BUMPER
51-3
Dismantling procedure
Three diamonds badge
Licence plate garnish
Licence plate bracket
Licence plate bracket ASSY
Front bumper plate
Cover
Front air dam panel
Front bumper lower plate ASSY
Front bumper lower reinforcement
ASSY
10. Front bumper upper plate ASSY
1.
2.
3.
4.
5.
6.
7.
8.
9.
3A4
11. Bumper net
12. Front bumper side cover
13. Bumper side net (LH)
14. Oil cooler duct
15. Bumper side net (RH)
• Water spray hose and nozzle (ref.
Section 15)
4A316. Front bumper side plate ASSY
17. Front bumper upper reinforcement
ASSY
18. Front bumper facing
Important notes on dismantling
3A4 Front bumper side plate removal
Same as for existing front bumper rivet removal.
Important notes on assembly
4A3 Fitting front bumper side plate
Same as for existing front bumper rivet fitting.
51-4
EXTERIOR - MARKINGS
Markings
Removal and fixing
4A3
1. Three diamonds badge
4A3
2. EVOLUTION MR mark
Important fitting notes
4A3 Fixing the markings
1. Positions
(1) Three diamonds badge
Boot lid press line
Vehicle centre point
EXTERIOR - MARKINGS
51-5
(2) EVOLUTION MR MARK
Boot lid end line
Boot lid end line
2. Important fixing notes
(1) Clean and remove any grease from the body surface where markings will be
affixed, using unleaded petrol.
(2) Remove the paper backing on the rear of the markings, and fix in position.
(3) Remove the ‘application’ tape.
Note
• Do this job in an ambient temperature of 20 - 38˚C in a dust free location.
• If temperature is less than 20˚C, warm up the markings and the body where
they will be fitted to between 20 – 30˚C.
• Stick the markings on and press firmly so that no air bubbles get trapped.
RJSY402025–46