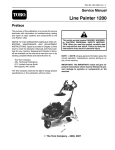
1
PART NO. 12188SL
Service Manual
(Models 04041 and 04040)
GreensmasterR Flex 1800/2100
Preface
The purpose of this publication is to provide the service
technician with information for troubleshooting, testing
and repairing assemblies and components on the
Greensmaster Flex 1800 (Model 04041) and Flex 2100
(Model 04040).
REFER TO THE OPERATOR’S MANUAL FOR OPERATING,
MAINTENANCE
AND
ADJUSTMENT
INSTRUCTIONS. Space is provided in Chapter 2 of this
book to insert the Operator’s Manual and Parts Catalogs
for your machine. Replacement Operator’s Manuals
and Parts Catalogs are available on the internet at
www.toro.com
The Toro Company reserves the right to change product
specifications or this publication without notice.
This safety symbol means DANGER, WARNING
or CAUTION, PERSONAL SAFETY INSTRUCTION. When you see this symbol, carefully read
the instructions that follow. Failure to obey the
instructions may result in personal injury.
NOTE: A NOTE will give general information about the
correct operation, maintenance, service, testing or repair of the machine.
IMPORTANT: The IMPORTANT notice will give important instructions which must be followed to prevent damage to systems or components on the
machine.
E The Toro Company -- 2012
This page is intentionally blank.
Greensmaster Flex 1800/2100
Chapter 6 -- Chassis and Controls
Safety Instructions . . . . . . . . . . . . . . . . . . . . . . . . . . 1 -- 2
Safety and Instruction Decals . . . . . . . . . . . . . . . . 1 -- 4
Specifications . . . . . . . . . . . . . . . . . . . . . . . . . . . . . . 6 -- 2
General Information . . . . . . . . . . . . . . . . . . . . . . . . 6 -- 3
Service and Repairs . . . . . . . . . . . . . . . . . . . . . . . . 6 -- 4
Chapter 2 -- Product Records and Maintenance
Chapter 7 -- Cutting Unit
1
1
2
3
3
3
3
3
-----
3
4
5
6
4
4
4
4
4
------
2
3
5
6
9
5
5
5
5
5
5
-------
3
4
5
6
8
9
Chapter 3 -- Engine
Specifications . . . . . . . . . . . . . . . . . . . . . . . . . . . . . .
General Information . . . . . . . . . . . . . . . . . . . . . . . .
Adjustments . . . . . . . . . . . . . . . . . . . . . . . . . . . . . . .
Service and Repairs . . . . . . . . . . . . . . . . . . . . . . . .
SUBARU SERVICE MANUAL
Chapter 4 -- Traction and Reel Drive System
Specifications . . . . . . . . . . . . . . . . . . . . . . . . . . . . . .
General Information . . . . . . . . . . . . . . . . . . . . . . . .
Special Tools . . . . . . . . . . . . . . . . . . . . . . . . . . . . . .
Adjustments . . . . . . . . . . . . . . . . . . . . . . . . . . . . . . .
Service and Repairs . . . . . . . . . . . . . . . . . . . . . . . .
Chapter 5 -- Electrical System
Chapter 8 -- Groomer
Specifications . . . . . . . . . . . . . . . . . . . . . . . . . . . . . .
General Information . . . . . . . . . . . . . . . . . . . . . . . .
Troubleshooting . . . . . . . . . . . . . . . . . . . . . . . . . . . .
Adjustments . . . . . . . . . . . . . . . . . . . . . . . . . . . . . . .
Service and Repairs . . . . . . . . . . . . . . . . . . . . . . . .
8
8
8
8
8
------
2
3
4
6
7
Groomer
Cutting Unit
General Information . . . . . . . . . . . . . . . . . . . . . . . .
Wiring Schematic . . . . . . . . . . . . . . . . . . . . . . . . . . .
Wire Harness Drawings . . . . . . . . . . . . . . . . . . . . .
Special Tools . . . . . . . . . . . . . . . . . . . . . . . . . . . . . .
Troubleshooting . . . . . . . . . . . . . . . . . . . . . . . . . . . .
Component Testing . . . . . . . . . . . . . . . . . . . . . . . . .
Specifications . . . . . . . . . . . . . . . . . . . . . . . . . . . . . . 7 -- 3
General Information . . . . . . . . . . . . . . . . . . . . . . . . 7 -- 4
Special Tools . . . . . . . . . . . . . . . . . . . . . . . . . . . . . . 7 -- 6
Factors That Affect Quality Of Cut . . . . . . . . . . . . 7 -- 8
Adjustments . . . . . . . . . . . . . . . . . . . . . . . . . . . . . . 7 -- 10
Service and Repairs . . . . . . . . . . . . . . . . . . . . . . . 7 -- 11
Traction and Reel
Drive System
-----
Electrical
System
2
2
2
2
Chassis and
Controls
Product Records . . . . . . . . . . . . . . . . . . . . . . . . . . .
Maintenance . . . . . . . . . . . . . . . . . . . . . . . . . . . . . . .
Equivalents and Conversions . . . . . . . . . . . . . . . .
Torque Specifications . . . . . . . . . . . . . . . . . . . . . . .
Engine
Chapter 1 -- Safety
Product Records
and Maintenance
Safety
Table Of Contents
Greensmaster Flex 1800/2100
This page is intentionally blank.
Greensmaster Flex 1800/2100
Safety
Table of Contents
SAFETY INSTRUCTIONS . . . . . . . . . . . . . . . . . . . . . .
Before Operating . . . . . . . . . . . . . . . . . . . . . . . . . . . .
While Operating . . . . . . . . . . . . . . . . . . . . . . . . . . . . .
Maintenance and Service . . . . . . . . . . . . . . . . . . . .
SAFETY AND INSTRUCTION DECALS . . . . . . . . . .
Greensmaster Flex 1800/2100
2
2
3
3
4
Page 1 -- 1
Safety
Safety
Chapter 1
Safety Instructions
Greensmaster Flex 1800 and Flex 2100 machines have
been tested and certified by TORO for compliance with
existing safety standards and specifications. Although
hazard control and accident prevention are partially dependent upon the design and configuration of the machine, these factors are also dependent upon the
awareness, concern and proper training of the personnel involved in the operation, transport, maintenance
and storage of the machine. Improper use or maintenance of the machine can result in injury or death. To reduce the potential for injury or death, comply with the
following safety instructions.
WARNING
To reduce the potential for injury or death, comply with the following safety instructions.
Before Operating
1. Operate the machine only after reviewing and understanding the contents of the Operator’s Manual and Operator Training DVD. A replacement Operator’s Manual
is available on the internet at www.toro.com
2. Never allow children to operate the machine or allow
adults to operate it without proper instructions.
8. Keep everyone, especially children and pets, away
from the areas of operation.
9. Since gasoline is highly flammable; handle it carefully.
A. Use an approved gasoline container.
3. Become familiar with the controls and know how to
stop the machine and engine quickly.
B. Do not remove cap from fuel tank when engine is
hot or running.
4. Keep all shields, safety devices and decals in place.
If a shield, safety device or decal is malfunctioning, illegible or damaged, repair or replace it before operating the
machine.
C. Do not smoke while handling gasoline.
5. Always wear substantial shoes. Do not operate machine while wearing sandals, tennis shoes or sneakers.
Do not wear loose fitting clothing which could get caught
in moving parts and cause personal injury.
E. Wipe up any spilled gasoline.
6. Wearing safety glasses, safety shoes, long pants,
ear protection and a hard hat is advisable and required
by some local safety and insurance regulations.
7. Ensure work area is clear of objects which might be
picked up and thrown by the cutting reel.
Safety
D. Fill fuel tank outdoors and no higher than to the
bottom of filter screen. Do not overfill fuel tank.
F. Fuel may leak from filler neck when mower is
tilted for servicing if tank is over filled.
10.The safety interlock switches are for the operator’s
protection; do not disconnect them. Check the operation
of the switches daily to assure the interlock system is operating. If a switch is defective, replace it before operating the machine. See Component Testing in Chapter 5
-- Electrical System.
Page 1 -- 2
Greensmaster Flex 1800/2100
1. Do not run the engine in a confined area without adequate ventilation. Exhaust fumes are hazardous and
could be deadly.
2. Always stand behind the handle when starting and
operating the machine.
3. To start the engine:
A. Open fuel shut-off valve. Make sure spark plug
wire is connected to spark plug.
B. Verify that the control lever on handle is in NEUTRAL position for both traction and reel drives.
C. Move on/off switch to ON position, set choke to
full choke position (cold start) and throttle to half
throttle.
5. Before emptying basket of clippings, disengage traction and reel drives, reduce engine speed and move on/
off switch to OFF position to stop engine. Wait for all
machine motion to stop before removing basket.
6. Do not touch engine, muffler or exhaust pipe while
engine is running or soon after it has stopped because
these areas are hot enough to cause burns.
7. If the cutting unit strikes a solid object or vibrates abnormally, stop machine operation immediately, turn engine off, wait for all machine motion to stop and inspect
for damage. A damaged reel or bedknife must be repaired or replaced before operation is commenced.
8. Whenever machine is left unattended, be sure engine is stopped and cutting unit reel is not spinning.
9. Close fuel shut-off valve if machine is not to be used
for an extended period of time. Also, close fuel shut-off
valve if machine is to be transported on a trailer or in a
vehicle.
D. Pull starter cord to start engine.
4. To stop the engine:
A. Disengage reel and traction drives and reduce
engine speed to SLOW.
B. Move on/off switch to OFF position to stop engine.
Maintenance and Service
1. The Traction Unit and Cutting Unit Operator’s Manuals provide information regarding the operation, general
maintenance and maintenance intervals for your
Greensmaster machine. Refer to these publications for
additional information when servicing the machine.
2. Before servicing or making adjustments to the machine, stop the engine and wait for all machine motion
to stop. Remove the spark plug wire from the spark plug
to prevent accidental starting of the engine.
3. To make sure entire machine is in good condition,
keep all nuts, bolts, screws and belts properly tightened.
4. To reduce potential fire hazard, keep the engine area
free of excessive grease, grass, leaves and accumulation of dirt.
5. Wear heavy gloves and use caution when checking
or servicing the cutting unit.
7. Do not overspeed the engine by changing governor
settings. Recommended engine high idle speed is from
3190 to 3340 RPM. To ensure safety and accuracy,
check engine speed with a tachometer.
8. Engine must be shut off and cooled down before
checking oil or adding oil to the engine crankcase.
9. If major repairs are ever needed or assistance is required, contact your Authorized TORO Distributor.
10.At the time of manufacture, the machine conformed
to all applicable safety standards. To assure optimum
performance and continued safety certification of the
machine, use genuine Toro replacement parts and accessories. Replacement parts and accessories made
by other manufacturers may result in non-conformance
with the safety standards and the warranty may be
voided.
6. If the engine must be running to perform maintenance or make an adjustment, keep hands, feet, clothing and all parts of the body away from the cutting unit
and all moving parts. Keep bystanders away.
Greensmaster Flex 1800/2100
Page 1 -- 3
Safety
Safety
While Operating
Safety and Instruction Decals
Safety decals and instructions are easily visible to the
operator and are located near any area of potential danger. Replace any decal that is damaged or lost. Decal
part numbers are listed in your Parts Catalog. Order replacement decals from your Authorized TORO Distributor.
Safety
Page 1 -- 4
Greensmaster Flex 1800/2100
Chapter 2
Product Records
and Maintenance
Product Records and Maintenance
Table of Contents
PRODUCT RECORDS . . . . . . . . . . . . . . . . . . . . . . . . .
MAINTENANCE . . . . . . . . . . . . . . . . . . . . . . . . . . . . . . .
EQUIVALENTS AND CONVERSIONS . . . . . . . . . . .
Decimal and Millimeter Equivalents . . . . . . . . . . . .
U.S. to Metric Conversions . . . . . . . . . . . . . . . . . . .
TORQUE SPECIFICATIONS . . . . . . . . . . . . . . . . . . . .
Fastener Identification . . . . . . . . . . . . . . . . . . . . . . .
Standard Torque for Dry, Zinc Plated, and Steel
Fasteners (Inch Series Fasteners) . . . . . . . . . . .
Standard Torque for Dry, Zinc Plated, and Steel
Fasteners (Metric Fasteners) . . . . . . . . . . . . . . . .
Other Torque Specifications . . . . . . . . . . . . . . . . . .
Conversion Factors . . . . . . . . . . . . . . . . . . . . . . . . . .
1
1
2
2
2
3
3
4
5
6
6
Product Records
Insert Operator’s Manual and Parts Catalog for your
Greensmaster Flex 1800 or Flex 2100 at the end of this
section. Additionally, if any optional equipment or accessories have been installed to your machine, insert the
Installation Instructions, Operator’s Manuals and Parts
Catalogs for those options at the end of this chapter.
Maintenance
Maintenance procedures and recommended service intervals for the Greensmaster Flex 1800 and Flex 2100
are covered in the Operator’s Manual. Refer to that publication when performing regular equipment maintenance.
Greensmaster Flex 1800/2100
Page 2 -- 1
Product Records and Maintenance
Equivalents and Conversions
0.09375
Product Records and Maintenance
Page 2 -- 2
Greensmaster Flex 1800/2100
Recommended fastener torque values are listed in the
following tables. For critical applications, as determined
by Toro, either the recommended torque or a torque that
is unique to the application is clearly identified and specified in this Service Manual.
These Torque Specifications for the installation and
tightening of fasteners shall apply to all fasteners which
do not have a specific requirement identified in this Service Manual. The following factors shall be considered
when applying torque: cleanliness of the fastener, use
of a thread sealant (e.g. Loctite), degree of lubrication
on the fastener, presence of a prevailing torque feature
(e.g. Nylock nut), hardness of the surface underneath
the fastener’s head or similar condition which affects the
installation.
As noted in the following tables, torque values should be
reduced by 25% for lubricated fasteners to achieve
the similar stress as a dry fastener. Torque values may
also have to be reduced when the fastener is threaded
into aluminum or brass. The specific torque value
should be determined based on the aluminum or brass
material strength, fastener size, length of thread engagement, etc.
The standard method of verifying torque shall be performed by marking a line on the fastener (head or nut)
and mating part, then back off fastener 1/4 of a turn.
Measure the torque required to tighten the fastener until
the lines match up.
Fastener Identification
Grade 1
Grade 5
Grade 8
Class 8.8
Inch Series Bolts and Screws
Greensmaster Flex 1800/2100
Class 10.9
Metric Bolts and Screws
Page 2 -- 3
Product Records and Maintenance
Product Records
and Maintenance
Torque Specifications
Standard Torque for Dry, Zinc Plated and Steel Fasteners (Inch Series Fasteners)
Thread Size
# 6 -- 32 UNC
Grade 1, 5 &
8 with Thin
Height Nuts
SAE Grade 1 Bolts, Screws, Studs &
Sems with Regular Height Nuts
(SAE J995 Grade 2 or Stronger Nuts)
in--lb
in--lb
N--cm
10 + 2
13 + 2
147 + 23
# 6 -- 40 UNF
# 8 -- 32 UNC
13 + 2
25 + 5
282 + 30
# 8 -- 36 UNF
# 10 -- 24 UNC
18 + 2
30 + 5
339 + 56
# 10 -- 32 UNF
SAE Grade 5 Bolts, Screws, Studs &
Sems with Regular Height Nuts
(SAE J995 Grade 2 or Stronger Nuts)
SAE Grade 8 Bolts, Screws, Studs &
Sems with Regular Height Nuts
(SAE J995 Grade 5 or Stronger Nuts)
in--lb
N--cm
in--lb
N--cm
15 + 2
169 + 23
23 + 3
262 + 34
17 + 2
192 + 23
25 + 3
282 + 34
29 + 3
328 + 34
41 + 5
463 + 56
31 + 4
350 + 45
43 + 5
486 + 56
42 + 5
475 + 56
60 + 6
678 + 68
48 + 5
542 + 56
68 + 7
768 + 79
1/4 -- 20 UNC
48 + 7
53 + 7
599 + 79
100 + 10
1130 + 113
140 + 15
1582 + 169
1/4 -- 28 UNF
53 + 7
65 + 10
734 + 113
115 + 12
1299 + 136
160 + 17
1808 + 192
5/16 -- 18 UNC
115 + 15
105 + 15
1186 + 169
200 + 25
2260 + 282
300 + 30
3390 + 339
5/16 -- 24 UNF
138 + 17
128 + 17
1446 + 192
225 + 25
2542 + 282
325 + 33
3672 + 373
ft--lb
ft--lb
N--m
ft--lb
N--m
ft--lb
N--m
3/8 -- 16 UNC
16 + 2
16 + 2
22 + 3
30 + 3
41 + 4
43 + 5
58 + 7
3/8 -- 24 UNF
17 + 2
18 + 2
24 + 3
35 + 4
47 + 5
50 + 6
68 + 8
7/16 -- 14 UNC
27 + 3
27 + 3
37 + 4
50 + 5
68 + 7
70 + 7
95 + 9
7/16 -- 20 UNF
29 + 3
29 + 3
39 + 4
55 + 6
75 + 8
77 + 8
104 + 11
1/2 -- 13 UNC
30 + 3
48 + 7
65 + 9
75 + 8
102 + 11
105 + 11
142 + 15
1/2 -- 20 UNF
32 + 4
53 + 7
72 + 9
85 + 9
115 + 12
120 + 12
163 + 16
5/8 -- 11 UNC
65 + 10
88 + 12
119 + 16
150 + 15
203 + 20
210 + 21
285 + 28
5/8 -- 18 UNF
75 + 10
95 + 15
129 + 20
170 + 18
230 + 24
240 + 24
325 + 33
3/4 -- 10 UNC
93 + 12
140 + 20
190 + 27
265 + 27
359 + 37
375 + 38
508 + 52
3/4 -- 16 UNF
115 + 15
165 + 25
224 + 34
300 + 30
407 + 41
420 + 43
569 + 58
7/8 -- 9 UNC
140 + 20
225 + 25
305 + 34
430 + 45
583 + 61
600 + 60
813 + 81
7/8 -- 14 UNF
155 + 25
260 + 30
353 + 41
475 + 48
644 + 65
667 + 66
904 + 89
NOTE: Torque values may have to be reduced when
installing fasteners into threaded aluminum or brass.
The specific torque value should be determined based
on the fastener size, the aluminum or base material
strength, length of thread engagement, etc.
NOTE: The nominal torque values listed above for
Grade 5 and 8 fasteners are based on 75% of the minimum proof load specified in SAE J429. The tolerance is
approximately + 10% of the nominal torque value. Thin
height nuts include jam nuts.
NOTE: Reduce torque values listed in the table above
by 25% for lubricated fasteners. Lubricated fasteners
are defined as threads coated with a lubricant such as
engine oil or thread sealant such as Loctite.
Product Records and Maintenance
Page 2 -- 4
Greensmaster Flex 1800/2100
Standard Torque for Dry, Zinc Plated and Steel Fasteners (Metric Fasteners)
Class 8.8 Bolts, Screws and Studs with
Regular Height Nuts
(Class 8 or Stronger Nuts)
Class 10.9 Bolts, Screws and Studs with
Regular Height Nuts
(Class 10 or Stronger Nuts)
M5 X 0.8
57 + 6 in--lb
644 + 68 N--cm
78 + 8 in--lb
881 + 90 N--cm
M6 X 1.0
96 + 10 in--lb
1085 + 113 N--cm
133 + 14 in--lb
1503 + 158 N--cm
M8 X 1.25
19 + 2 ft--lb
26 + 3 N--m
28 + 3 ft--lb
38 + 4 N--m
M10 X 1.5
38 + 4 ft--lb
52 + 5 N--m
54 + 6 ft--lb
73 + 8 N--m
M12 X 1.75
66 + 7 ft--lb
90 + 10 N--m
93 + 10 ft--lb
126 + 14 N--m
M16 X 2.0
166 + 17 ft--lb
225 + 23 N--m
229 + 23 ft--lb
310 + 31 N--m
M20 X 2.5
325 + 33 ft--lb
440 + 45 N--m
450 + 46 ft--lb
610 + 62 N--m
NOTE: Torque values may have to be reduced when
installing fasteners into threaded aluminum or brass.
The specific torque value should be determined based
on the fastener size, the aluminum or base material
strength, length of thread engagement, etc.
NOTE: The nominal torque values listed above are
based on 75% of the minimum proof load specified in
SAE J1199. The tolerance is approximately + 10% of the
nominal torque value.
NOTE: Reduce torque values listed in the table above
by 25% for lubricated fasteners. Lubricated fasteners
are defined as threads coated with a lubricant such as
engine oil or thread sealant such as Loctite.
Greensmaster Flex 1800/2100
Page 2 -- 5
Product Records and Maintenance
Product Records
and Maintenance
Thread Size
Other Torque Specifications
SAE Grade 8 Steel Set Screws
Wheel Bolts and Lug Nuts
Recommended Torque
Thread Size
Thread Size
Square Head
Hex Socket
1/4 -- 20 UNC
140 + 20 in--lb
73 + 12 in--lb
5/16 -- 18 UNC
215 + 35 in--lb
145 + 20 in--lb
3/8 -- 16 UNC
35 + 10 ft--lb
18 + 3 ft--lb
1/2 -- 13 UNC
75 + 15 ft--lb
50 + 10 ft--lb
Recommended Torque**
7/16 -- 20 UNF
Grade 5
65 + 10 ft--lb
88 + 14 N--m
1/2 -- 20 UNF
Grade 5
80 + 10 ft--lb
108 + 14 N--m
M12 X 1.25
Class 8.8
80 + 10 ft--lb
108 + 14 N--m
M12 X 1.5
Class 8.8
80 + 10 ft--lb
108 + 14 N--m
** For steel wheels and non--lubricated fasteners.
Thread Cutting Screws
(Zinc Plated Steel)
Type 1, Type 23 or Type F
Thread Size
Baseline Torque*
No. 6 -- 32 UNC
20 + 5 in--lb
No. 8 -- 32 UNC
Thread Cutting Screws
(Zinc Plated Steel)
Thread
Size
Threads per Inch
Baseline Torque*
Type A
Type B
No. 6
18
20
20 + 5 in--lb
30 + 5 in--lb
No. 8
15
18
30 + 5 in--lb
No. 10 -- 24 UNC
38 + 7 in--lb
No. 10
12
16
38 + 7 in--lb
1/4 -- 20 UNC
85 + 15 in--lb
No. 12
11
14
85 + 15 in--lb
5/16 -- 18 UNC
110 + 20 in--lb
3/8 -- 16 UNC
200 + 100 in--lb
* Hole size, material strength, material thickness & finish
must be considered when determining specific torque
values. All torque values are based on non--lubricated
fasteners.
Conversion Factors
in--lb X 11.2985 = N--cm
ft--lb X 1.3558 = N--m
Product Records and Maintenance
N--cm X 0.08851 = in--lb
N--m X 0.7376 = ft--lb
Page 2 -- 6
Greensmaster Flex 1800/2100
Chapter 3
Engine
Table of Contents
Greensmaster Flex 1800/2100
Page 3 -- 1
Engine
SPECIFICATIONS . . . . . . . . . . . . . . . . . . . . . . . . . . . . . 3
GENERAL INFORMATION . . . . . . . . . . . . . . . . . . . . . 4
Operator’s Manual . . . . . . . . . . . . . . . . . . . . . . . . . . 4
Fuel Evaporative Control System . . . . . . . . . . . . . . 4
ADJUSTMENTS . . . . . . . . . . . . . . . . . . . . . . . . . . . . . . 5
Throttle Cable Adjustment . . . . . . . . . . . . . . . . . . . . 5
SERVICE AND REPAIRS . . . . . . . . . . . . . . . . . . . . . . 6
Cooling System . . . . . . . . . . . . . . . . . . . . . . . . . . . . . 6
Spark Plug . . . . . . . . . . . . . . . . . . . . . . . . . . . . . . . . . 7
Ignition Components . . . . . . . . . . . . . . . . . . . . . . . . . 7
Engine . . . . . . . . . . . . . . . . . . . . . . . . . . . . . . . . . . . . . 8
Engine Coupler Sleeve . . . . . . . . . . . . . . . . . . . . . . 11
SUBARU SERVICE MANUAL
Engine
This page is intentionally blank.
Engine
Page 3 -- 2
Greensmaster Flex 1800/2100
Specifications
Item
Description
Make / Designation
Subaru, 4--stroke, OHC single cylinder,
air--cooled, gasoline engine with gear reduction
Bore x Stroke
2.28 in x 1.89 in (58 mm x 48 mm)
7.69 in3 (126 cc)
Total Displacement
Carburetor
Float feed, fixed main jet
Mechanical flyweight
Low Idle Speed (no load)
1465 to 1665 RPM
High Idle Speed (no load)
3190 to 3340 RPM
Direction of rotation
Clockwise (facing PTO shaft)
Fuel
Unleaded, automotive grade gasoline
Fuel Tank Capacity
2.85 U.S. qt (2.7 l)
Engine Oil
See Operator’s Manual
Lubrication System
Splash type
Oil Capacity
0.63 U.S. qt (0.6 l)
Air Cleaner
Dual element
Ignition System
Electronic flywheel magneto
Spark Plug
NGK BR--6HS
Spark Plug Gap
0.024” to 0.028” (0.6 to 0.7 mm)
Lighting Coil
12 V AC / 15 Watt
Dry Weight
34.2 lbs (15.5 kg)
Greensmaster Flex 1800/2100
Page 3 -- 3
Engine
Engine
Governor
General Information
This Chapter gives information about specifications,
maintenance, troubleshooting, testing and repair of the
Subaru gasoline engine used on the Greensmaster Flex
1800 and Flex 2100 mowers.
Most repairs and adjustments require tools which are
commonly available in many service shops. Several
special tools are described in the Subaru Service Manual. The use of some specialized test equipment is ex-
plained. However, the cost of the test equipment and the
specialized nature of some repairs may dictate that the
work be done at an engine repair facility.
Service and repair parts for the Subaru engine used on
Greensmaster Flex mowers are supplied through your
local Toro distributor. Be prepared to provide your distributor with the Toro model and serial number.
Operator’s Manual
The Operator’s Manual provides information regarding
the operation, general maintenance and maintenance
intervals for your Greensmaster machine. Refer to the
Operator’s Manual for additional information when servicing the machine.
Fuel Evaporative Control System
To meet worldwide emission requirements, the engine
that powers your Flex mower is equipped with a fuel cap
that has an integrated carbon canister. This fuel cap
captures fuel vapors from the fuel tank prior to venting
to atmosphere.
Engine
To prevent saturating the carbon cannister in the fuel
cap, it is important to make sure that the fuel tank is not
overfilled. The recommended level for a full fuel tank is
flush with the top of the plastic fill screen in the tank. Do
not overfill the tank when refueling.
Page 3 -- 4
Greensmaster Flex 1800/2100
Adjustments
Throttle Cable Adjustment
If a new throttle cable must be installed or the cable is
out of adjustment, adjust the cable as follows:
3
1. Park machine on a level surface. Make sure engine
is OFF. Remove spark plug wire from the spark plug.
2
2. Move throttle control on the machine handle to the
FAST position.
Engine
3. Loosen throttle cable screw that secures the throttle
cable to the governor lever.
4. Make sure throttle control is in the FAST position and
the governor lever is against the high speed screw.
1
5. Tighten screw to secure the throttle cable to the governor lever.
6. After cable adjustment, connect spark plug wire to
spark plug, start engine and allow it to warm to operating
temperature. Check engine speed with a tachometer:
Figure 1
1. Throttle cable
2. Throttle cable clamp
3. Governor lever
A. Low idle speed should be 1465 to 1665 RPM. Adjust low idle screw on carburetor to attain the correct
low idle speed setting.
B. High idle speed should be 3190 to 3340 RPM.
Adjust throttle cable position on engine to attain the
correct high idle speed setting.
IMPORTANT: The engine governor control is
equipped with a tamper resistant cap to prevent adjustment of high idle speed. Modification to this cap
will void the engine warranty and likely will make the
engine non--compliant with emission certification
of the engine.
Greensmaster Flex 1800/2100
Page 3 -- 5
Engine
Service and Repairs
Cooling System
IMPORTANT: The engine that powers the Greensmaster Flex 1800 and Flex 2100 is air--cooled. Operating the engine with dirty or plugged cooling fins
or a plugged or dirty blower housing will result in
engine overheating and damage.
2
1. Park machine on a level surface. Make sure engine
is OFF. Remove spark plug wire from the spark plug.
IMPORTANT: Never clean engine with pressurized
water. Water could enter and contaminate the fuel
system.
2. Clean cooling fins on cylinder and cylinder head. Remove engine cylinder shroud from engine for more thorough cleaning (Fig. 2).
1
3. Clean blower housing of dirt and debris (Fig. 3). Remove housing if necessary.
IMPORTANT: Never operate engine with the cylinder shroud and blower housing removed. Overheating and engine damage will result.
Figure 2
1. Engine cylinder shroud
2. Cooling fins
4. Make sure blower housing and/or engine cylinder
shroud are installed to the engine if removed.
5. Attach spark plug wire to spark plug.
1
2
Figure 3
1. Blower housing
Engine
Page 3 -- 6
2. Rewind starter
Greensmaster Flex 1800/2100
Spark Plug
Use a NGK BR--6HS spark plug or equivalent.
1. Make sure engine is OFF. Carefully remove spark
plug wire from the spark plug.
0.024” to 0.028“
(0.6 to 0.7 mm)
2. Clean cylinder head area around spark plug and remove plug from the cylinder head.
IMPORTANT: Replace a cracked, fouled or dirty
spark plug. Do not sand blast, scrape or clean spark
plug electrodes because engine damage could result from grit entering cylinder.
Engine
3. Inspect the spark plug.
Figure 4
4. Set spark plug electrode gap from 0.024” to 0.028”
(0.6 to 0.7 mm).
5. Install correctly gapped spark plug into cylinder head
and torque plug 17 ft--lb (23 N--m).
6. Connect spark plug wire to spark plug.
Ignition Components
Engine ignition component information is included in the
Subaru Service Manual.
Greensmaster Flex 1800/2100
Page 3 -- 7
Engine
Engine
Antiseize
Lubricant
1
8
65 in--lb
(7.3 N--m)
11
8
2
14
4
11
15
12
8
3
7
5
7
10
9
6
FRONT
13
RIGHT
Figure 5
1.
2.
3.
4.
5.
Engine
Square key
Engine coupler
Coupler sleeve
Engine base
6.
7.
8.
9.
10.
Hardened washer (2 used)
Cap screw (4 used)
Flange nut (6 used)
Flange head screw
Hardened washer
Engine Removal (Fig. 5)
Flat washer (4 used)
Wire harness
Cap screw (2 used)
Set screw (2 used)
Transmission assembly
3. Remove throttle cable from engine (Fig. 6):
1. Park machine on a level surface with the engine OFF.
Remove spark plug wire from the spark plug to prevent
the engine from starting. Close fuel shut--off valve on engine.
2. If engine is to be disassembled, it may be easier to
drain oil from engine before removing engine from traction unit.
Engine
11.
12.
13.
14.
15.
Page 3 -- 8
A. Loosen screw that secures cable clamp to engine
bracket. Remove cable from clamp.
B. Loosen screw that secures throttle cable to governor lever. Slide cable from governor lever.
C. Position throttle cable away from engine.
Greensmaster Flex 1800/2100
4. Disconnect electrical connections from engine (Fig.
7):
3
A. Unplug wire harness connector from engine armature wire.
B. Disconnect wire harness ground wire from engine by removing LH rear cap screw (item 7 in Fig. 5),
flat washer (item 11 in Fig. 5) and flange nut (item 8 in
Fig. 5).
2
C. If machine is equipped with optional lighting kit,
disconnect wire harness connectors from engine alternator wires.
5. Remove engine base assembly (with engine attached) from machine:
A. Remove two (2) cap screws (item 13), hardened
washers (item 6) and flange nuts (item 8) that secure
rear of engine base to rear frame.
Figure 6
1. Throttle cable
2. Cable clamp
3. Governor lever screw
3
B. Support front of engine base to prevent it from
moving.
1
C. Remove flange head screw (item 9) and hardened washer (item 10) that secure engine base to
frame.
2
D. Carefully move engine and engine base assembly away from transmission so that engine coupler
(item 3) slides out of coupler sleeve (item 4). Once
engine coupler is removed from sleeve, remove engine base assembly from machine.
6. If necessary, remove engine from engine base:
A. Remove cap screws (item 7), flat washers (item
11) and flange nuts (item 8) that secure engine to engine base.
Figure 7
1. Armature wire
2. Harness ground wire
3. Alternator wires
3. If engine coupler (item 3) was removed from engine
output shaft, install coupler.
B. Remove engine from engine base.
7. If necessary, remove two (2) set screws (item 14)
that secure engine coupler (item 3) to engine output
shaft. Slide coupler from shaft. Remove square key
(item 2) from engine output shaft keyway.
Engine Installation (Fig. 5)
1. Position machine on a level surface. Make sure that
spark plug wire is not connected to engine spark plug.
A. Position square key in output shaft keyway. Apply
antiseize lubricant to top surface of key.
B. Slide coupler onto output shaft until it contacts
shoulder on shaft.
C. Secure coupler to output shaft with two (2) set
screws (item 14). Torque set screws 65 in--lb (7.3
N--m).
2. Make sure that all parts removed from the engine
during maintenance or rebuilding are properly installed
to the engine.
Greensmaster Flex 1800/2100
Page 3 -- 9
Engine
Engine
1
4. Install engine to engine base if it was removed:
6. Connect electrical connections to engine (Fig. 7):
A. Position engine on the engine base.
NOTE: When installing engine to engine base, do
not install fastener in LH rear engine mounting hole.
Ground wire connection is made at this location
when engine base is attached to machine frame (Fig.
7).
B. Install and tighten three (3) cap screws (item 7),
flat washers (item 11) and flange nuts (item 8) to secure engine to engine base. Do not install fastener in
LH rear engine mounting hole.
C. Fully tighten flange nuts that secure engine to engine base.
5. Install engine base assembly (with engine attached)
to machine:
A. Make sure that coupler sleeve (item 4) is placed
on transmission input shaft coupler.
B. Position engine base assembly to machine.
A. Apply dielectric gel (see Special Tools in Chapter
5 -- Electrical System) to wire harness connectors.
B. Connect wire harness connector to engine armature wire.
C. Connect wire harness ground wire to engine by
installing LH rear cap screw (item 7 in Fig. 5), flat
washer (item 11 in Fig. 5) and flange nut (item 8 in
Fig. 5). Apply skin--over grease (see Special Tools in
Chapter 5 -- Electrical System) to prevent corrosion.
D. If machine is equipped with optional lighting kit,
connect wire harness connectors to engine alternator wires.
7. Connect throttle cable to engine (Fig. 6):
A. Slide throttle cable end into governor lever.
B. Place throttle cable under cable clamp and secure with screw.
C. Adjust throttle cable (See Throttle Cable Adjustment in the Adjustment section of this chapter).
Make sure that all fasteners are tightened after cable
adjustment.
C. Carefully slide engine base assembly toward
transmission allowing engine coupler to be inserted
into coupler sleeve on transmission. Engine output
shaft may have to be turned to align engine coupler
with coupler sleeve.
8. Check and adjust engine oil level as needed.
D. Support engine base assembly to allow fasteners
to be installed.
9. Attach spark plug wire to the spark plug. Open fuel
shut--off valve on fuel tank.
E. Install and finger tighten two (2) cap screws (item
13), hardened washers (item 6) and flange nuts (item
8) that secure rear of engine base to rear frame.
10.Start engine and allow it to warm to operating temperature. Check high and low idle speeds and adjust if
necessary.
F. Align frame hole with front mounting boss of engine base. Install and finger tighten flange head
screw (item 9) and hardened washer (item 10) that
secure engine base to frame.
G. Position front of engine base to align engine and
transmission couplers. Fully tighten flange head
screw (item 9) to secure front of engine base.
H. Fully tighten fasteners at rear of engine base.
Engine
Page 3 -- 10
Greensmaster Flex 1800/2100
Engine Coupler Sleeve
The coupler sleeve used on Greensmaster Flex 1800
and 2100 allows a positive coupling between the engine
and transmission while also providing vibration damping
and quiet operation. The outer surface of the coupler
sleeve includes a series of curved lines that can be used
to gauge the condition of the internal coupler cogs that
are used to connect the engine and transmission couplers.
65 in--lb
(7.3 N--m)
2
4
5
Engine
When the coupler sleeve is new, the center line on the
outer surface of the sleeve is basically straight while the
lines above and below are curved in different directions
(Fig. 9). As the coupler wears with normal machine use,
the curved lines may visually straighten indicated that
the coupler has distorted. When removed from the machine, the inner cogs of a used coupler may exhibit some
offset as shown in Figure 10. This type of offset will generally not impact normal machine operation. The cog
offset can be 0.250” (6.4 mm) before coupler replacement is necessary.
1
3
Figure 8
1. Engine
2. Key
3. Engine coupler
4. Set screw (2 used)
5. Coupler sleeve
If a coupler sleeve has torn or missing cogs, the coupler
should be replaced.
Figure 9
Figure 10
Greensmaster Flex 1800/2100
Page 3 -- 11
Engine
This page is intentionally blank.
Engine
Page 3 -- 12
Greensmaster Flex 1800/2100
Chapter 4
Traction and Reel Drive System
Table of Contents
Greensmaster Flex 1800/2100
Page 4 -- 1
Traction and Reel
Drive System
SPECIFICATIONS . . . . . . . . . . . . . . . . . . . . . . . . . . . . . 2
GENERAL INFORMATION . . . . . . . . . . . . . . . . . . . . . 3
Operator’s Manuals . . . . . . . . . . . . . . . . . . . . . . . . . 3
Disengaging Drum Drive From Transmission . . . . 3
Transmission Belt Tensioner . . . . . . . . . . . . . . . . . . 4
SPECIAL TOOLS . . . . . . . . . . . . . . . . . . . . . . . . . . . . . 5
Modified Socket for Reel Clutch Bearing Collar . . 5
ADJUSTMENTS . . . . . . . . . . . . . . . . . . . . . . . . . . . . . . 6
Cutting Unit Clip Adjustment . . . . . . . . . . . . . . . . . . 6
Reel Clutch Adjustment . . . . . . . . . . . . . . . . . . . . . . 7
SERVICE AND REPAIRS . . . . . . . . . . . . . . . . . . . . . . 9
Reel Drive Belt . . . . . . . . . . . . . . . . . . . . . . . . . . . . . . 9
Reel Drive Assembly . . . . . . . . . . . . . . . . . . . . . . . 10
Reel Drive Bearing Housing . . . . . . . . . . . . . . . . . 12
Drum Drive Belt . . . . . . . . . . . . . . . . . . . . . . . . . . . . 14
Drum Drive Idler Assembly . . . . . . . . . . . . . . . . . . 16
Traction Drums . . . . . . . . . . . . . . . . . . . . . . . . . . . . 18
Differential Assembly . . . . . . . . . . . . . . . . . . . . . . . 22
Differential Assembly Service . . . . . . . . . . . . . . . . 24
Transmission Drive Belt . . . . . . . . . . . . . . . . . . . . . 26
Transmission Idler System . . . . . . . . . . . . . . . . . . 28
Transmission Reel Drive System . . . . . . . . . . . . . 30
Removing Seized Reel Clutch Shaft From
Transmission . . . . . . . . . . . . . . . . . . . . . . . . . . . . 33
Transmission Clutch System . . . . . . . . . . . . . . . . . 34
Clutch Service . . . . . . . . . . . . . . . . . . . . . . . . . . . . . 36
Transmission Drum Drive System . . . . . . . . . . . . 38
Transmission . . . . . . . . . . . . . . . . . . . . . . . . . . . . . . 40
Traction and Reel Drive System
Specifications
Item
Description
Transmission
Engine Powered Ramp Engagement Style Friction Clutch
Transmission Drive uses Multi--Ribbed Poly--V Belt
Belt Tension Maintained by Spring Loaded Idler Pulley
Traction Drive
Transmission to Traction Drive uses Multi--Ribbed Poly--V Belt
Belt Tension Maintained by Spring Loaded Idler Pulley
Differential
Spur Gear Planetary Differential
Parking Brake
Band Style (at differential shaft drive)
Traction Drum
Dual Cast Aluminum, 7.5 inch (19 cm) Diameter
Cutting Reel Drive
Traction and Reel Drive System
Transmission Reel Clutch Shaft to Telescoping Drive Shaft
Two Beam Style Couplers Used in Reel Drive System
Final Reel Drive has Three (3) Pulleys with Positive Drive Belt
Pulley Configuration Allows Six (6) Clip Adjustments
Page 4 -- 2
Greensmaster Flex 1800/2100
General Information
Operator’s Manuals
The Traction Unit and Cutting Unit Operator’s Manuals
provide information regarding the operation, general
maintenance and maintenance intervals for your
Greensmaster machine. Refer to these Operator’s
Manuals for additional information when servicing the
machine.
Disengaging Drum Drive From Transmission
The traction drum is driven by a multi--ribbed belt that is
tensioned with a spring loaded idler assembly. To disengage the traction drum drive from the transmission, follow the following procedure:
1
Traction and Reel
Drive System
1. Park machine on a level surface. Make sure engine
is OFF. Remove spark plug wire from the engine spark
plug.
2. Locate the traction engage/disengage lever next to
the RH drive housing drum (Fig. 1).
2
CAUTION
Be careful when rotating the traction engage/disengage lever. The lever is spring loaded and may
cause personal injury. Push lever from the front
when removing belt tension to prevent unexpected movement of the lever.
3. Rotate traction engage/disengage lever toward the
rear of the machine to the disengaged position to remove tension from the drum drive belt.
Figure 1
1. Engaged position
2. Disengaged position
4. To engage the drum drive, rotate traction engage/
disengage lever to the engaged position by rotating the
lever toward the front of the machine.
5. Connect spark plug wire to spark plug.
Greensmaster Flex 1800/2100
Page 4 -- 3
Traction and Reel Drive System
Transmission Belt Tensioner
The transmission pulleys are driven by a multi--ribbed
belt that is tensioned with a spring loaded idler assembly. If the transmission belt tension needs to be engaged
or disengaged, follow the following procedure:
2
3
1
1. Park machine on a level surface. Make sure engine
is OFF. Remove spark plug wire from the engine spark
plug.
2. Locate the transmission engage/disengage shaft
next to the engine (Fig. 2).
CAUTION
Be careful when rotating the transmission engage/disengage lever. The lever is spring loaded
and may cause personal injury.
4
Figure 2
3. To disengage the spring loaded idler from the transmission drive belt, use a 3/8” wrench to rotate the engage/disengage shaft 1/4 turn clockwise.
1. Transmission
2. Engage/disengage shaft
3. Engine
4. Cutting unit drive
4. To engage the idler into the transmission drive belt,
use a 3/8” wrench to rotate the engage/disengage shaft
1/4 turn counter--clockwise. The transmission belt is
properly tensioned when the alignment marks on the engage/disengage shaft and the transmission cover are
aligned (Fig. 3).
2
5. Connect spark plug wire to spark plug.
1
3
Figure 3
1. Engage/disengage shaft
2. Alignment mark
Traction and Reel Drive System
Page 4 -- 4
3. Cover alignment mark
Greensmaster Flex 1800/2100
Special Tools
Modified Socket for Reel Clutch Bearing Collar
The modified socket is used to remove and install the
reel clutch bearing collar when servicing the transmission reel clutch shaft (Fig. 4). Refer to Transmission
Reel Drive System in the Service and Repairs section of
this chapter for complete information on servicing the
reel clutch shaft assembly.
3
2
1
Socket Modification
1. Make sure that socket (9/16” or 15mm) to be modified fits over the reel clutch shaft bearing collar.
1. Bearing collar
2. Reel clutch shaft
3. Hub flat location
Traction and Reel
Drive System
2. Drill a hole or grind slots in socket walls to allow a
5/32” pin to extend through socket. A modified socket
with ground slots is shown in Figure 5.
Figure 4
Modified Socket Use (Fig. 6)
IMPORTANT: Avoid using excessive clamping
pressure on the reel clutch shaft assembly to prevent damage.
1. Use flats on reel drive hub to carefully secure reel
clutch shaft assembly in a vise. Use a vise with soft jaws
to prevent damage to clutch shaft assembly components.
Figure 5
2. Slide modified socket over bearing collar.
3. Align modified socket so that 5/32” pin can be inserted through socket and hole in bearing collar.
4. Use modified socket and socket wrench to loosen or
tighten bearing collar.
1
2
3
Figure 6
1. Modified socket
2. Reel clutch shaft assy
Greensmaster Flex 1800/2100
Page 4 -- 5
3. Pin
Traction and Reel Drive System
Adjustments
Cutting Unit Clip Adjustment
Cutting unit clip adjustment on the Flex 1800 and Flex
2100 can be changed by installing the cutting unit drive
pulleys to the appropriate locations on the reel drive assembly. Clip frequency pulley locations for 11 blade and
14 blade cutting units are shown in Figure 8 below.
60 to 65 in--lb
(6.8 to 7.3 N--m)
Antiseize
Lubricant
4
To adjust clip frequency, follow the following steps:
3
1
1. Park machine on a level surface. Make sure engine
is OFF. Remove spark plug wire from the engine spark
plug.
5
2. Remove reel drive cover and reel drive belt from side
of cutting unit (see Reel Drive Belt in the Service and Repairs section of this chapter).
3. Loosen two (2) set screws from drive pulleys that are
to be removed. Slide pulleys from shafts.
2
4. Apply antiseize lubricant to top of woodruff keys. Arrange pulleys on reel drive assembly as needed for desired clip frequency (Fig. 8).
Figure 7
1. Reel drive cover
2. Reel drive belt
3. Pulley
5. Secure all pulleys with two (2) set screws. Torque
screws from 60 to 65 in--lb (6.8 to 7.3 N--m).
4. Set screw
5. Woodruff key
6. Install reel drive belt and reel drive cover to cutting
unit (see Reel Drive Belt in the Service and Repairs section of this chapter).
7. Connect spark plug wire to spark plug.
B
C
A
CLIP
BLADES
SET SCREW
60 -- 65 IN LBS
POSITION
11
14
A
B
C
0.147
0.115
22
24
25
0.153
0.120
22
25
24
0.160
0.126
24
22
25
0.174
0.137
25
22
24
0.182
0.143
24
25
22
0.190
0.149
25
24
22
22 TOOTH PULLEY IS ALUMINUM COLOR
24 TOOTH PULLEY IS BLACK COLOR
25 TOOTH PULLEY IS RED COLOR
Figure 8
Traction and Reel Drive System
Page 4 -- 6
Greensmaster Flex 1800/2100
Reel Clutch Adjustment
To adjust the reel clutch, follow the following steps:
1. Park machine on a level surface. Make sure engine
is OFF. Remove spark plug wire from the engine spark
plug.
6
2. Remove rubber plug from front of transmission to allow viewing of reel drive clutch components (Fig. 9).
5
4
3. Release clutch cable spring tension by removing reel
clutch cable from casting slot of transmission:
A. Loosen upper jam nut that secures reel cable to
casting slot of transmission.
4. Loosen jam nut that secures set screw position in
reel clutch lever (Fig. 9).
3
5. Apply light upward pressure against the reel clutch
lever.
6. Back out set screw in reel clutch lever until reel clutch
hub causes the tips of the reel drive hub teeth to contact
the mating reel clutch pulley.
2
1
0.040” to 0.060”
(1.0 to 1.5 mm)
Light Upward
Pressure
Figure 9
1. Reel drive hub tooth
2. Reel drive hub
3. Reel clutch hub
7. While maintaining light pressure on reel clutch lever,
rotate set screw clockwise until a gap of 0.040” to 0.060”
(1.0 to 1.5 mm) is attained between the reel drive hub
and reel clutch hub.
4. Reel clutch lever
5. Set screw
6. Jam nut
1
8. Tighten jam nut to secure adjustment. Make sure
that set screw does not rotate while tightening jam nut.
9. Install rubber plug into front of transmission.
10.Install reel cable to casting slot of transmission and
confirm that cable spring length is properly set (see Reel
Clutch Cable Replacement in Chapter 5 -- Chassis and
Controls).
4
2
3
Figure 10
1. Reel clutch lever
2. Reel clutch hub
Greensmaster Flex 1800/2100
Page 4 -- 7
3. Reel drive hub
4. Reel clutch pulley
Traction and Reel Drive System
Traction and Reel
Drive System
B. Lift cable free from casting slot of transmission.
This page is intentionally blank.
Traction and Reel Drive System
Page 4 -- 8
Greensmaster Flex 1800/2100
Service and Repairs
Reel Drive Belt
Flex 1800 and Flex 2100 machines use a positive drive
belt on the left side of the machine to operate the cutting
unit.
Removal
1. Park machine on a level surface. Make sure engine
is OFF. Remove spark plug wire from the engine spark
plug.
2. Remove reel drive cover to expose reel drive belt
(Fig. 11).
1
3. Loosen the bearing housing mounting nut (Fig. 12).
5. Remove reel drive belt from the pulleys.
Figure 11
1. Reel drive cover
2. Flange head screw
Installation
3
1. Park machine on a level surface. Make sure engine
is OFF. Remove spark plug wire from the spark plug.
4
2. Using a 5/8” (16mm) wrench, rotate and hold the
bearing housing to allow reel drive belt installation (Fig.
12).
3. Place a new drive belt onto the pulleys.
4. Release bearing housing to apply tension to reel
drive belt. Make sure that bearing housing rotates freely
which will allow accurate belt tension.
2
5. Rotate reel drive at least one (1) full turn to ensure
that drive belt is properly tensioned.
1
6. Tighten the bearing housing mounting nut (Fig. 12).
7. Install reel drive cover to machine and secure with
flange head screw (Fig. 11).
Figure 12
1. Reel drive belt
2. Bearing housing nut
3. Compression spring
4. Bearing housing
8. Connect spark plug wire to spark plug.
Greensmaster Flex 1800/2100
Page 4 -- 9
Traction and Reel Drive System
Traction and Reel
Drive System
2
4. Using a 5/8” (16mm) wrench, rotate the bearing
housing to release tension on reel drive belt (Fig. 12).
Reel Drive Assembly
Antiseize
Lubricant
20
12
22
3
Antiseize
Lubricant
16
21
60 to 65 in--lb
(6.8 to 7.3 N--m)
2
17
18
25
24
4
22
10
27
23
14
26
6
19
9
1
24
23
7
28
22
5
RIGHT
FRONT
11
8
Antiseize
Lubricant
15
13
Figure 13
1.
2.
3.
4.
5.
6.
7.
8.
9.
10.
Reel drive housing
O--ring
Carriage screw
Washer head screw
Flange head screw (2 used)
Hex nut (2 used)
Reel drive shaft
Reel pulley (22 tooth) (aluminum)
O--ring
Reel idler shaft
11.
12.
13.
14.
15.
16.
17.
18.
19.
Reel pulley (24 tooth) (black)
Bearing housing assembly
Cover plug
Reel pulley (25 tooth) (red)
Belt
Compression spring
Hardened washer
Hex nut
Reel drive cover
20.
21.
22.
23.
24.
25.
26.
27.
28.
Shoulder bolt
Spring pin
Woodruff key (3 used)
Set screw (2 used per pulley)
Ball bearing (2 used)
Spacer
Push nut
Cutting unit
Flange head screw
NOTE: Cutting unit clip adjustment on the Flex 1800
and Flex 2100 is adjusted by installing the cutting unit
drive pulleys (items 8, 11 and 14) to the appropriate locations on the reel drive assembly (see Cutting Unit Clip
Adjustment in the Adjustments section of this chapter).
Traction and Reel Drive System
Page 4 -- 10
Greensmaster Flex 1800/2100
1. Park mower on a level surface. Make sure engine is
OFF. Remove spark plug wire from the engine spark
plug.
2. Slide the telescoping coupler off the cutting unit hex
shaft (Fig. 14).
3. Remove reel drive belt (see Reel Drive Belt Replacement in this section).
4. Loosen two (2) set screws (item 23) that secure reel
pulley (item 8) to reel drive shaft (item 7). Slide pulley
from drive shaft. Locate and retrieve woodruff key (item
22) from shaft.
3. Position reel drive assembly to cutting unit. Make
sure that spring pin (item 21) and compression spring
(item 16) are positioned between reel drive housing and
bearing housing assembly.
4. Secure reel drive assembly with two (2) flange head
screws (item 5) and washer head screw (item 4).
5. Install woodruff key (item 22) to reel drive shaft (item
7). Apply antiseize lubricant to top of key.
6. Slide reel pulley (item 8) onto reel drive shaft until it
contacts shoulder on shaft. Secure reel pulley with two
(2) set screws (item 23). Torque set screws from 60 to
65 in--lb (6.8 to 7.3 N--m).
5. Remove washer head screw (item 4) that secures
reel drive housing to cutting unit side plate.
7. Install reel drive belt (see Reel Drive Belt Replacement in this section). Make sure that reel drive cover is
secured to housing after belt installation.
NOTE: Hex nuts (item 6) have adhesive applied during
cutting unit production. The nuts should remain in cutting unit side plate during reel drive housing removal.
8. Slide the telescoping coupler onto the cutting unit
hex shaft (Fig. 14).
6. Remove two (2) flange head screws (item 5) that secure reel drive housing to cutting unit side plate.
9. Connect spark plug wire to spark plug.
7. Remove reel drive assembly from cutting unit.
8. Remove components from reel drive housing as
necessary using Figure 13 as a guide.
A. If idler shaft bearings (item 24) are to be removed,
use press to remove bearings and bearing spacer
from shaft. Discard bearings after removal.
NOTE: See Reel Drive Bearing Housing in this section
for disassembly and assembly information of bearing
housing assembly (item 12).
NOTE: Reel pulleys (items 8, 11 and 14) can be identified by color and number of teeth. Pulley location can
vary based on desired cutting unit clip frequency (see
Cutting Unit Clip Adjustment in the Adjustments section
of this chapter).
1
2
Figure 14
1. Telescoping coupler
2. Cutting unit hex shaft
Reel Drive Assembly Installation (Fig. 13)
1. Install all removed components to reel drive housing
using Figure 13 as a guide.
A. If bearings (item 24) were removed from idler
shaft, use press to install bearings and bearing
spacer onto shaft.
2. Apply light coating of grease on reel drive housing
O--rings (items 2 and 9).
Greensmaster Flex 1800/2100
Page 4 -- 11
Traction and Reel Drive System
Traction and Reel
Drive System
Reel Drive Assembly Removal (Fig. 13)
Reel Drive Bearing Housing
11
10
8
6
5
13
3
12
2
1
9
7
4
Figure 15
1.
2.
3.
4.
5.
Retaining ring
Reel input shaft
Bearing (2 used)
Bearing spacer
Wave washer
Traction and Reel Drive System
6.
7.
8.
9.
Flocked bearing shield
Wave spring
Flat washer
Retaining ring
Page 4 -- 12
10.
11.
12.
13.
Bearing housing
Spring pin (2 used)
Flex coupling
Reel hex shaft
Greensmaster Flex 1800/2100
Disassembly (Fig. 15)
Assembly (Fig. 15)
1. Park mower on a level surface. Make sure engine is
OFF. Remove spark plug wire from the engine spark
plug.
1. If bearings were removed from reel input shaft, install
new bearings onto shaft. Press first bearing fully onto
shaft. Position spacer on shaft and then press second
bearing onto shaft.
3. Remove retaining ring (item 1) from bearing housing.
4. Slide reel input shaft assembly from bearing housing. Remove wave washer (item 5) from bearing housing.
IMPORTANT: When removing flex coupler (item 12)
from reel input shaft (item 2), do not mar outer surface of coupler (e.g. grasping with pliers or mounting in vise) as coupler may be damaged and fail
prematurely.
5. Support flex coupler (item 12) to prevent it from being
damaged during spring pin removal. Push spring pin
from flex coupler and reel input shaft. Slide coupler from
shaft and discard spring pin.
6. Remove retaining ring (item 9) from shaft. Then remove flat washer (item 8), wave spring (item 7) and
flocked bearing shield (item 6) from shaft. Note orientation of flocked shield for assembly purposes.
7. Press bearings and bearing spacer from shaft if necessary. Discard bearings if removed.
8. Clean all bearing housing components.
2. Install flocked bearing shield (item 6), wave spring
(item 7) and then flat washer (item 8) onto reel input
shaft. Secure components to shaft with retaining ring
(item 9). It may be necessary to drive the retaining ring
onto the input shaft with a tubular tool and mallet. Make
sure that retaining ring is fully seated into shaft groove
after installation.
3. Place wave washer (item 5) into bearing housing.
4. Fill cavity between bearings with Mobil High Temperature XHP--222 grease (or equivalent).
5. Install reel input shaft assembly into bearing housing
and secure with retaining ring (item 1).
IMPORTANT: When installing flex coupler (item 12)
onto reel input shaft (item 2), do not mar outer surface of coupler (e.g. grasping with pliers or mounting in vise) as coupler may be damaged and fail
prematurely.
6. Slide flex coupler onto reel input shaft, support coupler to prevent it from being damaged during spring pin
installation. Install new spring pin into coupler to secure
it to shaft.
7. Install reel drive bearing housing to reel drive housing (see Reel Drive Assembly in this section).
8. Connect spark plug wire to spark plug.
Greensmaster Flex 1800/2100
Page 4 -- 13
Traction and Reel Drive System
Traction and Reel
Drive System
2. Remove reel drive bearing housing from reel drive
housing (see Reel Drive Assembly in this section).
Drum Drive Belt
12
See text for
tightening
procedure
11
18
17
9
16
6
14
15
13
2
4
10
8
7
5
15 to 17 ft--lb
(21 to 23 N--m)
3
1
2
Figure 16
1.
2.
3.
4.
5.
6.
Drum drive cover
Washer head screw (7 used)
Gasket
Wave washer
Gear assembly
Retaining ring
7.
8.
9.
10.
11.
12.
Brake band
Brake mount pin
Extension spring
Drum drive belt
Brake clevis pin
Drum drive housing
The drum drive system on Flex 1800 and Flex 2100 machines uses a multi--ribbed poly--V drive belt on the right
side of the traction drum.
13.
14.
15.
16.
17.
18.
Retaining ring
Idler pulley assembly
Shoulder screw
Idler arm assembly
Washer head screw (4 used)
Drive pulley (from transmission)
Removal (Fig. 16)
3. Rotate traction engage/disengage lever to the disengaged position to remove tension from the drum drive
belt (Fig. 17) (see Disengaging Drum Drive From Transmission in the General Information section of this chapter).
1. Park machine on a level surface. Make sure engine
is OFF. Remove spark plug wire from the engine spark
plug.
4. Remove seven (7) washer head screws that secure
the drum drive cover. Remove cover to expose the traction drive belt.
2. Remove transport wheels if attached (see Transport
Wheels in the Service and Repairs section of Chapter 6
-- Chassis and Controls).
5. Remove and discard gasket (item 3) from between
cover and housing.
Traction and Reel Drive System
Page 4 -- 14
Greensmaster Flex 1800/2100
6. Remove retaining ring (item 6) that secures brake
band to brake clevis pin. Slide brake band from brake
clevis and brake mount pins and remove band from
drum drive housing.
1
7. Carefully remove one end of extension spring (item
9) from anchor point and rotate spring away from drive
belt.
8. Pivot the idler pulley away from the drum drive belt
to loosen belt tension (Fig. 18).
9. Remove drum drive belt from both pulleys.
2
Installation (Fig. 16)
2. Place drum drive belt onto differential pulley and then
fit belt to drive pulley. Make sure that belt is on rear side
of idler pulley (Fig. 18).
3. Carefully install removed end of extension spring
(item 9) to anchor point.
4. Install brake band over brake surface of differential
pulley. Slide ends of brake band onto brake clevis and
brake mount pins. Secure brake band to brake clevis pin
with retaining ring (item 6).
Figure 17
1. Engaged position
2. Disengaged position
2
5. Make sure that wave washer (item 4) is pressed into
bore of drum drive cover.
3
1
6. Position new gasket (item 3) to housing surface.
7. Slide drum drive cover onto drum drive assembly.
8. Install seven (7) washer head screws to secure cover to housing. Tighten screws as follows:
5
A. First, using an alternating crossing pattern,
torque all screws from 15 to 40 in--lb (1.7 to 4.5
N--m).
B. Again using an alternating crossing pattern,
torque all screws from 85 to 95 in--lb (9.6 to 10.7
N--m).
4
1. Traction drive belt
2. Drive pulley
3. Idler pulley
Figure 18
4. Differential pulley
5. Brake band
9. Rotate traction engage/disengage lever to the engaged position to tension the drum drive belt (Fig. 17).
10.Install transport wheels if they were attached (see
Transport Wheels in the Service and Repairs section of
Chapter 6 -- Chassis and Controls).
11. Connect spark plug wire to spark plug.
Greensmaster Flex 1800/2100
Page 4 -- 15
Traction and Reel Drive System
Traction and Reel
Drive System
1. Park machine on a level surface. Make sure engine
is OFF. Remove spark plug wire from the spark plug.
Drum Drive Idler Assembly
12
See text for
tightening
procedure
11
18
17
9
16
6
14
15
13
2
4
10
8
7
5
15 to 17 ft--lb
(21 to 23 N--m)
3
1
2
Figure 19
1.
2.
3.
4.
5.
6.
Drum drive cover
Washer head screw (7 used)
Gasket
Wave washer
Gear assembly
Retaining ring
7.
8.
9.
10.
11.
12.
Brake band
Brake mount pin
Extension spring
Drum drive belt
Brake clevis pin
Drum drive housing
Removal
1. Park machine on a level surface. Make sure engine
is OFF. Remove spark plug wire from the engine spark
plug.
2. Remove transport wheels if attached (see Transport
Wheels in the Service and Repairs section of Chapter 6
-- Chassis and Controls).
3. Rotate traction engage/disengage lever to the disengaged position to remove tension from the drum drive
belt (see Disengaging Drum Drive From Transmission
in the General Information section of this chapter).
Traction and Reel Drive System
13.
14.
15.
16.
17.
18.
Retaining ring
Idler pulley assembly
Shoulder screw
Idler arm assembly
Washer head screw (4 used)
Drive pulley (from transmission)
4. Remove seven (7) washer head screws that secure
the drum drive cover. Remove cover to expose the drum
drive system.
5. Remove and discard gasket (item 3) from between
cover and housing.
6. Carefully remove the end of the extension spring
(item 9) from idler arm.
7. Remove shoulder screw (item 15) that secures the
idler arm assembly to the drum drive housing. Remove
idler arm assembly from housing.
Page 4 -- 16
Greensmaster Flex 1800/2100
8. Disassemble idler arm assembly as needed (Fig.
20). Replace worn or damaged bearings and bushings.
2
A. Remove flange bushings from idler bracket. Discard removed bushings.
3
B. Remove retaining ring from idler bracket. Slide
idler pulley from bracket shaft. Press ball bearings
from idler pulley. Discard removed bearings.
5
Installation
1
1. If idler arm assembly was disassembled:
A. Press new flange bushings into idler bracket.
B. Press new ball bearings fully into idler pulley making sure to apply pressure to outer bearing race only.
Slide pulley assembly onto idler bracket and secure
with retaining ring.
4
Figure 20
1. Flange bushing (2 used)
2. Idler bracket
3. Ball bearing (2 used)
4. Idler pulley
5. Retaining ring
Traction and Reel
Drive System
2. Position idler arm assembly to drum drive housing
and secure with shoulder screw (item 15). Torque shoulder screw from 15 to 17 ft--lb (21 to 23 N--m). Check that
idler arm assembly can pivot freely after tightening
shoulder screw.
3. Carefully secure the end of the extension spring
(item 9) to idler arm.
4. Make sure that wave washer (item 4) is pressed into
bore of drum drive cover.
5. Position new gasket (item 3) to housing surface.
6. Slide drum drive cover onto drum drive assembly.
7. Install seven (7) washer head screws to secure cover to housing. Tighten screws as follows:
A. First, using an alternating crossing pattern,
torque all screws from 15 to 40 in--lb (1.7 to 4.5
N--m).
B. Again using an alternating crossing pattern,
torque all screws from 85 to 95 in--lb (9.6 to 10.7
N--m).
8. Rotate traction engage/disengage lever to the engaged position to tension the drum drive belt (see Disengaging Drum Drive From Transmission in the General
Information section of this chapter).
9. Install transport wheels if they were attached (see
Transport Wheels in the Service and Repairs section of
Chapter 6 -- Chassis and Controls).
10.Connect spark plug wire to spark plug.
Greensmaster Flex 1800/2100
Page 4 -- 17
Traction and Reel Drive System
Traction Drums
9
Antiseize
Lubricant
7
6
29
17
5
3
6
4
3
1
18
2
28
3
22
21
20
3
8
17
27
26
22
30
14
10
19
24
23
11
12
13
140 to 160 ft--lb
(190 to 216 N--m)
14
RIGHT
FRONT
15
75 to 90 ft--lb
(102 to 122 N--m)
16
70 to 80 ft--lb
(95 to 108 N--m)
25
Figure 21
1.
2.
3.
4.
5.
6.
7.
8.
9.
10.
Drum drive housing
Straight bushing
Flange bushing (4 used)
Brake lever
Traction lever
Square key (2 used)
Drum shaft
Long spur gear
Differential assembly
RH traction drum
11.
12.
13.
14.
15.
16.
17.
18.
19.
20.
Jam nut
Grease seal
LH traction drum
Ball bearing (2 used)
Bearing nut
LH hex shaft
Straight bushing (2 used)
Dowel pin (2 used)
Cap screw
Flat washer
Traction Drum Removal (Fig. 21)
1. Park machine on a level surface. Make sure engine
is OFF. Remove spark plug wire from the engine spark
plug.
2. If installed, remove transport wheels (see Transport
Wheels in the Service and Repairs section of Chapter 6
-- Chassis and Controls).
Traction and Reel Drive System
21.
22.
23.
24.
25.
26.
27.
28.
29.
30.
Traction engage lever
Retaining ring (2 used)
Brake lever
Retaining ring
LH side plate
Washer head screw
Lock collar
Pin
Thrust washer
O--ring
3. Remove handle assembly from machine (see Handle Assembly in the Service and Repairs section of
Chapter 6 -- Chassis and Controls).
4. Support both sides of machine frame with jackstands
or suitable blocking to prevent the machine from moving.
Page 4 -- 18
Greensmaster Flex 1800/2100
5. Separate LH side plate (item 25) from machine (Fig.
22):
1
A. Remove flange nut, hardened washer and carriage screw (items 3, 4 and 6 in Fig. 22) that secure
LH side plate to rear frame.
11
B. Remove three (3) flange screws and hardened
washers (items 8 and 4 in Fig. 22) that secure LH
side plate to frame.
10
2
C. Slide LH side plate from supporting bearing and
remove from machine.
3
4
6. Insert bar stock or other suitable tool through spokes
of LH traction drum to keep drum from turning.
6
8. Slide LH traction drum (item 13) from drum shaft. Locate and retrieve square key from shaft.
9. If necessary, carefully remove grease seal (item 12)
from LH traction drum taking care to not damage bore
of drum. Discard removed seal.
7
5
4
8
9
Figure 22
1.
2.
3.
4.
5.
6.
10.If necessary, remove LH hex shaft (item 16) and ball
bearing (item 14) from bearing nut.
Kickstand
Rear frame
Flange nut
Hardened washer
Frame
Carriage screw
7.
8.
9.
10.
11.
LH side plate
Flange screw (3 used)
Counterweight
Offset handle clamp
Handle clamp
1
2
11. Insert bar stock or other suitable tool through spokes
of RH traction drum to keep drum from turning.
12.Remove O--ring (item 30), pin (item 28) and lock collar (item 27) from drum shaft.
13.While retaining remaining drum, loosen and remove
jam nut (item 11) from long spur gear.
14.Remove RH traction drum (item 10) from machine.
Locate and retrieve square key from spur gear.
NOTE: If removal of the drum shaft (item 7), long spur
gear (item 8) or differential assembly (Item 9) is necessary, see Differential Assembly in this section.
Traction Drum Installation (Fig. 21)
1. Make sure that drum shaft (item 7), long spur gear
(item 8) and differential assembly (Item 9) are installed
to drum drive housing (refer to Differential Assembly in
this section).
2. Install LH hex shaft (item 16) and ball bearing (item
14) to bearing nut (item 15) if they were removed. Press
bearing fully onto bearing nut. Torque hex shaft from 70
to 80 ft--lb (95 to 108 N--m).
0.470” to 0.530”
(12.0 to 13.4 mm)
Figure 23
1. LH traction drum
2. Grease seal
4. Align slot in RH traction drum (item 10) with key on
long spur gear and slide traction drum onto gear.
5. Insert bar stock or other suitable tool through spokes
of RH traction drum to keep drum from turning.
6. Install jam nut (item 11) onto threads of long spur
gear to secure RH traction drum. Torque jam nut from
140 to 160 ft--lb (190 to 216 N--m).
3. Place square key (item 6) into slot of long spur gear
(item 8). Apply antiseize lubricant to top surface of key.
Greensmaster Flex 1800/2100
Page 4 -- 19
Traction and Reel Drive System
Traction and Reel
Drive System
7. While retaining LH drum, loosen and remove bearing
nut (item 15) from traction drum assembly. The ball
bearing (item 14) is pressed onto the bearing nut so it will
be removed with the nut.
7. Slide lock collar (item 27) onto drum shaft. Align
holes in collar and shaft and then install pin (item 28). Fit
O--ring (item 30) to slot in collar.
13.Secure LH side plate (item 25) to machine (Fig. 22):
8. If grease seal (item 12) was removed from LH traction drum, install new grease seal into drum. Make sure
that seal lip is orientated toward center of drum. Press
seal into drum bore so that seal is recessed from 0.470”
to 0.530” (12.0 to 13.4 mm) from edge of drum (Fig. 23).
B. Secure LH side plate to frame with three (3)
flange screws and hardened washers.
9. Place square key (item 6) into slot of drum shaft. Apply antiseize lubricant to top surface of key.
14.Install handle assembly to machine (see Handle Assembly in the Service and Repairs section of Chapter 6
-- Chassis and Controls). Make sure that all cable adjustments are correct.
10.Align slot in LH traction drum (item 13) with key on
drum shaft and carefully slide traction drum onto shaft
taking care to not damage grease seal in drum.
11. Insert bar stock or other suitable tool through spokes
of LH traction drum to keep drum from turning.
A. Slide LH side plate onto supporting bearing.
C. Secure LH side plate to rear frame with carriage
screw, hardened washer and flange nut.
15.Install transport wheels if necessary (see Transport
Wheels in the Service and Repairs section of Chapter 6
-- Chassis and Controls).
16.Connect spark plug wire to spark plug.
12.Make sure that ball bearing (item 14) is pressed onto
the bearing nut (item 15). While retaining LH drum, secure drum to traction drum assembly with bearing nut
(item 15). Torque bearing nut from 75 to 90 ft--lb (102
to 122 N--m).
Traction and Reel Drive System
Page 4 -- 20
Greensmaster Flex 1800/2100
Traction and Reel
Drive System
This page is intentionally blank.
Greensmaster Flex 1800/2100
Page 4 -- 21
Traction and Reel Drive System
Differential Assembly
9
Antiseize
Lubricant
7
31
6
29
17
5
6
3
4
3
1
18
2
28
3
22
21
20
3
8
17
27
30
10
19
26
22
14
24
23
11
Loctite #242
12
13
140 to 160 ft--lb
(190 to 216 N--m)
RIGHT
FRONT
14
15
75 to 90 ft--lb
(102 to 122 N--m)
16
70 to 80 ft--lb
(95 to 108 N--m)
25
Figure 24
1.
2.
3.
4.
5.
6.
7.
8.
9.
10.
11.
Drum drive housing
Straight bushing
Flange bushing (4 used)
Brake lever
Traction lever
Square key (2 used)
Drum shaft
Long spur gear
Differential assembly
RH traction drum
Jam nut
12.
13.
14.
15.
16.
17.
18.
19.
20.
21.
Grease seal
LH traction drum
Ball bearing (2 used)
Bearing nut
LH hex shaft (LH threads)
Straight bushing (2 used)
Dowel pin (2 used)
Cap screw
Flat washer
Traction engage lever
Disassembly (Fig. 24)
1. Park machine on a level surface. Make sure engine
is OFF. Remove spark plug wire from the engine spark
plug.
Traction and Reel Drive System
22.
23.
24.
25.
26.
27.
28.
29.
30.
31.
Retaining ring (2 used)
Brake lever
Retaining ring
LH side plate
Washer head screw
Lock collar
Pin
Thrust washer
O--ring
Spur gear assembly
2. Remove traction drums from machine (see Traction
Drums in this section).
3. Slide spur gear assembly from differential assembly
in drum drive housing (Fig. 25).
Page 4 -- 22
Greensmaster Flex 1800/2100
4. If necessary, disassemble spur gear assembly (Fig.
26).
A. The hex shaft has left hand threads. The shaft
also has thread locking compound on threads.
B. Press ball bearing and flange bushing from spur
gear as needed.
IMPORTANT: As drum shaft (item 7) and differential
assembly (item 9) are removed, make sure to retrieve and note location of thrust washer (item 29)
for assembly purposes.
4. Place thrust washer (item 29) onto drum shaft (item
7). Insert drum shaft into differential assembly. Make
sure that drum shaft properly engages differential gears.
5. Install traction drums to machine (see Traction
Drums in this section).
6. Install drum drive belt from machine (see Drum Drive
Belt in this section).
7. Connect spark plug wire to spark plug.
1
5. Push drum shaft (item 7) out of differential assembly.
Make sure to locate and retrieve thrust washer (item 29).
6. Slide differential assembly from long spur gear (item
8) and drum drive housing (item 1).
7. If necessary, slide long spur gear (item 8) from drum
drive housing. Straight bushings (item 17) in long spur
gear should be inspected for wear or damage and replaced if needed.
8. Ball bearing (item 14) that supports long spur gear is
pressed into drum drive housing. Make sure that bearing is in good condition and is pressed fully to shoulder
of housing.
Traction and Reel
Drive System
NOTE: For differential service procedure, see Differential Assembly Service in this section.
2
Figure 25
1. Drum drive housing
2. Spur gear assembly
Assembly (Fig. 24)
1. If long spur gear (item 8) was removed from drum
drive housing, slide gear into ball bearing in drive housing.
70 to 80 ft--lb
(95 to 108 N--m)
1
4
2. If spur gear assembly (Fig. 26) was taken apart, assemble as necessary:
3
A. Press new ball bearing fully onto spur gear if removed.
B. Press new flange bushing into spur gear if removed.
C. If the hex shaft was removed from the spur gear,
apply Loctite #242 (or equivalent) to threads of hex
shaft. Install hex shaft (left hand threads) into spur
gear and torque from 70 to 80 ft--lb (95 to 108 N--m).
2
Figure 26
1. Spur gear
2. Ball bearing
3. Hex shaft (LH threads)
4. Flange bushing
3. Make sure that differential housing cavity is packed
20% to 30% full of high temperature Mobil XHP--222
grease (or equivalent). Slide differential assembly into
drum drive housing (item 1) and onto long spur gear
(item 8). Make sure that spur gear properly engages differential gears.
Greensmaster Flex 1800/2100
Page 4 -- 23
Traction and Reel Drive System
Differential Assembly Service
3
1
5
4
6
99 to 121 in--lb
(11.2 to 13.6 N--m)
5
6
7
8
4
3
6
2
Figure 27
1. Housing
2. Cover
3. Ball bearing (2 used)
4. Gear pin (6 used)
5. Dual spur gear (6 used)
6. Spacer (9 used)
Disassembly (Fig. 27)
1. Remove differential assembly from machine (see
Differential Assembly in this section).
2. Remove six (6) socket head screws that secure cover to housing. Note alignment of index marks on housing
and cover for assembly purposes (Fig. 28).
7. Spur gear (3 used)
8. Socket head screw (6 used)
6. Slide each gear pin with gears and spacers from cover. Note location of gears and spacers on each of the six
(6) gear pins.
7. If necessary, remove ball bearings from cover and
housing. There are two (2) holes in the cover and housing that allow use of a pin punch to remove bearings.
Discard removed bearings.
3. Place differential assembly on workbench so that the
differential is resting on the cover with housing orientated up.
Inspection (Fig. 27)
4. Lift housing from differential assembly leaving internal components positioned on cover. For assembly purposes, note that index mark on housing is aligned with
a gear pin that has one (1) gear (Fig. 30).
2. Inspect all differential gears carefully looking for
chipped teeth, wear or other damage. Because gear
tooth damage is rarely isolated to one gear, replace
gears as a complete set.
5. Note locations of projections on inside of cover for
assembly purposes. The projections need to be aligned
with the gear pins that have one (1) gear (Fig. 29).
3. Inspect gear pins (item 4) for scoring or wear.
Traction and Reel Drive System
1. Clean all differential components.
4. Replace all worn or damaged differential assembly
components.
Page 4 -- 24
Greensmaster Flex 1800/2100
Assembly (Fig. 27)
2
1. If ball bearing was removed from either cover or
housing, press new ball bearing into bearing bore. Make
sure that bearing is fully pressed to shoulder of bore.
1
2. Place cover (with bearing installed) on workbench.
3. Slide each gear pin with gears and spacers into cover. Make sure that projections on inside of cover are
aligned with the pins that have one (1) gear (Fig. 29).
Figure 28
1. Cover index mark
2. Housing index mark
5. After housing is installed, use one of the spur gears
(see Differential Assembly in this section) to rotate differential gears making sure that they rotate freely without binding. If binding is noted, identify and correct
cause before securing the cover.
3
6. Secure cover to housing with six (6) socket head
screws. Torque screws from 99 to 121 in--lb (11.2 to
13.6 N--m).
1
2
2
7. Pack differential housing cavity 20% to 30% full of
high temperature Mobil XHP--222 grease (or equivalent).
3
3
8. Install differential assembly to machine (see Differential Assembly in this section).
2
Figure 29
1. Projection on cover
2. Gear pin with 2 gears
3. Gear pin with 1 gear
1
3
2
2
3
3
2
Figure 30
1. Housing index mark
2. Gear pin with 2 gears
Greensmaster Flex 1800/2100
Page 4 -- 25
3. Gear pin with 1 gear
Traction and Reel Drive System
Traction and Reel
Drive System
4. Position housing onto assembly making sure that
gear pin with one (1) gear is positioned next to index
mark on housing (Fig. 30). Also, align index marks on
housing and cover during assembly (Fig. 28).
Transmission Drive Belt
See text for
tightening
procedure
60 to 65 in--lb
(6.8 to 7.3 N--m)
13
12
11
1
2
RIGHT
FRONT
10
9
3
4
5
6
Antiseize
Lubricant
7
8
Figure 31
1.
2.
3.
4.
5.
Transmission assembly
Transmission belt
Gasket
Wave washer
Transmission cover
6.
7.
8.
9.
Key
Drive shaft wire
Telescoping coupler
Washer head screw (2 used)
10.
11.
12.
13.
Coupler guard
Coupler
Set screw (2 used)
Washer head screw (7 used)
Transmission removal from the machine is not necessary to service the transmission drive belt. The transmission drive belt can be replaced by removing the
engine from the frame, removing the transmission cover
and then removing the drive belt.
4. Remove coupler guard (item 10) from transmission.
Drive Belt Removal (Fig. 31)
IMPORTANT: During disassembly, make sure that
tension is released from transmission belt before
removing transmission cover.
1. Park machine on a level surface. Make sure engine
is OFF.
2. Remove engine from machine (see Engine Removal
in the Service and Repairs section of Chapter 3 -- Engine).
3. Use tips of needle nose pliers to spread ends of drive
shaft wire (item 7) in telescoping coupler (item 8). With
wire ends spread, slide coupler from transmission shaft.
Traction and Reel Drive System
5. Loosen two (2) set screws (item 12) that secure coupler (item 11) to transmission shaft. Slide coupler from
transmission shaft. Locate and retrieve key (item 6).
6. Remove tension on transmission belt by rotating the
engage/disengage shaft clockwise (see Transmission
Belt Tensioner in the General Information section of this
chapter).
7. Remove seven (7) washer head screws that secure
transmission cover to transmission. Carefully remove
cover from transmission. Remove and discard gasket
(item 3).
Page 4 -- 26
Greensmaster Flex 1800/2100
8. Make sure that wave washer (item 4) is pressed into
reel drive shaft bore of transmission cover.
9. Note transmission belt routing for assembly purposes (Fig. 32).
10.Remove transmission belt from drive and idler pulleys in transmission.
11. Check condition of all pulleys and idler components.
9. Secure coupler guard (item 10) to transmission.
10.Slide telescoping coupler onto transmission shaft so
that drive shaft wire engages hex shaft on transmission.
Make sure that telescoping coupler is properly attached
to cutting unit hex shaft.
11. Install engine to machine (see Engine Installation in
the Service and Repairs section of Chapter 3 -- Engine).
12.Clean inside of transmission before reinstalling new
belt.
1
4
2
5
Drive Belt Installation (Fig. 31)
IMPORTANT: During assembly, make sure that
transmission cover is installed with fasteners properly torqued before applying tension to transmission belt.
1. Install new transmission belt onto pulleys in transmission. Make sure that belt is correctly routed around
drive and idler pulleys (Fig. 32).
4
2. Make sure that wave washer (item 4) is pressed into
bearing bores of transmission cover. Also, make sure
that two (2) dowel pins are pressed into bores in the
transmission housing.
3. Position new gasket to transmission assembly. Align
gasket to two (2) dowel pins in transmission housing.
4. Install transmission cover. If necessary, use a rubber
mallet at dowel locations (Fig. 33) to seat cover to transmission.
3
Figure 32
1. Engage/disengage shaft
2. Drive pulley
3. Reel clutch pulley
4. Idler pulley
5. Drum drive pulley
6. Idler pulley
2
5. Install seven (7) washer head screws to secure cover to transmission. Tighten screws as follows:
1
A. First, using an alternating crossing pattern,
torque all screws from 15 to 40 in--lb (1.7 to 4.5
N--m).
B. Again using an alternating crossing pattern,
torque all screws from 85 to 95 in--lb (9.6 to 10.7
N--m).
6. Apply tension to transmission belt by rotating the engage/disengage shaft counter--clockwise (see Transmission Belt Tensioner in the General Information
section of this chapter).
7. Install key (item 6) to transmission shaft. Apply antiseize lubricant to top of key.
2
Figure 33
1. Transmission cover
2. Dowel location
8. Slide coupler (item 11) onto transmission shaft until
it is flush with the end of the shaft. Secure coupler with
two (2) set screws (item 12). Torque set screws from 60
to 65 in--lb (6.8 to 7.3 N--m).
Greensmaster Flex 1800/2100
Page 4 -- 27
Traction and Reel Drive System
Traction and Reel
Drive System
6
Transmission Idler System
6
2
7
10
11
10
9
3
8
7
1
4
5
7
13
12
10
14
15 to 17 ft--lb
(21 to 23 N--m)
RIGHT
FRONT
Figure 34
1.
2.
3.
4.
5.
Transmission cover
Engage/disengage shaft
Transmission belt
Extension spring
Main drive idler
6.
7.
8.
9.
10.
Driven pulley (drum drive)
Flange bushing (4 used)
Cap screw (2 used)
Idler pulley bushing (2 used)
Ball bearing (6 used)
11.
12.
13.
14.
Idler pulley (2 used)
Idler pulley
Shoulder screw
Retaining ring
Transmission removal from the machine is not necessary to service the transmission idler system. Transmission idler components can be accessed by removing the
engine from the frame, removing the transmission cover
and then removing the drive belt.
Traction and Reel Drive System
Page 4 -- 28
Greensmaster Flex 1800/2100
Disassembly (Fig. 34)
4
1. Park machine on a level surface. Make sure engine
is OFF.
1
2. Remove transmission drive belt (see Transmission
Drive Belt in this section).
3
3. Disassemble idler system as required using Figure
34 as a guide. Discard ball bearings if they are removed
from idler pulleys.
4. Check bushings (items 7 and 9) for wear or damage.
Replace bushings if necessary. Bushings for engage/
disengage shaft (item 2) are pressed into the transmission housing and cover.
5
4
2
Assembly (Fig. 34)
A. If bearings were removed from idler pulleys,
press new bearings fully to shoulder of idler pulleys.
Figure 35
1. Engage/disengage shaft
2. Main drive idler
3. Extension spring
4. Idler pulley
5. Transmission belt
B. If extension spring (item 4) was removed, make
sure that ends of spring are orientated as shown in
Fig. 35.
C. If main drive idler (item 5) was removed, secure
idler to transmission housing with shoulder screw
(item 13). Torque shoulder screw from 15 to 17 ft--lb
(21 to 23 N--m).
D. After securing idler components to transmission
housing, make sure that all idler pulleys rotate
smoothly.
2. Install transmission drive belt and all machine components removed for idler system service (see Transmission Drive Belt in this section).
Greensmaster Flex 1800/2100
Page 4 -- 29
Traction and Reel Drive System
Traction and Reel
Drive System
1. Assemble idler system as required using Figure 34
as a guide. Ball bearings that support idler pulleys are
pressed into the pulleys.
Transmission Reel Drive System
5
1
8
Indicator
Mark
11
16
9
8
10
28
6
7
RIGHT
Loctite #242
15
13
14
21
9
15
17
12
18
25
19
27
22
Loctite #242
2
3
20
23
FRONT
23 to 27 ft--lb
(32 to 36 N--m)
24
26
4
Figure 36
1.
2.
3.
4.
5.
6.
7.
8.
9.
10.
Transmission housing
Flex coupler
Hex shaft
Spring pin (2 used)
Retaining ring
Plug
Retaining ring (reel clutch cable)
Flange bushing (2 used)
Flange bushing (2 used)
Reel clutch lever
11.
12.
13.
14.
15.
16.
17.
18.
19.
Reel brake ring
Ball bearing
Retaining ring
Reel brake disc
Clutch pivot pin (2 used)
Reel clutch fork
Reel clutch hub
Reel drive hub
Clutch shaft
Transmission removal from the machine is not necessary to service the transmission reel drive system.
Transmission reel drive components can be accessed
by removing the battery pack from the frame, removing
the transmission cover and then removing the drive belt.
Reel Clutch Shaft Removal (Fig. 36)
1. Park machine on a level surface. Make sure engine
is OFF.
2. Disconnect reel clutch cable from transmission (see
Reel Clutch Cable Replacement in the Service and Repairs section of Chapter 6 -- Chassis and Controls).
Traction and Reel Drive System
20.
21.
22.
23.
24.
25.
26.
27.
28.
Spacer
Ball bearing (2 used)
Reel clutch pulley
Bearing collar
Flocked bearing shield
Wave spring
Flat washer
Retaining ring
Ball bearing
3. Remove transmission drive belt (see Transmission
Drive Belt in this section).
4. Remove retaining ring (item 5) that secures reel
clutch lever (item 10) in transmission housing. Slide reel
clutch lever from housing. Note missing tooth in spline
area of lever which is used for alignment with reel clutch
fork (item 16).
5. Pull reel clutch shaft assembly from transmission
housing. NOTE: If ball bearing (item 28) on reel clutch
shaft assembly is seized in housing, refer to Removing
Seized Reel Clutch Shaft From Transmission in this section for removal procedure.
Page 4 -- 30
Greensmaster Flex 1800/2100
6. Inspect flange bushings and reel brake ring for wear
or damage (Fig. 37). Replace bushings and brake ring
if necessary.
1
Reel Clutch Shaft Disassembly (Fig. 36)
NOTE: The following procedure covers complete disassembly of reel clutch shaft assembly. Depending on
service needs of machine, it may not be necessary to
perform every step of this procedure.
3
2
IMPORTANT: When removing flex coupler (item 2)
from clutch shaft, do not mar outer surface of coupler (e.g. grasping with pliers or mounting in vise)
as coupler may be damaged and fail prematurely.
4
Figure 37
1. Transmission housing
2. Flange bushing
2. Press ball bearing (item 28) from end of reel clutch
shaft. Discard removed bearing.
8
3. Flange bushing
4. Reel brake ring
7
6
5
4 3 2 1
3. Carefully remove retaining ring (item 13) that secures reel brake disc (item 14) to reel drive hub (item
18). Take care to not damage brake disc friction material
when removing retaining ring.
4. Remove reel brake disc (item 14) from reel drive hub
noting orientation of disc for assembly purposes. Friction material side of disc needs to be positioned toward
the reel brake ring (item 11) which is pressed into the
transmission housing.
5. Slide reel clutch hub (item 17) and reel clutch fork
(item 16) assembly from reel drive hub (item 18). Note
correct orientation of indicator mark on fork for assembly
purposes. If necessary, remove pivot pins (item 15) and
separate fork from hub.
6. Use modified socket (see Special Tools in this chapter) to remove bearing collar assembly from clutch shaft
(Fig. 38).
IMPORTANT: To prevent damage, avoid using excessive clamping pressure on the reel clutch shaft
assembly.
A. Use flats on reel drive hub to carefully secure reel
clutch shaft assembly in a vise. Use a vise with soft
jaws to prevent damage to clutch shaft assembly
components.
Figure 38
1.
2.
3.
4.
Retaining ring
Flat washer
Wave spring
Flocked bearing seal
5.
6.
7.
8.
Ball bearing
Bearing collar
Reel clutch shaft
Hub flat location
7. Remove retaining ring (item 27), flat washer (item
26), wave spring (item 25) and flocked bearing shield
(item 24) from bearing collar. Note orientation of flocked
shield for assembly purposes.
8. Press bearing (item 12) from bearing collar. Discard
removed bearing.
9. Slide reel clutch pulley assembly and reel drive hub
from clutch shaft.
10.If necessary, remove ball bearings and spacer from
pulley. Discard removed bearings.
Reel Clutch Shaft Assembly (Fig. 36)
B. Slide modified socket over bearing collar. Align
modified socket so that 5/32” pin can be inserted
through socket and hole in bearing collar.
1. If ball bearings were removed from reel clutch pulley,
press new inner bearing fully to bottom of bore in pulley.
Install spacer into pulley and then press new outer bearing into pulley until it contacts spacer.
C. Use modified socket and socket wrench to remove bearing collar assembly from clutch shaft.
2. If bearing was removed from bearing collar, press
new bearing fully onto collar.
Greensmaster Flex 1800/2100
Page 4 -- 31
Traction and Reel Drive System
Traction and Reel
Drive System
1. Support flex coupler (item 2) to prevent it from being
damaged during spring pin removal. Push spring pin
from flex coupler and bearing collar (item 23). Slide coupler with hex shaft (item 3) from collar. Discard removed
spring pin.
2
3
3. Slide reel clutch pulley assembly and reel drive hub
onto clutch shaft.
4. Use modified socket (see Special Tools in this chapter) to install bearing collar assembly onto clutch shaft
(Fig. 38).
IMPORTANT: To prevent damage, avoid using excessive clamping pressure on the reel clutch shaft
assembly.
A. Use flats on reel drive hub to carefully secure reel
clutch shaft assembly in a vise. Use a vise with soft
jaws to prevent damage to clutch shaft assembly
components.
B. Use modified socket, 5/32” pin and socket
wrench to install bearing collar assembly to clutch
shaft. Torque bearing collar from 23 to 27 ft--lb (32 to
36 N--m).
5. Install flocked bearing shield (item 24) (flocked side
orientated toward bearing location), wave spring (item
25), flat washer (item 26) and retaining ring (item 27)
onto bearing collar.
6. If reel clutch fork (item 16) was separated from reel
clutch hub (item 17), clutch pivot pins (item 15) should
either be replaced (new pins have patchlock on threads)
or have Loctite #242 (or equivalent) applied to threads
before installation. Secure fork to clutch hub with two (2)
pivot pins.
7. Slide reel clutch hub (item 17) and reel clutch fork
(item 16) assembly onto reel drive hub (item 18). Make
sure that indicator mark on fork is toward the rear of the
transmission.
8. Install reel brake disc (item 14) onto reel drive hub.
Friction material side of disc needs to be positioned toward the reel brake ring (item 11) which is pressed into
the transmission housing.
Traction and Reel Drive System
9. Carefully secure reel brake disc (item 14) to reel
drive hub (item 18) with retaining ring (item 13). Take
care to not damage brake disc friction material when
installing retaining ring.
10.Press new ball bearing (item 28) fully to shoulder of
reel clutch shaft.
IMPORTANT: When installing flex coupler (item 2)
onto shaft, do not mar outer surface of coupler (e.g.
grasping with pliers or mounting in vise) as coupler
may be damaged and fail prematurely.
11. Slide flex coupler onto bearing collar (item 23), support coupler to prevent it from being damaged during
spring pin installation. Install new spring pin into coupler
to secure coupler to collar.
Reel Clutch Shaft Installation (Fig. 36)
1. Before inserting reel clutch assembly into transmission housing, thoroughly clean reel brake ring (item 11)
that is pressed into housing.
2. Slide reel clutch shaft assembly into transmission
housing.
3. Align missing tooth in spline area of reel clutch lever
(item 10) with reel clutch fork (item 16). Insert lever
through housing and fork. Secure lever with retaining
ring (item 5).
4. Install transmission drive belt and all machine components removed for reel drive system service (see
Transmission Drive Belt in this section).
5. Check reel clutch adjustment (see Reel Clutch Adjustment in the Adjustments section of this chapter). Adjust as needed.
6. Connect reel clutch cable to transmission (see Reel
Clutch Cable Replacement in the Service and Repairs
section of Chapter 6 -- Chassis and Controls). Make sure
that clutch cable is properly adjusted.
Page 4 -- 32
Greensmaster Flex 1800/2100
Removing Seized Reel Clutch Shaft From Transmission
If reel clutch shaft assembly cannot be easily removed
from transmission housing due to bearing seizure, the
following procedure can be followed to remove the reel
clutch shaft assembly.
1
1. Make sure that transmission drive belt and reel
clutch lever are removed from housing (see Transmission Drive Belt and Transmission Reel Drive System in
this section).
2. Carefully drill two (2) No. 7 (0.201” diameter) holes
in the transmission housing using the dimples in the
housing as centers for the holes (Fig. 40). Holes should
be drilled completely through the housing allowing external access to the ball bearing on the reel shaft.
3
2
Figure 39
1. Reel clutch shaft
2. Ball bearing
3. Housing bearing bore
IMPORTANT: Ball bearing will be damaged during
this procedure. Remove ball bearing from reel
clutch shaft and discard bearing after shaft has
been removed from housing (see Transmission
Reel Drive System in this section for bearing removal information).
Traction and Reel
Drive System
3. Use a 3/16” punch through the drilled holes to carefully drive the bearing and reel clutch shaft from the
transmission housing.
2
4. Clean and inspect bearing bore in housing. If damage is severe in housing, replace transmission housing.
2
5. Use a 1/4”--20 UNC tap to install threads in the two
(2) holes drilled in the transmission housing.
6. Install two (2) 1/4”--20 cap screws with flat washers
into tapped holes in the transmission housing. Cap
screws no longer than 3/8” in length should be used. After screw installation, make sure that the ends of the
screws DO NOT extend into the ball bearing bore in the
housing.
1
Figure 40
1. Transmission housing
2. Housing dimple
7. Service the reel clutch shaft assembly as needed
(see Transmission Reel Drive System in this section).
Make sure that new ball bearing is installed on reel
clutch shaft.
8. Install reel clutch shaft assembly into transmission
housing and assemble transmission (see Transmission
Reel Drive System in this section).
Greensmaster Flex 1800/2100
Page 4 -- 33
Traction and Reel Drive System
Transmission Clutch System
2
21
15 to 17 ft--lb
(21 to 23 N--m)
1
25
20
18
24
2
4
17
5
19
22
15
16
2
3
See text for
tightening
procedure
17
14
23
6
9
10
12
7
RIGHT
8
FRONT
See text for
tightening
procedure
15
11
13
Figure 41
1.
2.
3.
4.
5.
6.
7.
8.
9.
Clutch housing
Flange head screw (5 used)
Grommet
Hardened washer
Clutch assembly
Clutch shaft
Ball bearing
Drive pulley
Ball bearing
10.
11.
12.
13.
14.
15.
16.
17.
Flocked bearing shield
Wave spring
Flat washer
Retaining ring
Flange nut
Washer head screw (7 used)
Cable bracket
Flange bushing (2 used)
18.
19.
20.
21.
22.
23.
24.
25.
Bellcrank lever
Bellcrank rod assembly
Clevis pin
Cotter pin
Flange nut
Cap screw
Shoulder screw
Traction clutch cable
Transmission removal from the machine is not necessary to service the transmission clutch system. Transmission clutch components can be accessed by
removing the engine from the frame, removing the
transmission cover and then removing the drive belt.
3. Remove flange nut (item 14) and cap screw (item 23)
that secure bellcrank rod assembly (item 19) to clutch lever. Separate rod from clutch lever.
Disassembly (Fig. 41)
5. Remove four (4) washer head screws (item 15) that
secure clutch housing to transmission housing.
1. Park machine on a level surface. Make sure engine
is OFF.
2. Remove transmission drive belt (see Transmission
Drive Belt in this section).
Traction and Reel Drive System
4. Support clutch housing to prevent it from falling.
6. Remove entire clutch assembly (including items 1, 5,
6 and 8) from transmission housing.
Page 4 -- 34
Greensmaster Flex 1800/2100
7. Remove three (3) flange head screws (item 2) that
secure clutch housing to clutch assembly. Remove
clutch housing from clutch.
5. Position clutch housing to clutch and secure with
three (3) flange head screws (item 2). Make sure that
grommet (item 3) is secure on housing.
8. Remove flange head screw (item 2) and washer
(item 4) that secure clutch to clutch shaft.
6. Install clutch assembly into transmission housing.
Secure clutch housing to transmission housing with four
(4) washer head screws (item 15). Tighten screws as follows:
10.If necessary, remove drive pulley (item 8) from clutch
shaft:
A. Remove retaining ring (item 13), flat washer (item
12), wave spring (item 11) and flocked bearing shield
(item 10) from clutch shaft. Note orientation of
flocked shield for assembly purposes.
B. Use bearing puller to remove outer ball bearing
(item 9) from clutch shaft. Discard bearing.
C. Slide drive pulley (item 8) from clutch shaft.
D. If necessary, remove inner ball bearing (item 7)
from clutch shaft. Discard bearing.
Assembly (Fig. 41)
1. If bellcrank rod (item 19) was disassembled, thread
rod into clevis until the end of the rod is flush with the inside of the clevis. Then, install balljoint so the centers
are from 8.150” to 8.210” (207.0 to 208.5 mm) as shown
in Figure 43. Also, make sure that sides of clevis and
balljoint are parallel to prevent binding during operation.
A. First, torque all four (4) screws from 15 to 40 in-lb (1.7 to 4.5 N--m).
B. Then, torque all screws from 85 to 95 in--lb (9.6
to 10.7 N--m).
7. Secure bellcrank rod (item 19) to clutch lever with
cap screw (item 23) and flange nut (item 14).
8. Install transmission drive belt and all machine components removed for clutch system disassembly (see
Transmission Drive Belt in this section).
9. Verify that traction clutch cable is properly adjusted
(see Traction Clutch Cable Replacement in the Service
and Repairs section of Chapter 6 -- Chassis and Controls).
4
1
2. If drive pulley (item 8) was removed from clutch shaft,
install components on shaft:
A. If inner ball bearing (item 7) was removed from
clutch shaft, press new bearing onto shaft.
3
2
B. Slide drive pulley (item 8) onto bearing on clutch
shaft.
C. Press new outer ball bearing (item 9) onto clutch
shaft.
D. Install flocked bearing shield (item 10), wave
spring (item 11) and flat washer (item 12) onto clutch
shaft. Secure with retaining ring (item 13)
Figure 42
1. Clutch housing
2. Clutch lever
8.150” to 8.210”
(207.0 to 208.5 mm)
3. Align clutch to clutch shaft and slide clutch onto
clutch shaft. Secure clutch to shaft with flange head
screw (item 2) and washer (item 4).
4. Secure drive pulley to clutch with three (3) washer
head screws. First, torque all three (3) screws from 15
to 40 in--lb (1.7 to 4.5 N--m). Then, torque all screws
from 95 to 105 in--lb (10.7 to 11.8 N--m).
1
2
3
2
4
Figure 43
1. Clevis
2. Jam nut (2 used)
Greensmaster Flex 1800/2100
3. Bellcrank rod assembly
4. Bellcrank lever
Page 4 -- 35
3. Bellcrank rod
4. Balljoint
Traction and Reel Drive System
Traction and Reel
Drive System
9. Remove three (3) washer head screws that secure
drive pulley to clutch. Slide clutch from clutch shaft.
Clutch Service
1
18
4
16
14
13
12
11
17
15
6
7
1
5
2
1
10
9
8
6
3
4
3
Figure 44
1.
2.
3.
4.
5.
6.
Retaining ring (3 used)
Retaining ring
Shim (6 used)
Ball bearing (2 used)
Mounting plate
Shim (2 used)
7.
8.
9.
10.
11.
12.
Spring cup
Wave spring
Oil seal
Thrust friction assembly
Retaining ring
Ball bearing
NOTE: Mounting plate (item 5), thrust friction assembly
(item 10), rotating housing (item 13), hub (item 14), drive
inserts (item 16) and fixed housing (item 17) are not
available separately. If any of these clutch components
are worn or damaged, replace complete clutch assembly.
Clutch Inspection
1. Before disassembling clutch, measure rotation
angle of clutch lever (Fig. 45). If lever can be rotated
more than 22o, the clutch assembly is worn and clutch
replacement is necessary.
Traction and Reel Drive System
13.
14.
15.
16.
17.
18.
Rotating housing
Hub
Airgap cover
Fixed drive insert (6 used)
Fixed housing
Retaining ring
Clutch Disassembly (Fig. 44)
NOTE: Ball bearings (items 4 and 12) are a pressed fit
on both races. A press is required to disassemble clutch.
1. Remove both retaining rings (item 1) from ends of
hub (item 14).
2. Press mounting plate (item 5) assembly from hub.
Remove retaining ring and then remove shims (item 3)
and ball bearing from mounting plate. Note location of
shims for assembly purposes. Discard removed bearing.
Page 4 -- 36
Greensmaster Flex 1800/2100
3. Remove retaining ring (item 1), two (2) shims (item
6), spring cup (item 7) and wave spring (item 8) from
hub.
4. Slide thrust friction assembly (item 10) (with rotating
housing (item 13) attached) from hub. Remove airgap
cover (item 15).
5. Press rotating housing assembly from thrust friction
assembly. Remove retaining ring and ball bearing from
rotating housing. Discard removed bearing.
6. Remove oil seal (item 9) from thrust friction assembly. Note orientation of oil seal for assembly purposes.
Discard removed oil seal.
9. After clutch assembly, measure clearance between
thrust friction assembly and mounting plate (Fig. 46).
Clearance should be from 0.025” to 0.045” (0.7 to 1.1
mm). If necessary, remove mounting plate (item 5 in Fig.
46) assembly and change shim locations (item 6 in Fig.
46) to adjust clearance. Moving shims from outside the
bearing to inside the bearing decreases clearance.
Moving shims from inside the bearing to outside the
bearing increases clearance.
ENGAGE
o
10 New Clutch Assembly
o
22 Worn Clutch Assembly
7. Press fixed housing (item 17) assembly from hub.
Remove retaining ring and then remove ball bearing
from housing. Discard removed bearing.
Traction and Reel
Drive System
8. Inspect clutch components for wear or damage. If
mounting plate (item 5), thrust friction assembly (item
10), rotating housing (item 13), hub (item 14), drive inserts (item 16) or fixed housing (item 17) is worn or damaged, replace clutch assembly.
Clutch Assembly (Fig. 44)
1. Press new ball bearing into fixed housing (item 17)
and secure with retaining ring. Then, press fixed housing (item 17) assembly onto hub and secure with retaining ring (item 1).
Figure 45
2. Install new oil seal (item 9) into thrust friction assembly.
2
0.025” to 0.045”
(0.7 to 1.1 mm)
3
4
3. Press new ball bearing into rotating housing (item
13) and secure with retaining ring. Then press rotating
housing assembly onto thrust friction assembly (item
10).
4. Apply coating of high temperature Mobil XHP--222
grease (or equivalent) to spline area of hub (item 14).
5
1
5. Install airgap cover (item 15) and then thrust friction
assembly (item 10) (with rotating housing (item 13) attached) onto hub. Take care to not damage oil seal during assembly.
6. Slide shim (item 6), wave spring (item 8), spring cup
(item 7) and second shim (item 6) onto hub. Secure assembly with retaining ring (item 1).
7. Install shims (item 3) and new ball bearing into
mounting plate (item 5). Position shims in same location
as noted during disassembly. Secure assembly with retaining ring.
8. Press mounting plate (item 5) assembly onto hub
and secure with retaining ring (item 1).
Greensmaster Flex 1800/2100
6
Figure 46
1. Hub
2. Fixed housing
3. Rotating housing
Page 4 -- 37
4. Thrust friction assy
5. Mounting plate
6. Shim locations
Traction and Reel Drive System
Transmission Drum Drive System
Antiseize
Lubricant
4
3
See text for
tightening
procedure
8
7
1
3
9
10
2
6
11
5
5
RIGHT
FRONT
12
12
13
Figure 47
1.
2.
3.
4.
5.
Transmission housing
Extension housing
Ball bearing (2 used)
Driven pulley (traction drum drive)
Hardened washer (2 used)
6.
7.
8.
9.
Driven pulley
Spacer
Wave washer
Woodruff key
Transmission removal from the machine is not necessary to service the transmission drum drive system
shown in Figure 47. Transmission drum drive components can be accessed by removing the engine from the
frame, removing the transmission cover and then removing the drive belt.
Disassembly (Fig. 47)
1. Park machine on a level surface. Make sure engine
is OFF.
2. Remove transmission drive belt (see Transmission
Drive Belt in this section).
Traction and Reel Drive System
10.
11.
12.
13.
Washer head screw (4 used)
Flange nut
Flange head screw (2 used)
Cap screw
3. Remove flange head screw (item 12) and hardened
washer (item 5) that secure driven pulley (item 6) to
shaft. Slide pulley from shaft. Locate and retrieve woodruff key (item 9).
4. Remove drum drive belt from machine (see Drum
Drive Belt in this section).
5. Slide traction drum drive driven pulley (item 4) from
extension housing.
6. If necessary, remove ball bearings (item 3), spacer
(item 7) and wave washer (item 8) from extension housing.
Page 4 -- 38
Greensmaster Flex 1800/2100
7. If it is necessary to remove extension housing (item
2):
3. Slide shaft of traction drum drive driven pulley (item
4) through extension housing bearings and spacer.
A. Loosen fasteners (items 12, 11 and 13) that secure transmission housing to machine frame.
4. Apply antiseize lubricant to pulley surface of drum
drive driven pulley (item 4).
B. Remove four (4) washer head screws that secure
extension housing to transmission housing and RH
drum drive housing.
5. Install woodruff key (item 9) in shaft and slide driven
pulley (item 6) onto shaft. Secure pulley (item 6) with
hardened washer (item 5) and flange head screw (item
12).
C. Remove four (4) washer head screws that secure
extension housing to RH drum drive housing (Fig.
48).
D. Carefully shift position of transmission housing to
allow removal of the extension housing.
Assembly (Fig. 47)
6. Install drum drive belt to machine (see Drum Drive
Belt in this section).
7. Install transmission drive belt and all machine components removed for drum drive system service (see
Transmission Drive Belt in this section).
1. If extension housing was removed:
1
2
Traction and Reel
Drive System
A. Position the extension housing between transmission housing and RH drum drive housing.
B. Align extension housing with RH drum drive
housing. Install four (4) washer head screws finger
tight to hold extension housing in position.
C. Position transmission housing to the extension
housing. Install four (4) washer head screws finger
tight to hold extension housing in position.
3
4
D. Secure extension housing to transmission housing and RH drum drive housing with washer head
screws. First, torque all washer head screws from 15
to 40 in--lb (1.7 to 4.5 N--m). Then, using an alternating crossing pattern, torque all screws from 85 to 95
in--lb (9.6 to 10.7 N--m).
E. Secure transmission housing to machine frame
by tightening fasteners (items 12, 11 and 13). If fasteners were removed, make sure that washer (item
5) is below frame tube.
5
See text for
tightening
procedure
Figure 48
1. RH drum drive housing
2. Extension housing assy
3. Screw (4 used)
4. Idler arm assembly
5. Idler pulley assembly
2. If removed, slide wave washer (item 8), spacer (item
7) and ball bearings (item 3) into extension housing.
Greensmaster Flex 1800/2100
Page 4 -- 39
Traction and Reel Drive System
Transmission
12
13
11
9
10
See text for
tightening
procedure
7
1
8
2
3
4
FRONT
5
7
6
RIGHT
Figure 49
1.
2.
3.
4.
5.
Transmission assembly
Flange head screw
Drum drive belt
Extension spring
Brake band
6.
7.
8.
9.
Drum drive cover
Washer head screw (11 used)
Retaining ring
Hardened washer
Transmission removal from the machine is not necessary in order to service internal transmission components. Transmission components can be accessed by
removing the engine from the frame, removing the
transmission cover and then removing the drive belt. If
transmission removal is desired, proceed with the following steps. Once the transmission has been removed
from the machine, service procedures for internal components are described earlier in this section.
10.
11.
12.
13.
Cap screw
RH drum drive housing
Flange nut
Extension housing
2. Disconnect reel clutch cable from transmission (see
Reel Clutch Cable Replacement in the Service and Repairs section of Chapter 6 -- Chassis and Controls).
3. Disconnect traction clutch cable from transmission
(see Traction Clutch Cable Replacement in the Service
and Repairs section of Chapter 6 -- Chassis and Controls).
Transmission Removal
4. Slide the telescoping coupler off the cutting unit hex
shaft (Fig. 50).
1. Park machine on a level surface. Make sure engine
is OFF.
5. Remove RH drum drive cover and belt from machine
(see Drum Drive Belt in this section).
Traction and Reel Drive System
Page 4 -- 40
Greensmaster Flex 1800/2100
7. Remove four (4) washer head screws (item 7) that
secure extension housing (item 13) to RH drum housing.
8. Support transmission to prevent it from falling.
9. Remove fasteners that secure transmission to machine frame.
A. Flange head screw (item 2) that secures front of
transmission to frame.
B. Cap screw (item 10), hardened washer (item 9)
and flange nut (item 12) that secure rear of transmission to frame.
10.Carefully move transmission assembly toward left
side of machine until extension housing is clear of RH
drum housing. Lift transmission from machine.
11. To disassemble transmission, refer to Transmission
Drive Belt, Transmission Idler System, Transmission
Reel Drive System, Transmission Clutch System and
Transmission Drum Drive System in this section.
4. Once all fasteners have been installed, fully tighten
fasteners in the following order:
A. Four (4) washer head screws (item 7). First,
torque all screws from 15 to 40 in--lb (1.7 to 4.5
N--m). Then, using an alternating crossing pattern,
torque screws from 85 to 95 in--lb (9.6 to 10.7 N--m).
B. Cap screw (item 10) and flange nut (item 12) that
secure rear of transmission to frame.
C. Flange head screw (item 2) that secures front of
transmission to frame.
5. Install engine to machine (see Engine Installation in
the Service and Repairs section of Chapter 3 -- Engine).
6. Install drum drive belt and RH drum drive cover to
machine (see Drum Drive Belt in this section).
7. Slide the telescoping coupler onto the cutting unit
hex shaft (Fig. 50).
8. Connect traction clutch and reel clutch cables to
transmission (see Traction Clutch Cable Replacement
and Reel Clutch Cable Replacement in the Service and
Repairs section of Chapter 6 -- Chassis and Controls).
Transmission Installation
1. Make sure that all transmission components are correctly installed before transmission is installed to machine frame.
2. Carefully install transmission assembly toward right
side of machine so that extension housing is inserted
into RH drum housing.
3. Align transmission mounting holes with frame and
RH drum housing. Install and finger tighten fasteners to
secure transmission to machine.
A. Four (4) washer head screws (item 7) that secure
extension housing (item 13) to RH drum housing.
1
2
Figure 50
1. Telescoping coupler
2. Cutting unit hex shaft
B. Cap screw (item 10), hardened washer (item 9)
and flange nut (item 12) that secure rear of transmission to frame. Make sure that washer (item 9) is below frame tube.
C. Flange head screw (item 2) that secures front of
transmission to frame.
Greensmaster Flex 1800/2100
Page 4 -- 41
Traction and Reel Drive System
Traction and Reel
Drive System
6. Remove engine from machine (see Engine Removal
in the Service and Repairs section of Chapter 3 -- Engine).
This page is intentionally blank.
Traction and Reel Drive System
Page 4 -- 42
Greensmaster Flex 1800/2100
Chapter 5
Electrical System
Table of Contents
Electrical
System
GENERAL INFORMATION . . . . . . . . . . . . . . . . . . . . . 3
Operator’s Manual . . . . . . . . . . . . . . . . . . . . . . . . . . 3
WIRING SCHEMATIC . . . . . . . . . . . . . . . . . . . . . . . . . 4
WIRE HARNESS DRAWINGS . . . . . . . . . . . . . . . . . . 5
SPECIAL TOOLS . . . . . . . . . . . . . . . . . . . . . . . . . . . . . 6
TROUBLESHOOTING . . . . . . . . . . . . . . . . . . . . . . . . . 8
Starting Problems . . . . . . . . . . . . . . . . . . . . . . . . . . . 8
COMPONENT TESTING . . . . . . . . . . . . . . . . . . . . . . . 9
Ignition System Operation . . . . . . . . . . . . . . . . . . . . 9
On/Off Switch . . . . . . . . . . . . . . . . . . . . . . . . . . . . . . 10
Parking Brake Latch Switch . . . . . . . . . . . . . . . . . . 11
Traction Switch . . . . . . . . . . . . . . . . . . . . . . . . . . . . 12
Interlock Module . . . . . . . . . . . . . . . . . . . . . . . . . . . 13
Lighting Coil . . . . . . . . . . . . . . . . . . . . . . . . . . . . . . . 13
Greensmaster Flex 1800/2100
Page 5 -- 1
Electrical System
This page is intentionally blank.
Electrical System
Page 5 -- 2
Greensmaster Flex 1800/2100
General Information
Operator’s Manual
Electrical
System
The Traction Unit Operator’s Manual provide information regarding the operation, general maintenance and
maintenance intervals for your Greensmaster machine.
Refer to this Operator’s Manual for additional information when servicing the machine.
Greensmaster Flex 1800/2100
Page 5 -- 3
Electrical System
Wiring Schematic
HIGH TENSION LEAD
INTERLOCK MODULE
B
C
D
F
CONNECTOR
WHITE
YELLOW
VIOLET
VIOLET
YELLOW
VIOLET
ENGINE
MAGNETO
(FLYWHEEL)
E
ORANGE
A
BLACK
VIOLET
IGNITION COIL
LIGHTING COIL
PARKING
BRAKE
LATCH
SWITCH
2
1
3
5
4
6
ON/OFF
SWITCH
(IN OFF)
CONNECTOR
HOUR
METER
TRACTION
SWITCH
Subaru Engine
ON\OFF SWITCH is open in the ON position
TRACTION SWITCH is closed when traction lever is in neutral
PARKING BRAKE LATCH SWITCH is closed when parking brake latch is engaged
Electrical System
Page 5 -- 4
Greensmaster Flex 1800/2100
Wire Harness Drawings
P06
PARKING
BRAKE
LATCH
SWITCH
P05
ON/OFF
SWITCH
J03
HOUR
METER
P01
INTERLOCK
MODULE
J02
ENGINE
MAGNETO
J01
ENGINE
GROUND
P02
TRACTION
SWITCH
Wire Harness Drawing
Electrical
System
BLACK
VIOLET
INTERLOCK
MODULE
VIOLET
TRACTION
SWITCH
WHITE
YELLOW
ORANGE
YELLOW
ON/OFF
SWITCH
Greensmaster Flex 1800/2100
PARKING BRAKE
LATCH SWITCH
HOUR
METER
BLACK
VIOLET
BLACK
VIOLET
ENGINE
MAGNETO
ENGINE
GROUND
Page 5 -- 5
Wire Harness Diagram
Electrical System
Special Tools
Order special tools from your Toro Distributor. Some
tools may also be available from a local supplier.
Multimeter
The multimeter can test electrical components and circuits for current, resistance or voltage.
NOTE: Toro recommends the use of a DIGITAL Volt-Ohm--Amp multimeter when testing electrical circuits.
The high impedance (internal resistance) of a digital meter in the voltage mode will make sure that excess current is not allowed through the meter. This excess
current can cause damage to circuits not designed to
carry it.
Figure 1
Skin--Over Grease
Special non--conductive grease which forms a light protective skin to help waterproof electrical switches and
contacts.
Toro Part Number: TOR50547
Figure 2
Dielectric Gel
Dielectric gel should be used to prevent corrosion of
connection terminals. To ensure complete coating of terminals, liberally apply gel to both component and wire
harness connector, plug connector to component, unplug connector, reapply gel to both surfaces and reconnect harness connector to component. Connectors
should be thoroughly packed with gel for effective results.
Toro Part Number: 107--0342
Figure 3
Electrical System
Page 5 -- 6
Greensmaster Flex 1800/2100
Spark Tester
For testing electronic ignitions. Saves time because you
will know if the ignition is causing the problem on a non-starting engine. The tester determines if ignition spark
is present.
Toro Part Number: TOR4036
Electrical
System
Figure 4
Greensmaster Flex 1800/2100
Page 5 -- 7
Electrical System
Troubleshooting
The interlock switches must not be by--passed, they
must be connected for proper electrical troubleshooting
and safety.
CAUTION
Remove all jewelry, especially rings and
watches, before doing any electrical testing or
troubleshooting.
NOTE: For engine component testing information, refer to the Subaru Service Manual.
For effective troubleshooting and repairs, there must be
a good understanding of the electrical circuits and components used on this machine (see Wiring Schematic
and Wire Harness Drawing sections of this chapter).
Starting Problems
Problem
Possible Causes
Correction
Engine will not start.
ON/OFF switch is in the OFF
position.
Turn switch to ON.
Ignition spark plug wire is not
connected to spark plug.
Connect spark plug wire to spark
plug.
Traction lever is not in the
NEUTRAL position.
Place traction lever in the
NEUTRAL position.
An engine problem exists that
prevents the engine from running.
Repair engine.
ON/OFF switch is faulty.
Replace ON/OFF switch.
Electrical wires are loose or
damaged.
Check electrical connections.
Repair wiring as needed.
Traction switch is not adjusted or is
faulty.
Adjust or replace traction switch.
Interlock module is faulty.
Replace interlock module.
Parking brake latch is engaged.
Disengage parking brake latch.
Electrical wires are loose or
damaged.
Check electrical connections.
Repair wiring as needed.
Traction switch is not adjusted or is
faulty.
Adjust or replace traction switch.
An engine problem exists that
causes the engine to stop.
Repair engine.
Interlock module is faulty.
Replace interlock module.
Engine will start, but will not
continue to run.
Electrical System
Page 5 -- 8
Greensmaster Flex 1800/2100
Component Testing
For accurate resistance and/or continuity checks, electrically disconnect the component being tested from the
circuit (e.g. unplug the ON/OFF switch connector before
doing a continuity check on switch). Individual components should be electrically isolated (e.g. disconnect all
leads or remove from circuit) from the circuit when
tested.
CAUTION
When testing electrical components for
continuity with a multimeter (ohms setting),
make sure that engine is not running to prevent
current flow through the component.
NOTE: For engine component testing information, refer to the Subaru Service Manual.
WARNING
The ignition system produces a dangerously
high voltage. Do not touch the spark plug,
ignition coil or spark plug lead when the engine
is running; you can receive a severe electrical
shock.
Ignition System Operation
Testing the Ignition System
NOTE: Do not remove spark plug from the engine when
testing the ignition system. The spark plug is necessary
to maintain normal starting speeds.
NOTE: If a sheared flywheel key exists, the spark tester
may indicate an operating ignition system but ignition
timing will be incorrect.
5. If visible and audible sparks are not produced, a
problem exists either with engine ignition components
or with machine components. To identify whether the
problem exists with the engine or the machine, disconnect the wire harness connector (violet wire) from the
engine primary wire and repeat step 4 above.
1. With engine not running, remove spark plug wire
from the spark plug and connect it to the spark tester
(see Special Tools in this chapter).
2. Connect spring clip of tester to a good, unpainted
ground on the engine block.
3. Make sure ON/OFF switch is in the ON position.
Also, make sure that the traction lever is in the NEUTRAL position.
A. If visible and audible sparks are not produced
with the engine primary wire disconnected, the engine ignition system is not operating properly. Refer
to the Subaru Service Manual for engine information.
B. If visible and audible sparks are produced with
the engine primary wire disconnected, machine
components (e.g. on/off switch, parking brake latch
switch, traction switch, interlock module, machine
wire harness) are damaged or faulty. Refer to machine component testing information in this section.
4. Pull the engine starter rope and observe the spark
tester. Visible and audible sparks should be produced if
the ignition system is operating properly.
Greensmaster Flex 1800/2100
Page 5 -- 9
Electrical System
Electrical
System
The engine on Greensmaster Flex 1800 and Flex 2100
machines has a magneto ignition system consisting of
an ignition coil, a spark plug and permanent flywheel
magnets. A flywheel key maintains proper ignition timing.
On/Off Switch
The on/off switch is located on the console on the handle. This rocker switch allows the engine to be turned on
and off.
1
2
Testing
1. Make sure the engine is OFF and the traction lever
is in the NEUTRAL position.
3
2. Remove console cover from handle to allow access
to on/off switch (Fig. 5).
3. Disconnect wire harness electrical connector from
the on/off switch.
4
4. With the use of a multimeter (ohms setting), the
switch functions may be tested to determine whether
continuity exists between the various terminals for each
switch position. The switch terminals are marked as
shown in Figure 6. The circuitry of the on/off switch is
shown in the chart below. Verify continuity between
switch terminals.
SWITCH
POSITION
NORMAL
CIRCUITS
5
OTHER
CIRCUITS
OFF
2+1
5+4
ON
2+3
5+6
Figure 5
1. On/Off switch
2. Switch panel
3. Lower handle
4. Console cover
5. Screw (4 used)
5. Replace switch if necessary.
6. When switch testing is complete, connect wire harness electrical connector to the on/off switch.
7. Install console cover to handle.
BACK OF SWITCH
Figure 6
NOTE: On/Off switch terminals 3, 4, 5 and 6 are not
used on Greensmaster Flex 1800 and Flex 2100 machines.
Electrical System
Page 5 -- 10
Greensmaster Flex 1800/2100
Parking Brake Latch Switch
Switch Adjustment
1. Make sure the engine is OFF and the traction lever
is in the NEUTRAL position.
2. Remove console cover from handle to allow access
to parking brake latch switch (Fig. 8).
4. Adjust brake latch switch as necessary (see Switch
Adjustment above).
5. Connect switch to machine wire harness. Secure
console cover to handle.
1
3. Engage the parking brake lever and engage the
parking brake latch.
3
4. With the parking brake latch applied, there should be
from 0.030” to 0.090” (0.8 to 2.3 mm) clearance between
the parking brake latch and the parking brake latch
switch (Fig. 7).
2
5. If clearance is incorrect, loosen brake latch switch
mounting fasteners, adjust clearance and tighten fasteners. Recheck clearance between lever and switch after tightening fasteners. The parking brake latch must
not contact the switch.
Switch Testing
Figure 7
1. Service brake lever
2. Park brake latch switch
3. Parking brake latch
2. Check the continuity of the brake latch switch by connecting a multimeter (ohms setting) across the connector terminals.
2
Electrical
System
1. Make sure the engine is OFF and the traction lever
is in the NEUTRAL position. Disconnect parking brake
latch switch connector from the machine wire harness.
1
3. With the parking brake latch released, there should
be no continuity (infinite ohms) across the switch terminals.
4
3
4. Verify that the switch closes (zero ohms) as the service brake lever and parking brake latch are engaged.
5. Replace switch if necessary.
5
Switch Removal/Installation
6
1. Disconnect parking brake latch switch from the machine wire harness.
2. Remove screws and lock nuts that mount switch to
switch panel on handle (Fig. 8). Remove switch from
machine.
NOTE: For proper parking brake latch switch operation, the screws and lock nuts used to secure the brake
latch switch are stainless steel. If these fasteners are replaced, make sure to use correct fasteners.
3. Position switch to switch panel and secure with
screws and lock nuts (Fig. 8).
Greensmaster Flex 1800/2100
7
Figure 8
1.
2.
3.
4.
Page 5 -- 11
Park brake latch switch
Switch panel
Lower handle
Screw (2 used)
5. Lock nut (2 used)
6. Console cover
7. Screw (4 used)
Electrical System
Traction Switch
Switch Adjustment
1. Make sure the engine is OFF and the traction lever
is in the NEUTRAL position.
2. Remove console cover from handle to allow access
to traction switch (Fig. 10).
4. Adjust traction switch as necessary (see Switch Adjustment above). Make sure that switch fasteners are
securely tightened after adjustment.
5. Connect switch to machine wire harness. Secure
console cover to handle.
3. Move the traction lever forward to engage the traction drive.
1
4. With the traction drive engaged, there should be
from 0.030” to 0.090” (0.8 to 2.3 mm) clearance between
the head of the cap screw in the traction lever and the
traction switch (Fig. 9).
5. If clearance is incorrect, loosen traction switch
mounting fasteners, adjust clearance and tighten fasteners. Recheck clearance between cap screw head
and switch after tightening fasteners. The cap screw in
the traction lever must not contact the switch.
3
2
Switch Testing
1. Make sure the engine is OFF and the traction lever
is in the NEUTRAL position. Disconnect traction switch
connector from the machine wire harness.
2. Check the continuity of the traction switch by connecting a multimeter (ohms setting) across the connector terminals.
Figure 9
1. Traction lever
2. Traction switch
3. Cap screw head
3. With the traction lever in the NEUTRAL position,
there should be continuity (zero ohms) across the switch
terminals.
2
4. Verify that the switch opens (infinite ohms) as the
traction lever is engaged.
8
3
5. Replace switch if necessary.
Switch Removal/Installation
5
1. Disconnect traction switch from the machine wire
harness.
6
1
4
2. Remove screws and lock nuts that mount switch to
switch mount bracket on handle (Fig. 10). Remove
switch from machine.
RIGHT
FRONT
NOTE: For proper traction switch operation, the screws
and lock nuts used to secure the interlock switch are
stainless steel. If these fasteners are replaced, make
sure to use correct fasteners.
3. Position traction switch to switch bracket and secure
with screws and lock nuts (Fig. 10).
Electrical System
7
Figure 10
1.
2.
3.
4.
Page 5 -- 12
Traction switch
Traction lever assembly
Lower handle
Screw (2 used)
5.
6.
7.
8.
Lock nut (2 used)
Console cover
Screw (4 used)
Switch mount bracket
Greensmaster Flex 1800/2100
Interlock Module
The interlock module prevents the engine from starting
unless the traction lever is disengaged. Once the engine
is running, the engine will continue to run with the traction lever engaged or disengaged as long as the parking
brake latch is not applied. The module also allows the
engine to run if the parking brake latch is applied and
traction is not engaged.
The interlock module controls grounding of the engine
ignition system. When the engine starter rope is pulled,
the engine magneto will begin to create current. The interlock module uses that current through the traction
and parking brake latch switches to determine the state
of the switches. If switch state is correct, the interlock
module opens the magneto to ground circuit so the engine can start and run. Once running, the interlock module allows the engine to continue to operate unless the
parking brake latch is applied and traction is engaged.
3
2
1
If the engine will not start, perform the following tests to
determine if the interlock module is at fault.
1. Check operation of the engine ignition system (see
Ignition System Operation in this section).
Figure 11
1. Interlock module
2. Traction switch
3. Park brake latch switch
Electrical
System
2. Check the operation of both the parking brake latch
and traction switches (see Parking Brake Latch Switch
and Traction Switch in this section). Adjust or replace
switch if necessary.
3. Check wire harness for damage (see Wiring Schematic and Wire Harness Drawings in this chapter). Repair or replace any damaged wire harness components.
4. If the engine ignition system, parking brake latch
switch, traction switch and wire harness all prove to be
operating correctly and engine does not start, replace
interlock module.
Lighting Coil
The engine on Greensmaster Flex 1800 and Flex 2100
machines is equipped with a lighting coil to provide electrical current for an optional LED light kit. The coil is located under the engine flywheel and uses permanent
magnets on the flywheel to operate. The lighting coil has
a 12VAC output that is rated at 15 watts. See the Subaru
Service Manual for additional lighting coil information.
Greensmaster Flex 1800/2100
NOTE: If lights are desired on the Flex 1800 or 2100,
use the recommended Toro LED light kit that is available
from your Toro Distributor. Incandescent or halogen
lights will not operate with the engine lighting coil that is
on these machines.
NOTE: If lighting coil output is to be measured with a
multimeter, a load has to be applied to the circuit.
Page 5 -- 13
Electrical System
This page is intentionally blank.
Electrical System
Page 5 -- 14
Greensmaster Flex 1800/2100
Chapter 6
Chassis and Controls
Table of Contents
Chassis and
Controls
SPECIFICATIONS . . . . . . . . . . . . . . . . . . . . . . . . . . . . . 2
GENERAL INFORMATION . . . . . . . . . . . . . . . . . . . . . 3
Operator’s Manual . . . . . . . . . . . . . . . . . . . . . . . . . . 3
SERVICE AND REPAIRS . . . . . . . . . . . . . . . . . . . . . . 4
Handle Assembly . . . . . . . . . . . . . . . . . . . . . . . . . . . 4
Throttle Cable Replacement . . . . . . . . . . . . . . . . . . 6
Brake Cable Replacement . . . . . . . . . . . . . . . . . . . . 7
Traction Clutch Cable Replacement . . . . . . . . . . . . 8
Reel Clutch Cable Replacement . . . . . . . . . . . . . . 10
Traction and Reel Drive Engagement Lever
Assembly . . . . . . . . . . . . . . . . . . . . . . . . . . . . . . . . 12
Kickstand . . . . . . . . . . . . . . . . . . . . . . . . . . . . . . . . . 16
Transport Wheels (Optional) . . . . . . . . . . . . . . . . . 18
Greensmaster Flex 1800/2100
Page 6 -- 1
Chassis and Controls
Specifications
Item
Description
Transport Wheel (Optional) Tire Pressure
Chassis and Controls
12 to 15 PSI (83 to 103 kPa)
Page 6 -- 2
Greensmaster Flex 1800/2100
General Information
Operator’s Manual
Chassis and
Controls
The Operator’s Manual provides information regarding
the operation, adjustment procedures and general
maintenance for your Greensmaster machine. Refer to
the Operator’s Manual for additional information when
servicing the machine.
Greensmaster Flex 1800/2100
Page 6 -- 3
Chassis and Controls
Service and Repairs
Handle Assembly
8
1
7
2
6
3
9
10
5
4
RIGHT
FRONT
Figure 1
1.
2.
3.
4.
Brake lever
Brake cable
Throttle cable
Handle
5. Traction clutch cable
6. Reel clutch cable
7. Traction and reel drive lever
Handle Removal (Fig. 1)
1. Park machine on a level surface. Make sure engine
is OFF. Remove spark plug wire from the engine spark
plug.
2. Remove console cover from handle assembly.
3. Disconnect reel clutch, traction clutch and brake
cables from transmission (see Cable Replacement in
this section).
4. Disconnect throttle cable from engine (see Throttle
Cable Replacement in this section).
Chassis and Controls
8. Throttle assembly
9. Console cover
10. Washer head screw (4 used)
5. Disconnect wire harness connections from electrical
components on handle. Position wire harness away
from handle.
6. Note height adjustment of handle for assembly purposes.
7. Support handle assembly to prevent it from moving.
NOTE: The offset handle clamps on Flex 2100 machines are mounted on the outside of the side plates
(Fig. 2). On Flex 1800 machines, the offset handle
clamps are mounted on the inside of the side plates (Fig.
3).
Page 6 -- 4
Greensmaster Flex 1800/2100
8. Remove handle clamps from handle assembly (Fig.
2 or 3):
Flex 2100
1
A. Remove carriage screws and flange nuts that secure handle clamps to offset handle clamps.
B. Remove flange nuts that secure shoulder bolts at
bottom of handle clamps.
12
C. Remove inner handle clamps. Leave shoulder
bolts and outer handle clamps in place on handle.
2
9
11
9. Remove the handle assembly from the machine.
3
13
8
4
6
6
10.If rubber bumpers (item 7 in Fig. 2 or 3) need to be
replaced, cut bumpers to remove from handle clamps.
Apply soapy water to inside of new bumpers to ease
installation onto clamps.
RIGHT
6
Handle Installation (Fig. 1)
7
1. Position handle assembly to outer handle clamps on
machine.
NOTE: The handle is traditionally operated with the
handle adjusted to the maximum height.
FRONT
10
Figure 2
1.
2.
3.
4.
5.
6.
7.
3. Attach reel clutch, traction clutch and brake cables to
transmission (see Cable Replacement in this section).
Check cable operation and adjust if necessary.
Handle
Offset handle clamp
Carriage screw
Carriage screw
Shoulder bolt
Bushing
Rubber bumper
3
Flex 1800
4. Attach throttle cable to engine (see Throttle Cable
Replacement in this section). Check cable operation
and adjust if necessary.
8.
9.
10.
11.
12.
13.
Handle retainer
Hair pin
Side plate (LH shown)
Flange nut
Flange nut
Handle clamp
1
4
12
2
5. Attach wire harness connections to electrical components on handle.
13
5
6. Secure console cover to handle assembly.
6
7. Attach spark plug wire to spark plug.
9
6
8
12
11
10
RIGHT
6
7
FRONT
Figure 3
1.
2.
3.
4.
5.
6.
7.
Greensmaster Flex 1800/2100
Page 6 -- 5
Handle
Offset handle clamp
Carriage screw
Carriage screw
Shoulder bolt
Bushing
Rubber bumper
8.
9.
10.
11.
12.
13.
Handle retainer
Hair pin
Side plate (LH shown)
Flange nut
Flange nut
Handle clamp
Chassis and Controls
Chassis and
Controls
2. Fit inner handle clamps to the handle assembly and
secure with removed fasteners (Fig. 2 or 3). Adjust handle height before fully tightening the fasteners.
5
Throttle Cable Replacement
Removal
1. Park machine on a level surface. Make sure the engine is OFF and the traction lever is in NEUTRAL.
2. Remove throttle cable from the engine governor linkage (Fig. 4):
4. Check throttle cable adjustment (see Throttle Cable
Adjustment in the Adjustments section of Chapter 3 -Engine).
5. Install console cover to handle assembly.
3
A. Loosen screw that secures cable clamp to engine
bracket. Remove cable from clamp.
B. Loosen screw that secures throttle cable to governor lever. Slide cable from governor lever.
2
C. Separate throttle cable from engine.
4
3. Remove console cover from handle assembly to allow access to upper end of throttle cable.
4. Remove throttle cable from the throttle control assembly (Fig. 5):
A. Remove retaining ring and flat washer that secure throttle cable end to pin on throttle control. Slide
cable end from throttle control.
1
Figure 4
1. Throttle cable
2. Throttle cable clamp
B. Remove the cable housing from the throttle
mount.
5. Remove throttle cable from the machine.
3. Governor lever
4. High speed screw
5
1
6
Installation
2
3
1. Connect throttle cable to throttle control assembly
(Fig. 5).
7
A. Secure throttle cable end to pin on throttle control
with flat washer and retaining ring.
4
RIGHT
FRONT
B. Secure cable housing to throttle mount.
2. Route throttle cable to the engine. Make sure that
cable is routed on right side of throttle mount cable guide
(item 7 in Fig. 5).
3. Install cable to the engine governor linkage as follows (Fig. 4):
A. Slide throttle cable end into governor lever.
B. Place throttle cable under cable clamp.
C. Make sure throttle control is in the FAST position
and the governor lever is against the high speed
screw on governor linkage.
D. Tighten screw on cable clamp to secure the
throttle cable.
Chassis and Controls
Figure 5
1.
2.
3.
4.
Page 6 -- 6
Pin
Flat washer
Retaining ring
Throttle cable
5. Throttle control
6. Throttle mount
7. Mount cable guide
Greensmaster Flex 1800/2100
Brake Cable Replacement
Removal
1. Park machine on a level surface. Make sure the engine is OFF, the traction lever is in NEUTRAL and parking brake is released.
2. Remove brake cable from the brake lever shaft on
the drum drive housing (Fig. 6):
4. Adjust cable jam nuts at brake cable bracket on handle assembly so that it requires 35 pounds (156 N) applied to the brake lever to release the parking brake
latch. After final cable adjustment, make sure that brake
does not drag.
5. Install console cover to handle assembly.
A. Loosen front cable jam nut that secures cable to
casting slot on drum drive housing. Separate cable
from slot.
3
2
B. Remove retaining ring that secures cable eyelet
to the brake shaft on drum drive housing.
4
1
C. Remove brake cable eyelet from brake lever
shaft.
3. Remove console cover from handle assembly to allow access to upper end of brake cable.
4. Remove flange nut that secures brake cable eyelet
to brake lever on machine handle (Fig. 7).
Figure 6
1. Brake cable
2. Cable eyelet
5. Loosen lower brake cable jam nut and lift cable free
from brake cable bracket on lower handle assembly. Remove cable from the bracket.
3. Cable jam nut location
4. Retaining ring
10.5 to 12.5 in--lb
(1.2 to 1.4 N--m)
6. Remove brake cable from the machine.
Installation
13
2. Attach brake cable to brake cable bracket on handle
assembly with a washer and jam nut on each side of the
bracket. Adjust jam nuts so that equal amount of cable
threads are visible above and below jam nuts. Leave
jam nuts snug until final cable adjustment.
9
11
3. Route brake cable to the drum drive housing and secure brake cable to the brake lever shaft on the drum
drive housing (Fig. 6):
12
RIGHT
A. Install cable eyelet to the brake lever and secure
with retaining ring.
B. Attach brake cable to the casting slot on drum
drive housing with a washer and jam nut on each side
of the slot. Adjust jam nuts so that equal amount of
cable threads are visible above and below jam nuts.
Greensmaster Flex 1800/2100
Chassis and
Controls
1. Secure brake cable eyelet to the brake lever on the
machine handle with flange nut (Fig. 7).
FRONT
8
10
5
6 7 3
4
3
1
2
Figure 7
1.
2.
3.
4.
5.
6.
7.
Page 6 -- 7
Brake lever
Brake cable
Bushing (2 used)
Flange nut
Spring
Parking brake latch
Lock nut
8.
9.
10.
11.
12.
13.
Brake lever keeper
Screw (4 used)
Spacer
Washer
Screw
Handle assembly
Chassis and Controls
Traction Clutch Cable Replacement
Note orientation
of spring hook
3
11
8
5
4
10
6
9
2
1
RIGHT
FRONT
7
Figure 8
1.
2.
3.
4.
Brake cable
Brake lever
Lever assembly
Shift mount
5.
6.
7.
8.
Reel clutch cable
Console cover
Washer head screw (4 used)
Lower handle
Removal
1. Park machine on a level surface. Make sure the engine is OFF and the traction lever is in NEUTRAL.
2. Remove traction clutch cable from the transmission
(Fig. 9):
3. Remove console cover from handle assembly to allow access to upper end of traction clutch cable.
4. Remove traction clutch cable from the traction lever
assembly (Fig. 10):
A. Loosen lower cable jam nut that secures traction
clutch cable to shift mount bracket on handle. Slide
cable from bracket.
A. Loosen front cable jam nut that secures cable to
traction cable bracket on transmission. Lift cable
from bracket.
B. Remove flange nut that secures cable eyelet to
transmission bellcrank lever and slide cable eyelet
from lever.
Chassis and Controls
9. Traction switch
10. Traction clutch cable
11. Shifter bracket
B. Remove cable spring from spring anchor on lever
assembly. Note orientation of cable spring hook on
lever assembly for assembly purposes.
5. Remove traction clutch cable from machine.
Page 6 -- 8
Greensmaster Flex 1800/2100
Installation
1
1. Secure traction clutch cable to the traction lever assembly (Fig. 10):
3
A. Install cable spring to spring anchor on lever assembly.
4
2
5
B. Slide the cable housing into the shift mount
bracket slot. Make sure that a jam nut, flat washer
and lock washer are on both sides of bracket. Adjust
jam nuts so that equal amount of cable threads are
visible above and below jam nuts. Leave jam nuts
snug until final cable adjustment.
2. Route traction clutch cable to the transmission and
install cable to transmission (Fig. 9):
A. Secure cable eyelet to transmission traction lever
with flange nut.
B. Position traction cable to the casting slot of transmission with a jam nut, flat washer and lock washer
on each side of the slot. Adjust and tighten jam nuts
so that equal amount of cable threads are visible
above and below jam nuts.
Figure 9
1. Traction clutch cable
2. Transmission
3. Traction cable bracket
4. Flange nut
5. Bellcrank lever
1
3. Make final traction clutch cable adjustment at traction lever assembly. Adjust cable jam nuts to remove
slack in cable without rotating the transmission bellcrank lever more than 3o (approximately 0.060” (1.5
mm) at slot).
4. Install console cover to handle assembly.
7
5
6
2
3
Figure 10
1.
2.
3.
4.
Greensmaster Flex 1800/2100
Page 6 -- 9
Shift handle
Traction clutch cable
Reel clutch cable
Traction cable spring
5. Upper cable jam nut
6. Lower cable jam nut
7. Shift mount bracket
Chassis and Controls
Chassis and
Controls
4
Reel Clutch Cable Replacement
Note orientation
of spring hook
3
11
8
5
4
10
6
9
2
1
RIGHT
FRONT
7
Figure 11
1.
2.
3.
4.
Brake cable
Brake lever
Lever assembly
Shift mount
5.
6.
7.
8.
Reel clutch cable
Console cover
Washer head screw (4 used)
Lower handle
Removal
1. Park machine on a level surface. Make sure the engine is OFF and the traction lever is in NEUTRAL.
2. Remove reel clutch cable from transmission (Fig.
12):
A. Loosen front cable jam nut and lift cable free from
casting slot of transmission.
B. Remove retaining ring that secures cable eyelet
to reel clutch lever and slide cable eyelet from lever.
C. Remove cable tie that secures reel drive cable to
transmission bracket.
Chassis and Controls
9. Traction switch
10. Traction clutch cable
11. Shifter bracket
3. Remove console cover from handle assembly to allow access to upper end of reel clutch cable.
4. Remove reel clutch cable from traction lever assembly (Fig. 13):
A. Loosen lower cable jam nut that secures reel
clutch cable to shift mount bracket on handle. Slide
cable from bracket.
B. Remove cable spring from spring anchor on lever
assembly. Note orientation of cable spring hook on
lever assembly for assembly purposes.
5. Remove reel clutch cable from machine.
Page 6 -- 10
Greensmaster Flex 1800/2100
Installation
2.780” to 2.850”
(70.6 to 72.4 mm)
1. Secure reel clutch cable to traction lever assembly
(Fig. 13):
2
1
A. Install cable spring to spring anchor on lever assembly. Orientate cable spring hook end toward front
of machine.
5
B. Slide the cable housing into the shift mount
bracket slot. Make sure that a jam nut, flat washer
and lock washer are on both sides of bracket. Adjust
jam nuts so that equal amount of cable threads are
visible above and below jam nuts. Leave jam nuts
snug until final cable adjustment.
3
2. Route reel clutch cable to transmission and install
cable (Fig. 12):
A. Secure cable eyelet to transmission reel clutch
lever with retaining ring.
6
4
Figure 12
1. Transmission
2. Reel clutch cable
3. Reel clutch lever
4. Retaining ring
5. Cable spring
6. Rubber plug
B. Position reel cable to the casting slot of transmission with a jam nut, flat washer and lock washer on
each side of the slot.
1
C. Adjust and tighten jam nuts to compress cable
spring to a length of 2.780” to 2.850” (70.6 to 72.4
mm).
4
7
E. Secure reel drive cable to transmission bracket
with cable tie.
5
6
3. Make final reel clutch cable adjustment at traction lever assembly (Fig. 13):
A. Loosen both top and bottom cable jam nuts at
shift mount bracket.
B. Pull down lightly on outer sheath of clutch cable.
C. Rotate bottom cable jam nut up on cable threads
until the bottom lock washer just contacts the shift
mount bracket.
3
2
Figure 13
1.
2.
3.
4.
Shift handle
Reel clutch cable
Traction clutch cable
Reel cable spring
5. Upper cable jam nut
6. Lower cable jam nut
7. Shift mount bracket
D. While holding the bottom jam nut in place, tighten
top cable jam nut.
4. Install console cover to handle assembly.
Greensmaster Flex 1800/2100
Page 6 -- 11
Chassis and Controls
Chassis and
Controls
D. Remove rubber plug at front of transmission to
view reel clutch. Make sure that reel clutch teeth disengage when the clutch is released. Also, verify that
clutch teeth do not bottom out when clutch is engaged.
Traction and Reel Drive Engagement Lever Assembly
Note orientation
of spring hook
14
Note orientation
of spring hook
18
12
14
7
14
5
11
14
5
23
28
4
15
9
25
24
21
19
16
28
13
1
14
27
29
14
8
14
17
14
10
2
3
26
22
14
7
14
20
6
28
Figure 14
1.
2.
3.
4.
5.
6.
7.
8.
9.
10.
Washer head screw
Detent ball
Detent spring
Shift arm link
Shoulder screw (2 used)
Shifter link
Bumper (2 used)
Spring collar
Spacer
Spring lever
Chassis and Controls
11.
12.
13.
14.
15.
16.
17.
18.
19.
20.
Shift handle
Extension spring
Latch pin
Bushing (10 used)
Shifter latch
Transport lever
Reel shift lever
Reel cam lever
Ball bearing
Cap screw
Page 6 -- 12
21.
22.
23.
24.
25.
26.
27.
28.
29.
Screw
Flat washer
Flat washer
Shoulder screw
Lock nut (2 used)
Lock nut
Roll pin
Retaining ring (3 used)
Extension spring
Greensmaster Flex 1800/2100
Disassembly
1. Make sure the engine is OFF and the traction lever
is in the NEUTRAL position.
Note orientation
of spring hooks
2. Remove console cover from handle to allow access
to lever assembly (Fig. 15).
2
9
4
11
4
5
3
3. Disconnect reel clutch and traction clutch cables
from lever assembly (see Cable Replacement in this
section). Position ends of cables away from lever assembly.
4. Disconnect wire harness connector from traction
switch (Fig. 15).
10
8
5
5. Disconnect spring (item 11 in Figure 15) that connects operator presence control with traction lever assembly.
6. Remove four (4) flange head screws and flange nuts
that secure lever assembly and brackets to handle. Remove assembly (including lever assembly, shifter bracket, shift mount and switch mount bracket) from handle.
7. Remove two (2) flange head screws and flange nuts
that secure switch mount bracket and shift mount to
shifter bracket. Separate brackets to allow disassembly
of lever assembly.
8. Disassemble lever assembly as necessary using
Figures 14 and 15 as guides. Note orientation of end
hooks on all springs for assembly purposes.
1
RIGHT
FRONT
7
6
Figure 15
1.
2.
3.
4.
5.
6.
Traction switch
Traction lever assembly
Lower handle
Flange screw (4 used)
Flange nut (4 used)
Console cover
7.
8.
9.
10.
11.
Screw (4 used)
Switch mount bracket
Shifter bracket
Shift mount
Spring
1. Assemble lever assembly using Figures 14 and 15
as guides.
1
A. If shift arm link (item 4 in Figure 14) was removed
from transport lever, make sure that tab on shift arm
link is positioned toward solid end of latch pin (Fig.
16).
4
2
NOTE: One of the mounting holes in both the switch
mount bracket and shift mount is elongated to allow for
adjustment of clearance between transport lever (item
16 in Figure 14) and reel shift lever (item 17 in Figure
14).
3
2. Secure switch mount bracket and shift mount to shifter bracket with two (2) flange head screws and flange
nuts. Before fully tightening fasteners, position legs of
shifter bracket to allow 0.040” (1.0 mm) clearance between transport lever and reel shift lever (Fig. 17).
3. Position lever assembly (including lever assembly,
shifter bracket, shift mount and switch mount bracket) to
handle. Secure assembly in place with four (4) flange
head screws and flange nuts.
Greensmaster Flex 1800/2100
Figure 16
1. Transport lever
2. Shift arm link
Page 6 -- 13
3. Latch pin
4. Shift link tab
Chassis and Controls
Chassis and
Controls
Assembly
4. Connect spring (item 11 in Figure 15) between traction lever assembly and operator presence control.
3
5. Connect wire harness connector to traction switch
(Fig. 15).
6. Connect reel clutch and traction clutch cables to lever assembly (see Cable Replacement in this section).
Check cable operation and adjust as necessary.
7. Check adjustment of traction switch (see Traction
Switch in the Adjustments section of Chapter 5 -- Electrical System). Adjust switch if necessary.
1
2
4
5
5
8. Install console cover to handle.
Figure 17
1. Transport lever
2. Reel shaft lever
3. Clearance location
Chassis and Controls
Page 6 -- 14
4. Shifter bracket
5. Screw and nut
Greensmaster Flex 1800/2100
Chassis and
Controls
This page is intentionally blank.
Greensmaster Flex 1800/2100
Page 6 -- 15
Chassis and Controls
Kickstand
1
12
2
5
3
7
8
6
RIGHT
9
10
4
11
FRONT
Figure 18
1.
2.
3.
4.
Kickstand
Flange nut
Spacer
Cap screw
5.
6.
7.
8.
Frame
Rear frame
Service position locking pin
Compression spring
9.
10.
11.
12.
Spacer
Retaining ring
LH side plate
Torsion spring
NOTE: The offset handle clamps on Flex 2100 machines are mounted on the outside of the side plates. On
Flex 1800 machines, the offset handle clamps are
mounted on the inside of the side plates. The illustration
in Figure 18 shows the Flex 2100.
Chassis and Controls
Page 6 -- 16
Greensmaster Flex 1800/2100
Removal (Fig. 18)
1. Park machine on a level surface. Make sure the engine is OFF.
1
2. Pivot kickstand up and hold against the frame stops.
CAUTION
Be careful when removing or applying tension
from or to the torsion spring of the kickstand.
The spring is under heavy load and may cause
personal injury.
4
3. Use a nutdriver or small diameter pipe over the end
of the torsion spring. Push the torsion spring down and
in to release spring tension (Fig. 19). Slide torsion spring
from pin on rear frame.
4. Remove cap screw, spacer and flange nut that secure left side of kickstand to rear frame.
2
3
Figure 19
1. Kickstand
2. Torsion spring
3. Rear frame
4. Service locking pin
5. Remove kickstand from the machine.
6. If necessary, disassemble and remove service position locking pin assembly (items 7, 8, 9 and 10) from rear
frame.
Installation (Fig. 18)
1. Make sure machine is parked on a level surface and
the engine is OFF.
Chassis and
Controls
2. If service position locking pin assembly (items 7, 8,
9 and 10) was removed from rear frame, install removed
locking pin components.
3. Position kickstand inside the machine frame. Insert
cap screw (item 4) through the rear frame, kickstand and
spacer. Thread flange nut on cap screw and tighten to
secure kickstand.
4. Slide torsion spring onto pin on rear frame. Place end
of spring in slotted hole in bottom of rear frame.
5. Pivot kickstand up and hold against the frame stops.
Use a nutdriver or small diameter pipe over the end of
the torsion spring. Push the spring end down and out to
install spring (Fig. 19).
Greensmaster Flex 1800/2100
Page 6 -- 17
Chassis and Controls
Transport Wheels (Optional)
2
1
13
9
Loctite #242
3
12
8
4
11
10
5
7
6
Figure 20
1.
2.
3.
4.
5.
Cap screw (3 used)
Lock washer (3 used)
Shallow rim
Tire
Hub
Chassis and Controls
6.
7.
8.
9.
Wheel retaining lever
Torsion spring
Shoulder screw (2 used)
Cap screw (4 used)
Page 6 -- 18
10.
11.
12.
13.
Deep rim
Inner tube
Hub bushing
Flange nut (4 used)
Greensmaster Flex 1800/2100
Wheel Removal (Fig. 21)
1. Park machine on a level surface. Make sure the engine is OFF.
1
2. Support the machine on the kickstand.
3. Pivot wheel retaining lever away from the center of
the wheel. Slide transport wheel off the wheel hex shaft.
Wheel Disassembly (Fig. 20)
1. Make sure that tire is fully deflated before disassembly of wheel.
2
2. Remove three (3) cap screws and lock washers from
the shallow rim and hub. Remove hub from deep rim.
3. Inspect hub bushing (item 12). If worn or damaged,
replace bushing.
Figure 21
1. Wheel retaining lever
2. Wheel hex shaft
4. Remove four (4) cap screws and flange nuts from the
deep rim and shallow rim. Remove shallow rim from the
deep rim.
5. Separate tire, tube and deep rim.
6. If necessary, remove shoulder screws, torsion spring
and retaining lever from the hub.
Wheel Assembly (Fig. 20)
1. If shoulder screws were removed from hub, apply
Loctite #242 (or equivalent) to threads of shoulder
screws. Secure torsion spring and retaining lever to the
hub with shoulder screws.
1
Figure 22
1. Wheel hex shaft
Chassis and
Controls
2. Assemble tire, tube and deep rim.
3. Install shallow rim into the tire. Align and secure shallow rim to the deep rim with four (4) cap screws and
flange nuts. Tighten fasteners.
4. Install hub into deep rim. Secure hub to deep rim with
three (3) cap screws and lock washers. Tighten fasteners.
5. Inflate tire from 12 to 15 PSI (83 to 103 kPa).
Wheel Installation (Fig. 21)
1. Make sure machine is parked on a level surface and
the engine is OFF.
2. Support the machine on the kick stand.
3. Slide transport wheel completely onto the wheel hex
shaft until the wheel retaining lever is secured into the
groove on the wheel hex shaft.
Greensmaster Flex 1800/2100
Page 6 -- 19
Chassis and Controls
This page is intentionally blank.
Chassis and Controls
Page 6 -- 20
Greensmaster Flex 1800/2100
Chapter 7
Cutting Unit
Table of Contents
SPECIFICATIONS . . . . . . . . . . . . . . . . . . . . . . . . . . . . 3
GENERAL INFORMATION . . . . . . . . . . . . . . . . . . . . . 4
Operator’s Manual . . . . . . . . . . . . . . . . . . . . . . . . . . 4
Supporting Cutting Unit when Servicing . . . . . . . . 4
Separating Cutting Unit from Traction Unit . . . . . . 5
SPECIAL TOOLS . . . . . . . . . . . . . . . . . . . . . . . . . . . . . 6
FACTORS THAT CAN AFFECT QUALITY OF CUT 8
ADJUSTMENTS . . . . . . . . . . . . . . . . . . . . . . . . . . . . . 10
Leveling Rear Roller . . . . . . . . . . . . . . . . . . . . . . . . 10
SERVICE AND REPAIRS . . . . . . . . . . . . . . . . . . . . . . 11
Backlapping . . . . . . . . . . . . . . . . . . . . . . . . . . . . . . . . 11
Bedbar Assembly . . . . . . . . . . . . . . . . . . . . . . . . . . 12
Bedknife Service . . . . . . . . . . . . . . . . . . . . . . . . . . . 14
Bedbar Adjuster Service . . . . . . . . . . . . . . . . . . . . 16
Front Roller . . . . . . . . . . . . . . . . . . . . . . . . . . . . . . . 18
Rear Roller . . . . . . . . . . . . . . . . . . . . . . . . . . . . . . . . 19
Roller Service . . . . . . . . . . . . . . . . . . . . . . . . . . . . . 20
Cutting Reel Assembly Removal and
Installation . . . . . . . . . . . . . . . . . . . . . . . . . . . . . . . 22
Cutting Reel Assembly Service . . . . . . . . . . . . . . 26
Preparing Reel for Grinding . . . . . . . . . . . . . . . . . 28
Cutting Unit
NOTE: This chapter includes service information for
Flex 1800 and 2100 cutting units with serial number
above 312000000. If an older production Flex 21 cutting
unit (serial number below 312000000) has been installed on a Flex 2100 traction unit, use information from
the appropriate Flex 21 service manual when servicing
that cutting unit.
Greensmaster Flex 1800/2100
Page 7 -- 1
Cutting Unit
This page is intentionally blank.
Cutting Unit
Page 7 -- 2
Greensmaster Flex 1800/2100
Specifications
FRAME CONSTRUCTION: Precision machined die
cast aluminum cross member with two bolt--on die--cast
aluminum side plates.
HEIGHT--OF--CUT: Cutting height is adjusted on the
front roller by two vertical screws and held by two lock
nuts. Standard bench height of cut range is 0.062 to
0.500 inch (1.6 to 12.7 mm) depending on type of bedknife installed. An optional High Height of Cut Kit is available for higher HOC adjustments. Effective HOC may
vary depending on turf conditions, type of bedknife, rollers and attachments installed.
CLIP: Clip frequency is adjusted by moving the pulleys
on the cutting unit reel drive housing. 6--clip adjustments
are possible based on pulley configuration.
BEDKNIFE AND BEDBAR: Single edged EdgemaxTM
bedknife (solid tool steel construction) used with 11 and
14 blade cutting unit. A cast iron bedbar is fastened to
the cutting unit. Other optional bedknives and a less
aggressive bedbar are available.
GRASS SHIELD: Non--adjustable shield with adjustable cut--off bar to improve grass discharge from reel in
wet conditions.
COUNTERBALANCE WEIGHT: A cast iron weight
mounted on right end of cutting unit balances the cutting
unit.
APPROXIMATE WEIGHT:
Flex 1800 with11 Blade Reel
68 lb. (30.8 kg)
Flex 1800 with14 Blade Reel
71 lb. (32.2 kg)
Flex 2100 with 11 Blade Reel
71 lb. (32.2 kg)
Flex 2100 with 14 Blade Reel
74 lb. (33.5 kg)
(NOTE: weights listed do not include front roller or
groomer)
ROLLERS: The rear roller is a 2.000” (5.1 cm) diameter
aluminum full roller. The front roller is a 2.500” (6.3 cm)
diameter roller that is chosen from a variety of configurations (narrow spaced Weihle front roller is shown).
Greensmaster Flex 1800/2100
Page 7 -- 3
Cutting Unit
Cutting Unit
REEL CONSTRUCTION: 5--inch (12.7 cm) diameter,
11 or 14 carbon steel blades welded to 5 stamped steel
spiders. High strength low alloy steel blades are thru
hardened and impact resistant.
General Information
Operator’s Manual
The Cutting Unit Operator’s Manual provides information regarding the operation, general maintenance and
maintenance intervals for the cutting unit on your
Greensmaster machine. Additionally, if optional kits
have been installed on the cutting unit (e.g. grooming
reel), the installation instructions for the kit includes set-up and operation information. Refer to those publications for additional information when servicing the
cutting unit.
Supporting Cutting Unit when Servicing
Whenever the cutting unit has to be tipped to expose the
bedknife or cutting reel, support the rear of the cutting
unit to make sure the lock nuts on the back of the bedbar
adjuster screws are not resting on the work surface.
1
1
2
Figure 1
1.
Cutting Unit
Page 7 -- 4
Lock nut
2. Support
Greensmaster Flex 1800/2100
Separating Cutting Unit from Traction Unit
1. Position mower on a flat, level work surface. Make
sure engine is OFF. Remove spark plug wire from the
engine spark plug.
1
2. Lower the kickstand and push in the locking pin to
lock the kickstand in the service position (Fig. 2). Allow
the kickstand and machine to rest against the locking
pin.
3. Remove grass basket from cutting unit, if installed.
4. Slide the telescoping coupler off the cutting unit hex
shaft (Fig. 3).
5. Loosen two (2) flange head screws that secure cutting unit pitch arms to traction unit roll frame (Fig. 4). It
is not necessary to completely remove the screws.
2
Figure 2
1. Kickstand
2. Locking pin
6. Rotate pitch arms forward and rest traction unit
against the kickstand.
7. Roll cutting unit away from machine.
8. Reverse procedure to install cutting unit to traction
unit.
9. After cutting unit is installed to traction unit, attach
spark plug wire to engine spark plug.
1
2
Figure 3
1. Telescoping coupler
2. Cutting unit hex shaft
1
3
2
1
Figure 4
1. Cutting unit pitch arm
2. Traction unit roll frame
Greensmaster Flex 1800/2100
Page 7 -- 5
3. Flange head screw
Cutting Unit
Cutting Unit
3
Special Tools
Some special tools may have been supplied with your
mower or are available as TORO parts. Order special
tools from your Toro Distributor. Some tools may also be
available from a local supplier.
Gauge Bar Assembly
Toro Part Number: 13--8199
Used to verify height--of--cut.
Figure 5
Backlapping Brush Assembly
Toro Part Number: TOR299100
Used to apply lapping compound to cutting unit while
keeping the operator’s hands at a safe distance from the
rotating reel.
Components for the brush assembly are available individually as follows:
Figure 6
Brush
36--4310
Handle
29--9080
Handle cap 2410--18
Bedknife Screw Tool
Toro Part Number: TOR510880
This screwdriver--type bit is made to fit Toro bedknife attaching screws. Use this bit with a 3/8” drive torque
wrench to secure the bedknife to the bedbar.
DO NOT use an air or manual impact wrench with this
tool.
Cutting Unit
Page 7 -- 6
Figure 7
Greensmaster Flex 1800/2100
Roller Bearing Installation Tools
Washers and spacer used to install bearings and seals
into front and rear rollers (Fig. 8).
Seal installation washer:
107--8133
Seal installation spacer:
107--3505
Bearing installation washer: 104--6126
As an alternative to using washers and spacers listed
above, a special tool set is available that can be used for
roller bearing and seal installation (Fig. 9).
Seal Installation
Washer
(black)
Seal Installation
Spacer
Bearing Installation
Washer
(yellow)
Figure 8
Toro Part Number: TOR4105
Figure 9
Diameter/Circumference Measuring Tape
Toro Part Number: TOR6023
Spring steel measuring tape for accurately measuring
the circumference and outside diameter of cutting reel
and other spherical components. Tape calibration is in
fixed inch readings (no adjustments).
Cutting Unit
Figure 10
Turf Evaluator Tool
Toro Model Number: 04399
Many turf discrepancies are subtle and require closer
examination. In these instances, the Turf Evaluator
grass viewing tool is helpful. It can assist turf managers
and service technicians in determining causes for poor
reel mower performance and in comparing the effective
height--of--cut of one mowed surface to another. This
tool should be used with the Toro Guide to Evaluation
Reel Mower Performance and Using the Turf Evaluator
(Toro part no. 97931SL).
Figure 11
Greensmaster Flex 1800/2100
Page 7 -- 7
Cutting Unit
Factors That Can Affect Quality of Cut
There are a number of factors that can contribute to unsatisfactory quality of cut, some of which may be turf
conditions. Turf conditions such as excessive thatch,
“sponginess” or attempting to cut off too much grass
height may not always be overcome by adjusting the
cutting unit. It is important to remember that the lower
the height--of--cut, the more critical these factors are.
See Cutting Unit Operator’s Manual and the Adjustments section and Service and Repairs section of this
chapter for detailed adjustment and repair information.
Factor
Possible Problem/Correction
Governed engine speed.
Check maximum governed engine speed. Adjust
engine to specifications if necessary (see Adjustments
section in Chapter 3 -- Engine).
Reel bearing condition.
Check and replace reel bearings if necessary (see
Cutting Reel in the Service and Repairs section of this
chapter).
Reel and bedknife sharpness.
A reel and/or bedknife that has rounded cutting edges
or “rifling” (grooved or wavy appearance) cannot be
corrected by tightening the bedknife to reel contact.
Grind reel to remove taper and/or rifling. Grind
bedknife to sharpen and/or remove rifling.
The most common cause of rifling is bedknife to reel
contact that is too tight.
A new bedknife must be ground or backlapped
after installation to the bedbar.
Bedknife to reel adjustment.
Check bedknife to reel contact daily. The bedknife
must have light contact across the entire reel. No
contact will dull the cutting edges. Excessive contact
accelerates wear of both edges. Quality of cut is
adversely affected by both conditions.
Slightly dull cutting edges may be corrected by
backlapping (see Backlapping in the Service and
Repairs section of this chapter).
Excessively dull cutting edges must be corrected by
grinding the reel and bedknife (see Preparing Reel for
Grinding in the Service and Repairs section of this
chapter).
Height--of--cut.
“Effective” or actual height--of--cut depends on the
mower weight and turf conditions. Effective
height--of--cut will be different than the bench set
height--of--cut.
Proper bedknife for height--of--cut.
If the bedknife is too thick for effective height--of--cut,
poor quality of cut will result.
Stability of bedbar.
Make sure bedbar pivot bolts are securely seated (see
Bedbar in Service and Repairs section of this chapter).
Number of reel blades.
Use correct number of blades for clip frequency and
optimum height--of--cut range.
Cutting Unit
Page 7 -- 8
Greensmaster Flex 1800/2100
Factor
Possible Problem/Correction
Rear roller level.
Reel and rear roller should be parallel for proper
cutting performance (see Leveling Rear Roller in
Adjustments section of this chapter).
Roller condition.
Make sure rollers rotate freely. Repair roller bearings if
necessary (see Roller Service in Service and Repairs
section of this chapter).
Traction speed.
Check maximum governed engine speed. Adjust
engine to specifications if necessary (see Adjustments
section in Chapter 3 -- Engine).
The traction drive belt may be loose or worn. Check
the condition of the traction belt. Replace traction drive
belt if necessary.
See Troubleshooting section of Chapter 8 -- Groomer.
Cutting Unit
Groomer reel operation.
Greensmaster Flex 1800/2100
Page 7 -- 9
Cutting Unit
Adjustments
DANGER
CAUTION
Never work on the cutting unit with the engine
running. Always stop the engine and remove the
spark plug wire from the spark plug first.
Contact with the reel, bedknife or other cutting
unit parts can result in personal injury. Use
heavy gloves when handling the cutting reel or
bedknife.
Leveling Rear Roller
The precision machined components of the cutting unit
frame keep the rear roller and cutting reel in alignment
(parallel). If the side plates are disassembled or as the
cutting reel wears, a limited amount of side plate adjustment is possible to make sure that the cutting unit is
properly aligned.
210 to 240 in--lb
(24 to 27 N--m)
1
2
1. Place the assembled cutting unit on a surface plate.
2. Make sure that bedknife is properly adjusted to cutting reel.
2
3. Using the surface plate, check if rear roller is level to
cutting reel by using a 0.005” (0.13 mm) shim at each
end of rear roller. If the shim will pass under the roller at
one end but not the other, a frame adjustment should be
made.
4. Loosen, but do not remove, the two (2) shoulder
bolts that secure the side plate to the frame opposite the
side that is not level (Fig. 12).
5. Adjust the position of the side plate to parallel the
rear roller and cutting reel. Then, tighten the shoulder
bolts to a torque from 210 to 240 in--lb (24 to 27 N--m).
Figure 12
1. Side plate (RH shown)
2. Shoulder bolt
6. After tightening the side plate, recheck the rear roller.
If necessary, loosen and adjust second side plate.
7. After leveling rear roller, complete cutting unit set--up
and adjustment sequence.
Cutting Unit
Page 7 -- 10
Greensmaster Flex 1800/2100
Service and Repairs
Backlapping
8. Install reel drive cover plug when backlapping operation is completed (Fig. 14).
DANGER
9. Adjust cutting unit reel to bedknife as needed.
TO AVOID PERSONAL INJURY OR DEATH:
D Never place hands or feet in the reel area
while backlapping. Stay away from the reel when
backlapping.
D
Do not attempt to restart reel by hand or foot.
D
Do not adjust cutting reel while backlapping.
10.If cutting unit is attached to the traction unit, slide the
telescoping coupler onto the cutting unit hex shaft. Attach spark plug wire to the engine spark plug.
D Never use a short handled paint brush for
applying lapping compound. Part Number
TOR299100 backlapping brush assembly (see
Special Tools) is available from your local
Authorized Toro Distributor.
NOTE: Additional instructions and procedures on
backlapping are available in the Toro General Service
Training Book, Reel Mower Basics (part no. 09168SL).
1
2
Figure 13
1. Telescoping coupler
2. Cutting unit hex shaft
1. Park machine on a level surface. Make sure the engine is OFF and the traction lever is in NEUTRAL.
2. The backlapping operation can be done with the cutting unit either removed or attached to the traction unit.
A. If cutting unit is attached to the traction unit, slide
the telescoping coupler off the cutting unit hex shaft
before backlapping. Also, remove spark plug wire
from the engine spark plug and make sure reel drive
lever is DISENGAGED.
1
4. Remove plug from the reel drive cover on the left side
of the reel assembly (Fig. 14).
Figure 14
1. Cover plug
5. Insert a 1/2” socket onto hex of reel drive shaft.
Top Face
6. Backlap according to procedure in Toro General Service Training Book, Reel Mower Basics (part no.
09168SL).
7. When the backlapping operation is completed and
cutting reel is stopped, run a file across the front face of
the bedknife (Fig. 15). This will remove any burrs or
rough edges that may have built up on the cutting edge.
Greensmaster Flex 1800/2100
Page 7 -- 11
Cutting Unit
3. Make initial reel to bedknife adjustments appropriate
for backlapping on cutting unit.
Relief Angle
Remove
Burr
Front
Face
Front Angle
Figure 15
Cutting Unit
Bedbar Assembly
Flex 2100 Shown
200 to 250 in--lb
(23 to 28 N--m)
1
17
16
2
3
190 to 240 in--lb
(22 to 27 N--m)
6
13
7
12
11
Antiseize
Lubricant
4
9
8
15
RIGHT
14
FRONT
18
16
5
17
10
Figure 16
1.
2.
3.
4.
5.
6.
Bedbar
Bedknife
Screw (13 used)
Bedbar adjuster screw (2 used)
Bedbar adjuster shaft (2 used)
Cap screw (2 used)
7.
8.
9.
10.
11.
12.
Detent (2 used)
Wave washer (2 used)
Retaining ring (2 used)
Lock nut (2 used)
Washer (2 used)
Compression spring (2 used)
Bedbar Removal (Fig. 16)
1. Park machine on a level surface. Make sure the engine is OFF and the traction lever is in NEUTRAL.
2. Remove the cutting unit from the machine and place
cutting unit on a flat work area.
3. Tip the cutting unit to expose the bedknife. Support
the rear of the cutting unit (see Supporting Cutting Unit
when Servicing in the General Information section of
this chapter).
Cutting Unit
13.
14.
15.
16.
17.
18.
Lock nut (2 used)
Rubber bushing (2 used)
Nylon bushing (2 used)
Plastic washer (4 used)
Metal washer (4 used)
Bedbar pivot bolt (2 used)
4. Loosen the lock nuts (item 13) on the end of each
bedbar adjuster assembly until washer (item 11) is
loose.
5. Loosen the lock nuts (item 10) on each bedbar pivot
bolt (item 18).
6. Remove two (2) bedbar pivot bolts (item 18), four (4)
metal washers (item 17) and four (4) plastic washers
(item 16) from the cutting unit side plates.
Page 7 -- 12
Greensmaster Flex 1800/2100
6. Position one (1) metal washer (item 17) and one (1)
plastic washer (item 16) between bedbar and each cutting unit side plate (Fig. 17).
CAUTION
Contact with the reel, bedknife or other cutting
unit parts can result in personal injury. Use
heavy gloves when handling the bedbar.
7. Remove bedbar assembly from cutting unit.
8. Inspect nylon bushings (item 15) and rubber bushings (item 14) in side plates for wear or damage. Remove bushings and replace if necessary.
Bedbar Installation (Fig. 16)
1. If rubber bushing was removed from either cutting
unit side plate, apply grease to outside surface of new
bushing and install into side plate. The bushing should
be installed flush with the inside of the side plate (Fig.
17).
2. If removed, install the nylon bushings (item 15) with
flange facing outward. Apply antiseize lubricant to inside
of flange bushing.
7. Install the bedbar pivot bolt assemblies. Make sure
that plastic washers are not caught on the threads of the
pivot bolts. Torque each bedbar pivot bolt from 190 to
240 in--lb (22 to 27 N--m).
8. Tighten both lock nuts (item 10) until outside washers do not have any endplay but still can be rotated. Do
not over tighten the lock nuts as this can distort the side
plates and affect reel bearing adjustment. When the lock
nut is correctly tightened, there may be a gap at the inside washers.
9. Tighten the lock nut (item 13) on each bedbar adjuster assembly until the adjuster spring is fully compressed, then loosen lock nut 1/2 turn.
10.Adjust cutting unit (see Cutting Unit Operator’s
Manual).
11. Install cutting unit to machine.
Antiseize
Lubricant
3. Apply antiseize lubricant to the bedbar threads and
the shoulder area of each bedbar pivot bolt (Fig. 17).
1
8
7
IMPORTANT: When installing washers (items 16
and 17), make sure that plastic washers are positioned on either side of the cutting unit sideplate
(Fig. 17).
4. Slide one (1) metal washer (item 17) and then one (1)
plastic washer (item 16) onto each bedbar pivot bolt.
CAUTION
3
5. Position bedbar into cutting unit. Make sure that the
top of each bedbar arm is between washer (item 11) and
adjuster screw flange (item 4).
Greensmaster Flex 1800/2100
6
5
4
2
4
5
Figure 17
1.
2.
3.
4.
Page 7 -- 13
Cutting unit sideplate
Rubber bushing
Nylon bushing
Plastic washer
5.
6.
7.
8.
Metal washer
Bedbar
Bedbar pivot bolt
Lock nut
Cutting Unit
Cutting Unit
Contact with the reel, bedknife or other cutting
unit parts can result in personal injury. Use
heavy gloves when handling the bedbar.
Bedknife Service
Flex 2100 Shown
2
Lightly Oil
Bedbar Surface
3
Antiseize Lubricant
200 to 250 in--lb
(23 to 28 N--m)
1
Figure 18
1. Screw
2. Bedbar
3. Bedknife
Bedknife Removal (Fig. 18)
1. Remove bedbar from cutting unit (see Bedbar Removal in this section).
NOTE: Flex 1800 cutting units use 11 screws to secure
bedknife to bedbar. Flex 2100 cutting units use 13
screws to secure bedknife to bedbar.
2. Remove screws from bedbar using a socket wrench
and bedknife screw tool (see Special Tools in this chapter). Discard screws.
3. Remove bedknife from the bedbar.
Bedknife Installation (Fig. 18)
1. Use scraper to remove all rust, scale and corrosion
from bedbar surface and lightly oil bedbar surface before installing bedknife.
Cutting Unit
2. Make sure that screw threads in bedbar
(5/16--18UNC--2A) are clean. If necessary, use tap to
clean threads.
3. Apply antiseize lubricant to the threads of new
screws. Take care to keep antiseize lubricant from taper
on screw heads.
IMPORTANT: Do not use an impact wrench to tighten screws into the bedbar.
4. Use new screws to secure bedknife to bedbar. Install
all screws but do not tighten fully. Then, using a torque
wrench and bedknife screw tool (see Special Tools in
this chapter), torque screws from 200 to 250 in--lb (23
to 28 N--m). Use a torquing pattern working from the
center toward each end of the bedknife (Fig. 19).
5. After installing bedknife to bedbar, grind bedknife.
Page 7 -- 14
Greensmaster Flex 1800/2100
Bedknife Grinding
Since there can be variations in the mounting surface of
the bedbar, a new bedknife will not be perfectly flat after
it is installed to the bedbar. Because of this, it is necessary to grind a new bedknife after installing it to the bedbar. Follow the existing angle that was ground into the
bedknife and grind only enough to make sure the top
surface of the bedknife is true and perfectly flat (Fig. 20).
# TOR510880
NOTE: When grinding the bedknife, be careful to not
overheat the bedknife. Remove small amounts of material with each pass of the grinder. Also, clean and dress
grinding stone often during the grinding process.
13 11
9
7
5
3
1
2
4
6
8
10 12
Figure 19
1. Use Toro General Service Training Book, Reel Mower Basics (part no. 09168SL) and grinder manufacturer’s instructions for bedknife grinding information.
Remove
Burr
Top Face
2. After bedknife grinding is complete, install bedbar to
cutting unit (see Bedbar Installation in this section).
Relief Angle
Front
Face
Front Angle
Figure 20
Bedknife Grinding Specifications (see Fig. 20)
Standard bedknife relief angle
3o (see Fig. 21)
Extended bedknife relief angle
7o (see Fig. 21)
Front Angle (all bedknife types)
13o
13o to 17o
Front Angle Range
Standard Bedknife
Cutting Unit
1.689” (42.9 mm)
Extended Bedknife
1.876” (47.7 mm)
Figure 21
Greensmaster Flex 1800/2100
Page 7 -- 15
Cutting Unit
Bedbar Adjuster Service
Flex 2100 Shown
1
Antiseize
Lubricant
2
6
3
11
7
10
9
8
5
RIGHT
FRONT
5
4
Figure 22
1.
2.
3.
4.
Bedbar assembly
Compression spring
Lock nut
Bedbar adjuster shaft
5.
6.
7.
8.
Flange bushing
Cap screw
Detent
Wave washer
NOTE: The detent (item 7) used on Flex 2100 is toward
the center of the cutting unit as shown in Figure 22. On
Flex 1800 cutting units, the detent is mounted on the outside of the cutting unit crossmember (Fig. 23). Cutting
unit service procedures are the same on both models.
Removal (Fig. 22)
1. Remove lock nut (item 3), compression spring (item
2) and washer (item 11) from bedbar adjuster screw.
2. Remove bedbar (see Bedbar Removal in this section).
NOTE: Bedbar adjuster shaft (item 4) has left--hand
threads.
3. Unscrew bedbar adjuster shaft (item 4) from the bedbar adjuster screw.
Cutting Unit
9. Retaining ring
10. Bedbar adjuster screw
11. Washer
4. Remove retaining ring (item 9) and wave washer
(item 8) from bedbar adjuster shaft and remove adjuster
shaft from cutting unit frame.
5. Inspect flange bushings (item 5) in cutting unit side
plate and remove if necessary.
6. If detent (item 7) is damaged, remove it from cutting
unit side plate by removing the cap screw (item 6).
Installation (Fig. 22)
1. If detent (item 7) was removed, secure detent to cutting unit side plate with cap screw.
2. If flange bushings (item 5) were removed, align key
on bushing to slot in frame and install bushings.
Page 7 -- 16
Greensmaster Flex 1800/2100
3. Slide bedbar adjuster shaft (item 4) into flange bushings in cutting unit side plate. Secure adjuster shaft with
wave washer (item 8) and retaining ring (item 9).
Flex 1800 Shown
NOTE: Bedbar adjuster shaft (item 4) has left--hand
threads.
4. Apply antiseize lubricant to threads of bedbar adjuster screw that fit into adjuster shaft. Thread bedbar adjuster screw (item 10) into adjuster shaft.
1
5. Install bedbar (see Bedbar Installation in this section).
6. Install washer (item 11), spring (item 2) and lock nut
(item 3) onto adjuster screw. Tighten the lock nut on
each bedbar adjuster assembly until the compression
spring is fully compressed, then loosen lock nut 1/2 turn.
2
3
Figure 23
1. Crossmember
2. Detent
3. Cap screw
Cutting Unit
7. Adjust cutting unit (see Cutting Unit Operator’s
Manual).
Greensmaster Flex 1800/2100
Page 7 -- 17
Cutting Unit
Front Roller
Removal (Fig. 24)
1. Park machine on a level surface. Make sure the engine is OFF and the traction lever is in NEUTRAL.
2. Remove the cutting unit from the machine and place
on a level working surface. Use appropriate support to
raise front roller from work surface.
Antiseize
Lubricant
3. Loosen cap screw (item 1) that secures the front roller shaft to each front height--of--cut arm.
4. On one of the height--of--cut arms, remove HOC nut
(item 7), HOC washer (item 6) and plow bolt (item 4) that
secure HOC arm to the cutting unit side plate. Remove
the HOC arm from the cutting unit.
4
5
7
5. Slide the front roller assembly from the remaining
HOC arm on the cutting unit.
1. Place cutting unit on a level working surface and use
appropriate support to support front of cutting unit.
1
2
6. If necessary, remove the second HOC arm from the
cutting unit.
Installation (Fig. 24)
6
3
Figure 24
1.
2.
3.
4.
Cap screw
HOC arm
Front roller assembly
Plow bolt
2. Inspect condition of HOC screws (item 5) in both
HOC arms. If necessary, apply antiseize lubricant to
threads of new HOC screw. Thread new HOC screw into
HOC arm.
5. HOC screw
6. HOC washer
7. HOC nut
3
4
NOTE: When assembling HOC arms to side plates,
make sure that ring on HOC screw fits into the notch on
the side plate.
3. If both HOC arms were removed from cutting unit
side plate, position one of the arms to side plate. Secure
arm to side plate with plow bolt (item 4), HOC washer
(item 6) and HOC nut (item 7). Tab on HOC washer
should be positioned into HOC arm slot and orientated
down toward the roller.
4. Slide front roller shaft into arm attached to the cutting
unit. Slide second HOC arm onto the other end of roller
shaft. Secure second arm to cutting unit side plate with
plow bolt (item 4), HOC washer (item 6) and HOC nut
(item 7).
1
2
Figure 25
1. Front roller assembly
2. HOC arm
3. HOC screw
4. HOC washer & nut
5. Center front roller to the cutting reel and secure to
HOC arms with cap screws (item 1).
6. Adjust cutting unit (see Cutting Unit Operator’s
Manual).
7. Install cutting unit to machine.
Cutting Unit
Page 7 -- 18
Greensmaster Flex 1800/2100
Rear Roller
Removal (Fig. 26)
1. Park machine on a level surface. Make sure the engine is OFF and the traction lever is in NEUTRAL.
4
2. Remove the cutting unit from the machine and place
on a level working surface. Place support blocks under
bedbar to raise rear roller from work surface.
5
3. Loosen two (2) flange nuts that secure the rear roller
shaft to each rear roller bracket.
2
4. On one of the rear roller brackets:
NOTE: On cutting units equipped with optional High
Height of Cut Kit, there will be additional roller shims
installed between rear roller bracket and cutting unit
side plate.
A. Note quantity and location of roller shims for assembly purposes.
B. Remove flange nuts and socket head screws that
secure rear roller bracket and roller shims to the cutting unit side plate.
C. Remove the roller bracket and roller shims from
the rear roller and cutting unit.
5. Slide the rear roller assembly from the remaining
rear roller bracket on the cutting unit.
6. If necessary, remove the second rear roller bracket
and roller shims from the cutting unit.
6
1
3
Figure 26
1. Rear roller assembly
2. Roller height spacer
3. Socket head screw
4. Flange nut
5. Roller shim
6. Shaft retainer
3. Slide rear roller shaft into the rear roller bracket attached to the cutting unit. Slide second rear roller bracket onto the other end of roller shaft. Secure second roller
bracket and shims to cutting unit side plate with two (2)
carriage screws and flange nuts. Do not fully tighten
flange nuts.
4. Center rear roller to the cutting reel and secure in
place by tightening four (4) flange nuts.
Installation (Fig. 26)
5. Adjust cutting unit (see Cutting Unit Operator’s
Manual).
1. Place cutting unit on a level working surface.
6. Install cutting unit to machine.
Cutting Unit
NOTE: Refer to Cutting Unit Operator’s Manual for
number of roller shims required for various height of cut
settings.
2. If both rear roller brackets were removed from cutting
unit side plate, position brackets and roller shims to one
of the side plates. Install two (2) carriage screws and
flange nuts to retain bracket in position. Do not fully tighten flange nuts.
Greensmaster Flex 1800/2100
Page 7 -- 19
Cutting Unit
Roller Service
1
6
5
4
25 to 30 ft--lb
(34 to 41 N--m)
2
5
7
4
6
7
25 to 30 ft--lb
(34 to 41 N--m)
3
Figure 27
1. Weihle roller
2. Smooth roller
3. Roller shaft
4. Ball bearing
5. Seal
6. V--ring
7. Bearing lock nut
Disassembly
1
1. To hold roller shaft for bearing lock nut removal,
install a 3/8--24 UNF 2B screw into threaded end of roller
shaft and secure screw in place with jam nut. While retaining shaft, remove bearing lock nut from each end of
roller shaft.
2
3
4
5
6
2. Remove V--ring from each end of roller.
3. Carefully inspect seating surface and threads of
bearing lock nuts. Replace lock nut if any damage is
found.
4. Loosely secure roller assembly in bench vise and
lightly tap one end of roller shaft until seal and bearing
are removed from roller cavity. Remove second seal and
bearing from roller cavity by tapping on shaft.
Figure 28
1. Roller
2. Ball bearing
3. Seal
5. Clean bearing cavity in roller and remove any rust
with crocus cloth.
4. V--ring
5. Bearing lock nut
6. Roller shaft
3
1
2
Assembly
1. Place roller shaft into roller.
NOTE: If bearing lock nuts are being replaced, use
original lock nuts for assembly purposes, if possible.
This will preserve the patch lock feature in the new lock
nuts. Use the new nuts only after new bearings and
seals have been installed.
Cutting Unit
Figure 29
1. Bearing lock nut
2. Black assembly washer
Page 7 -- 20
3. Bearing
Greensmaster Flex 1800/2100
NOTE: Special tool TOR4105 (see Special Tools) can
be used instead of washers and spacer when installing
bearings and seals in roller.
2
3
1
4
2. Position a new bearing, black assembly washer (see
Special Tools) and original lock nut onto each end of the
roller shaft (Fig. 29).
3. Tighten nuts until the bearings are seated into each
end of the roller.
4. Remove nut and black assembly washer from each
end of the roller.
IMPORTANT: Failure to grease bearing lock nut before seal installation may result in seal damage.
Figure 30
1. Bearing lock nut
2. Seal
3. Grease nut surface
4. Pack with grease
5. Apply a coating of grease to the nut surface to prevent seal damage during seal installation (Fig. 30).
1
2
6. Carefully install seals onto bearing lock nuts. Pack
the back of the seal 75 to 90% full with #2 grease (Fig.
30).
7. Install a nut with seal onto each end of the roller shaft.
Tighten nuts until they bottom against bearings (Fig. 31).
Remove nuts from roller shaft.
8. Position an assembly spacer and yellow assembly
washer (see Special Tools) on each end of roller shaft
(Fig. 32). Thread nut onto each end of shaft.
Figure 31
1. Bearing lock nut
2. Seal
9. Tighten each nut until the yellow assembly washers
bottom out against the roller housing. Remove nuts, assembly washers and assembly spacers from roller
shaft.
3
4
2
1
10.Lubricate lips of installed seals with #2 grease.
11. Carefully slide a dry V--ring onto each bearing lock
nut. The V--rings should be installed without any lubrication.
Figure 32
1. Bearing lock nut
2. Yellow assembly washer
3. Assembly spacer
4. Seal
12.Install bearing lock nut with V--ring onto each end of
the roller shaft. Torque lock nuts from 25 to 30 ft--lb (34
to 41 N--m).
Greensmaster Flex 1800/2100
Page 7 -- 21
Cutting Unit
Cutting Unit
NOTE: If original bearing lock nut(s) are being used,
apply Loctite #242 (or equivalent) to threads of lock
nut(s).
Cutting Reel Assembly Removal and Installation
210 to 240 in--lb
(24 to 27 N--m)
Flex 2100 Shown
8
4
9
13
10
210 to 240 in--lb
(24 to 27 N--m)
5
12
1
11
5
5
3
5
2
7
4
6
RIGHT
14
15
FRONT
3
Figure 33
1.
2.
3.
4.
5.
Crossmember
LH side plate
Compression spring (2 used)
Shoulder bolt (2 used per side plate)
Flange nut (2 used per side plate)
6.
7.
8.
9.
10.
Cutting reel assembly
RH pitch arm
Flange head screw (2 used)
RH side plate
Weight
NOTE: This section provides the procedure for removing and installing the cutting reel assembly (cutting reel,
flocked seals, reel bearings, bearing lock screw and reel
nut) from the cutting unit. Refer to Cutting Reel Assembly Service in this section for information on servicing
the cutting reel assembly.
Cutting Unit
11.
12.
13.
14.
15.
Hex nut
O--ring
Grass shield
Flat wire spring
LH pitch arm
NOTE: Flex 2100 cutting units use shoulder bolts (item
4) and flange nuts (item 5) to secure the side plates to
the crossmember as shown in Figure 33. On Flex 1800
cutting units, square nuts are used instead of flange
nuts. Cutting unit service procedures are the same on
both models.
Page 7 -- 22
Greensmaster Flex 1800/2100
Cutting Reel Assembly Removal (Fig. 33)
NOTE: Removal of the cutting reel can be completed
by removing the RH side plate from the cutting unit
crossmember. The LH side plate (including the reel
drive assembly) does not have to be removed from the
crossmember when using the following procedure.
9. Carefully slide the cutting reel assembly (with
flocked seals, reel bearings, bearing lock screw and reel
drive shaft) from the LH side plate. Locate and remove
flat wire spring (item 14).
2
CAUTION
1
Contact with the reel, bedknife or other cutting
unit parts can result in personal injury. Use
heavy gloves when removing the cutting reel.
1. Park machine on a level surface. Make sure the engine is OFF and the traction lever is in NEUTRAL.
3
2. Remove the cutting unit from the machine and place
cutting unit on a flat work area.
3. Remove reel drive cover and belt from reel drive assembly. Then, remove reel pulley from reel drive shaft.
Refer to Reel Drive Assembly in the Service and Repairs
section of Chapter 4 -- Traction and Reel Drive System
for procedure to remove these components.
IMPORTANT: If reel drive shaft (item 4 in Fig. 35) is
to be loosened, use appropriate wrench or socket
on 1” hex surface of shaft. Do not use 1/2” extension
on end of reel drive shaft when loosening or tightening drive shaft. The 1/2” hex is intended for backlapping only.
4. If bearings or seals are to be removed from cutting
reel, put a block of wood between the cutting reel blades
to prevent the reel from rotating. Loosen bearing lock
screw (RH threads) and reel drive shaft (LH threads) to
allow easier removal after reel assembly is removed
from cutting unit (Fig. 35).
Figure 34
1. Reel drive cover
2. Belt
3. Reel pulley
90 to 110 ft--lb
(123 to 149 N--m)
(Right Hand Threads)
5
90 to 110 ft--lb
(123 to 149 N--m)
(Left Hand Threads)
3
2
1
4
Use this 1” hex surface
when removing or
installing reel drive shaft
6
2
3
6. Loosen fasteners that secure front and rear rollers to
RH side plate (see Front Roller Removal and Rear Roller Removal in this section).
7. Support cutting reel to prevent it from shifting or falling.
Cutting Unit
5. Remove the bedbar pivot bolt and washers from the
RH side plate. Note location of plastic and steel washers
for assembly purposes (see Bedbar Removal in this
section).
Figure 35
1. Cutting reel
2. Flocked seal (2 used)
3. Bearing (2 used)
4. Reel drive shaft
5. Bearing lock screw
6. Reel groove location
8. Remove shoulder bolts (item 4) and flange nuts (item
5) that secure the RH side plate to the cutting unit crossmember. Remove the RH side plate from the reel shaft,
rollers, bedbar and cutting unit crossmember. Remove
pitch arm (item 7) and compression spring (item 3) from
RH side plate.
Greensmaster Flex 1800/2100
Page 7 -- 23
Cutting Unit
Cutting Reel Assembly Installation (Fig. 33)
1. Thoroughly clean side plates and other cutting unit
components. Inspect side plates and pitch arms for
wear or damage and replace components if needed.
2. Make sure that flocked seals, reel bearings, bearing
lock screw and reel drive shaft are properly positioned
on cutting reel (see Reel Assembly Service in this section).
CAUTION
Contact with the reel, bedknife or other cutting
unit parts can result in personal injury. Use
heavy gloves when installing the cutting reel.
3. Position the cutting unit on a flat work area. The rollers, bedbar and cutting unit crossmember should be attached to LH side plate. Make sure that pitch arm (item
15) and compression spring (item 3) is fitted to LH side
plate.
4. Place flat wire spring into bearing bore of LH side
plate. Carefully slide the cutting reel assembly (with
flocked seals, reel bearings, bearing lock screw and reel
drive shaft) into the LH side plate. Make sure that bearing is fully seated into side plate.
5. Carefully slide the RH side plate with pitch arm (item
7) and compression spring (item 3) onto the cutting reel
assembly, front roller and rear roller. Make sure that side
plate is fully seated onto bearing on reel shaft.
6. Install shoulder bolts (item 4) and flange nuts (item
5) to secure the RH side plates to the crossmember.
Torque the shoulder bolts from 210 to 240 in--lb (24 to
27 N--m).
Cutting Unit
IMPORTANT: If reel drive shaft (item 4 in Fig. 35) is
to be tightened, use appropriate wrench or socket
on 1” hex surface of shaft. Do not use 1/2” hex on
end of reel drive shaft when loosening or tightening
drive shaft. The 1/2” hex is intended for backlapping
only.
7. If bearing lock nut (RH threads) and reel drive shaft
(LH threads) were loosened during cutting reel service,
put a block of wood between the cutting reel blades to
prevent the reel from rotating. Torque bearing lock nut
(RH threads) and reel drive shaft (LH threads) from 90
to 110 ft--lb (123 to 149 N--m) (Fig. 35).
8. Secure the bedbar assembly to RH side plate (see
Bedbar Installation in this section). Make sure that plastic and steel washers are properly positioned.
9. Secure front and rear rollers to RH side plate (see
Front Roller Installation and Rear Roller Installation in
this section).
10.Adjust cutting unit (see Cutting Unit Operator’s
Manual).
NOTE: The parallel position of the rear roller to the cutting reel is controlled by the precision machined crossmember and side plates of the cutting unit. If necessary,
the cutting unit side plates can be loosened and a slight
adjustment can be made to parallel the rear roller with
the cutting reel (see Leveling Rear Roller in the Set--Up
and Adjustments section of this Chapter).
11. Install reel pulley, belt and reel drive cover to reel
drive assembly. Refer to Reel Drive Assembly in the
Service and Repairs section of Chapter 4 -- Traction and
Reel Drive System for procedure to install and adjust
these components.
12.Install cutting unit to the machine.
Page 7 -- 24
Greensmaster Flex 1800/2100
Cutting Unit
This page is intentionally blank.
Greensmaster Flex 1800/2100
Page 7 -- 25
Cutting Unit
Cutting Reel Assembly Service
5
3
2
90 to 110 ft--lb
(123 to 149 N--m)
(Right Hand Threads)
2
3
1
RIGHT
90 to 110 ft--lb
(123 to 149 N--m)
(Left Hand Threads)
FRONT
4
Figure 36
1. Cutting reel
2. Flocked seal (2 used)
Cutting Unit
3. Bearing (2 used)
4. Reel drive shaft (LH threads)
Page 7 -- 26
5. Bearing lock screw (RH threads)
Greensmaster Flex 1800/2100
Disassembly of Cutting Reel (Fig. 36)
IMPORTANT: When removing reel drive shaft (item
4), use appropriate wrench or socket on 1” hex surface of shaft. Do not use 1/2” extension on end of
reel drive shaft when loosening or tightening drive
shaft. The 1/2” hex is intended for backlapping only.
1. Remove bearing lock screw (item 5) and reel drive
shaft (item 4) from cutting reel. Reel drive shaft has LH
threads and is in end of reel shaft identified with a groove
that is just inside of reel spider (Fig. 37).
2. Slide bearings from reel shaft.
3. Note orientation of flocked seals for assembly purposes. Remove seals from reel shaft.
Inspection of Cutting Reel (Fig. 36)
1. Inspect reel bearings to insure that they spin freely
and have minimal axial play.
2. Inspect the reel shaft as follows. If reel damage is detected, replace cutting reel.
3. Slide bearings fully onto reel shaft. Bearings should
bottom on reel shaft shoulder.
IMPORTANT: When installing reel drive shaft (item
4), use appropriate wrench or socket on 1” hex surface of shaft. Do not use 1/2” extension on end of
reel drive shaft when loosening or tightening drive
shaft. The 1/2” hex is intended for backlapping only.
4. Install bearing lock screw (item 5) and reel drive shaft
(item 4) into reel shaft to secure bearings. Reel drive
shaft has LH threads and should be installed in end of
reel shaft identified with a groove that is just inside of reel
spider (Fig. 37).
NOTE: Installation torque for bearing lock screw and
reel drive shaft is from 90 to 110 ft--lb (123 to 149 N--m).
It is easiest to torque these items after the cutting reel is
installed in the cutting unit frame (see Reel Assembly
Removal and Installation in this section).
3
1
A. Check the reel shaft for bending and distortion by
placing the shaft ends in V--blocks.
B. Check the reel blades for bending or cracking.
C. Check the service limit of the reel diameter (see
Preparing a Reel for Grinding in this section).
2
D. Check threads in ends of reel shaft.
Figure 37
3. Check the woodruff key slot and hex drive on the reel
drive shaft (item 4) for excessive wear or distortion. Replace drive shaft if damage is evident.
1. LH threads
2. Groove
3. RH threads
Assembly of Cutting Reel (Fig. 36)
Cutting Unit
1. If bearings and/or flocked seals were removed from
reel shaft, discard removed components and replace.
IMPORTANT: The flocked seal should be installed
so the flocked side of the seal is toward the bearing
location.
2. Press flocked seals onto reel shaft with flocked side
orientated toward bearing location. Seal should be perpendicular to reel shaft after installation.
Greensmaster Flex 1800/2100
Page 7 -- 27
Cutting Unit
Preparing Reel for Grinding
NOTE: Before grinding a cutting reel, make sure that all
cutting unit components are in good condition. Depending on type of grinder used, faulty cutting unit components can affect grinding results.
Reel Grinding Specifications
NOTE: When grinding, be careful to not overheat the
cutting reel blades. Remove small amounts of material
with each pass of the grinder.
1. Follow reel grinder manufacturer’s instructions to
grind cutting reel to Toro specifications (see Reel Grinding Specifications chart to the right). Additional reel
grinding information can be found in the Toro General
Service Training Book, Reel Mower Basics (part no.
09168SL).
Reel Diameter (New)
5.060 in (128.5 mm)
Service Limit - Reel
Diameter
4.500 in (114.3 mm)
Reel Shaft Diameter (OD)
1.375 in (34.9 mm)
29o
Blade Relief Angle
27o to 31o
Blade Relief Angle Range
Blade Land Width
0.040 in (1.0 mm)
Blade Land Width Range
0.030 to 0.050 in (0.8 to 1.2 mm)
Service Limit Reel Diameter Taper
0.010 in (0.25 mm)
2. After completing the reel grinding process, adjust
cutting unit (see Cutting Unit Operator’s Manual).
Blade Relief Angle
Reel Diameter
Rotation
Blade Land
Width
D1
D2
Reel Diameter Taper = D1 -- D2
Figure 38
Cutting Unit
Page 7 -- 28
Greensmaster Flex 1800/2100
Chapter 8
Groomer
Table of Contents
Groomer
SPECIFICATIONS . . . . . . . . . . . . . . . . . . . . . . . . . . . . . 2
GENERAL INFORMATION . . . . . . . . . . . . . . . . . . . . . 3
Installation Instructions . . . . . . . . . . . . . . . . . . . . . . . 3
TROUBLESHOOTING . . . . . . . . . . . . . . . . . . . . . . . . . 4
Factors Affecting Grooming . . . . . . . . . . . . . . . . . . . 4
Grooming Reel Mechanical Problems . . . . . . . . . . 5
ADJUSTMENTS . . . . . . . . . . . . . . . . . . . . . . . . . . . . . . 6
Height/Depth of Groomer Adjustment . . . . . . . . . . 6
SERVICE AND REPAIRS . . . . . . . . . . . . . . . . . . . . . . 7
Groomer Belt Replacement (Forward Rotating
Groomer Drive) . . . . . . . . . . . . . . . . . . . . . . . . . . . 7
Groomer Cover (Counter Rotating Groomer
Drive) . . . . . . . . . . . . . . . . . . . . . . . . . . . . . . . . . . . . 8
Grooming Reel (Forward Rotating Groomer
Drive) . . . . . . . . . . . . . . . . . . . . . . . . . . . . . . . . . . . 10
Grooming Reel (Counter Rotating Groomer
Drive) . . . . . . . . . . . . . . . . . . . . . . . . . . . . . . . . . . . 14
Grooming Reel Service . . . . . . . . . . . . . . . . . . . . . 17
Grooming Reel Bearing Replacement . . . . . . . . . 18
Idler Assembly (Forward Rotating Groomer
Drive) . . . . . . . . . . . . . . . . . . . . . . . . . . . . . . . . . . . 20
Idler Assembly (Counter Rotating Groomer
Drive) . . . . . . . . . . . . . . . . . . . . . . . . . . . . . . . . . . . 22
Lift Arm Assembly . . . . . . . . . . . . . . . . . . . . . . . . . . 24
Groomer Brush . . . . . . . . . . . . . . . . . . . . . . . . . . . . 26
Greensmaster Flex 1800/2100
Page 8 -- 1
Groomer
Specifications
MOUNTING: The groomer is mounted to the cutting unit
side plates.
GROOMING REEL CONSTRUCTION: 2.375 inch (6
cm) diameter, 41 steel blades with 1/2 inch blade spacing. Blade spacing can be adjusted to 1/4 inch or 3/4 inch
by altering the number and position of blade spacers on
the groomer. Grooming reel is available with either steel
or carbide tipped blades. The groomer brush can be
installed in place of grooming reel.
GROOMER HEIGHT SETTING: From 0.030 to 0.620
inch (0.8 to 15.7 mm) at mowing HOC range of 0.060 to
0.750 inch (1.5 to 19.1 mm).
Groomer
WIDTH--OF--GROOMER: 19.380 inches (50.3 cm).
HEIGHT ADJUSTMENT KNOB: Allows a 0.003 inch
(0.08 mm) increment of height adjustment for each click
of the adjuster.
UP--DOWN FEATURE: Allows grooming reel to be
raised above the height/depth adjustment for no grooming reel action while mowing.
GROOMER DRIVE: Both forward rotating and counter
rotating groomer drive systems are available for the Flex
1800 and 2100. The groomer drive assembly is attached to the right side of the cutting unit.
Page 8 -- 2
Greensmaster Flex 1800/2100
General Information
Installation Instructions
Groomer
The Installation Instructions for the groomer provide information regarding the operation, general maintenance procedures and maintenance intervals for the
groomer assembly on your Greensmaster Flex machine. Refer to this publication for additional information
when servicing the groomer assembly.
Greensmaster Flex 1800/2100
Page 8 -- 3
Groomer
Troubleshooting
Factors Affecting Grooming
There are a number of factors that can affect the performance of grooming. These factors vary for different golf
courses and from green to green. It is important to inspect the turf frequently and vary the grooming practice
with turf needs.
It is important to remember that factors affecting quality
of cut also affect grooming performance.
IMPORTANT: Improper or overaggressive use of
the grooming reel, such as too deep or frequent
grooming, may cause unnecessary stress on the
turf leading to severe turf damage. Use the groomer
carefully. READ AND UNDERSTAND THE INSTALLATION INSTRUCTIONS BEFORE OPERATING OR
TESTING GROOMER PERFORMANCE.
Variables That Affect the Use and Performance of Grooming Reels:
1. The growing season and weather conditions.
8. The amount of time that a grooming reel has been in
use on a particular turf area.
2. General turf conditions.
3. The frequency of grooming/cutting -- number of cuttings per week and how many passes per cutting.
4. The blade spacing on the grooming reel.
5. The height--of--cut.
6. The grooming depth.
9. The amount of traffic on the turf.
10.The overall turf management program (e.g. irrigation, fertilizing, weed control, coring, overseeding, disease control, sand dressing and pest control).
11. Stress periods for turf (e.g. high temperatures, high
humidity, unusually high traffic).
7. The type of grass on the green.
Groomer
Page 8 -- 4
Greensmaster Flex 1800/2100
Grooming Reel Mechanical Problems
Problem
Possible Causes
Correction
The grooming reel rotates when it is The grooming reel should rotate
in the raised, transport position (for- whenever the cutting reel is enward rotating groomer drive).
gaged.
Normal operation.
No rotation of the grooming reel
(forward rotating groomer drive).
Seized grooming reel or idler bearing(s) in groomer side plate(s).
Identify and replace faulty bearing(s).
Broken or damaged drive belt idler
spring.
Replace idler spring.
The groomer drive belt is worn, bro- If the belt slips, it probably is worn
ken or damaged.
and must be replaced.
No rotation of the grooming reel
(counter rotating groomer drive).
The turf is damaged or has uneven
grooming.
Greensmaster Flex 1800/2100
Handle on groomer cover is rotated
rearward so that groomer drive is
disengaged.
Handle needs to be rotated toward
the front of the machine to engage
the groomer drive.
Seized grooming reel or idler bearing(s) in groomer side plate(s).
Identify and replace faulty bearing(s).
Broken or damaged drive idler
spring.
Replace idler spring.
Groomer drive gears are worn or
damaged.
Inspect groomer drive assembly
and replace damaged drive components.
The groomer is set too aggressively.
Refer to groomer Installation Instructions for groomer set--up information.
The grooming reel blades are bent,
damaged or missing.
Repair or replace blades if necessary.
The grooming reel shaft is bent or
damaged.
Replace grooming reel shaft.
Grooming depth is not equal on
both ends of grooming reel.
Adjust depth if necessary. Check
and adjust cutting unit set up (level
bedknife to reel, level rear roller to
reel, set height--of--cut, etc.).
Page 8 -- 5
Groomer
Groomer
Repair or replace belt if necessary.
A broken or worn belt could be the
result of improper belt routing or
seized bearings in groomer assembly.
Adjustments
CAUTION
Never work on the cutting unit with the engine
running. Always stop the engine and remove
spark plug wire from the engine spark plug.
before working on the cutting unit.
NOTE: See the Groomer Installation Instructions for
adjustment procedures for the groomer on your
Greensmaster.
Height/Depth of Groomer Adjustment
NOTE: Grooming is performed above the soil level.
When adjusting groomer height/depth, groomer blades
should never penetrate the soil.
FORWARD ROTATING GROOMER SHOWN
1. Position machine on a clean and level surface with
engine stopped. Engage parking brake.
2. Make sure rollers are clean and cutting reel is set to
the desired height--of--cut (see Cutting Unit Operator’s
Manual for cutting unit adjustment procedures).
3. Position the grooming reel to the lowered, grooming
position (Fig. 1).
NOTE: Improper or over--aggressive use of the grooming reel (i.e. too deep or too frequent grooming) may
cause unnecessary stress on the turf leading to severe
greens damage. Use the groomer cautiously.
4. On one end of the grooming reel, measure the distance from the lowest tip of the groomer blade to the
working surface. Lift and turn height adjustment knob to
raise or lower the blade tip (Fig. 1). Each notch on the
adjustment knob changes the groomer height approximately 0.003 inch (0.08 mm).
1
2
Figure 1
1. Height adjustment knob
2. Lock screw
5. Repeat step 4 on the opposite end of the groomer.
Then, recheck setting on the first side of groomer.
Height setting on both ends of groomer should be identical.
Groomer
Page 8 -- 6
Greensmaster Flex 1800/2100
Service and Repairs
Groomer Belt Replacement (Forward Rotating Groomer Drive)
1. Position machine on a clean and level surface with
engine stopped. Engage parking brake.
2. Remove three (3) lock nuts that secure groomer
drive cover, then remove cover (Fig. 2).
1
3. Pivot idler pulley by placing a 12mm wrench on
pulley nut and rotating idler bracket to relax belt tension.
Slip groomer drive belt off pulleys (Fig. 3). Carefully release idler bracket.
IMPORTANT: Make sure that the drive belt is centered on the pulleys and correctly aligned with
pulley grooves after installation.
4. Install new drive belt to drive pulley, idler pulley and
driven pulley observing correct belt routing (Fig. 3).
2
Figure 2
1. Groomer drive cover
5. Secure belt cover to machine with three (3) lock nuts
(Fig. 2).
1
5
2. Lock nut (3 used)
3
2
4
Figure 3
4. Driven pulley
5. Groomer drive belt
Groomer
1. Drive pulley
2. Idler pulley
3. Idler pulley nut
Greensmaster Flex 1800/2100
Page 8 -- 7
Groomer
Groomer Cover (Counter Rotating Groomer Drive)
On Flex machines with the counter rotating groomer, the
groomer cover includes a handle which engages and
disengages the groomer drive. When the handle is rotated toward the front of the machine, the groomer is engaged.
4
2
Removal
1. Position machine on a clean and level surface with
engine stopped. Engage parking brake.
2. Make sure that handle on groomer cover is rotated
toward front of machine so that groomer drive is engaged.
1
3
3. Remove groomer cover assembly from machine
(Fig. 4):
A. Remove five (5) flange head screws that secure
groomer cover assembly to RH drive plate.
Figure 4
1. Groomer cover assembly
2. Screw (5 used)
3. Gasket
4. Handle
B. Remove groomer cover assembly and gasket
from machine. Discard gasket.
Loctite #242
4. If necessary, remove shaft from groomer cover (Fig.
5):
9
8
A. Loosen set screw (item 9) on top of shaft and slide
handle from shaft.
10
5
Antiseize
Lubricant
4
B. Remove retaining ring (item 8) and thrust washer
(item 5) from shaft.
3
C. Remove plunger detent (item 6) from groomer
cover.
6
1
D. Slide shaft out of groomer cover. Remove and
discard O--ring (item 4) from shaft.
5. Remove grease from inside groomer cover and RH
drive plate on cutting unit. Thoroughly clean and inspect
all groomer drive components.
2
7
Figure 5
1.
2.
3.
4.
5.
Groomer
Page 8 -- 8
Groomer cover
Plug
Shaft
O--ring
Thrust washer
6.
7.
8.
9.
10.
Plunger detent
Cap screw
Retaining ring
Set screw
Handle
Greensmaster Flex 1800/2100
Installation
Flush to 0.020”
(Flush to 0.5 mm)
1. If removed, install shaft into groomer cover (Fig. 5):
A. Install new O--ring into groove of shaft.
1
B. Apply antiseize lubricant to shaft surface that is
below the retaining ring groove.
3
C. Slide shaft up through bore of cover and secure
with thrust washer and retaining ring.
D. Position shaft in cover so that cam point of shaft is
located away from the gasket surface (Fig. 6).
E. Install plunger detent into groomer cover so that
end of plunger if from flush to 0.020” (0.5 mm) extending from cover surface (Fig. 6).
2
F. Slide handle into shaft so that it extends toward
the front of the cover.
G. Apply Loctite #242 (or equivalent) to threads of
set screw. Install set screw into end of shaft to secure
handle in place.
2. Install groomer cover assembly to RH drive plate assembly (Fig. 4):
A. Make sure that handle on groomer cover is rotated toward the front of the machine.
Figure 6
1. Shaft
2. Cam point
3. Plunger detent
B. Fill groomer cover with approximately five (5)
ounces (142 grams) of Mobil XHP221 grease (or
equivalent).
Groomer
C. Install new gasket and then groomer cover assembly to RH drive plate. Secure cover with five (5)
flange head screws.
Greensmaster Flex 1800/2100
Page 8 -- 9
Groomer
Grooming Reel (Forward Rotating Groomer Drive)
100 ft--lb
(135 N--m)
26
25
8
6
17
14
15
22
18
23
4
1
19
7
11
12
13
27
5
1
2
13
3
12
11
Antiseize
Lubricant
20
16
21
24
9
RIGHT
17 to 21 ft--lb
(24 to 28 N--m)
10
FRONT
Figure 7
1.
2.
3.
4.
5.
6.
7.
8.
9.
Lock nut (4 used)
Drive cover
Groomer drive belt
Drive pulley
Shoulder bolt (2 used)
Spring
RH drive plate assembly
Groomer shim
RH groomer arm assembly
10.
11.
12.
13.
14.
15.
16.
17.
18.
Cap screw (2 used)
Bushing (2 used)
Spring washer (2 used)
Lock nut (2 used)
LH support plate assembly
LH groomer arm assembly
HOC washer (2 used)
Rear roller height shim
Socket head screw (4 used)
Remove the grooming reel to replace individual blades,
to replace worn groomer components, to reverse the
blades on the shaft (if not equipped with carbide blades)
or to replace the grooming shaft.
19.
20.
21.
22.
23.
24.
25.
26.
27.
Driven pulley
HOC screw (2 used)
HOC nut (2 used)
Plow bolt (2 used)
Grooming reel assembly
Front roller assembly
RH cutting unit sideplate
LH cutting unit sideplate
O--ring
3. Remove groomer drive cover (item 2) and groomer
drive belt (item 3) from groomer drive (see Groomer Belt
Replacement in this section).
Removal (Fig. 7)
4. Loosen cap screws (item 10) that secure front roller
shaft to groomer arms.
1. Position machine on a clean and level surface with
engine stopped. Engage parking brake.
5. Remove lock nut and spring washer that secure RH
groomer arm lift rod to RH drive plate assembly (Fig. 8).
2. Remove the cutting unit from the machine and place
cutting unit on a flat work area.
Groomer
Page 8 -- 10
Greensmaster Flex 1800/2100
6. Remove HOC nut (item 21), HOC washer (item 16)
and plow bolt (item 22) that secure RH groomer arm assembly to RH support plate assembly. Do not change
height--of--cut screw adjustment. Remove RH groomer
arm assembly from cutting unit.
5
2
7. Remove front roller assembly from cutting unit.
NOTE: To prevent grooming reel shaft from turning
when removing driven pulley (item 19), use wrench on
shaft flats to hold shaft.
8. Remove the lock nut (item 1) that secures driven
pulley (item 19) to grooming reel shaft. Remove driven
pulley from shaft.
NOTE: To prevent cutting reel from turning when removing drive pulley (item 4), use a 1/2” socket on hex of
reel drive shaft that is used for backlapping the cutting
reel.
4
1
3
Figure 8
1. Roller cap screw
2. Grooming reel assembly
3. Lock nut
9. Loosen and remove drive pulley (item 4) from the
cutting reel shaft.
1
5
4. Spring washer
5. Groomer arm lift rod
2
4
10.Remove two (2) shoulder bolts (item 5) that secure
the RH drive plate assembly (item 7) to the cutting unit
frame. Remove the groomer drive plate assembly from
grooming shaft and cutting unit. Locate and retrieve
groomer shim (item 8).
11. Carefully pull the grooming reel from the LH support
plate assembly.
Installation (Fig. 7)
1. Apply a light coating of grease to ends of grooming
shaft and also to seal lips in drive side and support
plates. Make sure that all bearings, bushings and seals
are properly installed.
2. Make sure that O--ring (item 27) is installed on
grooming shaft. Apply light coating of grease to O--ring.
3. Carefully place grooming reel assembly into the LH
support plate taking care to not damage seal in support
plate or O--ring on shaft.
4. Apply light coating of grease to O--ring on RH drive
plate assembly pivot hub and pilot bore of cutting unit
side plate.
5. Position groomer shim (item 8) to RH drive plate assembly.
Greensmaster Flex 1800/2100
Figure 9
1. Drive pulley
2. Idler pulley
3. Driven pulley
4. RH drive plate assy
5. Groomer drive belt
6. Carefully place RH drive plate onto groomer shaft
taking care not to damage seals in drive plate. Position
drive plate to the cutting unit frame and secure with two
(2) shoulder bolts (item 5). Make sure that RH drive plate
rotates freely after installation.
7. Apply light coating of grease to hub on driven pulley
(item 19) taking care to not get grease on belt surface of
pulley. Slide driven pulley onto the grooming reel shaft
taking care to not damage seal in RH drive plate.
NOTE: To prevent grooming reel shaft from turning
when securing driven pulley, use wrench on shaft flats
to hold shaft.
8. Secure driven pulley (item 19) to grooming reel shaft
with lock nut (item 1). Torque lock nut from 17 to 21 ft--lb
(24 to 28 N--m).
Page 8 -- 11
Groomer
Groomer
12.Inspect seals, bushings and bearings in RH drive
plate, LH support plate and groomer arms for wear or
damage. Replace components as needed.
3
NOTE: To prevent cutting reel from turning when installing drive pulley, use a 1/2” socket on hex of reel drive
shaft that is used for backlapping the cutting reel.
9. Secure drive pulley (item 4) to cutting reel shaft.
Torque pulley to 100 ft--lb (135 N--m).
10.Insert front roller into LH groomer arm assembly.
11. Make sure that bushing (item 11) is installed in RH
drive plate assembly.
15.Center front roller to cutting unit and tighten cap
screws (item 10) to secure roller.
16.Install groomer drive belt (item 3) and groomer drive
cover (item 2) to RH drive plate (see Groomer Belt Replacement in this section).
17.Check grooming reel height and mower height--of-cut settings. Adjust as needed.
18.Install cutting unit to the machine.
12.Apply antiseize lubricant to threads of RH groomer
arm lift rod.
19.Lubricate groomer bearings (see Groomer Installation Instructions).
13.Position RH groomer arm assembly to front roller,
groomer RH drive plate and cutting unit frame. Secure
groomer arm to cutting unit with plow bolt (item 22), HOC
washer (item 16) and HOC nut (item 21).
NOTE: After greasing groomer bearings, operate
groomer for 30 seconds, stop machine and wipe excess
grease from groomer shaft and seals.
14.Secure RH groomer arm assembly to RH drive plate
with spring washer (item 12) and lock nut (item 13).
Groomer
Page 8 -- 12
Greensmaster Flex 1800/2100
Groomer
This page is intentionally blank.
Greensmaster Flex 1800/2100
Page 8 -- 13
Groomer
Grooming Reel (Counter Rotating Groomer Drive)
10
120 in--lb
(13.5 N--m)
125 ft--lb
(170 N--m)
31
18
33
24
17
10
21
22
30
27
6
12
7
13
34
11
35
35
20
8
Antiseize
Lubricant
19
32
9
18 14
24
1
7
13
4
5
23 15
16
3
2
26
29
25
2
9
28
17 to 21 ft--lb
(24 to 28 N--m)
120 in--lb
(13.5 N--m)
Figure 10
1.
2.
3.
4.
5.
6.
7.
8.
9.
10.
11.
12.
RH groomer arm assembly
HOC nut (2 used)
Bushing (2 used)
Spring washer (2 used)
Lock nut (2 used)
LH groomer arm assembly
Cap screw (2 used)
Grooming reel assembly
HOC washer (2 used)
HOC screw (2 used)
O--ring
RH drive plate assembly
13.
14.
15.
16.
17.
18.
19.
20.
21.
22.
23.
24.
Shoulder bolt (2 used)
Driven gear (30T)
Lock nut
Front roller
Groomer drive gear (45T)
Bearing (2 used)
RH cutting unit side plate
Gasket
Flange head screw (5 used)
Groomer cover assembly
47T idler gear
Flange nut (2 used)
25.
26.
27.
28.
29.
30.
31.
32.
33.
34.
35.
Extension spring
Inner spring (2 used)
Outer spring (2 used)
LH support plate assembly
Support plate
Button head screw (4 used)
Roller shim
Socket head screw (4 used)
43T idler gear
LH cutting unit side plate
Plow bolt (2 used)
Remove the grooming reel to replace individual blades,
to replace worn groomer components, to reverse the
blades on the shaft (if not equipped with carbide blades)
or to replace the grooming shaft.
4. Remove groomer cover assembly (item 22) and gasket (item 20) from machine (see Groomer Cover (Counter Rotating Groomer Drive) in this section). Discard
gasket.
Removal (Fig. 10)
5. Carefully remove extension spring from anchor
points on RH drive plate (Fig. 11).
1. Position machine on a clean and level surface with
engine stopped. Engage parking brake.
2. Remove the cutting unit from the machine and place
cutting unit on a flat work area.
3. Make sure that handle on groomer cover is rotated
toward front of machine so that groomer drive is engaged.
Groomer
6. Remove the two (2) idler gears (43T and 47T) from
the RH drive plate assembly (Fig. 12). The bearings are
pressed into the gears.
7. Loosen cap screws (item 7) that secure front roller
shaft to groomer arms.
Page 8 -- 14
Greensmaster Flex 1800/2100
8. Remove lock nut and spring washer that secure RH
groomer arm lift rod to RH drive plate assembly (Fig. 13).
2
9. Remove HOC nut (item 2), HOC washer (item 9) and
plow bolt (item 35) that secure RH groomer arm assembly to RH drive plate assembly. Do not change height-of--cut screw adjustment. Remove RH groomer arm
assembly from cutting unit.
1
3
10.Remove front roller from cutting unit.
NOTE: To prevent grooming reel shaft from turning
when removing driven gear (item 14), use wrench on
shaft flats to hold shaft.
11. Remove the lock nut (item 15) that secures driven
gear (item 14) to grooming reel shaft. Remove driven
gear from shaft.
4
Figure 11
1. Extension spring
2. 43T idler gear
NOTE: To prevent cutting reel from turning when removing groomer drive gear (item 17), use a 1/2” socket
on hex of reel drive shaft that is used for backlapping the
cutting reel.
3. 47T idler gear
4. Groomer drive gear
1
2
12.Loosen and remove groomer drive gear (item 17)
from the cutting reel shaft.
13.Remove four (4) button head screws (item 30) that
secure the RH drive plate assembly (item 12) to the support plate on the cutting unit frame. Remove the RH
drive plate assembly from grooming shaft and cutting
unit.
3
4
14.Carefully pull the grooming reel from the LH support
plate.
15.Inspect seals, bushings and bearings in RH drive
plate, LH support plate and groomer arms for wear or
damage. Also, inspect gears and idler components for
wear or damage. Replace components as needed.
120 in--lb
(13.5 N--m)
Figure 12
1. RH drive plate assy
2. 43T gear/bearing
Installation (Fig. 10)
3. 47T gear/bearing
4. Flange nut
5
2
1. Apply a light coating of grease to ends of grooming
reel shaft and also to seal lips in RH drive plate and LH
support plate. Make sure that all bearings, bushings and
seals are properly installed.
3. Carefully place grooming reel assembly into the LH
support plate taking care to not damage seal in support
plate or O--ring on shaft.
4. Apply light coating of grease to O--ring on RH drive
plate assembly pivot hub and pilot bore of cutting unit
side plate.
Greensmaster Flex 1800/2100
Groomer
2. Make sure that O--ring (item 11) is installed on
grooming reel shaft. Apply light coating of grease to O-ring.
1
3
4
Figure 13
1. Roller cap screw
2. Grooming reel assembly
3. Lock nut
Page 8 -- 15
4. Spring washer
5. Groomer arm lift rod
Groomer
5. Carefully slide RH drive plate onto grooming reel
shaft taking care to not damage seals in drive plate.
Position drive plate to the support plate on the cutting
unit frame and secure with four (4) button head screws
(item 30). Make sure that drive plate rotates freely after
installation.
6. Install driven gear (item 14) onto grooming reel shaft:
A. Apply light coating of grease to hub on driven
gear (item 14).
B. Carefully slide driven gear onto the grooming reel
shaft taking care to not damage seal in drive plate.
NOTE: To prevent grooming reel shaft from turning
when installing driven gear, use wrench on shaft flats
to hold shaft.
C. Secure gear to shaft with lock nut (item 15).
Torque lock nut from 17 to 21 ft--lb (24 to 28 N--m).
NOTE: To prevent cutting reel from turning when installing groomer drive gear (item 17), use a 1/2” socket on
hex of reel drive shaft that is used for backlapping the
cutting reel.
7. Secure groomer drive gear (item 17) to cutting reel
shaft. Torque gear to 125 ft--lb (170 N--m).
8. Install the two (2) idler gears (43T and 47T) to RH
drive plate assembly (Fig. 12). Secure gears with flange
nuts and torque flange nuts 120 in--lb (13.5 N--m).
9. Install extension spring to RH drive plate assembly
(Fig. 11).
Groomer
10.Insert front roller into LH groomer arm assembly.
11. Make sure that bushing (item 3) is installed in RH
drive plate assembly.
12.Apply antiseize lubricant to threads of RH groomer
arm lift rod.
13.Position RH groomer arm assembly to front roller,
RH drive plate and cutting unit frame. Secure groomer
arm to cutting unit with plow bolt (item 35), HOC washer
(item 9) and HOC nut (item 2).
14.Secure RH groomer arm assembly to drive plate with
spring washer (item 4) and lock nut (item 5).
15.Center front roller to cutting unit and tighten cap
screws (item 7) to secure roller.
16.Fill groomer cover with approximately five (5) ounces
(142 grams) of Mobil XHP221 grease (or equivalent).
Install new gasket and then groomer cover assembly to
RH drive plate (see Groomer Cover (Counter Rotating
Groomer Drive) in this section).
17.Check grooming reel height and mower height--of-cut settings. Adjust as needed.
18.Install cutting unit to the machine.
19.Lubricate groomer bearings (see Groomer Installation Instructions).
NOTE: After greasing groomer bearings, operate
groomer for 30 seconds, stop machine and wipe excess
grease from groomer shaft and seals.
Page 8 -- 16
Greensmaster Flex 1800/2100
Grooming Reel Service
Inspect grooming reel blades frequently for damage and
wear. Straighten bent blades with a pliers. Replace
blades that are worn or damaged.
200 to 250 in--lb
(23 to 28 N--m)
6
Carbide tipped grooming blades (Fig. 15) should be replaced if the carbide tip is worn, loose or missing. Also,
if the blade is eroded around the carbide insert, the
blade should be replaced.
Grooming blades without a carbide tip (Fig. 16) should
be replaced if worn or damaged. Blades without a carbide tip that are rounded to the midpoint of the blade tip
can be reversed on the grooming shaft to extend the life
of the blade.
Disassembly (Fig. 14)
2
1
4
5
3
Figure 14
1. Grooming reel shaft
2. Groomer blade
3. Blade spacer
1. Remove grooming reel from cutting unit (see Grooming Reel Removal in this section).
4. Thick spacer (2 used)
5. Lock nut (2 used)
6. O--ring
2
1
2. Remove lock nut from either end of the shaft (Fig.
14).
3. Remove spacers and blades from groomer shaft as
necessary.
ROTATION
Assembly (Fig. 14)
1. Start by placing thick spacer against the lock nut
installed on one end of groomer shaft. Then, place first
blade against installed spacer (Fig. 14).
Figure 15
1. Grooming blade
IMPORTANT: If groomer is equipped with blades
with carbide tips, make sure that blades are
installed with the tips in the same direction.
2. Carbide tip
2
3
1
2. For 1/2 inch (1.3 cm) blade spacing, make sure there
are two (2) blade spacers between blades (Fig. 14).
3. When all blades have been installed, place second
thick spacer on shaft and then thread second lock nut
onto the shaft.
Figure 16
1. Grooming blade
2. Sharp edge
5. Install grooming reel back onto cutting unit (see
Grooming Reel Installation in this section).
1
3. Dull (rounded) edge
CENTER BLADES ON SHAFT
2
Figure 17
1. Lock nut
Greensmaster Flex 1800/2100
Page 8 -- 17
2. Grooming shaft
Groomer
Groomer
4. Position lock nuts to allow blades and spacers to be
centered on the shaft (Fig. 17). Torque lock nuts from
200 to 250 in--lb (23 to 28 N--m) so spacers are not free
to rotate.
ROTATION
Grooming Reel Bearing Replacement
Bearing Removal
1
1. Position machine on a clean and level surface with
engine stopped. Engage parking brake.
2
2. Remove the cutting unit from the machine and place
cutting unit on a flat work area.
3. To remove groomer RH drive plate assembly from
right side of cutting unit, remove front roller, grooming
reel and then drive plate assembly (see Grooming Reel
(Forward Rotating or Counter Rotating) in this section).
3
4. To remove LH support plate assembly from left side
of cutting unit (Fig. 18):
A. Remove reel drive cover, drive belt, reel pulley
and then reel drive assembly from cutting unit (see
Reel Drive Assembly in the Service and Repairs section of Chapter 4 -- Traction and Reel Drive System).
Figure 18
1. Cutting unit
2. Reel drive assembly
3. LH support plate
5
B. Remove lock nut and spring washer that secure
LH groomer arm lift rod to LH support plate (Fig. 19).
Remove support plate from cutting unit.
2
5. Remove grooming reel seals and bearings from RH
drive plate and LH support plate assemblies (Figs. 20,
21 and 22). Discard all removed seals and bearings.
Bearing Installation
1
1. Install new grooming reel bearings and seals into RH
drive plate and LH support plate assemblies (Fig. 23):
IMPORTANT: Bearings should be installed with extended inner races toward center of housing. Also,
apply pressure equally to inner and outer bearing
races when installing bearings.
4
3
Figure 19
1. Roller cap screw
2. Grooming reel assembly
3. Lock nut
4. Spring washer
5. Groomer arm lift rod
FORWARD ROTATING GROOMER
A. Press new outer bearing fully to shoulder of RH
drive plate bore. Then, install new inner bearing until
inner race contacts outer bearing race.
1
3
2
B. Press new bearing into LH support plate until it is
flush with shoulder of bearing bore.
C. Install new seals into groomer side plates. NOTE:
Seals should be installed so the lip side of the seal
will face the center of the cutting reel. When bearings
are greased, grease will purge from inner seals.
2
Seal lips
(toward center of
cutting unit)
3
Figure 20
1. RH drive plate assy
2. Bearing (2 used)
Groomer
Page 8 -- 18
3. Seal (2 used)
Greensmaster Flex 1800/2100
2. Install LH support plate to left side of cutting unit:
COUNTER ROTATING GROOMER
A. Apply antiseize lubricant to threads of LH groomer arm lift rod.
1
3
B. Position LH support plate to cutting unit making
sure that LH groomer arm lift rod is positioned
through bushing in support plate.
2
C. Place spring washer and lock nut on lift rod
threads (Fig. 19). Tighten lock nut.
2
3
D. Install reel drive assembly, reel pulley, reel drive
belt and then reel drive cover to left side of cutting
unit (see Reel Drive Assembly in the Service and Repairs section of Chapter 4 -- Traction and Reel Drive
System).
3. Install grooming reel, front roller and RH drive plate
to right side of cutting unit (see Grooming Reel (Forward
Rotating or Counter Rotating) in this section).
Seal lips
(toward center of
cutting unit)
Figure 21
1. RH drive plate assy
2. Bearing (2 used)
3. Seal (2 used)
1
4. Check and adjust grooming reel height and mower
height--of--cut settings.
Seal lip
(toward center of
cutting unit)
5. Install cutting unit to the machine.
6. Lubricate groomer bearings.
4
2
3
NOTE: After greasing groomer bearings, operate
groomer for 30 seconds, stop machine and wipe any excess grease from groomer shaft and seals.
Figure 22
1. LH support plate
2. Bearing
3. Seal
4. Plug
2
3
6
1
5
5
4
Groomer
5
7
8
Figure 23
1.
2.
3.
4.
Greensmaster Flex 1800/2100
Page 8 -- 19
Outer bearing
Drive plate shoulder
Inner bearing
Inner race
5.
6.
7.
8.
Seal lip
Support plate bearing
Drive plate (RH side)
Support plate (LH side)
Groomer
Idler Assembly (Forward Rotating Groomer Drive)
7
5
6
4
3
2
1
8
11
9
10
12
Figure 24
1.
2.
3.
4.
Pivot hub
Spacer
Idler bracket
Spacer
Groomer
5.
6.
7.
8.
RH drive plate
O--ring
Retaining ring
Grease fitting
Page 8 -- 20
9.
10.
11.
12.
Bearing (2 used)
Retaining ring
Idler pulley
Lock nut
Greensmaster Flex 1800/2100
The groomer RH drive plate assembly incorporates the
idler system for tensioning the groomer drive belt. The
idler system uses a spring to maintain proper belt tension.
1
5
2
4
Removal
1. Position machine on a clean and level surface with
engine stopped. Engage parking brake.
2. Remove groomer belt cover, drive belt and drive
pulley from groomer drive side of mower (see Grooming
Reel Removal in this section).
3. Using Figures 24 and 25 as guides, remove idler
bracket, idler pulley and/or idler bearings as needed.
Installation
3
Figure 25
1. Drive pulley
2. Idler pulley assembly
3. Driven pulley
4. RH drive plate assy
5. Groomer drive belt
1. Assemble components using Figures 24 and 25 as
guides.
NOTE: When properly installed, the idler pulley should
move freely from side to side on the idler bracket pin.
2. Install drive pulley, drive belt and belt cover to right
side of mower (see Grooming Reel Installation in this
section).
Groomer
3. Check and adjust grooming reel height and mower
height--of--cut settings.
Greensmaster Flex 1800/2100
Page 8 -- 21
Groomer
Idler Assembly (Counter Rotating Groomer Drive)
9
1
8
12
7
2
10
11
6
3
4
5
Figure 26
1.
2.
3.
4.
RH drive plate
Adjustment cam
Spacer
Idler bracket
5.
6.
7.
8.
Spacer
Reel hub
Retaining ring
O--ring
9.
10.
11.
12.
Flange nut
Extension spring
Grease fitting
Grease seal
The groomer RH drive plate assembly incorporates the
idler system for engaging the groomer gear drive.
5. Using Figure 26 as a guide, remove idler components from RH drive plate as needed.
Disassembly (Fig. 26)
Assembly (Fig. 26)
1. Position machine on a clean and level surface with
engine stopped. Engage parking brake.
1. Assemble idler components to RH drive plate using
Figure 26 as a guide. Make sure that retaining ring (item
7) is fully seated in groove of reel hub after assembly.
2. Make sure that handle on groomer cover is rotated
toward front of machine so that groomer drive is engaged.
3. Remove groomer cover assembly and gasket from
machine (see Groomer Cover (Counter Rotating
Groomer Drive) in this section).
4. Remove RH drive plate assembly from right side of
cutting unit (see Grooming Reel (Counter Rotating
Groomer Drive) in this section).
Groomer
NOTE: When properly installed, the idler bracket (item
4) should pivot freely on reel hub.
2. Install RH drive plate assembly to right side of cutting
unit (see Grooming Reel (Counter Rotating Groomer
Drive) in this section). Make sure that groomer drive
gear and grooming reel driven gear are properly
torqued. Do not install idler gears, extension spring or
groomer cover assembly to drive plate assembly.
Page 8 -- 22
Greensmaster Flex 1800/2100
3. Check adjustment of adjustment cam (Fig. 28):
4
A. Rotate idler bracket so the bracket stop is against
the adjustment cam.
2
B. While holding bracket stop against the cam, measure the distance between the idler gear bearing surfaces on the idler bracket and the drive plate. This
distance should be 1.484” (37.7 mm).
C. If distance is incorrect, loosen flange nut that secures adjustment cam to drive plate. Rotate the adjustment cam until distance is correct. Then, tighten
flange nut to secure adjustment. Make sure that distance is still correct after tightening the nut.
4. Install idler gears to drive plate assembly (Fig. 29).
Torque flange nuts that secure idler gears 120 in--lb
(13.5 N--m).
1
3
Figure 27
1. Groomer cover assembly
2. Screw (5 used)
5. Install extension spring to idler bracket and adjustment cam.
6. Fill groomer cover with approximately five (5) ounces
(142 grams) of Mobil XHP221 grease (or equivalent).
Install new gasket and then groomer cover assembly to
RH drive plate (see Groomer Cover (Counter Rotating
Groomer Drive) in this section).
1.484”
(37.7 mm)
4
3
2
3. Gasket
4. Handle
7. Check and adjust grooming reel height and mower
height--of--cut settings.
5
1
Figure 28
1. Idler bracket
2. Idler bracket stop
3. Adjustment cam
4. Idler bearing location
5. Plate bearing location
1
Groomer
3
4
2
120 in--lb
(13.5 N--m)
Figure 29
1. RH drive plate assy
2. Flange nut
Greensmaster Flex 1800/2100
Page 8 -- 23
3. 43T idler gear/bearing
4. 47T idler gear/bearing
Groomer
Lift Arm Assembly
1
14
2
13
15
11
7
12
16
10
8
Antiseize
Lubricant
9
7
6
3
4
17
Antiseize
Lubricant
18
5
Antiseize
Lubricant
Figure 30
1.
2.
3.
4.
5.
6.
HOC groomer arm (LH shown)
Flange nut
Grooved pin
E--ring
Groomer lift rod
Lock screw
Groomer
7.
8.
9.
10.
11.
12.
Bushing
Lift arm assembly (LH shown)
Detent spring
Spring washer
Cap screw
Bushing
Page 8 -- 24
13.
14.
15.
16.
17.
18.
Wave washer
Groomer adjuster
Groomer plate (LH shown)
Lock nut
Spring washer
Bushing
Greensmaster Flex 1800/2100
Disassembly (Fig. 30)
Assembly (Fig. 30)
1. Position machine on a clean and level surface with
engine stopped. Engage parking brake.
1. Assemble lift arm using Figure 30 as a guide.
2. Remove flange nut (item 2) that secures lift arm to
HOC groomer arm. Remove lock nut (item 16) and
spring washer (item 17) that secure lift arm to groomer
plate. Loosen lock screw (item 6) completely.
3. Remove lift arm from cutting unit.
4. Disassemble lift arm using Figure 30 as a guide.
NOTE: Right and left side HOC groomer arms (item 1)
and lift arm assemblies (item 8) are different; other components shown in Figure 30 are the same on both sides
of cutting unit.
2. Apply antiseize lubricant to threads of groomer lift
rod (item 5) and lift arm assembly stud (item 8).
3. Install lift arm onto cutting unit. Secure with flange nut
(item 2) and lock nut (item 16) with spring washer (item
17).
4. Secure groomer in raised or lowered position with
lock screw (item 6).
5. Check and adjust grooming reel height and mower
height--of--cut settings.
Groomer
NOTE: Grooved pin (item 3) is used to retain lock screw
(item 6) to lift arm assembly.
Greensmaster Flex 1800/2100
Page 8 -- 25
Groomer
Groomer Brush
3
1
2
5
20 to 25 in--lb
(2.3 to 2.8 N--m)
3
20 to 25 in--lb
(2.3 to 2.8 N--m)
4
2
Figure 31
1. Groomer brush shaft
2. Lock nut
3. J--bolt
4. Groomer brush
5. O--ring
The groomer brush attaches to the groomer drive in
place of the grooming reel. Removal and installation of
the groomer brush uses the same procedure as removal
and installation of the grooming reel (see Grooming
Reel (Forward Rotating or Counter Rotating) in this section).
To remove the groomer brush from the shaft, remove the
lock nut and J--bolt from both ends of the brush and slide
the brush from the shaft. When assembling the brush to
the shaft, secure the assembly with J--bolts and lock
nuts. Make sure that the J--bolts are installed with the
threaded portion on the outside of the brush (Fig. 32).
Torque lock nuts from 20 to 25 in--lb (2.3 to 2.8 N--m).
Groomer
1
2
Figure 32
1. J--bolt
Page 8 -- 26
2. Lock nut
Greensmaster Flex 1800/2100