Download OPERATING INSTRUCTIONS AND SERVICE MANUAL

Transcript
OPERATING INSTRUCTIONS AND SERVICE MANUAL
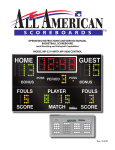
BASKETBALL SCOREBOARD
MODEL MP-5254R With MP-5000 Control
EFFECTIVE S.N. 18,725 June 3, 2003
TABLE OF CONTENTS
1.
GENERAL INFORMATION
1.1
1.2
1.3
1.4
2.
INSTALLATION
2.1
2.2
2.3
2.4
3.
GENERAL INFORMATION
INSPECTION
PRE-TEST
ELECTRICAL CONNECTIONS
CONTROL CONSOLE OPERATION
3.1
3.2
3.3
3.4
3.5
3.6
3.7
3.8
3.9
3.10
3.11
3.12
3.13
3.14
3.15
3.16
3.17
3.18
4.
DESCRIPTION
IDENTIFICATION
DAMAGE
DAMAGE CLAIM PROCEDURE
SCOREBOARD POWER
CONSOLE DISPLAY
CONSOLE POWER
TO USE SCOREBOARD
TIME OF DAY OPERATION
TIME SETTING AND CONTROL
FINAL MINUTE 1/10 SECOND TIME OPTION
TEAM SCORES
HORN
BONUS INDICATOR
PERIOD INDICATORS
TIMEOUT PERIOD
BALL POSSESSION INDICATOR
TIME OUTS LEFT
TEAM FOULS
PLAYER NUMBER AND PLAYER FOULS
WRESTLING OPERATION
VOLLEYBALL OPERATION
MAINTENANCE AND TROUBLESHOOTING
4.1
4.2
4.3
4.4
INTRODUCTION
TEST EQUIPMENT
TROUBLESHOOTING
TROUBLESHOOTING GUIDE
2
5.
REPLACEMENT PARTS LIST
5.1
5.2
5.3
6.
SCOREBOARD DISPLAY PARTS
CONTROLLER ASSEMBLY PARTS
POWER SUPPLY ASSEMBLY PARTS
DIAGRAMS
6.1
6.2
6.3
6.4
6.5
6.6
6.7
6.8
CONTROL CONSOLE KEYBOARD AND SLIPSHEET LAYOUT
SCOREBOARD SYSTEM LAYOUT
CONTROLLER ASSEMBLY WIRING
POWER SUPPLY DIAGRAM
RECEIVER BOARD DIAGRAM
DRIVER BOARD DIAGRAM
MICROPROCESSOR 4 X 7 LED PATTERN (8 BIT)
INSTALLATION DRAWING
3
1. GENERAL INFORMATION
1.1
Description
Your All-American scoreboard has been carefully inspected and tested before leaving
the factory. It is possible, however, that components may be loosened or forced out
of adjustment in transit. If this occurs, follow the troubleshooting guide (section 4).
If equipment then fails to operate, contact immediately:
ALL-AMERICAN Service Department
EVERBRITE LLC
P.O. Box 100
Pardeeville, WI 53954
Telephone: (608) 429-2121
Toll Free: 800-356-8146
E-mail [email protected]
Parts being returned for repair are to be sent to:
ALL-AMERICAN Service Department
EVERBRITE LLC
401 S. Main Street
Pardeeville, WI 53954
E-mail [email protected]
NOTE
If you need to send parts in for repair, please call the ALL AMERICAN
service department for a returned goods authorization (RGA) number.
1.2
Identification
The serial number tags are located on the back of the control console and the lower
right hand corner on the face of the scoreboard display. When contacting the factory
for assistance it is important that the model number and serial number are known.
1.3
Damage
Upon receipt, check for visible damage. If this occurs, or if damage is found after
shipment has been accepted, follow the damage claim procedure.
4
1.4
Damage Claim Procedure
An instruction sheet is enclosed advising the consignee in case of damage in transit.
If damage is noted at the time of delivery, consignee must obtain an 'Inspection of
Bad Order' from the delivering carrier. In order to process your claim, this must be
properly filled out with a complete statement of all damage and it must be signed by
the carrier.
If damage is discovered after delivery, you should call the delivery company. Have
them make out a Concealed Damage Report. Fifteen days after delivery are allowed,
so this should be done promptly or it is impossible to process this claim.
Advise EVERBRITE corporation of necessary replacement parts, or repairs.
Consignee will be invoiced and then should file a claim with the carrier to recover
charges. To file your claim follow this procedure:
(A) Cost of replacement parts or repair charges are invoiced to the carrier by the
consignee.
(B) The following documents, properly filled out, plus invoice, are
forwarded to the trucking company in support of your claim:
(a) Original bill of lading
(b) Original paid freight bill
(c) Certified copy of original invoice
(d) Standard form for presentation of loss and damage claim
2. INSTALLATION
2.1
General Information
Shipping papers accompany each scoreboard. Check carefully to see that you receive
the following:
1 ea 4-sided Basketball Display
1 ea Control Console
1 ea Service Manual
1 ea AC Wall Adaptor
2.2
Inspection
Inspect each unit and tighten all screws and fittings that may have loosened in
shipment.
5
2.3
Pre-Test
Before installing the scoreboard, pre-test all functions.
(A) Connect the scoreboard to a 15 AMP, 120 Volt AC circuit.
(B) Plug the power adaptor into the control console and into a wall outlet.
(C) Make sure that the control console is at least 10' from the scoreboard display.
(D) Test operate all functions on the scoreboard according to operating instructions
in section 3 of this manual.
(E) When all the functions test out, disconnect the power and the control
console before hanging the scoreboard.
2.4
Electrical Connections
This scoreboard requires a 120 V. 20 AMP AC circuit for the exclusive use of the
scoreboard. If you want to be able to turn the scoreboard off when not in use, by
means other than turning off the circuit breaker, a disconnect switch ( NOT
SUPPLIED ) must be installed by the installer or an electrician.
NOTE
To protect the control from damage, it is advisable that you disconnect the
control and store in a dry secure area when not in use.
NOTE
This equipment is UL and NRTL approved and complies with the requirements in
part 15 of the FCC rules for a class A computing device. Operation of this
equipment in a residential area may cause unacceptable interference to radio
and television reception, requiring the operator to take whatever steps are
necessary to correct the interference.
6
3. CONTROL CONSOLE OPERATION
3.1
Scoreboard Power
Turn on the branch circuit to the scoreboard. The scoreboard will blank all figures.
3.2
Console Display
The 2 line by 20 character Liquid Crystal Display module displays the scoreboard
information entered from the keyboard. The following information is displayed
during normal operation: Time, Home and Guest scores, Period, Home and Guest
Bonus, Ball Possession, Auto Horn Enable, and 1/10 Second Enable.
3.3
Console Power
Plug the hand held remote control into the scoreboard control console if you have a
hand held time control.
Plug the control console into the wall junction box.
Push
ON/OFF
once to turn the console on.
Push
ON/OFF
a second time to shut the console off.
When first turned on; the console display should show as follows.
MULTISPORT CONTROL
MP5000 VER 2.12 2002
3.4
To Use Scoreboard
Enter the two digit code (58) shown in the upper right corner of the keyboard as in
the following example:
Push
CODE
5
8
ENTER .
When the proper code has been entered, the console LCD will show as follows.
0
0
:00
H E
0
0
7
Home and Guest scores will now show "0", and the timer will show ":00".
3.5
Setup
The
SETUP key will step through a list of operational settings.
Press
YES/NO or make Numeric Entries to make changes.
Pushing
ENTER without any other input skips to the next item.
Pushing
CLEAR exits setup and all changes are kept.
Select brightness level for the scoreboard digits by pushing 1-8 and
Select game time period. Example, 800 and press
ENTER .
ENTER for 8 minutes.
Select time out length. Example, 100 and press
ENTER for 1 minute.
Select time outs allowed. Example, 3 and press
ENTER for 3 time outs.
Select automatic horn for end of period. Example, Yes/No and press
ENTER .
Select 1/10 second timing for the last minute of play. Example, Yes/No and press
ENTER .
Select set time of day clock. Example: Press
2
1
5
ENTER
for 2:15. The scoreboard will display the time of day after game time use, if desired.
Accurate time will be kept without power to the scoreboard for up to 2 months.
3.6
Timing
The main game time period is set in the "SETUP" Program, however this time
period may be changed or edited using the
To change the period time; Push
EDIT TIME
key.
EDIT TIME , the desired time period, then
ENTER .
To reset the period time to the original setting; Push
8
TIME RESET .
To change the time period directional mode for counting up or down; Push
UP/DOWN .
When in the Up mode, an arrow up symbol is displayed next to the time on the LCD
display. If in the Down mode, there is no arrow displayed.
3.7
Team Scores
The Home and Guest Scores can be changed in five different ways.
(A) To add 1 to the existing score: Push
+1 .
(B) To add 2 to the existing score: Push
+2 .
(C) To add 3 to the existing score: Push
+3 .
(D) To directly enter or correct a score: Push Home or Guest
by the desired number, then
SCORE followed
ENTER .
Example: Present Home Score is 15. Change the score from 15 to 23.
Push: Home
SCORE
(E) To clear the score: Push
3.8
2
3
SCORE
ENTER .
CLEAR .
Horn
The horn will blow each time
HORN is pressed.
The horn will blow automatically at the end of each period for 2 seconds, if selected
in the setup mode.
An 'H' is displayed on the LCD when this function is enabled.
3.9
Bonus Indicators
Push Home or Guest
BONUS to illuminate the appropriate bonus indicator. A
'<B' or 'B>' will be displayed when the bonus is illuminated.
3.10 Period Indicators
Push
PERIOD once to increment the period indicator. The LCD display will
9
show the period directly below the time.
3.11 Timeout Period
An automatic timeout period is selected in the setup mode, and is provided for
"Time Outs" when the main timer is not running.
Push:
TIME OUT TIMER to start the 1 minute timer. The LCD will show
"TIME OUT = 1:00" and start to count down. When 1 minute has elapsed the
internal beeper sounds, and the display returns to the current game time.
If you want to return to play before the Time Out Timer gets back to zero,
push:
TIME OUT TIMER
CLEAR and the console will return to play
mode.
3.12 Time Outs Left
The Time Outs allowed per game for each team are selected in the setup mode.
If, at Time Out, you push home or guest
TIME OUT , it will start the time out
timer and subtract a time out from the home or guest team. At the end of the
selected time out period the LCD will go to game time and be ready to go. If you
wish to start the game again before the one minute time out period ends, just push:
TIME OUT
CLEAR and the LCD will again go to the game display.
3.13 Ball Possession Indicator
The ball possession indicators alternate with each
BALL POSS entry.
The possession is displayed on the LCD with a '<P' or 'P>' to show Home or
Guest possession.
Push:
POSS.
CLEAR to clear both possession symbols.
3.14 Team Fouls
The Home and Guest team fouls are entered in the same manner as the Home and
Guest team scoring direct entry method.
Example: Present guest team foul is 3. Change to 4.
10
Key in Guest
FOUL
ENTER .
4
The control display will now show game time, and the scoreboard display will show
4 team fouls for the guest team.
3.15 Player Number and Player Fouls
The player number and player fouls information is entered as in the following
example:
If player number 25 gets a foul;
Push
PLAYER NO.
2
5
ENTER
ENTER .
1
The control console memory will store the player numbers and fouls for up to 20
players for each team. This information may be viewed on the LCD display at any
time.
This information is now stored in memory. To view the information, push
HOME STATS
or
GUEST STATS
key. The first 5 player numbers
entered, and their fouls are displayed.
Push the
HOME STATS
or
GUEST STATS key a second time to display
the next 5 player numbers and fouls. To return to normal game display,
push
GAME DISPLAY .
To clear a player number/foul from memory: push,
the number you want to clear, then
ENTER
PLAYER NO. followed by
CLEAR .
3.16 Wrestling Operation
When using the MP-5214 scoreboard for wrestling, replace the basketball slipsheet
with the wrestling slipsheet, The code is 60 for wrestling. All keyboard entries are
made in the same way as for basketball, with the following exceptions:
The console LCD display shows; Time, Home and Guest score, Home and Guest
Bout scores, Period, Weight Class, and Auto Horn Enable continuously.
The
+1 ,
+2 , and
+3 keys now control the Bout scores instead of team
scores.
To enable the advantage timer, push:
ADV SET
11
0
0
ENTER .
Use the Home or Guest
ADV key to indicate who has the advantage.
When the main timer is running, the
ADV OFF key will stop the advantage timer.
The Home or Guest BONUS indicator will light to show which side has the
advantage.
Pushing home or guest
Push
ADV will restart the timer.
ADV CLEAR to clear the timer back to :00.
3.17 Volleyball Operation
When using the scoreboard for volleyball, replace the console slipsheet with the
volleyball slipsheet. The code is 70 for volleyball. Operation of all keys is similar
to basketball operation.
The console LCD display shows; Time, Home and Guest Score, Home and Guest
Games Won, Game, Serving, and Auto Horn Enable continuously.
4. MAINTENANCE AND TROUBLESHOOTING
4.1
Introduction
This section gives maintenance and troubleshooting information. Included are
troubleshooting guides for typical scoreboard malfunctions. If the cause of a problem
cannot be determined, please contact the customer service department.
WARNING !!!
120 VAC wires are exposed whenever the cover over the power supply assembly is
removed from the scoreboard. Use extreme caution during troubleshooting or repair.
To avoid possible damage to equipment or personal injury, always turn off the main
power before removing the cover or replacing assemblies.
4.2
Test Equipment
A simple analog or digital voltmeter will be sufficient for all user repairable
problems. Printed circuit boards requiring troubleshooting should be returned to the
factory.
12
4.3
Troubleshooting
Whenever possible, follow the troubleshooting guides prior to contacting the
customer service department. If a problem not described in the guides exists, contact
the customer service department immediately. Refer to the diagrams provided for
assistance in troubleshooting scoreboard malfunctions.
4.4
Troubleshooting Guides
(A) Scoreboard doesn't light
(a) Check that the main power switch is turned on.
(b) Replace any defective or blown fuses.
(c) Check the power connections and voltages at the scoreboard.
(d) Check to see that the Green LED on the power supply is lit.
(e) Check for 12 VDC at the power supply terminal.
(f) Contact the customer service department.
(B) Control console doesn't turn on
(a) Check that the AC power to the AC adaptor is turned on.
(b) Replace any defective or blown fuses.
(c) Check the power connections and voltages in the control.
(d) Contact the customer service department.
(C) The scoreboard digits light, the console works, but there is no control of the
scoreboard.
(a) With the main power switch "off"; remove the cover over the power
supply and receiver.
(b) Check all connections.
(c) Turn the main power on.
(d) Turn the control console on and enter the code.
If LED D1 on the receiver board is flashing rapidly call the customer service
department.
(D) Scoreboard digits don't light, but the console works
(a) With the main power switch "off"; remove the cover over the power
supply and receiver.
(b) Check all connections.
(c) Turn the main power on.
(d) If the scoreboard still doesn't light, check the voltage between the
positive and negative terminal strips on the power supply for 12 VDC
with a voltmeter set on the 12 VDC or higher scale.
If the voltage is 12 VDC or greater, go to (e).
13
If the voltage is less than 12 VDC check the power supply input voltage for
120 VAC and contact the customer service department.
(e) Check LED D4 on the receiver board. It should be medium brightness.
Change the Dim level on the control console. D4 brightness should change.
(f) Check if LED D5 on the receiver board is on.
If D5 is on, check if D2 and D6 are flashing and call customer service
department. The flash will be very fast. The LED's may appear to be on at
half brightness.
If D5 is not on, check that the receiver board is plugged into the power
supply and call the customer service department.
(E) The scoreboard works, but some digits do not change.
(a) Reseat the data in ribbon cable connectors.
(b) Swap the driver board with a driver further down the shift order.
(c) If the digit still doesn't work call the customer service department.
CLUSTER REMOVAL
If it becomes necessary to remove a LED cluster: Insert a pointed object, like the end of
a ball point pen, into the two holes in the cluster retaining ring, and rotate the cluster
until these holes are at 3:00 o'clock and 9:00 o'clock. At this position the cluster should
be removable from the front of the face of the scoreboard.
Reverse the procedure to install the cluster.
14
5. REPLACEMENT PARTS LIST
5.1 Scoreboard Display Parts
1
figure 1
DISPLAY ASSEMBLY
15
REPLACEMENT PARTS LIST (MP-5214 Basketball)
fig.& MFG PART
index NUMBER
REF
DES
DESCRIPTION
VENDOR
PART #
1-
150707
Display Assembly
150707
1-1
151032
Controller Assembly
SEE FIGURE 2
A2
151032
1-2
EL00525P
Relay, 12 VDC DPDT 10A contacts
K1
MY2DC12(S)
1-3
151731
Power Supply Plate Assy
SEE FIGURE 3
A9
151731
1-4
1-5
1-6
1-7
1-8
150822
150820
150821
151727
703609
Cluster, Green
Cluster, Red
Cluster, Amber
Power Supply Cover
Horn, 350N
150822
150820
150821
151727
703609
151735
151684
151692
151735
151684
151681
SW005100
151740
930894
EL057700
151682
WH009100
122763
Control Console
Slipsheet Pair
Transmitter PCB Assembly
***** PROGRAM MP5000 V2.12 *****
Toggle Switch,
Cable Assy, 25'
Connector, 6 Pin Male Cable
LCD Display, 2 Line 20 Character
Keyboard Assembly,
Ribbon Cable Assembly, 14C 8"
Enclosure,
151739
930895
150500
Wall Junction Box, Single
Connector, 6 Pin Female
Cable, MP-41 Control
J1
151739
RM12BRD6S
8723
151741
930895
150500
Wall Junction Box, Dual
Connector, 6 Pin Female
Cable, MP-41 Control
J1-J3
151741
RM12BRD6S
8723
16
A1
S1
P1
SW005100
151740
RM12BPG6P
151682
WH009100
5.2 Controller Assembly Parts
6
figure 2
CONTROLLER ASSEMBLY
REPLACEMENT PARTS LIST (MP-5214) Controller Assembly
fig.& MFG PART
index NUMBER
DESCRIPTION
REF
DES
VENDOR
PART #
2-
151032
Controller Assembly
A2
151032
2-1
150635
PC Board Assy, 5000 Series Receiver
***** PROGRAM RX5000 V2.12 *****
A3
150635
2-2
150634
PC Board Assy, 4 Pos. Driver
A4-A8
150634
2-3
2-4
2-5
151718
705723
930674
Cable Set, DC Power 4"
Spacer, Amerlock
Cable Assy, 3" Ribbon 7C Fem.
17
151718
SPC# PCS-6
CE 100F22-7 Pand
5.3 Power Supply Assembly Parts
7
figure 3
POWER SUPPLY PLATE ASSEMBLY
REPLACEMENT PARTS LIST (MP-5214) Power Supply Plate Assembly
fig.& MFG PART
index NUMBER
DESCRIPTION
3-
151731
Power Supply Plate Assembly
3-1
BL00054P
Power Supply, 12V 150 Watt
3-2
3-3
3-4
3-5
3-6
EL00525P
703118
701011
701037
151716
Relay, 12 VDC DPDT 10A contacts
Socket, Relay
Fuse, 5A 250 V
Fuseholder,
Cable Assy, 3' Power
18
REF
DES
VENDOR
PART #
A6
151731
S-150-13-5
K1
A7
F1
MY2DC12(S)
27E008
MTH-5
151716
6. DIAGRAMS
6.1 Control Console Keyboard and Slipsheet Layout
8
for Basketball Operation
9
for Wrestling Operation
19
6.1 Control Console Keyboard and Slipsheet Layout (cont.)
1
0
for Volleyball Operation
CONSOLE KEYBOARD
20
6.2 Scoreboard System Layout
11
SYSTEM LAYOUT
21
6.3 Single Wall Junction Box Wiring
1
2
SINGLE JUNCTION BOX WIRING
22
6.4 Dual Wall Junction Box Wiring
1
3
DUAL JUNCTION BOX WIRING
23
6.5 Controller Wiring Diagram
14
CONTROLLER ASSEMBLY
24
6.6 Power Supply Diagram
1
5
POWER SUPPLY
25
6.7 Receiver Board Diagram
16
RECEIVER BOARD
26
6.8 Driver Board Diagram
17
DRIVER BOARD
27
6.9 Microprocessor 4 X 7 LED Pattern (8 Bit)
18
MICROPROCESSOR 4 X 7 (8 BIT) LED PATTERN
28
6.10
Installation Drawing
1
9
INSTALLATION DRAWING
29