1
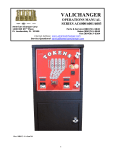
MULTI-DENOMINATION BILL
AND BILL & COIN CHANGERS
AC7502.1
AC7512.1
AC7505.1
AC7515.1
OPERATION MANUAL
ARL Listed STD: UL756
American Changer Corporation
1400 NW 65th Place
Ft. Lauderdale, FL 33309
Parts & Service:(888)741-9840
Sales:(800)741-9840
Fax:(954)917-5204
Internet Address: www.americanchanger.com
Service Questions? e-mail: [email protected]
TABLE OF CONTENTS
SPECIFICATIONS
SECTION A: SET-UP & INSTALLATION
Uncrating & Setup
Mounting Instructions
Loading the F53 Bill Dispenser
Filling the Coin Hopper
Fuse Replacement
2
2-3
3-4
5
5
SECTION B: BOARD PROGRAMMING
Programming the AC7500.1 Series
6-14
SECTION C: MEI (MARS) VALIDATOR
MEI AE2602 Bill Validator Info.
15-19
SECTION D: FUJITSU F-53 BILL DISPENSER
INFORMATION
20-21
F-53 Dispenser Information
22
F-53 Sensor locations
23-32
F-53 Error Code Descriptions
33-35
F-53 Cleaning & Maintenance
SECTION E: COIN HOPPER SERVICE MANUAL
36-42
Money Controls MKIV Universal Hopper
SECTION F: PARTS LISTS
Coin Hopper Breakdown
MARS Parts Breakdown
43
44-46
SECTION G: SERVICE CENTERS
MARS Authorized Service Centers
47-49
Revision 30A-27 7.28.06
Operating voltage
Power Consumption
Operating Temperature
Interface to F-53
Interface to Validator
120Vac +10/-15%
Logic Board: 10W
F-53: 144W max.
Validator: 50W max.
32 – 130 degrees
Fahrenheit
24Vdc, RS-232
24Vdc, MDB
WARRANTY
The MEI (Mars) Validator is under warranty for two
(2) years from the date of purchase. The dispensers
and logic boards are under warranty for one (1)
year from the date of purchase.
COVERED
•
Defects in workmanship or materials
NOT COVERED
•
Damage caused by physical abuse
•
Misapplication
•
Vandalism
•
End user’s attempt to repair item
•
Cleaning / Maintenance
It is the End User’s responsibility to follow the
cleaning & maintenance procedure outlined on
page 18. Any unit coming in for repair
requiring only a cleaning will be charged a flat
rate of $65.00 plus shipping and handling.
A Return Material Authorization number (RMA
#) must be obtained before returning a unit
for repair. A copy of invoices must accompany
any and all warranty work.
UNCRATING AND SETUP
9. NOTE: SECURING THE CHANGER USING
LESS THAN ALL 4 HOLES MAY BE
DANGEROUS. EACH HOLE NEEDS A BOLT
THROUGH IT MOUNTED SECURELY TO
THE WALL. MOUNTING THE CHANGER IN
ANY OTHER WAY MAY RESULT IN THE
CHANGER BEING TORN OFF OR FALLING
OFF
THE
WALL,
RESULTING
IN
PERSONAL
OR
CUSTOMER
INJURY
ALONG WITH ELECTRICAL SHOCK.
10. Choose a height to mount the changer,
keeping in mind that a handicapped person in
a wheelchair should still be able to insert a
bill into the bill validator. (We recommend
no higher than 4 feet above the ground.)
11. Have someone hold the changer against the
wall while someone else marks the holes.
CAUTION: THE CHANGER WEIGHS 125
POUNDS; DO NOT EXERT YOURSELF SO
THAT YOU MAY CAUSE AN INJURY.
12. BEFORE DRILLING THE FOUR MARKED
HOLES ENSURE THAT THERE ARE NO
ELECTRICAL WIRES, TELEPHONE LINES,
GAS, OR WATER LINES BEHIND THE
WALL WHICH DISRUPTING MAY CAUSE
PERSONAL INJURY OR LOSS OF LIFE!
13. Hold the changer back up to the wall. Thread
and tighten bolts.
14. Verify that the machine is securely mounted,
and reinstall the bill dispenser and coin
hopper (model AC7502.1 only).
Remove your AC7500 series dispenser from the
shipping box. Take the Hex handle out of the
manila envelope and open the door. The lock
system is a screw-in type and, therefore, must be
turned at least 10 times counter-clockwise until it
opens. Inspect the interior for any connectors or
components that may have been dislodged
during shipping. The lock and keys for your MultiDenomination Changer will also be inside the
manila envelope, along with this manual. To
install the locks, insert a cylinder into the center
of each of the round holes. Turn the keys
counter-clockwise ¼ turn, and remove the keys.
NOTE: The only way to get a duplicate set of keys
made is to save the silver tag that comes between
the keys. Write your Key ID# below for reference.
ALL KEY ORDERS TAKE 4-6 WEEKS!!!
MOUNTING THE AC7502.1/AC7512.1
TO A WALL
IF YOU ARE UNSURE IN ANY WAY IN
PROCEEDING WITH THE FOLLOWING STEPS,
PLEASE HIRE A LOCAL PROFESSIONAL
ELECTRICIAN TO MOUNT YOUR CHANGER
FOR YOU!
1. Disconnect any and all AC power going into
the AC7500 series changer.
2. Slide the bill dispenser and the coin hopper
(model AC7502.1 only) out of the cabinet.
3. Note:
You will need to verify with the
building code that it is allowable to plug the
changer into a 3 prong grounded wall outlet.
Do not use an extension cord unless
allowed by the building electrical code.
If it is not, there must be 120VAC run
through a conduit into the changer. If this is
not required, proceed to step #6.
4. Let an electrician run the conduit, install the
new breaker, run the wire, and help decide
how the wiring will enter the changer (from
the back or the bottom). This will affect the
mounting location.
5. After the conduit has been installed, proceed
with the mounting.
6. Locate the 4 punch-outs on the back wall of
the changer.
Using a screwdriver and
hammer knock the punch-outs out by hitting
them from the inside of the changer.
7. Using a stud finder, select a location to hang
the changer by locating the wall studs.
8. Find an appropriate wall to bolt the changer
into.
The wall should have studs or be
constructed of concrete. You may also be
required to use a support brace under the
changer. Consult a professional with any
questions you may have.
MOUNTING THE AC7505.1/AC7515.1
INTO A WALL
IF YOU ARE UNSURE IN ANY WAY IN
PROCEEDING WITH THE FOLLOWING STEPS,
PLEASE HIRE A LOCAL PROFESSIONAL
ELECTRICIAN TO MOUNT YOUR CHANGER
FOR YOU!
1.
Disconnect any and all AC power going into
the AC7500 series changer.
2. Slide the bill dispenser and the coin hopper
(model AC7505.1 only) out of the cabinet.
3. Note:
You will need to verify with the
building code that it is allowable to plug the
changer into a 3 prong grounded wall outlet.
Do not use an extension cord unless
allowed by the building electrical code.
If it is not, there must be 120VAC run
through a conduit into the changer. If this is
not required, proceed to step #6.
4. Let an electrician run the conduit, install the
new breaker, run the wire, and help decide
how the wiring will enter the changer (from
the back or the bottom). This will affect the
mounting location.
5. After the conduit has been installed, proceed
with the mounting.
6. Find an appropriate wall to bolt the changer
into. The wall should have studs or be
constructed
of
concrete.
Consult
a
2
7.
8.
9.
10.
11.
12.
13.
professional with any questions you may
have.
NOTE: SECURING THE CHANGER USING
LESS THAN 4 BOLTS OR WELDED ANGLE
IRON MAY BE DANGEROUS. EACH HOLE
NEEDS A BOLT THROUGH IT MOUNTED
SECURELY TO THE WALL.
MOUNTING
THE CHANGER IN ANY OTHER WAY MAY
RESULT IN THE CHANGER BEING TORN
OR FALLING OUT OF THE WALL,
RESULTING IN PERSONAL OR CUSTOMER
INJURY
ALONG
WITH
ELECTRICAL
SHOCK.
Choose a height to mount the changer
keeping in mind that a handicapped person in
a wheelchair should still be able to insert a
bill into the bill validator. (We recommend
no higher than 4 feet above the ground).
AC7505.1 and AC7515.1 changers have four
holes in the bottom of the cabinet to be used
for bolting it into the wall.
Have someone hold the changer inside the
wall while someone else marks the bolt
holes.
CAUTION: THE CHANGER WEIGHS 125
POUNDS; DO NOT EXERT YOURSELF SO
THAT YOU MAY CAUSE AN INJURY.
BEFORE DRILLING THE FOUR MARKED
HOLES ENSURE THAT THERE ARE NO
ELECTRICAL WIRES, TELEPHONE LINES,
GAS, OR WATER LINES INSIDE THE
WALL WHICH DISRUPTING MAY CAUSE
A LOSS OF LIFE OR PERSONAL INJURY!
Put the changer back into the wall. Thread
and tighten the bolts.
Verify that the machine is securely mounted,
and reinstall the bill dispenser and coin
hopper (model AC7505.1 only).
2. Push the button on the bottom right of an
inserted cartridge to release it. Then, slide it
straight forward, and out of the dispenser.
3. On the opposite side of the release button is
another button that unlocks the top of the
cartridge. Push it, and swing open the top.
PRESSURE PLATE
FRONT
REAR
GUIDE
SIDE GUIDES
4.
LOADING THE F53 BILL DISPENSER
Different bill types are held in individual bill
cartridges that are removable from the main
dispenser body. Perform the following procedure
to load bills into a cartridge, and ready the
machine for use.
5.
NOTE:
“Street Grade” notes may be
dispensed from this dispenser, but not
necessarily “Tissue Paper” degraded notes.
Please make sure ripped bills, taped bills,
seriously worn bills, and/or crumpled bills
are removed from the stack before loading!
Bills that are folded in any way should be
straightened before being loaded for the
most trouble-free operation.
6.
Loading Bills:
1. Turn off the power to the Main Logic Board
using the rocker switch on the bottom right
side (I = ON, O = OFF).
3
Lift open both the pressure plate and the rear
guide, as seen in the figure above. The rear
guide should just swing up, while the
pressure plate should be slid straight up
following the grooves on either side of it.
Then, it should be rotated so it is held in
place, at an angle, by the notches at the top
of the grooves.
Assemble the bills into a stack, and square
them up by jogging and aligning them,
tapping them against a flat surface, and
removing any folded or crumpled bills.
Load the bills into the cartridge so they fit
snugly between the side guides. Then, lower
the pressure plate and rear guide to hold the
bills securely in place. Re-close the cartridge.
NOTE: The cartridge holds a maximum of
500 bills; do not cram the bills or overfill the
cartridge!
a
Exterior
Interior
Setting Bill Denominations:
Inside each cartridge, there are four slots, a – d,
and two magnets. The magnets are used to
indicate the bill denomination loaded into each
cartridge. Refer to the following table to
determine the proper slots to put the magnets
into when loading bills.
c
b
d
Magnets
d
b
c
a
Bracket
NOTE:
The magnet positions are preset by
American Changer, and do not need to be
changed unless you wish to dispense a different
denomination. To simply refill empty cartridges,
use the table below to identify which cartridge to
load which bill denomination into.
Bill Denomination [ref.]
Magnet Slot
a
b
●
$1
[A]
●
$5
[B]
●
$10 [C]
●
c
4.
d
●
●
$20 [D]
●
$50 [E]
●
$100 [F]
●
●
●
●
To replace a magnet, locate the proper slot
using the bill denomination table and the
embossed letters on the exterior of the
cartridge (a-d in the figure above). Insert a
magnet into the slot with its white sides
oriented as shown in the figure below, i.e.
both white surfaces facing the exterior of the
cartridge. NOTE: This is VERY IMPORTANT!
The F53 may not properly recognize the bill
denomination if the magnets are inserted the
wrong way. Slide each magnet all the way
into its slot, and then reattach the bracket,
using the two screws, to hold them in place.
• = Magnet in slot; “ ” = Slot empty
1.
2.
3.
Remove a cartridge from the dispenser.
Open the cartridge, and locate the four
magnet slots along the inside front of the
top. The two magnets are held in place inside
their slots by an aluminum bracket.
To remove a magnet, unscrew the two
screws holding the aluminum bracket in
place, and remove the bracket. Be careful not
to lose the two nuts; they are small and not
permanently connected to the cartridge (In
case you do, the screw size is M3.5 x 6mm).
Once the bracket is off, a magnet may be
pulled out with your fingers, pried out with a
small flathead screwdriver, or pushed out
from the opposite side using any rod-shaped
implement.
White
4
White
FILLING THE COIN HOPPER
4.
Hopper Coin/Token Sizes:
The standard MKIV hopper will automatically
adjust to dispense coins/tokens ranging in size
from 21-30 mm in diameter and 1.25-3.5 mm in
thickness. There are options available to dispense
larger, up to 31 mm, and smaller, down to 16
mm, coins or tokens.
5.
6.
For reference, a nickel is 21.2 mm, a quarter
is 24.3mm, and Susan B. Anthony and
Sacagawea Dollars are 26.5mm in diameter.
The Money Controls MKIV Universal Hopper can
hold up to 1600 quarters ($400 worth) without a
hopper extension. With the supplied American
Changer hopper extension, an additional 1200
coins can be added, making the total 2800
quarters ($700 worth). The capacity for Dollar
coins is 2200 Susan B. Anthony or Sacagawea
dollars, with the extension, and 1250 coins
without it.
FUSE
This
is
the
primary
High voltage fuse:
transformer AC fuse for the main logic board,
from which the validator and hopper (if installed)
draw their power. Any direct short of the
Transformer, validator, or hopper will cause this
fuse to blow. Replace this fuse with a 2-½ Amp,
250 Volt, size 5mm x 20mm, fast-acting fuse
only.
REPLACING THIS FUSE WITH
ANYTHING OTHER THAN A 2-½ AMP FASTACTING FUSE MAY RESULT IN A FIRE OR AN
UNSAFE WORKING CONDITION!!
Hopper Coin Bin
(Pour the coins into
this hole)
Security LED
ON = All systems OK
Coin counting
LED
12Vdc Power LED
Coin counting optical
sensor
12-pin male
connector
(Rear-Load; on
Front-Load models,
connector is on
opposite side
Slide the hopper back onto the hopper plate,
making sure it goes all the way back. Do not
use excessive force!
Verify that the hopper plate harness is
plugged in to the correct connector on the
Main Logic Board for the coin/token value
being used. The upper connector is for $1.00
coins, and the lower connector is for $0.25
coins.
Turn
ON
the
power
switch.
After
approximately 30 seconds, when the machine
has completed its start-up procedure, the
changer will be ready to use. To change the
amounts of coins dispensed, refer to the
“Setting the Payouts” section of this manual.
Motor
Loading Coins/Tokens into the Hopper:
1. Turn off the power to the Main Logic Board
using the rocker switch on the bottom right
side (I = ON, O = OFF).
2. Remove the hopper from the cabinet by, first,
sliding it free of the hopper plate, and then,
lifting it out of the machine for access to the
coin bin.
3. Pour the coins/tokens into the opening.
NOTE: There must be at least enough coins
in the hopper to cover the two gold-color
metal plates at the bottom of the Hopper
Coin Bin for the machine to work (Anywhere
between 100 and 2800 coins, minimum
to maximum with extension).
5
PROGRAMMING THE AC7500.1 SERIES CHANGER
Section
Page(s)
Program Flow Chart
7-9
Standby Operation
10
Menu Navigation
10
Coin Hopper Setup
10
Bill Dispenser Setup
11
Dispenser Type
11
Low Bills Detection
11
Setting the Payouts
11-12
Using the Hopper ‘Dump’ Feature
12
Anti-Stringing Protection
12-13
System Diagnostics
13-14
Bill & Coin Counts
13
Ambient Temperature
14
Bill Cartridges
14
Board Firmware Version
14
Main Logic Board Command in Execution
14
Validator Command in Execution
14
Bill Dispenser (BDU) Command in Execution
14
Last Bill in Escrow
14
Last Change Payout
14
6
7
8
9
STANDBY OPERATION
decreases a value; SEL (Select) is like a
computer’s ‘Enter’ key in that it ‘enters’ the
submenus (moves right on the Flow Chart), and
saves values and selections to permanent
memory; ESC (Escape) is used to go back one
step to the previous menu (left on the Flow
Chart).
Power-ON the Main Logic Board (MLB), and allow
it to run through its start-up procedure, which
may take up to a minute. During this time, you
may hear the bill dispenser and validator motors
cycling as they are being initialized; this is
normal. The board will reach its Standby state,
ready to accept bills, once all motion has ceased,
and all indicator lights are showing the following
“Ready” conditions:
1. The MLB display’s green backlight will be ON
continuously, and the screen will show the
current count of total dollars changed by the
machine (refer to the figure below).
2. The Bill Dispenser’s green seven-segment
LED display will show a zero (0).
3. The validator’s red indicator LED will be ON
solid.
NOTE: Selecting any of the ‘Exit’ options located
in various places throughout the program menus
will take the display immediately back to the
Standby state.
The following sections of this manual describe the
various features available on the board, and how
to use them. The writing in parentheses at the
beginning of paragraphs is the pushbutton
sequences used to navigate to that specific
program menu option.
COIN HOPPER SETUP
TOTAL
$00000
(SELx2) HOPPERS:
The ‘Hoppers’ menu is used to tell the controller
board whether or not a hopper is going to be
used, and if so, the value of the coins/tokens it
contains to be dispensed.
(SELx3) HOPPER #1:
Press SELECT when the ‘Hopper #1’ menu option
is displayed to set the value of the coins/tokens
in Hopper #1. Hopper #1 is the hopper
connected to the lower hopper connector on the
left side of the board. Use the UP and DOWN
buttons to modify the displayed value until it is
as desired, and then press SELECT to save it into
permanent memory. The possible coin/token
values are 20 per $1 – 1 per $1, No Hopper,
$0.01, and $0.25 - $20.00 in $0.25 increments.
MENU NAVIGATION
Navigation through the various program menus is
done using the LCD screen and the four
pushbuttons located directly below it as an
interface. Various things can be accomplished
within the program, including setting up the Coin
Hopper(s) and Bill Dispenser, setting the
payouts, and accessing accounting and other
diagnostic information.
NOTE: If there is no Hopper #1 being used,
select ‘No Hopper’.
(SELx3, ↑) HOPPER #2:
Press SELECT when the ‘Hopper #2’ menu option
is displayed to set the value of the coins/tokens
in Hopper #2. Hopper #2 is the hopper
connected to the upper hopper connector on the
left side of the board. Use the UP and DOWN
buttons to modify the displayed value until it is
as desired, and then press SELECT to save it into
permanent memory. The possible coin/token
values are 20 per $1 – 1 per $1, No Hopper,
$0.01, and $0.25 - $20.00 in $0.25 increments.
To access the program menus, press any of the
four pushbuttons while in the Standby state.
These are, from left to right: UP, DOWN, SEL
(Select), and ESC (Escape), and they can be seen
in the above figure. The first menu option that
appears is the ‘Setup’ menu. Use either the UP
and DOWN pushbuttons to move to a different
menu option, or press SELECT to enter the
‘Setup’ menu. Pressing ESCAPE will take you
back to the Standby state.
At this point, it will be very helpful to follow along
in the Program Flow Chart on pgs. 7-9 as you
navigate through the program menus. The four
pushbuttons’
functions
remain
the
same
throughout the program menus. These are: UP
moves to the next menu item above the current
one, or increases a value; DOWN moves to the
next menu item below the current one, or
NOTE: If there is no Hopper #2 being used,
select ‘No Hopper’.
10
BILL DISPENSER SETUP
pushbutton down to increase or decrease the
count rapidly.
(SELx2, ↑) DISPENSER:
Enter the ‘Dispenser’ menu to make settings that
involve the bill dispenser. These include the type
of bill dispenser being used, the bill denomination
to be dispensed (F50 only), the low-bills
detection method to be employed, and the
number(s) of bills currently loaded in the bill
dispenser, by denomination.
When the desired count has been reached, press
SELECT to save the count into the board’s
permanent memory, and move to the next bill
denomination. The denominations appear in
order: $1, $5, $10, $20, $50, and $100. You only
need to set the counts of the bill denomination(s)
you will be dispensing, and you may ignore the
rest. Press SELECT to move through any counts
not needed.
(SELx2, ↑, SEL) DISPENSER TYPE:
Press SELECT when the ‘Type’ menu option is
displayed to set the type of bill dispenser to be
used. Use the UP and DOWN pushbuttons to
scroll between the different bill dispenser options,
which are F53, and F50 w/ $1 bills – F50 w/ $100
bills. When the desired bill dispenser is displayed,
press SELECT to save it into permanent memory.
The advantage of the ‘Counts’ method is the low
number of bills remaining when the machine
goes out-of-service. Since the board maintains
an exact count of bills remaining, it will only go
out-of-service when there are not enough to
make a single payout. Thus, depending on the
set payout, typically fewer than 10, but as few as
zero, bills may be left inside of the dispenser. The
disadvantage of the ‘Counts’ method is that the
bill quantities must be manually entered into the
controller board each time the machine is refilled.
NOTE: If using an F50, select the option that
shows the bill denomination you are going to
dispense. The F53 bill denominations are
automatically detected.
NOTE:
When using the ‘Counts’ low-bills
detection method, be careful to enter the exact
quantity of bills in the dispenser. Incorrect count
entries may lead to high numbers of bills
remaining inside the dispenser when the machine
goes out-of-service, or, worse, incomplete
payouts to customers!
(SELx2, ↑, SEL, ↑) LOW BILLS DETECTION
METHOD:
Press SELECT when the ‘Low Bills’ menu option is
being displayed to set the method that the
controller board will use to determine when there
is a low number of bills remaining in the
dispenser. The board can either use the built-in
sensors inside of the dispenser, or keep track of
the exact count of remaining bills, updating it
continuously as bills are dispensed. There are
pros and cons to both methods, which are
described in the following sections.
SETTING THE PAYOUTS
(SEL, ↑) PAYOUT:
Since each input bill denomination has its own
unique payout setting, pressing SELECT while the
‘Payout’ menu option is being displayed will enter
a menu where each of them are listed. Once
inside this menu, use the UP and DOWN
pushbuttons to scroll through the input bill
denominations, which begin with $1, and
increase through $2, $5, $10, $20, $50, and up
to $100. Navigate through the menu until the
desired input bill denomination is being
displayed, and then press SELECT.
(SELx2, ↑, SEL, ↑, SEL) SENSORS:
While the ‘Sensors’ menu option is displayed,
press SELECT to utilize the bill dispenser’s
sensors to detect when the bills are low. The
sensors are optical, and simply detect the size of
the remaining stack of bills. The advantage of
this method is its simplicity, because the bill
counts do not have to be manually entered into
the board. The disadvantage is that many bills,
up to 40 or more, remain inside of the dispenser
(F50) or its cartridges (F53) when the sensors
detect “low bills”, and send the machine out-ofservice.
The first setting to be made is whether the board
will accept or reject the selected input bill
denomination. Use the UP and DOWN buttons to
scroll through the options ‘Accept’, ‘Reject’, and
‘Exit’, and then press SELECT to save the
displayed choice into permanent memory.
(SELx2, ↑, SEL, ↑, SEL, ↑) COUNTS:
Press SELECT and enter the ‘Counts’ menu to
have the controller board keep track of the
remaining bills quantities to know when they run
low. Once ‘Counts’ has been selected, the display
will go immediately to the ‘$1:’ screen, where the
$1 bills count can be entered. Use the UP and
DOWN pushbuttons to increase or decrease the
count on the screen to the exact quantity of $1
bills that are currently loaded in the dispenser.
If ‘Accept’ is chosen, the next step is to set the
desired bill/coin payout combination for the
currently selected input bill denomination. The
first payout option to be displayed is the quantity
of coins/tokens to be dispensed from Hopper #1.
The LCD screen should look like the following
figure, with “HOP1:” at the bottom indicating
Hopper #1, and “000” beside it indicating the
quantity of coins/tokens to be dispensed.
NOTE: Each press of the pushbutton increments
or decrements the count by one. Hold the
11
USING THE HOPPER ‘DUMP’ FEATURE
(SEL, ↑x2) DUMP:
Press SELECT to enter the ‘Dump’ menu if you
would like to empty the coin hopper(s). Coin
“dumping” is a convenient method of emptying
all of the coins/tokens from a hopper without
having to remove the hopper from the machine.
Also, since the Main Logic Board is controlling the
operation, the coins are counted as they are
dispensed, so the user will know exactly how
many were left inside the hopper.
Σ=000.00
HOP1:XXX
(SEL, ↑x2, SEL) HOPPER #1:
Navigate to this menu, ‘Hopper #1’, to dump the
coins/tokens from Hopper #1. Press SELECT to
initiate the dispensing, and display the coin count
on the LCD screen. The hopper will run until it is
completely
empty,
and
will
turn
OFF
automatically, with the final count remaining on
the display. To stop the coin dump at any time
before the hopper is empty, press the SELECT
pushbutton. The count displayed will be the
number of coins dispensed up to that point. Press
ESCAPE to exit out of the hopper ‘Dump’ feature.
Use the UP and DOWN pushbuttons to increase or
decrease the number shown until it is the desired
quantity.
NOTE: If no Hopper #1 is installed, the payout
quantity “000” will change to “XXX”, and pressing
UP or DOWN will have no effect (refer to the
above figure).
Press SELECT to save the Hopper #1 payout
quantity into permanent memory and move to
the next payout option, Hopper #2. The Hopper
#2 payout quantity should be set in the same
manner, followed by the $1 bill payout quantity,
then the $5, and $10, and so on.
(SEL, ↑x2, SEL, ↑) HOPPER #2:
Navigate to this menu, ‘Hopper #2’, to dump the
coins/tokens from Hopper #2. Press SELECT to
initiate the dispensing, and display the coin count
on the LCD screen. The hopper will run until it is
completely
empty,
and
will
turn
OFF
automatically, with the final count remaining on
the display. To stop the coin dump at any time
before the hopper is empty, press the SELECT
pushbutton. The count displayed will be the
number of coins dispensed up to that point. Press
ESCAPE to exit out of the hopper ‘Dump’ feature.
NOTE: Only bill denominations that are less than
the currently selected input bill denomination will
show up as payout options. For example, $5 bills
will only show up as a payout option for $10 and
higher input bill denominations.
The top line of the LCD screen displays a running
total (Σ = sum) of the bill/coin payout
combination for the currently selected input bill
denomination. This total is based on the bill/coin
payout quantities and their values, and is
updated when SELECT is pressed.
ANTI-STRINGING PROTECTION
“Stringing” refers to a method of defrauding any
machine that uses a bill validator using string or
tape attached to the end of a bill. The bill is
inserted into the machine, and is yanked back
out using the string or tape attachment after the
validator has credited the money. This results in
the thief getting the bill back, in addition to the
change or other item(s) dispensed by the
machine. The board’s Anti-Stringing Protection
feature will not totally prevent the machine from
getting “strung”, rather it is a method of limiting
the amount of money and/or tokens the thief is
able to steal.
After the last payout option has been saved by
pressing SELECT, the display should return to the
list of input bill denominations so another payout
can be immediately set. If it doesn’t, and the
display returns, instead, to the Hopper #1 payout
setting, there is a problem with one or more of
the payout quantities just set. Notice that the
total (Σ) at the top of the screen does not add up
to the current input bill denomination; this will
give you a clue as to which setting is at fault.
If an input bill denomination is to be rejected,
pressing SELECT while ‘Reject’ is being displayed
will save that information into permanent
memory, and return the display to the input bill
denomination list. To exit from this list, either
scroll and choose ‘Exit’, or press the ESCAPE
pushbutton twice.
(SEL, ↑x3) STRING:
Press the SELECT pushbutton and enter the
‘String’ menu to either enable or disable the AntiStringing Protection feature.
12
(SEL, ↑x3, SEL) ANTI-STRINGING SETUP:
Immediately inside of the ‘String’ menu, the first
option displayed is ‘Yes’. Press SELECT with ‘Yes’
displayed to enable the Anti-Stringing Protection
feature, and to make the settings that control the
behavior of the protection.
with $1, and progressing through $2, $5, $10,
$20, $50, and up to $100. When finished, press
ESCAPE to exit the list.
↑x4,
SELx2,
↑)
BILLS/COINS
(SEL,
DISPENSED:
When the ‘Dispensed’ menu option is displayed,
press SELECT to view the amounts of bills and
coins dispensed by the machine. Use the UP and
DOWN pushbuttons to scroll through each count,
starting with Hopper #1, and progressing
through Hopper #2, $1, $5, $10, $20, $50, and
up to $100. When finished, press ESCAPE to exit
the list.
The first setting is the Maximum Dollar Amount
setting. This option establishes the maximum
dollar amount that can be accepted by the
machine within the user-set time limit (next
setting) before triggering the Anti-Stringing
Protection, which puts the machine out-ofservice. The dollar amount can be set anywhere
between $5 and $500 in $5 increments. Press
SELECT to save the amount into permanent
memory and continue to the second setting.
NOTE: The hopper counts are in dollar units, not
actual quantities. For example, if a hopper
containing quarters shows a count of “3”, this
means that $3.00, or 12 quarters, have been
dispensed. The bill counts, on the other hand are
actual quantities.
The second, and final, setting is the Maximum
Time setting. Entered here is the time limit for
the changer accepting the user-set Maximum
Dollar Amount (previous setting). If the changer
accepts the Maximum Dollar Amount within the
amount of time set here, the Anti-Stringing
Protection feature will be triggered, and the
machine will go out of service. The Maximum
Time can be set to anywhere between 1 and 120
minutes in 1 minute increments. Press SELECT to
save the time into permanent memory and return
to the Standby screen.
(SEL, ↑x4, SELx2, ↑x2) BILLS REJECTED:
When the ‘Rejected’ menu option is displayed,
press SELECT to view the quantities of bills
rejected by the dispenser. Bills are rejected by
the F50 or F53 bill dispensers for various
reasons, including being crumpled, folded, or
torn. These bills remain inside of the dispenser in
a special compartment. Use the UP and DOWN
pushbuttons
to
scroll
through
each
bill
denomination and its rejected count, starting
with $1, and progressing through $5, $10, $20,
$50, and up to $100. When finished, press
ESCAPE to exit the list.
(SEL, ↑x3, SEL, ↑) DISABLE PROTECTION:
Navigate to this menu, ‘No’, and press the
SELECT pushbutton to disable the Anti-Stringing
Protection feature. The display will return to the
Standby state, and the machine will operate
normally.
(SEL, ↑x4, SELx2, ↑x3) BILLS/COINS
REMAINING:
When the ‘Remaining’ menu option is displayed,
press SELECT to view the quantities of bills and
coins remaining in the machine. Use the UP and
DOWN pushbuttons to scroll through each count,
starting with Hopper #1, and progressing
through Hopper #2, $1, $5, $10, $20, $50, and
up to $100. When finished, press ESCAPE to exit
the list.
SYSTEM DIAGNOSTICS
(SEL, ↑x4) DIAGNOSTICS:
Enter the ‘Diagnostics’ menu to view various
information about the board’s current state of
operation. The most important submenu inside
the ‘Diagnostics’ menu is the ‘Counts’ submenu.
There, all of the counts maintained by the Main
Logic Board, including the received, dispensed,
rejected, and remaining counts, may be viewed.
The other submenus contain assorted diagnostic
information, as described in the following
paragraphs, designed for use in troubleshooting.
NOTE:
The hopper counts do not list actual
quantities, they only show either ‘OK’ or ‘LOW’,
indicating the hopper has enough coins/tokens
remaining or is running low, respectively. The bill
counts, on the other hand are actual quantities.
(SEL, ↑x4, SELx2, ↑x4) RESET COUNTS:
Enter the ‘Reset’ menu option to reset three of
the Logic Board’s four counts to zero. These are
the received, dispensed, and rejected counts.
(SEL, ↑x4, SEL) COUNTS:
Press SELECT when the ‘Counts’ menu option is
being displayed to view the board’s various
counts. The counts may only be viewed inside the
‘Counts’ menu, and not modified, except to reset
them to zero.
(SEL, ↑x4, SELx2) BILLS RECEIVED:
When the ‘Received’ menu option is displayed,
press SELECT to view the quantities of bills
received by the machine. Use the UP and DOWN
pushbuttons
to
scroll
through
each
bill
denomination and its received count, starting
NOTE:
The bills remaining counts cannot be
reset to zero here, they can only be modified in
the ‘Setup’ menu.
13
Use the UP and DOWN pushbuttons to scroll
between the two options, ‘Yes’ or ‘No’. Press
SELECT when ‘Yes’ is displayed to reset the
(SEL, ↑x4, SEL, ↑x6) BILL DISPENSER (BDU)
COMMAND IN EXECUTION:
Enter the program menu option ‘BDU CMD’ to
view the current Bill Dispenser command in
execution. The display shows the command,
which is the specific operation or function that
the Bill Dispenser is performing, on the top line
above a time-out period, in seconds, on the
bottom.
received, dispensed, and rejected counts to zero,
or when ‘No’ is displayed to return to the
‘Diagnostics’ menu without resetting the counts.
(SEL, ↑x4, SEL, ↑) AMBIENT TEMPERATURE:
Press SELECT when ‘Temp’ is being displayed on
the LCD screen to view the current ambient
temperature inside the cabinet. The temperature
will be displayed in degrees Celsius (°C). To
convert degrees Celsius to degrees Fahrenheit
(°F), multiply the Celsius number by 1.8, and
then add 32.
(SEL, ↑x4, SEL, ↑x7) LAST BILL IN ESCROW:
Press SELECT while the ‘Escrow’ menu option is
being displayed to view the denomination of the
bill most recently in the escrow position inside of
the validator. The escrow position is fully inside
the validator, but not yet stacked. A bill gets held
in this position while the controller board decides
whether to accept or reject it.
(SEL, ↑x4, SEL, ↑x2) BILL CARTRIDGES:
Navigate to the ‘F53’ menu option inside of the
‘Diagnostics’ menu, and press SELECT to view
the bill denominations currently loaded in the bill
dispenser. The denominations are listed by
‘Cassette’ (cartridge) number, with #1 being the
upper and #2 being the lower bill cartridge of the
F53 dispenser. Use the UP and DOWN
pushbuttons
to
scroll
between
‘Cassette’
numbers.
(SEL, ↑x4, SEL, ↑x8) LAST CHANGE PAYOUT:
While ‘Change’ is being displayed on the LCD
screen, press SELECT to view the bill/coin
combination that made up the most recent
payout. Use the UP and DOWN pushbuttons to
scroll through the list of possible payout options,
beginning with Hopper #1. The hopper numbers,
or bill denominations, are displayed beside the
quantity of bills/coins of that type that made up
the payout. The other payout options include
Hopper #2, $1, $5, $10, $20, $50, and $100
bills.
NOTE: Although most F53 dispensers have only
two bill cartridges, more are possible, so the
board was designed with the capability of
controlling an F53 with up to four bill cartridges.
In the case of an F50 dispenser, its single bill
denomination is listed in ‘Cassette #1’.
(SEL, ↑x4, SEL, ↑x3) FIRMWARE VERSION:
Enter the program menu option ‘Version’ to view
the board’s current firmware version. The
firmware version is also displayed momentarily
when the board power is turned on.
---[END PROGRAMMING SECTION]---
(SEL, ↑x4, SEL, ↑x4) MAIN LOGIC BOARD
COMMAND IN EXECUTION:
Enter the program menu option ‘MLB CMD’ to
view the current Main Logic Board command in
execution. The display shows the command,
which is the specific operation or function that
the MLB is performing, on the top line above a
time-out period, in seconds, on the bottom.
(SEL, ↑x4, SEL, ↑x5) VALIDATOR COMMAND
IN EXECUTION:
Enter the program menu option ‘VAL CMD’ to
view the current Validator command in execution.
The display shows the command, which is the
specific operation or function that the Validator is
performing, on the top line above a time-out
period, in seconds, on the bottom.
14
MARS AE2602
MEI MARS AE2602
VALIDATOR
SECTION
PAGE
BILL ACCEPTOR
24VDC $1-$20
15
Removing the Bill Box
16
Clearing a bill jam
16
Setting the bill types accepted
17
Cleaning & Maintenance
18
Troubleshooting & Error Codes
19
Removing the bill box
1. Push
BLUE
button
forward.
2. Push
bill box
up and
out.
Clearing A Bill Jam
1. Pull up on silver
bar (Rod)
2. Pull bar away
from the Mars.
16
Setting the DIP Switches
FACTORY DEFAULT IS ALL SWITCHES SET TO
“OFF”! (SETTINGS MARKED BY X’s)
X
X
17
Cleaning
Cleaning & Maintenance
You can clean the bill acceptor while it is still mounted in the machine.
1. Remove power from the machine.
2. Unlatch the magazine by pushing the blue latch (located on the top of the unit) toward the
front of the unit.
3. Unhook and remove the magazine by holding the latch and lifting up and then back on the
magazine.
4. Unlatch the LED Housing by lifting up on the metal bar (located below the Status LED).
5. Remove the LED Housing by holding the metal bar and pulling back on the LED Housing.
6. Clean the bill path with a soft cloth. You may use mild, non-abrasive, non-petroleum based
cleaners if sprayed on the cloth.
18
Status LED
A Status LED provides assistance in diagnosing the condition of the Series AE2600. The
following is a description of the LED codes, their meanings, and suggested remedial actions.
19
FUJITSU F-53 DISPENSER SECTION
driven
20
(2) This picture shows the F53 Spray-Type top unit of a Front Load
changer (AC7502.1, AC7512.1). The dispenser inside Rear Load
changers (AC7505.1, AC7515.1) feeds the bills out of a Release
outlet that is situated on the opposite side of the one shown.
21
SENSOR DIAGRAM
Sensor Descriptions
Cassette 1
BPS:
Bill Pass Sensor
(Dispensed bills)
REJS:
Rejected Bills Sensor
DFSS:
Gate Switch Timing Sensor
DFCS:
Double Feed Check Sensor
(Bill thickness detection)
FDLS1-6: Denominations 1-6 Length
Detection Sensor
Cassette 2
Cassette 3~6
(Option on F53)
22
NES1-6:
Denominations 1-6 Near-End
Sensor (Low bills detection)
SET1-6:
Magnet Settings Detection
Sensor (Cartridge bill type)
ERROR CODES
Error Codes from the F53 bill dispenser are presented on the green LED character display located on the
lower right-hand corner of the dispenser’s PC Board (refer to figure on page 33).
3RD
Character
4TH
Character
5TH
Character
6TH
Character
(1) All error codes are a sequence of 6 characters that are displayed, in order, for approximately 1
second each. Error codes always begin with “Er” as the first two characters.
(2) The third character shows the position in which the error occurred, the fourth character shows
more detailed information about the error, and the fifth and sixth characters give any
additional information.
(3) The tables on the following pages define all of the possible error codes on the F53.
EXAMPLE: For the error “2nd Cassette Pick Error”, the display will flash:
repeatedly; one second per character.
23
“E-r-2-8-0-0”
24
25
26
27
28
29
30
31
32
LED Character
Display
33
ROUTINE CLEANING & MAINTENANCE
YEARLY
Belts:
Inspect whether the bill-carrying flat belts have become loose due to expansion, or are worn, cracked, or
damaged in any way. If so, replace them with new belts.
Cartridge Pick/Sub Rollers:
Inspect the Pick and Sub Rollers in each bill cartridge. If they are worn, damaged, or have difficulty
pulling bills out of the cartridge, replace them with new rollers.
EVERY FOUR MONTHS (OR WHEN NEEDED)
Bill Thickness Detection Lever:
Check whether paper dust, or other dirt and grime has adhered to the thickness detection lever, or its
attached metal rollers. Clean both sides of the lever and the rollers with a soft dry cloth.
Sensors:
Inspect all of the F53’s optical sensors for dirt, dust, or any other grime that could lead to impaired
operation. Gently clean the sensors using ONLY a soft, dry, and lint-free cloth.
Belts and Rollers:
Clean all of the machine’s belts and rollers, paying close attention to the bill-carrying belts and the Pick
and Sub Rollers in each bill cartridge. Remove any dirt and grease from them using a soft, lint-free cloth
soaked in isopropyl alcohol.
34
35
MKIV UNIVERSAL
HOPPER
INDEX
PAGE
1. Coin box removal & assembly
SERVICE MANUAL
36
37-38
2. Exit window replacement
38
3. Logic board replacement
39
4. End plate removal
39
5. Track plate removal
39
5a. Track plate Assembly
40
5b. Track plate Replacement
41
5c. Final drive gear replacement
41
6. Gearbox assembly
42
7. 7. Motor replacement
42
To UN-jam the hopper, refer to
sections 4 – 5b, pages 39–41.
6.
1. COIN BOX REMOVAL
1.
Place the hopper in front of you as shown, (looking at
the outside of the ‘coin box’).
As the ‘coin box’ is being removed, carefully slide the
‘logic board’ out. The stirrer may stay with the ‘coin
box’ or fall onto the center plate.
Refer to FIG 1.
2.
Remove the 2 locking nuts, which hold the ‘low level
sense plate’ wires to the studs.
3.
Remove the crimp & wire from the studs.
ACCESS IS NOW AVAILABLE TO THE ‘LOW
LEVEL’ SENSE PLATES, THE MAIN PCB, THE
EXIT WINDOW, THE MOTOR TERMINALS &
PART OF THE WIRING LOOM.
Refer to FIG 1a.
4.
Remove the 5 screws indicated (B), which hold the
‘coin box’ to the ‘center plate’.
5.
Gently lift the ‘coin box’ away from the rest of the
hopper. (Refer to FIG 1b)
1a. COIN BOX ASSEMBLY
1.
NOTE: The ‘logic board’ & ‘stirrer’ are
located in the ‘coin box’.
37
Firstly, locate the ‘stirrer in the ‘coin box as shown in
FIG 12.
COIN BOX ASSEMBLY (cont.)
2.
Line up the ‘center plate’ & ‘coin box’ as shown
below. FIG 12a.
3.
Route the ribbon cable as shown below.
4.
Fit the ‘logic board’ into slots shown below.
5.
Feed the level sense wires through the slot shown
below.
7.
8.
9.
Align the ‘center plate’ & ‘coin box’ & push together.
Turn the hopper over & refit the screws.
Refit the level sense wires.
2. EXIT WINDOW REPLACEMENT
1. First, remove the ‘coin box’, section 1.
This will then enable access to the ‘exit window’
2. Unscrew & remove the 2 fixing screws. (See FIG 4)
3. Remove the ‘exit window’ from the ‘center plate’.
4. Unclip & remove the 10-way ribbon cable header.
6.
Lift the ‘centre plate’ to meet the ‘coin box’. FIG 12b
& c.
5.
38
To re-assemble, follow the above steps in reverse.
3. LOGIC BOARD REPLACEMENT
1.
4.
Holding the ‘connector blanking plate’ gently lift the
‘end plate’ away from the rest of the hopper.
5.
To re-assemble, follow the above steps in reverse.
First, remove the ‘coin box’, section 1.
This will then enable access to the ‘logic board’.
5. TRACK PLATE REMOVAL
1.
2.
3.
4.
5.
6.
7.
8.
See FIG 7.
10-way ribbon IDC socket (CONN 1):
Move the two ejector arms at right angles to & away
from the connector, if fitted.
This should release the socket from the header.
Clasping the connector between thumb & forefinger,
pull away from pin header.
2.
14-way crimp socket (CONN 2):
Gently unclip the “friction lock” from the connector
housing.
Clasping the connector between thumb & forefinger,
pull away from pin header.
The Logic Board is now released.
To re-assemble, follow the above steps in reverse.
4. END PLATE REMOVAL
1.
Place the hopper in front of you as shown, (looking at
the outside of the ‘end plate’).
Refer to FIG 6.
2.
Remove the 9 screws indicated (B), which hold the
‘end plate’ to the ‘center plate’.
3.
Locate the position of the ‘connector blanking piece’.
First, remove the ‘end plate’, section 4.
39
The ‘elevator track’ & ‘final drive gear’ can now be
removed by lifting up & away from the ‘center plate’.
5a. TRACK PLATE ASSEMBLY
The following 3 sketches show how to take the ‘track plate’ apart.
The following 3 sketches show how to assemble the ‘track plate’.
40
5b. TRACK PLATE REPLACEMENT
1.
The gray shaded area, in FIG 7b, is the ‘track plate’ guide path.
FIG 7b.
2.
Once the ‘track plate’ is in position, turn the track through 720 0 to ensure it is seated in the guide path correctly.
5c. FINAL DRIVE GEAR REPLACEMENT
1.
2.
Once the ‘elevator track’ is in place, the ‘final drive gear’ can be fitted by placing the gear over its mounting spindle,
while lining the teeth up with the secondary drive gear, adjust the ‘elevator track’ so that the gear falls into place.
(See FIG 7c)
The end plate can now be re-fitted. See section 4.
41
4.
6. GEAR BOX ASSEMBLY
1.
Remove the end plate. Section 4.
2.
Remove the ‘elevator track’ & ‘final drive gear’.
Section 5.
3.
Remove the gearbox cover.
Access to the motor fixing screws is now possible.
7. MOTOR REPLACEMENT
1.
Remove the ‘coin box’. Section 1.
2.
Unsolder the red & black wires from the motor.
NOTE: The black wire connects to the terminal
marked with a RED dot.
3.
Remove the ‘end plate’. Section 4.
4.
Remove the ‘track plate’ & final drive gear. Section 5
5.
Remove the gearbox cover.
6.
Disassemble the gearbox. Section 6.
Remove the gears in the order as shown in FIG 9.
42
5.
To re-assemble, follow the above steps in reverse.
7.
Unscrew the 2 motor fixing screws. FIG 10.
8.
To re-assemble, follow the above steps in reverse.
#1 - 1041-24-01 Motor
#2 - 1041-24-02
Motor Side Cover
#3 - 1041-24-03
Center Plate
#4 - 1041-24-04
End Plate
#5A- 1041-24-05
Coin Optic Board.
#5B- 1041-24-06
Optic ribbon cable.
#6 - 1041-24-07
Red track plates (16 per belt)
#7 - 1041-24-08
Logic board wire harness
#8 - 1040-24-113
Male 12 pin connector
#9 - 1040-24-112
Female 12 pin connector
#10 - 1041-24-12 Idler gear
#11 - 1041-24-13 Gear Box
#12 - 1041-24-14 Gear Shaft
#13 - 1041-24-15
Gear #1 Plastic
#14 - 1041-24-16
Gear #2 & 3
#15 - 1041-24-17
Output gear
#16 - 1041-24-18 Gear #4
#17 - 1040-24-22
Blanking Plate
#18 - 1040-24-25
Fixing screw
#19 - 1041-24-19 Cam Shaft
1041-24-22 Agitator
1041-24-20 Cam shaft bearing
#20 -1041-24-21 Cam Agitator
#21 – 1040-24-36 Stirrer
#22 - 1040-24-291
Low level contact plate.
#23 - 1041-27-373
Mark IV PC logic board.
#8
#2
#3
#5A
#4
#6
#21
#18
#5B
#18
#10
#19
#14
#20
#12
#11
#17
#23
#13
#1
#16
#7
#15
43
#22
MARS AE2600 SERIES 24VDC PARTS BREAKDOWN
#8
PICTURE #
#1
#2
#3
#4
#5
#6
#7
#8
#9
PART #
AE93-1-1
AE93-1-2
AE93-1-3
AE91-1-4
AE93-1-5
AC1045
AE93-1-7
AE93-1-8
AE93-1-9
44
CONTINUED
PICTURE #
#1
#2
#3
#4
#5
#6
#7
#8
PART #
AE93-2-1
AE93-2-2
AE93-2-3
AE93-2-4
AE93-2-5
AE93-2-6
AE93-2-7
AE93-2-8
DESCRIPTION
Gearbox Assy
Tension Assy
Tension Spring
Tire/Wheel Assy
Belt, Timing, (1 of 2)-143 Teeth
Pulley, Compound
Shaft, Pulley
Belt, Timing, (1 of 2)-56 Teeth
45
CONTINUED
PICTURE #
#1
#2
#3
#4
PART #
AE93-1-5
AE93-3-2
AE93-3-3
AE93-3-3
DESCRIPTION
Main Chassis, Plastic
Stacker Latch, Blue
Spring, Stacker Latch
Lower Housing Lift Spring
46
ALABAMA
Birmingham Vending Co.
Mr. Gerald Spiegelman
540 N. 2nd Avenue
Birmingham, AL 35204
Phone: 205-324-7526
Fax: 205-322-6639
Email: [email protected]
Web Site: www.bhmvending.com
ARIZONA
Vendtronics
Mr. Ken Van Leer
4020 Grand Avenue, Suite #21
Phoenix, AZ 85019-3173
Phone: 602-973-3300
Fax: 602-973-0033
Email: [email protected]
CALIFORNIA
Betson West
Mr. John McCann
5660 Knott Avenue
Buena Park, CA 90621
Phone: 714-228-7500
Fax: 714-228-7510
Web Site: www.betson.com
Betson West
Mr. Ben Fresenhazion
213 E. Harris Avenue
San Francisco, CA 94080
Phone: 650-952-4220
Fax: 650-827-3420
Web Site: www.betson.com
C.A. Robinson, Inc.
Mr. James Tomei
180 Utah Avenue
S. San Francisco, CA 94080
Phone: 650-871-4280
Fax: 650-588-8538
G&K Service
Mr. Vince D’Agostino
4364 Twain Avenue, Unit #4
San Diego, CA 92120
Phone: 619-281-9227
Fax: 619-281-8706
Superior Sales & Service
Mr. Esko Wallace
299 Old County Road, Suite 26
San Carlos, CA 94070
Phone: 800-995-8363 or 650591-2193
Fax: 650-591-1712
Email: [email protected]
Trilogy Magnetics, Inc.
Mr. Ed Colmenares
16250 Gundry Avenue
Paramount, CA 90723
Phone: 562-663-1800
Fax: 562-633-6408
COLORADO
Mountain Coin Machine
Distributors
Mr. Jack Brown
345 W. 62nd Avenue
Denver, CO 80216
Phone: 800-654-2646 or 303427-2133
Fax: 303-429-2104
Email: [email protected]
FLORIDA
V.E. South, L.C.
Mr. Joe Gilbert
4800 N.W. 15th Avenue
Ft. Lauderdale, FL 33309
Phone: 888-837-6884 or 954491-7300
Fax: 954-491-7301
Email: [email protected]
Web Site: www.vesouth.com
Vendor's Repair Service, Inc.
Mr. George Uilano
6025 Cinderlane Parkway
Orlando, FL 32810
Phone: 407-291-1712
Fax: 407-578-0651
[email protected]
Web Site:
www.vendorsrepair.com
47
GEORGIA
North Atlantic Marketing*
Mr. Kirk Chambless
Norcross Center
2100 Norcross Parkway, Suite
130
Norcross, GA 30071
Phone: 800-442-2388 or
770-449-5001
Fax: 770-729-1144
Southeastern Vending
Mr. Johnny Williams
1886 Forge Street
Tucker, GA 30084
Phone: 800-825-8554 or
770-621-9055
Fax: 770-621-9055
Email:
[email protected]
Web Site:
ILLINOIS
American Vending Sales, Inc.
Mr. Frank Manduno
750 Morse Avenue
Elk Grove Village, IL 60007
Phone: 847-439-9400
Fax: 847-439-9405
Email:
[email protected]
m or
[email protected]
Web Site:
www.americanvending.com
INDIANA
Shaffer Distributing
Mr. Ron Dixon
9461 E. Washington Street
Indianapolis, IN 46229
Phone: 800-876-0789 or
317-899-2530
Fax: 317-899-6080
Email: [email protected]
Web Site:
www.schafferdistributing.com
LOUISIANA
Sur Serv Corp.
Mr. Julian Ortiz
2920 Kingman Street
Suite 118
Meltaire, LA 70006
Phone: 504-887-1661
Fax: 504-887-9081
Email:
[email protected]
MARYLAND
Betson
Ms. Angie Swann
3431A Benson Avenue
Baltimore, MD 21227
Phone: 800-296-4100
Fax: 410-646-2053
Email: [email protected]
MISSOURI
Greater America
Mr. Duane Zarger
3230 Roanoke Road
Kansas City, MO 64111
Phone: 816-531-4300
Fax: 816-531-4337
Midwest Associates, Inc
MASSACHUSETTS
Mr. Glen Politte
Gekay Electronics Corp.
9334 Highway BB
Mr. Rob Collette
Hillsboro, MO 63050
16 Deer Park Drive
Phone: 800-237-0521
E. Longmeadow, MA 01028
Fax: 636-789-5848
Phone: 800-832-0028 or 413-525- Email: [email protected]
2700
Web Site: www.mwassoc.com
Fax: 413-525-6886
Shaffer Distributing Co
MICHIGAN
Mr. Chuck Ropke
Wolverine American, Inc.
2111 January Avenue
Mr. John Paskeretti
St. Louis, MO 63110
26400 Capitol
Phone: 314-645-3393
Redford, MI 48239
Phone: 314-645-3689
Phone: 313-937-4600
Email:
Fax: 313-937-1802
Web Site:
Wolverine American, Inc
Mr. John Paskeretti
3400 Jefferson Avenue, SE
Grand Rapids, MI 49548
Phone: 616-452-2125
Fax: 616-452-3319
MONTANA
Action Gaming Technology*
Mr. Harold Heyer
P.M.B. 117
425 N. 5th Street
Missoula, MT 59802
Phone: 406-728-0034
Fax: 406-549-0688
Email: [email protected]
MINNESOTA
Changer Services, Inc
Mr. Mark Stolley
7721 Pillsbury Avenue South
NEVADA
Richfield, MN 55423
Mars Electronics International*
Phone: 888-328-5067 or 612-798- 2700 East Patrick Lane, Suite 1
3610
Las Vegas, NV 89120
Fax: 612-798-3614
Phone: 702-597-4836
Email: [email protected] Fax: 702-597-4837
Email: [email protected]
Viking Vending
Mr. Guy Jones
NEW JERSEY
9549 Penn Avenue, South
Betson Enterprises
Minneapolis, MN 55431
Mr. Rob Zigmont
Phone: 800-879-0321
303 Paterson Plank Road
Fax: 612-887-5656
Carlstadt, NJ 07072
Email: [email protected] Phone: 800-524-2343 or 201-438Web Site: www.liebermanmusic.com 1300
Fax: 201-438-4837
Email: [email protected]
Web Site: www.betson.com
48
Ellenby Technologies,
Inc.*
Mr. Bob Dobbins
1460 Grandview Avenue, Unit
2
MidAtlantic Corporate Center
West Deptford, NJ 08066
Phone: 856-848-2020
Fax: 856-848-7080
Email: [email protected]
Web Site:
*Limited Retail Service Center
NORTH CAROLINA
Brady Distributing Co., Inc.
Mr. Roger Harrison
2708 Yorkmont Road
Charlotte, NC 28208
Phone: 704-357-6284
Fax: 704-357-1243
Email:
[email protected]
Web Site: www.bradydist.com
Southeastern Vending
Mr. John Hollar
2748-B Interstate Street
Charlotte, NC 28208
Phone: 800-825-8555 or
704-394-4911
Fax: 704-394-3789
Email: [email protected]
OHIO
Shaffer Distributing Co.
1100 W. Third Avenue
Columbus, OH 43212
Phone: 800-282-0194 or
614-421-6800 Extension 114
Fax: 614-294-2669
Email:
service@shafferdistributing.
com
Web Site:
www.shafferdistributing.com
Vendors Exchange
Mr. Brent Garson
4020 Payne Avenue
Cleveland, OH 44103
Phone: 800-321-2311 or
216-432-1800
Fax: 216-432-2786
Email: [email protected]
Web Site: www.veii.com
OKLAHOMA
TEXAS
Aeco Sales & Service
Aeco Sales & Service
Ms. Kacy Parker
Mr. Eddy Parker
619 North Broadway
10290 Monroe Drive #206
Tecumseh, OK 74873
Dallas, TX 75229
Phone: 800-682-0358 or 405-598- Phone: 214-352-4755
Fax: 214-352-8154
2915
Email: [email protected]
Fax: 405-598-5506
Email: [email protected]
OREGON
Mountain Coin Machine Distributors Serv-A-Mech Electronics, Inc.
Mr. Michael Damtew
Mr. Jerry Camp
6440 N.E. Halsey
5916 West 34th Street #B
Portland, OR 97213
Houston, TX 77092
Phone: 503-234-5491 or 800-233- Phone: 800-323-7214 or 7135198
681-6277
Fax: 503-233-3816
Fax: 713-681-8570
Email: [email protected]
Email: [email protected]
Web Site: www.mountaincoin.com
UTAH
PENNSYLVANIA
Wachtor Electronics
MEI
Mr. Larry Wachtor
Mr. Al Serro
73 West Truman Avenue
1301 Wilson Drive
Salt Lake City, UT 84115
West Chester, PA 19380
Phone: 801-485-2289
Phone: 610-430-2500
Fax: 801-485-8745
Fax: 610-430-2694
Email: [email protected]
VIRGINIA
Web Site: www.meiglobal.com
Eastern Commercial Services
Mr. Bob Vose
SOUTH CAROLINA
813-A Professional Place, Suite
Drew Distributing, Inc.*
100
Mr. Gabe Mull
Chesapeake, VA 23320
9107 Ashville Highway
Phone: 800-486-1020 or 757Boiling Springs, SC 29316
436-1020
Phone: 864-578-4444
Fax: 757-547-4772
Fax: 864-599-6232
Email:
*Limited Amusement Service
[email protected]
Center
Web Site:
TENNESSEE
Brady Distributing Co., Inc.
Mr. Brian Drost
3306 Winbrook Drive
Memphis, TN 38116
Phone: 901-345-7811
Fax: 901-398-0578
Email: [email protected]
Web Site: www.bradydist.com
www.easterncommercial.com
49
WASHINGTON
Wachtor Electronics
Mr. Larry Wachtor
232 S.W. 43rd Street
Renton, WA 98055
Phone: 425-251-0997
Fax: 425-251-8532
WISCONSIN
Pioneer Sales & Service
Mr. David Dropp
N55 W13875 Oak Lane
Menomonee Falls, WI
53051
Phone: 262-781-1420
Fax: 262-781-4307
Email:
[email protected]
Web Site:
www.execpc.com1~pioneers
Viking Vending pf
Wisconsin
Mr. Brent McKennon
N59 W16600 Greenway Circle
Unit B
Menomonee Falls, WI
53051
Phone: 262-703-4168
Fax: 262-703-4171
Email:
brent.mckennon@vikinvendi
ng.com