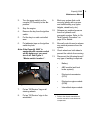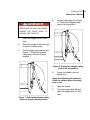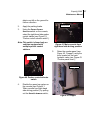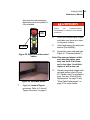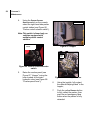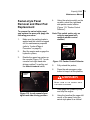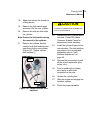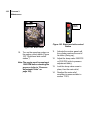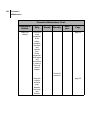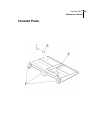
1
MAINTENANCE MANUAL
12/14/2006
Part # : 55379
Expert(t) 2000
TM
Maintenance Manual
TABLE OF CONTENTS
Introduction
About this Manual .........................................................1
What You Will Find in this Manual ........................................1
What You Will Not Find in this Manual .................................1
Introducing the Expert(t) 2000 ....................................2
TM
Expert(t) 2000 for Manual and Automated Collection .........3
TM
Service and Maintenance on the Expert(t) 2000 .......3
TM
Contacting Labrie Environmental Group ....................4
Plant information ........................................................4
Labrie Customer Support Center ...............................4
Chapter 1
Safety
Safety Conventions .......................................................5
Responsibilities of the Employer ................................5
Responsibilities of the Employee ...............................7
Lockout/Tagout Procedure ..........................................8
Protection Against Fire ...............................................10
Safety Props ................................................................11
Body Safety Prop .....................................................11
Tailgate safety prop .................................................12
Other General Safety Precautions .............................15
iii
iv
Table of Contents
Chapter 2
Controls
Helping Hand Joystick ..............................................17
Pump Switch ............................................................18
TM
Control Console ..........................................................20
Red Emergency-Stop Button ...................................20
Green Start Cycle Button .........................................21
Yellow Retract Button ..............................................21
Multi-cycle Control Switch .......................................22
Engine RPM Control ................................................22
Speed-up Switch .....................................................23
Speed-up Inhibitor Control .......................................23
Control Station Selector Switch ...............................24
Temporary Handbrake ................................................24
Body Control Station ..................................................26
Strobe Light Switch ....................................................26
Chapter 3
Maintenance
Prior to start up ...........................................................28
Shutdown procedure ..................................................30
Air Tank Draining Procedure ...................................30
General Cleanliness ....................................................33
Cleaning the Hopper Area .......................................33
On Helping Hand -equipped Units ..................................... 34
On Manual-collection and Cart-tipper-equipped Units ....... 36
TM
Expert(t) 2000
TM
Maintenance Manual
Packer Maintenance ....................................................43
Changing Packer Multi-cycle Settings .....................46
Limit Switches Adjustment .......................................48
Sliding Shoes and Wear Pads .................................53
Sliding Shoes Replacement ...............................................54
Wear Pads Replacement ...................................................57
Packer Removal Procedure .....................................61
Floor Guide Replacement Procedure ......................67
Packer Roller Replacement .....................................70
Swivel-style Panel Removal
and Wear Pad Replacement ....................................71
Arm Doghouse Panel Scraper Removal
and Wear Pad Replacement ....................................73
Packer Cylinder Replacement .................................76
Tailgate and Body Hinges Maintenance ...................80
Tailgate Locking Mechanism (Single Tailgate) ........80
Tailgate Seal and Hinges Inspection .......................81
Body/Chassis Hinges Inspection .............................82
Body Raised Limit Switch ........................................83
Tailgate Limit Switch Adjustment .............................84
Optional Limit Switch and Proximity Switch .............85
Hydraulic System Maintenance .................................87
Hydraulic Cylinder Inspection Procedures ...............88
Main Hydraulic Valve ...............................................88
v
vi
Table of Contents
Cycle Time for All Hydraulic Functions ....................91
Hydraulic Tank Inspection Procedure ......................91
Hydraulic Oil Replacement Procedure ............................... 92
Filter Element Replacement Procedure ............................. 94
Strainer Cleaning Procedure .............................................. 96
Hydraulic Vane Pump Systems .................................99
Dump Valve Pressure Adjustment Procedure .......100
Main Relief Valve Pressure Adjustment
(Vane Pump Systems) ...........................................103
Crusher panel ................................................................... 103
Tailgate ............................................................................ 103
Packer .............................................................................. 103
Hoist ................................................................................. 104
Priming a New Pump ................................................107
Body Hoist Replacement Procedure .......................109
Speed-up System Maintenance ............................111
Air System Maintenance ..........................................113
Surface Finishing and Painting ...............................116
Chapter 4
Lubrication
Recommended lubricants ........................................123
Grease ...................................................................123
Hopper Lubrication ................................................123
Engine Oil ..............................................................123
Hydraulic Oil ..........................................................123
Minimum Requirements for Hydraulic Oil ......................... 124
Expert(t) 2000
TM
Maintenance Manual
Hydraulic Oil Test .............................................................124
Lubrication Chart ......................................................129
Packer ........................................................................130
Body-Chassis Hinges ...............................................131
Hopper Section (Standard Version) ........................132
Crusher Panel ............................................................133
Full-width Tailgate .....................................................134
Chapter 5
Troubleshooting
Troubleshooting Guide .............................................135
Appendix
About Wiring Schematics .........................................145
Connectors ................................................................146
Commonly-used Electrical Connectors ..................146
Deutsch ............................................................................146
AMP .................................................................................146
Labrie Electrical Schematics ..................................147
Commonly-used Symbols ......................................147
TM
Alarms ..............................................................................147
Connectors .......................................................................148
Diodes ..............................................................................148
Fuses ...............................................................................149
Lights ................................................................................150
Relays ..............................................................................152
Solenoids .........................................................................153
Switches ...........................................................................154
Other Symbols .................................................................157
vii
viii
Table of Contents
Expert(t) 2000
TM
Maintenance Manual
INTRODUCTION
ABOUT THIS MANUAL
The current manual is designed to help
qualified maintenance personnel
through repairing, servicing and
maintaining the Expert(t) 2000 .
TM
What You Will Find in
this Manual
Only maintenance of the body and
packer components are outlined in this
manual.
What You Will Not Find
in this Manual
•
For maintenance of the chassis,
refer to the chassis manufacturer’s
service manual;
•
For details on options such as
camera, tag axle, and
backing-accidents prevention
systems, refer to the optional
material manufacturer’s service
manual;
•
For details on operation of the
Expert(t) 2000 , refer to the
Expert(t) 2000 ’s Operator Manual;
TM
TM
•
For details and schematics
concerning body parts, refer to the
Expert(t) 2000 ’s Parts Catalog.
TM
1
2
Introduction
INTRODUCING THE EXPERT(T) 2000
The Expert(t) 2000 is a side-loading
refuse collection vehicle. It is designed
and built to aid in the manual collection
of different types of refuse by only one
operator.
then determine and supply, at the
customer’s expense, the required
safety items.
TM
•
Expert(t) 2000 units equipped with
a lifting arm are primarily designed
to be operated by only one person.
TM
If, however, the end user elects to
operate the unit with more than one
worker, the following safety items
shall be installed to protect the
co-worker from hazardous
situations.
For example, an additional set of
sustained manual pressure
controls for each additional worker
shall be provided. The actuation of
the controls shall take place
concurrently in order to operate the
Helping-Hand lifting arm. The
sustained manual pressure control
shall be located so that the
co-worker pressing it, is not in the
path of the arm and has a clear and
full view of the point of operation.
TM
•
In such a case, Labrie
Environmental Group must be
informed of every and all units
equipped with a lifting arm
operated by more than one worker.
Labrie Environmental Group will
TM
•
Please contact the Labrie
Customer Support Center at
1-800-231-2771 for additional
information.
DANGER
FAILURE TO CONTACT LABRIE
ENVIRONMENTAL GROUP TO
REPORT A TWO-OPERATOR USE
OF THE UNIT MAY RESULT IN UNIT
AND / OR PROPERTY DAMAGES,
PERSONAL INJURY OR EVEN
DEATH.
The Expert(t) 2000 is a unit that,
depending on the type of collection it
will be used for, appears in three main
categories: manual, semi automated,
and automated. The Expert(t) 2000
always allows for manual collection,
that is, in whatever configuration the
product is built, manual collection is
available.
TM
TM
Also, the Expert(t) 2000 exists in what
is called a “co-mingle” version where
the body is splitted in half to create two
TM
Expert(t) 2000
TM
Maintenance Manual
separate compartments for the
collection of two different types of load.
manual collection of waste bags and
other refuse.
Expert(t) 2000 for
Manual and Automated
Collection
TM
ALL Expert(t) 2000 vehicles are
designed with a lowered hopper to
allow easier manual collection.
TM
Helping-Hand
That is, instead of having the body on
top of a straight frame chassis, they
have it on top of a chassis frame that
has been modified and lowered at the
hopper area. Therefore, the hopper is
at a more friendly height for the
TM
Figure 1. Expert(t) 2000 for manual
and automated collection
TM
SOME Expert(t) 2000 vehicles are
equipped with an automated arm
called Helping-Hand for collecting
waste from roller carts.
TM
TM
SERVICE AND MAINTENANCE ON THE EXPERT(T)
2000
TM
Maintenance on the Expert(t) 2000 is
of outmost importance to ensure a
longer durability of all its parts and an
optimal performance in the field.
Maintenance has to be done on almost
every system involved in the operation
of the Expert(t) 2000 such as the
hydraulic, electrical, and mechanical
systems. There are parts submitted to
more repetitive and intensive activity
than others, therefore, a more often
TM
TM
and dedicated maintenance is required
on them.
In this manual, you find the most
common maintenance and inspection
procedures needed on the Expert(t)
2000 .
TM
3
4
Introduction
CONTACTING LABRIE ENVIRONMENTAL GROUP
Plant information
Address
175 du Pont
St-Nicolas (Quebec)
CANADA G7A 2T3
Phone:
1-800-463-6638
(418) 831-8250
Fax:
Sales Dept.:
(418) 831-5255
Labrie Customer
Support Center
Address
54 Park Place (Upper)
Appleton, WI 54914
Hot Line
Technical Support,
Service & Warranty:
24-Hour Service
1-800-231-2771
Service & Warranty:
(418) 831-1673
Parts:
(418) 831-7561
Parts:
8 am through 7 pm ET
1-800-231-2771
Web Site:
www.labriegroup.com
E-mail:
[email protected]
IMPORTANT
FOR TECHNICAL SUPPORT AND
PARTS ORDERING, THE SERIAL
NUMBER OF YOUR VEHICLE IS
REQUIRED, THEREFORE, LABRIE
ENVIRONMENTAL
GROUP
RECOMMENDS TO KEEP RECORD
OF THE INFORMATION FOUND ON
THE VIN PLATE WHICH IS
LOCATED IN THE CAB.
Expert(t) 2000
TM
Maintenance Manual
SAFETY
Being a heavy duty vehicle, the
Expert(t) 2000 implies a number of
safety issues. Such issues, along with
TM
all necessary safety instructions and
conventions, are presented in this
section of the Maintenance Manual.
SAFETY CONVENTIONS
DANGER
INDICATES
AN
IMMINENTLY
HAZARDOUS SITUATION WHICH, IF
NOT AVOIDED, WILL RESULT IN
DEATH OR SERIOUS INJURY.
Responsibilities of the
Employer
In accordance with ANSI Z245.1
1999 Standards, it is the
responsibility of the employer:
•
To ensure the operation of the
Expert(t) 2000 is in accordance
with all safety requirements and
codes, including all applicable
regulations, the Occupational
Safety and Health Act (OSHA) and
the American National Standards
Institute (ANSI).
TM
WARNING
INDICATES
A
POTENTIALLY
HAZARDOUS SITUATION WHICH, IF
NOT AVOIDED, COULD RESULT
ON DEATH OR SERIOUS INJURY.
•
To ensure the employees are
qualified for the operation of the
equipment and take all safety
measures before working with this
equipment.
•
To properly maintain all mobile
equipment to meet all provincial/
state and federal safety standards.
•
To supply adequate instructions
and training for the safe use of the
CAUTION
INDICATES
A
POTENTIALLY
HAZARDOUS SITUATION WHICH, IF
NOT AVOIDED, MAY RESULT IN
MINOR OR MODERATE INJURY.
5
6
CHAPTER 1
Safety
vehicle before assigning the
employee to such equipment.
•
•
To keep the vehicle maintained and
properly adjusted to meet the
manufacturer’s standards and
recommendations. For help or
more information, contact the
manufacturer or any authorized
representative.
To keep record of any breakdowns
or malfunctions of the vehicle as
well as any inspection and
maintenance.
•
To ensure the repair of any failures
or malfunctions that may affect the
safe use of the vehicle, always
before it is used again.
•
To meet the appropriate lighting
requirements for night shift work (if
permitted).
•
To regularly accompany the
operator of the vehicle and take
measures to ensure the smooth
and safe operation of the vehicle.
•
To make sure that the backup
alarm works properly while the
vehicle is in reverse.
•
To take the necessary measures
that follow a damage or
malfunction report from any
employee.
•
To establish and ensure the
application of a “Lockout/Tagout
Procedure” at the time of any
inspection, repair or maintenance
to the vehicle, whether it takes
place on the road or in the garage.
WARNING
PRIOR TO PERFORMING ANY
MAINTENANCE ON THE VEHICLE,
ALL
SAFETY
REGULATIONS
MENTIONED IN CHAPTER 1 OF
THE OPERATOR MANUAL, MUST
BE RESPECTED, ESPECIALLY THE
“LOCKOUT/TAGOUT” ON PAGE 6.
CAUTION
MAINTENANCE
AND
REPAIRS
CARRIED OUT ON THIS VEHICLE
MUST
ONLY
BE
DONE
BY
QUALIFIED PERSONNEL WHO IS
FAMILIAR WITH THE EQUIPMENT.
LABRIE ENVIRONMENTAL GROUP
DECLINES ANY RESPONSIBILITY
FOR
FAILURES
RESULTING
IMPROPER REPAIRS PERFORMED
BY THE END USER.
Expert(t) 2000
TM
Maintenance Manual
Responsibilities of the
Employee
In accordance with ANSI Z245.1
1999 Standards, it is the
responsibility of the employee:
•
To enforce all safety measures to
meet the requirements established
by the employer.
•
To operate the Expert(t) 2000 only
after having received instructions
and training in accordance with the
Operator Manual.
•
•
TM
To immediately report to the
employer or supervisor about any
damage or malfunction of the
vehicle.
To make sure that there is nobody
near the vehicle before activating
any of the controls and be
prepared to stop everything upon
the existence of possible danger.
WARNING
PRIOR TO PERFORMING ANY
MAINTENANCE ON THE VEHICLE,
ALL
SAFETY
REGULATIONS
MENTIONED IN CHAPTER 1 OF
THE OPERATOR MANUAL, MUST
BE RESPECTED, ESPECIALLY THE
“LOCKOUT/TAGOUT” ON PAGE 6.
CAUTION
MAINTENANCE
PERSONNEL
SHALL NEVER PERFORM ANY
ON
THE
MAINTENANCE
EQUIPMENT IF THEY ARE NOT
WELL ACQUAINTED WITH THE
OPERATIONS OF THE EQUIPMENT
WELL
AS
ALL
SAFETY
AS
PRECAUTIONS
OF
SUCH
OPERATIONS. REFER TO THE
OPERATOR ’S MANUAL BEFORE
ATTEMPTING TO PERFORM ANY
TYPE OF WORK ON THE UNIT.
7
8
CHAPTER 1
Safety
CAUTION
MAINTENANCE
AND
REPAIRS
CARRIED OUT ON THIS VEHICLE
MUST ONLY BE PERFORMED BY
QUALIFIED PERSONNEL WHO IS
FAMILIAR WITH THE EQUIPMENT.
LABRIE ENVIRONMENTAL GROUP
DECLINES ANY RESPONSIBILITY
FOR
FAILURES
RESULTING
IMPROPER REPAIRS PERFORMED
BY THE END USER.
LOCKOUT/TAGOUT PROCEDURE
The Lockout/Tagout Procedure
procedure must be applied to render
the vehicle out of service and thus
ensure its safety and that of those who
will be around it.
To lock out and tag out the Expert(t)
2000 :
TM
1.
Apply the parking brake. See
Figure 2. “Parking brake knob” .
DANGER
NEVER PERFORM ANY REPAIR OR
MAINTENANCE ON A VEHICLE
THAT HAS NOT BEEN UNLOADED.
Figure 2. Parking brake knob
Expert(t) 2000
TM
Maintenance Manual
2.
Turn the pump switch on the
console (PTO switch) to the OFF
position.
3.
Stop the engine.
4.
Remove the key from the ignition
switch.
5.
Put the key in a safe controlled
area.
6.
Put adhesive tape on the ignition
switch keyhole.
Note:If the Expert(t) 2000 is
equipped with a master switch
on the battery set, you must
turn it off. See Figure 3.
“Master switch location” .
9.
Block any system that could
move by gravity with a proper
and visible safety prop (open
tailgate, raised body, etc.)
10.
Release any residual pressure
from the hydraulic and
pneumatic system. Refer to “Air
Tank Draining Procedure” on
page 30 for details.
11.
Move all control levers to release
any residual pressure from the
system.
12.
Chock wheels on both sides to
prevent the vehicle from moving.
13.
Disconnect the following items if
any type of welding is required:
TM
Master Switch
•
Battery
•
ABS module (anti-lock
brake system)
1
1
•
Electronic transmission
(ECU)
1
•
Electronic engine module
(ECM)
1
Figure 3. Master switch location
7.
Put an “Off Service” tag on all
steering wheels.
8.
Put an “Off Service” sign in the
windshield.
•
Intermittent wiper module
1. Refer to the chassis manufacturer
service manual to locate electronic
components.
1
9
10
CHAPTER 1
Safety
PROTECTION AGAINST FIRE
It is mandatory to have an ABC-type
fire extinguisher easily accessible from
both, outside and inside the cab.
CAUTION
ALWAYS
MAKE
SURE
THE
HOPPER AND/OR BODY OF THE
EXPERT(T) 2000 IS EMPTY
BEFORE SERVICING IT, SINCE
EXPLOSIVE AND/OR FLAMMABLE
OBJECTS, SUCH AS TELEVISION
TUBES, FLUORESCENT TUBES,
CANS UNDER PRESSURE, ETC.
MAY HAVE BEEN COLLECTED.
FAILURE TO EMPTY THE HOPPER
AND/OR BODY OF THE EXPERT(T)
2000 MAY RESULT IN UNIT AND/
OR
PROPERTY
DAMAGES,
PERSONAL INJURY.
The employer must inform and train all
personnel about the measures to be
taken in case of a truck and/or a
loaded body catching on fire. The
employer must also inform its
employees of an appropriate place to
drop the load near the maintenance
facility (preferably away from traffic,
surface drains and ditches).
TM
Fire Extinguisher
TM
If, for any reason, the maintenance
personnel has to work on equipment
that has not been unloaded, for any
type of work, a fire extinguisher (see
Figure 4. “Fire extinguisher location”)
should be made readily available and
close to this vehicle. Anytime a loaded
vehicle is inside a garage, there shall
be a fire extinguisher very close
nearby.
Figure 4. Fire extinguisher location
Expert(t) 2000
TM
Maintenance Manual
SAFETY PROPS
Safety props are essential safety
devices which are to be used every
time maintenance has to be performed
under a raised body or tailgate. Two
types of safety props are installed on
every Expert(t) 2000 :
Body Safety Prop
To set the body safety prop:
1.
Lift the body until the safety prop
is clear to be tilted under the
body;
2.
Pull the handle (see Figure 5.
“Safety prop release handle”) to
release the safety prop, then pull
down the safety prop;
TM
•
the body safety prop is designed to
hold the body in case a
hoist-related failure occurs;
•
the tailgate safety prop is designed
to hold the tailgate in case a
tailgate-cylinder-related failure
occurs.
DANGER
Handle
SAFETY PROPS MUST BE SET
PRIOR TO PERFORMING ANY
MAINTENANCE UNDER A RAISED
BODY OR TAILGATE. FAILURE TO
DO SO MAY RESULT IN SEVERE
INJURY OR EVEN DEATH.
DANGER
Figure 5. Safety prop release handle
3.
DO NOT USE PROPS WITH A
LOADED BODY. NEVER STAND
UNDER A RAISED AND LOADED
BODY.
Slowly lower the body so it rests
properly on the prop (see Figure
6. “Body safety prop”);
11
12
CHAPTER 1
Safety
DANGER
ALWAYS
USE THE TAILGATE
SAFETY PROP WHEN WORKING
UNDER A RAISED TAILGATE. THE
SAFETY
PROP
MUST
BE
INSTALLED EVEN IF THE TAILGATE
IS
IN
THE
FULLY
RAISED
POSITION.
Safety prop
Figure 6. Body safety prop
4.
Once finished with repairs or
inspection, slightly raise the
body and bring back the safety
prop to its vertical position, then
lower the body.
Tailgate safety prop
Apply the following procedure to
install the safety prop:
1.
Make sure there is no garbage
inside the body.
2.
Remove the tailgate-locking
mechanism safety pins.
The tailgate safety prop is used to
support and keep the tailgate open
during inspection or when
maintenance is carried out on the
vehicle. It is mandatory to install the
safety prop each time the tailgate is
opened for such purpose.
For maintenance on comingle split
body units equipped with an inside
door; refer to the comingle section of
the parts and service manual.
The safety prop can be easily installed
when the tailgate is slightly open.
DANGER
MAKE SURE THAT NO ONE IS
STANDING BEHIND THE TRUCK
AND THAT THERE IS NO WASTE
MATERIAL IN THE BODY PRIOR TO
RAISING THE TAILGATE.
3.
Start the engine.
4.
Turn the pump switch ON;
Expert(t) 2000
TM
Maintenance Manual
8.
DANGER
Set the safety prop (see Figure
8. “Putting the tailgate safety
prop in its set position”).
MAKE SURE NO ONE IS STANDING
BEHIND THE TRUCK PRIOR TO
RAISING THE TAILGATE.
5.
Open the tailgate about 3 feet
high;
6.
Raise the tailgate 3 feet (enough
to raise the safety prop);
7.
Pull the safety prop upward (see
Figure 7. “Pulling the tailgate
safety prop out from its home
position”).
Figure 8. Putting the tailgate safety
prop in its set position
9.
Lower the tailgate onto the
safety prop.
Apply the following procedure to
close the tailgate when the safety
prop is set:
Figure 7. Pulling the tailgate safety
prop out from its home position
1.
Start the engine;
2.
Turn the pump switch ON and
raise the tailgate about 3 feet
high;
13
14
CHAPTER 1
Safety
3.
Raise the tailgate safety prop
(see Figure 9. “Raising the
tailgate safety prop upward”);
Figure 10. Putting the tailgate safety
prop back in its home position
Figure 9. Raising the tailgate safety
prop upward
4.
Release your grip on the safety
prop to set in its hom position
(see Figure 10. “Putting the
tailgate safety prop back in its
home position”);
5.
Lower the tailgate;
6.
Using the locking mechanism
controls in the cab, lock the
tailgate in place;
7.
Put the safety pins back in place.
Expert(t) 2000
TM
Maintenance Manual
OTHER GENERAL SAFETY PRECAUTIONS
The following is general safety and
operational precautions which should
be adhered to by operators AND/OR
maintenance personnel at all times.
DANGER
NEVER STAND UNDERNEATH A
RETRACTED AUTOMATED ARM,
DANGER
SINCE NO ARM CYLINDER IS
EQUIPPED WITH A HOLDING
VALVE. SHOULD A HYDRAULIC
COMPONENT BREAK, SUCH AS AN
HYDRAULIC HOSE, FAILURE TO
STAY AWAY FROM THE ARM MAY
RESULT IN PERSONAL INJURY OR
EVEN DEATH.
DO NOT OPERATE OR SERVICE
THIS VEHICLE BEFORE HAVING
READ
AND
COMPLETELY
UNDERSTOOD THIS MANUAL AND
THE SAFETY LABELS ON THE
VEHICLE.
MAINTENANCE
PERSONNEL MUST ALSO READ
UNDERSTAND
THE
AND
OPERATOR ’S MANUAL FOR THIS
VEHICLE.
•
The operator of the Helping Hand
lifting arm shall make sure that any
people or obstructions are far away
from the automated arm before
moving it. Failure to do so may
result in unit and / or property
damages, personal injury or even
death;
•
At the beginning of every working
day, inspect the body, the packing
system and any system that might
endanger the safety of the public
and/or the operator;
•
Verify that the mirrors, brakes,
accelerator pedal, steering wheel
and turn signals are in good
working order;
DANGER
FAILURE TO CONTACT LABRIE TO
REPORT A TWO-OPERATOR USE
OF THE UNIT MAY RESULT IN UNIT
AND/ OR PROPERTY DAMAGES,
PERSONAL INJURY OR EVEN
DEATH.
TM
15
16
CHAPTER 1
Safety
•
•
Do not operate this equipment if
there are any signs of damage or
incomplete repairs;
Report any doubts and any
equipment safety service
requirements to your supervisor;
•
Maximum speed while
right-hand-side driving, if permitted,
is 20 Mph (or 32 km/h);
•
Keep both hands on the steering
wheel at all times for better control;
•
Do not leave the driving position
until the vehicle is completely
stopped and the parking brake
applied;
•
When the vehicle is parked, the
parking brake must be applied;
•
For any work, cleaning or
inspecting being performed
between the body and the chassis,
the body safety prop must be used.
The vehicle must also be on level
ground.
DANGER
WATCH AND BE ABSOLUTELY
SURE THAT THERE ARE NO
PEOPLE AT THE REAR OF THE
VEHICLE WHEN OPENING AND/OR
CLOSING THE TAILGATE(S), OR
WHEN
RAISING
AND/OR
LOWERING THE BODY.
DANGER
DO NOT GET INTO THE HOPPER
COMPARTMENT OR TRY TO
REPAIR ANYTHING BEHIND THE
PACKER WHEN IT IS WORKING OR
WHEN THE HYDRAULIC PUMP IS
RUNNING.
PERSONNEL
STILL
AUTHORIZED TO GET INTO THE
HOPPER MUST FIRST COMPLETE
THE
LOCKOUT/TAGOUT
PROCEDURES REQUIRED BY THE
EMPLOYER.
Expert(t) 2000
TM
Maintenance Manual
CONTROLS
The Expert(t) 2000 uses a series of
controls systems located either in the
cab or around the body for easier
access and operation of the different
functions installed on the vehicle. This
section of the Maintenance Manual
presents you a description of such
controls systems.
TM
HELPING HAND
JOYSTICK
TM
The joystick is used to control the
Helping Hand arm of the Expert(t)
2000 . It can be located either at the
center of the cab or to the right or left
of the stand-up position steering
wheel. The joystick frame, depending
on which side you drive, is usually
inserted into brackets on either side to
offer you a comfortable reach.
TM
TM
The controls on the joystick are the
handle, the buttons on the top and
front, and the deadman switch.
•
The handle is used to control the
horizontal and vertical movements
of the arm components.
•
The buttons on the top are used to
control the opening and closing
movement of the gripper; the one
on the right to open and the one on
the left to close it.
•
The buttons on the front are used
to control the Auto-dump feature
(optional).
Note: The Auto-dump feature is
optional therefore, only those
vehicles with the feature
installed will have the front
buttons functional.
•
The deadman switch is used as a
safety device to ensure every
movement of the arm from the
joystick is absolutely wanted and
controlled by the operator. That is,
if the operator is not pressing the
deadman switch while trying to
move the arm with the joystick, no
movement will occur. With such
safety feature, whatever accidental
movement inflicted on the joystick
will not be transmitted to the arm as
a command signal.
Note:Whenever the arm is out of its
home position, two red
warning lights flash on the
dashboard to remind you that
you shouldn’t move the
vehicle under such
circumstances.
17
18
CHAPTER 2
Controls
Pump Switch
Gripper functions buttons
Handle
Autodump control
buttons (optional)
Deadman switch
Figure 11. Helping Hand joystick
TM
The pump switch engages the
Expert(t) 2000 hydraulic system and
enables all body control and functions.
This switch is also called “PTO switch”.
When it is turned ON, a red pilot light on
the dashboard is turned on to indicate
that the hydraulic system is engaged.
TM
Note:The pump switch can only be
turned on when the engine
RPM is lower than 900 and the
air pressure is higher than
70 PSI. It is recommended to
raise the engine RPM only
after the hydraulic system is
engaged.
Pump
switch
Pilot light
Figure 13. Pump switch and pilot
light on the console
Figure 12. Helping Hand joystick
functions
TM
Expert(t) 2000
TM
Maintenance Manual
CAUTION
CAUTION
TO TURN THE PUMP SWITCH TO
EITHER ON OR OFF, ALWAYS
WHEN A MAJOR LEAK IN THE
HYDRAULIC SYSTEM OCCURS,
MAKE SURE THE MAIN VALVE ON
THE HYDRAULIC TANK IS OPEN.
THE PUMP IS ALWAYS TURNING
ALONG
WITH
THE
ENGINE,
THEREFORE,
IT
WILL
BE
SERIOUSLY DAMAGED OR EVEN
DESTROYED IF THERE IS NO OIL
FEED INTO IT.
TURN OFF THE ENGINE AND
CLOSE THE MAIN VALVE ON THE
HYDRAULIC TANK.
IF THE VEHICLE HAS TO BE
TAKEN SOMEWHERE ELSE, CALL
FOR TOWING AND DO NOT
RESTART THE ENGINE.
REPORT MAINTENANCE STAFF
ABOUT THE PROBLEM.
Figure 14. Main valve on the
hydraulic tank
19
20
CHAPTER 2
Controls
CONTROL CONSOLE
The Expert(t) 2000 control console
houses most of the controls of the
Expert(t) 2000 functions and systems.
It is located in the center of the cab for
easy access from both driving
positions. Outside the console, you
find its interface with all buttons and
switches and on the inside, you find
the corresponding electrical wiring and
devices.
TM
TM
Figure 15. Control console
Red Emergency-Stop
Button
The red emergency STOP button
switches on and off all the hydraulic
functions on the body. It is conceived
and designed to instantly stop all body
functions in the case of an emergency
of any kind.
•
Pressing this button stops all body
functions right where they’re at.
•
Pulling the button will enable the
hydraulic pump back. To resume
any function from where it has
stopped, apply the appropriate
procedure for this action.
Red Emergency
Stop button
Figure 16. Emergency stop button
Expert(t) 2000
TM
Maintenance Manual
Green Start Cycle
Button
The green START CYCLE button activates
the packer for a full cycle. A full
packing cycle lasts approximately
15 seconds with the engine running at
1200 RPM.
Note:When the multi-cycle feature
is in use, the green button
activates the packer for the
number of cycles defined on
the multi-cycle module. For
more information, see
“Changing Packer Multi-cycle
Settings” on page 46.
Yellow Retract Button
The yellow RETRACT button activates the
packer for a retract stroke to bring it
back to the home position. Such
control is very useful when the body is
full and the load in the body does not
allow the packer to reach the end of its
extend stroke.
Retract
button
Figure 18. Retract button
Start Cycle
button
Figure 17. Start Cycle button
21
22
CHAPTER 2
Controls
Multi-cycle Control
Switch
The MULTI-CYCLE control switch allows
you to choose whether you want to
activate the packer for several
predefined cycles or for its default only
one cycle. Turning on the switch allows
packer multi-cycling when you press
the green packer start cycle button.
See “Green Start Cycle Button” on
page 21. Turning it off during the
multi-cycling operation will have the
packer finish the cycle it is on and not
starting a new one. When the switch is
turned OFF, the packer will perform only
one cycle when you press the green
button.
Engine RPM Control
The Expert(t) 2000 is equipped with
an engine RPM control system which
consists of the increment or decrement
of a predetermined value of the engine
RPM (revolutions per minute)
depending on the results you want to
achieve.
TM
For example:
•
if you want to achieve faster
operation of moving parts such as
the hoist and the packer, increase
the engine RPM.
•
if you want to reduce the level of
noise while operating the Expert(t)
2000 , decrease the engine RPM.
Increasing or decreasing the
engine RPM directly affects fuel
consumption therefore, it is an
issue to look at when using the
system.
TM
The engine RPM controls that exist in
the Expert(t) 2000 are the SPEED-UP
switch, the SPEED-UP INHIBITOR control,
and the packer automatic speed-up.
These controls are individually
presented throughout this guide.
TM
Multi-cycle
control switch
Figure 19. Multi-cycle control
switch
Note:The throttle pedal is an
element that can directly affect
the engine RPM; however, it
must not be used to control
any moving parts of the body
Expert(t) 2000
TM
Maintenance Manual
but rather be used for regular
driving purposes as with any
other vehicle.
Speed-up Switch
The SPEED-UP switch allows the operator
to manually increase the engine RPM
while operating the body moving parts.
That is, turning the switch to ON will
rev-up the engine to a predetermined
value (usually 900, 1200 or
1500 RPM).
This feature is effective under the
following conditions:
•
Control station properly selected.
•
Transmission is in neutral.
•
Speed-up inhibitor control set to
“Disable”.
Note:Increasing the engine RPM
direct and proportionally
affects fuel consumption.
Speed-up Inhibitor
Control
The SPEED-UP INHIBITOR control allows you
to override any RPM speed-up control
existing on the Expert(t) 2000 ; in
particular, the packer automatic
SPEED-UP feature. Independently, from
what control station is controlling the
functions of the body moving parts, the
SPEED-UP INHIBITOR control, when
enabled, brings the engine RPM to its
idle value. In other words, when
enabled, this feature disables all other
speed-up functions.
TM
Speed-up
inhibitor
control
Speed-up
switch
Figure 20. Speed-up switch
Figure 21. Speed-up inhibitor
control
23
24
CHAPTER 2
Controls
Note:Decreasing the engine RPM
direct and proportionally
affects fuel consumption.
Control Station
Selector Switch
This switch allows you to choose the
control station that you want to use.
Only one control station is enabled at a
time. You can either use the control
station located on the console or the
one outside by the hopper.
TEMPORARY
HANDBRAKE
The temporary handbrake option
(available only on Labrie extended
cabs) sets the temporary brake on and
off and shifts the transmission into
either NEUTRAL or DRIVE by switching on
and off the Auto-Neutral system. It is
mainly used for stops of short duration
where you work no farther than ten
feet from the Expert(t) 2000 , such as
the regular and repetitive stops you do
when door-to-door refuse collecting.
This brake is in the form of a toggle
switch located near the right-hand side
door and must be applied only when
you have used the brake pedal to bring
the vehicle to a full stop. For longer
stops, use the parking brake.
TM
Control station
selector switch
Figure 22. Control station selector
switch
Temporary
handbrake
Figure 23. Temporary handbrake
Expert(t) 2000
TM
Maintenance Manual
CAUTION
NEVER
LEAVE THE VEHICLE
BEFORE IT HAS COME TO A FULL
STOP
AND
EITHER
THE
TEMPORARY HANDBRAKE AND/OR
THE PARKING BRAKE HAS BEEN
APPLIED. IF THE VEHICLE IS ON A
SLOPE OR IF YOU ARE ABOUT TO
GO FARTHER THAN TEN (10)
FEET AWAY FROM IT, LABRIE
ENVIRONMENTAL
GROUP
RECOMMENDS ENGAGING BOTH
BRAKE
SYSTEMS
FOR
ADDITIONAL SAFETY.
IMPORTANT
WHEN YOU RETURN IN THE CAB
TO
DRIVE
AWAY
FROM
A
COLLECTION STOP, ONLY SLIGHT
PRESSURE ON THE BRAKE PEDAL
AND
SHIFTING
OF
THE
TEMPORARY HANDBRAKE AND/OR
THE
PARKING
BRAKE
ARE
NECESSARY TO ENGAGE THE
TRANSMISSION AND MOVE THE
VEHICLE.
THIS
CAREFUL
SEQUENCE
HELPS
YOUR
EXPERT(T)
2000
BRAKE
SYSTEMS LAST LONGER AND
PERFORM AT HIGHER LEVELS.
TM
25
26
CHAPTER 2
Controls
BODY CONTROL
STATION
The body control station, located
outside the cab by the body, allows you
to use and control most of the
hydraulic functions of the body.
STROBE LIGHT SWITCH
The STROBE LIGHT switch is located on
the control console of the Expert(t)
2000 . It is used to turn on and off the
strobe lights that are installed on the
Expert(t) 2000 . You must turn on the
STROBE LIGHT switch at the beginning of
a work day. See Starting the Vehicle.
TM
TM
Emergency Stop
Start Cycle
Retract
Figure 24. Body control station
Strobe Light
switch
Figure 25. Strobe light switch
Expert(t) 2000
TM
Maintenance Manual
MAINTENANCE
In spite of our efforts to build a vehicle
that is as safe as possible, the
operator’s safety certainly depends on
the precautionary measures taken
while operating or servicing the
vehicle.
Note:If in doubt, ask your
supervisor or contact the
Labrie Customer Support
Center for any technical
support you may require.
Establish and apply a periodic
inspection program to keep moving
parts in good working order, properly
adjusted and safe. It is recommended
that a brief inspection be done by the
operator every day and any detected
malfunctions must be reported for
correction before using the equipment.
Once a month, inspect the chassis and
the body for breaks, cracks or any
potential problems. Any defects found
must be repaired without delay. To
ensure the good working order of the
equipment, particular attention should
be paid to structural components in
order to prevent deterioration due to
corrosion; touchups and/or complete
paint jobs should be done when
necessary.
27
28
CHAPTER 3
Maintenance
PRIOR TO START UP
Before starting the vehicle, ensure that
no system will engage and start to
operate as you are starting the engine.
All electrical components should be
turned OFF and the hydraulic pump
disengaged (see Figure 26. “Hydraulic
pump switch”).
The main valve on the hydraulic tank
must be open (see Figure 27. “Main
hydraulic tank (pressurized model)”
and Figure 29. “Suction-line-mounted
valve”).
Open Ball Valve
Return
Filter
Figure 26. Hydraulic pump switch
Figure 27. Main hydraulic tank
(pressurized model)
Expert(t) 2000
TM
Maintenance Manual
WARNING
MAKE SURE THE BALL VALVE ON THE
HYDRAULIC
TANK
IS
FULLY
OPEN
(SEE
FIGURE 27. “MAIN HYDRAULIC TANK
(PRESSURIZED MODEL)”, FIGURE 28.
“MAIN HYDRAULIC TANK (“SADDLE”
MODEL)”
AND
FIGURE
29.
“SUCTION-LINE-MOUNTED VALVE”).
IF NOT OPEN, IMMEDIATE DAMAGE WILL
OCCUR TO THE PUMP, EVEN THOUGH
THE PTO SWITCH IS TURNED OFF.
BEFORE STARTING THE ENGINE
Open
Ball
Valve
Figure 28. Main hydraulic tank
(“saddle” model)
Once the engine is started, wait for the
air pressure to build up to at least
70 PSI.
Open Ball
Valve
CAUTION
DO NOT OPERATE NOR MOVE THE
VEHICLE UNTIL THE AIR PRESSURE HAS
REACHED
Figure 29. Suction-line-mounted
valve
70 PSI.
29
30
CHAPTER 3
Maintenance
SHUTDOWN PROCEDURE
If the vehicle has to be stored for an
extended period; follow the chassis
manufacturer shutdown requirements
as well as the maintenance
requirements and perform the
following procedure.
1.
Park on a hard, level surface;
2.
Apply the parking brake;
3.
Make sure all moving parts are in
stored position (tailgate, body,
crusher panel, packer, etc.);
4.
Air Tank Draining
Procedure
Labrie strongly recommends draining
the Expert(t) 2000 air tanks at the end
of each working day and prior to any
maintenance.
TM
TM
CAUTION
THE OPERATOR MUST WEAR SAFETY
Turn hydraulics, electrical and
engine off;
5.
Turn the master switch to the OFF
position;
6.
Drain all air tanks. (See “Air Tank
Draining Procedure” on
page 30.)
GLASSES
TO
AGAINST
DUST
MATTERS.
PROTECT
AND
HIS
EYES
SUSPENDED
THE OPERATOR MUST ALSO
STAY AWAY FROM THE STREAM TO
AVOID POTENTIAL INJURIES.
To drain the air tanks, apply the
following procedure:
1.
Find the valve(s).
Note:Some trucks are equipped
with more than one drain
valve.
2.
Before opening the valve, be
sure to stay away from the
stream. Open the valve and
leave it open until no more water
is going out.
Expert(t) 2000
TM
Maintenance Manual
•
If the truck is equipped with
the following type of tank,
turn the valve one-quarter
turn.
Drain valve
Figure 30. Air tank
•
If the drain valve is
equipped with a steel cable
(see Figure 31. “Air tank
with steel cable on drain
valve”), the operator has to
pull the cable in order to
open the valve.
Figure 31. Air tank with steel cable
on drain valve
•
When the air tanks are not
easily reachable, extension
hoses join them to ball
valves in order to perform
draining remotely
(optional).
31
32
CHAPTER 3
Maintenance
Figure 32. Ball valves with
extension hoses
•
3.
In this case, the operator
has to open the valves
(quarter turn) to proceed
with the draining.
Close the valve and repeat the
procedure for all the other valves
(if there’s more than one
installed on the truck).
Expert(t) 2000
TM
Maintenance Manual
GENERAL CLEANLINESS
Cleanliness is part of the safety.
•
•
•
Ensure the equipment to work
properly by removing any stacked
garbage in the hopper area.
Clean all truck lights, warning lights
and safety stickers, so the operator
and the surrounding pedestrians
and vehicles will be safe around
the truck at all times.
Keep clean the contact surface
between the body and chassis.
Labrie recommends to clean the
chassis after every unloading.
TM
•
Make sure that the side step and/or
the hopper step (if installed) are
clean and free of any slippery
material.
KEEP THE RIGHT- AND LEFT-HAND SIDE
FLOOR
DRY
AND
CLEAN
TO
PREVENT ANY RISK OF SLIPPING AND
ACCIDENT.
USE A STEPLADDER TO WORK ON THE
HIGHER PARTS OF THE VEHICLE.
REMEMBER THE ROOF IS NOT MEANT
TO BE WALKED ON. BE VERY CAUTIOUS
IF YOU HAVE TO WORK ON THE ROOF
AREA.
DANGER
ALWAYS USE SAFETY HARNESS WHEN
WORKING OR WALKING ON THE ROOF
OF THE VEHICLE.
Cleaning the Hopper
Area
WARNING
CAB
DANGER
The area behind the packer should be
cleaned out every day. The packer will
not work properly if waste accumulates
in this area; it could even cause severe
damage to the packer and other
related parts.
This section indicates the cleaning
procedure of the hopper section.
Note:The procedure may vary
depending on what type of
33
34
CHAPTER 3
Maintenance
chassis and options are
installed on the vehicle (i.e.
crusher panel, comingled
body, glass compartment,
automated arm type, etc.)
multiple packer control
stations.
Packer Control
Selector
DANGER
ALWAYS
BOOTS,
WEAR
SHIRT,
GLOVES,
SAFETY
FULL-LENGTH
PANTS
AND SAFETY GLASSES WHEN CLEANING
THE HOPPER AND BODY.
On Helping
Hand -equipped Units
TM
To clean the hopper on a Helping
Hand -equipped Expert(t) 2000 ,
apply the following procedure:
TM
1.
TM
Park the Expert(t) 2000 on level
ground, in an area where small
debris can fall on the ground for
further collection.
Figure 33. Packer control selector
switch
4.
Disable the speed-up system on
the console (see Figure 34.
“Main console from right-hand
side driving position”) by pulling
out the SPEED-UP INHIBITOR switch;
TM
2.
Apply the parking brake.
3.
Using the PACKER CONTROL
SELECTOR switch on the console,
select the right-hand side packer
control station (see Figure 33.
“Packer control selector switch”).
Note:This switch is found only on
vehicles equipped with
Speed-Up
Inhibitor Switch
Figure 34. Main console from
right-hand side driving position
Expert(t) 2000
TM
Maintenance Manual
5.
Raise the crusher panel (see
Figure 35. “Hopper”) using the
lever located on the main
hydraulic valve (see Figure 36.
“Crusher panel lever”);
7.
Push the green START CYCLE
button to fully extend the packer,
then push the red emergency
STOP button when the packer is
fully extended.
Crusher Panel
Start
Cycle
Button
Emergency
Stop Button
Figure 35. Hopper
Figure 37. Right-hand side control
station
Crusher
Panel
Lever
Figure 38. Extended packer
8.
Figure 36. Crusher panel lever
6.
Using the joystick, fully extend
the Helping Hand arm.
TM
Apply the Lockout/Tagout
procedure. Refer to “Lockout/
Tagout Procedure” on page 8.
35
36
CHAPTER 3
Maintenance
11.
DANGER
APPLY
THE
LOCKOUT/TAGOUT
PROCEDURE TO PREVENT ANY ENGINE
START-UP.
9.
Open the clean-out trap door on
both sides of the hopper;
Figure 39. Clean-out trap door
10.
Clean all accumulated dirt under
the cylinders and in the side
tracks using a hoe and a water
jet if necessary.
Clean out the rest of the
Expert(t) 2000 body.
TM
Note:Perform a visual inspection of
the hopper area, checking for
possible leaks in the hydraulic
system and wear on the
mechanical parts.
12.
Exit the hopper;
13.
Using the hoe, rake small pieces
of garbage out of the clean-out
trap;
14.
Clean the area with a water jet;
15.
Close the clean-out trap doors;
16.
Start the engine;
17.
Engage the hydraulic system;
18.
Fully retract the packer;
19.
Retract the arm along the
hopper.
On Manual-collection
and Cart-tipperequipped Units
To clean the hopper on an Expert(t)
2000 not equipped with a Helping
Hand , apply the following
procedure:
TM
CAUTION
DO NOT USE THE WATER JET DIRECTLY
ON CONNECTORS OR BATTERY FUSES.
TM
1.
Park the Expert(t) 2000 on level
ground, in an area where small
TM
Expert(t) 2000
TM
Maintenance Manual
debris can fall on the ground for
further collection.
2.
Apply the parking brake.
3.
Using the PACKER CONTROL
SELECTOR switch on the console,
select the right-hand side packer
control station (see Figure 33.
“Packer control selector switch”).
Speed-Up
Inhibitor Switch
Note:This switch is found only on
vehicles equipped with
multiple packer control
stations.
Figure 41. Main console from
right-hand side driving position
5.
Packer Control
Selector
Raise the crusher panel (see
Figure 42. “Hopper”) using the
lever located on the main
hydraulic valve (see Figure 43.
“Crusher panel lever”);
Crusher Panel
Figure 40. Packer control selector
switch
4.
Disable the speed-up system on
the console (see Figure 41.
“Main console from right-hand
side driving position”) by pulling
out the SPEED-UP INHIBITOR switch;
Figure 42. Hopper
37
38
CHAPTER 3
Maintenance
Crusher
Panel
Lever
Figure 45. Extended packer
Figure 43. Crusher panel lever
6.
7.
Push the green START CYCLE
button to fully extend the packer,
then push the red emergency
STOP button when the packer is
fully extended.
Apply the lockout/tagout
procedure. Refer to “Lockout/
Tagout Procedure” on page 8.
DANGER
APPLY
THE
LOCKOUT/TAGOUT
PROCEDURE TO PREVENT ANY ENGINE
START-UP.
Start
Cycle
Button
8.
Open both hopper doors;
9.
Slowly open the clean-out trap
door on both sides of the hopper.
Emergency
Stop Button
Figure 44. Right-hand side control
station
CAUTION
THE CLEAN-OUT TRAPS MAY BE FILLED
WITH CERTAIN AMOUNTS OF LIQUID,
MAINLY
WATER
WHICH
SOAKED
GARBAGE DURING THE WORK DAY.
BE
CAREFUL NOT TO SPILL THESE LIQUIDS
ON BARE SKIN AND/OR IN EYES.
Expert(t) 2000
TM
Maintenance Manual
Note:Keep the clean-out traps open
during the cleaning.
12.
Rake with the hoe small pieces
of garbage out of the clean-out
trap.
13.
Clean the area with a water jet.
14.
Close the clean-out trap doors.
15.
Retract the arm along the
hopper.
Figure 46. Clean-out trap door
10.
Clean all accumulated dirt under
the cylinders and in the side
tracks using a hoe and a water
jet if necessary.
Emergency
Stop Button
Figure 47. Right side control station
CAUTION
DO NOT USE THE WATER JET DIRECTLY
ON CONNECTORS OR BATTERY FUSES.
11.
Clean out the rest of the
Expert(t) 2000 body.
TM
Note:Perform a visual inspection of
the hopper area, checking for
possible leaks in the hydraulic
system and wear on the
mechanical parts.
16.
Open the clean-out trap door on
each side of the hopper (see
Figure 48. “Hopper clean-out
trap door”);
39
40
CHAPTER 3
Maintenance
19.
Remove the safety pin from its
holder and put the pin in the hole
at the bottom left of the
swivel-style panel (see Figure
49. “Swivel-style panel in vertical
position (left-side view)”). This
pin is a mandatory safety device,
preventing from being caught at
the pinch point, when
manipulating the swivel-style
panel;
20.
Lower the swivel-style panel
over the packer (see Figure 50.
“Tilted swivel-style panel”);
Clean-Out Trap
Figure 48. Hopper clean-out trap
door
17.
Climb inside the hopper using a
small step-ladder;
18.
Bring the swivel-style panel to a
vertical position and hold it,
using the handle at the upper left
corner of the panel (see Figure
49. “Swivel-style panel safety
devices”);
Pinch Points
Handle
Figure 50. Tilted swivel-style panel
Safety Pin
Safety Pin
Holder
Figure 49. Swivel-style panel safety
devices
21.
Remove all accumulated dirt
under the cylinder brackets and
side rails (see Figure 51.
“Cylinder bracket and side rails
(left-side view)”) using a scraper
or pressurized water;
Expert(t) 2000
TM
Maintenance Manual
24.
Side Rail
Cylinder
Bracket
Perform a visual inspection of
the hopper area, checking for for
proper working order and/or
alignment, possible leaks in the
hydraulic system and wear on
the mechanical parts, such as:
•
Rollers;
•
Cylinders pins;
Figure 51. Cylinder bracket and side
rails (left-side view)
•
Hoses, pipes and
connections;
22.
•
Proper tightness of bolts;
•
Check for excessive wear
of the floor and sidewalls of
the hopper;
•
Check cylinders and hoses
for leaks;
Rake small pieces of garbage
towards the clean-out traps (see
Figure 52. “Clean-out trap when
the swivel-style panel is
lowered”);
Clean-out Trap
25.
Figure 52. Clean-out trap when the
swivel-style panel is lowered
23.
Finish cleaning the area with
pressurized water;
After cleaning and inspecting,
raise the swivel-style panel until
the safety pin is leaning against
the side frame (see Figure 53.
“Swivel-style panel safety
devices”);
41
42
CHAPTER 3
Maintenance
Handle
Safety Pin
Safety Pin
Holder
Figure 53. Swivel-style panel safety
devices
26.
Hold the swivel-style panel to a
vertical position using the handle
and remove the safety pin;
27.
Push the swivel-style panel
towards the front of the vehicle,
and secure the panel using the
lock handle;
28.
Exit the hopper;
29.
Using the hoe, rake small pieces
of garbage out of the clean-out
trap;
30.
Clean the area with a water jet;
31.
Close the clean-out trap doors;
32.
Start the engine;
33.
Engage the hydraulic system;
34.
Fully retract the packer;
35.
Retract the cart tipper (if
applicable) along the hopper.
Expert(t) 2000
TM
Maintenance Manual
PACKER MAINTENANCE
The Expert(t) 2000 packing system
has a heavyduty guiding system using
high-strength steel wear plates.
Because of the intensive use of the
packer (1000 to 3000 cycles per day),
Labrie recommends both:
TM
is available for any type of technical
support.
DANGER
TM
•
•
APPLY
a mandatory visual inspection of
the packer and its components,
performed daily by the operator;
a mandatory inspection and
maintenance, carried out weekly by
maintenance personnel.
Greasing all moving parts on a daily
basis is very important, and the proper
adjustment of the limit switches is
imperative, especially on units
equipped with multi-cycle options.
Refer to “Lubrication” on page 123 for
detailed diagrams of greasing points
and lubrication schedule.
CAUTION
DO NOT GREASE THE SIDE RAILS:
ABRASIVE MATERIAL STICKS TO THE
GREASE AND CAN CAUSE PREMATURE
WEAR OF THE ROLLERS AND/OR THE
SIDE RAILS.
Any problem found on the packing
system must be corrected immediately.
The Labrie Customer Support Center
LOCKOUT/TAGOUT
THE
PROCEDURE
MAINTENANCE
AT
ALL
OR
TIMES
WHEN
INSPECTION
IS
CARRIED OUT ON THE VEHICLE.
To prevent breakdowns and to
reduce maintenance expenses,
apply the following procedure:
1.
Park the Expert(t) 2000 on level
ground, in an area where small
debris can fall on the ground for
further collection.
2.
Apply the parking brake.
3.
Using the PACKER CONTROL
SELECTOR switch on the console,
TM
select the right-hand side packer
control station (see Figure 54.
“Packer control selector switch”).
Note:This switch is found only on
vehicles equipped with
multiple packer control
stations.
43
44
CHAPTER 3
Maintenance
hydraulic valve (see Figure 57.
“Crusher panel lever”);
Packer Control
Selector
Crusher Panel
Figure 54. Packer control selector
switch
4.
Disable the speed-up system on
the console (see Figure 55.
“Main console from right-hand
side driving position”) by pulling
out the SPEED-UP INHIBITOR switch;
Figure 56. Hopper
Speed-Up
Inhibitor Switch
Crusher
Panel
Lever
Figure 55. Main console from
right-hand side driving position
Figure 57. Crusher panel lever
5.
Raise the crusher panel (see
Figure 56. “Hopper”) using the
lever located on the main
6.
Push the green START CYCLE
button to fully extend the packer,
Expert(t) 2000
TM
Maintenance Manual
then push the red emergency
STOP button when the packer is
fully extended.
DANGER
APPLY
Start
Cycle
Button
Emergency
Stop Button
Figure 58. Right-hand side control
station
7.
Apply the Lockout/Tagout
procedure. Refer to “Lockout/
Tagout Procedure” on page 8.
LOCKOUT/TAGOUT
START-UP.
8.
Check the follower panel hinges
and make sure there is no wear
on the panel surface;
9.
Unbolt and remove the wear pad
bracket (Part #69584);
10.
Inspect the nylon wear pad (see
Figure 61. “Extended packer”).
Note:This wear pad wipes out dirt
each time the packer goes
back and forth. If this wear
pad is less than 1-inch thick,
replace it with a new one.
11.
Figure 59. Extended packer
THE
PROCEDURE TO PREVENT ANY ENGINE
Visually inspect both hopper side
rails and packer rollers (Figure
60. “Packer roller”) for premature
wear. See also “Packer Roller
Replacement” on page 70 and
“Wear Pads Replacement” on
page 57 for more details;
45
46
CHAPTER 3
Maintenance
floor also suggests that the
sliding shoes require immediate
replacement. Refer to “Sliding
Shoes and Wear Pads” on
page 53, “Sliding Shoes
Replacement” on page 54 and
“Wear Pads Replacement” on
page 57;
16.
Check if there is no knocking
noise when the packer reaches
the end of cylinder’s stroke. A
knocking noise will indicate that
both limit switches require
adjustment. Refer to “Limit
Switches Adjustment” on
page 48 for details.
17.
To check if hydraulic cylinders
are internally leaking (insufficient
packing force), refer to
troubleshooting; section 3.19
“Internal Leak Detection”.
Figure 60. Packer roller
12.
Make sure there are no leaks on
hydraulic hoses and pipes.
Tighten leaking connections and/
or replace the defective hose;
13.
Cylinder rod ends must be clear
of any dirt;
14.
Verify cylinder rods for scratches
that may cause the cylinder to
leak oil. In this case, the cylinder
and/or the seal must be replaced
immediately.
Note:Do not attempt to change
cylinder seals and packing
during the warranty period.
15.
Check for vertical and horizontal
movement of the packer. If the
packer seems to play sideways
or even up and down, the packer
wear pads need to be replaced.
Extensive wear of the hopper
Changing Packer
Multi-cycle Settings
The packer multi-cycle module is
programmed at the factory to execute
three cycles when the Multi-cycle
switch on the console has been turned
on and the packer is activated.
However, if these settings do not suit
your needs, you can manually change
them for those you desire.
Expert(t) 2000
TM
Maintenance Manual
Note:The packer multi-cycle
function lets you program up
to 8 cycles at a time.
To change the packer multi-cycle
settings:
1.
Turn on the engine and the
hydraulic system (PUMP switch);
2.
Apply the parking brake;
3.
On the console, turn the
MULTI-CYCLE switch on;
4.
Green LED
Remove the front side panel
located behind the cab on the
left-hand side of the Expert(t)
2000 body;
Figure 62. Packer multi-cycle
module
TM
On the bottom left of the packer
module, a green LED flashes on
and off (Figure 63. “Status
LED”);
Front Side Panel
Flashing green LED
Figure 61. Front side panel
5.
Locate the settings switch found
on the harness feeding the
module (see Figure 62. “Packer
multi-cycle module”).
Figure 63. Status LED
6.
Press and hold the button on the
settings switch (see Figure 64.
“Multi-cycle settings switch”) for
47
48
CHAPTER 3
Maintenance
about three to four seconds. A
continuous red light on the LED
appears;
Start
Cycle
Button
Settings switch
Emergency
Stop Button
Figure 65. Right-hand side control
station
Figure 64. Multi-cycle settings
switch
7.
Press the button the number of
times you want the packer to
cycle at a time.
Note:The module has been set at
the factory to three cycles.
Once you have entered the
desired number of cycles, the
LED flashes red/green the same
number of times to confirm you
the new settings have been
stored;
8.
On the control station or the
right-hand side console, press
the green START CYCLE button to
test the new settings of the
packer multi-cycle module;
9.
If the packer performs the
desired number of cycles,
re-install the side panel. The
vehicle is ready to use the new
settings.
Note:For any other issues
concerning the multi-cycle
module, please contact the
Labrie Customer Support
Center.
Limit Switches
Adjustment
The packer limit switches were
properly adjusted at the factory for
optimal operation of the packer. If a
daily cleaning is not properly done
behind the packer, it is possible that
the limit switches no longer stop the
Expert(t) 2000
TM
Maintenance Manual
packer, creating a knocking noise
when the packer reaches the end of a
stroke (bottoming out). The packer
may also not retract far enough to
touch the limit switch preventing the
automatic cycle to work properly.
PackerExtension
Limit Switch
After a certain period of time, a
misalignment of the components may
occur due to the frequent back and
forth movement of the packer. An
adjustment might be necessary to
prevent the cylinders from completely
extending and retracting to the end of
their strokes.
Two limit switches control the
extension and retraction limits of the
packer (before the end of cylinder’s
stroke):
•
the packer extension limit switch
stops the packer during its
extension;
•
the packer retraction limit switch
stops the packer during its
retraction.
Both limit switches are located at the
front end of the body, on its right-hand
side, between the cab and the body
(Figure 66. “Packer cylinder limit
switches” ).
PackerRetraction
Limit Switch
Figure 66. Packer cylinder limit
switches
Optional proximity switches can also
be installed on the vehicle but the
adjustment procedure remains the
same.
To adjust the packer limit switches,
apply the following procedure:
1.
Park the Expert(t) 2000 on level
ground, in an area where small
debris can fall on the ground for
further collection.
2.
Apply the parking brake.
3.
Using the PACKER CONTROL
SELECTOR switch on the console,
TM
select the right-hand side packer
control station (see Figure 33.
“Packer control selector switch”).
Note:This switch is found only on
vehicles equipped with
49
50
CHAPTER 3
Maintenance
multiple packer control
stations.
Packer Control
Selector
5.
Raise the crusher panel (see
Figure 42. “Hopper”) using the
lever located on the main
hydraulic valve (see Figure 70.
“Crusher panel lever”);
Crusher Panel
Figure 67. Packer control selector
switch
4.
Disable the speed-up system on
the console (see Figure 41.
“Main console from right-hand
side driving position”) by pulling
out the SPEED-UP INHIBITOR switch;
Speed-Up
Inhibitor Switch
Figure 69. Hopper
Crusher
Panel
Lever
Figure 68. Main console from
right-hand side driving position
Figure 70. Crusher panel lever
Expert(t) 2000
TM
Maintenance Manual
6.
Push the green START CYCLE
button to fully extend the packer,
then push the red emergency
STOP button when the packer is
fully extended.
DANGER
APPLY
THE
LOCKOUT/TAGOUT
PROCEDURE TO PREVENT ANY ENGINE
START-UP.
Start
Cycle
Button
8.
Locate the limit switches at the
front end of the body, on its
right-hand side, between the cab
and the body (Figure 73. “Packer
cylinder limit switches”);
Emergency
Stop Button
PackerExtension
Limit Switch
PackerRetraction
Limit Switch
Figure 71. Right-hand side control
station
Figure 73. Packer cylinder limit
switches
Figure 72. Extended packer
9.
7.
Apply the Lockout/Tagout
procedure. Refer to “Lockout/
Tagout Procedure” on page 8.
Srew or unscrew the
limit-switch-finger adjustment
screw (Figure 74. “Packer
cylinder finger”) so the cylinder
lever can trigger the switch when
the packer cylinder reaches this
position;
51
52
CHAPTER 3
Maintenance
Levers
Cylinder
Finger
Figure 74. Packer cylinder finger
Note:If the vehicle is equipped with
proximity switches (Figure 75.
“Proximity switches”), loosen
the proximity switch on the
bracket and move the
proximity switch over the
trigger lever to get the light
found on the proximity switch
to turn ON. The gap between
the proximity switch and the
trigger lever must be adjusted
to 3/16 of an inch.
Figure 75. Proximity switches
10.
To adjust the packer retraction
limit switch, retract the packer to
1” before the fully retracted
position, using the yellow button
on the packer control station;
11.
Push the red emergency-stop
button when the packer reaches
the right position;
12.
Stop the engine and apply the
lockout/tagout procedure. Refer
to “Lockout/Tagout Procedure”
on page 8 for details.
Expert(t) 2000
TM
Maintenance Manual
DANGER
Levers
NEVER CLIMB IN THE HOPPER WHILE
THE ENGINE IS RUNNING.
13.
Locate the limit switch on the
right-hand side of the vehicle
(see Figure 76. “Packer limit
switches”);
Cylinder
Finger
Figure 77. Packer cylinder finger
Levers
15.
Start the engine;
16.
Test the packer for a full cycle.
Make sure there is no knocking
noise at either end of the packer
cylinder stroke.
Cylinder
Finger
Figure 76. Packer limit switches
14.
Srew or unscrew the
limit-switch-finger adjustment
screw (Figure 77. “Packer
cylinder finger”) so the cylinder
lever can trigger the switch when
the packer cylinder reaches this
position;
Sliding Shoes and Wear
Pads
Use a pry bar to move the packer up
and down and from side to side and if
the packer has a vertical movement
greater than 3/16” or a side movement
greater than 1/8”, verify both packer’s
sliding shoes as well as wear pads
(see Figure 78. “Fully retracted
packer”) under the side rails.
53
54
CHAPTER 3
Maintenance
Sliding Shoes
Replacement
Sliding Shoe
Note:It is not necessary to remove
the packer to perform this
procedure.
To replace the sliding shoe, apply
the following procedure:
1.
Make sure the parking brake is
applied and the vehicle is tagged
out for maintenance purposes
(refer to “Lockout/Tagout
Procedure” on page 8);
2.
Start the engine and engage the
hydraulic system;
3.
Disable the speed-up system on
the console (Figure 79. “Main
console from right-hand side
driving position”) by pulling out
the SPEED-UP INHIBITOR switch;
Figure 78. Fully retracted packer
Two different types of steel are used
on packer guiding system:
•
AR-425 type steel; and
•
AR-500 type steel.
The sliding shoes are made of AR-425
type steel to wear out before floor
guides, which are made of AR-500.
Refer to the Parts Catalog for
replacement part numbers.
To keep the packer in good working
order and to prevent breakdowns,
replace the sliding shoes and wear
pads before extensive wear or damage
appears on the hopper floor and walls.
Speed-Up
Inhibitor Switch
Figure 79. Main console from
right-hand side driving position
Expert(t) 2000
TM
Maintenance Manual
4.
Then using the selector switch
on the console, select the
right-hand side packer control
station (Figure 80. “Packer
control selector”). This switch
exists only on vehicles equipped
with multiple packer control
stations;
18 inches before the end of the
stroke (Figure 81. “Packer
extended 18” from end of
stroke”);
Packer Control
Selector
Figure 81. Packer extended 18”
from end of stroke
Figure 80. Packer control selector
5.
If the packer is not fully
extended, press the green
button on the packer control
station to extend it;
6.
Turn the engine and hydraulic
pump off;
7.
Remove the tack weld from
behind the packer (Figure 80.
“Packer control selector”). The
weld must be cut out before
extending the packer;
8.
Start the engine;
9.
Engage the hydraulic pump to
extend the packer about
10.
Turn the engine and hydraulic
pump off;
11.
Cut the welding tracks (Figure
82. “Sliding shoe”);
Sliding
Shoe
Floor Guide
Welds
Figure 82. Sliding shoe
Note:In order to move the packer
(retract or extend) for a short
55
56
CHAPTER 3
Maintenance
distance, press on the green
(or yellow) button then
immediately push the red
button to stop the packer. Pull
out the red button and repeat
the process until the packer
reaches the desired position.
12.
Tack weld a piece of steel tubing
to the floor rail and to the front of
the sliding shoe (Figure 83.
“Sliding shoe”);
Sliding
Shoe
Floor Guide
Welds
the weld on the floor guide using
a grinder.
16.
Align the new sliding shoe in
front of the packer and slowly
extend the packer to make the
sliding shoe go under the
packer;
17.
Once the sliding shoes are back
in place, weld the shoes and the
plates (Figure 83. “Sliding
shoe”);
18.
If the wear pads at the top of the
packer need to be replaced,
refer to “Wear Pads
Replacement” on page 57
19.
Retract the packer;
20.
Weld the four (4) sliding shoes
and both plates to the packer
(Figure 84. “View from behind
the packer when fully retracted”);
21.
Test the packer for proper
operation.
22.
If the packer is binding, to find
out where the interference is,
apply primer paint on the floor
guide.
23.
Run the packer a few times.
24.
The location where the paint
comes off indicates the surface
to be grinded.
Figure 83. Sliding shoe
13.
14.
15.
Then start the engine, engage
the hydraulic pump and slowly
retract the packer by pressing
the yellow button and the red
button;
The sliding shoes will come out
from under the packer as it is
retracting (Figure 84. “View from
behind the packer when fully
retracted”);
Remove the old sliding shoes
and plate. Make sure to remove
Expert(t) 2000
TM
Maintenance Manual
DANGER
APPLY
THE
LOCKOUT/TAGOUT
PROCEDURE TO PREVENT ANY ENGINE
START-UP.
DANGER
Figure 84. View from behind the
packer when fully retracted
Wear Pads Replacement
Replacement of the wear pads at the
top of the packer is required when
vertical movement of the packer is
greater than 3/16” (check with a pry
bar).
This section will provide the full
procedure to remove and change both
wear pads at the top of the packer.
Apply the following procedure to
remove and replace the wear pads:
1.
NEVER CLIMB IN THE HOPPER WHILE
THE ENGINE IS RUNNING.
2.
Start the engine and engage the
hydraulic pump;
3.
Disable the speed-up system on
the console (Figure 85. “In-cab
console from right-hand side
driving position”) by pulling out
the SPEED-UP INHIBITOR switch;
Speed-Up
Inhibitor
Switch
Make sure the parking brake is
applied and the vehicle is tagged
out for maintenance purposes
(refer to “Lockout/Tagout
Procedure” on page 8);
Figure 85. In-cab console from
right-hand side driving position
57
58
CHAPTER 3
Maintenance
4.
Using the PACKER CONTROL
SELECTOR switch on the console,
select the right-hand side packer
control station (see Figure 86.
“Packer control selector switch”).
Crusher Panel
Note:This switch is found only on
vehicles equipped with
multiple packer control
stations.
Packer Control
Selector
Figure 87. Hopper
Crusher
Panel
Lever
Figure 86. Packer control selector
switch
5.
Raise the crusher panel (see
Figure 87. “Hopper”) using the
lever located on the main
hydraulic valve (see Figure 88.
“Crusher panel lever”);
Figure 88. Crusher panel lever
6.
Using the joystick, fully retract
the optional Helping Hand in the
hopper;
TM
7.
Push the yellow RETRACT button
to fully retract the packer, then
push the red emergency STOP
button when the packer is fully
retracted.
Expert(t) 2000
TM
Maintenance Manual
8.
Turn the engine and hydraulic
pump off;
Retract
Button
DANGER
NEVER CLIMB IN THE HOPPER WHILE
THE ENGINE IS RUNNING.
Emergency
Stop Button
9.
Figure 89. Right-hand side control
station
Unbolt both hopper side panels
(Figure 91. “Hopper side panel”)
located below the hopper doors
of the Expert(t) 2000 ;
TM
Hopper Side Panel
Figure 90. Retracted packer
Figure 91. Hopper side panel
Note:To move the packer (retract or
extend) for a short distance,
press on the green (or yellow)
button then immediately push
the red button to stop the
packer. Pull the red button and
repeat the procedure until the
packer reaches the desired
position.
10.
Unbolt the deflector stands on
both sides of the hopper to
remove them. (Figure 92. “Side
rail and deflector stand”);.
59
60
CHAPTER 3
Maintenance
Deflector
Stand
13.
Extend the packer about
12 inches before the end of the
stroke;
14.
Turn the engine and hydraulic
pump off;
DANGER
Side Rail
Figure 92. Side rail and deflector
stand
11.
Unbolt the side rails from the
right- and left-hand side hopper
walls (Figure 92. “Side rail and
deflector stand” & Figure 93.
“Side rails removal”);
NEVER CLIMB IN THE HOPPER WHILE
THE ENGINE IS RUNNING.
15.
Replace both wear pads and bolt
them back in place;
16.
Start the engine and engage the
hydraulic pump;
17.
Retract the packer;
18.
Reinstall the side rails, plastic
shields and deflector stands
back in place.
19.
Turn the engine and hydraulic
pump off;
Side Rail
DANGER
NEVER CLIMB IN THE HOPPER WHILE
THE ENGINE IS RUNNING.
Figure 93. Side rails removal
12.
When both side rails are
removed, start the engine and
engage the hydraulic pump;
Expert(t) 2000
TM
Maintenance Manual
Packer Removal
Procedure
Speed-Up
Inhibitor
Switch
To remove the packer, apply the
following procedure:
1.
Make sure the parking brake is
applied and the vehicle is tagged
out for maintenance purposes
(refer to “Lockout/Tagout
Procedure” on page 8);
DANGER
APPLY
THE
LOCKOUT/TAGOUT
PROCEDURE TO PREVENT ANY ENGINE
START-UP.
DANGER
NEVER CLIMB IN THE HOPPER WHILE
THE ENGINE IS RUNNING.
2.
Start the engine and engage the
hydraulic pump;
3.
Disable the speed-up system on
the console (Figure 94. “In-cab
console from right-hand side
driving position”) by pulling out
the SPEED-UP INHIBITOR switch;
Figure 94. In-cab console from
right-hand side driving position
4.
Using the PACKER CONTROL
SELECTOR switch on the console,
select the right-hand side packer
control station (see Figure 95.
“Packer control selector switch”).
Note:This switch is found only on
vehicles equipped with
multiple packer control
stations.
Packer Control
Selector
Figure 95. Packer control selector
switch
61
62
CHAPTER 3
Maintenance
5.
Raise the crusher panel (see
Figure 96. “Hopper”) using the
lever located on the main
hydraulic valve (see Figure 97.
“Crusher panel lever”);
7.
Push the yellow RETRACT button
to fully retract the packer, then
push the red emergency STOP
button when the packer is fully
retracted;
Crusher Panel
Retract
Button
Emergency
Stop Button
Figure 96. Hopper
Figure 98. Right-hand side control
station
Crusher
Panel
Lever
Figure 99. Retracted packer
Figure 97. Crusher panel lever
6.
Using the joystick, fully extend
the optional Helping Hand ;
TM
Note:To move the packer (retract or
extend) for a short distance,
press on the green (or yellow)
button, then immediately push
the red button to stop the
Expert(t) 2000
TM
Maintenance Manual
packer. Pull the red button and
repeat the procedure until the
packer reaches the desired
position.
8.
Deflector
Stand
Turn the engine and hydraulic
pump off;
Side Rail
DANGER
NEVER CLIMB IN THE HOPPER WHILE
THE ENGINE IS RUNNING.
9.
Unbolt both hopper side panels
(Figure 100. “Hopper side
panel”) located below the hopper
doors of the Expert(t) 2000 ;
Figure 101. Side rail and deflector
stand
11.
TM
Unbolt the side rails from the
right- and left-hand side hopper
walls (Figure 101. “Side rail and
deflector stand” & Figure 102.
“Side rails removal”);
Side Rail
Hopper Side Panel
Figure 100. Hopper side panel
10.
Unbolt the deflector stands on
both sides of the hopper to
remove them. (Figure 101. “Side
rail and deflector stand”).
Figure 102. Side rails removal
12.
When both side rails are
removed, remove the arm
63
64
CHAPTER 3
Maintenance
doghouse panel scraper (if
applicable) from the hopper.
Note:Units equipped with an
automated Helping Hand arm
are equipped with an arm
doghouse panel scraper.
TM
Refer to “Arm Doghouse Panel
Scraper Removal and Wear Pad
Replacement” on page 73 for
details.
13.
Replace both scraper wear pads;
14.
Start the engine and engage the
hydraulic pump;
15.
Retract the packer (Figure 103.
“Fully retracted packer”);
DANGER
NEVER CLIMB IN THE HOPPER WHILE
THE ENGINE IS RUNNING.
17.
Remove the swivel-style panel
from the hopper. Refer to
“Swivel-style Panel Removal and
Wear Pad Replacement” on
page 71 for details.
18.
Start the engine and engage the
hydraulic system;
19.
Extend the packer about 12”
from the end of the stroke;
20.
Stop the hydraulic pump and the
engine;
DANGER
NEVER CLIMB IN THE HOPPER WHILE
THE ENGINE IS RUNNING.
Figure 103. Fully retracted packer
16.
Stop the hydraulic pump and the
engine;
21.
Remove the access cover and
the cylinder pin (Figure 104.
“Packer cylinder pins, access
cover and greasing hoses”).
Note:The greasing hoses must be
disconnected from the
cylinder pins; these hoses are
Expert(t) 2000
TM
Maintenance Manual
located under the follower
panel.
Greasing
Hoses
24.
Remove the four packer roller
assemblies from the follower
panels;
25.
Fold the follower panels over the
packer;
26.
Weld the follower panels to the
packer;
27.
Attach the packer to a lifting
device (fork lifter) in order to
extract it from the hopper;
28.
Re-install the new packer into
the hopper checking the
alignment of the packer with the
floor guides;
29.
Install a new wiper blade on
each side of the packer (Figure
105. “Wiper blade”);
Cylinder
Pin
Access
Cover
Figure 104. Packer cylinder pins,
access cover and greasing hoses
Note:The cylinder pins top plates
are provided with two (2)
threaded holes to use as a
puller by inserting two (2)
½-NC bolts.
22.
After removing the cylinder pin,
start the engine and retract the
hydraulic cylinders;
23.
Stop the hydraulic pump and the
engine;
DANGER
NEVER CLIMB IN THE HOPPER WHILE
THE ENGINE IS RUNNING.
Note:These wiper blades may
require to be adjusted to fit
between the new packer and
the hopper walls.
65
66
CHAPTER 3
Maintenance
DANGER
NEVER CLIMB IN THE HOPPER WHILE
THE ENGINE IS RUNNING.
Wiper Blade
(plastic)
Wiper Blade
Figure 105. Wiper blade
30.
Once the packer is installed in
the hopper, install roller
assemblies and reverse the
procedure to reconnect the
hydraulic cylinders and re-install
both side rails;
31.
Bolt the rails along the top edge
of the hopper wall (Figure 101.
“Side rail and deflector stand”);
32.
Once finished re-assembling the
removed components, lubricate
and check for proper operation
of the packer.
Expert(t) 2000
TM
Maintenance Manual
Floor Guide
Replacement Procedure
Speed-Up
Inhibitor
Switch
After years of hard work, the floor
guides inside the hopper may require
replacement. The following
step-by-step procedure will help
removing and replacing the floor
guides inside the hopper.
Figure 106. In-cab console from
right-hand side driving position
To replace the floor guide, apply the
following procedure:
1.
Make sure the parking brake is
applied and the vehicle is tagged
out for maintenance purposes
(refer to “Lockout/Tagout
Procedure” on page 8);
4.
Using the selector switch on the
console, select the right-hand
side packer control station
(Figure 107. “Packer control
selector”);
2.
Start the engine and engage the
hydraulic system;
3.
Disable the speed-up system on
the console (Figure 106. “In-cab
console from right-hand side
driving position”) by pulling out
the SPEED-UP INHIBITOR switch;
Note:This switch exists only on
vehicles equipped with
multiple packer control
stations.
Packer Control
Selector
Figure 107. Packer control selector
5.
Place the optional arm a few feet
away from the body;
67
68
CHAPTER 3
Maintenance
6.
Remove the packer from the
hopper (refer to “Packer
Removal Procedure” on
page 61);
7.
Retract the hydraulic cylinders
and move them out of the way;
8.
Mark the exact location of both
floor guides to ensure the proper
positioning of the new ones;
9.
Using a grinder or cutting tool,
remove the floor guides by
cutting the welds;
10.
Clean the hopper floor and wall
surfaces from any metal
shavings or dirt;
11.
Position new guides onto the
hopper floor;
Packer Sitting
on the Floor
Guide
Figure 108. View from behind the
packer when fully extended
15.
Tack weld the floor guides to the
hopper floor (see Figure 109.
“Floor guide top-view”);
Note:Do not tack nor weld yet.
12.
Using a proper lifting device,
bring the packer over the
hopper;
13.
Lower the packer on the floor
guides, and align them with the
packer;
14.
Once the packer sits on the floor
guides, center the packer (and
the floor guides) in the hopper,
making sure they are parallel to
the hopper wall (see Figure 108.
“View from behind the packer
when fully extended”);
Weld Here on Both Sides
of the Floor Guide
Figure 109. Floor guide top-view
16.
Adjust the packer wipers on both
sides (UHMW plastic);
Expert(t) 2000
TM
Maintenance Manual
17.
Connect the packer cylinders
(refer to “Packer Removal
Procedure” on page 61);
18.
Slowly retract the packer under
the rails until the end of the
packer stroke. Keep the packer
centered with the hopper,
re-install the side rails then tack
the floor guides to the hopper
floor (see Figure 110. “Floor
guide end-view”);
Weld Here on
Both Sides of
the Floor Guide
Weld Here on
Both Sides of
the Floor Guide
FCAW
3
”
8
3-12
Figure 111. Floor guide end-view
FCAW
3
”
8
3-12
Figure 110. Floor guide end-view
19.
Extend the packer to the middle
of the hopper; verify the
alignment with the hopper side
rails;
20.
Stitch weld the floor guides going
towards the back of the vehicle;
21.
Fully extend the packer to finish
welding under the packer;
22.
Check for proper operation.
69
70
CHAPTER 3
Maintenance
Packer Roller
Replacement
6.
Clean the roller axle;
7.
Grease the new roller assembly;
Packer rollers need to be replaced
when damaged or showing excessive
wear or flat spots.
8.
Bolt the assembly in place;
9.
Put the front covers back on the
cylinder pins;
To replace the packer rollers, apply
the following procedure:
10.
Check full cycle for smooth
operation.
1.
Make sure the parking brake is
applied and the vehicle is tagged
out for maintenance purposes
(refer to “Lockout/Tagout
Procedure” on page 8);
DANGER
APPLY
THE
LOCKOUT/TAGOUT
PROCEDURE TO PREVENT ANY ENGINE
START-UP.
2.
Fully retract the packer;
DANGER
NEVER CLIMB IN THE HOPPER WHILE
THE ENGINE IS RUNNING.
3.
Stop the engine.
4.
Remove the front covers over
the cylinder pins;
5.
Unbolt the roller assembly;
Expert(t) 2000
TM
Maintenance Manual
Swivel-style Panel
Removal and Wear Pad
Replacement
To remove the swivel-style panel
and replace the wear pad, apply the
following procedure:
1.
Make sure the parking brake is
applied and the vehicle is tagged
out for maintenance purposes
(refer to “Lockout/Tagout
Procedure” on page 8);
2.
Start the engine and engage the
hydraulic system;
3.
Disable the speed-up system on
the console (Figure 112. “In-cab
console from right-hand side
driving position”) by pulling out
the SPEED-UP INHIBITOR switch;
4.
Using the selector switch on the
console, select the right-hand
side packer control station
(Figure 113. “Packer Control
Selector”).
Note:This switch exists only on
vehicles equipped with
multiple packer control
stations;
Packer Control
Selector
Figure 113. Packer Control Selector
5.
Fully extend the packer;
6.
Press the red emergency stop
button to keep it at this position;
Speed-Up
Inhibitor
Switch
DANGER
NEVER CLIMB IN THE HOPPER WHILE
THE ENGINE IS RUNNING.
Figure 112. In-cab console from
right-hand side driving position
7.
Disengage the hydraulic pump
and stop the engine.
8.
Using the handle at the upper left
corner of the panel, bring the
swivel-style panel to a vertical
71
72
CHAPTER 3
Maintenance
position and hold it (Figure 114.
“Swivel-style panel safety
devices”);
WARNING
INSTALL
THE
SWIVEL-STYLE
PANEL
SAFETY PIN TO PREVENT HANDS OR
Handle
FINGERS FROM BEING CAUGHT AT THE
PINCH POINT OF THE SWIVEL-STYLE
PANEL
Safety Pin
Safety Pin
Holder
10.
Figure 114. Swivel-style panel safety
devices
9.
Remove the safety pin from its
holder and put the pin in the hole
at the bottom left of the
swivel-style panel (Figure 114.
“Swivel-style panel safety
devices”);
CAUTION
THIS PIN IS A MANDATORY SAFETY
DEVICE, PREVENTING FROM BEING
CAUGHT AT THE PINCH POINT, WHEN
THE
SWIVEL-STYLE
MANIPULATING
PANEL.
(SEE FIGURE 115. “TILTED
SWIVEL-STYLE PANEL” FOR DETAILS).
Continue tilting the swivel-style
panel over the packer (Figure
115. “Tilted swivel-style panel”);
Pinch Points
Figure 115. Tilted swivel-style panel
11.
Remove retaining screws
holding the wear pad;
12.
Install the new wear pad and
tighten bolts;
13.
Re-install the swivel-style panel
back in place;
Expert(t) 2000
TM
Maintenance Manual
14.
Check for even contact of wear
pad with the packer and follower
panels.
Arm Doghouse Panel
Scraper Removal and
Wear Pad Replacement
Units equipped with an automated
Helping Hand arm are equipped with
an arm doghouse panel scraper
preventing refuse build-up in front of
the packer cylinder.
TM
To remove the arm doghouse panel
scraper and replace the wear pad,
apply the following procedure:
1.
Make sure the parking brake is
applied and the vehicle is tagged
out for maintenance purposes
(refer to “Lockout/Tagout
Procedure” on page 8);
DANGER
APPLY
THE
LOCKOUT/TAGOUT
PROCEDURE TO PREVENT ANY ENGINE
START-UP.
DANGER
NEVER CLIMB IN THE HOPPER WHILE
THE ENGINE IS RUNNING.
2.
Start the engine and engage the
hydraulic pump;
73
74
CHAPTER 3
Maintenance
3.
Disable the speed-up system on
the console (Figure 116. “In-cab
console from right-hand side
driving position”) by pulling out
the SPEED-UP INHIBITOR switch;
Packer Control
Selector
Speed-Up
Inhibitor
Switch
Figure 117. Packer control selector
switch
5.
Figure 116. In-cab console from
right-hand side driving position
4.
Using the PACKER CONTROL
SELECTOR switch on the console,
select the right-hand side packer
control station (see Figure 117.
“Packer control selector switch”).
Note:This switch is found only on
vehicles equipped with
multiple packer control
stations.
Push the green START CYCLE
button to fully extend the packer,
then push the red emergency
STOP button when the packer is
fully extended.
Start
Cycle
Button
Emergency
Stop Button
Figure 118. Right-hand side control
station
Expert(t) 2000
TM
Maintenance Manual
Figure 119. Fully extended packer
6.
Turn the engine and hydraulic
pump off;
DANGER
NEVER CLIMB IN THE HOPPER WHILE
THE ENGINE IS RUNNING.
7.
Remove the Helping Hand
doghouse panel;
8.
Starting on the right-hand side of
the truck, unbolt both arm
doghouse panel scraper
retaining bolts;
9.
On the left-hand side of the
truck, unbolt both arm doghouse
panel scraper retaining bolts;
10.
Still from the left-hand side of the
truck, pull the arm doghouse
panel scraper from under the
doghouse to extract it;
TM
11.
Replace the nylon strip on the
arm doghouse panel scraper;
12.
Reinstall the arm doghouse
panel scraper back in place;
13.
Check for even contact of wear
pad with the packer and follower
panels.
75
76
CHAPTER 3
Maintenance
Packer Cylinder
Replacement
Speed-Up
Inhibitor
Switch
To remove the packer cylinder,
apply the following procedure:
1.
Make sure the parking brake is
applied and the vehicle is tagged
out for maintenance purposes
(refer to “Lockout/Tagout
Procedure” on page 8);
DANGER
APPLY
THE
LOCKOUT/TAGOUT
PROCEDURE TO PREVENT ANY ENGINE
START-UP.
DANGER
NEVER CLIMB IN THE HOPPER WHILE
THE ENGINE IS RUNNING.
2.
Start the engine and engage the
hydraulic pump;
3.
Disable the speed-up system on
the console (Figure 116. “In-cab
console from right-hand side
driving position”) by pulling out
the SPEED-UP INHIBITOR switch;
Figure 120. In-cab console from
right-hand side driving position
4.
Using the PACKER CONTROL
SELECTOR switch on the console,
select the right-hand side packer
control station (see Figure 117.
“Packer control selector switch”).
Note:This switch is found only on
vehicles equipped with
multiple packer control
stations.
Packer Control
Selector
Figure 121. Packer control selector
switch
Expert(t) 2000
TM
Maintenance Manual
5.
Using the joystick, extend the
Helping Hand along the hopper.
7.
TM
6.
Raise the crusher panel (see
Figure 132. “Hopper”) using the
lever located on the main
hydraulic valve (see Figure 133.
“Crusher panel lever”);
Push the green START CYCLE
button to fully extend the packer,
then push the red emergency
STOP button when the packer is
fully extended.
Start
Cycle
Button
Crusher Panel
Emergency
Stop Button
Figure 124. Right-hand side control
station
Figure 122. Hopper
Crusher
Panel
Lever
Figure 125. Fully extended packer
8.
Figure 123. Crusher panel lever
Turn the engine and hydraulic
pump off;
77
78
CHAPTER 3
Maintenance
DANGER
NEVER CLIMB IN THE HOPPER WHILE
THE ENGINE IS RUNNING.
9.
Remove the swivel-style panel.
Refer to “Swivel-style Panel
Removal and Wear Pad
Replacement” on page 71 for
details.
10.
Open the access cover and
remove the pin from the cylinder
rods.
Figure 126. Packer with follower
panels in folded position
Note:The cylinder pins top plates
are provided with two (2)
threaded holes to use as a
puller by inserting two (2)
½-NC bolts.
13.
Start the engine and engage the
hydraulic system;
14.
Retract the cylinders;
15.
Disengage the pump;
11.
16.
Stop the engine;
12.
Remove the roller assemblies on
the follower panels (refer to
“Packer Roller Replacement” on
page 70);
Fold the follower panels over the
packer(Figure 126. “Packer with
follower panels in folded
position”);
DANGER
NEVER CLIMB IN THE HOPPER WHILE
THE ENGINE IS RUNNING.
17.
Remove the hydraulic hoses
from the cylinders;
Note:Use absorbent material to
catch oil spills.
Expert(t) 2000
TM
Maintenance Manual
18.
Attach and secure the cylinder to
a lifting device;
19.
Remove the limit switch target
and save it for the new cylinder;
20.
Remove the side pin that holds
the cylinder.
CAUTION
PACKER CYLINDERS MUST BE REMOVED
WITH A LIFTING DEVICE.
22.
Replace the faulty cylinder with a
new one. Contact the Labrie
Customer Support Center for
replacement under warranty;
23.
Install the cylinder fingers on the
new cylinders. The limit switches
may require to be re-adjusted
afterwards; refer to “Limit
Switches Adjustment” on
page 48;
24.
Reverse the procedure to install
all the other components (pins,
rollers, etc.);
25.
Prior to installing the cylinder
pins, apply an anti-seize
compound on the pins;
26.
Grease the cylinder pins;
27.
Start the engine and engage the
hydraulic system;
28.
Check for proper operation.
Note:Protect the limit switch during
the removal of the cylinder;
21.
Remove the cylinder bracket
used for both limit switches and
save them for the new cylinder
(Figure 127. “Packer cylinder
limit switches”) ;
Cylinder
FInger
Levers
Figure 127. Packer cylinder limit
switches
79
80
CHAPTER 3
Maintenance
TAILGATE AND BODY HINGES MAINTENANCE
Tailgate Locking
Mechanism (Single
Tailgate)
It is important to lubricate the tailgate
hinges and the locking mechanism
with multipurpose grease as per the
lubricating schedule (refer to
“Recommended lubricants” on
page 123).
CAUTION
Cylinder
Head
Figure 128. Right-hand side tailgate
cylinder
•
EXCESSIVE
WEAR
MIGHT
Cylinder retaining bolts and circlips;
BE
DANGEROUS AND HARMFUL TO THE
PROPER
WORKING
ORDER
OF
THE
TAILGATE.
Also, inspect the welds around hinges.
The proper working order of the
following components is also to be
checked (Figure 131. “Tailgate locking
components” to Figure 137.
“Body-to-chassis left hinge”):
•
Cylinder
Circlip
Figure 129. Tailgate left cylinder
circlip
Tailgate hydraulic cylinders;
•
Tailgate hinges and pins;
Expert(t) 2000
TM
Maintenance Manual
Retaining Bolt
Tailgate Pin
Tailgate
Hinge
Figure 130. Right side tailgate hinge
and pin
•
Wear on the locking mechanism;
Locking
Mechanism
Figure 132. Tailgate rubber seal
Tailgate Seal and Hinges
Inspection
Tailgate hinge pins must not have any
sign of wear or metal fatigue.
Tailgate
Lock Pin
Safety Pin
Figure 131. Tailgate locking
components
•
Wear on the tailgate lock pins;
•
Tailgate rubber seal.
Cylinder
Head
Figure 133. Right-hand side tailgate
cylinder
81
82
CHAPTER 3
Maintenance
The retaining bolts must be kept tight
(Figure 134. “Right side tailgate hinge
and pin”).
Retaining Bolt
Tailgate Pin
Tailgate
Hinge
Figure 135. Tailgate rubber seal
Figure 134. Right side tailgate hinge
and pin
The tailgate rubber seal must not show
any sign of damage. Replace the seal
as needed (Figure 135. “Tailgate
rubber seal”).
Body/Chassis Hinges
Inspection
Monthly lubrication of the
body-to-chassis hinges should be
done. Also, inspect for cracks or
corrosion. Any crack must be reported,
and repaired by qualified personnel.
Contact the Labrie Customer Support
Center for technical support, if
required.
Expert(t) 2000
TM
Maintenance Manual
Body Raised Limit
Switch
Body Hinge
Figure 136. View from behind the
rear-right mud guard
A limit switch located on the truck
chassis (Figure 138. “Body raised limit
switch”) activates the backup alarm
and a warning buzzer sounds as soon
as the body is about one foot above
the chassis. Adjust the limit switch
accordingly.
Limit Switch Arm
Truck
Chassis
DANGER
DO NOT OPERATE THIS EQUIPMENT IF
THERE ARE ANY SIGNS OF DAMAGE OR
Air Tank
INCOMPLETE REPAIRS.
Limit Switch
Figure 138. Body raised limit switch
This safety feature is provided to warn
people around, that the truck is
unloading and to tell the operator that
the body is still raised.
Figure 137. Body-to-chassis left
hinge
83
84
CHAPTER 3
Maintenance
DANGER
APPLY
LOCKOUT/TAGOUT
THE
PROCEDURE
MAINTENANCE
Limit
Switch
AT
ALL
OR
TIMES
WHEN
INSPECTION
IS
CARRIED OUT ON THE VEHICLE.
Trigger
Lever
Tailgate Limit Switch
Adjustment
Non-comingle Expert(t) 2000 units
are equipped with a limit switch located
at the top of the left-hand side tailgate
cylinder (Figure 139. “Left-hand side
tailgate cylinder”). When the tailgate is
unlocked, the cylinder releases the
limit switch lever that activates the
backup alarm and a warning buzzer
inside the cab.
TM
As the cylinder head is moving down,
the limit switch trigger lever is
released, and the warning buzzer and
backup alarm should be heard.
Figure 139. Left-hand side tailgate
cylinder
To adjust the limit switch located
next to hydraulic cylinder (tailgate
unlocked), apply the following
procedure:
1.
Make sure the parking brake is
applied and the vehicle is tagged
out for maintenance purposes
(refer to “Lockout/Tagout
Procedure” on page 8);
2.
Start the engine and engage the
hydraulic system;
3.
Open the tailgate using the lever
on the console and listen if the
warning buzzer and the backup
alarm start to beep as you move
the lever;
4.
Adjust the trigger lever of the
limit switch so the limit switch will
Expert(t) 2000
TM
Maintenance Manual
“click”, as the cylinder head is
moving down (Figure 138. “Body
raised limit switch” & Figure 139.
“Left-hand side tailgate
cylinder”).
WARNING
MAKE SURE NO ONE IS STANDING
BEHIND OR NEAR THE TAILGATE WHEN
The proximity switch will be located
behind the left-hand side tailgate
locking mechanism. This proximity
switch requires no other maintenance
than checking the distance between
the metal target and the face of the
proximity switch. The proximity switch
must be tighten at 3/16” of an inch from
the metal plate (Figure 140. “Proximity
switch side-view” & Figure 141.
“Proximity switch front-view”).
ADJUSTMENT PROCEDURE IS CARRIED
OUT.
Proximity
Switch
Metal
Target
Optional Limit Switch
and Proximity Switch
An optional limit switch is also
available to warn the operator that the
tailgate is fully open. This limit switch is
located next to the left-hand side
tailgate hinge. When the tailgate
reaches its fully open position, the
optional fully open switch will trigger a
red light on the console.
A proximity switch may instead be
used to trigger the backup alarm and
warning buzzer in the cab (Tailgate
unlocked).
Note:The location and the
procedure to adjust the
proximity switch may differ
from the standard limit switch.
3/16”
Figure 140. Proximity switch
side-view
85
86
CHAPTER 3
Maintenance
Figure 141. Proximity switch
front-view
Expert(t) 2000
TM
Maintenance Manual
HYDRAULIC SYSTEM MAINTENANCE
In order to keep the hydraulic
system efficient and reliable, the
following care must be taken:
•
On a daily basis, inspect the
hydraulic lines and connections for
leaks, and correct as needed;
•
•
Inspect the pump for leaks or
unusual noise;
•
The ball valve on the hydraulic tank
must be completely opened before
engaging the pump or starting the
engine (refer to “Prior to start up”
on page 28);
•
When draining the hydraulic oil
from the system — e.g. when
replacing the hydraulic oil — the
hydraulic system must first be filled
with hydraulic oil; the hydraulic
pump must then be removed and
filled individually with hydraulic oil.
This procedure will prevent the
pump from running dry, and
therefore burning out.
•
For new vehicles, change the
return filter element after 50 hours
of use, and twice a year afterwards
(refer to “Filter Element
Replacement Procedure” on
page 94);
Clean the strainer inside the tank
after the first 50 hours of use, and
once a year afterwards (refer to
“Strainer Cleaning Procedure” on
page 96);
•
Hydraulic oil must be replaced at
least once a year or when
contaminated (refer to “Hydraulic
Oil Replacement Procedure” on
page 92);
•
When maintenance is carried out,
protect all hoses, fittings and pipes
or any other holes from dirt that
would eventually get into the oil.
Use plugs to block hoses that are
not connected;
•
Monthly inspect and adjust (as
needed) the oil pressure of the
hydraulic system (refer to
“Hydraulic Vane Pump Systems”
on page 99);
87
88
CHAPTER 3
Maintenance
Hydraulic Cylinder
Inspection Procedures
To maintain proper working order and
extend cylinder life, it is essential to
inspect the hydraulic cylinders at least
once a month. Make sure that
connections between all hoses and
pipes are tightened, and there are no
oil leaks.
DANGER
APPLY
THE
PROCEDURE
MAINTENANCE
/
LOCKOUT
AT
ALL
OR
TIMES
TAGOUT
WHEN
INSPECTION
IS
CARRIED OUT ON THE VEHICLE.
Check that all cylinder caps are firmly
tightened and there are no leaks. All
leaks must be repaired immediately by
replacing damaged or faulty cylinders.
Lubricate and inspect all cylinders’
mounting points (pins, retaining bolts,
etc.)
WARNING
MAKE SURE THE BALL VALVE ON THE
SUCTION LINE IS COMPLETELY OPEN
BEFORE
SYSTEM.
ENGAGING
THE
HYDRAULIC
Main Hydraulic Valve
The Expert(t) 2000 side-loading unit is
equipped with a directional control
valve which is assembled as follows
from top to bottom (Figure 142. “Main
hydraulic valve”).
TM
For further details, refer to the
hydraulic system Parts and Diagram
section, or see the simplified diagram
for the packing system in the
troubleshooting section.
Note:Configuration of the main
valve may change depending
on what option is installed on
the vehicle.
To get more information regarding
specific options, refer to the proper
section of the manual included with the
vehicle documentation or contact the
Labrie Customer Support Center.
Expert(t) 2000
TM
Maintenance Manual
Packer
Tailgate
Body
Hoist
Crusher
Panel
Figure 142. Main hydraulic valve
89
90
CHAPTER 3
Maintenance
Valve Section Description
VALVE SECTION
CRUSHER
PANEL
VALVE TYPE
4 WAYS
TAILGATE
4 WAYS
PACKER
4 WAYS
BODY
HOIST
3 WAYS
NUMBER OF
POSITIONS
3
POSITIONS
OPERATION
MANUALLY OPERATED
3
OPERATED WITH AN AIR
POSITIONS
ACTUATOR
3
OPERATED WITH AN AIR
POSITIONS
ACTUATOR
3
OPERATED WITH AN AIR
POSITIONS
ACTUATOR
Expert(t) 2000
TM
Maintenance Manual
Cycle Time for All
Hydraulic Functions
CAUTION
MAXIMUM
Engine at 1200RPM (vane
pump)
VANE PUMP
CRUSHER
PANEL
FOR
180°F.
CYCLE TIME
Oil Gauge
Temperature
4-5 SEC.
TAILGATE
40-50 SEC.
PACKER
12-14 SEC.
BODY HOIST
TEMPERATURE
HYDRAULIC OIL IS
¾ of Oil
Level
Gauge
Figure 143. Hydraulic Tank Gauge
1.
Make sure the parking brake is
applied and the vehicle is tagged
out for maintenance purposes
(refer to “Lockout/Tagout
Procedure” on page 8);
2.
Clean the strainer and replace
the filter element inside the tank
after the first 50 hours of service.
Refer to “Strainer Cleaning
Procedure” on page 96;
3.
Change the return filter element,
twice a year (after the first 50
hours). Refer to “Filter Element
Replacement Procedure” on
page 94;
55-65 SEC.
Hydraulic Tank
Inspection Procedure
Verify that the oil in the reservoir is
clean and always at the appropriate
level. The oil must be clean and not
colored.
91
92
CHAPTER 3
Maintenance
4.
Ensure the proper operation of
the filler cap (Figure 144.
“Hydraulic Tank”). Make sure the
filler cap has no obstruction;
5.
The hydraulic oil must be clean
and not colored as well as in
sufficient quantity (level at ¾ of
the oil level gauge, with all
cylinders retracted);
Hydraulic Oil
Replacement Procedure
WARNING
HIGHLY
Suction Line
AVOID ANY DAMAGE ON THE HYDRAULIC
SYSTEM.
To change the hydraulic oil, apply
the following procedure:
1.
Strainer
HYDRAULIC
FLUID MUST BE CHANGED PROMPTLY TO
Note:The whole system requires
50 to 60 gallons of oil.
Ball Valve
CONTAMINATED
Filler/
Breather Cap
Baffle
Make sure the parking brake is
applied and the vehicle is tagged
out for maintenance purposes
(refer to “Lockout/Tagout
Procedure” on page 8);
DANGER
Filter
Element
Housing
Oil Heater
Plug
Drain Plug
APPLY
THE
PROCEDURE
MAINTENANCE
Access Cover
LOCKOUT
AT
ALL
OR
/
TIMES
TAGOUT
WHEN
INSPECTION
IS
CARRIED OUT ON THE VEHICLE.
Oil Temp/Level Gauge
Figure 144. Hydraulic Tank
2.
Start the engine;
3.
Engage the hydraulic pump;
4.
Disable the speed-up system;
5.
Retract all cylinders (Packer,
crusher panel, tailgate etc.);
Expert(t) 2000
TM
Maintenance Manual
6.
Disengage the pump;
7.
Stop the engine;
8.
Clean around the filler cap and
remove it.
Strainer
Filler/
Breather Cap
CAUTION
SOME
HYDRAULIC
TANKS
Access
Cover
ARE
(3 TO 5 PSI). UNSCREW
THE FILLER CAP SLOWLY.
Drain Plug
PRESSURIZED
9.
10.
Use a clean container with a
minimum capacity of 60 US
gallons to collect the oil;
To drop the oil, remove the drain
plug under the tank.
11.
Completely drain the tank;
12.
Once the system emptied,
reinstall the drain plug, ;
13.
Remove and clean the strainer
(once a year);
14.
Change the return filter element
(twice a year);
15.
Open the access cover. (Refer to
"Figure 145. Hydraulic tank" on
page 93 for details.)
16.
and clean the inside of the tank
of any metal particles or debris
that may have accumulated at
the bottom;
Figure 145. Hydraulic tank
17.
Refill the tank until oil reaches
3/4 of the oil gauge (Figure
1.83).
Note:Use a high quality oil, that has
good performance in cold
weather (if applicable), such
as Shell Tellus T32 or
equivalent (refer to
“Lubrication” on page 123)
The whole system will require
between 50 and 60 gallons;
93
94
CHAPTER 3
Maintenance
WARNING
IT IS NOT RECOMMENDED TO MIX
DIFFERENT BRAND NAMES AND/OR
GRADES OF OIL IN THE SAME TANK.
Note:The oil must be clean and free
of any dirt, metallic particles
or sand etc.) The use of a
filtering screen is strongly
recommended while filling the
tank with new oil.
18.
Unscrew the test port on the
return filter. and plug a pressure
hose in the to push air in the
hydraulic tank. then feed the
system. This will force feed the
hydraulic pump and bleed the
hydraulic system at once,
preventing the pump from
running dry — and therefore
burning out — and the system
from unnecessary cavitation.
Filter Element
Replacement Procedure
To protect new components of the
hydraulic system, the return filter
element must be changed after the first
50 hours of operation of the vehicle.
Then, change the element twice a year
(refer to “Preventive Maintenance
Chart” on page 117).
The filter restriction indicator located at
front of the tank (Figure #1.90) will
indicate if the filter requires to be
changed. Replace the filter when the
indicator is in the yellow zone, before it
reaches the red zone. This will keep
the oil clean, extend component life
expectancy and reduce breakdowns.
Figure 146. Filter restriction
indicator
Expert(t) 2000
TM
Maintenance Manual
tank (Figure #1.91); this in-tank
return filter system has a
selfclosing trap that is closing as
you remove the cartridge
therefore preventing the whole
tank to empty itself.
4.
Cover
Retaining
Bolts (4)
Filter Head
Cover
Change the filter element with a
new one (Figure 148. “Filter
element”);
Figure 147. Hydraulic tank’s filter
head cover
WARNING
CHANGE
To replace the hydraulic filter, apply
the following procedure:
1.
AFTER
RETURN
THE
FIRST
FILTER
ELEMENT
50 HOURS OF
OPERATION.
Make sure the parking brake is
applied and the vehicle is tagged
out for maintenance purposes
(refer to “Lockout/Tagout
Procedure” on page 8);
DANGER
APPLY
THE
PROCEDURE
MAINTENANCE
LOCKOUT
AT
ALL
OR
/
TIMES
TAGOUT
WHEN
INSPECTION
IS
CARRIED OUT ON THE VEHICLE.
2.
Prepare a pan or a bucket to
recuperate oil that will spill out of
the filter housing (2 gallons of
oil);
3.
Remove the four (4) bolts of the
filter head cover of the hydraulic
Figure 148. Filter element
5.
Reinstall the filter head cover.
95
96
CHAPTER 3
Maintenance
Strainer Cleaning
Procedure
CAUTION
SOME
To clean the strainer, apply the
following procedure:
1.
DANGER
THE
PROCEDURE
MAINTENANCE
LOCKOUT
AT
ALL
OR
/
TIMES
TANKS
ARE
(3 TO 5 PSI). UNSCREW
THE FILLER CAP SLOWLY.
Make sure the parking brake is
applied and the vehicle is tagged
out for maintenance purposes
(refer to “Lockout/Tagout
Procedure” on page 8);
APPLY
HYDRAULIC
PRESSURIZED
7.
Drain the hydraulic tank using
the drain plug under the tank
(Refer to “Hydraulic Oil
Replacement Procedure” on
page 92);
8.
Once emptied, reinstall the drain
plug (Figure 149. “Hydraulic
tank”);
TAGOUT
WHEN
INSPECTION
IS
Filler/
Breather Cap
CARRIED OUT ON THE VEHICLE.
2.
Retract all cylinders (packer,
crusher panel, tailgate etc.)
3.
Raise the body and install the
safety prop;
4.
Disengage the hydraulic pump;
5.
Stop the engine;
6.
Clean around the filler cap and
remove it;
Strainer
Access
Cover
Drain Plug
Figure 149. Hydraulic tank
9.
Remove both hose clamps from
the suction hose (Figure 150.
“Suction hose”) and slide the
hose over the pipe until it clears
Expert(t) 2000
TM
Maintenance Manual
the ball valve (slide towards the
front of the vehicle);
Swivel
Fitting
Suction Hose
Ball
Valve
Hose Clamps
Figure 150. Suction hose
Hydraulic Tank
Suction Hose
Figure 152. Swivel fitting
11.
Remove the strainer from the
tank port (Figure 153. “Strainer/
Ball Valve Assembly” & Figure
155. “Vane pump”). The strainer
has to be turned
counterclockwise to be removed;
Strainer/Ball Valve
Assembly
Figure 151. Strainer removal
10.
Disconnect the swivel bulkhead
of the pressure return hose to
allow the ball valve assembly to
turn freely when the strainer is
loosened (Figure 152. “Swivel
fitting”);
Strainer/Ball Valve
Assembly
Figure 153. Strainer/Ball Valve
Assembly
97
98
CHAPTER 3
Maintenance
Return Hose
Suction Hose
Figure 154. Strainer removal
12.
Once the strainer is removed,
clean it using solvant, and
inspect for damage; replace as
needed;
13.
Apply thread seal compound on
the strainer threads and re-install
the strainer;
14.
Refer to “Hydraulic Oil” on
page 123 for filling up the tank
and ensure there is no leak.
Expert(t) 2000
TM
Maintenance Manual
HYDRAULIC VANE PUMP SYSTEMS
The Expert(t) 2000 side loader is
offered with a vane-type hydraulic
pump. This high-efficiency pump can
be used at lower RPMs than gear
pumps, up to 1200 RPM. This results
in lower fuel consumption and less
noise, which increase the operator’s
safety. It also can achieve higher
pressure settings (3000 PSI).
TM
The new vane pump (Figure 155.
“Vane pump”) is a constant drive pump
linked with the engine crank shaft. It
uses an electric solenoid dump valve
(Figure 156. “Dump valve”) to send the
hydraulic flow either to the system or
back to the tank when not in use. The
dump valve limits the flow to 45 gallons
per minutes.
Dump Valve
(located between the
dropped frame rails)
Figure 156. Dump valve
The pump switch (PTO switch) found
on the console (Figure 157. “PTO
switch”) controls this dump valve.
Figure 157. PTO switch
Figure 155. Vane pump
99
100
CHAPTER 3
Maintenance
Dump Valve Pressure
Adjustment Procedure
0-4000 PSI
Gauge
The dump valve is provided with a
safety relief cartridge. This cartridge
requires to be adjusted 10% higher
than the system pressure, therefore
3300 PSI. It also requires to be
adjusted before the main relief valve.
Note:Two persons are required to
adjust the dump valve.
1.
Make sure the parking brake is
applied and the vehicle is tagged
out for maintenance purposes
(refer to “Lockout/Tagout
Procedure” on page 8);
Figure 158. Dump valve
HYJ00910
WARNING
APPLY
THE
PROCEDURE
MAINTENANCE
LOCKOUT
AT
ALL
OR
/
TIMES
TAGOUT
WHEN
INSPECTION
IS
CARRIED OUT ON THE VEHICLE.
2.
HYF10195
Hook a 0-4000 PSI pressure
gauge on the quick connect
located on the hydraulic valve
(Figure 158. “Dump valve” and
Figure 159. “Quick-connect
dump-valve pressure gauge”);
Figure 159. Quick-connect
dump-valve pressure gauge
3.
Start the engine, engage the
hydraulic system;
Expert(t) 2000 101
TM
Maintenance Manual
4.
Raise the body until clearing the
safety prop;
5.
Lower the safety prop into
position under the body (Figure
160. “Body safety prop”);
6.
Lower the body on the prop;
Adjustment
Screw
Lock Nut
Safety Prop
Figure 160. Body safety prop
7.
Locate the dump valve inside the
right-hand side frame rail (Figure
156. “Dump valve”);
8.
Loosen completely the dump
valve adjustment screw,
removing the lock nut and using
the proper hex key (Figure 161.
“Dump Valve”);
Figure 161. Dump Valve
9.
Tighten completely the main
relief valve (Figure 162. “Main
valve”) using the proper hex key;
102
CHAPTER 3
Maintenance
Main Relief Valve
Adjustment
Figure 162. Main valve
10.
Turn on the speed-up system on
the packer control station (Figure
163. “Right-hand side control
station”)
Note:The engine must be running at
1200 RPM before checking the
pressure (refer to “Pressure
Adjustment Table” on
page 106);
Speed-Up
(Bunny
Button)
Figure 163. Right-hand side control
station
11.
Activate the crusher panel until
the cylinder reaches the end of
its stroke (Going up);
12.
Adjust the dump valve 3300 PSI
or 2300 PSI (refer to pressure
adjustment table);
13.
Lock the dump valve screw in
place, then the main relief;
14.
Readjust the main relief
according to pressure table in
section 1.15.2;
Expert(t) 2000 103
TM
Maintenance Manual
Main Relief Valve
Pressure Adjustment
(Vane Pump Systems)
Note:Make sure to perform the
“Dump Valve Pressure
Adjustment Procedure” on
page 100 prior to performing
any adjustment on the main
relief valve.
It is recommended to check the
pressure setting once every month in
order to prevent damage to the
equipment and to make sure it
operates as efficiently as posssible.
(i.e: keeping a good packing capacity).
If the pressure is not at the
recommended setting, both the dump
valve and the main relief valve have to
be readjusted. Refer to the pressure
adjustment table for proper settings
according to the type of chassis and
packer cylinder size.
Each of the hydraulic valve sections
operates at a different pressure
setting. Some are using a fixed work
port relief (Figure 164. “Main hydraulic
valve”) and some others use system
pressure. For details, refer to the
hydraulic system schematics included
in the operator manual pocket located
in the cab.
CAUTION
DO NOT ADJUST THE MAIN RELIEF
VALVE
TO
A
RECOMMENDED.
HIGHER
VALUE
THAN
THIS COULD DAMAGE
THE PUMP AND OTHER COMPONENTS,
AND VOID THE WARRANTY.
Starting from the right of the valve
stack:
Crusher panel
Down:Work port relief at 2000 PSI at
idle speed
Up:System pressure (refer to
“Pressure Adjustment Table” on
page 106)
Tailgate
Down:System pressure (refer to
“Pressure Adjustment Table” on
page 106)
Up:System pressure (refer to
“Pressure Adjustment Table” on
page 106)
Packer
Extend:System pressure (refer to
“Pressure Adjustment Table” on
page 106)
104
CHAPTER 3
Maintenance
Retract:Work port relief at 1500 PSI at
idle speed (to prevent shocks when
packer changes direction)
To adjust the main relief valve
pressure, apply the following
procedure:
Hoist
1.
Down:To tank
Up:Work port relief at 1700 PSI at idle
speed
DANGER
Note:The work port relief cartridges
are fixed and do not need
adjustment. If pressures differ
from those above by + or
– 100 PSI, remove and clean
the cartridges or replace them
as needed.
Work Port
Relief
Figure 164. Main hydraulic valve
Make sure the parking brake is
applied and the vehicle is tagged
out for maintenance purposes
(refer to “Lockout/Tagout
Procedure” on page 8);
APPLY
THE
PROCEDURE
MAINTENANCE
LOCKOUT
AT
ALL
OR
/
TIMES
TAGOUT
WHEN
INSPECTION
IS
CARRIED OUT ON THE VEHICLE.
2.
Start the engine;
3.
Engage the hydraulic system;
4.
Using the selector switch on the
console, select the right-hand
side packer control station
(Figure 165. “Packer Control
Selector”). This switch exists
only on vehicles equipped with
multiple packer control stations;
Expert(t) 2000 105
TM
Maintenance Manual
Packer Control
Selector
0-4000 PSI
Gauge
Figure 165. Packer Control Selector
5.
Make sure the speed-up inhibitor
on the console is set to “Enable”;
6.
Turn on the speed-up system
(Bunny button) on the packer
control station: Engine must be
running at 1200 RPM before
checking the pressure (refer to
“Pressure Adjustment Table” on
page 106);
7.
Hook a 0-4000 PSI pressure
gauge on the quick connect
located on the hydraulic valve
(Figure 166. “Dump valve” and
Figure 167. “Quick-connect
dump-valve pressure gauge”);
Figure 166. Dump valve
HYJ00910
HYF10195
Figure 167. Quick-connect
dump-valve pressure gauge
8.
Start the engine, engage the
hydraulic system;
106
CHAPTER 3
Maintenance
9.
Raise the crusher panel until it
reaches the end of its stroke.
Hold the lever in order to make
the pressure build up in the
system;
10.
Check the pressure at the same
time on the pressure gauge;
11.
Adjust the main relief as needed
(Figure 168. “Main valve”) by
loosening the lock nut and
turning the adjustment screw
clockwise to increase the
pressure or the other way to
reduce it;
Main Relief Valve
Adjustment
Lock Nut
Crusher Panel
Control Lever
Figure 168. Main valve
12.
When finished, hold the
adjustment screw and tighten
the lock nut.
Pressure Adjustment Table
Pump
Chassis
Cylinder
Bore
(Packer)
Main Relief
Pressure
(±50 PSI)
Dump Valve
Pressure
(±50 PSI)
6 X4
4”
3000 PSI@
1200 RPM
3300 PSI@
1200 RPM
2 X4
4”
3000 PSI@
1200 RPM
3300 PSI@
1200 RPM
VANE
PUMP
Expert(t) 2000 107
TM
Maintenance Manual
PRIMING A NEW PUMP
To prevent cavitation or air in the
hydraulic system after installing a new
pump or even when flushing the
hydraulic system, make sure to prime
the pump before starting the engine.
5.
Open the ball valve on the
suction line;
6.
Crank the engine repeatedly —
about five times — without letting
it start in order to fill the suction
hose and the pump with
hydraulic oil and to push the air
back into the tank;
7.
Start the engine and make sure
the pump does not make
excessive noise;
8.
Before putting back the vehicle
in service, recalibrate the system
pressures according to section
1.15.1 and section 1.15.2.
Apply the following procedure for
any new installed pump:
1.
Make sure the parking brake is
applied and the vehicle is tagged
out for maintenance purposes
(refer to “Lockout/Tagout
Procedure” on page 8);
DANGER
APPLY
THE
PROCEDURE
MAINTENANCE
LOCKOUT
AT
ALL
OR
/
TIMES
TAGOUT
WHEN
INSPECTION
IS
Note:For units equipped with vane
pump.
CARRIED OUT ON THE VEHICLE.
2.
With the ball valve closed
(Figure 169. “Hydraulic pump on
front bumper”), fill the suction
line before installing it on the
pump;
3.
Fill the pump housing with new
oil;
4.
Reinstall the pressure hose on
the pump housing;
Figure 169. Hydraulic pump on front
bumper
108
CHAPTER 3
Maintenance
Figure 170. Ball valve in closed
position
Expert(t) 2000 109
TM
Maintenance Manual
BODY HOIST REPLACEMENT PROCEDURE
To replace the body hoist, apply the
following procedure:
1.
2.
DANGER
Make sure the parking brake is
applied and the vehicle is tagged
out for maintenance purposes
(refer to “Lockout/Tagout
Procedure” on page 8);
DO NOT USE THE SAFETY PROP WITH A
LOADED BODY. UNLOAD THE BODY
PRIOR TO PERFORMING ANY REPAIRS.
Remove the locknut at the top of
the cylinder cover (Figure 171.
“Top of the body hoist”);
Safety Prop
Locknut
Figure 172. Body safety prop
5.
Install the safety prop and using
a lifting device secure the
cylinder to prevent the cylinder
from tilting on the cab or falling
onto the chassis;
6.
Start the engine, engage the
hydraulic system and lower the
body cylinder using the lever on
the console;
7.
Disengage the hydraulic system
and stop the engine;
Figure 171. Top of the body hoist
3.
Start the engine and engage the
hydraulic pump;
4.
Lift the body to get enough
space to lower the safety prop
under the body (Figure 172.
“Body safety prop”);
110
CHAPTER 3
Maintenance
8.
Disconnect the hydraulic fitting
(Figure 173. “Hydraulic fitting”);
12.
Start the engine and engage the
hydraulic pump;
13.
Slowly raise the cylinder until it
reaches the top of the cover
where the lock nut will be
tightened.
Hydraulic Fitting
Note:The cover must be aligned
with the threaded rod at the
top end of the cylinder;
14.
When the threaded rod passes
through the cover, install the
locknut;
15.
Lubricate the cover and the base
pillowblocks (Figure 174. “Base
pillow blocks” & Figure 175.
“Cover pillow blocks”);
Figure 173. Hydraulic fitting
9.
Remove the cylinder base pillow
blocks (Figure 174. “Base pillow
blocks”);
Base Pillow Blocks
Cover Pillow Blocks
Figure 174. Base pillow blocks
10.
Replace the cylinder;
11.
Reinstall the cylinder base pillow
blocks on both sides and
reconnect the hydraulic hose;
Figure 175. Cover pillow blocks
16.
Lift the body, store the safety
prop and check for proper
operation.
Note:Periodically verify the status
of the hoist cylinder glands.
Expert(t) 2000 111
TM
Maintenance Manual
With time, these glands can
loosen and may cause the
sudden dropping of the body.
If the glands loosen, tightly
screw them back.
Air Cylinder
Speed-up System
Maintenance
There are two acceleration systems
available on the Expert(t) 2000 units
depending on the type of engine;
mechanical or electronic:
TM
The first speed-up system is provided
with mechanical engines. The system
uses an air cylinder that pushes on the
accelerator pedal located on driver’s
side (Figure 176. “View from under
left-hand side dashboard”). On some
units, the air cylinder is installed
directly on the engine fuel pump.
Adjustment
Screw
Cylinder Rod
Figure 176. View from under
left-hand side dashboard
To adjust the speed-up system
(equipped with air cylinder), apply
the following procedure:
1.
Make sure the parking brake is
applied and the vehicle is tagged
out for maintenance purposes
(refer to “Lockout/Tagout
Procedure” on page 8);
112
CHAPTER 3
Maintenance
DANGER
APPLY
THE
/
LOCKOUT
AT
PROCEDURE
MAINTENANCE
ALL
OR
TIMES
TAGOUT
WHEN
INSPECTION
IS
CARRIED OUT ON THE VEHICLE.
2.
Start the engine;
3.
Engage the hydraulic pump;
4.
Make sure that the speed-up
inhibitor control switch located
on console, is set to ENABLE;
5.
Turn the speed-up switch or
“bunny button” on the packer
control to ON; the engine rpm
should speed up to 1200 RPM;
6.
Adjust the screw on the air
cylinder (Figure 176. “View from
under left-hand side dashboard”)
to get the recommended
speed-up.
WARNING
DO NOT ADJUST THE SPEED-UP SYSTEM
OVER 1500 RPM. THIS COULD CAUSE
DAMAGE
TO
MECHANICAL
AND
HYDRAULIC COMPONENTS.
The second speed-up system is
provided with electronic engines.
There are no mechanical components
that require maintenance, since
electronic signals from the engine are
switched by one (1) or two (2) relays
(depending on the engine used),
located and identified inside the
console (Refer to section 3.11
”Speed-up troubleshooting” for further
details).
Expert(t) 2000 113
TM
Maintenance Manual
AIR SYSTEM MAINTENANCE
Air system is crucial for the brakes to
operate with maximum efficiency. All
air tanks on the chassis must be
drained after each working day.
Drain Valve
activate the corresponding air actuator
on the main valve; resulting in a
movement of the hydraulic spool inside
the valve.
The same thing occurs when the
packer is activated; when pressing the
green button on the packer control
station, an electric signal is sent to the
air-valve that controls the actuator on
the main hydraulic valve. Refer to Air
System section for air diagrams.
Figure 177. Air tank
Some units are equipped with an air
dryer and/or alcohol evaporator
(Figure 177. “Air tank”). These devices
are used to reduce water in the air
system, preventing air components to
rust or to freeze in cold weather.
Air Actuators
To perform maintenance on the air
dryer and alcohol evaporator, refer to
the chassis manufacturer maintenance
manual.
The main hydraulic valve which
controls the body functions, is
activated by air actuators (Figure 178.
“Air actuators”). When the tailgate or
body lever on the console is moved, air
pressure passing through the lever will
Figure 178. Air actuators
114
CHAPTER 3
Maintenance
At the end of each day :
DANGER
APPLY
THE
PROCEDURE
MAINTENANCE
LOCKOUT
AT
ALL
OR
/
TAGOUT
TIMES
WHEN
INSPECTION
IS
CARRIED OUT ON THE VEHICLE.
Water Trap
Bleed
1.
Bleed the water from the air filter
bowl located on the cab console
(Figure 179. “In-cab console”);
2.
Unscrew the drain cock;
3.
Using a small rag in hand, collect
the water that will come out.
Drain Cock
Note:This water trap helps keep
residual moisture out of the air
system.
DANGER
APPLY
THE
PROCEDURE
MAINTENANCE
LOCKOUT
AT
ALL
OR
/
TIMES
TAGOUT
WHEN
INSPECTION
CARRIED OUT ON THE VEHICLE.
IS
Figure 179. In-cab console
To avoid affecting control of packer
or other system on the vehicle
(especially under cold weather
conditions), apply the following
procedure:
1.
Make sure the parking brake is
applied and the vehicle is tagged
out for maintenance purposes
(refer to “Lockout/Tagout
Procedure” on page 8);
2.
Drain all air tanks daily. Refer to
“Air Tank Draining Procedure” on
page 30 for details.
Expert(t) 2000 115
TM
Maintenance Manual
3.
Change the cartridge in the air
dryer twice a year: On this type
of equipment the compressor
works all the time (frequent use
of the brake system). As a
consequence, a lot of moisture is
injected into the air system. See
chassis manufacturer
recommendations
4.
Twice a year lubricate the air
actuators found on the main
control valve with light oil (low
temperature). Refer to section
3.6 “Packer air system
troubleshooting”.
Note:For vehicles equipped with
alcohol evaporator, please
refer to the chassis
manufacturer dealer for
proper maintenance.
Figure 180. Air dryer
116
CHAPTER 3
Maintenance
SURFACE FINISHING AND PAINTING
Type of surface finishing
recommended:
Painting Procedure
SURFACE
PREPARATION
SANDBLASTI
NG
ANTICORRO
PRIMARY COAT
SIVE
EPOXY
PRIMER
TWO
(2)
COATS,
FINISHING
COAT
INDUSTRIAL
TYPE
PAINT
(OR
EQUIVALENT)
Expert(t) 2000 117
TM
Maintenance Manual
Preventive Maintenance Chart
Component/
System
Hydraulic
system
Daily
Weekly
Monthly
Each
year
Page
Check oil
level in
tank and
refill if
required.
page 91
Check if
the ball
valve is
open on
the main
tank.
page 28
Check on
ground for
overnight
leaks.
118
CHAPTER 3
Maintenance
Preventive Maintenance Chart
Component/
System
Hydraulic
system
(continued)
Daily
Weekly
Monthly
Each
year
Page
page 87
Check
cylinders,
pump,
control
valve and
system for
leaks.
Repair or
replace if
required.
Replace
hydraulic
filter
(twice a
year)
page 94
Drain,
flush,
clean and
refill
strainer.
page 96
1
Check
pressure.
page 99
Expert(t) 2000 119
TM
Maintenance Manual
Preventive Maintenance Chart
Component/
System
Hopper area
Daily
Weekly
Monthly
Each
year
Page
Clean
traps on
each side.
page 33
Tilt down
the
swivel-styl
e panel
and clean
dirt under
or behind
the
packer.
page 33
120
CHAPTER 3
Maintenance
Preventive Maintenance Chart
Component/
System
Body and
chassis
Daily
Weekly
Monthly
Each
year
Page
page 33
Perform a
visual
inspection
of the
rollers,
hydraulic
cylinders
and
cylinder
pins,
hoses,
inspection
of the pipes
and
connection
s, wear of
floor and
side of
hopper.
Check for
corrosion.
Keep the
contact
surfaces
clean,
between
the body
and
chassis.
page 33
Expert(t) 2000 121
TM
Maintenance Manual
Preventive Maintenance Chart
Component/
System
Daily
Limit switches
Weekly
Monthly
Each
year
page 48
Proper
adjustmen
t of the
limit
switches
is
imperative
.
Check and
clean area
around
switches.
Lubrication
Lubricate
packer and
its
accessorie
s.
See lubrication chart on side of the truck
Cart tipper
Grease
and inspect
all pivots.
Check
pressure.
Steering wheel
gearbox
Page
Add light
grease if
required.
122
CHAPTER 3
Maintenance
Preventive Maintenance Chart
Component/
System
Daily
Weekly
Monthly
Wiring system
Each
year
Page
Check for
damaged
harnesses
and/or
bad
connectio
ns.
Operator’s
control
Check for
proper
operation.
Air tanks
Drain.
page 111
Air system
Check for
leaks.
page 111
Safety systems
Check for
proper
operation
(tailgate
alarm
and
special
devices).
page 11 &
page 12
1. Replace return filter after the first 50 hours of operation
Expert(t) 2000TM 123
Maintenance Manual
LUBRICATION
RECOMMENDED
LUBRICANTS
Grease
Any lithium-base commercial
multipurpose grease may be used.
CAUTION
BECAUSE OF ITS INTENSE USE,
THE
PACKER
AND
ITS
ACCESSORIES
MUST
BE
LUBRICATED EVERY WORKING
DAY.
weekly basis to provide optimal
operation of the packer.
The following sections present detailed
lubrication points on packer, crusher
panel, cylinder pins, hopper door’s
headplate bearings and body chassis
hinges.
For a vehicle equipped with special
options such as the commingle unit,
automated arm, glass compartment
and cart tipper, refer to the chapter of
the parts and service manual related to
such options.
Engine Oil
Refer to the engine’s manufacturer
maintenance manual for
recommended type of oil.
Hopper Lubrication
Side rails and the exterior of the rollers
should not be greased.
Grease causes sand and other
abrasives to stick to it which leads to
premature wear of the components.
When regularly collecting dry and/or
abrasive refuse material, Labrie
recommends the use of Shell
Malleus® Gl Multi-Lube on the floor
guides and hopper side walls on a
Hydraulic Oil
DANGER
DO NOT MIX DIFFERENT BRAND
OF OILS. IN DOUBT, DRAIN AND
REFILL WITH NEW OIL.
124
CHAPTER 4
Lubrication
Minimum Requirements
for Hydraulic Oil
To take oil samples on Labrie
trucks, apply the following
procedure:
Viscosity of:
Note: The procedure may change
depending on the
corresponding lab sample
kits and standards. The
procedure presented here is
used as an example to
follow.
•
32.2 cSt at 104 °F (40 °C);
•
6.4 cSt at 212 °F (100 °C).
The oil must contain anti-wear and
anti-foam additives, rust and oxidation
neutralizers and self- protecting
agents.
The oil must also meet MIL-H-5606 or
SAE IOW “MS” standards. The
following oils may be used in the
EXPERT 2000TM.
•
Esso Ramdo 32 or Polar 47
•
Texaco Ramdo 32
•
Sunoco hydraulic oil 100
1.
Apply all safety measures to
ensure safety around the vehicle
at all times;
2.
Start the engine and raise the
body;
DANGER
DO NOT USE PROPS WITH A
LOADED BODY. NEVER STAND
Note: For nordic regions, Shell
Tellus T 32 is strongly
recommended.
Hydraulic Oil Test
It is recommended to have the
hydraulic oil tested and analysed by a
lab to prevent hydraulic system or
pump breakdowns. This will also
optimize oil change frequency.
UNDER A RAISED AND LOADED
BODY.
3.
Install the body safety prop and
lower the body onto it;
4.
Slowly lower the body so it rests
properly on the prop (see Figure
181. “Body safety prop”);
Expert(t) 2000TM 125
Maintenance Manual
Safety prop
Figure 181. Body safety prop
5.
Disengage the pump and stop
the engine;
6.
Locate the oil sampler coupler
on the side of the hydraulic tank
(Figure 182. “Standard hydraulic
tank”), or on the top of it in the
case of a saddle type tank
(Figure 183. “Saddle-type
hydraulic tank”).
Coupler
Figure 183. Saddle-type hydraulic
tank
7.
Remove the cap from the
coupler and clean the sampler
coupler using a clean rag
(“Sampler coupler” on
page 125);
Coupler
Figure 182. Standard hydraulic tank
Figure 184. Sampler coupler
126
CHAPTER 4
Lubrication
8.
pressure on the system will push
the oil out of the coupler;
Using a small tip (Figure 185.
“Pressing the coupler spring
ball”), press on the coupler
spring ball (Figure 186. “Spring
ball”) to purge oil before taking
sample;
CAUTION
DO NOT ENGAGE THE HYDRAULIC
PUMP.
10.
Remove the sample kit from its
bag and using a screw driver,
remove the vent cap from the
bottle cap;
Figure 185. Pressing the coupler
spring ball
Vent Cap
Spring Ball
Figure 187. Sample bottle top-view
11.
Figure 186. Spring ball
9.
Use a small bucket to retrieve
the oil that will come out. Let the
oil leak for a few seconds (about
half a cup). The residual
Remove the protective cap from
the probe;
Expert(t) 2000TM 127
Maintenance Manual
Recommended Oil Level
Probe Tip
Protective Cap
Figure 188. Sample bottle probe tip
12.
Install the probe on the coupler
to fill the sample bottle;
CAUTION
DO NOT OPEN THE BOTTLE CAP.
Figure 190. Sample bottle
14.
Remove any excess of oil
through the vent;
15.
Once the sample is taken,
remove the probe from the
coupler and pull out the probe to
remove it from the bottle (Figure
191. “Probe removal from the
bottle”);
Probe
Figure 189. Sample bottle probe
13.
Fill the bottle to the level mark
(Figure 190. “Sample bottle”);
Figure 191. Probe removal from the
bottle
128
CHAPTER 4
Lubrication
Figure 194. Sealed sample
Figure 192. Bottle cap with probe
removed
17.
16.
Put the seal cover over the bottle
cap;
Figure 193. Seal cover over the
bottle cap
Fill the identification form
(sticker) and apply it on the
sample bottle;
Figure 195. Labeled sample bottle
Expert(t) 2000TM 129
Maintenance Manual
LUBRICATION CHART
LUBRICATION CHART - EXPERT (t) 2000
LUBRICATION CHART*
NO.
DESCRIPTION
WEEKLY
TAILGATE HINGES
WEEKLY
CRUSHER PANEL HINGES
CRUSHER PANEL CYLINDER PIN
WEEKLY
WEEKLY
TWICE A WEEK
PACKER FRONT
WEEKLY
BODY HOIST PINS
17
FREQUENCY
TAILGATE UPPER CYLINDER PINS
PUMP DRIVE SHAFT "U" JOINT
TWICE A WEEK
PUMP DRIVE SHAFT "U" JOINT
TWICE A WEEK
FOLLOWER PANEL ROLLERS
TWICE A WEEK
PACKER REAR PINS
TWICE A WEEK
CRUSHER PANEL CYLINDER PIN
WEEKLY
TAILGATE LOWER CYLINDER PINS
WEEKLY
TAILGATE LOCKING MECHANISM
WEEKLY
TAILGATE PINS
WEEKLY
BODY HINGES
HOPPER SIDE WALLS
WEEKLY
WEEKLY
FLOOR GUIDES
WEEKLY
*SEE EXPERT (t) 2000 MAINTENANCE MANUAL FOR PROPER LUBRICANT
REV. 0
LABRIE
79780
130
CHAPTER 4
Lubrication
PACKER
Expert(t) 2000TM 131
Maintenance Manual
BODY-CHASSIS HINGES
132
CHAPTER 4
Lubrication
HOPPER SECTION (STANDARD VERSION)
Expert(t) 2000TM 133
Maintenance Manual
CRUSHER PANEL
134
CHAPTER 4
Lubrication
FULL-WIDTH TAILGATE
Expert(t) 2000 135
TM
Maintenance Manual
TROUBLESHOOTING
This section of the guide gets you
through some of the typical
troubleshooting procedures to be
performed on the Expert(t) 2000 .
Troubleshooting the Expert(t) 2000 is
a process where, in the event of a
failure, malfunction, or breakdown, you
will inspect and spot its causes and
then proceed to accordingly apply a
solution.
IMPORTANT
TM
TM
Note:Only qualified staff must be
allowed to perform
troubleshooting tasks on the
Expert(t) 2000 .
YOU MUST ENSURE THAT ALL
SAFETY
FEATURES
ARE
CORRECTLY LOOKED AT AND ALL
RELATED
PROCEDURES
ARE
APPLIED,
SUCH
AS
THE
LOCKOUT/TAGOUT. REFER TO
“LOCKOUT/TAGOUT
PROCEDURE” ON PAGE 8 FOR
DETAILS.
TM
TROUBLESHOOTING GUIDE
Problem
Insufficient packing
ratio
Possible cause(s)
Solution(s)
Low oil pressure
Perform the hydraulic
pressure adjustment
procedure.
The packer hydraulic
cylinder is internally
bypassing.
Call the Labrie Customer
Support Center. Refer to
“Hydraulic Cylinder
Inspection Procedures” on
page 88 for details.
Defective pump
Replace the pump.
136
CHAPTER 5
Troubleshooting
Problem
The hydraulic oil is
over heating
(temperature
higher than 180°F
or 77°C)
Posible cause(s)
Solution(s)
The oil level in the
hydraulic tank is too low.
Add oil to the tank upto the
required level. Refer to
“Hydraulic Oil” on
page 123.
Hydraulic pressure is either
too low or too high.
Perform the hydraulic
pressure adjustment
procedure.
The oil doesn’t have the
proper grading (i.e. too thin
in hot temperatures and
too thick in cold
temperatures).
See “Recommended
lubricants” on page 123 to
find out about the proper
type of oil to use. Refer
also to “Hydraulic Oil
Replacement Procedure”
on page 92.
Contaminated oil
Change the return filter.
Restrictions in the
hydraulic system
Check all hydraulic
components that may have
the presence of debris
causing restrictions in the
system. Have the pump
inspected by a specialist.
Expert(t) 2000 137
TM
Maintenance Manual
Problem
Oil is foaming
Possible cause(s)
Solution(s)
The oil level is low.
Add oil to the tank upto the
required level. Refer to
“Hydraulic Oil” on
page 123
Air is getting into the
system.
Check and tighten all hose
and pipe connections
between the pump and the
hydraulic tank.
The oil doesn’t have the
proper grading (i.e. too thin
in hot temperatures and
too thick in cold
temperatures).
See “Recommended
lubricants” on page 123 to
find out about the proper
type of oil to use. Refer
also to “Hydraulic Oil
Replacement Procedure”
on page 92.
138
CHAPTER 5
Troubleshooting
Problem
Possible cause(s)
Solution(s)
Cavitation,
excessive noise or
vibration of the
pump
The hydraulic tank valve is
not fully open.
Fully open the hydraulic
tank valve.
The oil level is low.
Add oil to meet the
requirements.
The oil is too thick.
Verify the oil in the system
is part of the
recommended lubricants
and/or change the oil. See
“Recommended lubricants”
on page 123 to find out
about the proper type of oil
to use. Refer also to
“Hydraulic Oil
Replacement Procedure”
on page 92.
There is air in the system.
Check all the connections
of hoses and pipes and
tighten them if necessary.
There is particle
contamination.
Change the oil return filter
and replace the oil in the
system. See “Hydraulic Oil
Replacement Procedure”
on page 92.
Expert(t) 2000 139
TM
Maintenance Manual
Problem
The hydraulic
system does not
engage.
Problem
No hydraulic
pressure
Problem
The pump is
leaking oil
Possible cause(s)
Solution(s)
There is a red emergency
STOP button pressed in.
Check all red emergency
STOP buttons and pull out
the one that has been
pressed in.
Low air pressure
Make sure the air pressure
is above 90 PSI.
Engine runs at more than
900 RPM.
Lower the engine RPM to
less than 900 RPM. If you
can’t accomplish such
task, contact your local
chassis dealer.
Electrical fault
Check fuses on the
console and the main
fuses on the batteries.
Possible cause(s)
Solution(s)
The pump is not engaged.
Turn on the pump switch.
Hydraulic pressure needs
adjustment.
Perform the hydraulic
pressure adjustment
procedure.
Possible cause(s)
Solution(s)
Hydraulic connections are
loose.
Check and tighten all
hydraulic connections.
The pump is damaged.
Change the hydraulic
pump.
140
CHAPTER 5
Troubleshooting
Problem
Possible cause(s)
Solution(s)
The packer moves
irregularly or
sideways
The packer wear plates are
worn out.
Problem
Possible cause(s)
The tailgate
unlocks and lowers
by itself
The velocity fuse is dirty or
deffective
Clean or replace the
velocity fuse. Call the
Labrie Customer Support
Center for details.
Inverted hydraulic hoses
on the main hydraulic
valve.
Test the power bleed on
the tailgate section of the
valve. Call the Labrie
Customer Support Center
for details.
Replace the wear plates.
Solution(s)
Problem
Possible cause(s)
Solution(s)
The packer doesn’t
complete a full
cycle
The body is full, preventing
the packer to reach the
fully extended position.
Unload the body.
An accumulation of refuse
material behind the packer
doesn’t allow the packer to
reach its fully retracted
position.
Clean the area behind the
packer.
The limit switches for the
packer lost their settings or
are annoyed by some
debris.
Clean the area around the
limit switches and/or adjust
their settings.
Expert(t) 2000 141
TM
Maintenance Manual
Problem
The packer does
not start at all
when you press
the green button.
Problem
The yellow RETRACT
button functions as
a press-and-hold
button instead of a
just-press button.
Possible cause(s)
Solution(s)
The PTO switch is off.
Turn on the PTO switch.
There is a red emergency
STOP button pressed-in.
Verify that all red
emergency STOP buttons
are pulled out.
The packer controls station
of the pressed button has
not been selected.
Verify the packer controls
station selector switch; it
must be turned to the
corresponding station.
Possible cause(s)
Solution(s)
There is a hydraulic
defficiency.
Verify and make sure the
hydraulic pressure is at the
proper level.
There is a defective
electrical harness.
Apply the electrical system
troubleshooting between
the packer module and the
corresponding packer
control station.
The packer module is
deffective.
Troubleshoot the packer
module. Call the Labrie
Customer Support Center
for details.
142
CHAPTER 5
Troubleshooting
Problem
The green START
CYCLE button
functions as a
press-and-hold
button instead of a
just-press button.
Possible cause(s)
Solution(s)
There is a deffective
electrical harness.
Apply the electrical system
troubleshooting between
the packer module and the
corresponding packer
control station. Call the
Labrie Customer Support
Center for details.
The packer module is
deffective.
Apply the packer module
trobleshooting. Call the
Labrie Customer Support
Center for details.
Problem
Possible cause(s)
Solution(s)
The packer moves
forward but stops
at the end of the
stroke.
The packer wear plates are
worn out.
Replace the wear plates.
The packer extension limit
switch needs adjustment.
Adjust the packer
extension limit switch.
Expert(t) 2000 143
TM
Maintenance Manual
Problem
Packing is
insufficient
Possible cause(s)
Solution(s)
Low hydraulic pressure
Adjust the hydraulic
pressure. Call the Labrie
Customer Support Center
for details.
Packer limit switches are
not properly set up.
Verify and adjust the
packer limit switches.
“Limit Switches
Adjustment” on page 48.
The hydraulic system
prematurely switches off.
Verify the packer cylinder
which may be bypassing.
Refer to “Hydraulic
Cylinder Inspection
Procedures” on page 88
for details.
Problem
Possible cause(s)
Solution(s)
The backup alarm
and the warning
buzzer in the cab
are continuously
on and do not
stop.
Tailgate limit switch needs
adjustment.
“Tailgate Limit Switch
Adjustment” on page 84.
Faulty electrical harness
Troubleshoot the electrical
harness connected to the
tailgate limit switch.
Change the electrical
harness if necessary.
144
CHAPTER 5
Troubleshooting
Expert(t) 2000 145
TM
Maintenance Manual
APPENDIX
This appendix includes general reference information, such as symbols used in
Labrie ’s electrical schematics, commonly-used electrical connectors and crimp
tools, wiring schematic key numbers and colors.
TM
ABOUT WIRING SCHEMATICS
Every Labrie truck is delivered with its own pneumatic, hydraulic and electrical
schematics. You may find these schematics in the Operator Manual case located
in the cab.
TM
146
Appendix
CONNECTORS
Commonly-used Electrical Connectors
Deutsch
AMP
Expert(t) 2000 147
TM
Maintenance Manual
LABRIE ELECTRICAL SCHEMATICS
TM
Commonly-used Symbols
Alarms
Symbol
Description
12V BUZZER ON
CONSOLE
12V
BACKUP
ALARM ON CHASSIS
Part number
ELR01005
ELA00700
148
Appendix
Connectors
Symbol
Description
6-OUTLET AMP OR
DEUTSCH
Part number
TYPICAL
CONNECTOR
Diodes
Symbol
Description
1A DIODE
Part number
ELD00100
Expert(t) 2000 149
TM
Maintenance Manual
Fuses
Symbol
Description
10A FUSE
12-FUSE
FUSE BLOCK
Part number
TYPICAL
ATO
ELS00461
150
Appendix
Lights
Symbol
Description
6", 12V STROBE
LIGHT
12V
AMBER
FLASHING LIGHT
Part number
ELL02765
ELL02855
Expert(t) 2000 151
TM
Maintenance Manual
Symbol
Description
Part number
12V WORK LIGHT
ELL01300
12V
PILOT
PNI00500
ELL00200
&
12V GREEN PILOT
PNI00500
ELL00300
&
RED
LIGHT
LIGHT
152
Appendix
Relays
Symbol
Description
12V SINGLE-POLE
NORMALLY
OPEN-NORMALLY
CLOSED AND BASE
12V ALTERNATING
FLASHER RELAY
Part number
RELAY:
ELR00810
BASE: ELR00860
ELR00700
Expert(t) 2000 153
TM
Maintenance Manual
Solenoids
Symbol
Description
12V SOLENOID
12V
SOLENOID
VALVE
DUAL
Part number
12V SOLENOID
PNV01957
12V
SOLENOID
VALVE
FOR PACKER
PNV01914
154
Appendix
Switches
Symbol
Description
Part number
0-66PSI
ADJUSTABLE
PRESSURE SWITCH
NORMALLY
OPEN
ON
INSTALLED
PNEUMATIC
LINE
PNI00605
#1
2 NORMALLY OPEN,
2
NORMALLY
CLOSED,
3-POSITION
ELB00260, 2 X
ELB00270
SWITCH
55PSI
NORMALLY-OPEN
PRESSURE SWITCH
INSTALLED
ON
PNEUMATIC
LINE
#1
PNI00600
Expert(t) 2000 155
TM
Maintenance Manual
Symbol
Description
Part number
BIPOLAR SWITCH
ELB02505
NORMALLY
CLOSED-NORMALLY
ELI00550,
ELC00200
ELI00850
OPEN LIMIT SWITCH
&
156
Appendix
Symbol
Description
Part number
TOGGLE-TYPE:
SINGLE-POLE
SWITCH
ELI00805
ROCKER-TYPE:
ELI00818
DUAL POLE, DUAL
THROUGH-SWITCH
(TOGGLE-TYPE)
ELI00806
RED
EMERGENCY
BUTTON
ELB02200
Expert(t) 2000 157
TM
Maintenance Manual
Other Symbols
Symbol
Description
Part number
TO GROUND POST
INTO CONSOLE
PACKER MODULE
ELM01005
158
Appendix
Expert(t) 2000 159
TM
Maintenance Manual
Other symbols
Symbol
Description
Part number
TO GROUND POST
INTO CONSOLE
PACKER MODULE
ELM01005
160
Appendix