1
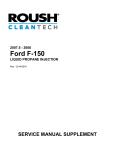
ROUSH Short Throw Shifter Kit
Part Number: R15040014
Application: 2005-09 Ford Mustang GT
Installation Instructions
Before installing your ROUSH Performance Product(s), read through the entire
installation procedure and check to make sure all items are present. Contact ROUSH
Customer Service at 1-800-59-ROUSH, 9:00 AM to 5:00 PM EST, weekdays, for any
questions regarding fit, missing parts or instructions that are unclear to you.
(Shifter shown assembled)
1305-R15040020-AA
Page 1 of 11
1-800-59-ROUSH
(Shifter shown assembled)
Packaging List for Complete ROUSH Short Throw Shifter Kit
Part # R15040014
Description
2005 - 09 Short Throw Shifter Kit
Shifter Assembly
Isolator - Shifter rear
Bolts - 3/8-24 x 1" Button Head Cap Screw
Lock Washer - 3/8" ID, Int. Tooth
Upper Stick - Short
Installation Instructions - Shifter
ROUSH Part Number
R15040014
R15040015
R15040018
R15040020
Qty
1
1
1
2
2
1
1
Equipment and Supplies Required
10mm wrench
10mm Deep Well Socket and matching drive/extensions
13mm Wrench or Socket and matching drive/extensions
7/32” hex driver
White Lithium Grease
Recommended Supplies
Loctite 242 Medium Strength Thread Locker
Small pry bar
Aerosol glass cleaner
1305-R15040020-AA
Page 2 of 11
1-800-59-ROUSH
LIMIT OF LIABILITY STATEMENT
The information contained in this publication was accurate and in effect at the time the
publication was approved for printing and is subject to change without notice or liability.
ROUSH Performance Products (RPP) reserves the right to revise the information presented
herein or to discontinue the production of parts described at any time.
SAFETY REQUIREMENTS
STOP! READ IMPORTANT SAFETY CAUTIONS AND WARNINGS BEFORE
PROCEEDING.
IMPORTANT SAFETY NOTICE
Appropriate disassembly, assembly methods and procedures are essential to ensure the
personal safety of the individual performing the kit installation. Improper installation due to the
failure to correctly follow these instructions could cause personal injury or death. Read each
step of the installation manual carefully before starting the actual installation.
1.
2.
3.
4.
5.
Always wear safety glasses for eye protection.
Place ignition switch in the OFF position.
Always apply the parking brake when working on a vehicle.
Block the front and rear tire surface to prevent unexpected vehicle movement.
If working without a lift, always consult vehicle manual for correct lifting
specifications.
6. Operate the engine only in well-ventilated areas to avoid exposure to carbon
monoxide.
7. Do not smoke or use flammable items near or around the fuel system.
8. Use chemicals and cleaners in well-ventilated areas.
9. Batteries produce explosive gases, which can cause personal injury. Therefore, do
not allow flames, sparks or flammable substances to come near the battery.
10. Keeps hands and any other objects away from the radiator fan blades.
11. Keep yourself and your clothing away from moving parts when the engine is
running.
12. Do not wear loose clothing or jewelry that can get caught in rotating parts or scratch
surface finishes.
13. Allow the engine, cooling system, brakes and exhaust to cool before working on a
vehicle.
WORK SAFELY!
Perform this installation on a good clean level surface for maximum safety and with the engine
turned off.
1305-R15040020-AA
Page 3 of 11
1-800-59-ROUSH
USE EXTREME CAUTION WHEN WORKING UNDERNEATH VEHICLE. Never get
near or underneath vehicle until you are confident that it is safely supported and will not
move or fall from its raised position.
DO NOT USE A BUMPER JACK!
NOTE! There is a limited amount of working space underneath the car around the
transmission and floor pan area while replacing and installing the shifter assembly,
however, shifter removal and replacement can be performed without removal of drive
shaft. If drive shaft is removed to facilitate the installation, consult the manufacturer’s
service manual for correct procedure.
Disassembly (FACTORY SHIFTER REMOVAL)
1. Apply the emergency brakes or block two wheels to avoid vehicle movement while the
vehicle is on the ground.
2. Place the shifter in neutral position.
3. Work the upper part of the shift boot out of the
shifter knob retainer groove and slide the boot
down onto the stick. Refer to Figure 1
Figure 1
4. Remove the factory shifter knob from the
shifter stick by grasping and turning counterclockwise. Refer to Figure 2.
Figure 2
1305-R15040020-AA
Page 4 of 11
1-800-59-ROUSH
5. Remove the shifter boot by placing your finger
tips underneath the inside edge of the shifter
boot flange. Pull straight up to release the
shifter boot from the center console. Slide the
boot up and over the shifter stick and remove
the shifter boot. Refer to Figure 3.
Figure 3
6. Remove the large dust boot by pulling
it out of transmission tunnel opening.
Refer to Figure 4.
Note: Some later model Mustangs may
have an insulating pad inside the center
console. It is very flexible and can be
removed and installed through the shifter
boot opening.
Figure 4
7. Raise the vehicle to an adequate height using an appropriate lifting device to gain
access to the underside of the shifter assembly. Support the vehicle using automotive
approved support stands having adequate load capacity.
CAUTION: To avoid any possibility of bodily injury or damage to vehicle, do not attempt
shifter installation until you are confident that vehicle is safely secured and will not move
or fall from its raised position.
1305-R15040020-AA
Page 5 of 11
1-800-59-ROUSH
8. From underneath the car, use a 13 mm
wrench to remove the hex nut that secures
the transmission linkage rod to the bottom of
the factory shifter. Disconnect the rod by
pulling it out of the shifter stick bottom. Refer
to Figure 5.
Figure 5
9. Using a 10 mm wrench, remove the front bolt
that secures the shifter assembly arm to the
transmission. Refer to Figure 6.
Figure 6
10. Using a 10 mm wrench or deep well socket, remove the two (2) hex nuts that secure the
rear mount of the shifter assembly to the floor pan and set aside. Refer to Figures 7 & 8.
Remove the rear saddle bracket and set aside for reuse.
Figure 7
1305-R15040020-AA
Figure 8
Page 6 of 11
1-800-59-ROUSH
11. Carefully slide the factory shifter out of the car by maneuvering it between the floor pan
and the transmission/driveshaft.
TRANSFER SHIFTER PARTS
12. Place the factory shifter on a workbench. Remove the metal-flanged sleeve and the two
(2) black rubber insulators from the front of the Ford shifter assembly. Transfer these
three (3) parts to the ROUSH Shifter and install the metal-flanged sleeve as shown.
(The same way it came off the Ford shifter) Refer to Figures 9 & 10.
Figure 9
Figure 10
Note: Glass Cleaner can be used as a lubricant to aid installation.
13. Remove the two (2) nylon bushings from the shifter arm. Transfer the two (2) nylon
bushing to the ROUSH Shifter Arm as shown. Refer to Figures 11 & 12.
Figure 11
1305-R15040020-AA
Figure 12
Page 7 of 11
1-800-59-ROUSH
INSTALLATION
14. Carefully maneuver the ROUSH Shifter up into the opening in the floor tunnel.
15. Apply Loctite 242 or equivalent to the take out front
shifter arm bolt. Install the front shifter arm to the
transmission but do not tighten. Refer to Figure 13.
Figure 13
16. Using the take off saddle bracket, attach the
rear isolator of the shifter assembly to the
floor pan studs. Slide the red isolator on the
arm as required. Install the two (2) hex nuts
previously removed. Refer to Figure 14.
Torque the two (2) nuts to 10Nm (8 lb-ft).
(Right side shown, Left side out of view)
Figure 14
17. Using a 10 mm wrench, tighten the hex bolt that secures the front shifter arm to the
transmission. Torque to 40Nm (30 lb-ft). Refer back to Figure 13.
1305-R15040020-AA
Page 8 of 11
1-800-59-ROUSH
18. Insert the shift rod linkage through the bushings in the shifter stick bottom. Important:
The offset (long side) side of connector located on the stick bottom must be
positioned to the left (driver) side. Refer to Figure 15. Apply Loctite 242 or
equivalent to the shift rod linkage threads. Install the hex nut, previously removed, and
torque to 25Nm (18 lb-ft). Refer to Figure 16.
Insert
shift rod
linkage
Driver’s
side of
car
Figure15
Figure16……
…
19. Ensure all fasteners a tightened and torqued. Lower the vehicle to the ground.
20. From inside the car, attach the ROUSH upper stick to the stick bottom with the two (2)
button head socket bolts and star tooth lock washers supplied. Refer to Figure 17.
Important: Be sure that serrations on upper stick engage serrations on stick
bottom. Using a 7/32” hex key wrench, torque bolts 35 Nm (25 lb-ft).
Figure 17
1305-R15040020-AA
Page 9 of 11
1-800-59-ROUSH
21. IMPORTANT! Test shifter operation. Move shifter through entire gearshift pattern
making sure that it engages each gear fully and that stick moves freely from side to side
in “neutral” position.
22. Replace the large rubber dust boot onto the
ROUSH shifter assembly. Align the boot so that
the arrows are facing the front and rear. Ensure
that the groove in dust boot is seated properly into
floor tunnel opening. Slide the center of the boot
down over the bolts for the upper stick. Refer to
Figure 18.
Figure 18
23. Replace the insulation pad if equipped.
Refer to Figure 19.
24. Place the shifter boot over the shifter stick. Align
the boot to the console opening. Press the outer
edges down and ensure the retainer clips snap
firmly into place. Refer back to Figure 3.
Figure 19
25. Reinstall the Ford shifter knob. The fit is tight in
order to keep the shift knob from loosening while in
operation. Turn the knob clockwise (on) to thread
the knob onto the Shifter Upper Stick. Once you
have it threaded fully onto the upper stick, turn the
knob counterclockwise (off) just enough to
straighten the shifter knob text / shift pattern. Work
the shift boot top onto the base of the shift knob.
Refer to Figure 20.
Figure 20
1305-R15040020-AA
Page 10 of 11
1-800-59-ROUSH
Congratulations!!! You have completed the installation of the ROUSH Performance Products,
Short Shifter Kit. It is recommended that you save all parts removed from your vehicle during
the installation of this kit.
WARRANTY
All retail parts carry a 90-day warranty from the date of purchase. This warranty covers
defects in materials or workmanship, and does not include (i) normal wear and tear,
environmental conditions, improper installation; (ii) road hazards, misuse, abuse,
neglect, accidents, collision, fire, theft, freezing, vandalism, riot, explosion, or objects
striking the vehicle; (iii) misusing the vehicle, such as driving over curbs, overloading,
racing, or using the vehicle as a stationary power source; (iv) altering, disassembling or
modifying the parts; (v) defects caused or induced by failures, breakdowns, or damage
by other parts, components or the vehicle; (vi) subjecting the parts to excessive
moisture or water or any motor vehicle fluids (e.g.: oil, anti-freeze, battery acid, brake
fluid, etc.); (vii) acts of God, natural disasters and other similar causes beyond the
reasonable control of ROUSH; or (viii) application of chemicals that affect the parts.
This Limited Warranty does not cover surface deterioration of paint, trim, and
appearance items that result from use and/or exposure to the elements, such as stone
chips, scratches, bird droppings, lightning, hail, windstorm, dings, dents, earthquake,
road salt, tree sap, water or flood.
ROUSH SHALL NOT BE LIABLE TO REIMBURSE CUSTOMER/DEALER FOR
INCIDENTAL OR CONSEQUENTIAL DAMAGES RESULTING FROM THE
INSTALLATION OR USE OF ANY PRODUCT SOLD THROUGH THIS CATALOG OR
ARISING OUT OF ANY BREACH OF WARRANTY. EXCEPT AS MAY BE STATED IN
THIS CATALOG, ROUSH DISCLAIMS ALL EXPRESS AND IMPLIED WARRANTIES,
INCLUDING THE WARRANTIES OF MERCHANTABILITY AND FITNESS FOR A
PARTICULAR PURPOSE. IN NO EVENT SHALL ROUSH’S LIABILITY EXCEED THE
PRICE PAID BY CUSTOMER/DEALER FOR PRODUCTS SOLD REGARDLESS IF
ROUSH HAS BEEN ADVISED IN ADVANCE OF ANY POTENTIAL PROBLEM OR IF A
CLAIM IS BASED ON CONTRACT, TORT, STRICT LIABILITY, PRODUCT LIABILITY
OR OTHERWISE. SOME STATES DO NOT ALLOW THE EXCLUSION OR
LIMITATION OF IMPLIED WARRANTIES OR THEIR DURATION, OR LIABILITY FOR
INCIDENTAL OR CONSEQUENTIAL DAMAGES, SO THE ABOVE EXCLUSIONS OR
LIMITATIONS MAY NOT APPLY.
1305-R15040020-AA
Page 11 of 11
1-800-59-ROUSH