
1
TWIN-TURBINE CENTRIFUGAL COMPRESSOR
SERVICE MONITORING TOOLS USER MANUAL
Danfoss Turbocor Compressors Inc.
M-SM-001-EN Rev. C
October 2013
This Page Left Intentionally Blank
Service Monitoring Tools User Manual
Service Monitoring Tools Software System License
This license governs use of the accompanying software and should be carefully read before
installing this package. By installing and using this software, you accept these terms and agree
that you will be legally bound to them.
Definitions
“Customer” refers to the individual installing this software package, any individual using this
software, and/or the company employing such individuals).
“Developer” refers to Danfoss Turbocor Compressors Inc. and any of its employees, past or
present.
This software is provided “as is” without warranty of any kind.
In addition to this license any Danfoss Turbocor Compressors Inc. license conditions apply.
Customer shall not remove any product identification, copyright notices, or other notices or
proprietary restrictions from Service Monitoring Tools Software System.
Customer shall not cause or permit reverse engineering, disassembly, or decompilation of any
part of this software written or published by Danfoss Turbocor Compressors Inc.
Service Monitoring Tools Software System is the proprietary product of Developer and its
licensors and it is protected by copyright, trade secret and other intellectual property laws.
Customer acquires the right to use this software freely but must immediately discontinue use and
uninstall this product on request of Danfoss Turbocor Compressors Inc.
Customer may not redistribute this package or any part authored by Danfoss Turbocor
Compressors Inc. without explicit consent of Danfoss Turbocor Compressors Inc.
Service Monitoring Tools Software System may receive small amounts of information with
Internet hosts managed by Danfoss Turbocor Compressors Inc. only for purposes of updating
data used by this local installation of the Service Monitoring Tools Software System. Service
Monitoring Tools Software System will never transmit personal, system, or identification
information other than the minimal required for executing such HTTP transactions.
Developer, or its licensor, shall at all times retain all rights, title, interest, including intellectual
property rights, in Service Monitoring Tools Software System.
Danfoss Turbocor Compressors Inc.
M-SM-001-EN Rev C
3
Service Monitoring Tools User Manual
Limitation of Liability: In no event and under no legal theory, whether in tort (including
negligence), contract, or otherwise, unless required by applicable law (such as deliberate and
grossly negligent acts) or agreed to in writing, shall Danfoss Turbocor Compressors Inc. or
Developer be liable to Customer for damages, including any direct, indirect, special, incidental,
or consequential damages of any character arising as a result of this license or out of the use or
inability to use the this product (including but not limited to damages for loss of goodwill, work
stoppage, computer failure or malfunction, or any and all other commercial damages or losses),
even if such Developer has been advised of the possibility of such damages.
FO.NET - License
Apache License
Version 2.0, January 2004
http://www.apache.org/licenses/
TERMS AND CONDITIONS FOR USE, REPRODUCTION, AND DISTRIBUTION
1. Definitions.
“License” shall mean the terms and conditions for use, reproduction, and distribution as defined
by Sections 1 through 9 of this document.
“Licensor” shall mean the copyright owner or entity authorized by the copyright owner that is
granting the License.
“Legal Entity” shall mean the union of the acting entity and all other entities that control, are
controlled by, or are under common control with that entity. For the purposes of this definition,
“control” means (i) the power, direct or indirect, to cause the direction or management of such
entity, whether by contract or otherwise, or (ii) ownership of fifty percent (50%) or more of the
outstanding shares, or (iii) beneficial ownership of such entity.
“You” (or “Your”) shall mean an individual or Legal Entity exercising permissions granted by
this License.
“Source” form shall mean the preferred form for making modifications, including but not limited
to software source code, documentation source, and configuration files.
“Object” form shall mean any form resulting from mechanical transformation or translation of a
Source form, including but not limited to compiled object code, generated documentation, and
conversions to other media types.
“Work” shall mean the work of authorship, whether in Source or Object form, made available
under the License, as indicated by a copyright notice that is included in or attached to the work
(an example is provided in the Appendix below).
Danfoss Turbocor Compressors Inc.
M-SM-001-EN Rev C
4
Service Monitoring Tools User Manual
“Derivative Works” shall mean any work, whether in Source or Object form, that is based on (or
derived from) the Work and for which the editorial revisions, annotations, elaborations, or other
modifications represent, as a whole, an original work of authorship. For the purposes of this
License, Derivative Works shall not include works that remain separable from, or merely link (or
bind by name) to the interfaces of, the Work and Derivative Works thereof.
“Contribution” shall mean any work of authorship, including the original version of the Work
and any modifications or additions to that Work or Derivative Works thereof, that is intentionally
submitted to Licensor for inclusion in the Work by the copyright owner or by an individual or
Legal Entity authorized to submit on behalf of the copyright owner. For the purposes of this
definition, “submitted” means any form of electronic, verbal, or written communication sent to
the Licensor or its representatives, including but not limited to communication on electronic
mailing lists, source code control systems, and issue tracking systems that are managed by, or on
behalf of, the Licensor for the purpose of discussing and improving the Work, but excluding
communication that is conspicuously marked or otherwise designated in writing by the copyright
owner as “Not a Contribution.”
“Contributor” shall mean Licensor and any individual or Legal Entity on behalf of whom a
Contribution has been received by Licensor and subsequently incorporated within the Work.
2. Grant of Copyright License.
Subject to the terms and conditions of this License, each Contributor hereby grants to You a
perpetual, worldwide, non-exclusive, no-charge, royalty-free, irrevocable copyright license to
reproduce, prepare Derivative Works of, publicly display, publicly perform, sublicense, and
distribute the Work and such Derivative Works in Source or Object form.
3. Grant of Patent License.
Subject to the terms and conditions of this License, each Contributor hereby grants to You a
perpetual, worldwide, non-exclusive, no-charge, royalty-free, irrevocable (except as stated in this
section) patent license to make, have made, use, offer to sell, sell, import, and otherwise transfer
the Work, where such license applies only to those patent claims licensable by such Contributor
that are necessarily infringed by their Contribution(s) alone or by combination of their
Contribution(s) with the Work to which such Contribution(s) was submitted. If You institute
patent litigation against any entity (including a cross-claim or counterclaim in a lawsuit) alleging
that the Work or a Contribution incorporated within the Work constitutes direct or contributory
patent infringement, then any patent licenses granted to You under this License for that Work
shall terminate as of the date such litigation is filed.
4. Redistribution.
You may reproduce and distribute copies of the Work or Derivative Works thereof in any
medium, with or without modifications, and in Source or Object form, provided that You meet
the following conditions:
1. You must give any other recipients of the Work or Derivative Works a copy of this License;
and
Danfoss Turbocor Compressors Inc.
M-SM-001-EN Rev C
5
Service Monitoring Tools User Manual
2. You must cause any modified files to carry prominent notices stating that You changed the
files; and
3. You must retain, in the Source form of any Derivative Works that You distribute, all copyright,
patent, trademark, and attribution notices from the Source form of the Work, excluding those
notices that do not pertain to any part of the Derivative Works; and
4. If the Work includes a “NOTICE” text file as part of its distribution, then any Derivative
Works that You distribute must include a readable copy of the attribution notices contained
within such NOTICE file, excluding those notices that do not pertain to any part of the
Derivative Works, in at least one of the following places: within a NOTICE text file distributed
as part of the Derivative Works; within the Source form or documentation, if provided along with
the Derivative Works; or, within a display generated by the Derivative Works, if and wherever
such third-party notices normally appear. The contents of the NOTICE file are for informational
purposes only and do not modify the License. You may add Your own attribution notices within
Derivative Works that You distribute, alongside or as an addendum to the NOTICE text from the
Work, provided that such additional attribution notices cannot be construed as modifying the
License.
You may add Your own copyright statement to Your modifications and may provide additional or
different license terms and conditions for use, reproduction, or distribution of Your
modifications, or for any such Derivative Works as a whole, provided Your use, reproduction,
and distribution of the Work otherwise complies with the conditions stated in this License.
5. Submission of Contributions.
Unless You explicitly state otherwise, any Contribution intentionally submitted for inclusion in
the Work by You to the Licensor shall be under the terms and conditions of this License, without
any additional terms or conditions. Notwithstanding the above, nothing herein shall supersede or
modify the terms of any separate license agreement you may have executed with Licensor
regarding such Contributions.
6. Trademarks.
This License does not grant permission to use the trade names, trademarks, service marks, or
product names of the Licensor, except as required for reasonable and customary use in describing
the origin of the Work and reproducing the content of the NOTICE file.
Danfoss Turbocor Compressors Inc.
M-SM-001-EN Rev C
6
Service Monitoring Tools User Manual
7. Disclaimer of Warranty.
Unless required by applicable law or agreed to in writing, Licensor provides the Work (and each
Contributor provides its Contributions) on an “AS IS” BASIS, WITHOUT WARRANTIES OR
CONDITIONS OF ANY KIND, either express or implied, including, without limitation, any
warranties or conditions of TITLE, NON-INFRINGEMENT, MERCHANTABILITY, or
FITNESS FOR A PARTICULAR PURPOSE. You are solely responsible for determining the
appropriateness of using or redistributing the Work and assume any risks associated with Your
exercise of permissions under this License.
8. Limitation of Liability.
In no event and under no legal theory, whether in tort (including negligence), contract, or
otherwise, unless required by applicable law (such as deliberate and grossly negligent acts) or
agreed to in writing, shall any Contributor be liable to You for damages, including any direct,
indirect, special, incidental, or consequential damages of any character arising as a result of this
License or out of the use or inability to use the Work (including but not limited to damages for
loss of goodwill, work stoppage, computer failure or malfunction, or any and all other
commercial damages or losses), even if such Contributor has been advised of the possibility of
such damages.
9. Accepting Warranty or Additional Liability.
While redistributing the Work or Derivative Works thereof, You may choose to offer, and charge
a fee for, acceptance of support, warranty, indemnity, or other liability obligations and/or rights
consistent with this License. However, in accepting such obligations, You may act only on Your
own behalf and on Your sole responsibility, not on behalf of any other Contributor, and only if
You agree to indemnify, defend, and hold each Contributor harmless for any liability incurred by,
or claims asserted against, such Contributor by reason of your accepting any such warranty or
additional liability.
Danfoss Turbocor Compressors Inc.
M-SM-001-EN Rev C
7
Service Monitoring Tools User Manual
DotNetZip Library - License
Microsoft Public License (Ms-PL)
This license governs use of the accompanying software. If you use the software, you accept this
license. If you do not accept the license, do not use the software.
1. Definitions
The terms “reproduce,” “reproduction,” “derivative works,” and “distribution” have the same
meaning here as under U.S. copyright law.
A “contribution” is the original software, or any additions or changes to the software.
A “contributor” is any person that distributes its contribution under this license.
“Licensed patents” are a contributor's patent claims that read directly on its contribution.
2. Grant of Rights
(A) Copyright Grant- Subject to the terms of this license, including the license conditions and
limitations in section 3, each contributor grants you a non-exclusive, worldwide, royalty-free
copyright license to reproduce its contribution, prepare derivative works of its contribution, and
distribute its contribution or any derivative works that you create.
(B) Patent Grant- Subject to the terms of this license, including the license conditions and
limitations in section 3, each contributor grants you a non-exclusive, worldwide, royalty-free
license under its licensed patents to make, have made, use, sell, offer for sale, import, and/or
otherwise dispose of its contribution in the software or derivative works of the contribution in the
software.
3. Conditions and Limitations
(A) No Trademark License- This license does not grant you rights to use any contributors' name,
logo, or trademarks.
(B) If you bring a patent claim against any contributor over patents that you claim are infringed
by the software, your patent license from such contributor to the software ends automatically.
(C) If you distribute any portion of the software, you must retain all copyright, patent, trademark,
and attribution notices that are present in the software.
(D) If you distribute any portion of the software in source code form, you may do so only under
this license by including a complete copy of this license with your distribution. If you distribute
any portion of the software in compiled or object code form, you may only do so under a license
that complies with this license.
Danfoss Turbocor Compressors Inc.
M-SM-001-EN Rev C
8
Service Monitoring Tools User Manual
(E) The software is licensed “as-is.” You bear the risk of using it. The contributors give no
express warranties, guarantees or conditions. You may have additional consumer rights under
your local laws which this license cannot change. To the extent permitted under your local laws,
the contributors exclude the implied warranties of merchantability, fitness for a particular
purpose and non-infringement.
Graphic Resources - Licenses
Some of the graphic resources used by this product, full or in part, are copyrighted Microsoft
content: Used with permission from Microsoft.
For more information, visit http://www.microsoft.com/About/Legal/EN/US/IntellectualProperty/
Permissions/Default.aspx
Some of the graphic resources used by this product are copyrighted works of icons-land.com and
used under the icons-land.com freeware agreement.
Visit http://www.icons-land.com/license-agreements.php for more information.
Some of the graphic resources used by this product, full or in part, are copyrighted works of their
respective authors which have been obtained for open use from findicons.com.
For more information, visit http://www.findicons.com
Danfoss Turbocor Compressors Inc.
M-SM-001-EN Rev C
9
Service Monitoring Tools User Manual
Service Monitoring Tools Software System - License ....................................................................................... 3
List of Changes................................................................................................................................................ 13
1 Service Monitoring Tools Overview ............................................................................................................
1.1 Service Monitoring Tools Suite
1.2 Compatibility Requirements................................................................................................................
1.3 SMT Suite Launcher Strip Tool Options .............................................................................................
1.4 General Usage ...................................................................................................................................
1.5 Running a Simulation .........................................................................................................................
1.6 Using the Remote Serial Multiplexer ..................................................................................................
14
14
14
15
18
21
27
2 Compressor Connection Manager..............................................................................................................
2.1 Accessing the Compressor Connection Manager ..............................................................................
2.2 Establishing a Connection with a Compressor ...................................................................................
2.3 Closing an Established Connection....................................................................................................
2.4 Detecting Compressor Settings..........................................................................................................
2.5 Changing Compressor Access Levels................................................................................................
2.6 Synchronizing the Compressor Real-Time Clock with a PC Clock ....................................................
2.7 Viewing a List of Recent Compressor Connection Settings ...............................................................
2.8 Compressor Connection Manager Layout
2.9 Connection Status Indications
2.10 RAM Only and RAM & EEPROM Check boxes ...............................................................................
28
28
29
32
32
33
33
34
34
35
36
3 ModComm Tool ..........................................................................................................................................
3.1 Accessing the ModComm Tool
3.2 Register-Parameter Tooltips...............................................................................................................
3.3 Changing the Current Register Watch Range ....................................................................................
3.4 Toggling Between the Specified Watch Range and All Currently Polled Register Watches
3.5 Making a Single Write Request ..........................................................................................................
3.6 Changing the Current Data Interpretation View..................................................................................
37
37
38
39
40
41
42
4 Active Alarm/Fault Viewer........................................................................................................................... 43
4.1 Accessing the Active Alarm/Fault Viewer Tool
43
4.2 Viewing and Configuring Alarm/Fault Limits and Lockout Settings
45
5 Compressor Monitor ...................................................................................................................................
5.1 Accessing the Compressor Monitor....................................................................................................
5.2 View Options ......................................................................................................................................
5.3 Changing the Demand........................................................................................................................
5.4 Changing the IGV Opening ................................................................................................................
5.5 Changing the Desired Motor Speed ...................................................................................................
5.6 Levitating or De-levitating the Shaft....................................................................................................
46
46
47
47
47
48
48
6 Logged Event and Fault Viewer..................................................................................................................
6.1 Accessing the Logged Event and Fault Viewer
6.2 Applying Filters for Data Retrieval and Watching
6.3 Retrieving Logged Event and Fault Data............................................................................................
6.4 Watching for New Logged Event and Fault Data
6.5 Viewing Logged Events and Faults Details ........................................................................................
6.6 Exporting Logged Event and Fault Data to a File
6.7 Importing Logged Event and Fault Data.............................................................................................
6.8 Viewing the Fault Occurrence Counters.............................................................................................
6.9 Viewing Runtime History Data............................................................................................................
6.10 Viewing Application Help Information ...............................................................................................
49
49
50
51
51
51
52
52
52
52
53
7 Compressor Data Recording and Playback Tool........................................................................................ 54
7.1 Launching the Compressor Data Recording and Playback Tool
54
Danfoss Turbocor Compressors Inc.
M-SM-00-EN Rev C
10
Service Monitoring Tools User Manual
7.2 Recording
55
7.3 Playback ............................................................................................................................................. 59
8 Bearing Calibration Tool .............................................................................................................................
8.1 Accessing the Bearing Calibration Tool..............................................................................................
8.2 Performing a Calibration.....................................................................................................................
8.3 Performing a Validation ......................................................................................................................
8.4 Saving the Latest Bearing Calibration for Temporary Use .................................................................
8.5 Saving the Latest Bearing Calibration for Persistent Use...................................................................
8.6 Viewing Bearing Calibration or Operation Settings ............................................................................
8.7 Creating a Calibration Report .............................................................................................................
66
66
68
69
69
69
70
70
9 Chiller and Analog Configuration Tool ........................................................................................................
9.1 Accessing the Chiller and Analog Configuration Tool ........................................................................
9.2 Viewing or Modifying Chiller Controller Settings.................................................................................
9.3 Viewing or Modifying Analog Output Controller Settings....................................................................
71
71
72
73
10 EXV Configuration Tool ............................................................................................................................ 74
10.1 Accessing the EXV Configuration Tool............................................................................................. 74
10.2 Viewing and Modifying EXV Controller Settings............................................................................... 75
11 BMCC System Configuration Tool............................................................................................................
11.1 Accessing the BMCC System Configuration Tool ............................................................................
11.2 Viewing Compressor Identification Settings .....................................................................................
11.3 Viewing or Modifying Communication Settings ................................................................................
11.4 Viewing Power Settings....................................................................................................................
77
77
78
78
78
12 Compressor Configuration Tool................................................................................................................
12.1 Accessing the Compressor Configuration Tool ................................................................................
12.2 Viewing or Modifying Compressor Operation Settings .....................................................................
12.3 Viewing or Modifying Compressor Startup Settings .........................................................................
12.4 Viewing or Modifying IGV Configuration Settings.............................................................................
12.5 Viewing or Modifying Surge/Choke Configuration Settings ..............................................................
79
79
80
81
81
81
13 Compressor Commissioning Tool.............................................................................................................
13.1 Accessing the Compressor Commissioning Tool .............................................................................
13.2 Importing a Commissioning Configuration from a File......................................................................
13.3 Adjusting Commissioning Parameters Requirement Step................................................................
13.4 Exporting a Commissioning Values Configuration to a File..............................................................
13.5 Signing an Existing Commissioning File...........................................................................................
13.6 Exporting Commissioning Parameter Values to a Signed File .........................................................
13.7 Exporting Commissioning Parameters to a Connected Compressor ...............................................
13.8 Creating a Commissioning Report....................................................................................................
82
82
83
83
84
85
85
86
87
14 Compressor Data Trending Tool ..............................................................................................................
14.1 Accessing the Compressor Data Trending Tool...............................................................................
14.2 Adding Parameters for Graphical Monitoring ...................................................................................
14.3 Removing Parameters from Graphical Monitoring ...........................................................................
14.4 Selecting the Plot Color a Specific Parameter..................................................................................
14.5 Starting Graphical Monitoring ...........................................................................................................
14.6 Stopping Graphical Monitoring .........................................................................................................
14.7 Resetting Plot Data...........................................................................................................................
14.8 Saving Plot Data to a CSV File.........................................................................................................
14.9 Loading a Saved or Pre configured Watch Group............................................................................
14.10 Deleting a Saved or Pre configured Watch Group .........................................................................
14.11 Saving the Active Watch Configuration for Later Recall.................................................................
88
88
89
90
91
92
93
94
94
95
96
96
Danfoss Turbocor Compressors Inc.
M-SM-00-EN Rev C
11
Service Monitoring Tools User Manual
15 Remote Serial Multiplexer......................................................................................................................... 97
15.1 Settings............................................................................................................................................. 97
15.2 Configuration File ............................................................................................................................. 97
Danfoss Turbocor Compressors Inc.
M-SM-00-EN Rev C
12
Service Monitoring Tools User Manual
List of Changes
The following List of Changes tables contains all changes made from the preceding version of
this manual (Rev C) to this version (Rev D).
Table 1 List of Changes
Page
Description
29
Updated Figure 16 to show new Compressor Connection Manager Tool window
containing RAM Only and RAM & EEPROM selections.
36
Added Section 2.10 RAM Only and RAM & EEPROM Check boxes.
45
Updated Figure 31 Alarm and Fault Settings.
46
Updated Figure 33 Compressor Monitor Tool Window.
67
Updated Figure 61 Bearing Calibration Window.
67
Added Note in Bearing Calibration section regarding RAM Only and RAM & EEPROM
check boxes.
77
Updated Figure 68 BMCC System Configuration Tool Window.
80
Updated Figure 70 Compressor Configuration Window.
82
Updated Figure 72 Compressor Commissioning Window.
84
Updated Figure 73 Compressor Commissioning Finish Window.
Danfoss Turbocor Compressors Inc.
M-SM-001-EN Rev C
13
Service Monitoring Tools User Manual
1
Service Monitoring Tools Overview
1.1
Service Monitoring Tools Suite
The Service Monitoring Tools (SMT) Suite can be used to launch other tools and to view detailed
version information for all tools included in the SMT (software system) software package.
The launcher strip contains at least one standard menu item, About, as well as menu items
representing any tools included in the software package. The launcher strip will only display
items which are accessible at any given time, typically dependent upon connection status and
access level. This tool can be used to launch tools, view detailed version information for all tools
included in the SMT software package, or change the launcher layout orientation.
Figure 1 SMT Suite Launcher Strip - Not Connected
Once connected, more tool icons may appear in the SMT Suite Launcher Strip depending on the
compressor's established access level.
Figure 2 SMT Suite Launcher Strip - Connected
1.2
Compatibility Requirements
The SMT software requires the following environment for operation:
• Framework: .NET Framework Version 3.5 or later
• Operating System: Microsoft Windows XP (32-bit or 64-bit) SP2 or later, Microsoft
Windows Vista (32-bit or 64-bit) Basic or better, or Microsoft Windows 7 (32-bit or 64-bit)
Home Basic or better
• Hardware: 1.0 GHz or higher CPU, minimum OS-required RAM, 1024x768 high-color
display (or better), and 20 MB or more available hard-disk space
Danfoss Turbocor Compressors Inc.
M-SM-001-EN Rev C
14
Service Monitoring Tools User Manual
1.3
SMT Suite Launcher Strip Tool Options
Depending on compressor acess level, the following tools may be available from the SMT Suite
Launcher Strip:
Icon
Tool
Description
About
The About tool displays a form showing OS
and framework version information, SMT
software system release product version info,
and a listing of software assemblies loaded for
the SMT software product.
• To view a detailed description of any given
assembly, select an item in the loaded
assemblies listing and a text description and
graphic icon (if exists) displays in the area
below
• To copy all of the version information to the
clipboard, click the Copy Info button.
Compressor
Connection
Manager
Discover and establish a means of
communication with the compressor.
ModComm
Tool
Assists in troubleshooting a BMCC or
monitoring registers by providing access to
ModBus registers on a raw level.
Active Alarm/
Fault Viewer
Instantaneously monitor the alarm and fault
status of a connected compressor device and
configure the alarm and fault limits.
Compressor
Monitor
Chiller and
Analog
Configuration
Danfoss Turbocor Compressors Inc.
M-SM-001-EN Rev C
Monitor the most commonly desired
parameters of the BMCC related to motor,
bearing, and compressor operation.
Allows you to view or modify the chiller
control and analog output control configuration
parameters and settings.
15
Service Monitoring Tools User Manual
Icon
Tool
Description
EXV
Configuration
Tool
This allows you to view and configure the
electronic expansion valve configuration
parameters and settings.
Logged Event
and Fault
Viewer
Retrieve logged fault and event data regarding
the operation of a connected compressor for
the purpose of troubleshooting and diagnostics.
Compressor
Data Recording
and Playback
Start and stop recording of any variables on the
BMCC, as well as launch a server partially
simulating an actual compressor using
previously recorded data. The intended usage
of this tool is not only for training, but for
testing, evaluation and compressor
troubleshooting purposes.
Bearing
Calibration
BMCC System
Configuration
Danfoss Turbocor Compressors Inc.
M-SM-001-EN Rev C
Execute a bearing calibration procedure and
analyze the outcome.
View and change many of the system settings
of a BMCC which are not included within the
scope of compressor, chiller, motor, bearing,
etc. operation.
16
Service Monitoring Tools User Manual
Icon
1.3.1
Tool
Description
Compressor
Configuration
View and configure the compressor operation,
IGV startup, surge/choke, and other
operational configuration parameters.
Compressor
Commissioning
View, modify and commit site-specific
compressor parameter values of a connected
compressor, as well as import and export
configurations between portable files. Minor
guidance is provided to the user by presenting
any number of configuration pages which are
necessary for consideration during the
deployment of a compressor system and the
displaying of basic coverage/flow indication.
Compressor
Data Trending
Graphically monitor selected compressor
parameter values and load or save userconfigurable watch configurations.
Right-Click Context Menu
From the SMT Launcher Strip, you can right-click with your mouse to view a context menu
providing easy access to tasks, including:
• Launching a tool - select the desired tool by name.
• Display the About form - click About.
• Minimize the tool suite - click Minimize and the tool will be minimized to your task bar
under one window button.
• Change the SMT Launcher Strip orientation - click Alignment -> Horizontal to display the
SMT Launcher Strip in a landscape format or Alignment -> Vertical for a portrait layout.
Danfoss Turbocor Compressors Inc.
M-SM-001-EN Rev C
17
Service Monitoring Tools User Manual
1.4
General Usage
There are several helpful features common across all tools in the SMT software system geared
toward simplifying day-to-day as well as extensive usage. These features include: internal
logging system, informative tooltips, highlight-on-click, collapsible group boxes, interactive
graphs, persistent user settings, interaction with the Remote Serial Multiplexer, normalized tool
framework, and product update checking.
1.4.1
Internal Logging System
To enhance maintenance and troubleshooting the SMT software system, all tools utilize a
common logging system functionality for outputting to file internal trace information, as well as
any error occurrences which may occur
The log file is located at: [My Documents]\Danfoss Turbocor\SMT\smt.log
1.4.2
Informative Tooltips
To aid in general use and interpretation of compressor data, all compressor parameter edit/
display fields will display a tooltip which pops up if the mouse cursor is hovered over the field.
The text displayed in the tooltip is a localized compressor parameter description including,
depending on access level, the Modbus register address and any masks necessary for
interpretation.
1.4.3
Highlight-on-click
To assist you in viewing data 'at a glance', certain readout fields can be highlighted to make them
stand out from the rest. The highlighting of fields with this functionality enabled can be toggled
by left-clicking on the desired field.
Danfoss Turbocor Compressors Inc.
M-SM-001-EN Rev C
18
Service Monitoring Tools User Manual
1.4.4
Collapsible Group Boxes
Any group boxes which display a box bearing a +/- box in the upper left-hand corner may be
collapsed in order to reduce the size of a form when some information is not desired to be
viewed. To collapse or expand these regions, left-click on the +/- graphic.
Collapsed Box
Figure 3 Collapsible Group Boxes Example
1.4.5
Interactive Graphs
Graphs are used to display some data in a way so as to provide a different perspective on data.
With these views comes the need for panning, zooming, and etc.
• To pan: if panning is enabled, click and drag in either the X or Y direction
• To fast pan: hold the control key while clicking and dragging within a graph to pan across
larger areas
• To zoom: if zooming is enabled, use the scroll wheel on the mouse to zoom in and out holding shift while scrolling will only stretch the Y axis; holding ctrl while scrolling will only
stretch the X axis
• To reset to initial view: double-click anywhere on the graph
Danfoss Turbocor Compressors Inc.
M-SM-001-EN Rev C
19
Service Monitoring Tools User Manual
1.4.6
Persistent User Settings
Many of the interface settings are saved in a local settings file in order to persist common settings
on a user-by-user basis.
Typical persistent settings include: tool form screen location, tool form normal/maximized state,
collapsible form collapse/expand states, user-entered application fields (i.e. hostnames, TCP
ports, technician name fields, etc.).
The settings file is located at:
[My Documents]\Danfoss Turbocor\SMT\Settings.xml
1.4.7
The Remote Serial Multiplexer
The Remote Serial Multiplexer is a system which allows multiple applications to indirectly
communicate with a single device connected to one serial port. In addition to local serial port
multiplexing, this system can be used remotely. For example, machine A, which is connected to
a compressor, may allow machine B to communicate with its compressor, although machine B is
in a different building, so long as there is a network/Internet connection enabling communication
between the two computers.
1.4.8
Normalized Tool Framework
All components considered to be tools contain a commonly-structured data identifying a tool
and its interface components.
Data included in the tool metadata (assembly information) include: Tool Id #, Tool Name Id,
Tool Description Id, Tool Classification, Minimum (execution) Access Level, Enumeration
Count, Persistence, Connection Requirement, Dedication Requirement, and an Application
Graphic.
In addition to the framework metadata, there are several components geared toward the
utilization of these tool components, including standalone execution support, common
interfacing components, etc.
1.4.9
Product Update Checking
To keep users informed of available updates, an automatic update check and notification can be
enabled, which will indicate to the user if there is a newer version of the SMT software product
available for download.
This process is performed by downloading the latest product information from a Turbocor
website and comparing the indicated version against the current product version. To prevent
possibly malicious modification of the product release notice, authentication can be performed
by checking a required signature of the product info message using the assembly's public key,
which is part of the same key pair used for signing the product release notice.
Danfoss Turbocor Compressors Inc.
M-SM-001-EN Rev C
20
Service Monitoring Tools User Manual
1.4.10
Tool Identification
Each tool's title frame contains information identifying it. This information includes:
• Tool/Form ID - The first number, indicating the ID number of the current tool
• Tool Title - The localized text title of the current tool
• Device Connection Info - This includes the serial port and baud rate or IP address and port
number and the slave address of the device with which the current tool is connected.
NOTE
To differentiate between instances of the SMT,
look at the device communication information
displayed in the tool’s frame.
1.5
Running a Simulation
While the SMT Suite Tools are intended to be used with live DTC compressors, it is possible to
partially simulate communication with a compressor using recorded data. The playback
simulation can be used for displaying values, but cannot accept write requests (parameter
updates) and certain features may not be available (such as fault or event log retrieval).
When you first open the Service Monitoring Tools software, a limited version of the Service
Monitoring Tools (SMT) Suite Launcher Strip is displayed.
Figure 4 SMT Suite Launcher Strip - Not Connected
1. Click the Compressor Data Recording & Playback Tool icon.
Figure 5 Compressor Data Recording & Playback Tool Icon
Danfoss Turbocor Compressors Inc.
M-SM-001-EN Rev C
21
Service Monitoring Tools User Manual
2. The Compressor Data Recording & Playback Tool window displays.
Figure 6 Compressor Data Recording and Playback Tool
3. Click the Open Recording icon.
Figure 7 Open Recording Icon
Danfoss Turbocor Compressors Inc.
M-SM-001-EN Rev C
22
Service Monitoring Tools User Manual
The Choose a recording file to open window displays:
Figure 8 Choose a Recording File to Open Window
4. Select a recording file, and then click Open.
Danfoss Turbocor Compressors Inc.
M-SM-001-EN Rev C
23
Service Monitoring Tools User Manual
The playback host will automatically start when you connect to it. See Figure 9.
Figure 9 Compressor Data Recording & Playback Tool
5.
If the playback control icons do not appear at the top of the Compressor Data Recording &
Playback Tool, a window similar to Figure 10 will display. Complete steps a and b;
otherwise jump to step 6.
Danfoss Turbocor Compressors Inc.
M-SM-001-EN Rev C
24
Service Monitoring Tools User Manual
Figure 10 Compressor Data Recording and Playback Tool showing Launch Server
a. Check the settings of the Host Address and Port fields
(default values are 'any' and '503') .
b. Click the Launch Playback Server icon . For more information, see Section 7.1
"Launching the Compressor Data Recording and Playback Tool".
Figure 11 Launch Playback Server Icon
6. Click the Compressor Connection Manager icon.
Figure 12 Compressor Connection Manager Icon
Danfoss Turbocor Compressors Inc.
M-SM-001-EN Rev C
25
Service Monitoring Tools User Manual
Figure 13 Compressor Connection Manager
7. In the Compressor Connection Manager, ensure that Shared is selected under the
Connection Settings.
8. Ensure that the field labeled Port matches the Port filed displayed on the Compressor Data
Recording & Playback Tool and that the field labeled 'Remote Host' says 'localhost'.
9. In the Compressor Connection Manager, click Connect to Remote Host.
The items listed in the drop-down labeled Serial Port identify available compressor data
streams - typically, the default (and most likely only) selection is sufficient.
10. Click Connect. You are now connected.
11. Type in an Access Code and click Submit. Depending on the compressor's established
access level, more tool icons may appear in the SMT Suite Launcher Strip.
Figure 14 SMT Suite Launcher Strip - Connected
Danfoss Turbocor Compressors Inc.
M-SM-001-EN Rev C
26
Service Monitoring Tools User Manual
1.6
Using the Remote Serial Multiplexer
Key steps:
1. Start the Remote Serial Multiplexer
a. From the command line:
i
For default settings (local only), execute RemoteSerialMultiplexer.exe.
ii To specify settings, specify TCP port number [ServerPort] and host name/address
[ServerAddress] - for remote, specify the machine's computer name or IP address
[see Server.config for details] - and execute RemoteSerialMultiplexer.exe -c
[filename].
b. From the Start Menu (uses default settings): click Start->Run->Programs->Danfoss
Turbocor->Remote Serial Multiplexer.
2. Connect to the Remote Serial Multiplexer
a. Open Connection Manager and follow the steps in Section 2.2.2 “Shared Connection”.
Danfoss Turbocor Compressors Inc.
M-SM-001-EN Rev C
27
Service Monitoring Tools User Manual
2
Compressor Connection Manager
The Compressor Connection Manager is used to discover and establish a means of
communication with a compressor. This tool can be used to establish a connection with a
compressor, close an established connection, detect compressor settings, change compressor
access level, synchronize the compressor real-time clock (RTC) with a personal computer (PC)
clock, and view a list of recent compressor connection settings.
When a connection with a compressor is established, information detailing the compressor's
current access level, BMC version, CC version, part number, configuration number, refrigerant
type, unit system, and current real-time clock readout are displayed as well as the current
connection status.
2.1
Accessing the Compressor Connection Manager
NOTE
Please see Section 1.5 "Running a Simulation"
if you wish to evaluate the software without
connecting to a compressor.
1. Click the Compressor Connection Manager icon.
Figure 15 Compressor Connection Manager Icon
Danfoss Turbocor Compressors Inc.
M-SM-001-EN Rev C
28
Service Monitoring Tools User Manual
The Compressor Connection Manager window displays:
Figure 16 Compressor Connection Manager
2.2
Establishing a Connection with a Compressor
To establish a connection with a compressor:
1. From the to Connection Settings group, select a connection type:
• Direct for direct use of the serial port. This is the default recommended setting.
• Shared for indirect use of a serial port, allowing multiple applications access to the same
compressor via the same serial port
• TCP/IP for communication with a Modbus TCP compressor interface
2. If using Shared or TCP/IP, enter your shared host name and TCP port number - usually
the default values (localhost and 502) are fine.
a. For a Shared Connection, see Section 2.2.2 "Shared Connection".
b. For TCP/IP, see Section 2.2.3 "TCP/IP Connection".
c. For a Direct Connection, see Section 2.2.1 "Direct Connection".
Danfoss Turbocor Compressors Inc.
M-SM-001-EN Rev C
29
Service Monitoring Tools User Manual
2.2.1
Direct Connection
1. From the Connection Settings group, select Direct as your connection type.
2. Select the serial port name to which the compressor is connected from the Serial Port
drop-down list.
NOTE
The Serial Port listing only shows serial port
names which currently exist on the local/host
machine.
3. Do one of the following:
a. If the slave address and baud rate are known: enter the known slave address in the Slave
Address field and select the known baud rate from the Baud Rate drop-down and click
Connect - a connection should now be established
b. If the slave address or baud rate are unknown, enter a slave address search range or list
of values to test for detection in the Search Addresses field and click Search.
After a short period of time (the less addresses to check, the quicker the search will be),
the search results containing a list of communication setting combinations display in the
Search Addresses field.
Double-click any of the communication setting combinations to automatically connect
using the those settings. A connection should now be established.
If no compressors are detected, No compressors found! will display in the listing.
4. Type in your Access Code and click Submit.
Danfoss Turbocor Compressors Inc.
M-SM-001-EN Rev C
30
Service Monitoring Tools User Manual
2.2.2
Shared Connection
To enter a Shared connection:
1. From the to Connection Settings group, select Shared as your connection type.
2. Enter your shared host name and TCP port number - usually the default values are fine.
3. Click the Connect to Remote Host button.
4. Select the serial port name to which the compressor is connected from the Serial Port
drop-down box.'
5. Do one of the following:
a. If the slave address and baud rate are known: enter the known slave address in the Slave
Address field and select the known baud rate from the Baud Rate drop-down and click
Connect - a connection should now be established
b. If the slave address or baud rate are unknown, enter a slave address search range or list
of values to test for detection in the Search Addresses field and click Search.
After a short period of time (the less addresses to check, the quicker the search will be),
the search results containing a list of communication setting combinations display in the
Search Results listing.
Double-click any of the communication setting combinations to automatically connect
using those settings. A connection should now be established If no compressors are
detected, No compressors found! will display in the listing.
6. Type in your Access Code and click Submit.
2.2.3
TCP/IP Connection
1. From the Connection Settings group, select TCP/IP as your connection type:
2. Enter the slave address in the Slave Address field.
3. Click Connect.
A connection should now be established.
4. Type in your Access Code and click Submit.
Danfoss Turbocor Compressors Inc.
M-SM-001-EN Rev C
31
Service Monitoring Tools User Manual
2.3
Closing an Established Connection
To close an established connection:
1. Click the Disconnect button.
2. To also disconnect from a remote host (such as the Compressor Data Recording &
Playback tool's playback host or the Remote Serial Multiplexer), click the Disconnect from
Remote Host button. The tool will close any connections established and data polling will
stop.
2.4
Detecting Compressor Settings
To detect compressor settings:
• Enter a slave address search range or list of values to test for detection in the Search
Results listing and click the Search.
After a short period of time (the less addresses to check, the quicker the search will be), the
search results display in the Search Addresses field. If no compressors are detected, No
compressors found! will display in the listing; otherwise, communication setting
combinations will display.
Danfoss Turbocor Compressors Inc.
M-SM-001-EN Rev C
32
Service Monitoring Tools User Manual
2.5
Changing Compressor Access Levels
NOTE
On connection, the SMT requires a valid access code in order to allow access to the various tools
available at the given access level.
A user must not change the access level of the BMCC to a lower than 2 if the compressor is being
controlled by Modbus. If the access level is lower than access level 2, the compressor can not
accept a demand write.
For example, if the lowest level that a compressor can accept a demand write is at 2-Low, then on
submission of a “0” in the Access Code field, the SMT will revert to a read-only state and the
compressor will not accept writes to demand from the Modbus controller. In this case, the
compressor access level should be left at 2-Low or higher.
To change the compressor access level:
1. Enter the desired access code in the Access Code field and click Submit.
The tool will send the access code to the compressor and indicate the access level on the connected compressor.
If the access code is incorrect: the compressor will bump its access level to Basic. After five
failed access code change attempts, the compressor will no longer accept access codes and
will require a power cycle before elevating access level will be possible.
NOTE
Since the access level on the compressor will
remain beyond use of this software, be sure to
either downgrade the access level or reset the
compressor after completing service.
2.6
Synchronizing the Compressor Real-Time Clock with a PC
Clock
To synchronize a compressor real-time clock (RTC) with a PC clock:
• Click the Sync Compressor/Computer Time button
The tool will attempt to update the compressor's RTC to match the local computer's date and
time to within ±500 ms.
Danfoss Turbocor Compressors Inc.
M-SM-001-EN Rev C
33
Service Monitoring Tools User Manual
2.7
Viewing a List of Recent Compressor Connection Settings
To view a list of recent compressor connection settings:
• Click the Recent Compressors button
A list of recent compressor communication settings display in the Search Results listing
If there is no connection history, No compressors found! displays in the listing; otherwise,
communication setting combinations are displayed. Double-clicking any of the settings
combination entries will automatically attempt to connect using the those settings.
2.8
Compressor Connection Manager Layout
The Compressor Connection Manager contains the following frames:
• Connection Settings:
— Direct
— TCP/IP
— Shared
• Remote Host
• Port
• Connect/Disconnect from Remote Host button
• Slave Address
• Serial Port
• Baud Rate
• Connect/Disconnect button
• Recent Compressors button
• Search button
• Search Addresses box
• Access Code
• Submit button
• Compressor Info frame
Danfoss Turbocor Compressors Inc.
M-SM-001-EN Rev C
34
Service Monitoring Tools User Manual
2.9
Connection Status Indications
• Disconnected: no connection exists with a compressor or remote compressor host
• Ready to Connect: a connection with a remote host (if applicable) has been established, but
no compressor connection has yet been established
• Compressor is starting up: The currently connected compressor is in startup mode
• Connected: There has been established a connection with a remote host (if applicable) and a
connection with a compressor has been established and verified
• No compressor found: Any serial ports or connections have been established, but a valid
compressor was not able to be detected
• Error opening port: There was an error opening the specified serial port (either the port is
already in use, the port name doesn't exist, or there was some other error attempting to open
the serial port)
• Server not found: Could not connect to remote host
• There was a time out during communication' (Error Time out): There was a timeout during
communication
• Invalid response: The response received was invalid
• Received an error response: The host responded with an error
• Error: CRC mismatch: The received message has a CRC mismatch
Danfoss Turbocor Compressors Inc.
M-SM-001-EN Rev C
35
Service Monitoring Tools User Manual
2.10
RAM Only and RAM & EEPROM Check boxes
By default, changes made in the SMT are set to RAM & EEPROM.
If the RAM & EEPROM check box is clicked, all parameter changes are saved to persistent
memory.
!
• • • CAUTION! • • •
Saving to RAM & EEPROM will commit all the
current values to permanent memory and all previous
values will be lost.
Figure 17 Parameter Saving Frame
The Parameter Saving frame is located in the lower right corner of the Compressor Connection
Tool. See Figure 16.
NOTE
The Parameter Saving selection on the Compressor
Connection Manager tool applies to the entire SMT.
Danfoss Turbocor Compressors Inc.
M-SM-001-EN Rev C
36
Service Monitoring Tools User Manual
3
ModComm Tool
The ModComm Tool assists users in troubleshooting a BMCC or monitoring extra registers by
providing access to Modbus registers on a raw level. This tool can be used to change the current
register watch range, toggle between watching the specified watch range and all currently polled
register watches, make a single write request, and change the current data interpretation view.
3.1
Accessing the ModComm Tool
• Once connected, select the ModComm tool icon from the SMT Suite Launcher Strip.
Figure 18 ModComm Tool Icon
The ModComm window displays.
Figure 19 ModComm Window
Danfoss Turbocor Compressors Inc.
M-SM-001-EN Rev C
37
Service Monitoring Tools User Manual
3.2
Register-Parameter Tooltips
If you hover your mouse over any given register or parameter, a tooltip will display listing all
parameter references for that register (if any exist).
Figure 20 ModBus Tool Showing Register Tooltip
Danfoss Turbocor Compressors Inc.
M-SM-001-EN Rev C
38
Service Monitoring Tools User Manual
3.3
Changing the Current Register Watch Range
To change the current register watch range:
1. Right-click anywhere on the main form and the context menu will appear.
Figure 21 ModComm Window Displaying Menu
2. Select the Update Range. The Update Watch Range window displays:
Figure 22 Update Watch Range
3. Enter a valid start address and watch length.
4. Click Update to dismiss the window and update the current watch range.
Danfoss Turbocor Compressors Inc.
M-SM-001-EN Rev C
39
Service Monitoring Tools User Manual
3.4
Toggling Between the Specified Watch Range and All Currently
Polled Register Watches
To toggle between watching the specified watch range and all currently polled register watches:
1. Right-click anywhere on the main form and the context menu displays.
2. Check or un check Show Global Watches and the displayed Modbus registers will change.
NOTE
The configured register watch range is displayed
in black text while the external watches are
displayed in grey text.
Figure 23 ModComm Tool Window Showing External Watches
Danfoss Turbocor Compressors Inc.
M-SM-001-EN Rev C
40
Service Monitoring Tools User Manual
3.5
Making a Single Write Request
To make a single write request:
1. Double-click on a register value, or right-click on a Modbus register in the main form and
select Write Single Value from the context menu.
Figure 24 ModComm Tool Window Showing Menu
The Write Single Register window displays.
Figure 25 Write Single Register
2. Enter a valid register address (if necessary) and the appropriate value.
3.
Click Send to perform the write. A window displays indicating the result of the operation.
Figure 26 Write Single Register Result Window
Danfoss Turbocor Compressors Inc.
M-SM-001-EN Rev C
41
Service Monitoring Tools User Manual
3.6
Changing the Current Data Interpretation View
To change the current data interpretation view:
1. Right-click anywhere on the main form and the context menu will display.
Figure 27 ModComm Tool Window Showing Menu
2. Highlight Display Format.
Figure 28 ModComm Tool Window Showing Display Format Options
3. Select the desired value display format. The values displayed in the main form will be
formatted as specified.
Danfoss Turbocor Compressors Inc.
M-SM-001-EN Rev C
42
Service Monitoring Tools User Manual
4
Active Alarm/Fault Viewer
The Active Alarm/Fault Viewer allows you to instantaneously monitor the alarm and fault status
of a connected compressor device and configure the alarm and fault limits. This tool can be used
to view compressor alarms and faults, view motor alarms and faults, view bearing alarms and
faults, and view/configure alarm and fault limits and lockout settings.
NOTE
This tool may not function properly if the
connected compressor's access level is below
Low.
NOTE
For alarm/fault indicators, alarm and fault status
are indicated by the colored LED graphic to the
left of the alarm/fault name (alarms are yellow,
faults are red, and alarm + fault are orange)
4.1
Accessing the Active Alarm/Fault Viewer Tool
• Once connected, select the Active Alarm/Fault Viewer tool icon from the SMT Suite
Launcher Strip.
Figure 29 Active Alarm/Fault Viewer Tool Icon
The Active Alarm/Fault Viewer window displays.
Danfoss Turbocor Compressors Inc.
M-SM-001-EN Rev C
43
Service Monitoring Tools User Manual
Figure 30 Active Alarm/Fault Viewer Window
Danfoss Turbocor Compressors Inc.
M-SM-001-EN Rev C
44
Service Monitoring Tools User Manual
4.2
Viewing and Configuring Alarm/Fault Limits and Lockout
Settings
To view/configure alarm and fault limits and lockout settings:
• Click the Configure Alarms/Faults menu option. The Alarm and Fault Settings window
displays.
Figure 31 Alarm and Fault Settings
Danfoss Turbocor Compressors Inc.
M-SM-001-EN Rev C
45
Service Monitoring Tools User Manual
5
Compressor Monitor
The Compressor Monitor tool allows you to monitor the most commonly desired parameters of
the BMCC related to motor, bearing, and compressor operation. This tool can be used to view
compressor, bearing, and motor operational readouts, change the demand, change the IGV
opening, change the desired motor speed, and levitate/de-levitate the shaft.
5.1
Accessing the Compressor Monitor
• Once connected, select the Compressor Monitor Tool icon from the SMT Suite Launcher
Strip.
Figure 32 Compressor Monitor Tool Icon
The Compressor Monitor window displays.
Figure 33 Compressor Monitor Tool Window
Danfoss Turbocor Compressors Inc.
M-SM-001-EN Rev C
46
Service Monitoring Tools User Manual
5.2
View Options
The following view options are available on the Compressor Monitor Tool window:
• To view bearing-related readouts, expand the Bearing section
Included in this section is a graph which displays the front radial bearing (in blue) and rear
radial bearing (in yellow) offset position.
• For compressor-related readouts, expand the Compressor section
NOTE
The Pressure Ratio value displayed CAN NOT
be guaranteed to accurately reflect the pressure
ratio as calculated by the BMC for BMCC
software versions earlier than 1210 - in such a
case, it is at best an approximation of what the
compressor is assumed to be calculating.
• For motor-related readouts, expand the Motor section
Included in this section is a graph which displays the motor current (Id) (in blue) and motor
current (Iq) (in yellow) offset position.
5.3
Changing the Demand
To change the demand:
1. Expand the Compressor section.
2. In the Demand field, either use the up/down arrows or manually enter a value and press
Enter to submit a new value.
5.4
Changing the IGV Opening
To change the IGV opening:
1. Make sure you are in Manual mode.
2. Expand the Compressor section.
3. In the IGV Open Percentage field, either use the up/down arrows or manually enter a
value and press Enter to submit a new value.
Danfoss Turbocor Compressors Inc.
M-SM-001-EN Rev C
47
Service Monitoring Tools User Manual
5.5
Changing the Desired Motor Speed
To change the desired motor speed:
1. Make sure you are in Manual mode.
2. Expand the Motor section.
3. In the Desired Speed field, either use the up/down arrows or manually enter a value and
press Enter to submit a new value
5.6
Levitating or De-levitating the Shaft
NOTE
This procedure will only work if you are in “Levitate
Only” mode.
To levitate or de-levitate the shaft:
1. Expand the Bearing section.
2. Click the Shaft Levitation Status graphic located just above the Bearing graph.
Figure 34 Shaft Levitation Status Graphic
The graphic will appear as a floating yellow ball when the shaft is levitating and a blue ball
on the ground if the shaft is de-levitated.
Danfoss Turbocor Compressors Inc.
M-SM-001-EN Rev C
48
Service Monitoring Tools User Manual
6
Logged Event and Fault Viewer
The Logged Event and Fault Viewer allows you to retrieve logged fault and event data regarding
the operation of a connected compressor for the purpose of troubleshooting and diagnostics.
This tool can be used to retrieve logged event/fault data, watch for new logged event/fault data,
view details pertaining to logged events/faults, export logged event/fault data to file, import
logged event/fault data from file, view the fault occurrence counters, view runtime history data,
and view application help information.
NOTE
This tool may not function properly if the
connected compressor's access level is below
Low
6.1
Accessing the Logged Event and Fault Viewer
NOTE
Launch this tool after connecting to a
compressor.
Any instance of this tool launched before
connecting to a compressor will remain
“offline”.
Launch another instance of this tool after
connecting if you later want to view logs of a
connected device.
1. Click the Logged Event and Fault Viewer icon.
Figure 35 Logged Event and Fault Viewer Icon
Danfoss Turbocor Compressors Inc.
M-SM-001-EN Rev C
49
Service Monitoring Tools User Manual
The Logged Event and Fault Viewer window displays:
Figure 36 Logged Event and Fault Viewer Window
6.2
Applying Filters for Data Retrieval and Watching
To apply filters for data retrieval and watching:
• To retrieve logged event data from the connected compressor, check the Retrieve check box
to the side of the Events count indicator.
• To retrieve logged fault data from the connected compressor, check the Retrieve check box to
the side of the Faults count indicator.
• To apply a cut-off date/time for items retrieved, select the Don’t retrieve older than check
box, and then choose a date from the calendar drop-down. Items older than the selected date
will not be retrieved.
Danfoss Turbocor Compressors Inc.
M-SM-001-EN Rev C
50
Service Monitoring Tools User Manual
6.3
Retrieving Logged Event and Fault Data
NOTE
Closing the Logged Event & Fault Viewer will
terminate the retrieve functions.
To retrieve logged even and fault data:
1. Click the Data->Start Retrieving menu item.
The tool will automatically start retrieving events and faults as specified until either there
are no more entries to retrieve or there are no more entries within the specified date/time
range filter. Entries will appear in the event/fault listing panel.
2. To stop retrieving logged event and fault data before retrieval is completed, click
Data->Stop Retrieving Data.
6.4
Watching for New Logged Event and Fault Data
NOTE
Closing the Logged Event & Fault Viewer will
terminate the watch functions.
To watch for new logged event/fault data:
1. Click Data->Watch for New… menu item.
The tool will continuously check for changes in the event and fault logs as specified. Entries
will display in the Event/Fault Listing pane.
2.
6.5
To stop watching for new logged event and fault data, click the Data'->'Stop Watching
menu item.
Viewing Logged Events and Faults Details
To view details pertaining to logged events and faults:
• Click on any entry in the Event/Fault Listing panel.
The tool will display details and analysis information describing the selected event or fault
Danfoss Turbocor Compressors Inc.
M-SM-001-EN Rev C
51
Service Monitoring Tools User Manual
6.6
Exporting Logged Event and Fault Data to a File
To export logged event/fault data to file:
1. Do one of the following:
a. To export only selected entries, select desired entries in the event/fault listing panel, and
then select File->Export Selected.
b. To export all entries, select File->Export all.
2. In the Save as window, select an output file name and data type. For a reusable format
which may be reopened at a later time, select TLF files from the file type drop down. For
CSV output, select CSV files from the file type drop down.
6.7
Importing Logged Event and Fault Data
NOTE
You do not have to be connected to a compressor
to import a saved TLF file for viewing.
To import logged event/fault data from a file:
• Click File>Import Data.
• In the Open file window, select a previously exported TLF logged event/fault data file.
If the file is valid, event and fault entries will display in the Event/Fault Listing panel.
6.8
Viewing the Fault Occurrence Counters
To view the fault occurrence counters:
• Click the History->View Fault Occurrence History menu option.
The tool will display a form listing the fault occurrence counters.
6.9
Viewing Runtime History Data
To view rutime history data:
• Click the History->View Runtime History menu option.
The tool will display a form containing various runtime history data.
Danfoss Turbocor Compressors Inc.
M-SM-001-EN Rev C
52
Service Monitoring Tools User Manual
6.10
Viewing Application Help Information
To view application help information:
• Click the Help menu option, and then select any help area item from the list which appears.
The tool will display relevant help information in the details view
Danfoss Turbocor Compressors Inc.
M-SM-001-EN Rev C
53
Service Monitoring Tools User Manual
7
Compressor Data Recording and Playback Tool
The Compressor Data Recording & Playback tool is used to start and stop recording of any
variables on the BMCC, as well as to launch a server partially simulating an actual compressor
using previously recorded data. The intended usage of this tool is not only for training, but for
testing, evaluation, and compressor troubleshooting purposes. This tool can be used to either
record data communicated between the desktop SMT system and a compressor or to host
('playback') recorded data for use with the SMT system.
When recording, the tool can be used to create a new recording, start recording, end recording,
cancel recording, and pause/resume recording. A recording can be created and started either
before or after establishing a connection with a compressor.
When playing back, the tool can be used to open a recording, close an open recording, manually
launch a playback server, stop a playback server, manipulate the playback rate, seek playback
time, and specify the minimum access level.
7.1
Launching the Compressor Data Recording and Playback Tool
To launch the Compressor Data Recording and Playback Tool:
• Click the Compressor Data Recording and Playback Tool icon.
Figure 37 Compressor Data Recording and Playback Tool Icon
Danfoss Turbocor Compressors Inc.
M-SM-001-EN Rev C
54
Service Monitoring Tools User Manual
7.2
Recording
7.2.1
Creating a Recording
To create a new recording:
1. Click the New Recording icon.
New Recording icon
Figure 38 Compressor Data Recording and Playback
2. A Save as window displays. Select an output filename and click OK.
Figure 39 Choose Destination File Name
Danfoss Turbocor Compressors Inc.
M-SM-001-EN Rev C
55
Service Monitoring Tools User Manual
3. In the Site Information section, enter the Customer Name, Customer Address, Email
Address, and any Notes regarding the recording (optional).
Site
Information
Figure 40 Site Information
4. To change the chiller and compressor identification, in the Chillers & Compressors' tree,
select the compressor node and change the chiller number, compressor number, and
compressor serial number, and then click Update.
5. To start recording, click the Start Recording (record circle) menu item.
Figure 41 Start Recording Icon
The tool will automatically make an initial read of all standard compressor parameters and
begin polling all 'volatile' compressor parameters until recording is finished.
NOTE
Recording can be started before or after
establishing a connection with a compressor
Danfoss Turbocor Compressors Inc.
M-SM-001-EN Rev C
56
Service Monitoring Tools User Manual
The tool will automatically save and close the recording when an active compressor connection is closed.
NOTE
The current time indicator may appear to only
advance in short bursts - this is normal and is not
indicative of performance degradation
7.2.2
Ending a Recording
To end a recording:
1. Click the Stop Recording menu item
Figure 42 Stop Icon
The tool will prompt you to verify ending of recording.
2. Click Yes to stop recording.
The tool will stop recording, finish writing any buffered data reads, compress, and close the
recording. Long recordings may take a moment to save - file saving progress is displayed at
the bottom of the Playback Control section.
NOTE
If no data has been recorded, a file will not be
created
NOTE
If compressor connection is lost during
recording, the recording file will automatically
save and close
Danfoss Turbocor Compressors Inc.
M-SM-001-EN Rev C
57
Service Monitoring Tools User Manual
7.2.3
Cancelling a Recording
To cancel a recording:
1. Click the Cancel Recording (red X) menu item
Figure 43 Cancel Recording Icon
You are prompted to verify canceling of the recording.
2. Click Yes to cancel.
The tool will cancel recording, wait for any pending writes to complete, close the file, and
delete the temporary recording data
7.2.4
Pausing a Recording
To pause a recording:
• If recording is active, click the Pause Recording (red pause marks) menu item - the tool will
suspend recording data until recording is stopped or resumed.
Figure 44 Pause Recording Icon
7.2.5
Resuming a Recording
To resume a recording:
• If recording is paused, click the Start Recording menu item - the tool will resume recording
data.
Figure 45 Start Recording Icon
Danfoss Turbocor Compressors Inc.
M-SM-001-EN Rev C
58
Service Monitoring Tools User Manual
7.3
Playback
7.3.1
Playing Back a Recording
1. To open a recording, click the Open Recording (folder) menu item.
Figure 46 Open Recording Icon
An Open file window displays.
Figure 47 Choose a Recording to Open Window
2. Select a recording file.
If the file is properly loaded, the recording's site information displays in the 'Site Information' section - this data may not be altered.
3. The playback server will automatically attempt to launch - if there are any problems
starting the playback host, a popup dialog displays.
NOTE
A connection with the playback server may be
made in the same manner as with a remote
compressor - Match the client host name and
TCP port settings with those displayed in this
application.
Danfoss Turbocor Compressors Inc.
M-SM-001-EN Rev C
59
Service Monitoring Tools User Manual
NOTE
Typically, the default settings - host address =
any and port = 503 - are acceptable; however,
ensure that this port is unused. For example,
another application may be using port 503. The
'launch' button will not display if the host name
text box is empty.
Host Address
Port
Playback Rate
Allow Looping
Figure 48 Compressor Data Recording and Playback Window
When the first connection is established, the playback rate will automatically be changed to
1 (play). Likewise, when the last client disconnects, playback will automatically pause.
Long recordings may take a moment to completely load - file load progress is displayed at
the bottom of of the Playback Control section. If data is currently not ready for a desired
recording time, the playback time will reset - this is normal and, in this case, please wait until
the appropriate data range has been loaded.
Danfoss Turbocor Compressors Inc.
M-SM-001-EN Rev C
60
Service Monitoring Tools User Manual
7.3.2
Enabling or Disabling Automatic Playback Looping
The tool contains an Allow Looping feature which will enable the playback server to loop the
playback timer when a boundary time is reached; otherwise the playback will pause.
• To enable looping, click the Allow Looping checkbox; to disable looping un-check the
checkbox.
7.3.3
Closing an Open Recording
To close an open recording:
1. Click the Close Recording menu item.
Figure 49 Close Recording Icon
The tool will prompt to confirm the closure of the recording file.
2. Select Yes to close the file and terminate any active playback sessions.
Danfoss Turbocor Compressors Inc.
M-SM-001-EN Rev C
61
Service Monitoring Tools User Manual
7.3.4
Manually Launching a Playback Server
To manually launch a playback server:
1. in the Playback Control section, enter the desired playback server host name/address
and TCP port.
NOTE
In most cases, the default settings, host name=
“any” and port=“503” are acceptable entries;
however ensure that port 503 is unused. It may
be used by another application. The launch
button will not appear if the host text box is
empty.
Host Address
Port
Figure 50 Playback Window
2. Click the Launch Playback Server menu item.
Figure 51 Launch Playback Server
Danfoss Turbocor Compressors Inc.
M-SM-001-EN Rev C
62
Service Monitoring Tools User Manual
NOTE
If the server fails to start, the tool will display a
notification
The data will be hosted as if connected to an actual compressor.
3. Initiate a remote connection using the same configuration used to launch the playback
server and select the port which reflects the serial number of the source compressor.
NOTE
The playback server will launch in the paused
mode - click the play button (play triangle) to
begin playback at a normal rate.
7.3.5
Stopping the Playback Server
To stop the playback server:
1. Click the Stop Playback Server menu item.
Figure 52 Stop Playback Server
You are prompted for confirmation of termination of the playback server:
2. Select Yes to terminate the playback server.
Danfoss Turbocor Compressors Inc.
M-SM-001-EN Rev C
63
Service Monitoring Tools User Manual
7.3.6
Changing the Playback Rate
To change the playback rate:
In the Playback Control section, the playback rate may be manually specified by either using the
up/down arrows or by entering a number in the Playback Rate field.
• To play at the normal rate (1.0), click the Play menu item .
Figure 53 Play Menu Item
• To pause the playback rate (rate = 0.0), click the Pause menu item.
Figure 54 Pause Menu Item
• If the absolute value of the playback rate >= 1.0, click the Fast Forward menu item to double
playback rate up to 8x.
Figure 55 Fast Forward Menu Item
• If the absolute value of the playback rate >= 1.0, click the Reverse menu item to double
playback rate up to -8x.
Figure 56 Reverse Menu Item
• If the absolute value of the playback rate < 1.0, click the Slow Forward menu item to
increase playback rate up to 1x in 1/8 increments.
Figure 57 Slow Forward Menu Item
• If the absolute value of the playback rate < 1.0, click the Slow Reverse menu item to
decrease playback rate down to -1x, in 1/8 increments.
Figure 58 Slow Reverse Menu Item
Danfoss Turbocor Compressors Inc.
M-SM-001-EN Rev C
64
Service Monitoring Tools User Manual
7.3.7
Seeking Playback Time
To seek playback time:
• Click the Rewind menu item to seek back to the beginning of the playback data.
Figure 59 Rewind Menu Item
• To set the playback time, in the Playback Control section, click and drag the track bar along
the time line.
7.3.8
Specifying the Minimum Access level
In case the recorded access level is too low to use certain tools for viewing, you can specify the
minimum access level:
To specify the minimum access level:
• From the Minimum Access Level drop-down, select the desired minimum access level.This
forces the playback server to disallow the access level to drop below the level specified.
NOTE
You have to enter your Access level on the
Compressor Connection Manager window to see the
appropriate level. See "Changing Compressor
Access Levels" on page 33.
Danfoss Turbocor Compressors Inc.
M-SM-001-EN Rev C
65
Service Monitoring Tools User Manual
8
Bearing Calibration Tool
The Bearing Calibration Tool allows you to execute a bearing calibration procedure and analyze
the outcome. The tool can be used to calibrate the bearings, validate a calibration, view the
current persistent and latest calibration values and create a calibration report.
NOTE
This tool may not function properly if the
connected compressor's access level is below 3Technician. This tool requires exclusive
application focus - all other tools will be closed
or hidden when starting this tool.
8.1
Accessing the Bearing Calibration Tool
• Once connected, select the Bearing Calibration tool icon from the SMT Suite Launcher
Strip.
Figure 60 Bearing Calibration Tool Icon
Danfoss Turbocor Compressors Inc.
M-SM-001-EN Rev C
66
Service Monitoring Tools User Manual
The Bearing Calibration window displays:
Figure 61 Bearing Calibration Window
NOTE
If the Save to EEPROM setting is set to RAM Only on the Compressor Connection window, the Save to
EEPROM button will be unavailable for use on the Bearing Calibration window.
Danfoss Turbocor Compressors Inc.
M-SM-001-EN Rev C
67
Service Monitoring Tools User Manual
8.2
Performing a Calibration
To perform a calibration:
1. Ensure that the compressor's interlock is open and the Modbus connection to the
compressor is disconnected.
2. Click the Start Calibration button.
The tool will invoke the calibration sequence on the compressor and display the bearing offset data in the three graphs visible at the top of the main form
The left-most graph displays data pertinent to the front radial bearing; the middle graph displays data pertinent to the rear radial bearing; and the right-most graph displays data pertinent to the axial bearing The radial graphs display the offsets of the shafts edges. The axial
graph displays the axial displacement by time.
After the compressor successfully completes a bearing calibration sequence, the option to
Save to RAM or Save to EEPROM become available.
Figure 62 Bearing Calibration Tool Showing Graphs
Danfoss Turbocor Compressors Inc.
M-SM-001-EN Rev C
68
Service Monitoring Tools User Manual
8.3
Performing a Validation
To perform a validation:
• Click the Validate button.
The tool will validate the calibration by levitating the shaft, sampling orbit offset data, and
performing validation using these data as well as the calibration values.
NOTE
If the tool indicates that it is unable to perform a
validation, check for any faults present and take
appropriate actions before attempting validation
again.
8.4
Saving the Latest Bearing Calibration for Temporary Use
This calibration will be lost the next time the compressor power is cycled. The compressor
will revert back to previous calibration information saved in EEPROM.
8.5
Saving the Latest Bearing Calibration for Persistent Use
• To save the latest bearing calibration for persistent use, click the Save to EEPROM button.
The tool will notify the compressor to use the latest calibration for persistent operation.
This calibration will overwrite previous calibration data.
NOTE
If the last calibration values differ from the
stored values outside of the tolerances set in the
SMT, a warning message will appear when
saving to the EEPROM.
This measures changes from the stored
calibration and may be an indicator of shaft
alignment changes over time. Refer to the
Service Manual for further information.
Danfoss Turbocor Compressors Inc.
M-SM-001-EN Rev C
69
Service Monitoring Tools User Manual
8.6
Viewing Bearing Calibration or Operation Settings
To view bearing calibration or operation settings:
1. Click the Bearing Configuration button.
The tool will display a form consisting of three sections: Calibration Limits, Operational
Limits, and Bias Settings.
2. Close the form when done.
8.7
Creating a Calibration Report
To create a calibration report:
1. Click the Create Report button.
A Save As window displays.
2. Select a path to use for saving the generated report.
The tool will generate a report at the user-specified path.
Danfoss Turbocor Compressors Inc.
M-SM-001-EN Rev C
70
Service Monitoring Tools User Manual
9
Chiller and Analog Configuration Tool
The Chiller and Analog Configuration tool allows you to view and configure the configuration
and operational parameters of the BMCC's chiller controller and analog output controller. This
can be used to view or modify the chiller control and analog output control configuration
settings.
The tool can only modify parameters which the BMCC will allow for each given access level. If
the current access level is below any individual write access level, the corresponding field will
appear disabled.
9.1
Accessing the Chiller and Analog Configuration Tool
• Once connected, select the Chiller and Analog Configuration Tool icon from the SMT Suite
Launcher Strip.
Figure 63 Chiller and Analog Configuration Tool Icon
The Chiller and Analog Configuration window displays:
Figure 64 Chiller and Analog Configuration Window
Danfoss Turbocor Compressors Inc.
M-SM-001-EN Rev C
71
Service Monitoring Tools User Manual
9.2
Viewing or Modifying Chiller Controller Settings
To view or modify the chiller controller settings:
1. Expand the Chiller Controller section
This section includes:
• Chiller Control Mode - The functional control mode of the compressor and how it is
expected to interact with external chiller system components.
• Chiller Set Point - Represents the operational target for the chiller control loop.
• Chiller Proportional Gain - Represents the proportional gain for the chiller control loop.
The higher the proportional gain, the more severe the reaction to a given instantaneous
deviation from the setpoint will be.
• Chiller Integral Gain - Represents the integral gain for the chiller control loop. The
higher the integral gain, the more severe the reaction to an accumulated deviation from
the setpoint over time will be.
2. Modify as necessary.
Danfoss Turbocor Compressors Inc.
M-SM-001-EN Rev C
72
Service Monitoring Tools User Manual
9.3
Viewing or Modifying Analog Output Controller Settings
To view or modify the analog output settings:
1. Expand the Analog Output Controller section.
This section includes:
• Analog Control Mode - Represents the methodology used to control the Analog Output.
• Analog Control Action - Indicates the control action of the analog output.
• Analog Setpoint - The target value by which the analog output controller operates.
• Analog Start Output - This value represents the percentage of maximum voltage sent to
the 'ANALOG' (JP1) terminal on the compressor interface module. This position will be
maintained until the Start Delay Timer has expired.
• Analog Start Delay Time - Represents the time in seconds that the analog Start Output is
held. The Start Delay Timer starts to count down when drive is enabled.
• Analog Output Offset - Represents the minimum amount of the maximum output voltage
to output at all times.
• Analog Output Process Value - The process value used by the BMCC for analog output
control. This readout is only available for BMCC software versions 1210 or later.
• Analog Output - The value indicated by the analog output via the analog output
controller.
• Analog Proportional Gain - Represents the analog output proportional gain.
• Analog Integral Gain - Represents the analog output integral gain.
• Analog Derivative Gain.- Represents the analog output derivative gain.
2. Modify as necessary.
Danfoss Turbocor Compressors Inc.
M-SM-001-EN Rev C
73
Service Monitoring Tools User Manual
10
EXV Configuration Tool
The EXV Configuration Tool allows you to view and configure the electronic expansion valve
configuration parameters and settings.
The tool can only modify parameters which the BMCC will allow for each given access level. If
the current access level is below any individual write access level, the corresponding field will
appear disabled.
10.1
Accessing the EXV Configuration Tool
• Once connected, select the EXV Configuration Tool icon from the SMT Suite Launcher
Strip.
Figure 65 EXV Configuration Tool Icon
The EXV Configuration Tool displays.
Figure 66 EXV Configuration Tool
Danfoss Turbocor Compressors Inc.
M-SM-001-EN Rev C
74
Service Monitoring Tools User Manual
10.2
Viewing and Modifying EXV Controller Settings
To view or modify external expansion valve settings:
• Expand either the 'EXV #1 Controller' or 'EXV #2 Controller' sections.
These sections include:
• EXV #1 Control Mode - The methodology used to control the EXV #1 output.
• EXV #1 Control Action - Indicates the control action of the EXV output
• EXV #1 Control Setpoint - Suction Superheat or Liquid Level percentage in accordance
with the selected control mode. Not applicable to Load Balance control mode because
the compressor will calculate the best position.
• EXV # 1 Stepper Start Delay Time - Represents the time in seconds that the valve's Start
Position is held. The Stepper Start Delay Timer starts to count down when drive is
enabled.
• EXV #1 Control Loop Speed - Represents the reaction time of the control loop to a
process error and replaces the PID (proportional, integral, and derivative) controller
gains.
• EXV #1 Derivative Gain - The gain of the EXV controller's derivative component.
• EXV #1 Process Value - The EXV's process value by which the EXV position is
controlled.
• EXV #1 Position - The current valve position.
• EXV #1 Min Steps - The minimum number of steps EXV #1 can open.
• EXV #1 Start Offset - The number of steps required to close EXV #1 to ensure
initialization to the closed position.
•
EXV #1 Max Steps - The number of steps between the minimum and maximum
positions for EXV #1.
• EXV #1 Start Position - The percentage that the valve is open in start position
and
• EXV #2 Control Mode - The methodology used to control the EXV #2 output.
• EXV #2 Control Action - Indicates the control action of the EXV output
Danfoss Turbocor Compressors Inc.
M-SM-001-EN Rev C
75
Service Monitoring Tools User Manual
• EXV #2 Control Setpoint - Suction Superheat or Liquid Level percentage in accordance
with the selected control mode. Not applicable to Load Balance control mode because
the compressor will calculate the best position.
• EXV # 2 Stepper Start Delay Time - Represents the time in seconds that the valve's Start
Position is in held. The Stepper Start Delay Timer starts to count down when drive is
enabled.
• EXV #2 Control Loop Speed - Represents the reaction time of the control loop to a
process error and replaces the PID (proportional, integral, and derivative) controller
gains.
• EXV #2 Derivative Gain - The gain of the EXV controller's derivative component.
• EXV #2 Process Value - The EXV's process value by which the EXV position is
controlled.
• EXV #2 Position - The current valve position.
• EXV #2 Min Steps - The minimum number of steps EXV #2 can open.
• EXV #2 Start Offset - The number of steps required to close EXV #2 to ensure
initialization to the closed position.
• EXV #2 Max Steps. - The number of steps between the minimum and maximum
positions for EXV #2.
• EXV #2 Start Position - The percentage that the valve is open in start position.
Danfoss Turbocor Compressors Inc.
M-SM-001-EN Rev C
76
Service Monitoring Tools User Manual
11
BMCC System Configuration Tool
The BMCC System Configuration Tool allows you to view and change many of the system
settings of a BMCC which are not included within the scope of compressor, chiller, motor,
bearing, and etc. operation. This tool can be used to view or modify compressor identification
settings, communication settings, or power configuration.
NOTE
The BMCC System Configuration Tool can only
modify parameters which the BMCC will allow
for each given access level. If the current access
level is below any individual write access level,
the corresponding field will appear disabled.
11.1
Accessing the BMCC System Configuration Tool
• Once connected, select the BMCC System Configuration icon from the SMT Suite
Launcher Strip.
Figure 67 BMCC System Configuration Tool Icon
The BMCC System Configuration window displays:
Figure 68 BMCC System Configuration Tool Window
Danfoss Turbocor Compressors Inc.
M-SM-001-EN Rev C
77
Service Monitoring Tools User Manual
11.2
Viewing Compressor Identification Settings
To view compressor identification settings:
1. Expand the Compressor Identification section.
This section includes: BMCC Serial #, Housing Serial # (if applicable), Compressor Part #,
Configuration Version #, Compressor Model, Refrigerant Type, and Unit System.
11.3
Viewing or Modifying Communication Settings
To view communication settings:
1. Expand the Communication section.
This section includes: Modbus Slave Address, RS-485 Baud Rate, Parity, and Stop bits and
RS-232 Baud Rate, Parity, Stop bits, and Handshake (if applicable).
2. Modify as necessary.
11.4
Viewing Power Settings
To view power settings:
1. Expand the Power Setting section.
This section includes: SCR Mains Input Frequency, Max. Motor Current, Soft Start OverVoltage Limit, Nominal DC Bus Current, Generator mode Enable Threshold, 24VDC High
Limit, 24VDC Low Limit, Max. DC Bus Voltage, Nominal DC Bus Voltage, Soft Start
Charge Voltage, and 6-Pole Motor Configuration.
Danfoss Turbocor Compressors Inc.
M-SM-001-EN Rev C
78
Service Monitoring Tools User Manual
12
Compressor Configuration Tool
The Compressor Configuration Tool allows you to view and configure the compressor operation,
IGV, startup, surge/choke, and other operational configuration parameters and settings.
NOTE
The Compressor Configuration Tool can only
modify parameters which the BMCC will allow
for each given access level. If the current access
level is below any individual write access level,
the corresponding field will appear disabled.
12.1
Accessing the Compressor Configuration Tool
• Once connected, select the Compressor Configuration Tool icon from the SMT Suite
Launcher Strip.
Figure 69 Compressor Configuration Tool Icon
The Compressor Configuration window displays:
Danfoss Turbocor Compressors Inc.
M-SM-001-EN Rev C
79
Service Monitoring Tools User Manual
Figure 70 Compressor Configuration Window
12.2
Viewing or Modifying Compressor Operation Settings
To view or modify the compressor operation settings:
1. Expand the Compressor Configuration section.
This section includes: Control Mode, Envelope Coefficients A & B, Suction Pressure
Alarm/Fault Factor & Delay, Inverter & Cavity Cooling Max Temperatures, Hot Gas Bypass
Gain, Cooling Mode, Power Control Loop Gain, Minimum Pressure Ratio, and Calculation
Polarity.
2. Modify as necessary.
Danfoss Turbocor Compressors Inc.
M-SM-001-EN Rev C
80
Service Monitoring Tools User Manual
12.3
Viewing or Modifying Compressor Startup Settings
To view or modify the compressor startup settings:
1. Expand the Startup Configuration section.
This section includes: Motor Pre-Cooling Mode and Time, Start Speed, Start Speed Offset,
Motor Start Acceleration, Motor Start IGV Percentage, Max Drive Startup Temperature,
Min. Start Speed Percentage, Part Vane Speed Compensation, Min. Motor Current, Run Status Contact Close Speed, IGV Start Position, Low Speed Acceleration Threshold, and DC
Bus Voltage Min. Threshold.
2. Modify as necessary.
12.4
Viewing or Modifying IGV Configuration Settings
To view or modify the IGV configuration settings:
1. Expand the IGV Configuration section.
This section includes: IGV Coefficient A & B, IGV Gain, IGV Init. Steps, Max & Min IGV
Steps, Fast Re-Start on Power Interrupt, Fast Start Skip Bearing Check Cycle Count, and
Initialize IGV on Idle.
2. Modify as necessary.
NOTE
Refer to M-PR-001-EN OEM Programming Guide for
detailed information on the Fast Restart feature.
12.5
Viewing or Modifying Surge/Choke Configuration Settings
To view or modify the surge/choke configuration settings:
1. Expand the Surge & Choke Configuration section.
This section includes: Part-Vane Speed Gain, Surge Offset, Surge Recovery/Prevention Orbit Limit (formerly 'Orbit Limit 1'), Surge Warning Orbit Limit (formerly 'Orbit Limit 2'),
Surge Coefficients A-D, Choke Coefficients A-D.
2. Modify as necessary.
Danfoss Turbocor Compressors Inc.
M-SM-001-EN Rev C
81
Service Monitoring Tools User Manual
13
Compressor Commissioning Tool
The Compressor Commissioning Tool is used to view, modify, and commit site-specific
compressor parameter values of a connected compressor, as well as to import and export such
configurations between portable files. Minor guidance is provided by presenting any number of
configuration 'pages', which are necessary for consideration during the deployment of a
compressor system, and by displaying basic coverage/flow indications.
This tool can be used to import commissioning configuration from a file, adjust commissioning
parameters requirement steps, export a commissioning value configuration to a file, sign an
existing configuration file, export commissioning parameter values to a connected compressor,
and create a commissioning report.
NOTE
The Compressor Commissioning Tool requires
exclusive application focus - all other tools may
be closed or hidden when starting this tool.
13.1
Accessing the Compressor Commissioning Tool
• Once connected, select the Compressor Commissioning icon from the SMT Suite Launcher
Strip.
Figure 71 Compressor Commissioning Tool Icon
The Compressor Commissioning window displays:
Figure 72 Compressor Commissioning Window
Danfoss Turbocor Compressors Inc.
M-SM-001-EN Rev C
82
Service Monitoring Tools User Manual
13.2
Importing a Commissioning Configuration from a File
To import a commissioning configuration from a file:
1. From the Commissioning Configuration window, click the Import from File button.
2. Select a commissioning file The commissioning parameters will be loaded and a notice is
displayed indicating whether or not the file contains the signature of a DTC Trusted
Official.
NOTE
If a file contains the signature of a DTC Trusted
Official (i.e. is 'signed'), it can be regarded as an
authentic document created by personnel
recognized by DTC.
13.3
Adjusting Commissioning Parameters Requirement Step
To adjust the Commissioning parameters requirement step:
• Click any of the graphical commissioning section flow item representation buttons
(colored circle with text name) in the flow items toolbar or click the Next or Prev buttons
along the top toolbar.
NOTE
An orange button means the item has been
visited, a blue is button is an unvisited item, and
yellow is the current item.
The selected section will appear below in the Commissioning Section display
Danfoss Turbocor Compressors Inc.
M-SM-001-EN Rev C
83
Service Monitoring Tools User Manual
13.4
Exporting a Commissioning Values Configuration to a File
To export a commissioning values configuration to a file:
1. From the Commissioning Configuration Finish window, click the Export to File button.
Figure 73 Compressor Commissioning Finish Window
2. Select a file destination.
Figure 74 Choose Commissioning File Location
3. Click Save. The commissioning parameters and values are saved.
Danfoss Turbocor Compressors Inc.
M-SM-001-EN Rev C
84
Service Monitoring Tools User Manual
13.5
Signing an Existing Commissioning File
NOTE
This option is only available to DTC Trusted
Officials who have been issued a recognized
private key file.
To sign an existing commissioning file:
1. From the Commissioning Configuration window, click the Sign Existing File button.
2. Select the file to sign.
3. Select your private key file.
A signature which is unique between that specific file and the signer's key will be appended
to the file.
13.6
Exporting Commissioning Parameter Values to a Signed File
NOTE
This option is only available to DTC Trusted
Officials who have been issued a recognized
private key file.
To export commissioning parameter values to a signed file:
1. From the Commissioning Configuration window, click the Export to Signed File button.
2. Select a file destination.
3. Select your private key file.
The commissioning parameters and values will be saved and a signature unique between
that specific file and the signer's key will be appended to the file.
Danfoss Turbocor Compressors Inc.
M-SM-001-EN Rev C
85
Service Monitoring Tools User Manual
13.7
Exporting Commissioning Parameters to a Connected
Compressor
• Click the Export to Compressor button.
All parameters will be updated on the connected compressor .The progress of the export can
be gauged by the progress bar directly below the button. A notification of completion will
be displayed when finished.
Figure 75 Commissioning Complete
NOTE
The Parameter Saving selection in the Connection
Manager must be set to RAM & EEPROM to enable
the option to Export to Compressor.
Danfoss Turbocor Compressors Inc.
M-SM-001-EN Rev C
86
Service Monitoring Tools User Manual
13.8
Creating a Commissioning Report
To create a commissioning report:
When commissioning is completed, a prompt displays asking if you would like to create a report:
Figure 76 Report Prompt
1. Click Yes. A Save As window displays.
Figure 77 Report Save As Window
2. Enter a filename and path to which the report will be saved.
3. Click Save.
A report is generated and saved to the user-specified path.
Danfoss Turbocor Compressors Inc.
M-SM-001-EN Rev C
87
Service Monitoring Tools User Manual
14
Compressor Data Trending Tool
The Compressor Data Trending Tool is used to graphically monitor selected compressor
parameter values and load or save user-configurable watch configurations. This tool can be used
to add or remove parameters for graphical monitoring, select the plot color of a specific
parameter, start or stop graphical monitoring, reset plot data, save plot data to CSV file, load
saved or pre configured watch groups, delete saved or pre configured watch groups, or save the
active watch configuration for later recall.
14.1
Accessing the Compressor Data Trending Tool
• Once connected, select the Compressor Data Trending icon from the SMT Suite Launcher
Strip.
Figure 78 Compressor Data Trending Tool Icon
The Compressor Data Trending window displays:
Figure 79 Compressor Data Trending Window
Danfoss Turbocor Compressors Inc.
M-SM-001-EN Rev C
88
Service Monitoring Tools User Manual
14.2
Adding Parameters for Graphical Monitoring
To add or remove parameters for graphical monitoring:
1. From the Compressor Data Trending window, in the Available Parameters listing, scroll to
the desired parameter.
Figure 80 Compressor Trending Window - Parameter Pane
NOTE
You can enter a partial query in the Available
Parameters text box above the listing to filter the
visible parameters.
NOTE
Clicking inside the listing and typing the first
few letters of the name can help speed up finding
the parameter to select.
2. Double-click on the desired entry or click the Add to Trend Configuration button (refer
to Figure 80).
Danfoss Turbocor Compressors Inc.
M-SM-001-EN Rev C
89
Service Monitoring Tools User Manual
The parameter is removed from the Available Parameters listing and added to the Watched
Parameters. listing.
NOTE
A maximum of eight watched parameters is
allowed.
NOTE
This operation is not available when plotting is
active.
14.3
Removing Parameters from Graphical Monitoring
To remove parameters from graphical monitoring:
1. From the Compressor Data Trending window, in the Watched Parameters listing, select the
desired parameter.
2. Double-click on the desired entry or click the Remove from Trend Configuration button
(refer to Figure 80).
The parameter is removed from the Watched Parameters listing and is added to the top of
the Available Parameters listing.
NOTE
This operation is not available when plotting is
active.
Danfoss Turbocor Compressors Inc.
M-SM-001-EN Rev C
90
Service Monitoring Tools User Manual
14.4
Selecting the Plot Color a Specific Parameter
To select the plot color of a specific parameter:
1. From the Compressor Data Trending window, in the Watched Parameters listing, click on
the colored square immediately to the left of the name of the parameter whose plot
color is to be changed. A color selection dialog displays.
Figure 81 Parameter Color Selection
2. Select a new color and click OK. The color square in the listing will update as will the
color of the appropriate plot line (if plotting is active).
Danfoss Turbocor Compressors Inc.
M-SM-001-EN Rev C
91
Service Monitoring Tools User Manual
Figure 82 Watched Parameters After Color Change
14.5
Starting Graphical Monitoring
• To start graphical monitoring, from the Compressor Data Trending window, click the Start
Plotting button (orange button with down arrow). Plotting begins.
The Start Plotting button will change to the Stop Plotting button.
Plot Line
Stop Plotting
Figure 83 Watched Parameters Being Plotted
Danfoss Turbocor Compressors Inc.
M-SM-001-EN Rev C
92
Service Monitoring Tools User Manual
14.6
Stopping Graphical Monitoring
To stop graphical monitoring:
1. From the Compressor Data Trending window, click the Stop Plotting button (see Figure
83).
A prompt confirming that you want to stop plotting displays.
Figure 84 Stop Plotting Dialog Box
2. Select Yes to stop plotting. You are prompted as to whether you would like to save the data
to a file.
Figure 85 Save Data Prompt
3. Select Yes to save a CSV (Excel) file.
Figure 86 Save Data to a CSV File
Danfoss Turbocor Compressors Inc.
M-SM-001-EN Rev C
93
Service Monitoring Tools User Manual
4. Enter the destination file name and all trend data will be recorded to the specified file in
CSV format.
NOTE
You will also receive the Save As prompt if a
compressor connection is lost or you are
disconnected.
14.7
Resetting Plot Data
• To reset plot data, click the Reset Plots button (orange curl-arrow).
All plots will be reset and the graph may momentarily clear.
NOTE
When resetting the plots, data recorded before
resetting will not be saved to file if this option
was selected when plotting was stopped.
14.8
Saving Plot Data to a CSV File
To save plot data to CSV file:
1. After stopping, a prompt asking whether the user would like to save the trend data to file
displays. Select Yes to save data to a CSV file.
A Save As window displays (see Figure 86).
2. Enter the destination file name and all trend data will be recorded to the specified file in
CSV format.
NOTE
You will also receive the Save As prompt if a
compressor connection is lost or you are
disconnected.
Danfoss Turbocor Compressors Inc.
M-SM-001-EN Rev C
94
Service Monitoring Tools User Manual
14.9
Loading a Saved or Pre configured Watch Group
To load a saved or pre configured watch group:
1. From the Compressor Data Trending window, click the Manage Watch Configurations
button.
Figure 87 Managed Watch Configurations Button
The Watch Management window displays.
Figure 88 Watch Management Window
2. Select the desired watch configuration (if any exist) from the listing.
3. To load the selected watch configuration, either double-click the item in the listing or
click the Load button.
The watch configuration will display in the Watched Parameters listing on the main form
and each item's plot color will be adjusted as saved.
Danfoss Turbocor Compressors Inc.
M-SM-001-EN Rev C
95
Service Monitoring Tools User Manual
14.10
Deleting a Saved or Pre configured Watch Group
To delete a saved or pre-configured watch group:
1. Click the Manage Watch Configurations button (wrench & screwdriver).
A watch configuration management form displays.
Figure 89 Watch Management Window
2. Select the desired watch configuration (if any exist) from the listing.
3. Click Delete. A prompt verifying whether you really want to delete the selected watch
configuration displays.
4. Select Yes to remove the watch configuration.
14.11
Saving the Active Watch Configuration for Later Recall
To save the active watch configuration for later recall:
1. Add at least one parameter to the Watched Parameters listing.
2. Click the Manage Watch Configurations button (wrench & screwdriver).
A watch configuration management form displays.
3. Click the Save Current button. A form requesting a name for the watch configuration will
appear
4. Enter a name and click OK to save the current watch configuration
Danfoss Turbocor Compressors Inc.
M-SM-001-EN Rev C
96
Service Monitoring Tools User Manual
15
Remote Serial Multiplexer
The Remote Serial Multiplexer is a supplemental application which allows for one or more TCP
clients to pass Modbus messages between a single serial port. It can handle some special
messages which are used for completing remote operations, such as opening a host serial port,
retrieving host device information, detection, etc; in addition to acting as a pass-through for
Modbus messages. When the application accepts a TCP connection, a session is created which is
used for handling messages between the host and client, and is destroyed when the TCP
connection is terminated. A connection session may have up to one serial port association at a
time, which can either be negotiated using special messages or automatically assumed if a
current association matches the requested slave address. Additionally, serial port communication
and TCP communication can optionally be recorded to the log file for troubleshooting purposes.
15.1
Settings
• ServerAddress: The host IP address or hostname to use for hosting
Default: any or 0.0.0.0
• ServerPort: The host IP port to use for hosting
Default: 502
• log_local: Indicates whether serial messages are to be logged
Default: false
• log_remote: Indicates whether remote (TCP) messages are to be recorded to the log file
Default: false
15.2
Configuration File
To specify a configuration file, provide on the command line:
-c [filename] where [filename] is a properly-formatted XML document matching the XSD
schema specified in the design document
Danfoss Turbocor Compressors Inc.
M-SM-001-EN Rev C
97
Service Monitoring Tools User Manual
0XOWLSOH3&6HULDO3RUWVZLWK
0XOWLSOH&RPSUHVVRUV
&KLOOHU
&KLOOHU
&RQWUROOHU
56
56
56
&RPSUHVVRUQ
6ODYHQ
&20Q
&RPSUHVVRU
6ODYH
&20
&20
&RPSUHVVRU
6ODYH
56
3&
5HPRWH6HULDO0XOWLSOH[HU
&20
&20
607
/DE9LHZ
$SS
&20Q
607
607Q
/DE9LHZ
/DE9LHZQ
$SS
$SSQ
Figure 90 Multiple Serial Ports with Multiple Compressors
Danfoss Turbocor Compressors Inc.
M-SM-001-EN Rev C
98
Service Monitoring Tools User Manual
6LQJOH3&6HULDO3RUWZLWK
0XOWLSOH&RPSUHVVRUV
&KLOOHU
&KLOOHU
&RQWUROOHU
&RPSUHVVRU
6ODYH
&RPSUHVVRU
6ODYH
56PXVWEH
GLVFRQQHFWHG
&RPSUHVVRUQ
6ODYHQ
&20
563RUW
56
3&
5HPRWH6HULDO0XOWLSOH[HU
&20
607
/DE9LHZ
$SS
607
607Q
/DE9LHZ
/DE9LHZQ
$SS
$SSQ
Figure 91 Single PC Serial Port with Multiple Compressors
Danfoss Turbocor Compressors Inc.
M-SM-001-EN Rev C
99
This Page Left Intentionally Blank
Danfoss Turbocor Compressors Inc., 1769 East Paul Dirac Drive, Tallahassee, Florida 32310
Phone: 1-850-504-4800 Fax: 1-850-575-2126 www.turbocor.com
101
Danfoss Turbocor Compressors Inc.


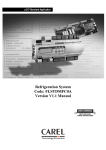
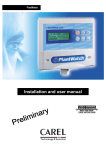


![[1]Oracle® DIVAdirector](http://vs1.manualzilla.com/store/data/005731358_1-211e3778ae12716a403cbbeaab90ad2a-150x150.png)
