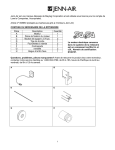
1
®
OPERATION & S ERVIC E MAN UAL
GAS ROTISSERIE
Spit Model with Live Flame
Models: AR-4G
AR-6G
COOK/HOLD/SERVE SYSTEMS
W 1 6 4 N 9 2 2 1 W a t e r S t r e e t ● P.O. Box 450 ● Menomonee Falls, Wisconsin 53052-0450 U.S.A.
PHONE: 262.251.3800
FAX: 262.251.7067 • 800.329.8744 U.S.A. ONLY
WEBSITE:
800.558.8744 U.S.A./CANADA
262.251.1907 INTERNATIONAL
www.alto-shaam.com
PRINTED IN U.S.A.
#853 • 8/2002
®
GAS ROTISSERIE
Model: AR-4G, AR-6G
Installation, Operation & Maintenance Manual
F or Your Saf ety:
Do not store or use gasoline or other flammable vapors or
liquids in the vicinity of this or any other appliance.
Warning:
Improper installation, adjustment, alteration, service or
maintenance can cause property damage, injury or death.
Read the installation, operating and maintenance instructions
thoroughly before installing or servicing this equipment.
Note:
In some prominent location, instructions obtained from the
local gas supplier must be posted indicating
procedures to be followed in the event that
the user smells gas.
GAS FOOD SERVICE EQUIPMENT
ANS Z83,11.CGA 11 b - (2000) Food Service Equip.
9M14
CLASSIFIED TO
NSF 4 - 1992
The information contained in this manual is important for the proper installation,
use and maintenance of this oven. Please read carefully and retain for future
reference. Improper connection of this appliance will nullify all warranties.
®
ROTISSOIRE AR-4G, AR-6G
NOTICE D’INSTALLATION ET D’ENTRETIEN A L ‘ATTENTION DE
L’UTILISATEUR ET DE L’INSTALLATEUR
AV E R T I S S E M E N T
Ne pas entreposer ni utiliser de l'essence
ni d'autres vapeurs ou liquides inflammables
dans le voisinage de cet appareil,
ni de tout autre appareil.
AV E R T I S S E M E N T
Une installation, un ajustement, une altération, un service
ou un entretien non conforme aux normes peut causer des
dommages àla propriété, des blessures ou la mort. Lisez
attentivement les directives d'installation, d'opération et
d'entretien avant de faire l'installation ou l'entretien
de cet équipement.
N OT E
Les instructions provenant du fournisseur local de
gas doivent être affichées de manière à indiquer les
procedures à suivre au cas où l'utilisateur sentirait le gaz.
GAS FOOD SERVICE EQUIPMENT
ANS Z83,11.CGA 11 b - (2000) Food Service Equipment
9M14
MISE EN GARDE
CLASSIFIED TO
NSF 4 - 1992
Les informations contenues dans ce manuel sont importantes pour l'installation,
l'utilisation et l'entretien de ce four. S'il vous plait lisez-le très attentivement et
conservez-le. La non-application de ces instructions annule toutes garanties.
®
— Gas Rotisserie
it is highly recommended that a gas shut-off valve be
located in an accessible location close to any gas appliance.
D E L I V E RY
Upon receipt of the gas rotisserie, check
the exterior of the shipping crate for any
physical damage that could result in
damage to the contents. If the rotisserie
was not received from the carrier in an
upright position, there is a strong possibility of concealed damage. Immediately report any possible shipping damage to the delivering carrier.
See Transportation Damage and Claims section
located in this manual.
The rotisserie must remain on the pallet while being
moved to the installation site by fork-lift or pallet-lift truck.
Check to ensure that all items have been received
with each unit. Save all the information and instructions
packed inside the cabinet. The time and care given to
reading this manual will be well compensated by the
information in it. Understanding the information in this
manual will prevent incorrect use of the rotisserie and risk
of damage, which may at times be irreparable. Complete
and return the warranty card to the factory as soon as
possible to assure prompt service in the event of a warranty
parts and labor claim.
N O T E : All claims for warranty must include the full
model number and serial number of the cabinet.
I N S TA L L AT I O N R E Q U I R E M E N T S
In order to eliminate any operation problems and to
insure proper operation, the installation of this rotisserie must be done in accordance with the instructions
given in this manual by a qualified gas service installer.
Failure to do so may cause damage to the rotisserie and
building, or cause personal injury to personnel. The
following requirements are needed for installation of
this unit: Air Supply, Electrical Connections, Gas
Connections, and Gas Exhaust.
CLEARANCES
Maintain a 4" (100mm) spacing of air behind and
18” (472mm) on both sides of the rotisserie in order to allow
adequate ventilation and the protection of surrounding
walls and other equipment. These clearances must be
assured, and the construction wall type must be non-combustible. In order to provide sufficient clearance for service,
it may be necessary to disconnect the electric and gas line
before moving the unit.
A S S E M B LY
After unpacking the unit, wash and disinfect all components
including the spits and drip pan. Ensure that the drain plug
is securely inserted on the bottom of the pan.
A I R S U P P LY
Installation of this rotisserie must provide an adequate flow
of fresh air for the combustion of the gas. Instructions must
be left with the user to keep this area clear of material which
might block the flow of the combustion or ventilation air to
the rotisserie.
Make sure that the rotisserie has plenty of
ventilation air around it to provide cooling air
for the electrical and gas components. Failure
to do so may result in damage to components
and will void the warranty.
Do not use circulating fans on the floor as this
will cause the loss of pilot flame and affect burner operation.
Local codes and the National Fuel Gas Code give rules for
determining the amount of fresh air necessary for combustion and ventilation of commercial cooking appliances. The
codes will help determine if additional outside air may be
necessary to meet health and safety regulations.
C O D E S & S TA N D A R D S
The gas appliance installation must be done in
accordance with local codes and in the absence of
local codes with National Fuel Gas Code, ANSI Z223.1
(latest edition). In Canada, the appropriate code is the
Natural Gas Installation Code, CAN/CGA-B149.1.
These codes must be adhered to by a qualified installer
concerning: Gas Plumbing, Gas Appliance Installation,
Commercial Cooking Ventilation, Water and Plumbing,
and OSHA Regulations.
UNIT PLACEMENT
The rotisserie should be placed on a strong, level, noncombustible surface in the upright position. It is highly
recommended that this rotisserie or any
mobile gas appliance be tethered by an
approved method that complies with
Federal, State and local codes. Failure to
tether a mobile gas appliance could result
in premature failure of the flexible gas lines
and other gas components. In case of emergency,
ELECTRICAL CONNECTIONS
Ensure that the electrical supply matches the specification
on the rotisserie data plate. Gas models available for USA
and Canada are typically rated for 110-120V, 60Hz, 1Ph. An
electric cord is supplied and is ready to use. The oven must
be electrically grounded in accordance with local codes, or
in the absence of local codes, with the National Electrical
Code, ANSI/NFPA 70 (latest edition) or in Canada with the
Canadian Electrical Code, CSA C22.1. The installation of
any wiring or electrical connections must be done by a
licensed electrical contractor.
WARNING
Electrical Grounding Instructions
This appliance is equipped with a three-prong
(grounding) plug for your protection against shock
hazard and should be plugged directly into a properly
grounded three-prong receptacle. Do not cut or
remove the grounding prong from this plug
# 8 5 3 O p e r a t i o n & C a r e • 1.
Accessing Control Area
To access the electrical/control system, make sure to
disconnect power and ensure the gas supply is shut OFF
before removing any access panels. The electrical diagram
is affixed to the rear of the unit. A copy of the electrical diagram is shown at the back of this manual. Service or
changes must be done by a licensed electrical contractor and
in accordance with local codes and regulations.
GAS CONNECTIONS
The installation of this rotisserie must be done by a qualified installer familiar with the local codes and regulations
governing the installation of commercial gas appliances.
The installation must be done in accordance with local
codes and in the absence of local codes with the National
Fuel Gas Code ANSI Z223.1 (latest edition). In Canada,
the appropriate code is the Natural Gas Installation Code,
CAN/CGA-B149.1 or the Propane Installation Code,
CAN/CGA-B149.2.
The appliance and its individual shutoff valve must be
disconnected from the gas supply piping system during any
pressure testing of that system at test pressures in excess of
1/2 psi (3.45kPa).
The appliance must be isolated from the gas supply
piping system by closing its individual manual shutoff valve
during any pressure testing of the gas supply piping system
at test pressures equal to or less than 1/2 psi (3.45 kPa).
is to use 2000 pound test stainless steel cable attached to a
structural member of the kitchen wall behind the unit. The
attachment means should have a quick connect snap such
that it can be disconnected when the appliance needs to be
moved away from the wall. The other end of the cable
should be permanently attached to the rear frame of the
rotisserie. The length of the cable should be such that no
strain is ever placed upon the flexible gas connector if the
appliance is accidentally moved without first disconnecting
the gas connector.
The flexible connector should be routed so that it forms
a downward "U" loop between the building gas supply and
where it attached to the rear of the rotisserie.
The routing of the flexible connector must be done
under the rotisserie. The temperatures during operation are
too hot for safe operation. Gas piping should be installed
from the point of gas connection at the bottom where the
flexible connector may be used. See illustration for the recommended procedure.
GAS INTAKE
A-G
B
C-D
E-F
H
Gas Type & Pressure
Check the nameplate information to determine the type
of gas the rotisserie was manufactured for (natural
or propane) and make sure the gas supply matches the
nameplate information.
Check the nameplate to determine the gas manifold
pressure for the oven. The minimum supply pressure to the
oven must exceed this value by at least 1" w.c. It is
recommended that the supply pressure be between
6" w.c. and 14" w.c. for natural gas, and 11" w.c. and
14" w.c. for propane.
Gas Connection
The minimum size of the gas piping or flexible
connector is 3/4" (19mm). For long runs of gas piping,
the pipe diameter must conform to the tables in the National
Fuel Gas Code, ANSI/NFPA Z223.1
A listed gas shut off valve must be installed upstream
of the appliance for shutting off the gas supply during
servicing. This valve should be installed so that it is accessible with the appliance in its normally installed position.
As this rotisserie is supplied with casters – the
installation must be done with a flexible connector that complies with the Standard for Connectors for Movable Gas
Appliances, ANSI Z21.69; or in Canada, Connectors for
Movable Gas Appliances, CAN/CGA-6.16-M87. When
using a flexible connector, a quick disconnect device must
also be used that complies with the Standard for QuickDisconnect Devices for Gas Fuels, ANSI Z21.41; or in
Canada, Quick Disconnect Devices for Use with Gas Fuels,
CAN1-6.9.
When a quick disconnect device and flexible connector
are used, a restraining device must be used which will limit
the movement of the appliance to prevent damage to the
connector or quick disconnect. An example of such a system
Installation elbow
Wall Valve
three-piece union
fitting (minimum 1
per installation)
End connector for
the flexible tube
Marking line
THE GAS PIPING MUST NEVER RUN UNDER
THE BURNER (DANGER OF OVERHEATING)!
Leak Testing
If a pressure leak test above 1/2 psi is to be done on the
building supply gas piping, the shutoff gas valve and unit
inlet gas supply line must be disconnected from the building
supply piping before conducting the pressure test. Failure
to do so may result in damage to the manual gas valve
and/or gas components in the rotisserie.
If any gas leak tests are to be conducted at pressures
equal to or below 1/2 psi, the manual gas shut off valve
upstream of the oven must be turned off before conducting
the tests.
Leak testing of the internal oven piping system was conducted before shipping the rotisserie from the factory. If
additional testing is needed, it should only be conducted at
normal gas supply pressures. If the testing is performed
using combustible gas in the piping, the leak checking
should be done with a soap solution (bubble checking) or
approved liquid.
NEVER CHECK FOR LEAKS
USING AN OPEN FLAME
The use of electronic combustible gas leak detectors is helpful; but they can be so oversensitive.
They may find leaks that are not visible when checking with
a liquid solution, and therefore, present no hazard.
When starting unit after initial installation, the gas
lines must be free of air. It may take up to 30 minutes to
do this. If, after this time, burners do not light, call factory
for assistance.
# 8 5 3 O p e r a t i o n & C a r e • 2.
GAS EXHAUST
The rotisserie is not for direct connection to a chimney
vent system or for direct connection to a horizontal
exhaust system. The unit must be installed under a ventilation hood listed to ANSI/UL 705 (latest edition), and the
installation must be done in accordance with the
ANSI/NFPA 96-1987, Standard for Ventilation Control
and Fire Protection of Commercial Cooking Operations.
The operators of the rotisserie should be instructed not
to place any material on top of the unit that would obstruct
the flow of flue products out the opening. They should
also be instructed that the flue gases are hot, and that any
material or items they place on top of, or in front
of the flue defector could be damaged or cause fire hazard.
button until the burner has ignited. If the burner fails
to ignite after 4 seconds, turn valve to the OFF position, open the doors, and allow the gas to dissipate.
Then repeat process.
After burner has ignited, rotate the gas valve to
desired flame height desired for cooking.
To Shut Off Burners:
Rotate the gas valve knob to the OFF position.
In case of emergency, close the shut-off valve
located in the rear of the unit.
NOTE: When unit is first installed, additional time to
evacuate the excess air from the supply lines
might be needed.
IGNITION SYSTEM
This unit is equipped with a manual "direct spark
ignition" for ease of lighting the burners. The intermittent push button switch is located on the control
panel to the left of the control knobs. This switch
sends a signal to a spark module that energizes all of
the igniters and lights the burner.
The electrodes are located just above the burner
under the burner cover on the right hand side of the
unit. These electrodes are very fragile and care must
be taken if adjustment is required. Take special care
not to break the porcelain insulator. If the porcelain is
damaged or broken, replace the igniter assembly.
The end of the electrode must have a 1/8” to 3/16”
(3mm to 5mm) gap from the top surface of the burner.
The spark must be maintained between the electrode
and the burner for proper ignition.
Propane is a heavy gas and will settle on the
floor or the lowest point in a building. If a
raw gas smell is present, evacuate the building and contact your local fire department
or safety agency for assistance.
WARNING
In the event of loss of power to the unit, turn the
“burner control knobs” to the OFF position. Remove
food product from the unit. If burner control fails to
extinguish the flame, shut off main gas valve located
in rear of unit. This unit requires the ventilation
hood to be working during testing.
PRESSURE CHARGE
The gas train and orifice for the main burner have been fitted according to the gas type specified on the data plate.
Technical specifications for the gas system are as follows:
AR-4G
BURNER LIGHTING INSTRUCTIONS
Verify the unit is connected to the correct gas
source. For this information, refer to the Data Plate
that is located on the rear of the unit.
NOTE: Use soap and water solution to check all fittings for leaks. Brush solution on all joints or
where a leak is suspected. If bubbles appear,
re-tighten the fitting and recheck. If bubbles
persist, replace fitting or component.
Verify the manual gas shut-off valve is in the open
position. It is located at the rear of the unit.
AR-6G
NATURAL GAS
Min. connected pressure
5 in W.C.
5 in W.C.
Max. connected pressure
10 in W.C.
10 in W.C.
Air Gap
.158 (4mm)
.158 (4mm)
Manifold Pressure
5.0 in W.C.
5.0 in W.C.
Gas Consumption
52.3 cu.ft./hr.
78.4 cu.ft./hr.
Gross Thermal Output
Orifice HL Dia.
130,000 Btu/hr. 195,000 Btu/hr.
.137 (3.5mm)
.137 (3.5mm)
PROPANE GAS
The unit has either two or three cooking zones:
lower and upper, or lower, middle and top burners.
Min. connected pressure
12 in W.C.
12 in W.C.
Max. Connected pressure
14 in W.C.
14 in W.C.
Recommended lighting sequence is as follows:
Natural: Top, Middle and Lower
Propane: Bottom, Middle and Top
Air Gap
.079 (2mm)
.079 (2mm)
Manifold pressure
10 in W.C.
10 in W.C.
Gas Consumption
38.4 cu.ft./hr.
57.6 cu.ft./hr.
To Light the Burner:
Select corresponding gas valve knob and rotate the
knob to the ignite position.
Wait 3 seconds, then depress and hold the ignition
Gross Thermal Output
Orifice HL Dia.
# 8 5 3 O p e r a t i o n & C a r e • 3.
130,000 Btu/hr. 195,000 Btu/hr.
.090 (3.5mm)
.090 (3.5mm)
G A S F L A M E PAT T E R N S
When starting the unit after initial installation, the gas lines must be free of air pockets. It may take up
to 30 minutes to do this. If, after this time there is no ignition, call for factory assistance.
For all practical reasons this will be the
only check necessary during initial operation
by the installer. After the installation is
complete the oven needs to be test fired to
ensure that the system is operating properly.
Follow the operating instructions posted on
the front of the unit.
The flame pattern both under hot and
cold conditions should be stable on all
burner ports and there should be no lifting
or blowing after 4 seconds of operation.
There is an air shutter adjustment on these
burners and if the flame pattern does not
match that shown, contact the factory for
further directions.
Make sure that the burner is lighting
quickly from the electric ignitor. Then
check that the main burner is lighting quickly (within 4 seconds), smoothly (no harsh
noise), and without any problems. Allow
the unit to heat up for 5 minutes and repeat
the process.
Check the flame pattern on the burners.
The flames should be blue in color with little
or no yellow in the flame.
On propane gas some yellow tipping is
normal.
# 8 5 3 O p e r a t i o n & C a r e • 4.
CONTROLS
The unit has a Main Power switch located on the left
side of the control panel. When this switch is in the ON
position, the lights in the top of the unit will illuminate.
For your safety, this switch is equipped with a resetable
circuit breaker.
Top burner
Middle burner
Bottom burner
corresponding set of spits. Note that each switch controls two
spit assemblies.
Next to the Power Switch are switches that control the
rotation of the spits. These are labeled Top, Middle, and
Bottom. When in the ON position, this will activate the
The Ignition Button is used to activate the ignition
module. When the Ignition button is depressed, a signal is
sent to the ignition module, which in turn sends a spark to
the Burner Assemblies which ignites the burners. When
this button is released, this deactivates the ignition module
which stops the spark to the burner.
PLACEMENT AND ADJUSTMENT OF SPITS
BIRDS ON THE SPIT
The spits are independent of one
another, and can have their depths
adjusted. To adjust depths,
first insert the spit's square bit
drive into the flared driving
bracket, and, if necessary, turn
the spit slightly to make sure it is
correctly positioned. Then, place
the bearing neck (round part)
located at the other end of the spit
on the cross bracket. To adjust the
drive bracket position, just slide the driving bracket. To
adjust the cross brackets, just slide the cross bracket.
On the opposite side of the flange, insert the first bird by its
tail and slide it down until it reaches the flange. Continue
in the same fashion for the following birds. After the last
bird, always be sure five centimeters (2 inches) remain free
on the spit. To remove the birds, remove the spit from the
rotisserie, hold it by the flange and dip it towards a plate.
Then proceed, using a fork, to free the cooked meat.
DOOR LOCK CONTROL
This mechanism keeps the doors closed during cooking.
Turn the handle of the right door a quarter turn to position
the small catch vertically so doors can
be opened. To lock the door, turn the
handle of the right door a quarter turn
positioning the small catch horizontally.
START TO COOK
Pricking the birds prior to roasting them is recommended.
This improves the crust and smooth texture. Properly
insert each of the spits prepared according to the method
explained in this manual. Adjust the depth of the spits
according to the size of the birds to be roasted and the
speed of cooking desired. Activate the geared motors by
choosing the number of desired spits on the switch.
COOK TIME
Use a 60-minute cook time for a 2-1/2 lb. (1.2kg) bird.
However, this time may vary based on external climactic
conditions, and the quality and size of the bird to be
roasted.
P R E PA R AT I O N
Make sure the unit is supplied with sufficient Power and
Gas supply. Refer to Data Plate located on the rear of the
unit for this information. Fill the drip pan half full of water
and maintain this level during cooking. This is recommended to ease the cleaning process.
Placing plates or other objects on top of the unit or
obstructing the gas exhaust pipe and ventilation areas
in any way is strictly prohibited.
PREPARATION OF THE SPITS
Never use or place aluminum foil in the rotisserie.
Unless specifically requested otherwise, the rotisserie is
equipped with Simplifil spits. These stainless steel spits are
in the shape of a spindle. On the side of its square bit, a
flange acts as a stopper and handle when birds are placed
on the spit or removed from it.
In order to avoid grease splatters and for the correct
operation of the rotisserie, the window door must be
closed and kept closed using the locking mechanism.
# 8 5 3 O p e r a t i o n & C a r e • 5.
MAINTENANCE
CLEANING
When cooking is done -- stop the motor for the
corresponding spits and remove the splits by
proceeding with the reverse steps for their insertion.
The cleanliness and appearance of this equipment will
contribute considerably to operating efficiency and
savory, appetizing food. Good equipment that is kept
clean works better and lasts longer.
✔Never use a high-pressure scrubber.
✔Only use oven cleaning products in the category of
basic solvents approved for use in food preparation.
✔Never spray any product (water, cleaning product,
etc.) onto the burners.
DAILY CLEANING
✔With the rotisserie still warm:
wipe down the inside walls, the base, and the side
windows and doors as well as the lights.
✔Completely clean after disassembly:
the spits and accessories,
the empty drip pan,
the reflectors between the burners.
✔Clean the top of the rotisserie.
CHANGING LIGHT BULBS
To avoid possible burns, change the light
bulbs after cooling the unit. Otherwise, use
hand protection.
The gas rotisserie is supplied with two
120 volt, 150 watt halogen bulbs. These bulbs should be
replaced with the exact substitute or a factory recommended replacement.
OPENING THE MACHINE COMPARTMENT
(To be performed by certified service technicians only)
Prior to opening these various sections, disconnect the
electrical supply and close the gas intake valve located
on the rear of the rotisserie.
The machine compartments are located at the left rear
(electric geared motors) and right (gas supply) of the
rotisserie as well as below the front floor (the gas
valves/intake manifold assembly and various electric
switches) and allow access to and repair of various
components of the electrical and gas circuits.
Left and Right Rear Housings
Using a screwdriver, remove the various screws
holding the outside panel in question and remove the
the panel.
Once the operation is completed, this panel must be
remounted and the screws tightened.
Front Floor Access Cover
(This will allow access to gas valves and electrical
components)
Remove drip pan assembly.
Remove four (4) bolts that secure access panel.
Remove cover.
Once the operation is completed, perform the abovedescribed operations in reverse, making sure that a
line of silicone is laid to provide a seal again
# 8 5 3 O p e r a t i o n & C a r e • 6.
S P E C I F I C AT I O N S
AIR ADJUSTMENTS
This unit cannot be converted in the
field from one type of gas to another
(Natural to Propane or vice versa).
Air adjustment must be performed by a
certified service technician qualified to
work on gas appliances.
After taking the necessary safeguards for the gas circuit
(shut-off valve located at the rear of unit), and after
disconnecting the apparatus from the electric supply,
open the right-hand machine compartment.
AR-4G
AR-6G
Overall width
55.125” (1400mm)
55.125” (1400mm)
Overall depth
27.562” (700mm)
27.562” (700mm)
Height
cooking cavity
– pedestal
– overall
42.5 “ (1808mm)
33.875” (860mm)
27.562” (700mm)
59.25” (1505mm)
17.125” (435mm)
27.562” (700mm)
Total weight, empty 661 lbs. (300kg)
716 lbs. (325kg)
TECHNICAL COMPONENTS
AR-4G
AR-6G
4
43.307
6
43.307” 1100mm
Driving Motors
– Number
4
– Voltage, unit power 120V/20W
6
120V/20W
Spits
– Number
– Usable length
Using a suitable measuring instrument measure the
distance “A” shown in the view above.
Gas
Distance A
Natural
.158 inches (4mm)
Propane
.079 inches (2mm)
NOTE: Distances are for reference only and
may vary due to climate or altitude.
Repeat this process for all three burners.
If any gas fittings were loosened or replaced,
do the following:
Use a soap and water solution to check all fittings for
leaks. Brush solution on all joints or where a leak may
be present. If bubbles appear, re-tighten the fitting and
recheck. If bubbles persist, replace fitting.
Always reconnect the gas line and inspect for leaks before
replacing access panels.
Gas Burners
– Type: direct flame
– Number
Yes
2
Yes
3
130,000 Btu, 21Kw
130,000 Btu, 21kW
195,000 Btu, 21 kW
195,000 Btu, 21 kW
Motor Switch
– Number
2
3
Bulbs
– 120V, 150W
– 120V, 40W
2
1
2
1
Yes
Yes
Capacity
– Bird
24/28
36/42
Total Electric
Consumption
420W
460W
Unit power:
– Propane
– Natural
Power Cord
– Plug:
2 prongs + ground
# 8 5 3 O p e r a t i o n & C a r e • 7.
TROUBLESHOOTING
Defect Observed
Possible Cause
Remedy
No power supply to unit
Verify unit has power to it.
ELECTRICAL
Spits and lamps do not work
Reset circuit breaker.
Interior light off but
spits work
Defective bulb
Replace bulb.
One spit is not turning
Defective motor
or broken chain
Contact manufacturer for
replacement.
One or all spits not turning
Defective switch
or power supply
Contact manufacturer
for replacement.
None of the burners are lighting
Gas shutoff is in OFF position
Flexible gas line not connected
Check main supply
Ensure safety switch is working
Open closed valve.
Reconnect gas line.
Reset safety switch.
One burner heats irregularly
or not at all
Burner orifices are clogged
Clean or replace.
Inlet pressure too low
Contact qualified gas specialist.
GAS CIRCUIT
# 8 5 3 O p e r a t i o n & C a r e • 8.
77.5"
19.7"
Hood Installation • Illustration • Both Models
Installed
in a corner
against
a wall
11.8"
4"
11.8"
4"
70.9"
77.5"
19.7"
37"
Installed
central against
a wall
11.8"
11.8"
4"
78.7"
77.5"
19.7"
37"
11.8"
11.8"
11.8"
44.9"
Installed
free-standing
central away
from
a wall
11.8"
11.8"
78.7"
Note: Outside dimensions are the same for both AR-4G and AR-6G.
# 8 5 3 O p e r a t i o n & C a r e • 9.
Illustration 1 - AR-6G
1. Pedestal, sheet metal with baked on enamel
finish, has six swivel casters, three of which have
locking brakes
7. Drip pan, stainless steel
2. Structure containing roof, lateral sheets, internal
vertical walls made of baked on enamel sheet metal,
with other elements in brushed stainless steel
9. Two side windows, tempered glass
8. Two doors, tempered glass
10. Two recessed quartz spotlights
11. Control panel
3. Direct flame burners
4. Deflectors which separate the direct flame burners
5. Spits, rotating, depth adjustable
12. Detachable deflector, prevents risk of
obstruction in the exhaust gas stack
13. Door lock
6. Independent electric geared motor driven by
chain, has hollow tapered, mounting bracket
# 8 5 3 O p e r a t i o n & C a r e • 10.
Illustration 2 - Control Panel
Reflector
Casting
Power Switch
Spit Motor Switches
Ignitor
Switch
# 8 5 3 O p e r a t i o n & C a r e • 11.
Gas Burner Control Valves
Illustration 3 - Side Panel
Spark
Generator
•
Bulb Assembly
Burner
Venturi’s
Lamp Assembly
# 8 5 3 O p e r a t i o n & C a r e • 12.
Illustration 4 -
Side Panel • Spit Motor
Spit
Motors
Spit Motor and
Drive Chain
Spit
Motors
Spit
Motors
Terminal
Block
Terminal
Block
# 8 5 3 O p e r a t i o n & C a r e • 13.
Cooling Fan Motor
Illustration
5 - Spark Electrode • Rear View of Pedestal
Spark Electrode
Gas
Regulator
Union
Gas Shutoff
Valve
Cord & Plug
# 8 5 3 O p e r a t i o n & C a r e • 14.
# 8 5 3 O p e r a t i o n & C a r e • 15.
# 8 5 3 O p e r a t i o n & C a r e • 16.
T R A N S P O RTAT I O N
DAMAGE and CLAIMS
All Alto-Shaam equipment is
sold F.O.B. shipping point,
and when accepted by the
carrier, such shipments
become the property of
the consignee.
Should damage occur in shipment, it is a matter between the carrier
and the consignee. In such cases, the carrier is assumed to be
responsible for the safe delivery of the merchandise, unless negligence can be established on the part of the shipper.
L I M I T E D WA R R A N T Y
Alto-Shaam, Inc. warrants to the original purchaser that any original
part that is found to be defective in material or workmanship will, at
our option, subject to provisions hereinafter stated, be replaced with
a new or rebuilt part.
The labor warranty remains in effect one (1) year from installation or
fifteen (15) months from the shipping date, whichever occurs first.
The parts warranty remains in effect one (1) year from installation or
fifteen (15) months from the shipping date, whichever occurs first.
Exceptions to the one year part warranty period are as listed:
A. Halo Heat cook/hold ovens include a five (5) year parts warranty
on the heating element. Labor will be covered under the terms of
the standard warranty period of one (1) year or fifteen (15) months.
1. Make an immediate inspection while the equipment is still in
the truck or immediately after it is moved to the receiving area.
Do not wait until after the material is moved to a storage area.
B. Alto-Shaam Quickchillers include a five (5) year parts warranty
on the refrigeration compressor. Labor will be covered under the
terms of the standard warranty period of one (1) year or fifteen
(15) months.
2. Do not sign a delivery receipt or a freight bill until you have
made a proper count and inspection of all merchandise received.
This warranty does not apply to:
3. Note all damage to packages directly on the carrier’s delivery
receipt.
4. Make certain the driver signs this receipt. If he refuses to sign,
make a notation of this refusal on the receipt.
5. If the driver refuses to allow inspection, write the following on
the delivery receipt:
Driver refuses to allow inspection of
containers for visible damage.
1.
Calibration
2.
Replacement of light bulbs and/or the replacement of display
case glass due to damage of any kind.
3.
Equipment damage caused by accident, shipping, improper
installation or alteration.
4.
Equipment used under conditions of abuse, misuse, carelessness
or abnormal conditions.
5.
Any losses or damage resulting from malfunction, including loss
of product or consequential or incidental damages of any kind.
6.
Equipment modified in any manner from original model, substitution of parts other than factory authorized parts, removal of
any parts including legs, or addition of any parts.
7. Save any packages and packing material for further inspection
by the carrier.
This warranty is exclusive and is in lieu of all other warranties,
expressed or implied, including the implied warranties of merchantability and fitness for purpose. In no event shall the Company
be liable for loss of use, loss of revenue, or loss of product or profit,
or for indirect or consequential damages. This warranty is in lieu of
all other warranties expressed or implied and Alto-Shaam, Inc. neither assumes or authorizes any persons to assume for it any other
obligation or liability in connection with Alto-Shaam equipment.
8. Promptly file a written claim with the carrier and attach copies
of all supporting paperwork.
ALTO-SHAAM, INC.
6. Telephone the carrier’s office immediately upon finding damage, and request an inspection. Mail a written confirmation of
the time, date, and the person called.
We will continue our policy of assisting our customers in collecting
claims which have been properly filed and actively pursued. We
cannot, however, file any damage claims for you, assume the responsibility of any claims, or accept deductions in payment for such
claims.
Warranty effective January 1, 2000
Record the model and serial numbers of the unit for easy reference.
Always refer to both model and serial numbers in your
correspondence regarding the unit.
Model: _____________________________________________
Serial Number: _______________________________________
Purchased From: ______________________________________
Date Installed: ____________
Voltage: ________________
COOK/HOLD/SERVE SYSTEMS BY
W164 N9221 Water Street
PHONE:
262.251.38 0 0
800.558.87 4 4 U . S . A ./ C A N A D A
●
®
P.O. Box 450 ● Menomonee Falls, Wisconsin 53052-0450 ● U.S.A.
FAX:
2 6 2 . 2 5 1 . 7 0 6 7 ● 8 0 0 . 3 2 9 . 8 7 4 4 U . S . A ./ C A N A D A
WEBSITE:
262.251.1907 INTERNATIONAL
W W W .alto-shaam.com
PRINTED IN U.S.A.