1
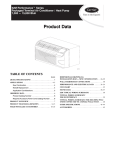
GA Series
Packaged Terminal Air Conditioner / Heat Pump
7,000 --- 15,000 Btuh
Service Technician
Guide
A07228
TABLE OF CONTENTS
PAGE
PAGE
SAFETY CONSIDERATIONS . . . . . . . . . . . . . . . . . . . . . . . . 2
OPERATING CONTROL FUNCTIONS /
PROTECTIONS . . . . . . . . . . . . . . . . . . . . . . . . . . . . . . . . 25--27
GENERAL INFORMATION. . . . . . . . . . . . . . . . . . . . . . . . . . 2
UNIT DIS--ASSEMBLY . . . . . . . . . . . . . . . . . . . . . . . . . . . 3--5
ACCESSING COMPONENTS . . . . . . . . . . . . . . . . . . . . . 6--12
Accessing Indoor--Air Components . . . . . . . . . . . . 6--8
Accessing Control Components . . . . . . . . . . . . . . 9--10
Accessing Outdoor--Air Components . . . . . . . . . 11--12
COMPONENT OPERATION . . . . . . . . . . . . . . . . . . . . . 13--24
Compressor . . . . . . . . . . . . . . . . . . . . . . . . . . . . . 13 -- 17
Heater . . . . . . . . . . . . . . . . . . . . . . . . . . . . . . . . . 18 -- 19
Fan Motors . . . . . . . . . . . . . . . . . . . . . . . . . . . . . 19 -- 21
Capacitors . . . . . . . . . . . . . . . . . . . . . . . . . . . . . . . . . 22
Condensate Drain Valve . . . . . . . . . . . . . . . . . . . . . . 23
Indoor Coil Sensor . . . . . . . . . . . . . . . . . . . . . . . . . . 24
Outdoor Coil Sensor . . . . . . . . . . . . . . . . . . . . . . . . . 24
Room Temperature Sensor . . . . . . . . . . . . . . . . . . . . 25
CONFIGURATION . . . . . . . . . . . . . . . . . . . . . . . . . . . . . 27--28
Dipswitches . . . . . . . . . . . . . . . . . . . . . . . . . . . . . . . . 28
Keypad Configuration . . . . . . . . . . . . . . . . . . . . . . . 29
WALL THERMOSTAT INTERFACE . . . . . . . . . . . . . . 30--32
ENERGY MANAGEMENT INPUT . . . . . . . . . . . . . . . . . . 33
CONTROL DIAGNOSTICS . . . . . . . . . . . . . . . . . . . . . . . . . 33
TYPICAL WIRING SCHEMATIC . . . . . . . . . . . . . . . . . . . . 34
TROUBLESHOOTING . . . . . . . . . . . . . . . . . . . . . . . . . . . . . 35
CARE AND CLEANING . . . . . . . . . . . . . . . . . . . . . . . . 36--38
APPENDIX . . . . . . . . . . . . . . . . . . . . . . . . . . . . . . . . . . . . 39--40
SAFETY CONSIDERATIONS
GENERAL
Recognize safety information. This is the safety--alert
symbol . When you see this symbol on the unit and
in instructions or manuals, be alert to the potential for
personal injury.
Understand these signal words: DANGER,
WARNING, and CAUTION. These words are used
with the safety--alert symbol. DANGER identifies the
most serious hazards which will result in severe
personal injury or death. WARNING signifies hazards
which could result in personal injury or death.
CAUTION is used to identify unsafe practices which
may result in minor personal injury or product and
property damage. NOTE is used to highlight
suggestions which will result in enhanced
installation, reliability, or operation.
The focus of this manual is to provide basic
information on service procedures, safety,
troubleshooting,
cleaning,
and
component
replacement for service technicians.
It is intended for use only by HVAC service
technicians who have successfully completed
instruction and received Type I Certification from the
U.S. Environmental Protection Agency. The
instructions in this manual are general in nature and
are not to be substituted for installation and service
instructions shipped with the unit. No attempt to
install, operate, adjust, repair, or dismantle any
equipment should be made until the manufacturer’s
instructions are read and thoroughly understood by
the service technician. Even equipment that seems
familiar may have specific model differences from
year to year. Always review manufacturer’s
instructions.
Gree GA series packaged terminal air conditioner
(PTAC) and heat pump units are self--contained for
installation through the wall for individual room
heating and cooling. The PTAC polymer and metal
sleeves are permanently fastened to the wall; the unit
chassis slides out of the sleeve to allow the service
technician easy access. Many accessories are offered
to complement the unit’s performance and comfort
control.
Before beginning any service procedure, it is
important to check the unit model number. See
Figure 1 and 2. Units that seem similar may have
subtledifferences that could affect serviceprocedures.
The following units are covered in this manual:
GAE — 60 Hz cooling with electric heat units
GAA — 60 Hz heat pump with electric heat units
Knowing which model is being serviced will help
determine if the unit is performing at optimum levels.
The model number is located on the data information
plate behind the front panel of the unit. See Figure 1.
The data information plate also lists voltage ranges
and other important electrical information about the
unit.
!
WARNING
PERSONAL INJURY AND/OR PROPERTY DAMAGE
HAZARD
Failure to follow this warning could result in personal injury,
death and/or property damage.
For your safety, the information in this manual must be
followed to minimize the risk of fire or explosion, electric
shock, or to prevent property damage, personal injury, or loss
of life.
•
This unit must be properly installed in accordance
with the Installation Instructions before it is used.
•
Immediately repair or replace all electric service
cords that have become frayed or otherwise
damaged.
•
Unplug or disconnect the unit at the fuse box or
circuit breaker before making any repairs.
NOTE: We strongly recommend that any servicing
be performed by a qualified individual.
GREE ELECTRIC APPLIANCES
INC. OF ZHUHAI
MODEL: PTAC-GAA12AB-P
SERIAL: 3504Z88741
63229919466
DESIGN PRESSURE LOWSIDE 300 P.S.I. HISIDE 500 P.S.I.
RATED VOLTS 265
1 PHASE 60Hz
EER 10.7 COP 3.1 R410A 35.98 OZ.
MFG.DATE
COOLING
BTU/HR 12000
AMPS 4.8
WATTS 1120
ELECTRIC HEATING
BTU/HR 17060/10236/6824
AMPS 21.5/13.2/8.9
WATTS 5000/3000/2000
HEATING
BTU/HR 10700
AMPS 4.5
WATTS 1010
Warning: Use on Single Outlet Circuit Only
Fig. 1 – Sample Data Information Plate
2
Energy
Performance
Rendement
Energetique
PACKAGED TERMINAL AIR CONDITIONER
Also Verified In Accordance With Energy Standards DOE Test Procedure
10 CFR,Part 430,App.F,Issued 01/01 and CAN/CSA-C368.1-M90
A07229
PRODUCT CATALOG NUMBER-NOMENCLATURE
PTAC-GA
E
12
AB
-CP
D
None – Standard Protection
CP – Corrosion Protection
Series Designation
PTAC (Packaged Terminal Air Conditioner)
Electrical Data
D--- 208--- v, 60HZ
D--- 230--- v, 60Hz
P--- 265--- v, 60 Hz
Performance Series
E – Cooling with Electric Heat
A– Heat Pump
AB - Major & Minor Revsions
Cooling Capacity (nominal)
07 – 7,000 Btuh
09 – 9,000 Btuh
12 – 12,000 Btuh
15 – 15,000 Btuh
A08385
Fig. 2 – Catalog Number Nomenclature
ACCESSORY POWER CORD (REQUIRED) CATALOG NUMBER
PWRCORD
–
230v
–
20A
Kit Description
PWRCORD = Power Cord
*Power Cord
for 208/230v*
Amperage
15A = 15 Amps
20A = 20 Amps
30A = 30 Amps
Voltage
230v = 208/230-v, 60 Hz
265v = 265-v, 60 Hz
*Power Cord
for 265v
A07636
A07637
UNIT DIS--ASSEMBLY
This section includes common procedures for dis--assembly and re--assembly of unit.
IMPORTANT: Follow manufacturer’s instructions when disassembling and reassembling a unit for
cleaning, maintenance, or part replacement. When disassembling wiring, it is strongly recommended that
numbered stickers be attached to identify leads and terminals to aid in the re--assembly process. Always
review safety procedures prior to the start of a job.
!
WARNING
ELECTRICAL SHOCK HAZARD
Failure to follow this warning could result in personal
injury or death.
Prior to servicing electrical equipment, disconnect all power
to avoid electric shock.
TOOLS NEEDED
The following field--supplied items are recommended
for general dis--assembly of the unit:
• Phillips--head screw driver
• 10 mm open wrench
• Safety glasses
Tag all disconnects.
Never alter cord or plug and DO NOT use extension cords.
3
A. Remove Front Panel
1. Grasp the front panel firmly at the center of the
top and bottom of the panel.
2. Remove the front panel by pulling it out at the
bottom to release it, then lift up to clear the rail
along the unit top. See Fig. 3.
DISCONNECT POWER FOR
PERMANENTLY CONNECTED
(HARDWIRED) UNITS
1. Use power button on keypad or wall thermostat
to turn unit OFF.
2. Open the disconnect switch at main power
supply.
3. Remove junction box cover by removing three
screws from front. Remove junction box by
taking out top, rear and side screws. See Fig. 4
4. Pull out the plug assembly and disconnect. See
Fig. 5.
Unit connector
Fig. 3 – Removal of Front Panel
A07064
B. Disconnect Power for Cord--Connected Unit
!
Junction box cover Junction box
WARNING
Fig. 4 – Removal of Junction Box Cover
ELECTRICAL SHOCK HAZARD
Failure to follow this warning could result in personal
injury or death.
Disconnect all power to unit to avoid possible electrical
shock during service or installation.
A07058
TERMINAL
BLOCK
POWER
CORD
RECEPTACLE
1. Use power button on keypad or wall thermostat
to turn unit OFF.
2. Open the disconnect switch at main power
supply. Use proper lockout and tag procedures.
3. Unplug the unit service cord.
POWER
CORD
BASEPAN
Fig. 5 – Plug Assembly on Hardwire Units
4
A07059
C. Remove Unit From The Wall Sleeve
1. Remove the four mounting screws that secure
the PTAC unit to the wall sleeve (2 screws per
side). See Fig. 6 and Fig. 7.
2. Grasp sides of unit and slide it from the sleeve.
!
VARIOUS ATTACHMENT
HOLE LOCATIONS
WARNING
AMANA, TRANE
(SLOTTED
HOLES) WALL
SLEEVE HOLES
PERSONAL INJURY HAZARD
GE WALL
SLEEVE
HOLES
GREE, CARRIER AND
BRYANT WALL SLEEVE
HOLES
Failure to follow this warning could result in personal injury
or death.
Chassis weighs up to 150 pounds (68.0 kg). Seek help when
lifting unit.
Lift unit by holding unit basepan. The basepan may contain
water. Tilt the unit back slightly when removing it from the
sleeve to drain some of the water into the sleeve.
Fig. 6 – PTAC Unit to Wall Sleeve Mounting Screws
Fig. 7 – Location of Wall Sleeve Screws
5
A08516
A07057
ACCESSING COMPONENTS
ACCESSING INDOOR--AIR COMPONENTS
Remove the Gussets
1. Remove the 2 screws on each side that secure
the gussets to the partition.
2. Remove the 2 screws that secure the gussets to
the outdoor fan shroud. See Fig. 8.
3. Lift gussets from the unit.
SCREW
TOP PLATE
SCREW
A08523
Fig. 10 – Removing Top Plate from Unit
GUSSET
GUSSET
SCREW
SCREW
A08521
Fig. 8 – Location of Gusset Screws
Remove the Top Plate
1. Locate 7 screws that secure top plate to partition
and remove. See Fig. 9.
2. Once all 7 screws have been removed, lift the
top plate up and away from the unit. See Fig.
10.
Removal of Discharge Screen
1. Once the top plate has been removed, locate and
remove 3 screws that secure discharge screen to
fan assembly. See Fig. 9.
2. After the screws have been removed, the
discharge screen can be lifted from the unit.
Removal of Controls Keypad
The controls keypad must be removed to gain access
to 2 screws that secure the electrical box to the
partition.
1. Locate and remove the screw that attaches
controls keypad to electrical box and remove.
See Fig. 11.
2. Push keypad toward partition to release from
plastic tabs underneath, then lift up to remove
keypad.
Keypad Screw
Location
SCREW
(NOT SHOWN)
SCREW
SCREW
DISCHARGE
SCREEN
SCREWS
SCREW
A08549
Fig. 11 – Keypad Screw Location
SCREW
A08522
Fig. 9 – Removal of Screws from Top Plate
6
Remove Electrical Box
1. Locate and remove the 5 screws that fix the
electrical box to the rest of the unit. See Fig.
12.
2. At this point, the heater limits (black), electric
heat (large white), and indoor fan motor (small
white) plugs need to be disconnected. See Fig.
13.
3. To remove the electrical box, firmly grasp and
lift box up and away from the 2 tabs located
behind the box.
SCREW
SCREW
SCREW
SCREW
SCREW
Removing Indoor Fan/ Electric Heat Assembly
Once the top plate and electrical box have been
removed, the indoor fan/ electric heat assembly is
accessible.
1. Locate and remove the screws that secure the
assembly to the partition. There are 2 screws
located on the fan motor side and 2 screws
located on the opposite side. See Fig. 14 and
Fig. 15.
2. There are a total of 5 screws that secure the
indoor fan/electric heat assembly to the indoor
coil that must be removed. 2 screws (one on
each side) are located at the top of the coil. The
remaining screws are found along the sides of
the coil. 1 screw will be on the fan motor side,
and the other 2 at the opposite end. See Fig. 14
and Fig. 15.
3. Once all screws have been removed, separate
the assembly from the partition to release it. See
Fig. 16.
4. The assembly can then be lifted up and away
from the unit for removal.
A08524
Fig. 12 – Remove 5 Screws from Electrical Box
PARTITION
SCREW
TOP OF COIL SCREW
SIDE OF
COIL SCREW
INDOOR FAN
MOTOR
PARTITION
SCREW
HEAT ASSEMBLY
A08526
Fig. 14 – Location of Fan Assy. Screws on Fan Motor Side
INDOOR FAN PLUG
ELECTRIC HEAT PLUG
HEATER LIMIT PLUG
PARTITION
SCREW
A08525
Fig. 13 – Heater Limits, Electric Heat, and Indoor Fan Motor
Plugs
TOP OF COIL SCREW
SIDE OF COIL SCREW
PARTITION
SCREW
SIDE OF COIL SCREW
A08527
Fig. 15 – Location of Fan Assembly Screws on Opposite Side
7
Accessing Electric Heat Assembly
1. Once the indoor fan assembly has been
removed, the electric heat assembly is
accessible.
2. To detach heat assembly from indoor fan
assembly, locate and remove 3 screws on each
end of heat assembly. See Fig. 17 and Fig. 18.
PARTITION
INDOOR FAN ASSEMBLY
ELECTRIC HEAT
ASSEMBLY
INDOOR FAN
MOTOR
SCREW
A08528
Fig. 16 – Separate Indoor Fan Assembly from Partition
SCREW
SCREW
A08529
Fig. 17 – Location of Heater Assembly Screws
(Fan Motor Side)
OUTDOOR
COIL
HEATER
ASSEMBLY
SCREWS
DRAIN VALVE
BASEPAN
A08545
Fig. 18 – Location of Heater Assembly Screws
(Opposite Side)
8
ACCESSING CONTROL COMPONENTS
Removal of Controls Keypad
The controls keypad must be removed to access
unit--mounted interaface and display board. The
controls keypad should also be removed if additional
room is required to access components in the control
box.
1. Locate and remove the screw that attaches the
controls keypad to the electrical box. (See Fig.
19.)
2. Push keypad toward partition to release from
plastic tabs underneath, then lift up to remove
keypad.
A09312
Fig. 21 – Side Cover Removed
The control components will be accessible when the
panel has been removed. The control component
layout is shown in Fig. 22.
Keypad Screw
Location
COMPRESSOR
CAPACITOR
A08549
Fig. 19 – Keypad Screw Location
Accessing Control Box Wiring, Capacitors or to
Check Voltages
To remove the side cover for access to control box:
1. Remove nine (9) screws as shown in Fig. 20
from side cover. Fig. 21 shows the side cover
removed.
PLUG
CONNECTOR
RELAY BOARD
(PCB1)
LOGIC BOARD
(PCB2)
JUNCTION BOX
INDOOR FAN CAPACITOR
OUTDOOR FAN
CAPACITOR
A09324
Fig. 22 – Location of Components Inside Control Box
Fig. 20 – Screw Location
A09311
9
Access or Remove Control Boards
Remove the control box side--access cover as shown
in previous section.
To remove the front control box cover:
1. Remove the two (2) screws that hold the bottom
cover in place as shown in Fig. 23.
2. Remove cover. See Fig. 24.
3. Remove the five (5) remaining screws from the
front cover as shown in Fig. 25.
4. Remove two (2) additional screws that hold the
control board to the control box as shown in
Fig. 26.
A09316
Fig. 26 – Location of Screws Holding Control Board to
Control Box
5. Gently pull the front cover of control box away
from the bottom. See Fig. 27 and Fig. 28.
A09313
Fig. 23 – Location of Control Box Cover Screws
A09317
Fig. 27 – Pull Control Box Away From Bottom
A09314
Fig. 24 – Control Box Cover Removed
A09318
Fig. 28 – Control Box Pulled Away From Bottom
A09315
Fig. 25 – Screw Location in Front Cover
10
ACCESSING OUTDOOR--AIR COMPONENTS
Remove Gussets
Refer to Remove Gussets section in Accessing
Indoor--Air Section Components (page 6).
UPPER CONDENSER SHROUD
Remove Upper Condenser Shroud
1. Locate and remove 2 screws that join condenser
shroud to outdoor coil. Also remove 2 screws
that attach condenser shroud to fan bracket. See
Fig. 29.
2. Locate and remove the 4 connecting screws (2
on each side) located on the rear of the shroud.
See Fig. 30
3. Once the 4 connecting screws have been
removed, push the shroud away from the fan
motor. See Fig. 31.
4. With upper shroud separated from the fan motor
bracket, grasp the shroud and remove it from
the unit. See Fig. 32.
SCREW
SCREW
SCREW
SCREW
SCREW
OUTDOOR FAN MOTOR BRACKET
A08532
Fig. 30 – Location of Screws Connecting Shroud
FAN BRACKET
OUTDOOR FAN
MOTOR BRACKET
SCREW
UPPER CONDENSER SHROUD
SCREW
SCREW
A08533
Fig. 31 – Push Condenser Shroud from Fan Motor Bracket
UPPER CONDENSER
SHROUD
UPPER CONDENSER SHROUD
A08531
Fig. 29 – Location of Attachment Screws on Top of Condenser
Shroud
SLINGER RING
OUTDOOR
FAN
A08534
Fig. 32 – Removal of Upper Condenser Shroud
11
Remove the Outdoor Fan Assembly
With the upper condenser shroud removed, the
outdoor fan assembly can be removed.
1. Locate and remove 2 screws that attach fan
motor bracket to base of unit. See Fig. 33.
2. Lift outdoor fan assembly out of unit.
3. To remove fan from assembly, use 10 mm open
wrench to loosen nut on motor shaft. See Fig.
34
a. Pull outdoor fan off fan motor shaft.
Removal of Lower Condenser Shroud
For cleaning purposes, the lower condenser shroud
may need to be removed from the unit to provide
access to the outdoor coil.
1. Verify the upper condenser shroud and outdoor
fan assembly have been removed. If necessary,
refer to previous sections.
2. Locate and remove 2 screws (1 on each side)
that fasten lower condenser shroud to outdoor
coil. See Fig. 35 and Fig. 36.
3. The lower condenser shroud can now be
separated from the coil and taken out of the
unit.
OUTDOOR MOTOR BRACKET
OUTDOOR
COIL
COPRESSOR
SOUND SHIELD
OUTDOOR FAN MOTOR
LOWER
CONDENSOR
SHROUD
SCREW
SLINGER
RING
SCREW
OUTDOOR FAN
SCREW
BASEPAN
A08535
Fig. 33 – Location of Fan Motor Bracket Screws
CAPILLARY TUBE
OUTDOOR COIL
TEMPERATURE
SENSOR
A08537
Fig. 35 – Location of Shroud to Coil Screw
(Compressor Side)
10MM
OPEN WRENCH
10MM NUT
OUTDOOR FAN
OUTDOOR FAN MOTOR
A08536
Fig. 34 – Remove 10 mm Nut on Fan Motor Shaft
A08550
Fig. 36 – Location of Shroud to Coil Screw
(Vent Door Side)
12
COMPONENT OPERATION
COMPRESSOR
A cutaway view of the rotary compressor with key
components labeled is shown in Fig. 37. The motor
stator is rigidly attached to the compressor shell. The
rotor is pressed onto the eccentric shaft, which is
supported by 2 bearings. Both the discharge valve
and discharge muffler are attached to the motor
bearing. The pump bearing provides a thrust surface
for the shaft and the rolling piston. Compressed gas is
separated from the suction gas by the vane. Discharge
gas pressure and the vane spring keep the vane in
contact with the rolling piston.
NOTE: The compressor sound shield is secured by
Velcro and should be removed before servicing the
compressor.
DISCHARGE TUBE
SUCTION INLET
SHELL
STATOR
ECCENTRIC SHAFT
SUCTION MUFFLER/
ACCUMULATOR
ROTOR
MOTOR BEARING
DISCHARGE MUFFLER
DISCHARGE VALVE
CYLINDER
PISTON
VANE
PUMP BEARING
OIL TUBE
MOUNTING PLATE
A08557
Fig. 37 – Rotary Compressor Components
13
between the vane tip and the rolling piston requires
careful selection and control of materials to provide
wear resistance and reliable long--term operation.
The rotary compression process (see Fig. 38), starts at
top dead center as shown in (1). Suction gas flows
through the suction inlet and into the cylinder area.
As the shaft rotates through 90 degrees, the rolling
piston moves to position A as shown in (2). The
suction volume is now the area defined by point A
and the tip of the vane. Gas in the remaining volume
has been compressed above suction pressure. After
another 90 degrees of shaft rotation, the rolling piston
has moved to position B as shown in (3). Both the
compressed gas and suction gas volumes are now
equal. Another 90 degrees of shaft rotation is shown
in (4). Compressed gas has reached a pressure
sufficient to open the discharge valve, and flows from
the cylinder into the compressor shell. After another
90 degrees of shaft rotation, the entire process begins
again. Continuous suction and discharge allows for a
smooth compression process.
The rolling piston is not in actual contact with the
cylinder wall, vane, or bearing faces. Hydrodynamic
sealing prevents leakage from the compressed gas
volume to the suction volume via these paths. Precise
control of machining tolerances, surfaces, finishes,
and assembly clearances is critical to achieve high
efficiency performance. In addition, the line contact
A08558
Fig. 38 – Rotary Compressor Compression Process
COMPRESSOR TROUBLESHOOTING
Refer to the Compressor Troubleshooting Table
below for a basic compressor troubleshooting guide.
COMPRESSOR TROUBLESHOOTING GUIDE
POSSIBLE CAUSE
CHECK UNIT STATUS INDICATOR FOR A
DIAGNOSTIC CODE (See Control Diagnostics section of this manual)
UNIT MAY BE IN A RANDOM 3--- MINUTE
TIMEGUARD
COILS/FILTERS DIRTY OR PLUGGED
AIR OR NON--- CONDENSABLE GASES IN
SYSTEM
SYSTEM REFRIGERANT OVERCHARGED
DISCHARGE LINE RESTRICTED
CAPILLARY TUBE OR STRAINER
RESTRICTED OR PLUGGED
FAN BLADE OR MOTOR DEFECTIVE
FAN BLADE OR BLOWER WHEEL STUCK
SYSTEM REFRIGERANT UNDERCHARGED
EVAPORATOR AIRFLOW RECIRCULATION
UNIT OVERSIZED FOR APPLICATION
COMPRESSOR REQUIRES START ASSIST
NO POWER TO UNIT
LOW VOLTAGE TO UNIT
OVERLOAD PROTECTOR OPEN
OVERLOAD PROTECTOR INCORRECT OR
DEFECTIVE
CAPACITOR INCORRECT OR DEFECTIVE
THERMOSTAT IS SET TOO HIGH OR LOW
WIRING IS INCORRECT OR DEFECTIVE
SYSTEM PRESSURES NOT EQUALIZED
COMPRESSOR MOTOR OR MECHANISM
DEFECTIVE
COMPRESSOR GROUNDED
Compressor
Starts and Runs
But Cycles On
the Overload
Compressor
Starts After
Cycling the
Overload
Several Times
SYMPTOM
Compressor Will
Not Start. It
Hums and
Cycles On the
Overload
Compressor Will
Not Start and
Makes No Noise
Compressor
Cycles Off
(Not On Overload)
X
X
X
X
X
X
X
X
X
X
X
X
X
X
X
X
X
X
X
X
X
X
X
X
X
X
X
X
X
X
X
X
X
X
X
X
X
X
X
X
X
X
X
X
X
X
X
X
X
X
X
Note: In order to aid in compressor operation troubleshooting, disable control delays and timers for one cycle by depressing the temp up and temp down . . .
. . . keys at the same time (hold for 3 seconds). The delays and timers will be enabled after the cycle has completed or if power is cycled.
14
BASIC HERMETIC COMPRESSOR
ELECTRICAL MEASUREMENTS
There are 2 basic electrical tests for hermetic
compressors that will determine the electrical state of
the motor. The first test requires checking the
electrical resistance of each of the electrical motor
windings. The second test requires checking the
electrical resistance of each of the electrical motor
windings to ground. These tests may be accomplished
by performing the following steps:
1. DISCONNECT ALL POWER TO THE
UNIT.
!
WARNING
ELECTRICAL SHOCK HAZARD
Failure to follow this warning could result in personal injury
or death.
Disconnect all power to unit to avoid possible electrical
shock during service or installation.
2. Remove the unit chassis from the sleeve as
detailed in the Unit Dis--assembly section.
3. Open the control box as detailed in the
Accessing Components section then locate,
label, and remove the three (3) compressor
wires from the following locations: the RUN
wire (blue) from the capacitor, the START wire
(yellow) from the capacitor. The third wire,
COMMON wire (red), will be connected to the
terminal block.
!
NOTE: The rotary compressor has the compressor
overload located under the terminal cover. If the
overload is open it can show ohm readings that are
infinite. The unit should be off for at least an hour to
give this overload time to reset if it is open.
5. Next, perform a grounded windings test to test
the resistance individually of each wire to the
shell of the compressor. The paint on the
compressor can prevent good contact between
the probe and the metal. The paint should be
removed from a small section of the shell of the
compressor to ensure good contact by the meter
probe. The volt--ohmmeter should be set to at
least the 100X ohm level. The measured
resistance between each wire and ground should
be infinite or O.L. on the readout. If there is
measurable resistance one of the windings is
likely shorted to ground. See Fig. 40.
6. A compressor that has a winding to winding
short or a winding to compressor shell short is
electrically failed and needs to be replaced. See
the Compressor Replacement section for details.
DANGER
PERSONAL INJURY OR DEATH HAZARD
Failure to follow this warning could result in personal injury
or death.
For compressors that are known to be damaged:
Remove refrigerant prior to disconnecting compressor wires.
Damaged hermetic compressor terminals may become loose
and eject from the compressor. Wear safety glasses and keep
your face away from the area above the terminals when
removing compressor wires.
A08559
Fig. 39 – Shorted/Open Windings Test
4. Perform a shorted/open windings test to
measure the resistance between the windings of
the compressor motor. Use a volt--ohmmeter
set to the lowest ohm reading level then read
and record the resistance between the RUN and
START, START and COMMON, and RUN and
COMMON wires. See Fig. 39. The typical
resistance readings will be about 4, 3, and 1
ohms respectively. The smaller values should
add to equal the larger value. If this is not true
then the compressor is likely shorted winding to
winding.
A08560
Fig. 40 – Grounded Windings Test
15
COMPRESSOR REPLACEMENT
Before working on the compressor, read the
instructions thoroughly and gather the necessary tools
for the job. Review all safety information on unit and
in literature. Always turn off all power to unit to
avoid the possibility of electrical shock.
!
WARNING
ELECTRICAL SHOCK HAZARD
Failure to follow this warning could result in personal injury
or death.
Disconnect all power to unit to avoid possible electrical
shock during service or installation.
Consider the following safety issues before
beginning:
• New and unfamiliar tasks should be
performed under the supervision of an
experienced service technician.
• Personal protective equipment, such as work
gloves and safety glasses, should be worn.
• The floor around the work area should be
clean and free of debris.
• Make sure tools are the correct tools for the
job and that they are working properly and in
good condition.
• Never replace a blown fuse without
correcting the cause of the original failure. If
thermally operated circuit breakers or
overloads are tripping, make sure the trip is
not due to excessively high temperatures or
loose connections.
• When brazing suction and discharge lines,
cool the lines with a damp, clean cloth to
prevent injury.
• Oil may be present in the compressor
accumulator and interconnecting tubing. Use
caution when removing tubing.
!
DANGER
Tools Needed
The following list includes the recommended tools
and devices for removing and replacing the
compressor.
1/2--- in. and 3/8--- in. Tube Benders
1/2--- in. Nut Driver
5/16--- in. Nut Driver
Flat Head Screwdriver
Piercing Valve
Top Tech Access Valve (Part No. TT-AVX2 )
Pinch Off Tool
Top Tech Filter Drier -All Units (Part No. T-LLDBF083S)
Refrigerant Acidic Test Kit
Refrigerant Reclaim System
Charging Cylinder or an Electronic Scale
R410A Refrigerant
Tubing Cutter
Torch
Nitrogen Cylinder with Regulator
Strainers
Capillary Tubes
Removing the Compressor
Follow the steps below to remove the compressor:
1. Disconnect all power to unit.
2. Remove unit from wall sleeve as detailed in the
Unit Dis--assembly section. The unit weighs up
to 150 pounds (68 kg). Seek assistance or use a
lifting device when removing unit from wall
sleeve.
3. If the unit is a heat pump: Disconnect the
wire plug on the reversing valve solenoid and
carefully remove the outdoor coil temperature
sensor. See Fig. 41.
4. Attach the piercing valve to the suction side
process tube below the crimps. Use a refrigerant
acidic tester to verify acidity of the system. After
verifying the system acidity, remove the refrigerant using a certified refrigerant recovery system.
!
CAUTION
ENVIRONMENTAL HAZARD
Failure to follow this caution may result in environmental
pollution.
Remove and recycle all components (i.e. oil, refrigerant,
etc.) before unit final disposal.
PERSONAL INJURY OR DEATH HAZARD
5. When all the refrigerant has been recovered,
remove the terminal cover from the compressor
with a nut driver. Disconnect the 3 wires from
the compressor and label the location of each.
Once the wires are labeled, replace the terminal
cover to protect the compressor terminals.
6. Remove the air system components by
following the procedure detailed in the
Accessing Unit Components section.
Failure to follow this warning could result in personal injury
or death.
For compressors that are known to be damaged:
Remove refrigerant prior to disconnecting compressor wires.
Damaged hermetic compressor terminals may become loose
and eject from the compressor. Wear safety glasses and keep
your face away from the area above the terminals when
removing compressor wires.
16
7. Remove the piercing valve and cut the crimped
portion of both process tubes off with a small
tubing cutter. Braze an access valve on each
process tube. Using a torch, disconnect the
suction and discharge tubes from the
compressor connections.
8. Remove the compressor mounting bolts, and
remove the compressor.
!
16. Pinch off each access valve on the process tubes
in 2 places using a pinch off tool. Release any
refrigerant pressure trapped in the access valve
by depressing the valve core, then confirm that
no R410A is leaking past the pinch off tool
location. Cut the access valve stem of the
process tube above the top crimp and braze the
top of each process tube to ensure the system is
sealed (leave the pinch off tool in place until
after the brazing process is complete).
17. Reassemble the unit.
18. Re--install compressor sound shield.
19. Connect the compressor wires and energize the
unit to verify operation.
CAUTION
PERSONAL INJURY HAZARD
Failure to follow this caution may result in personal injury.
The compressor may still be hot from brazing process.
REVERSING VALVE
IMPORTANT: Any time the compressor is
replaced, the strainer and capillary tubes must be
removed and replaced also.
9. For all units: Remove and replace the strainer
and capillary tubes from the system. See Fig. 41
for strainer and capillary tube location.
10. For Heat/Cool Units: Use an in--line filter drier
(Part No. T-LLDBF083S). The filter drier can be
installed in any location in suction line. See Fig.
42 for general installation location.
For Heat Pump Units: Use an in--line filter
drier (Part No. T-LLDBF083S) and install between
the reversing valve and the compressor
accumulator. There are several suction tube
configurations and the in--line filter drier will be
field piped and brazed into the suction tube for
your unit.
11. Remove the grommets from the existing
compressor and install them onto the new
compressor.
12. Install the new compressor and the new
capillary assembly.
IMPORTANT: Any time the compressor is
replaced, the strainer and capillary tubes must
also be removed and replaced. An in--line filter
drier must also be added. See Fig. 42 for location.
13. Leak check the unit with 150 psi (10.55
kg/cm2)of nitrogen pressure.
14. The refrigeration system should be evacuated
from the high side to the low side to a minimum
of 200 microns of mercury. This evacuation
removes residual moisture from the system
prior to charging.
15. Recharge unit to the nameplate refrigerant
charge using a charging cylinder or scale.
REVERSING VALVE
SOLENOID
OUTDOOR COIL
OUTDOOR COIL
TEMPERATURE
SENSOR
COMPRESSOR
CAPILLARY TUBE
COMPRESSOR
SOUND SHIELD
A08539
Fig. 41 – Reversing Valve Solenoid
and Outdoor Temperature Sensor
IN-LINE FILTER DRIER
OUTDOOR COIL
CAPILLARY TUBE
SUCTION LINE
COMPRESSOR
OUTDOOR
COIL SENSOR
A08540
Fig. 42 – In--line Filter Drier general Installation Location
Refrigerant Charging
Every mechanical refrigeration system that is opened
for servicing must be accurately charged before it is
returned to service. Run the compressor ONLY after
charging the system with refrigerant.
IMPORTANT: The compressor should never be
operated without refrigerant!
It is important to remember that recovered and/or
recycled refrigerant may only be recharged into the
system from which it was initially recovered, or
another one owned by the same customer. Charge
level is important. Charge units only as recommended
by manufacturer.
17
HEATERS
HEATER REMOVAL
The heater in Gree GA series PTACs is located
directly behind the evaporator coil. The heater assembly includes the universal heater (which can be configured for 2.0kW, 3.0kW or 5.0kW), a primary limit
switch, and a secondary limit switch. See Fig. 43. The
primary and secondary limit switches are safety
switches that regulate heater operation. The primary
limit switch disables current to the heater when the
temperature exceeds the setting on the switch.
For example, a 3.0 kW heater may have a primary
limit switch setting of 140˚ F (60˚ C). If the
temperature at the switch exceeds 140˚ F (60˚ C), the
primary limit switch will electrically open and shut
off power to the heater. Once the temperature drops
below 110˚ F (43˚ C), the primary limit switch will
automatically reset.
The secondary limit switch works in the same manner
as the primary limit switch, except it is a one time
switch and has a slightly higher temperature setting
of 178˚ F (81˚ C). Once this switch is thermally
opened, it must be replaced. Together, the primary
and secondary switches help maintain safe
temperature limits for unit operation.
Before working on the heater, read the instructions
thoroughly and gather the necessary tools for the job.
Review all safety information on the unit and in the
product literature.
SECONDARY LIMIT (REAR)
PRIMARY LIMIT (REAR)
HEATERS
!
WARNING
ELECTRICAL SHOCK HAZARD
Failure to follow this warning could result in personal injury
or death.
Disconnect all power to unit to avoid possible electrical
shock during service or installation.
The manufacturer reserves the right to discontinue, or
change at any time, specifications or designs without
notice and without incurring obligations.
Consider the following safety issues:
• Disconnect All Power to unit prior to
performing any service or maintenance.
• New and unfamiliar tasks should be
performed under the supervision of an
experienced service technician.
• Personal protective equipment, such as safety
glasses and work gloves, should be worn.
• The floor around the work area should be
clean and free of debris.
• Make sure tools are the correct tools for the
job, and that they are working properly and in
good condition.
Tools Needed
The following list includes the recommended tools
and devices for removing and replacing the
compressor.
Phillips Head Screw Driver
Volt--- ohmmeter
A08541
Fig. 43 – Limit Switch Location
COMMON CAUSES OF HEATER FAILURE
Heater failure may result from broken heater coils,
primary limit switch failure, or an open secondary
limit switch. These conditions are generally caused
by low or no airflow or failed electronic board.
Perform the following steps to remove the Heater
Assembly.
1. DISCONNECT ALL POWER TO UNIT.
2. Remove heater by following instructions in
Accessing Unit Components section.
18
After the heater is removed, examine the heater as
follows to determine if it is operational:
Perform a visual inspection. The heater coil should be
free of breaks. If there are any breaks in the coil,
replacement of the heater assembly is necessary.
PRIMARY LIMIT
FAN MOTOR TROUBLESHOOTING
Refer to the Fan Motor Troubleshooting table for a
basic troubleshooting chart.
Tools Needed
The following list includes the recommended tools
and devices for working on the fan motor.
Gloves
Safety Glasses
Small Adjustable Wrench
Phillips Head Screwdriver
Volt--- ohmmeter
SECONDARY LIMIT
3kW Element
Connections
2kW Element
Connections
!
HEATER ASSEMBLY
WARNING
ELECTRICAL SHOCK HAZARD
Failure to follow this warning could result in personal injury
or death.
A09319
Fig. 44 – Heater Coil (Removed)
Coil resistance must also be checked to verify the
heater is operating correctly. The resistance of the
heater coils must meet approximate levels for the
heater to perform at its optimum efficiency. See
Acceptable Heater Resistance Values table for
approximate resistance for heaters at 75˚ F (24˚ C).
Before checking the heater coil resistance, be sure all
power to unit is off.
To check resistance, set the volt--ohmmeter selector
switch to the proper ohm range setting. Connect the
volt--ohmmeter leads to the metal studs on each side
of the heater coil at the element connections that hold
the incoming wires in place. Incorrect readings can
be obtained if the heater connecting plug is not
removed from connector located on the control box
(see figure 14). If the resistive reading is infinite or
zero, the heater is failed and replacement is necessary.
NOTE: If the application is using a 30 amp power
cord / 5 kW heater, the 2kW and 3kW heaters are
operated in parallel. The resistance values for the
individual 2kW and 3kW elements should be
measured and compared to the values provided in the
table
ACCEPTABLE HEATER RESISTANCE VALUES
HEATER
SIZE
2.0 kW
3.0 kW
2.0 kW
3.0 kW
WATTS
VOLTS
2000
3000
2000
3000
230
230
265
265
FAN MOTORS
ACCEPTABLE
RESISTANCE (Ohms)
25.2--- 27.8
16.8--- 18.6
33.4--- 37.0
22.3--- 24.6
The Gree GA series PTAC has an indoor and an
outdoor fan, each with their own motor. The indoor fan
motor can operate at 3 speeds: High, Medium, and
Low. Each motor has it’s own capacitor located inside
the control box. the indoor fan capacitor is gray in
color and the outdoor fan capacitor is black.
Before cleaning, servicing, performing maintenance, or
removing the chassis from the wall sleeve, disconnect all
power to the unit.
Only trained and qualified service personnel should perform
installation and service procedures on these units. Untrained
personnel may perform basic maintenance tasks such as
cleaning and replacing filters. Refer to Accessing Unit
Components section of this manual for proper procedures to
disconnect power to units.
BASIC FAN MOTOR ELECTRICAL TESTS
There are two basic electrical tests for fan motors that
will determine the electrical state of the motor. The
first test requires checking the electrical resistance
between the motor windings. The second test
requires checking the electrical resistance between the
motor windings and ground. These tests may be
accomplished by performing the following steps:
Outdoor Fan Motor
1. DISCONNECT ALL POWER TO UNIT.
2. Open the control box as detailed in the UNIT
DIS--ASSEMBLY section.
3. Label and disconnect the fan motor wires from
the circuit board and outdoor fan capacitor. See
Fig. 48.
NOTE: The outdoor fan motor has 2 wires that run to
the outdoor fan capacitor and 2 wires that run to the
circuit board.
4. Measure and record the resistance between the
black wire and each of the other wires. Make
sure the motor is cool before attempting to
measure resistance. The internal thermostat of
the motor may be electrically open and will not
close until the motor cools. See typical motor
winding resistance measurements in Outdoor
Fan Motor Information table on the following
page. The resistance values in the table are
19
approximate. Values that are within 10% of
those listed are acceptable. If the motor in your
model is not listed, find a motor of similar
horsepower and voltage on the chart and
compare it to the resistance measurements of
your motor.
5. Measure the resistance of each of the motor
wires to the motor casing. The resistance should
be infinite. Make sure the motor is cool before
attempting to measure resistance. The internal
thermostat of the motor may be electrically
open and will not close until the motor cools. A
motor that has measurable resistance to ground
is shorted to ground and must be replaced.
Indoor Fan Motor
1. DISCONNECT ALL POWER TO UNIT.
2. Open the control box as detailed in the UNIT
DIS--ASSEMBLY section.
3. Unplug indoor fan harness from side of control
box. See Fig. 13.
NOTE: The indoor fan motor has 3 wires that run to
the indoor fan capacitor and 3 wires that run to the
circuit board.
4. Measure and record the resistance between the
black wire and each of the other wires. Make
sure the motor is cool before attempting to
measure resistance. The internal thermostat of
the motor may be electrically open and will not
close until the motor cools. See typical motor
winding resistance measurements in the
following Indoor Fan Motor Information table.
The resistance values in the table are
approximate. Values that are within 10% of
those listed are acceptable. If the motor in your
model is not listed, find a motor of similar
horsepower and voltage on the chart and
compare it to the resistance measurements of
your motor.
5. Measure the resistance of each of the motor
wires to the motor casing. The resistance should
be infinite. Make sure the motor is cool before
attempting to measure resistance. The internal
thermostat of the motor may be electrically
open and will not close until the motor cools. A
motor that has measurable resistance to ground
is shorted to ground and must be replaced.
NOTE: When troubleshooting fan motors, test
capacitors first (covered on following pages). If
capacitors are not faulty, fan motors may need to be
replaced.
20
21
147±8%(at 68° F/20° C)
98±8%(at 68° F/20° C)
Resistance (Ohms) Black to Brown
Resistance (Ohms) Black to Red
Motor Manufacturer
Motor Manufacturer’s Part Number
Motor Voltage
Motor Horsepower (Watts)
Motor Full Load Amps
Motor Speeds
1501180202
Zhongshan Nan ---feng
Electrical Machinery
Co.,Ltd.
FN18F
208/230
0.024 (17.9)
0.1
3
517.4±8%
(at 68° F/20° C)
328.0±8%
(at 68° F/20° C)
33.2±8%
(at 68° F/20° C)
67.0±8%
(at 68° F/20° C)
7000
208/230
GAE / GAA Series
150110343
Zhongshan Nan ---feng
Electrical Machinery
Co.,Ltd.
FW40G
208/230
0.054 (40.3)
0.4
1
Gree’s Motor Part Number
Outdoor Fan Motor Information:
Resistance (Ohms) Black to Blue
Resistance (Ohms) Black to Yellow
Resistance (Ohms) Black to Red
Resistance (Ohms) Black to Brown
Motor Manufacturer’s Part Number
Motor Voltage
Motor Horsepower (Watts)
Motor Full Load Amps
Motor Speeds
Motor Manufacturer
Gree’s Motor Part Number
GAE/GAA series (BTUH)
Voltage Rating
Description
Indoor Fan Motor Information:
DEFECTIVE BEARING
CAPACITOR DEFECTIVE
CONTROL BOARD DEFECTIVE
LOW LINE VOLTAGE
SHORTED MOTOR WINDING
NO POWER TO UNIT
INTERNAL THERMOSTAT OPEN
MISWIRED
FAN STUCK
BROKEN MOTOR WIRE
MOTOR WINDING GROUNDED
OPEN MOTOR WINDING
POSSIBLE CAUSE
X
X
X
X
X
X
X
X
Makes No Noise and Does Not
Start
150110345
Zhongshan
Broad---Ocean Motor
Co.,Ltd.
FW40P
265
0.054 (40.3)
0.3
1
287.4±8%(at
68° F/20° C)
203.2±8%(at
68° F/20° C)
1501180204
Zhongshan
Broad---Ocean Motor
Co.,Ltd.
FN18P
265
0.024 (17.9)
0.2
3
502.2±8%
(at 68° F/20° C)
202.5±8%
(at 68° F/20° C)
26.8±8%
(at 68° F/20° C)
48.4±8%
(at 68° F/20° C)
98±8%(at 68° F/20° C)
147±8%(at 68° F/20° C)
150110343
Zhongshan Nan ---feng
Electrical Machinery
Co.,Ltd.
FW40G
208/230
0.054 (40.3)
0.4
1
15011802
Zhongshan Nan ---feng
Electrical Machinery
Co.,Ltd.
FN21F
208/230
0.029 (21.6)
0.2
3
391.7±8%
(at 68 F/20 C)
222.3±8%
(at 68 F/20 C)
22.4±8%
(at 68 F/20 C)
42.2±8%
(at 68 F/20 C)
9000
208/230
GAE / GAA Series
150110345
Zhongshan
Broad---Ocean Motor
Co.,Ltd.
FW40P
265
0.054 (40.3)
0.3
1
287.4±8%(at
68° F/20° C)
203.2±8%(at
68° F/20° C)
238.2±8%
(at 68° F/20° C)
25.8±8%
(at 68° F/20° C)
38.2±8%
(at 68° F/20° C)
568±8%(at 68° F/20° C)
1501180201
Zhongshan
Broad---Ocean Motor
Co.,Ltd.
FN21P
265
0.029 (21.6)
0.2
3
12000 / 15000
208/230
15000
208/230
GAA Series
107±8%(at 68° F/20° C)
96±8%(at 68° F/20° C)
15011047
Zhongshan Nan ---feng
Electrical Machinery
Co.,Ltd.
FW65G
208/230
0.088 (65.6)
0.6
1
1501180203
Zhongshan Nan ---feng
Electrical Machinery
Co.,Ltd.
FN23F
208/230
0.031 (23.1)
0.2
3
247±8%
(at 68° F/20° C)
303±8%
(at 68° F/20° C)
50.8±8%
(at 68° F/20° C)
80.4±8%
(at 68° F/20° C)
15000 GAE, 12000 GAE/GAA Series
110.4±8%(at 68 F/20
C)
97.8±8%(at 68 F/20 C)
15011048
Zhongshan Nan ---feng
Electrical Machinery
Co.,Ltd.
FW65G
208/230
0.088 (65.6)
0.6
1
1501180203
Zhongshan Nan ---feng
Electrical Machinery
Co.,Ltd.
FN23F
208/230
0.031 (23.1)
0.2
3
247±8%
(at 68° F/20° C)
303±8%
(at 68° F/20° C)
50.8±8%
(at 68° F/20° C)
80.4±8%
(at 68° F/20° C)
150110342
Zhongshan
Broad---Ocean Motor
Co.,Ltd.
FW45P
265
0.06 (44.7)
0.35
1
214.3±8%(at
68° F/20° C)
138.1±8%(at
68° F/20° C)
1501180205
Zhongshan
Broad---Ocean Motor
Co.,Ltd.
FN23P
265
0.031 (23.1)
0.2
3
421.7±8%
(at 68° F/20° C)
192.2±8%
(at 68° F/20° C)
110.2±8%
(at 68° F/20° C)
159.8±8%
(at 68° F/20° C)
12000 / 15000
265
GAE / GAA Series
X
X
X
X
X
Runs On One Speed, Not On
Others
X
X
Starts But Runs
Slow
X
X
X
X
SYMPTOM
Starts But Stops After
Short Time
X
X
9000
265
GAE / GAA Series
INDOOR FAN MOTOR INFORMATION
7000
265
GAE / GAA Series
X
X
X
X
X
X
X
Motor Hums But Does Not
Start
X
X
FAN MOTOR TROUBLESHOOTING CHART
CAPACITORS
1. Turn off unit power as described in UNIT
DIS--ASSEMBLY section but do not unplug the
service cord; it will supply ground connection
for the unit chassis. Check to ensure power is
off and LOCKED OUT.
2. Connect one lead of a 20,000 ohm, 2--watt
resistor to the center group of terminals on the
dual capacitor. Attach the other lead from the
resistor to an unpainted metal section of the unit
chassis. This allows that section of the dual
capacitor to discharge. Repeat this process
between the other group of terminals.
3. Locate and disconnect the wires from the start
and/or run capacitor to isolate them from the
remainder of the circuit. Refer to the unit
wiring diagram (Fig. 60) if you need assistance
locating wires.
4. Perform capacitor test. Set up the
volt--ohmmeter to measure resistance by
connecting terminals C to HERM on the meter.
5. The reading on the meter should first indicate
zero, or a low resistance, then slowly rise
toward infinity or some high value or
measurable resistance. This indicates the
capacitor is most likely good. If the reading
goes to zero or a low resistance and stays there,
the capacitor is likely shorted and needs
replacement. If the reading immediately
indicates infinity, the capacitor is likely open
and must be replaced.
6. Replace the capacitor if failed and rewire
according to the wiring schematic. See Fig. 60.
For capacitor locations and identification refer to
Fig. 48.
!
WARNING
ELECTRICAL SHOCK HAZARD
Failure to follow this warning could result in personal injury.
Capacitors are capable of holding charge similar to a battery
and may cause an electrical shock.
Capacitors
The Gree GA series model uses 3 capacitors. the
compressor capacitor (designated on wiring diagram
as C1), the indoor fan capacitor, and outdoor fan
capacitor (both of which are designated as C2 on
wiring diagram). See Fig. 60.
NOTE: Wiring diagram shows both indoor and
outdoor fan capacitors are designated as C2. to
ensure correct capacitor is tested, verify that outdoor
fan capacitor is wired to M2 (outdoor fan motor ) and
indoor fan capacitor is wired to M3 (indoor fan
motor).
Run--circuits on single--phase compressor motors use
capacitors which dramatically affect the motor
operation. Run capacitors are connected to the motor
circuit at all times.
To evaluate the capacitor, perform a visual check
first. A shorted capacitor may give a visual
indication of its failure. For example, the pop--out
hole at the top of a start capacitor may bulge or blow
out. A run capacitor may bulge or leak. In these
instances, the capacitor must be replaced with one
recommended by the manufacturer. If there are no
visual signs of capacitor failure, testing of the
capacitor resistance may be done with a
volt--ohmmeter as follows:
22
CONDENSATE DRAIN VALVE
The condensate drain valveis atemperature--activated
valve that begins to open when outdoor temperature
drops below 59˚ F (15˚ C). The valve function allows
water to build up in the basepan at higher ambient
temperatures (>59˚ F / >15˚ C) and drains at lower
temperatures to prevent water from freezing in the
basepan. At higher ambient conditions, above 59˚ F
(15˚ C), the collected water is distributed on the
outdoor coil by the slinger ring and evaporated into
the air passing through the heating coil. The basic
location and installation of the condensate drain valve
is shown in Fig. 45.
The condensate drain valve may be faulty or the
outlet may be plugged if the basepan is full of water
at ambient temperatures below 45˚ F (7.2˚ C) (drain
valve should be open), or if the outdoor fan has
become frozen. If this is the case, the condensate
drain valve should be inspected to determine if it may
need to be replaced or if any obstructions must be
removed from the drain pan opening. The condensate
drain valve may also fail in the open position. If the
water continuously drains from the basepan at
ambient temperatures greater than 59˚ F (15˚ C), the
drain valve should be inspected to determine if it may
need to be replaced.
NOTE: If outdoor fan has become frozen due to
buildup, slinger ring may have been damaged and in
need of replacement. See Fig. 46.
SLINGER
RING
CONDENSATION
SUCTION PORT
CONDENSER SECTION
Fig. 45 – Condensate Drain Valve
A07550
Fig. 46 – Slinger Ring
23
A07678
INDOOR COIL SENSOR
The indoor coil temperature sensor is located on the
return bend end of the indoor coil (closest to the
control box) and is labeled “TUBE” on the schematic
diagram. The sensor is mounted in a well brazed to
the coil to provide better sensor response (see figure
48 for approximate location). The indoor coil
temperature sensor prevents the indoor coil
temperature from exceeding operating limits. The
sensor wiring connects the sensor bulb to the control
board in the control box. Resistance testing the
indoor coil sensor will verify operation is within
range. The resistance in Ohms should be taken at the
board connection end of the sensor lead wires. The
resistance of the indoor coil temperature sensor varies
with temperature. The approximate correlation
temperatures are listed in Appendix A. If the sensor
resistance reading is open or shorted, the sensor has
failed.
Indoor Coil Sensor
A08590
Fig. 47 – Location of Indoor Coil Sensor
OUTDOOR COIL SENSOR
The outdoor coil temperature sensor is located on the
return bend end of the outdoor coil (closest to the
compressor) and is labeled “OUTTUBE” on the
schematic diagram. The sensor is mounted in a well
brazed to the coil to provide better sensor response
(see figure 49 for approximate location). The outdoor
coil temperature sensor prevents the outdoor coil
temperature from exceeding operating limits and acts
as the board sensor input for defrost function on heat
pump units. The sensor wiring connects the sensor
bulb to the control board in the control box.
Resistance testing the outdoor coil sensor will verify
operation is within range. The resistance in Ohms
should be taken at the board connection end of the
sensor lead wires. The resistance of the outdoor coil
temperature sensor varies with temperature. The
approximate correlation temperatures are listed in
Appendix A. If the sensor resistance reading is open
or shorted, the sensor has failed.
OUTDOOR
COIL
COMPRESSOR
BASEPAN
CAPILLARY TUBE
OUTDOOR COIL
TEMPERATURE
SENSOR
A08544
Fig. 48 – Location of Outdoor Coil Sensor
COMPRESSOR
CAPACITOR
PLUG
CONNECTOR
RELAY BOARD
(PCB1)
LOGIC BOARD
(PCB2)
JUNCTION BOX
INDOOR FAN CAPACITOR
OUTDOOR FAN
CAPACITOR
Fig. 49 – Location of Components Inside Control Box
24
A09324
ROOM TEMPERATURE SENSOR
Keypad selected functions
The room temperature sensor is located in the middle
of the indoor coil and reads the temperature on the
inside of the room. The room temperature sensor has
wiring that runs to the circuit board on the inside of
the control box.
Theapproximatecorrelation temperatures are listed in
Appendix A. If the sensor resistance reading is open
or shorted, the sensor has failed.
OPERATING CONTROL FUNCTIONS /
PROTECTIONS
Keypad Controls
The keypad for the GREE GA series models is located
on the top right of the front of the unit and serves as
an interface for common user controls. See Fig. 50.
FAN ONLY Mode
FAN ONLY and MEDIUM fan speed is the default
mode when unit is first powered ON.
While in FAN ONLY mode:
• The FAN ONLY mode LED indicator is ON
as well as the requested fan speed LED
indicator.
• The indoor fan will run at the requested fan
speed (High, Medium, or Low).
• The compressor and electric heat are
disabled.
• The UP and DOWN buttons on the keypad
will be disabled.
• The air temperature of the room is displayed
(display range is between 32˚ F~ 122˚ F, 0˚ C
~ 50˚ C).
• The indoor LED indicator will be on,
showing the room temperature.
• Fan speed will remain constant during
changes to other modes of operation.
OFF Mode:
A07632
Fig. 50 – Keypad Controls
Keypad Button Functions
There are 5 buttons on the keypad: ON/OFF, UP,
DOWN, MODE, and FAN SPEED. There is a 3
second delay between mode changes but the display
will change immediately. This will prevent going in
and out of modes while scrolling through keypad.
While in OFF Mode:
Only ON/OFF, UP, DOWN, and MODE buttons are
enabled. If UP or DOWN buttons are pressed, a 7
segment display will show indoor air temperature for
15 seconds. If ON/OFF or MODE buttons are
pressed, the unit will be started in last used mode
setting.
While in ON Mode:
All buttons are enabled. The button functions are
defined below.
Button
ON/OFF
MODE
FAN SPEED
UP
DOWN
Function
Turns unit ON or OFF when pressed
Switches run mode between COOL, HEAT, and FAN
ONLY
Specifies HIGH, MED, or LOW fan speed when
pressed
Increases the temperature set point value
Decreases the temperature set point value
While unit is in OFF mode:
• The 7 segment display will be blank.
• The Power LED indicator will be red to show
the unit is still plugged in. All other
indicator LEDs will be off.
• All outputs will be disabled but Freeze Guard
protection feature will still be available (see
Freeze Guard section).
COOL Mode:
While unit is in COOL Mode:
• Reversing valve is de--energized
• COOL Mode LED indicator is ON
• Setpoint LED indicator is ON and 7 segment
display shows temperature setpoint value
(unless configured to show room temp.)
• Setpoint remains constant with mode
changes.
• Fan speed remains constant with mode
changes.
Regular Cooling Operation:
1. If indoor air temperature + temperature cool
bias is greater than or equal to temperature
setpoint + 2˚ F (1˚ C):
— Cooling is requested
— Outdoor fan starts to run
— Indoor fan motor runs at fan speed
requested
— 10 seconds later, the compressor is
allowed to start up
— Fan motors will energize immediately
25
NOTE: Compressor may not start because of internal
protections or timers (see Diagnostic section).
2. When indoor air temperature + cool bias is less
than or equal to temperature setpoint -- 2˚ F
(1˚ C):
— Cooling is satisfied
— Compressor and outdoor fan stop running
— Indoor fan motor runs at the requested fan
speed
NOTE: If fan cycle for cooling mode has been
selected through dip switches, the indoor fan will
operate for 60 seconds after the compressor has
de--energized. CYCLE Mode will not override any
protections which requires the indoor fan to be ON.
COOLING Mode protections
Outdoor Coil High Temperature Protection
Safety Start Condition: If outdoor coil temperature
rises above 149˚ F (65˚ C) continuous for 1 minute,
the outdoor coil high temperature protection is
activated and compressor will turn off.
Safety Stop Condition: If the outdoor coil high
temperature protection is active and outdoor coil
temperature falls below 131˚ F (55˚ C) continuously
for 2 minutes, the outdoor coil high temperature
protection de--activates and compressor will be
allowed to restart.
Indoor Coil Anti--Freeze Protection
Safety Start Condition: If indoor coil temperature
falls below 28˚ F (--2˚ C) continuously for 1 minute,
the indoor coil anti--freeze protection is activated.
The compressor and outdoor fan will turn off.
Safety Stop Condition: if the indoor coil anti--freeze
protection is active and indoor coil temperature rises
above 40˚ F (5˚ C) continuously for 2 minutes, the
indoor coil anti--freeze protection de--activates. The
compressor and outdoor fan will be allowed to restart.
Temperature Setpoint Limit
This feature is a configurable option that applies to
both heating and cooling modes. It allows the owner
to configure what the minimum and maximum
setpoint values will be, regardless of what the user
selects on the display.
The following ranges can be selected through use of
dipswitches. Refer to Dip Switch section.
Range 1: 61~ 86˚ F (16~ 30˚ C)+
Range 2: 63~ 80˚ F (18~ 28˚ C)
Range 3: 65~ 78˚ F (19~ 26˚ C)
Range 4: 68~ 75˚ F (20~ 24˚ C)
NOTE: The unit setpoint display will show the full
range of 61~ 86˚ F (16~ 30˚ C) no matter which limit
range is selected. The software will control to the
actual setpoint limit selected.
Heat Mode
While the unit is in HEAT mode:
— The reversing valve stays energized as
long as heat pump heating is being used.
— HEAT mode LED indicator is ON,
requested fan speed LED indicator is ON,
and the 7 segment display will show
setpoint temperature (unless configured to
show room temperature).
— Setpoint and fan speed remain constant
with mode changes.
Regular Heating Operation:
Heat Pump Models
NOTE: The compressor and electric heaters are not
allowed to run at the same time. The regular
operation conditions are defined below.
1. If indoor temperature -- temperature heat bias
falls between 5˚ F (3˚ C) less than the setpoint
temperature, and 2˚ F (1˚ C) less than the
setpoint temperature, the following occurs:
— Heating is requested
— Reversing valve becomes energized
— Outdoor fan starts to run
— Indoor fan starts to run at requested fan
speed
— 10 seconds later, compressor is allowed to
restart
2. If indoor temperature -- temperature heat bias
falls to less than setpoint temperature --5˚ F
(--3˚ C), the electric heater will be used to
produce heat quickly (compressor will turn off
if it was on), the indoor fan will run at
requested speed. Once step 2 is initiated, the
unit will continue to heat with electric heat until
the demand is satisfied.
3. If heat pump is needed while the compressor is
disabled by protection, the electric heater will
replace the compressor after a 15 second delay.
4. If indoor temperature -- temperature heat bias is
greater than setpoint temperature +2˚ F (+1˚ C):
— Heating satisfied (heating demand is off)
— Compressor or electric heater stops
— If configured for fan cycle (through dip
switch setting), the indoor fan will
continue to run at the requested speed for
60 seconds to blow the remaining heat
from the unit. Fan will then turn off.
— If configured for continuous mode, the
indoor fan will run at the user selected
speed.
26
Heat/Cool Models
Heat/Cool models use electric heat only for heating.
Normal operating conditions are defined below:
1. If indoor temperature -- temperature heat bias is
less than or equal to the setpoint temperature
--2˚ F (1˚ C), the electric heater starts up and the
indoor fan will run at requested speed.
2. If indoor temperature -- temperature heat bias is
greater than setpoint temperature +2˚ F (1˚ C):
— Heating is satisfied (heating demand is
off)
— Electric heater stops
— If configured for fan cycle (through dip
switch setting), the indoor fan will
continue to run at the requested speed for
60 seconds to blow the remaining heat
from the unit. Fan will then turn off.
— If configured for continuous mode, the
indoor fan will run at the user selected
speed.
Heating mode protections
Indoor Coil High Temperature Protection
(Heat Pump Models Only)
Safety Start Condition: If indoor coil temperature
rises above 136˚ F (58˚ C) continuously for 1 minute,
the indoor coil high temperature protection activates.
The compressor and outdoor fan will be turned off.
Safety Stop Condition: If the outdoor coil high
temperature protection is active and outdoor coil
temperature falls below 126˚ F (52˚ C) continuously
for 2 minutes, the indoor coil high temperate
protection de--activates. The compressor and outdoor
fan will be allowed to restart (all other safeties and
protections will still be enforced).
Sound Protection
When turning the unit off or changing the operation
mode, the reversing valve will de--energize 2 minutes
after the compressor has stopped.
Defrost (Heat Pump Models Only)
Safety Start Condition: If the outdoor coil
temperature falls below 28˚ F (--2˚ C) continuously
for 1 minute and the accumulated compressor run
time is above the minimum run time, DEFROST
activates. The compressor and outdoor fan will stop
and the electric heater will replace the compressor
until DEFROST de--activates.
Safety Stop Condition: If DEFROST is active and
the outdoor coil temperature rises above 40˚ F (5˚ C)
continuously for 10 minutes, DEFROST de--activates
and the compressor and outdoor fan will be allowed
to restart at the next heating cycle.
MISCELLANEOUS PROTECTIONS
Freeze Guard Protection
Freeze Guard Protection is only active in OFF, FAN
ONLY, and COOL modes
Safety Start Condition: If Freeze Guard Protection
is enabled (dip switch) and the indoor air temperature
is below 40˚ F (5˚ C), Freeze Guard activates. The
electric heater and indoor fan will turn ON and the 7
segment display will show “FP”.
NOTE: Freeze Guard Protection mode cannot be
stopped using the keypad or wall thermostat.
Safety Stop Condition: When the indoor air
temperature rises to 50˚ F (10˚ C), Freeze Guard
de--activates.
Temperature Sensor Open/Short Failure
If any temperature sensor has an open or short failure,
a warning signal will be sent to the main STATUS
LED indicator and the 7 segment display will show
the failure code. When this happens in COOLING or
FAN ONLY modes, only the indoor fan is allowed to
run. For HEAT mode, all outputs will be disabled.
Minimum Compressor ON Time
Any time the compressor relay turns ON, there must
be a 3 minute minimum run--time regardless of the
actual room temperature. This function prevents
short--cycling of the compressor. This protection can
be over--ridden by: other protections, turning the unit
off, a mode change, or adjusting the setpoint.
Minimum Compressor OFF Time
Any time the compressor switches OFF, or power is
reset, the compressor will stay off for a random time
period of 2 minutes, 45 seconds to 3 minutes, 15
seconds. This allows pressures to equalize.
Timer Speed--Up
For easier field service, push UP and DOWN buttons
at the same time and hold for 3 seconds. This will
speed up the internal timers for one compressor ON
cycle.
Other Safety Protections
Whenever the compressor or electric heater runs, the
indoor fan is always ON. If a wall thermostat is
being used and there is a request for the compressor
or electric heater, but no fan, the indoor fan will run
at MED speed by default.
The compressor and electric heater will never be
allowed to run at the same time.
27
CONFIGURATION
Dipswitches
Auxiliary dip switch controls can easily be found
behind front panel.
To access, remove front panel. See Fig. 3.
7 Dip switches are accessible without opening the
control box.
IMPORTANT: Unit must be powered down to
change their status. See Fig. 51 and Fig. 52.
Factory settings for dip switches will be in the
DOWN position. See Dip Switch Functions Table
for the function of each dip switch position.
NOTE: The Unit Type Selector dip switch is NOT
accessible without first opening the electrical box.
the Unit Type Selector switch defines the unit type
where ON is for heat pump, and OFF is for heat/cool.
Effective changing of Unit Type Selector status
requires the unit to be turned off.
Dip Switches
A07071
Fig. 51 – Dipswitch Location on Unit
Dipswitch
UP
Down
Freeze guard
Setpoint Limit 2
Setpoint Limit 1
Fan CON/CYC for cooling
Fan CON/CYC for heating
Wall Thermostat enable
Electric heat only (for Heat Pumps)
A07072
Fig. 52 – Dip Switches
DIP SWITCH FUNCTIONS
No,
UP
DOWN
REMARKS
DEFAULT
1
Electric Heat Only
Heat Pump
For Heat Pump unit only.
DOWN
2
Wall Thermostat Enable
Control Panel Enable
DOWN
3
Fan Continuous Run for Heating
Fan Cycle for Heat
DOWN
4
Fan Cycle for Cool
Fan Continuous Run for Cooling
5*6
7
UP*UP
68--- 75 ˚F
20--- 24 ˚C
UP*DOWN
63--- 80 ˚F
18--- 28 ˚C
Freeze Guard Disable
DOWN*UP
65--- 78 ˚F
19--- 26 ˚C
DOWN*DOWN
61--- 86 ˚F
16--- 30 ˚C
(full range)
Freeze Guard Enable
28
DOWN
Two configurations (5*6)
combine to select set point
range.
The display always shows
the full range.
DOWN*DOWN
61--- 86 ˚F
16--- 30 ˚C
DOWN
Keypad Configuration
Allows further configuration of system.
NOTE: Changes do not take affect until power is
cycled on the unit.
To enter Keypad configuration
Cycle power to unit. Press and hold the Fan Speed
Button and the setpoint DOWN button for 5
continuous seconds, within 30 seconds of the unit
being powered up. If the unit has had power for more
than 30 continuous seconds, keypad configuration
cannot be entered. When keypad configuration mode
is first entered, it will default to Fahrenheit/ Celsius
Display Mode.
To scroll through the Keypad Configuration Options
Press and release the Fan Speed button. The stored
value will be displayed.
To modify configuration settings
Press and release the Setpoint Up or Setpoint Down
buttons.
To exit Keypad Configuration
Keypad Configuration will end on its own 30 seconds
after the last button press or when the MODE button
on the Keypad is pressed.
Fahrenheit/ Celsius Display Switch:
Change between degrees Fahrenheit and Celsius on
the display. An “F” indicates Fahrenheit display and
‘C’ indicates Celsius. Default is degrees “F”.
Indoor Air Temperature Sensor Biasing for Cooling mode:
Sometimes known as an anticipator, the air
temperature sensor bias is used to adjust the room air
temperature reading when in cooling mode. (Not
normally required.) Default biasing value is zero.
NOTE: The range for biasing change is --6˚ F to
+6˚ F (--3˚ C to +3˚ C)
Indoor Air Temperature Sensor Biasing for Heating mode:
Sometimes known as an anticipator, the air
temperature sensor bias is used to adjust the room air
temperature reading when in heating mode. (Not
normally required.) Default biasing value is zero.
NOTE: The range for biasing change is --6˚ F to
+6˚ F (--3˚ C to +3˚ C)
Indoor Temperature Display:
Change between showing setpoint only on the display
during heating and cooling modes “SP” or displaying
room temperature during heating and cooling modes
“AA”. “SP” mode is the default mode.
• If “SP” is selected, only the setpoint will be
displayed during heating and cooling modes,
regardless of what the real temperature is in
the room.
• If “AA” mode is selected, the room
temperature will be displayed during heating,
cooling and fan only modes.
— If the mode button has been changed to
either heating or cooling modes, setpoint
will be displayed for 10 seconds. After the
10 seconds, the room temperature will
again be displayed.
— If the on/off button is depressed (when the
unit is off) and the last mode was either
cooling or heating mode, the setpoint will
be displayed for 10 seconds before
displaying room temperature.
— During heating and cooling modes, if
either the up or down setpoint button is
depressed, the display will show the
setpoint for 10 seconds after the last up or
down button press. Then the room
temperature will be displayed again.
29
WALL THERMOSTAT INTERFACE
Wall Thermostat Terminal
NOTE: If configured for a wall thermostat, the
digital display and buttons on the control pad become
disabled.
IMPORTANT: Only trained, qualified personnel
should access electrical panel on unit and install
electrical accessories. Please contact your local
electrical contractor, dealer, or distributor for
assistance.
!
WARNING
ELECTRICAL SHOCK HAZARD
Failure to follow this warning could result in personal injury
or death.
Disconnect all power to unit to avoid possible electrical
shock during service or installation.
Wall thermostat terminal connections
The wall thermostat terminal block is located behind
the front panel and is easily accessible.
!
CAUTION
UNIT DAMAGE HAZARD
Failure to follow this caution may result in equipment
damage or improper operation.
Improper wiring may damage unit electronics. Common
busing is not permitted. Damage or erratic operation may
result.
Thermostat Wire Routing
Thermostat wire is field supplied. Recommended
wire gauge is 18 to 20 gauge solid thermostat wire.
NOTE: It is recommended that extra wires are run to
unit in case any are damaged during installation.
Thermostat wire should always be routed around or
under, NEVER through, the wall sleeve. The wire
should then be routed behind the front panel to the
easily accessible terminal connector. See Fig 45.
STATUS LED
Energy Management
Terminal Connections
THERMOSTAT WIRE ROUTING
(UNDER SLEEVE, BEHIND FRONT PANEL)
Wall Thermostat
Terminal Connections
A07074
Fig. 54 – Proper Wire Routing Beneath Unit
A07088
Fig. 53 – Terminal Connector and Status LED Location
30
Wiring Thermostat To Unit
Wire wall thermostat input as defined in Fig. 55.
NOTE: Terminal connector can be removed and
replaced to simplify the wiring (see Fig. 56).
NOTE: For heat pump models, anytime there is a
second--stage call for heating from the wall
thermostat, the unit will automatically switch over to
electric heating.
Energy
Management
(24VAC in)
Common
R
W
Y
TYPICAL WALL THERMOSTAT
O
Install Thermostat Wiring
1. Check to be sure power to unit is disconnected.
2. Pull terminal connector to remove
3. Connect wires from the thermostat to terminals
on unit terminal connector.
4. Reinstall terminal connector.
5. Ensure that unit is configured for wall
thermostat enable.
6. Replace control panel label with wall
thermostat label (included with Owner’s
Manual). See Fig. 57.
7. Restore power to unit.
8. Typical wiring schematic for multiple units
connected to single wall thermostat is shown in
Fig. 58.
See Note 1
GH
GL
C
See Note 2
WALL THERMOSTAT COMFORT
TERMINAL BLOCK
NOTES:
1. Use terminal “O” for heat pump connection only.
2. Terminal “C” (common) is typically only required for digital
thermostats.
A07076
TERMINAL
DESIGNATION
R
24 VAC
W
Electric Heat
Y
Compressor
O
Reversing Valve
GH
High Fan
GL
Low Fan
C
Common
A07315
Fig. 57 – Wall Thermostat Control Panel Label
NOTE: Any illegal input combinations will be captured as thermostat wiring
failures and will light the STATUS LED indicator on main board
(see Intelligent Self --- Checking Control section)
Fig. 55 – Wiring Connections
R W Y O Gh Gl C
NOTE: For thermostats that have only one fan speed
output (on or auto), the fan speed is determined by
how the terminal connector is wired. If Low fan is
desired, wire the G output from the thermostat to GL
on the unit’s terminal block. If Hi fan is desired, wire
the G output from the thermostat to GH on the unit’s
terminal block.
NOTE: After proper installation, if your thermostat is
not working properly, refer to the Trouble Shooting
section.
A07073
Fig. 56 – Terminal Connector Removal and Replacement
31
MASTER
PTAC
R
R
Y
Y
W
W
G
G
O
O
C
C
T’STAT
R
UNIT 1
Y
W
G
O
C
UNIT 2
R
Y
W
G
O
C
CAUTION
UNIT 3
All units must be connected to the
same ground source.
To accomplish this, be sure to
connect all units back to the same
breaker box.
R
Y
W
G
O
C
1. Do not daisy chain R (24 VAC).
2. Maximum of 4 PTAC units can be connected to one single wall
thermostat.
3. Wall thermostat wire is field-supplied and should be 18 to
20 gage solid thermostat wire.
A07391
Fig. 58 – Typical Wiring Schematic for Multiple PTAC Units Connected to a Single Wall Thermostat
32
ENERGY MANAGEMENT INPUT
(FRONT DESK CONTROL)
The controller can handle a switch signal from remote
energy management input, called EM signal or front
desk control. Input must be 24VAC. If system
receives a 24VAC signal, it will turn unit off;
otherwise, the unit runs in normal control. This
function will be disabled under Freeze Guard
protection.
For energy management wiring
schematic, see Fig. 59.
FRONT DESK SWITCH PANEL
ROOM 100
ROOM 101
ROOM N
FIELD-SUPPLIED
24-V
TRANSFORMER
(SEE NOTE 1)
B
W
PTAC #1
AWG
B
PTAC
W
---------
B
B
W
W
PTAC #N
PTAC #2
LEGEND
American Wire Gage
Black
Packaged Terminal Air Conditioner
White
NOTES:
1. To size transformer, use the following equation:
Quantity of PTAC units x 12 va = Transformer Size (va)
Example: 110 PTAC Units x 12 va = 1320 va Transformer
2. Following are recommended wire sizes:
AWG WIRE SIZE NO.
MAXIMUM LENGTH ft (m)
24
22
20
18
16
400 (121.9)
600 (182.9)
900 (274.3)
1500 (457.2)
2000 (609.6)
A07390
Fig. 59 – Energy Management Wiring Schematic
CONTROL DIAGNOSTICS
Intelligent Self--Checking Control
Your Gree PTAC has a computer board that
continuously checks key components of the unit to
ensure they are operating properly. Under normal
operation, unit status indicator (STATUS, on main
PCB), light is steadily ON. If there is a major
problem, the unit will shut down and display a
diagnostic failure code on the unit’s display. If it is
only a minor failure and unit is correcting the fault by
itself, the diagnostic code will be flashed on the status
LED that can easily be seen when the front panel is
removed (see Fig. 53). Failure STATUS codes are
defined in the table below.
STATUS LED INDICATOR DEFINITIONS
1
2
3
4
5
6
7
8
9
Indoor air temp sensor open/short
Indoor coil sensor open/short
Outdoor coil sensor open/short
Freeze Guard protection
Thermostat wiring error
Indoor coil high temp protection
Defrost (heat pump type)
Outdoor coil high temp protection
Indoor coil freeze protection
7--- segment display ‘F1’, with STATUS light flash 1 time,off 2 seconds
7--- segment display ‘F2’, with STATUS light flash 2 time,off 2 seconds
7--- segment display ‘F4’, with STATUS light flash 4 time,off 2 seconds
7--- segment display ‘FP’
STATUS light flash 9 times and off 3 sec, repeat
STATUS light flash 8 times and off 3 sec, repeat
STATUS light flash 7 times and off 3 sec, repeat
STATUS light flash 6 times and off 3 sec, repeat
STATUS light flash 5 times and off 3 sec, repeat
NOTE: When status light is flashing, it will be ON for 0.5 seconds and OFF for another 0.5 seconds.
33
Fig. 60 – Typical Wiring Schematic for Standard Units
A08389
34
AP1
AP2
AP3
C1
C2
L1, L2
L3
M1
M2
M3
OUTTUBE
ROOM
SAT
TC
TRIN-24V
TUBE
X1
X2
X3
X4
X5,X6
X7,X8
XT1
XT2
YV
LEGEND
Main Circuit Board
Relay Circuit Board
Displaly Circuit Board
Compressor Capacitor
Fan Motor Capacitor
Electric Heater Relay
Compressor Relay
Compressor Motor
Outdoor Fan Motor
Indoor Fan Motor
Outdoor Coil Sensor
Room Air Temp. Sensor
Compressor Overload
Transformer
Transformer 24 Volt Connector
Indoor Coil Sensor
Main Power Connector
Heater Connector
Heater Limit Connector
Indoor Fan Motor Connector
Transformer Connector
Board Jumper Connector
Terminal Block (White)
Terminal Block (Black)
Reversing Valve (Heat Pump Units)
*NOTE: Dashed area above shows REVERSING VALVE.
It is found only in HEAT PUMP (MQ) models.
TROUBLESHOOTING
POSSIBLE CAUSES
UNIT DOES NOT START
•
•
•
•
Unit may have become unplugged
Fuse may have blown
Circuit breaker may have been tripped
Unit may be off or in wall thermostat mode.
Check section on dipswitch settings to verify
dipswitches are set properly.
• Unit may be in a protection or diagnostic failure
mode. See section on Intelligent Self ---checking
Control.
SOLUTIONS
• Check that plug is plugged securely in wall receptacle.
Note :Plug has a test/reset button on it. Make sure that the plug
has not tripped.
• Replace the fuse. See Note 1.
• Reset circuit breaker. See Note 1.
• Turn unit on (bottom right button on keypad).
Note: If the unit turns on, the LED will be green. If the unit is off,
the LED will be red. If there is no LED on, there is a problem
with power or damage to the control.
UNIT NOT COOLING/HEATING ROOM
• Unit air discharge section is blocked
• Temperature setting is not high or low enough
Note: Setpoint limits may not allow the unit to heat
or cool the room to the temperature desired.
Check section on dipswitch settings.
• Unit air filters are dirty.
• Room is excessively hot or cold when unit is started.
• Vent door left open
• Unit may be in a protection or diagnostic failure
mode. Check section on Intelligent Self ---checking
Control.
• Compressor is in time delay. There is a protective
time delay (approx. 3 minutes) on starting the
compressor after a power outage (or restarting
after it has been turned off), to prevent tripping of
the compressor overload.
DISPLAY HAS STRANGE
NUMBERS/CHARACTERS ON IT
• Make sure that curtains, blinds or furniture are not restricting or
blocking unit airflow.
• Reset to a lower or higher temperature setting.
• Remove and clean filters.
• Allow sufficient amount of time for unit to heat or cool the room.
Start heating or cooling early before outdoor temperature, cooking
heat or gatherings of people make room uncomfortable.
• Close vent door.
• Check dipswitch settings for desired comfort.
UNIT MAKING NOISES
• Clicking, gurgling and whooshing noises are normal during
operation of unit.
• If a drain kit has not been installed, condensation runoff during
very hot and humid weather is normal. See Note 2. If a drain kit has
been installed and is connected to a drain system, check gaskets
and fittings around drain for leaks and plugs.
WATER DRIPPING OUTSIDE
Wait approximately 3 minutes for compressor to start
• The unit may be in a diagnostic condition. Check Intelligent Self --checking Control section to determine if unit has had a failure.
• The unit may be set for ˚C (instead of ˚F), see the keypad
configuration section
WATER DRIPPING INSIDE
• Wall sleeve is not installed level
• Wall sleeve must be installed level for proper drainage of
condensation. Check that installation is level and make any
necessary adjustments.
ICE OR FROST FORMS ON INDOOR COIL
• Low outdoor temperature
• Dirty filters
• When outdoor temperature is approximately 55˚F (12.8˚C) or
below, frost may form on the indoor coil when unit is in Cooling
mode. Switchunit to FAN operation until ice or frost melts.
• Remove and clean filters.
COMPRESSOR PROTECTION
• Power may have cycled, so compressor is in a
restart protection.
• Random Compressor restart --- Whenever the unit is plugged in,
or power has been restarted, a random compressor restart will
occur. After a power outage, the compressor will restart after
approximately 3 minutes.
• Compressor Protection --- To prevent short cycling of the
compressor, there is a random start---up delay of 3 minutes and a
minimum compressor run time of 3 minutes.
NOTES:
1. If circuit breaker is tripped or fuse is blown more than once, contact a qualified electrician.
2. If unit is installed where condensation drainage could drip in an undesirable location, an accessory drain kit should be installed and connected to drain
system.
35
CARE AND CLEANING
GENERAL CLEANING
Maintaining proper performance of Gree GA series
PTAC requires conscientious cleaning and care of
components. See Figure 52. Specific components
require periodic cleaning and/or replacement, including the following:
COMPONENT CLEANING SCHEDULE
Indoor Air Filter
Vent Air Filter
Indoor Coil
Indoor Fan
Outdoor Coil
Monthly
Monthly
Seasonally
Seasonally
Seasonally
CLEANING AND SAFETY
Before starting to clean a unit, read the instructions
thoroughly and gather the necessary tools for the job.
Review all safety information on unit and in
literature.
!
Consider the following safety issues before
beginning:
•
New and unfamiliar tasks should be
performed under the supervision of an
experienced service technician.
•
Personal protective equipment, such as safety
glasses and work gloves, should be used.
•
The floor around the work area should be
clean and free of debris.
•
The unit weighs up to 150 pounds (68 kg). Use
a lifting device or ask for assistance if the unit
must be moved.
•
Make sure tools are the correct tools for the
job, and that they are working properly and in
good condition.
WARNING
ELECTRICAL SHOCK HAZARD
Failure to follow this warning could result in personal injury
or death.
Before cleaning, servicing, performing maintenance, or
removing the chassis from the wall sleeve, disconnect all
power to the unit.
Only trained and qualified service personnel should perform
installation and service procedures on these units. Untrained
personnel may perform basic maintenance tasks such as
cleaning and replacing filters. Refer to Accessing Unit
Components section of this manual for proper procedures to
disconnect power to units.
COIL TUBE
SHEETS
WIRE SCREEN
BI-MOLDED
CONDENSER
SHROUD
DISCHARGE
GRILLE
INDOOR-AIR
FILTERS
ACCESSORY
OUTDOOR
GRILLE
BASEPAN
CONFIGURATION
DIP SWITCHES
DIGITAL CONTROL PAD
W/ELECTRONIC DISPLAY
FRONT
PANEL
INDOOR
COIL
ACCESSORY
WALL
SLEEVE
WALL THERMOSTAT
AND ENERGY MANAGEMENT
INTERFACE
A06752
Fig. 61 – Typical GA series PTAC System
36
CARE AND CLEANING (CONTINUED)
FRONT PANEL AND CASE
AIR FILTERS
Turn unit off and disconnect power supply.
To clean, use water and a mild detergent. DO NOT
use bleach or abrasives. Some commercial cleaners
may damage the plastic parts.
IMPORTANT:
CLEANING
!
OUTDOOR COIL
TURN UNIT OFF BEFORE
CAUTION
UNIT DAMAGE HAZARD
Coil on outdoor side of unit should be checked
regularly. Unit will need to be removed to inspect
dirt build--up that will occur on the inside of the coil.
If clogged with dirt or soot, coil should be
professionally cleaned.
NOTE: Never use a high--pressure spray on coil.
Failure to follow this caution may result in equipment
damage or improper operation.
Do not operate unit without filters in place. If a filter
becomes torn or damaged, it should be replaced
immediately.
Operating without filters in place or with damaged filters
will allow dirt and dust to reach indoor coil and reduce
cooling, heating, airflow and efficiency of unit. Airflow
restriction may cause damage to unit.
Coil
Grille
Clean inside and outside of outdoor
. coil regularly
Dirty filterNeeds cleaning
A07077
Fig. 62 – Outdoor Coil
Clogged filter Greatly reduces cooling,
heating and airflow.
A07078
!
Fig. 63 – Identifying Clogged Filter
CAUTION
UNIT DAMAGE HAZARD
Failure to follow this caution may result in equipment
damage or improper operation.
Airflow restriction may cause damage to the unit.
BASE PAN
In some installations, dirt or other debris may be
blown into unit from outside and settle in base pan
(bottom of unit).
In some areas of the United States, a “jell--like“
substance may be seen in the base pan. Check base
pan periodically and clean, if necessary.
The most important thing you can do to maintain unit
efficiency is to clean the filters at least every 30 days
(or sooner depending on application). Clogged filters
reduce cooling, heating and airflow.
Keeping filters clean will:
•
Decrease cost of operation.
•
Save energy.
•
Prevent clogged indoor coil.
•
Reduce risk of premature component failure.
To Clean Air Filters:
•
Vacuum off heavy soil.
•
Run water through filters.
•
Dry thoroughly before replacing.
2 Air filters
Push down
Pull up
Removing Air Filter
A07079
Replacing Air Filter
Fig. 64 – Removing and Replacing Air Filter
37
A07080
Cleaning Outdoor Vent Filter
1. Open the vent door and remove 4 screws that
secure the outdoor filter to the partition. See
Fig. 65.
2. Remove the outdoor vent filter for cleaning.
LOWER CONDENSER
SHROUD
SCREWS
OUTDOOR
COIL
OUTDOOR VENT
FILTER
VENT
DOOR
DRAIN
VALVE
BASEPAN
SCREW
A08538
Fig. 65 – Removal of Outdoor Vent Filter Screws
38
APPENDIX A
t[F]
32.0
33.0
34.0
35.0
36.0
37.0
38.0
39.0
40.0
41.0
42.0
43.0
44.0
45.0
46.0
47.0
48.0
49.0
50.0
51.0
52.0
53.0
54.0
55.0
56.0
57.0
58.0
59.0
60.0
61.0
62.0
63.0
64.0
65.0
66.0
67.0
68.0
69.0
70.0
71.0
72.0
73.0
74.0
75.0
76.0
77.0
78.0
79.0
80.0
81.0
82.0
83.0
84.0
85.0
86.0
87.0
88.0
89.0
90.0
91.0
92.0
93.0
94.0
95.0
96.0
Rmin.[kΩ]
64.46
62.68
60.95
59.27
57.65
56.07
54.54
53.06
51.63
50.23
48.88
47.57
46.30
45.07
43.87
42.71
41.58
40.48
39.42
38.39
37.39
36.42
35.47
34.56
33.66
32.80
31.96
31.14
30.35
29.58
28.83
28.10
27.40
36.71
36.04
25.39
24.76
24.15
23.55
22.97
22.40
21.85
21.32
20.80
20.30
19.80
19.33
18.86
18.41
17.97
17.54
17.12
16.71
16.32
15.93
15.56
15.19
14.84
14.49
14.15
13.82
13.50
13.19
12.89
12.59
R ---T CONVERSION TABLE
R25 :20.0kΩ (Tolerance 1% )
Rnom.[kΩ]
65.89
64.03
62.23
60.48
58.80
57.16
55.58
54.04
52.55
51.11
49.72
48.36
47.05
45.78
44.55
43.35
42.19
41.07
39.98
38.92
37.89
36.89
35.93
34.99
34.08
33.20
32.34
31.51
30.70
29.91
29.15
28.41
27.69
26.99
26.31
25.66
25.01
24.39
23.79
23.20
22.63
22.07
21.53
21.01
20.50
20.00
19.52
19.05
18.59
18.15
17.71
17.29
16.88
16.48
16.10
15.72
15.35
14.99
14.65
14.31
13.98
13.66
13.34
13.04
12.74
39
Rmax.[kΩ]
67.34
65.40
63.53
61.71
59.96
58.26
56.62
55.03
53.49
52.00
50.56
49.16
47.81
46.50
45.23
44.00
42.81
41.65
40.53
39.45
38.39
37.37
36.39
35.43
34.50
33.59
32.72
31.87
31.05
30.25
29.47
28.72
27.99
27.28
26.59
25.92
25.27
24.64
24.03
22.43
22.85
22.29
21.74
21.21
20.70
20.19
19.71
19.23
18.77
18.32
17.89
17.46
17.05
16.65
16.26
15.88
15.51
15.15
14.80
14.46
14.13
13.81
13.49
13.19
12.89
APPENDIX A (CONT.)
t[F]
97.0
98.0
99.0
100.0
101.0
102.0
103.0
104.0
105.0
106.0
107.0
108.0
109.0
110.0
111.0
112.0
113.0
114.0
115.0
116.0
117.0
118.0
119.0
120.0
121.0
122.0
Rmin.[kΩ]
12.30
12.02
11.75
11.48
11.22
10.97
10.72
10.48
10.25
10.02
9.791
9.573
9.361
9.154
8.952
8.755
8.563
8.376
8.193
8.015
7.841
7.671
7.506
7.344
7.186
7.033
R ---T CONVERSION TABLE (cont.)
R25 :20.0kΩ (Tolerance 1% )
Rnom.[kΩ]
12.45
12.17
11.90
11.63
11.37
11.11
10.87
10.62
10.39
10.16
9.937
9.719
9.506
9.299
9.097
8.900
8.708
8.520
8.338
8.159
7.985
7.815
7.650
7.488
7.330
7.176
40
Rmax.[kΩ]
12.60
12.32
12.04
11.77
11.51
11.26
11.01
10.77
10.53
10.30
10.08
9.866
9.653
9.446
9.243
9.046
8.854
8.667
8.484
8.305
8.131
7.961
7.796
7.634
7.476
7.322
NOTES:
________________________________________________________________________________________
________________________________________________________________________________________
________________________________________________________________________________________
________________________________________________________________________________________
________________________________________________________________________________________
________________________________________________________________________________________
________________________________________________________________________________________
________________________________________________________________________________________
________________________________________________________________________________________
________________________________________________________________________________________
________________________________________________________________________________________
________________________________________________________________________________________
________________________________________________________________________________________
________________________________________________________________________________________
________________________________________________________________________________________
________________________________________________________________________________________
________________________________________________________________________________________
________________________________________________________________________________________
________________________________________________________________________________________
________________________________________________________________________________________
________________________________________________________________________________________
________________________________________________________________________________________
________________________________________________________________________________________
41
Copyright 2010 Gree Electric Appliance Inc.
Printed in U.S.A.
Edition Date: 08/10
Manufacturer reserves the right to change, at any time, specifications and designs without notice and without obligations.
42
Catalog No. PTAC-GA-1SM