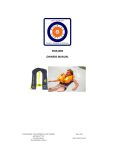
1
Service Manual
Mullion mariner 275n
dot twin chamber lifejacket
with Hammar hydrostatic mechanism.
On board service manual
This manual is designed to help you fit,
1.0 Maintenance schedule.
Only a responsible officer may perform the checks mentioned herein. All checks shall be recorded in an appropriate
log - book. The records shall include the lifejacket serial number, date of check, and the last date of service
(if applicable/ available).
2.0 Servicing/maintenance procedure at periods not
exceeding 12 months!!
2
2
• The lifejacket should be visually inspected as per inspection check- list and the
service requirements recorded.
• At 12 monthly intervals, or immediately if the lifejacket has been inflated or
immersed in water, or load applied to harness/belt.
re-arm, re-pack and care for your Lifejacket.
3.0 check list.
The following parts / areas should be checked:
• General materials / webbings / buckles / crutch-strap
• General stitching
• Rip & velcro fastenings
• Reflective tapes
• Automatic emergency light
• Whistle
• Automatic firing mechanisms
• Co2 gas cylinders
• Oral inflation tubes / valves + full lifejacket inflation
3
3
On board service manual
04. Service check procedure.
4.1 General check
•Checkthatthelifejacketstoleandcovermatchexactlythediagramsasattachedand
that all component parts are present.
•Checkfordamage/tearstoallmaterials/componentparts/trim&accessories.
any defects return to distributor / factory for service
Missing / defective crutch-straps can be replaced on board with new parts
supplied by Mariteam.
Mullion Mariner 275n dot twin chamber lifejacket with
hammar hydrostatic mechanisms
Mullion Mariner 275n
Solas approved cover
10cmLengthx20mmwidth
Black loop
Velcro sewn
Inside front cover only on
the binding edge
Front
32mmBlack
binding tape
Crutchstrap
Back
Heat seal logo
CE/DOTlogo
32mmBlack
binding tape
Information label
2x66cm
Black one way zips
4
9MT2 A2 275 N double chamber
4.2 General stitching
Lifejacket
•Checkallstitchingareintactandsecure.
if any defects are observed – discard the lifejacket or return for service
4.3 Zips & velcro fastenings
•Checkallzipsandvelcrofasteningsareintactandsecure.
if any defects are observed – discard the lifejacket or return for service
4.4 reflective tape
double chamber
Mullion Mariner 275n
Solas approved Bladder/Stole
5cmwidthx22,5cmlength
Solas approved
Front
Marine
Grade
Reflectivetape
9MT2
•Checkallreflectivetapesareintactandadheredsecurelytotheinflatablechambers.
any defects – replace with new reflective tapes supplied by Mariteam
Over pressure oral,
tube and dust cap
Back
Standard oral
tube and dust
cape
Hydrostatic
Hammar
machanism
Light Solas Approved
tested stamp
plus serial
number
Hydrostatic
Hammar
machanism
3cmx12,5cmlength
Solas approved reflector
10cmLengthx25mmwidth
Webbingflag
Stitched with cap for cord
Patch weld
* PU weldable nylon (NMA)
YS0on iside to seal stitches
5
On board service manual
4.5 automatic emergency light
Automatic emergency light
•Checklightfunctionbyswitchingonmanually&/orimmersinginwater
and ensure light is securely fastened to inflatable chambers
any defects – replace with new light supplied by Mariteam
4.6 Whistle
•Checkwhistleissecurelyfastenedtoinflatablechambersandisfunctional
Whistle
any defects – replace with new whistle supplied by Mariteam
4.7 automatic firing mechanism
•Checkdateofmechanismhasnotexpired
•Checkthatthemechanismwindowisnotshowingred
•Checkthatthemanualpullhandlehasnotbeenremovedorpartiallypulled
•Checkthereisnodamagetothemechanismbodyandbackassembly
Automatic firing mechanism
if any one of the above are found to not conform
remove and refit mechanism by following hammar instructions as attached:
reference diagram
4.8 co2 gas cylinders
To check the cylinder, the hammar mechanism must first be removed as per
the instruction attached and then unscrewed from the
Hammar back assembly
Co2gascylinder
1.Checkthecylinderisnotpiercedordamagedinanyway
2.Checkthecylinderisnotcorroded
3.Thecylinderislessthan10yearsold
if any of these defects are found the cylinder must be replaced immediately
and the old one discarded / disposed of (parts supplied by Mariteam).
4.9 Oral inflation tubes/valves & full lifejacket inflation
To check this a full inflation test is required as follows:
•Checkthatbothfrontandbackoraltubesareintact,undamagedandblackdust caps are fitted
•Withcompressedairequipmentoramanometerandthroughthestandardoraltube
onthebackoftheinflatablechambers,inflatetherearchamberto0.5p.s.i.or
3.5 k.p.a.
•Withthesameequipmentinflatedthefrontchamberthroughthefrontoraltubewith
over pressure valve until the over pressure valve “blows off”
•Leavethelifejacketinflatablechambers,inflatedforaminimumof12hours
•Checktheinflatablechambersafter12hours–iftheyarestillatfullpressurethey can be deflated by depressing each valve in the oral inflation tubes at front and back
andpressingdownonthebladdertoexpeltheair
if the inflatable chambers have deflated in any way after 12 hours the inflatable
chambers must be rejected and returned to the manufacturer for an
interchangeable replacement
6
2010-01
THE HAMMAR LIFEJACKET INFLATOR
REARMING INSTRUCTION
1
1.
Place the lifejacket (PFD = Personal
Floating Device) on a flat smooth surface and wipe off any water. Hold the
gas cylinder through the fabric using
one hand.
4
4.
Squeeze sealing ring to elongate and
remove the inflator body through the
sealing ring.
2
2.
Insert metal key and turn the key
anti-clockwise between black locking
ring and labelled yellow cap. The black
locking ring will now turn anti-clockwise
5
5.
Unscrew the gas cylinder.
Note: If hard to unscrew, hold the black
inner body with a soft tissue/clothing
and hold the cylinder with a pipe pliers
or other holding tool.
3
3.
Now turn black locking ring anti-clockwise and lift off cap (cap = yellow inflator operating head). Dispose used cap.
6
6.
Dispose of used gas cylinder in an nvironmentally approved manner.
Recharge Instructions standard model 1 (2)
7
2010-01
On board service manual
THE HAMMAR LIFEJACKET INFLATOR
Instructions for Torque tightening of
REARMING
INSTRUCTION
gas
cylinder on the
Hammar inflator
1
1.
Place the lifejacket (PFD = Personal
Floating Device) on a flat smooth surface and wipe off any water. Hold the
gas cylinder through the fabric using
one hand.
4
4.
Squeeze sealing ring to elongate and
remove the inflator body through the
sealing ring.
2
2.
Insert metal key and turn the key
anti-clockwise between black locking
ring and labelled yellow cap. The black
locking ring will now turn anti-clockwise
5
5.
Unscrew the gas cylinder.
Note: If hard to unscrew, hold the black
inner body with a soft tissue/clothing
and hold the cylinder with a pipe pliers
or other holding tool.
3
3.
Now turn black locking ring anti-clockwise and lift off cap (cap = yellow inflator operating head). Dispose used cap.
6
6.
Dispose of used gas cylinder in an nvironmentally approved manner.
1. Screw the cylinder into the body and tighten it by hand.
2. Carefully slide the body into the bracket.
3. Put on the cylinder adapter tool on to the cylinder.
1. Screw4.the
cylinder
intowrench
the body
and
it by hand.
Apply
the torque
on to
nuttighten
on the cylinder
adapter tool and
2. Carefully
slide
the
body
into
the
bracket.
tighten the cylinder to a torque of not more than 10 Nm
3. Put on the cylinder adapter tool on to the cylinder.
4. Apply the torque wrench on to nut on the cylinder adapter tool and tighten the cylinder to a torque of not more than 10Nm.
Recharge Instructions standard model 1 (2)
8
-
2 0 1 0 -0 1
7
78
9
7.
Reset the piercing pin by rotating
the shaft in the inner body to a position where the underside monitor with
eyelet surrounds the green dot in the
centre of the indicator.
8.
Carefully examine the top of the new
gas cylinder to make sure that it is
not punctured. The cylinder must be
VERY FIRMLY TIGHTENED into the
black inner body. The black inner body
should be checked for any damage
or splitting following this tightening.
9.
10
11
12
10.
11.
Hold the gas cylinder through the life
jacket fabric. Take the replacement
cap with the pull tab pointing in the
opposite direction to the gas bottle
(i.e. Down) and press it FIRMLY onto
12.
7
Now check the automatic/manual cap
as follows:
Manual/Automatic:
• Check that the single point
indicator is green
• Check that expiry date is within the
limit.
• Check that red handle is attached.
Manual:
cylinder pointing upward inside the
lifejacket (PFD). Let the sealing ring
lugs.
body turn the black locking ring clockwise into the locked position. Pull the
cap to make sure it has locked onto the
NOTE:
closed position, the gas cylinder, the
side of the yellow cap and the pull
handle are in parallell.
• Check that red handle is attached.
If YES is the answer to ALL these ques tions, then proceed to item 11:
9
On board service manual
5 General maintenance & cleaning
5.1Ifanypartofthelifejackethasbeenincontactwithsaltwaterorother
5.1
contaminants such as oil, paint thinner it shall be sponged off immediately with a
mildsoapsolution.Rinsedwithcleanfreshwaterandhungtodry.
Do not immerse in water as this will activate the firing mechanism
Do not use harsh cleaning agents / chemicals / dry cleaning fluids
Do not place on direct heat to dry
5.2
5.2Co2gascylindersafteruse/contactwithsaltwatercanbecleanedbywipingwith
a cloth soaked in clean fresh water and then dried immediately afterwards (to
prevent corrosion) with a clean dry absorbent cloth
6 re-packing the lifejacket
6.1Followlifejacketpackingprocedure.
6.1
Once both the bladder and cover have been finally checked, the bladder is packed into the
coverusingthemethodexplainedbelowandvisuallydepictedinthepackingprocedure
illustrations.
SteP 1 Shows a general bladder/ stole. The cover is laid front facing upwards on a flat
surface, with fastenings open. The bladder front facing upwards is inserted into
the cover (through the harness loop at the top of the cover if present) and tied into
position using the harness bladder attachment cord or buckles.
SteP 2 The bladder top is folded in a concertina method, allowing the top of the bladder
to unfold easily when deployed and the harness loop is folded once over the
concertina bladder top and the velcro at the very top of the cover is fastened
closed. The zip heads are pulled up with the bladder inside to the very top of the
cover underneath the velcro and left in this position whilst packing the rest of the
bladder.
SteP 3Foldtherightoutersideofthebladderunderneath,andclearofthemechanism.
SteP 4Foldtheinnerrightsideofthebladderunderneathawayfromthemechanism.
SteP 5Foldthebottomofthebladderunderneathawayfromthemechanism.Whilst
holding the folded lobe pull the zip head down to fasten that side of the cover
closed.Ensurethatthemechanismpullcord/pullhandleisclearlyvisibleand
usable outside the cover and can not slip back into the cover.
SteP 6Foldtheinnersideoftheleftlobeover
SteP 7Foldtheoutersideoftheleftbladderlobeover
SteP 8 Foldthebottomofthebladderoverawayfromthemechanism.Whilstholdingthe
foldedlobepullthezipheaddowntofastenthatsideofthecoverclosed.Ensure
that the mechanism pull cord/ pull handle is clearly visible and usable outside the
cover and can not slip back into the cover.
By using this folding method and fastening the buckles on the waist belt and crutch strap
correctly the bladder should work efficiently and open correctly when deployed.
10
Correct lifejacket packing procedure
1
3
2
JERK TO
INFLATE
JERK TO
INFLATE
4
6
5
JERK TO
INFLATE
JERK TO
INFLATE
JERK TO
INFLATE
JERK TO
INFLATE
8
7
JERK TO
INFLATE
JERK TO
INFLATE
11
7 Storage
when not in use the lifejacket should be stored in a well ventilated room, not subject to
extremesintemperature,extendedperiodsofbrightsunlight,hydrocarbonfumes,oils
creasesorconcentratedozone.Thestorageconditionsmustnotbedamporextremely
humid. the lifejacket must always be dry prior to placing in storage. Lifejackets held in
store must be laid flat or hung from the neck aperture by suitable means. Prior to issue
from store a visual inspection must be performed. A damaged lifejacket must be subject to
the service / maintenance procedure before being issued for use or returned to the store.
Providing the storage conditions are satisfactory the lifejacket may remain stored between
service/ maintenance periods.
8 Spare parts list
Description:SolasautolightaquaspecAQO2U
Mullionpartnr.:LLI00000M
Description:60grcylinder
Mullionpartnr.:LCY030000
Description:Hammarautofront
Mullionpartnr.:LIN01F000
Description:Whistle
Mullionpartnr.:LWH030C10
Description:Hammarback
Mullionpartnr.:LIN01B000
Description:Solasreflectorsself-adhesive
Mullionpartnr.:NRIRFQ50MOR12CM
Mullionpartnr.:IRFQ50MOR22CM
Formoreinformationcontactus:
MariTeam A/S
Marielundvej17
DK-2730Herlev
Telefon:+4539186644
TeleFax:+4539180757