1
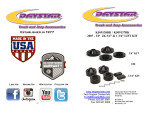
2009 & UP KC09113BK FRONT DODGE 1500/4WD
2009 & UP KC09114BK FRONT & REAR Kit 1500/4WD
2009 & UP KC09116BK REAR only KIT 2WD & 4WD
FRONT SPACERS &
STUD EXTENDERS
REAR SPACERS
www.Daystarweb.com
Instruction Sheet: P20165-02
Tech Support Contact Info
2014 Daystar Products International Inc.
[email protected]
Phone: 623.907.0081
Revision: 04
Fax: 623.907.0088
Revision Date: 6/11/2014
st
841 South 71 Avenue
Phoenix, AZ 85043
1
Revised by: DE
Introduction
is your number one source for Made In The USA quality,
Comfort Ride™ leveling kits. Now backed with our exclusive Go Everywhere © Lifetime Limited Warranty (see
terms at Daystarweb.com). To assure your safety and
proper installation of this product, take a moment to read all instructions and Product Safety Information before trying to install your Daystar® product. Current
OEM suspension design is complex: meaning safe and proper installation requires
understanding OEM service techniques for disassembly and assembly of the components indicated together with the instructions and warnings set out below and in
the OEM service manual and your owner’s manual. Daystar® strongly recommends seeking advice from or having this product installed by a professional mechanic who can inspect your suspension, confirm compatibility with your tire and
wheel choice and, if needed, reset alignment to optimize your steering and the fea-
Product Safety Information
Throughout these instructions important safety information is generally preceded by one of three signal words indicating the relative risk of injury. The
signal words mean:
! WARNING A hazardous situation which, if not avoided, could result in
death or serious injury. You can be Killed or Seriously Hurt if you don’t follow instructions.
! CAUTION A hazardous situation which, if not avoided, could result in
minor or moderate injury. You can be moderately HURT and also may suffer
property damage if you don’t follow instructions.
NOTICE
Careful attention is required to this instruction or operation but
does generally not relate to personal injury. Damage to your product or other
!WARNING
Familiarize yourself with all vehicle manufactures’ and Daystar
warnings, instructions and limited warranties before driving your
modified suspension vehicle. Also be aware many states / countries have laws governing on-road vehicle heights and modifications. You are responsible for assuring the safety and legality of
your vehicle. A summary of current state vehicle laws is available
at www.sema.org.
2
Tools Needed
Quantity
Description
1
Floor jack
2
Jack stands
2
Wheel chocks
1
Lug wrench
1
1/2” Rachet
Set
1/2” Drive metric socket set
Set
Metric wrench set
1
Torque wrench
Bill of Materials / Part list
FRONT KIT KC09113BK
REAR KIT KC09116 BK
Quantity
Part Number
Description
KC09113
FRONT KIT
2
M03703
Front Coil Spring spacer
6
S11082
Stud Extenders
6
S10292
10mm 1.5 Lock nut elastic
1
P20165 / P10474
Instructions / Warning decal
KC09116
REAR KIT
2
M20119
Rear Coil Spring Spacer
1
P20165 / P10474
Instructions / Warning decal
KC09114
FRONT AND REAR KIT
All Parts Numbers All parts listed for Front &
Rear kits
3
Installation Instruction
!Warning: Always work with appropriate personal safety
gear including safety glasses, gloves and hearing protection if using air powered tools.
Begin by inspecting the components & hardware for damage.
Then compare components & hardware to the bill of materials
for completeness. If anything is missing or damaged, do not
proceed with the installation. Please, call Daystar Products
(800-595-7659)
!Caution: Vehicle front end must be raised to install leveling kit. Using a hydraulic chassis lift will greatly ease installation. If another jack is used, assure vehicle is level on
a firm surface, in park (1st gear), rear wheels blocked and
Front Suspension
1. Put the transmission in park or 1st gear for ( manual
transmission ) and chock the rear tires.
2. Raise the front of the truck in accordance to manufacturer
recommendations and support with jack stands, chock rear
wheels. Raise vehicle so that the
3. Remove Front Tires
4
4. Disconnect The Electronic Steering Control. Failure To do
5
5. Remove the sway bar end link from the lower control arm
6. Loosen & Remove Tie Rod End Bolt
6
7. Remove the upper ball joint nut and separate the knuckle from
the upper A-arm using the appropriate Puller tool
A
7
8. Remove the lower strut bolt and nut. Retain the factory lower
bolt for reassembly. Note the direction of the bolt for reassembly
9. Remove the upper strut nuts on strut tower (3) per side.
8
10. Remove the strut from the upper strut tower so you
can install the spacer.
11. Trim the factory / OEM studs
12. Install the stud extenders over the stock strut studs, and use
the supplied Loctite
9
13. Install the spacer over the stud extenders
10
14. Re-Install the strut to the strut bucket. Putting (1) nut on
helps to hold the strut in place
15. Install the strut to the strut tower. Using a floor jack,
raise the lower control arm and reconnect the strut to the
16. Reconnect the upper ball joint to the knuckle.
17. Reconnect the lower tie rod end first, & Then the sway bar
11
14. Torque all nuts and bolts to OEM specifications.
15. Install the wheels.
16. Remove jack stands and lower the truck back on the
ground. Remove all jacks and jack stands from under vehicle.
17. Torque the lug nuts to 85ft.lbs. using an X pattern.
!Caution: Have an alignment professional check and adjust
the alignment to factory specifications.
18. With the vehicle on the ground cycle the steering wheel
side to side and inspect suspension components, brake lines
and tires to ensure there are not any clearance issues.
Jounce the suspension to assure front suspension operates
freely, brake lines retain proper slack at full extension and
19. Install “Warning to Driver” decal on the vehicle’s sun
visor or dash. The decal must be placed in a conspicuous
location. Anyone that operates the vehicle must be made
aware of the changes made.
20. After 25 miles of driving re-torque the lug nuts to
85ft.lbs..
21. After 500 miles of driving re-torque all of the hardware
associated with the leveling spacer installation to factory
specifications.
Repeat
torqueing
12
REAR SUSPENSION
1. Read instructions completely, verify bill of materials
and determine if you have the correct tools before beginning installation.
2. Chock front tires and raise the rear of vehicle placing
jack stands under the frame rails so the tires are off
the ground .
3. Support the rear axle with a floor jack.
5. On each side remove the lower shock bolt and nut at the
axle.
13
Rear Suspension Cont.
6. Remove the 2 sway bar end link mounting nuts at the axle.
7. Lower the axle and remove the spring and stock spring isolator pad.
8. Install the lift spacer on the top of the spring with the spring
properly positioned in the spacer helix. The factory isola9. Reinstall the spring/spacer assembly into spring seat with
the spacer on top. Be sure the spring and spacer are properly seated on the axle and frame
11. Then then double check the installation.
12. Reinstall driver and passenger tires and wheels.
13. Remove jack stands and lower the truck back on the
ground. Remove all jacks and jack stands from under vehicle.
14
14. Torque the lug nuts to 85 ft.lbs. using an X pattern.
!Caution: Have an alignment professional check and
Adjust the alignment to factory specifications.
15. With the vehicle on the ground inspect suspension components, brake lines and tires to ensure there are not any
clearance issues. Jounce the suspension to assure front
suspension operates freely, brake lines retain proper slack
at full extension and that they remain clear of springs or
other obstructions.
16. Install “Warning to Driver” decal on the vehicle’s sun
visor or dash. The decal must be placed in a conspicuous
location. Anyone that operates the vehicle must be made
aware of the changes made.
17. After 25 miles of driving re-torque the lug nuts to 85
ft.lbs..
18. After 500 miles of driving re-torque all of the hardware
2-1/2” Lift Kit Installed
Daystar® Lifetime GoEverywhere Limited Warranty
Your Daystar® Comfort Ride or Budget Boost leveling kit is covered by
the following Go Everywhere Lifetime Limited Warranty.
15
What is Covered? Real Life Use, Off Road & On: Subject to the terms,
exclusions and limitations herein, Daystar® warrants to the initial retail purchaser that your Comfort Ride™ or Budget Boost™ leveling kit shall be free
of defects in material and workmanship for so long as it is properly installed on
a single vehicle owned by the initial retail Daystar® purchaser.
What is Not Covered? Your Vehicle & Parts Not Daystar’s GoEverywhere:
Your Daystar Limited Warranty does not cover: (a.) damage to your vehicle,
vehicle systems (ex. electronic stability control) other products, components or
property not manufactured by Daystar to our exclusive GoEverywhere standards, (b.) customer choice of vehicle configuration/tire and wheel combinations contrary to Daystar® recommendations, warnings or applicable laws,
(C.) Acts of God, weather, corrosion, accidents, theft, vandalism, negligent
misuse or intentional damage, other exclusions under your OEM Limited Warranty.
Remedy Limited to Repair/Replacement. Get back on your favorite trail
fast. The exclusive remedy provided hereunder shall, upon Daystar’s inspection and option, be either repair or replacement of the Comfort Ride™ or
Budget Boost™ leveling kit or parts covered under this Limited Warranty.
Call us and we will get you back wheelin’ (623/907-0081). All labor, removal,
shipping and installation costs are customer’s responsibility.
Other Exclusions –Limitation of Damages - Your Rights Under State Law.
Stuff Lawyers Say.
At Daystar® we aren’t big fans of lawyers, even ours. Still, he says our Limited Warranty has to include this stuff. In consideration of the purchase price
paid, neither Daystar® nor any independent Daystar® distributor or repair person are responsible for any time loss, loss of vehicle use, rental costs, transportation, labor or for any incidental, consequential, punitive or other damages
you may have or incur in connection with any part or product purchased. No
Daystar® employee or independent distributor is authorized to make any statement or representation altering the terms of Daystar’s GoEverywhere Lifetime
Limited Warranty. Your exclusive remedy hereunder for covered parts is
repair/replacement as described above. This Limited Warranty gives you
specific rights. You may also have other rights that vary from state to state. For
example, some states do not allow limitations of how long an implied warranty
lasts and/or do not allow the exclusion or limitation of incidental or consequential damages, so the limitations and exclusions herein may not apply to you.
All other warranties are hereby disclaimed, except to the extent prohibited by
applicable law in which case any implied warranty of merchantability, fitness
for a particular purpose or other implied warranty are limited to a period of
four (4) years from date of initial retail purchase. Daystar® reserves the rights
to: (a.) require invoice or other proof of purchase; (b.) make future revisions to
these products and Limited Warranty without prior notice or obligation to
upgrade your Daystar® product.
16
17
18
19
Established in 1977
Like Us
Watch Us
Share Us
20
Follow Us