1
•
NeXT Design
*
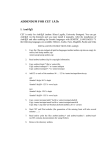
Verifica~ion
Test (DVT)
Features
*
*
*
*
*
*
•
*
•
Standalone - does not run under Mach
Boots from Ethernet, SCSI, or Optical Disk
Tests Hardware ONLY
Setup is menu driven; no similarity to NeXTStep
Bands-off operation
tests > 95% of hardware
* does NOT test
* Ethernet receive CRC checker
* Data integrity out to printer. Must ba done visually .
* Data integrity of sound in
* Video alignment. Must be dona visually.
* DSP Serial port
* FPO (MC68881)
Common Oser-spacifiabla Modes
* Loop/Single Pass
* Pause on Error/Halt On Error
* Multiple/Single test Selection
•
*
Test/subtast hierarchy
Top
I
+---------+---------+---------+--- ...---+
tests:
Memory
Optical
SCSI
sec
DSP
I
+-----------+------.. .-----+
subtests:
•
*
*
•
Random
W/R
Sequential
W/R
Basic
Command
Tests are either "Enabled" or "Disabled"
Subtests hava loop counts; a loop count of 0 disables the
subtest. A loop count of 'n' means that tha subtest will
run for 'n' loops before tha naxt subtest runs .
•
*
Menu Overview
*
•
•
Common features
* Select entry w/single keystroke, no CR
* 'h' i.s HELP
* 'x' is EXIT to calling manu
* ESC all the way to top of calling sequence
* Radix ALWAYS displayed - (d) or B
* Types of menu entries
* Name of another menu
* Variable
* Boolean - selecting toqgle.s
*
*
Numeric
* Osar is propmted, with a default taken for CR
* Enter number in same radix it's displayed
Command - selectinq executes the command
•
*
Tests
*
*
Memor y
Optic al Disk
Monit or/Sou nd
*
* sec
* DSP (56001 )
* Ether net
*
*
*
*
*
•
•
Memor y-to-M emory DMA
Two-b it Graph ics
SCSI
Laser Print er
Timer
canon
•
1. What is Magneto-Optic Storage ?
• The 3rd Generatlon Technology of the Optical Disk Storage. The 1st Generation optical disk storage technology started with ROM or read
only type. Examples of this are CD (Digital Audio Disc), Laser Vision (Video Disc)
and CD-ROM. The basic mechanism is just like that of phonography except its data
pattern is very small and reading is done with diode laser beam instead of stylus.
ROM discs only replay information stamped at the disc plant. As of last year, CD
already has dominated the conventional phonography which have been around
since Edison.
Desire for writing your information generated the 2nd Generation optical
storage technology, called write-once (WORM). You can write information at will, but
disadvantage is you can do it only once since the recording is done by generating
an irreversible chemical or physical changes such as ablation and phase transition
of amorphous materials with strong laser heat on a very thin recording layer.
Write-once has been on the market for several years. However the applications
have been limited to document filing system because of the limitation of write-once.
•
Write-once technology was developed because the rewritable optical technology
seemed to be too great a technology hurdle several years ago .
Today. by breaking through difficult technical barrier, the 3rd Generation
rewritable optical technology is a reality. Three types of the rewritable optical
technologies have been investigated so far. They are t~e Magneto-Optic, the
reversible phase transition between crystal and amorphous state and the bubble
formation of organic dye/polymer layer.
The M.O. technology has become available as the commercial product in
advance of the other two types while they are fighting with such the problems as poor
environmental stability and poor erase cycles.
..(1 st Generation)
I
Read Only
I •
(2nd Generation)
Write-Once
(Non-rewntable)
j
'V
N
(3rd Generation)
Magneto-Optic
(Rewritable)
~
......
L...-
•
______________________.................
-3-
Canon
•
2. What is the Erase/Write Principle?
- Thermo-Magnetic Recording by LaserBasically M.O. is the Thermo-magnetic recording onto the perpendicular
magnetic recording thin film by means of laser spot. The Perpendicular magnetic
fil m means that th e magnetic moments which generate magnetic field are oriented
vertical to the recording layer. The conventional magnetic recordings have been
done holizontally to the recording layer.
•
M.O. recording layer has the magnetic hysteresis as shown in the Fig. 2. 1.
known as the hysteresis loop or the magnetization curve. The coercive force
(H) represents the strength of magnetic property. At room temperature, M.O. layer
has large coercive force (HR). When laser spot is exposed onto the M.O. layer, laser
light is absorbed by the M.O. material and is converted into heat. This heat increases
the temperature of the M.O. layer. As temperature goes up, the hysteresis loop
shrinks and the coercive force becomes to zero at its Curie Temperature which is
specific to M.O. layer material. When laser exposure is removed, the temperature of
th e M.O. layer decreases back to room temperature. During this cooling process, the~
coercive fo rce increases again along the He curve in Fig. 2. 1. (arrow B). If at this
time, the bias magnetic field is applied to the opposite polarity direction to its
original magnetic moment, the resulted direction of magnetic moment becomes just
opposite to that of before the laser exposure. For example N -> S becomes S -> N.
This means that only the small spot area on the M.O. layer which is exposed by
laser is altered to have the opposite magnetic moment orientation from the
surrounding area. This is called as magnetic domain.
The generation process of the magnetic domain is used for writing the M.O. layer.
The erasure can be done by applying an opposite bias magnetic field polarity in the
same process as writing .
•
-4-
C an o n
•
Hysteresis Loo p
-
\ \
<1.>
-::r:
0
He
HA
<1.>
~
0
u..
<1.>
•
>
'(3
~
~
(.)
I
I
I
He
: Bias Mag. Field Level
-- ,- -- -- -- -- -- -1
Room Te mp.
Cu rie Te mp .
Temperature.
Fig. 2. 1. Erase/Write Principle
•
-5 -
Canon
•
3. What is the Read Principle?
·Kerr Effect Reading by Laser·
Reading of the small magnetic domain in the M.O. layer is done by using either
Kerr Effect or Faraday Effect which have been known since the late 1800's.
As shown in Fig. 3.1, when a polarized laser beam is reflected by the
perpendicu larly oriented M.O. layer surface, the polarization angle is twisted by
small angle as expressed as 9k, (Kerr Rotation ). Furthermore the direction of this
twist is opposite according to the orientation direction of the perpendicular magnetic
moment, which is either upward or downward. Therefore, there is a total of 2 9 k
difference of the polarized surface angle between the two reflected lights from
upward and downward oriented magnetic domains. Reading is done by detecting
this difference.
The difficu lty in M.O. technology has been that this Kerr Rotation ( 9 K) is so small
angle (approximately 0.3-0.4 degree). It is not enough for getting good carrier to
noise ratio (C/N) of M.O. signal. Most of the development efforts have been on
improving this carrier to noise ratio. As the result of the improvements in the M.O.
media materials and layer configuration, optical head system and electronics, the
M.O. storage system has become a commercial product.
•
•
If the rotation angle is detected in the mode of transmission beam, in stead of
reflection, it is called the Faraday Rotation . The most of the commercial M.O.
systems are expected to use Kerr Effect .
-6.
ca no n
•
Polarized Laser Beam
Kerr Rotation
M.O . Layer
•
\
+
+
+
+
+
+
+ + +
+ + + + •. +
Fig. 3.1 Read Principle
•
+
-7-
Canon
•
4. What is the Tracking Servo Principle?
-The Push-Pull Servo of Pre-groove •
Several auto-tracking servo technologies have been reserched. Among
th em the push-pull servo using the pre-stamped groove (tracking guide),
seems to have become popular. The following explains the principle of push-pull
servo.
A very narrow and shallow tracking guide of 0.4 J..Lm (4,000 A) width and 800 A
(angstrom) depth is applied with a track pitch of 1.6 J..L m onto the disk substrate
before the deposition of the M.O. layer, by means of either pre-stamping or 2P
(photo-polymer) process as shown in Fig. 4. 1.
The push-pull servo is the closed loop auto-tracking technology which follows
exactly on this groove using the same laser beam as read/write/erase of M.O. data.
The tall portions of th e laser power Gaussian distribution are used for
tracking while the center portion, which is higher than threshold level, is used for
write/erase (it is shown in Fig. 4. 1.).
As it is shown in Fig. 4. 2. the reflected and/or diffracted light from the M.O.
layer surface is detected by the quadruple photo sensors.
•
•
Because of the difference of the reflection and/or diffraction patterns as shown
with the shadowed portion in Fig. 4. 2. according to on-track or off-tracks, the
exposed pattern on the quadruple photo sensors vary.
Outputs from quadruple sensors are calculated and the result is feed-back into a
voice coil type objective lens actuator in order to compensate for positional
deviations from the center of the groove .
________________________...............
-8.
Ca no n
•
M.O. Layer
Disc Substrate
•
Power Used for Writing
---T hre shold Level for Write /Erase
Used for Tracking
Laser Power Gaussian Distribution
Fig. 4. 1.
•
Disk Groove Configuration and Laser Spot
-9 -
75
Can \ln
•
Laser Beam
Laser Beam
(Off Track: to left)
•
A
B
(On Track)
A
(Off Track: to right)
B
A
B
Pattern on
quadruple
photo
sensor
c
D
c
A+C< B+D
D
A + C =B +D
Fig. 4. 2.
•
Laser Beam
c
D
A + C>B + D
Principle of Push-Pull Servo
• 10 -
Detected
Signal
Ca110n
•
5. What are the Theoretical Advantages of M.O. Tech. over
conventional Magnetic Technologies?
-Disk Removability and Interchangeability, High Areal Density and
High Data Stability From its origin, M.O. disk storage technology has principal advantages over
magnetic disk storage technology. They are defined as the the following:
•
•
•
Disk Removability and Interchangeability-medium can be removed and
interchanged among drives.
High Arial Density - arial density is more than a magnitude higher than of the
highest density magnetic disks.
High Data Stability- recorded data are stable for more than ten years without
rewriting.
The following explains the theoretical reasons for the advantages of M.O. storage
technology.
5. 1 Defocus Effect : Exceptional Re liability against Dust/Scratches, Removability.
•
Even with its very high density, optical recording is exceptionally well against the
dust and scratches on the recording media as compared to conventional magnetic
storage with the comparable linear recording density. The key is what is known as
the defocus effect of the optical disk storage. This provides M.O. disk storage the
essential advantage of the disk removability .
As shown in Fig. 5. 1, the read/write/erase are done from the side of
transmissive disk substrate. By using an objective lens with high numerical
aperture, the laser beam is sharply focused onto the M.O. recording layer. Even
though the spot size of recording area is less than one j.lm in diameter, the beam
incident area at the disk surface is more than one thousand times larger in diameter
and more than one million times larger in area. Because of this, the effect of dust or
scratches on the disk surface is about one million times less harmful. This is called
as the defocus effect of optical disk storage.
•
_________________________..............
- 11 -
•
Protective Layer
E
.....-
-
M.O. Layer
/
/
/
______
I
I
J..
\
¢1 ,urn
c.__~-----('
\
\
I
A+---
/
/""'
I
I
I
\
I
/
Spot
\
1200.urn ----t~
(1.2mm)
Beam lnsident Area
•
-----------
--
------ ------ -----Laser Beam
Fig. 5. 1.
•
Defocus Effect (not to the scale)
1r
•
Whitney-type
Magnetic Head
/
..:?
~moke Particle ( -ci>10.um)
-~·-y-- -
\Recorded Bit (1 .um x 30,um)
Head Flying Height (0.2- O.S,um}
•
Disk Substrate
Fig. 5. 2. Dust Trouble of Magnetic Storage
•
- 13-
Canon
•
When compared magnetic winchester drives, dust and scratches are very
destractive since they are contact systems.
As shown in Fig. 5. 2. dust and scratches of one J.l.m size is critical for read/write
of magnetic recording signal since the flying height of Whitney magnetic head is as
low as 0.2-0.5 J.l.m. Dusts in the air are at least several micro-meter (J.l.m) in size and
the size of smoke particle is close to 10 J.l.m. The diameter of human hair is about
80-1 00 J.l.m. This is several hundreds times larger than the gap between head and
media. This is one of the essential reason why high density magnetic disks has to be
enclosed in the dust free clean box and why they are not removable.
5. 2 No Head/Media Contact : No Head Crash and Wear Down.
As it is shown in Fig. 5. 1, the objective lens of the optical head unit is located at
about 2mm distance from the surface of M.O. disk. This means that the M.O.disk drive
system is completely the non-contact system. Therefore the wear down or the head
crash which are the critical problems for the magnetic tape system and the magnetic
disk system are not a trouble at all for M.O. disk storage system.
•
5. 3 Optical Servoing :High Areal Density and Disk Interchangeability.
The ability to do closed loop auto-focusing and auto-tracking using the same
laser beam during reads, writes and erases provides another key advantage over
typical magnetic storage. Auto-tracking, which is explained in section 4, is the key to
more than magnitude of one order higher track density than magnetic storage.
The track pitch of M.O. disk storage is 1.5 -1.6 llm while the latest magnetic hard
disk track pitch is 20 - 30 j.Lm.
This has resulted in an areal density of about more than 10 times grater than
magnetic storage even though the linear recording density iS about the same.
The tracking of typical magnetic disk drives is done using open loop
mechanical positioning. This limits the track pitch because there are variations in
mechanical dimensions of disk and head hold arm which are effected by
temperature. This open loop tracking makes the magnetic storage difficult to achieve
the disk
•
- 14-
Canon
•
interchangeability since a disk clamping mechanism causes the disk excenterisity
of at least so ~m which is more than the track pitch of high density magnetic storage.
5. 4 High Coercivity : High Data Stability
The coerclvlty of M.O. layer at room temperature can be designed to be more
than ten times higher than magnetic storage. It is because. the erases and writes of
data are done at an elevated temperature, and the coercivity becomes low enough
to reverse polarlity by a low bias magnetic field at such the elevated temperature (it
is explained in section 2.).
In case of magnetic recording, the reverse of the magnetic moment is done by
magnetic field from a magnetic head at room temperature. Because of this, the
coercity of the magnetic recording layer can not be as high. The small magnetic
head flying above media can not generate a very high magnetic field which is
sufficient enough to reverse the magnetic moment of high coercivity.
•
The coercivity of M.O. layer can be more than 20 kOe while magnetic recording
can be at most 800-900 Oe. The higher the coercivity, the better the stability against
the self-demagnetization of the written data. This high coercivity resu lts in very
high a data stability of more than ten years without need for rewriting data. In case of
the magnetic tape and the magnetic hard disk storage, rewriting is required once
every one to three years .
Additionally, M.O. disk can be designed to be extremely stable against erase of
data by magnet or electromagnetic field. This added protection is acheived because
the M.O. layer is under a thick disk substrate. Even in a situation where a piece of
strong magnet comes in contact with the media, the data will not be erased.
5. 5 Perpendicular Magnetic Recording : High Data Stability.
Beside the high coercivity already discussed in section 5. 4, perpendicular
magnetic recording provides another reason for high data stability in high density
recording. The magnetic moment of the recorded data becomes energetically stable
because of a closed magnetic field flux loop as shown in Fig. 5. 3. In contrast
to this, the horizontal magnetic recording which is commonly used in magnetic
storage, the recorded data becomes energetically unstable because the magnetic
field flux loop of the data area is repulsive against the surrounding area and works
as the self-demagnetization force (it is shown in Fig. 5. 3) .
•
Ca no n
•
Horizontal Recording
•
Perpendicular Recording
I
Close Loop
Fig. 5. 3. Energetical Stability of Magnetic Moment.
•
- 16-
Canon
•
6. What is the Future of M.O. Technology?
-Overwriting, Fast Access, Fast Data Speed, More Capacity. Although there are many theoretical advantages explained in section 5, there are
still some characteristics which should be further improved. Some of the obvious
improvements will come by improving seek speed, data through-put and capacity.
Less obvious and much more challenging will be direct overwriting.
6. 1 Overwriting
Direct overwriting means that when writing data, the data can be simply
overwritten over the existing data. Currently, writing over existing data requires
erasing, writing and verifying. With current M.O., direct overwrite is very difficult. The
reason is that since the electro-magnet that generates the bias magnetic field is
located very further away from the M.O. layer than magnetic recording. With hard
disk, the distance between the magnetic layer and the magnetic head is less than
one J.lm. With M.O. disk technology, the distance between the electro-magnet and
M.O. layer is about 3,000 J.lm (3mm). This distance causes an electro-magnet that is
very powerful which in turn slows down the speed of swiching of electro-magnet
polarity.
•
Since the bias magnetic field can not be switched at the high speed required for
high performance data storage device, current M.O. drive erases in the first spindle
cycle. Then the polarity of bias magnet is switched and the new data is written on
the second spindle cycle.
Once, direct overwrite technology can be developed, the performance of M.O.
drives will rival today's highest performing hard disks.
Research into overwritable M.O. system are focusing on two approaches. The
first is based on a multi-layer M.O. media which enables overwriting by laser
power modulation. The second uses semi-flying type magnetic bias coil
located on the reverse side of M.O. disk close to the M.O. layer.
•
- 17 -
Canon
•
7. .Canon's Advanced M.O. Technology
-Advanced M.O. Media Tech., High Performance Drive Unit·
7. 1. High Performance M.O. Media Technology.
The highest priority Canon has placed in research and developement over the
past seven years has been in M.O. media technology. As a result, Canon has come
up with the high erase and write speed M.O. disk which Canon has coined "EC
type" (Exchange Coupling) M.O. disk.
7. 1. 1 "Canon EC type" M.O. Disk
•
EC type M.O. disk means that the disk is composed of two M.O. layers of different
functional performances and they are quantum-mechanically exchange
coupled to each other. The M.O. layer of high erase/write speed {low Curie Temp.}
but poor in read performance {small Kerr rotation) is exchange coupled with another
M.O. layer which is slow in speed {high Curie Temp.) but is especially good in read
performance {big Kerr rotation). The writing to this EC type M.O. disk is done by
heating the layers at around the Curie Temperature of the fi rst M.O. layer. The
magnetization of the second M.O. layer is sustained by the fi rst M.O. layer through
the exchange coupling. Accordingly the good reading can be done from the second
M.O. layer because of its good carrier to noise ratio signal level.
What this means is that both the functions of the high speed writes and erases and
good read performance are kept separately in two M.O. layers and the best of the
functional combinations are used for maximizing performance. M.O. media that
utilize a single layer can never achieve this performance.
The reason why such the best functional combination can not be expected in the
single M.O. layer is well expalained by so-called "Uchiyama C4rve". As it is shown in
Fig. 7. 1. 1, every M.O. materials are plotted on the Uchiyama curve. What this
means is that a Curie Temperature {which defines read/write speed) and Kerr
rotation (which defines the read signal level) are in the contradictory relationship to
each other. This means that a high speed M.O. layer is poor in carier to noise level
of read signal and, in turn, a good read performance M.O. layer is slow in erase /write
sensitivity .
•
- 18-
Canon
•
Canon has made the most use of the two contradictory functions by means of
exchange coupling of two different M.O. layers. The basic patent of this EC type M.O.
media concept based on rare earth/ transition metal amorphous alloy
system has already been established in the 7 countries. Canon expects that the
primary reserch and development in M.O. disk technology will involve Exchange
Coupling in the future.
7. 1. 2 High Stability Plastic Disk
Besides the high speed, Canon's M.O. disk has achieved the overall stability
using plastic substrate.
Because freedom of M.O. materials selection is very big in case of "Canon EC
type", M.O. disk is desinged to have very high coercivity of more than 20 kOe. This
provides the high data stability (it is explained in section 5).
Besides high data stability. the long shelf life of M.O. layer also has been achieved
even using the plastic substrate which is essential in reducing the cost of the media.
The materials selection and the application technology of protective layer is key.
•
Canon has developed its own manufacturing equipment for depositing of M.O.
layers .
Canon has plan to offer "Canon EC type" high speed M.O. disk with OEM
coustomer's specifications • if any of the high performance drive unit manufacturers
need it.
7. 2 High Performance 5.25" M.O. Drive
Making the most of the "Canon EC type" M.O. media performances, Canon has
come up with the high performance 5.25" M.O. rewrltable disk drive. Its disk
rotational speed is 3,000 rpm making it the fastest optical disk drive in the industry.
The media performance allowed the drive to erase and write at high speed using a
35 mW laser diode. This is the maximum power which is now available without fear
of laser life and high cost.
•
- 19-
1!
Canon
•
Accordingly the average latency is 10 mS and the sustained data transfer
rate at the drive interface is 9.1 M bits per second. The high through-put of
erase-write-verify process is attributable to those high performances addition to the
high speed polarity switching bias-magnet. This electro-magnet is
developed by Canon and it has the maximun switching time of less than 4 mS.
7. 3 Major Specifications
7. 3. 1 M.O. Drive and Disk Cartridge
Model Number Designations
Drive Unit
Disk Cartridge (single sided)
Disk Cartridge (dual sided)
Formatted Capacity
Disk Rotation Speed
Average Latency
Average Seek Time
Sustained Data Transfer Rate
Power Requirement
Power Consumption
Bias Magnet Polarity Change Speed
Bias Magnet Type
Disk Format
•
MTBF 20,000 Hours (Target)
Drive Size
Disk Size
Cartridge
Disk Substrate
7. 3. 2
•
Model OM-5000
Model OM-X131
Model OM·X132
256MB (OM-X131)
512MB (OM-X132)
3,000 rpm
10 mS
92mS
9.1 M bps
+5 V(DC), + 12V(DC)
Typicai18W, Max.40 W
<4 mS
High Speed Electromagnet
1,024 Bytes/Sector
16 Sectors/Track.
Continuous Spiral Groove
5.25" Full Height
" 130 mm
ISO TC97 SC23 like
Polycarbonate
Controller (OM-C10)
Size of PCB
Interfaces
to Drive
to Host
118 x 190 mm
ESDI like
SCSI (ANSI X3.131·1986,
ccs Rev. 4.8)
- 20.
Ca no n
•
Cross-interleave Reed Solomon
Product Code
< 1Q-12
ECC
Corre cted BER
Data Trans fer Rate
Burst
Susta ined
Buffe r size
Daisy Chain
Powe r Requ ireme nt
1.5 M bytes/sec.
6.6 M bits/sec.
64 K Bytes
2 Drives
+5V (DC) Max. SW
•
•
-21-
canon
r ecording sensttLvLty
high
(h tgh bits rate >
•
lo w
<Lo w bits rate>
-------------------
0. 5
I
f-
....
>.
t----
... '-. -----
---+
0. 4
~ ......
/
0.3
+'
c
,
0
_..
CJI
.c
" v
>.
-'
\.....
'
ClJ
c.
0
1...
,, 0
a.
)(
..-J
ro
0.2
I
')('
I
1...
1...
.:
0
c
6
0
ro
<1J
0
1...
I
I
I
<1J
>.
I
~
•
I
0. 1
....J
I
(/')
I
1...
I
0
I
.......
~
I
I
<1J
"0
):
0
0
100
300
200
Curie point
(~
400
)
Tb-Fe , Tb-Fe-Co (after Ts ujimo t o e t al .)
Tb-Fe, Tb-Fe-Co (after Endo et al. )
Ho-Fe-Co (after Endo et al.)
0
Gd-Fe, Gd-Fe-Co ( after Ts unash i ma et al. )
~
+ : Tb-Fe , Tb-Fe-Co ( after Kobayashi et al .)
x : Dy-Fe, Dy-Fe-Co ( after Endo et a l.)
e Gd-Tb-Fe-Co (after Matsushima et al. )
()
6
&
c
Q
JJ
I
0
Gd-Tb-Fe-Co ( after Yamada et a l . )
Fig. 7. 1. 1 "Uchiyama Curve"
•
<1J
"0
X,£
0
0
-
cJ"'
c
J::
, - ifA
f-.6'
CJI
1...
0
0
CJI
,''I( A
'lJ
..-J
0
-22·
•
Product Description
The NeXT Computer combines the best attributes of personal computers and
workstations, adds features previously found only on mainframe computers, and
introduces entirely new innovations.
The NeXT Computer System begins with the Computer, a one-foot cube that houses the
main CPU (central processing unit) board (with room for three additional expansion
boards of the same size); a universal power supply, which makes the system usable
throughout the world; and up to two 5.25-inch full-height mass storage devices. Standard
in the cube are eight megabytes (MB) of main memory, expandable to 16 MB on the
main CPU board.
•
The computer is powered by Motorola s top-of-the-line microprocessor and memory
management unit, the 68030, and the 68882 Floating-Point Unit for fast mathematical
computation, both running at 25 megahertz (MHz). The system also includes a 10 MIPS
(million instructions per second) Motorola 56001 Digital Signal Processor, which
. supports complex, computation-intensive processes including CO-quality music and
sound synthesis. Also standard is high-performance Ethemeto networking.
The CPU board contains two proprietary VLSI (very large-scale integration) chips that
endow the NeXT Computer System with mainframe-like qualities. One, called the
Integrated Channel Processor (ICP), ensures high system throughput by carefully
managing and optimizing the flow of data within the system, particularly between the
main memory, the CPU and peripheral devices such as the network, sound output,
monitor and disk drives.
The other VLSI chip, called the Optical Storage Processor (OSP), controls the systems
read/write/erasable 256 Megabyte Optical Disk. The Optical Disk represents a new form
of mass storage technology, combining laser technology and magnetic (Winchester disk)
technology. Information on the Optical Disk can be edited and manipulated, not just
read, and the entire disk can be removed and carried between computers for convenience
and security .
•
J
•
The NeXT Computer System also features the MegaPixel Display, with a 17-inch, crisp,
high-resolution screen. Images on the screen can appear as black, white and various
shades of gray, through the use of two bits per pixel. This shading ability adds depth to
the images that appear on the MegaPixel Display, which in turn adds depth to an
observer s interpretation.
In addition to its visual capabilities, the MegaPixel Display houses impressive sound
capabilities. The system can generate CO-quality stereo sound (i.e., 44.1 kHz, 16-bit
two-channel digital audio). Users can listen to the sound through a built-in speaker,
through stereo headphones via a built-in headphone jack or through a connected audio
system via built-in line-out jacks. The Display also features a microphone jack for voice
input Because the MegaPixel Display derives its power from the cube, it requires no
separate AC plugs or external power sources.
Taken together, the hardware components of the NeXT Computer System create a
powerful, efficient and aesthetic platform that allows users to extend far beyond their
traditional desktop computer boundaries .
•
•
•
Options
The 400dpi laser printer
An optional but recommended component of the NeXT Computer System is the 400 dpi
Laser Printer. As its name implies, the printer can produce extremely high-quality output
of 400 dots per inch (dpi), as well as the standard desktop laser printer output of 300 dpi.
Memory Expansion
Memory on the NeXT Computer is expandable to 16MB using 1MB, 100 nanosecond,
page memory, nonparity SIMMs. These are available in packs of 4MB.
Mass storage options
NeXT offers both 330MB and 660MB SCSI hard disks for the NeXT Computer. These
high-performance storage devices provide the added storage capacity necessary in server
and heavy development environments.
Accessories
•
Blank media
Optical disk cartridges, which have a 256MB capacity, are available individually, in
packs of 10, or packs of 40.
MegaPixel Display
Ordered as a separate item, this accessory includes the MegaPixel Display, keyboard,
mouse, and 3-meter display cable.
Ethernet Connector Kit
This kit includes aT-connector, 30 feet (9 meters) of thin ethernet cable, and a terminator.
•
e
Product Specifications
Computer
Processors
Motorola 68030 25 MHz CPU
Motorola 68882 25 MHz FPU
Motorola 56001 25 MHz DSP
NeXT integrated channel processor
12 DMA channels
32 MB/sec bandwidth
NeXT optical storage processor
•
•
Memory
64Kbytes boot ROM
8 to 16 MB of memory, user expandable in 4 MB increments
256K bytes of dual-ported video RAM
Communications and Interfaces
Video monitor interface (DB 19)
Thin wire Ethernet® (BNC), IEEE 802.3 compatible
Two RS-422 serial ports (SCC chip Z8530) with 8-pin mini-DIN connectors
SCSI interface implemented with a 53C90 SCSI chip with transfer rate of 4.8 MB/sec
(burst rate), DB 25 external, 50-pin shrouded vertical header internal
Four enhanced NuBus expansion slots (three after main processor board), type C
Eurocard connector operating at a basic cycle rate of 12.5 MHz, a burst rate of 25
MHz and a peak transfer rate of 100 MB/sec.
400 dpi Laser Printer port (DB9) with 5 Mbits/sec serial transfer rate
Digital signal processor port (DB 15) with a maximum transfer rate of 2Mbits/sec
Power
Powers up to four slots with 25 watts each
Automatically adjusts to line frequency and voltage
Voltage: 90 to 270 volts AC
Frequency: 47 Hz to 63 Hz single phase
Power: 300 W (including MegaPixel Display)
•
Clock/calendar
32.768 KHz crystal powered by a 3.0 volt removable lithium battery
Environment
Ambient temperature: 32° to 104 o F (0 o to 40 o C)
Relative humidity: 10% to 90% non-condensing
Altitude: 0 to 15,000 feet (0 to 4,500 meters)
Regulations
UL listed and CSA certified
Complies with FCC Part 15 Class A requirements
Size and weight
Weight: 25 to 40 lbs (10 to 19 Kg) depending on peripheral configuration
Height X width X depth: 12 X 12 X 12 (30 X 30 X 30 em)
Can hold two full-height, 5.25 storage devices
•
MegaPixel Display
Monitor
17 " monochrome, flat screen
1120 x 832 pixels, 2-bit resolution (black, dark gray, light gray, white)
94 pixels per inch
100 MHz video bandwidth
68.3 Hz vertical refresh rate
Input/output
Video monitor interface (DB19) canies +12/-12 VDC, video, and 1/0
Keyboard jack, 5-pin mini-din connector
16-bit, 44.1 kHz stereo output through gold-plated RCA phono line-out jacks
Mini-connector stereo headphone jack
Integrated speaker
8-bit, 8 kHz audio input via monophonic microphone jack
•
Keyboard/mouse
85-key low-profile keyboard, including cursor keys, numeric keypad, brightness and
volume controls, and power on/off
Two-button opto-mechanical mouse
•
Size and weight
Weight: 50 lbs (23 Kg)
Height X width X depth: 17.3
X
16.0
X
14.0 (44 X 40 X 35 em)
Mass Storage
Magneto-Optical Disk Drive
256 MB (formatted)
92 ms average seek time
5 ms average seek time within 5MB range
1.14 MB/sec raw burst transfer rate
0.26- 0.83 MB/sec raw sustained transfer rate
3000 RPM
Infinite read/write/erase
Removable, primary storage and/or backup device
•
•
SCSI Hard Disks
Rotary voice coil actuator and integrated SCSI contoller for speed and reliablity
Formatted capacities: 330 MB and 660 MB
Average seek time: 14.5 and 16.5 ms respectively
5 and 8 platters respectively
45 KB dual ported FIFO buffer
4.8 MB/sec raw burst transfer rate
3600RPM
•
Care and Feeding of the NeXT System
The NeXT Computer is designed to be rugged and reliable, but some care should be taken
to avoid scratching surfaces. The Cube is coated with a water-based black paint which
can be scratched with sharp objects. Do not use solvents such as alcohol, ammonia, or
any abrasives to clean the computer. Repeated use of these substances will cause the
paint to soften and rub off. We recommend water-based soap cleaners such as Formula
409.
The computer will operate best if not exposed to extreme temperatures. Keep it out of
direct sunlight You should not stack the cube on top of the NeXT LaserPrinter, or put
the LaserPrinter on top of the cube. Cubes may be stacked atop one another but should
not be stacked more than three high. Make sure that nothing blocks the vents on the
bottom of the cube, to allow for adequate air flow. If the cube is placed on a shag carpet,
it is a good idea to put a piece of cardboard or wood underneath the computer to prevent
excessive dust or fibers from getting inside.
•
Thumb screws on cable connectors should be tightened fully (but not excessively). Be
sure to avoid excessive crimping or stressing of any cables. Stressing or crimping the
cable between the cube and the monitor can cause distortions in the display.
The NeXT Computer is designed to withstand normal static conditions. However, if
service work is being performed with the back of the cube removed, full static-safe
procedures should be followed.
Do not defeat the purpose of the grounded power cord. The three-prong plug should only
be connected to grounded electrical outlets.
Never transport a cube with an optical disk inserted in the optical disk drive. Serious
damage can be done to the drive mechanisim.
See The NeXT User's Reference Manual for further information about keeping the NeXT
Computer in good condition.
•
7
•
Using the NeXT Interface
•
Introduction
As you sit facing a NeXT computer, many questions are probably crowding your mind.
The first might even be, "What are all those things on my screen?". Moving to more
specific issues, you may be wondering how to rearrange your screen layout, access files
or run applications. Over and over, the phrase "How do I ... " is undoubtedly repeating
itself in your brain. Never fear-the answers to these and many other questions are at
hand. Once you have completed this module, you will be able to perform basic
operations on the NeXT computer: identify (and move) screen objects, access files and
applications and copy, move, rename and delete files. So, limber up those fingers and
prepare for your introduction to the NeXT interface .
•
•
Introducing the Workspace Manager
The items you see before you on your screen are brought to you courtesy of the
Workspace Manager. The Workspace Manager is an application program that greets you
when you access a NeXT computer, and remains active as long as you are using the
system. The function of the Workspace Manager is to provide access to all of the files and
applications stored on your system. A similar service is provided by the shell in a
traditional UNIX environment, and by Finder in the Macintosh environment.
a Identifying the objects: At this point you should see four objects of interest displayed on
your screen:
•
Menu
In the upper left comer is a menu associated with the Workspace
Manager, which allows you to issue commands (note that it is labeled
Workspace).
Window
Near the center of your screen is a directory window, labeled Directory
Browser, which provides a view into the directory structure.
Dock
On the right edge of the screen is a column of icons, called the dock,
which provides easy access to commonly used applications.
Black Hole
Finally, a special icon called the black hole is provided for file removal
(as the bottom icon of the dock).
a Using the mouse: Now that you've examined your screen, it's time to begin exploring.
The first thing to do is select an item from the main menu. Use the mouse to position the
cursor over the menu item labeled Info •••. Next, press and release either mouse button
(this is called single clicking, or just clicking). As a result of your action, a panel has
appeared on the screen. On this panel is a button in the upper right comer marked with an
X. Use the mouse to single click this button. The panel disappears, and your screen is
once again in its original configuration. (The button you clicked is a close button-more
on it later.)
•
•
a Moving the dock: All of the objects on your screen can be moved (within limits). Start
testing the extent of these limits by relocating the dock:
Use the mouse to position the cursor over the NeXT icon
Press down on a mouse button
Move the mouse until the dock is in a desirable location
Release the mouse button
This process of pressing the mouse button and moving the mouse is called dragging.
Specifically, the four steps of dragging are:
1)
2)
3)
4)
•
Position the cursor
Press a mouse button
Move the mouse
Release the button
As you have just seen, moving an object involves dragging. Try moving the dock a few
more times. You have undoubtedly discovered two fascinating things (at least) about the
dock:
The dock can only be moved up or down , and the NeXT logo cannot be moved
off the screen.
This icon is a permanent fixture of the dock. Moving any of the other icons may cause
them to disappear. (If this happens to you, don't worry-you '11 see how to replace them a
little later.)
a Moving windows: The next item to throw around is the directory window. Across the
top of this window is a black band that contains two buttons and a title. This band is
called the title bar. Moving a window is achieved with the same method that you used
with the dock, with one constraint:
When moving a window, the cursor must be placed over the title bar before you
begin dragging.
•
Do not, however, click either of the buttons contained in the title bar (one, you will
remember, closes the window, the other will be explored a little later). How far can you
drag the directory window? Can you remove it from the screen?
/C
•
Try moving the menu now, using the same method (again, dragging on the title bar). Can
the menu be pulled off the screen?
As you may have noticed, the menu, directory window and panel all look pretty similar.
Each is a special kind of window. Like all windows, they are each rectangular and have a
title bar.
Just about any visual object can be dragged partially off the screen, as long as some part
of the object is always visible. For those items with a title bar, part of the bar must
remain visible.
Using the Browser
•
a Examining the directory structure: As mentioned earlier, the directory window is a
view into the directory structure. With this facility, you can locate and access the files and
applications on your system. The directory structure used on the NeXT machine is a
hierarchical directory tree based on the UNIX file system .
A directory tree is a method of organizing files that involves a topmost directory pointing
at files and other directories (called subdirectories). These subdirectories can themselves
point to files or additional subdirectories (which may point to additional subdirectories,
and so on). Thus, you have a directory structure containing many different levels, all of
which can be traced back to a common starting point.
There are many ways to represent such a structure. Outline format is a possibility, as is a
tree with branches and leaves, or nesting folders within folders within folders. The
directory window on your screen is currently displaying a standard Browser view.
The standard Browser representation has the advantage of displaying several
different levels of the directory hierarchy simultaneously within a single
window.
•
In this representation, the leftmost column is topped by the label/. This character is used
to represent the root directory, the topmost level of the directory hierarchy. This column
is a listing of the file and subdirectory names contained in the root directory. The
subdirectory name me is highlighted. The column to the right of I is labeled me and
displays the contents of that directory. To the right of the columns is an icon of a folder
labeled with the name me. This area is called the Browser icon well.
•
a Traversing the directory tree: Use the mouse to move the cursor until it is over the
word Next Library in the leftmost column of the Browser view. Notice the arrowhead to
the right of the name. Watch the screen carefully as you click once. Several things
happen:
The word Nextlibrary is highlighted
The title of the second column of the window changes to Next library
The second column displays the contents of the directory (folder) Nextllbrary
The icon well on the right changes to be a folder with the name Next Library
•
Find the word Documentation in the Nextllbrary column, and click that. Again, the
selected name is highlighted, the rightmost column displays the contents of the indicated
directory, and the icon well shows the selected directory name. The full path of this
directory can be read from the column headings across the top of the Browser:
/Nextlibrary/Documentation. As you might expect, this is where the on-line
documentation can be found
In the Documentation column, click NeXT (again note the arrowhead), and observe what
happens. All the columns shift to the left to make room for the new directory.
In the NeXT directory, select SysRefMan.
a Scrolling a column of names: At the bottom of every column in the Browser is a pair of
scroll buttons. Place the cursor over the left button at the bottom of the SysRefMan
column. Note that this button has a black arrowhead pointing down. Now, press down
on a mouse button and watch the names scroll by as you hold it down (holding down a
mouse button is called pressing).
Pressing an active scroll button produces a continuous scrolling of text.
In this case, the text is a list of names in a directory. Try scrolling up the list. Notice that
the arrowhead on a scroll button turns gray when it is inactive, and black when it is
active .
•
(2-
•
a Scrolling the Browser horizontally: On the left edge of the Browser view are two
additional scroll buttons. These function very similarly to the other scroll buttons.
Experiment with horizontal scrolling by alternately pressing the two buttons.
a Selecting a file: Use your traversing skills to move to the directory /NextApps--scroll
the Browser to the left until the root directory appears, then click the name NextApps.
Notice that the rightmost column is cleared.
In this directory, locate the name Webster. Notice that there is no arrowhead to the right
of this name. Click on Webster (make sure that it is only a single click) and observe.
No new column was created for you this time. Instead, the name was highlighted (as
usual), and the icon well changed to display a picture of a terminal. Webster is the name
of the file containing the Digital Webster application.
•
Whenever an arrowhead appears to the right of a name in the Browser view, it
indicates a subdirectory. Names without this indicator are files .
Compare the icon displayed in the Browser icon well to those on your dock. Is there a
match?
Select another file in this directory by single clicking its name. Is the icon for this
application stored on your dock?
Continue selecting file names and comparing icons until you have identified several of
the icons populating the dock.
•
a Launching an application from the Browser: Once you have finished your
explorations, select the application Webster by clicking its name in the directory
window. Now, move the cursor over the icon in the Browser icon well and press twice on
either mouse button in very rapid succession (this is called double clicking). The icon
will immediately flash white, indicating that the icon has been double clicked. The icon
on the dock will turn into a "ghost" version of itself (a very pale image), indicating that
the application is being launched. (If you removed the Webster icon from your dock in
earlier explorations, the icon will appear somewhere near the bottom of your screen.
More about this later.) A short time later, the application will become active, and several
•
things will happen at once. The Webster menu will appear in the top left corner of the
screen, a window will appear on some other part of the screen, and the docked icon will
return to its normal color. Notice, however, that this icon no longer has three little
dimples in its lower left corner.
The presence of three dimples on a docked application icon indicates an
inactive application. The absence of these dimples indicates that the application
is running.
a Q uitting a n appplication from the menu: You'll be able to explore this application
later. For now, exit the program by selecting the Quit command from Webster's main
menu (notice the dimple reappearing on the docked icon).
Almost all applications can be exited by selecting the Quit option from their
main menu.
•
a Depopulating the dock: Locate the icon associated with the Shell application on your
dock (if you removed it earlier in your explorations, just select some other icon). Using
the dragging method, begin to pull the icon away from the dock. Notice that a ghost
version of the icon remains on the dock as you begin to pull away. Release the mouse
button while the ghost image is still on the dock. Watch as the icon "snaps" back onto the
dock in its original position.
Drag the icon again, this time pulling it far enough away so that the ghost image
disappears. Now release the mouse button, and the icon itself vanishes. This is called
depopulating the dock. (Don't worry, you're not really eliminating any files or
applications, simply eliminating access to that application from the dock.)
Removing an icon from the dock is accomplished by dragging the icon away
from the dock until the ghost image disappears and then releasing the mouse
button .
•
It-t
•
a Populating the dock: Now, place the cursor over the Webster icon displayed in the
Browser window. Using the dragging method, pull the icon toward the dock. Notice that
the ghost image of the icon appears in the dock as you approach. As soon as the ghost
image appears, you can release the mouse button, and the icon will be placed on the dock.
Whenever a dragged icon approaches the dock, a ghost image appears in the
position where the icon will be placed when the mouse button is released.
If you have removed any other icons from your dock (and remember what they look like),
use this method to restore your dock to its original condition. As it is changed, the
contents of the dock are remembered so that it will look the same when next you log in.
As you gain more experience with the system, you will undoubtedly determine your own
favorite dock configuration.
•
a Launching an application from the dock: Launching an application from the dock is
achieved with the same procedure as launching from the Browser icon well. Go ahead
and double click the Shell icon on the dock. Do you notice anything different about the
way the application is launched? You shouldn't; the functionality is exactly the same .
a Quitti ng an application using the keyboard: Examine the menu for the Shell
application. Notice that to the right of the Quit option is the letter q . Exit the application
by holding down the Command key (lower left or right on the keyboard) and pressing q .
Thjs is called a keyboard alternative.
Whenever a letter appears to the right of a menu item , it is an indication that
that menu item can be selected by pressing the indicated letter in conjunction
with the Command key.
•
a Using additional directory windows: There will be times when one directory window
is just not enough--copying or moving files between directories requires multiple
directory windows. To open a second directory window, place the cursor over the
Browser window (avoiding its buttons) and click. This makes the Browser active (more
on this later). Now, single click the word NextApps in the leftmost column. The icon
well will be changed to display the folder icon for Next Apps. Place the cursor over this
icon and double click. The icon will flash white and a second window will appear. This
second window should be partially overlaying the original directory window.
15
•
Double clicking a directory icon in the Browser icon well opens an additional
directory window.
It is entirely possible that this window does not look anything like the original Browser
view (and if it does, it soon won't).
The standard Browser view with which you have become familiar is only one of several
available representations. To change the way the directory information is presented,
place the cursor over the View command in the Workspace menu and click. Note that
this item has an arrowhead to its right, indicating a submenu. In the submenu are listed
the various ways in which the directory information can be shown. Select one of them
and observe your new view. One by one, select each of the other available views,
comparing them to ones you have already seen. Which is your favorite?
tt
•
Determining the key window: After you've reviewed all the possible views, make sure
the view for your second window is set to Browser. You may have noticed that your
original window now has a grey title bar, while the new window has a black bar. The
black title bar indicates which window on the screen is the key window .
The key window is the window that will receive keystrokes and be affected by
menu commands. It is identified by a black title bar.
Remember, only the key window was affected when you changed the directory
representation with the View command. Changing the key window is a very simple
matter-move the cursor so that it is anywhere within the borders of your original
directory window (except over either of its buttons) and click once. The title bar of the
original window turns black and the entire window moves to the foreground-it has
become the key window. Any keyboard or menu actions taken now will affect this
window (go ahead and change the view, just to prove it, but be sure to change the view
back to Browser). Now, click anywhere within your second window (again, avoiding its
buttons) to make it the key window .
•
lb
•
a Closing a window: Now that you've got a second directory window, how do you get rid
of it? Right-click the close button (remember it's the button in the top right comer of
each of your windows marked with an X). This process is called closing a window, and
the button you clicked is a close button. Be sure you don't confuse closing a window
with quitting an application. Just because you've closed the Browser window doesn't
mean that you have quit Workspace Manager.
Clicking a close button closes a window.
a Copying a file: One of the most popular activities on a computer system is to copy files.
Copying files on the NeXT system involves opening a second directory window. So, first
make sure that your directory window has its view set to Browser. Then, make sure that
the current directory in that window is /NextApps. Now, open a second window by
double clicking the icon NextApps. In this second window, make sure the view is set to
Browser and then change the current directory to be your home directory (/me).
•
Make the original view the key window by clicking anywhere within its borders. In the
directory NextApps, once again lcx;ate the file Webster and single click its name. Notice
that the associated icon appears in the icon well .
At this point, you need to be able to see the icon well in both windows. If this is not the
case, move the key window until it is.
Now, to copy the file Webster into your home directory, place the cursor over the
Webster icon and drag the icon toward the icon well in the second window. As the icon
approaches, watch the folder open up to receive the new file as the cursor changes to
represent two small sheets of paper. As soon as this occurs, release the mouse button. If
the operation takes more than a second or two, a panel will appear, indicating that the
system is Copying the file Webster.
Copying a file is accomplished by dragging a file's icon from one directory
window to another.
•
/7
•
Ta-da-you now have your very own copy of the Webster application residing in your
home directory. Notice that the original Webster file was not affected, and the word
Webster now appears in the listing of your home directory.
a Moving a file: But wait-you didn' t really want the file to be in your home directory,
you wanted it to be in the Apps directory under your home directory. You now need to
move the file from its current location to the Apps directory.
First. make sure your original Browser view is the key window (the one pointing to
NextApps). Then, make the current directory of that window be /me/Apps.
•
Make your second window the key window and make sure the file Webster is selected in
your home directory. To move the file, simply place the cursor over the icon in the well,
hold down the Command key, press down the mouse button and drag the icon to the
folder in the original directory window. Once again, the folder opens to receive the new
file (but the cursor does not change). Release the mouse button and the Command key
(in that order). (You must release the mouse button before you release the Cormnand
key, because the significance of the Command key is only noted at the time the mouse
button is released.) After you release the button, if the operation is lengthy, a Moving
panel will appear. This time, the file is moved from one directory to another, so that the
file no longer appears in your home directory.
Moving a file is accomplished by dragging a file's icon from one directory
window to another while pressing the Command key.
n Renaming a file: Now that you ' ve got this spiffy new file, how about giving it a spiffy
new name? Make the view containing the new file the key window. Make sure the icon
for the Webster file appears in the icon well, then move the cursor so that it is over the
file name under the icon. Double click the name, and it will be highlighted. Now, enter
Dicti onary. Notice that, as you type, an insertion point appears (a blinking vertical
bar) that indicates where your characters will be placed.
A double click selects an entire word, allowing you to overwrite it.
•
Press Return and an Alert panel will appear informing you that changing the name of
this file will cause problems for the Workspace manager and asking you if you want to
change the name anyway. Since we are working with a copy of the application, changing
the name won't cause any probelms, so you can go ahead and select Yes. Watch as both
I~
•
the name and the icon are changed in the Browser. The icon changes because the original
icon was associated with an application file named Webster. The new icon is a generic
one used for files containing applications that do not have their own icon specified.
Use the mouse to place the cursor immediately before the D in Dictionary. Click once.
Now enter My followed by Return.
A single click positions the insertion point and allows you to insert or delete
characters .
r.t
•
Deleti ng a file: Now that you've gone to all the trouble of copying, moving and renaming
this file, you discover that you don't really need it. To get rid of the file MyDictionary,
place the cursor over the associated icon in the Browser, then drag it towards the black
hole. As the icon approaches, watch the hole begin to spin. As soon as this occurs, you
can release the mouse button, and the icon will be sucked into the black hole. Once again,
a Moving panel may appear, indicating that the file is being moved into the black hole.
Deleting a file is accomplished by dragging the associated icon to the black
hole.
r.t
Recover ing a file: Sending a file to the black hole seems pretty final, but is it? Can a
file ever be recovered? Place your cursor over the black hole and double click.
Surprise-what you see now is another directory window containing the names of all the
files that have been deleted. (For those of you who are curious, the black hole is actually
a directory to which deleted files are moved. For the insatiably curious, the name of this
directory is ..f.NeXT/.NeXTtrash.) At this point, you can drag a file out to a different
directory to recover it. Go ahead and try moving the file MyDictlonary from the black
hole back to your Apps directory (by dragging its icon). Then, move it into the black
hole once again.
Files that have been deleted can be recovered by double clicking the black hole
and then dragging the appropriate icon from the resulting directory window
into another directory window.
•
When you're finis hed looking at this window, you'll want to tum it back into the black
hole. To accomplish this, find the button at the left of the title bar that has a black bar
across its top. Click once, and the black hole returns. (This button is the miniaturize
button. More on it later.)
1'1
•
a Destroying files: Well, if removed files still exist, don't they take up space? Certainly.
Can you remove them permanently? Of course.
To destroy files dragged to the black hole, select Utilities from the Workspace
Manager menu, and then Destroy Deleted Files.
So, has the file truly been destroyed? How can you ftnd out? You got it-double click
the black hole to tum it into a directory window. Once you 've verified that the file is
really gone, tum the view back into the black hole.
Before moving on, clean up the Workspace a little-close all directory windows but one,
and make sure that the directory for that view is /NextApps.
•
a Using the Browser's text window: Now it's time to play with a couple of shortcuts for
selecting files. Type in an upper case S. A new window appears on your screen labeled
Name Expansion; Return Opens.
The name Shell is highlighted in the NextApps column, and the icon well now holds the
associated icon. This is just the same as if you had single clicked the name Shell. Finish
typing in the word Shell, but do NOT press Return.
Typing in a file name selects that file, just as clicking its name in a directory
window does.
Close the Name Expansion window by clicking the close button, and then enter an upper
case L . Now, press the Esc key. The name in the window expands to be Librarian.app,
and that file is selected in the Browser view.
•
Close the window once again, and then enter a capital W followed by the Esc key. Rather
than being expanded into a name, the system beep is sounded, indicating that the
expansion was not successful (there are two files that begin with W). Even so, the first
flle that matches is highlighted (Webster) .
•
The Esc key is the expansion key. When you enter one or more characters, the first file
with a name matching the entered character(s) is selected. If you follow the characters
with the Esc key , the name is expanded to whatever file matches. If no files have a
name matching the characters you've entered, the expansion will not work. The same is
true if more than one me matches (you must enter enough characters to identify the file
uniquely).
Now, for the grand finale. Close the Name Expansion window, type an s and press
Return. The name is expanded to Shell, the file is highlighted, and then the
application is launched, all in one fell swoop.
•
£me ring an application's file name in the Name Expansion window ,followed by
a Return , selects the file and launches it, just as double clicking its name in a
directory window does .
Conclusion
At this point, you have explored the very basics of dealing with your NeXT systemusing the mouse, selecting items, moving objects, manipulating the dock, traversing the
directory structure, using menus and windows, and accessing applications. Hopefully,
there are several fewer questions rattling around in your brain than when you started.
You are, obviously, far from finished, but you now possess the basic tools necessary to
begin a thorough exploration of the NeXT computer.
•
•
Keyboard Overview
The NeXT keyboard looks much like ordinary typewriter and computer keyboards and is
used to enter text, perform software operations that can also be performed with the
mouse, and perform hardware operations such as turning the system on and off. The
keyboard is divided into three different sections: the regular keypad, the system control
keys and the numeric keypad.
Character Keys: Character keys are labeled with letters, numbers, punctuation marks, or
other typographical symbols and are used to enter text.
Special Character Keys: Special character keys generate non-printing characters that
perform special functions depending on the context in which they are used. These keys
include:
•
•
Return
Pressing this key most often simply starts a new line of text. In other
contexts it is used to tell the system to interpret a command line.
Enter
Pressing this key often has the same effect as pressing Return. It is
used by some applications to initiate the interpretation of a command
line. Command-Return generates the same special character as
Enter.
Tab
Pressing this key moves to the next preset tab stop.
moves the cursor in the reverse direction.
Delete
This key is most often used to delete previously entered text or other
objects. Shift-Delate produces a backspace character which
usually produces the same effect as Delete.
Esc
The Escape key is most often used to change modes when you are
conununicating with a UNIX utility.
Shift-Tab
•
Modifier Keys: Modifier keys do not generate characters but change the effect of the
mouse or other keys. They are used by holding them down while pressing another key.
For example, holding down the Command key while pressing the h key will hide the
current application. This action is indicated with the notational convention Command-h.
These modifier keys include:
Shift
This key is used to produce capital letters and the upper character of
keys labeled with two symbols.
Alternate This key is most often used to produce special-purpose, infrequently
used characters, such as scientific and mathematical symbols. See
Chapter 2 of The NeXT User's Reference Manual for coverage of the
available symbols.
•
Command
This key is used chiefly to provide a keyboard alternative to making a
menu selection with the mouse. Several of the more commonly used
keyboard alternatives are labeled in green on the keyboard.
Control
This key is most often used when you are communicating with UNIX
to perform traditional UNIX functions (e.g., stopping a job with
Control-z).
Arrow Keys: Arrow keys are most often used to move the insertion point in the
indicated direction when you are entering text or graphics.
System Control Keys: The fi ve system control keys modify the computer 's physical
functions:
•
Power
This key turns the computer on and off. See the handout Shut Down
Procedures for more information.
Volume
These keys adjust the volume of the speaker contained in the
MegaPixel display. The upper key increases volume, the lower one
decreases it. Holding down the Command key and pressing the lower
volume key will mute the speaker.
Brightness These keys adjust the brightness of the MegaPixel display. The upper
key increases the brightness, the lower one decreases it.
•
Less Than One Hundred and One Things
You Can Do with a Mouse
There are really only two simple actions that can be performed with a mouse:
• Moving the mouse, which results in the cursor moving in an analogous direction
• Pressing and releasing either of the mouse buttons.
These two simple actions can be combined to produce the following four basic mouseinitiated operations:
•
Clicking: Clicking the primary mouse button results in the selection of an object, while
clicking the secondary mouse button results in the appearance of a popup menu at the
cursor's location. Clicking is accomplished by using the mouse to move the cursor to the
desired location and pressing and releasing the appropriate mouse button. The
Preferences application is used to determine which mouse button is which. The default
is that both buttons act as the primary mouse button. If the popup menu button is enabled
in Preferences, then the Handedness option determines whether the left or right button
is the primary button.
Multiple clicking: Multiple clicking is used to extend the meaning of a single click. For
example, positioning the cursor on an icon in the workspace and double clicking results in
the application associated with that icon being selected and launched.
Dragging: Dragging wi~h the mouse is accomplished by placing the cursor over an
object, pressing the primary mouse button, moving the mouse, and then releasing the
mouse button. Dragging is used to:
• Move an object For example, a scroll bar or workspace icon.
• Defme a range. For example, a range of text can be selected by dragging from the
first to the last character you wish to select.
• Slide from one object to another. For example, you can slide from a menu item to
the submenu that appears when the initial item is selected .
•
•
•
•
Pressing: Pressing an object, like multiple clicking, results in an extension of the function
performed by clicking on that object. Pressing is accomplished by positioning the cursor
over the desired object and holding the primary mouse button down for some period of
time. For example, pressing a scroll button results in continuous scrolling until the mouse
button is released .
•
Less Than One Hundred and One Things
You Can Do to a Dock
The NeXT dock is used to provide easy access to frequently used applications. An
application's icon can be docked (placed in the dock) and that application can then be
launched by double clicking the docked icon. The dock is defined as the area below the
NeXT logo on the right side of your screen.
Moving the dock: The dock can be moved up and down the right side of your display.
Simply position the cursor over the NeXT logo and drag up or down. Notice that the
NeXT logo cannot be moved off the screen. This icon provides a handle that is always
available to move the dock back onto the screen.
•
Docking an application: To dock an application, grab the application 's icon from the
Browser and position it somewhere near the dock. Notice that a "ghost" version of the
icon appears in the dock as your selected icon approaches the dock. This is where the
icon will be placed when you release the mouse button. Once an application's icon has
been docked, it will remain docked, through logging out and logging in, through sleet and
rain and dark of night-until you explicitly remove it from the dock.
Und ocking an application: To remove an application's icon from the dock, grab the
application's docked icon and drag it to any location not in the dock's region.
Peeking behind the dock: For those of you who care, the names of all docked
applications are stored in a file called -/.NeXT/.dock. This file is updated whenever you
change the dock, so that it will be identical when you next log in. Be warned, this is a
non- ASCII file .
•
•
Less Than One Hundred and One Things
You Can Do to a Window
The following is a list of the most common things users do to windows:
Opening a standar d window: In most cases, standard windows are automatically
opened when you launch an application. Many applications also provide a menu
selection for opening a new window or a window containing previously stored contents.
C losing a window: When you are done working with a window you will want to close
it. Closing a window has the effect of removing it from the screen. Almost all
applications provide a mechanism for closing their standard windows. In most cases
these mechanisms include a close button and a close menu selection. Many panels also
include a close button.
•
•
Moving a standa rd window: All windows can be moved anywhere on your screen.
Simply drag the window by any portion of its title bar except its buttons (you wouldn't
want to push anyone's buttons accidentally).
Miniaturizing a standard window: Another way to put a window aside without getting
rid of it completely, besides dragging it off the screen, is to miniaturize it. Miniaturizing
a window only changes its appearance. A miniaturized window changes into a
mini window-an icon that appears out of your way at the bottom of the screen. Most
standard applications include both a miniaturize button in their title bar and a Miniaturize
menu command.
Resizing a standard window: It is also easy to change the size of most standard
windows (and some panels). Resizable windows can be enlarged or shrunk by relocating
the bottom border and/or either the left or right border. Windows are resized by
positioning the cursor over the window's resize bar, pressing the primary mouse button,
and dragging in the direction desired. As you drag the bar, a dashed line will appear
indicating the new size of the window. When the button is released, the window will be
resized to match the dashed line. Dragging anywhere between the two marks on the
resize bar will change the vertical dimensions of the window. Dragging outside of these
marks, on either side, will change the horizontal dimensions, or both dimensions
simultaneously. Dragging inward makes the window smaller, outward makes it larger.
•
Scrolling within a standard window: There are three ways to scroll within standard
windows. Pressing a scroll button produces a slow continuous scroll. Selecting and
dragging a scroll knob is usually used for larger motions and also produces a continuous
scroll. Clicking directly above or below the knob will relocate the knob to the cursor
position, producing a jump scroll of the window contents.
Making a standard window the key window: The key window is the standard window
or panel that is currently receiving keyboard input. The title bar of the key window will
always be black. To make a window the key window, simply click anywhere within its
boundaries (other than its buttons). This window will be moved to the front and become
the key window .
•
•
•
Standard Window Components
•
Scroll
Buttons
Scroll
Bar
•
Resize
Bar
•
Less Than One Hundred and One Things
You Can Do to a Menu
Menus are windows containing lists of commands. They are used to control the actions
performed by applications. In addition, several actions can be performed on menus
themselves. The following is a list of the most common things users do to and with
menus:
Opening a main menu: In most cases a main menu is automatically opened when you
launch an application and closed when you quit the application. Usually, only the
menu(s) associated with the active application will be visible.
Moving a menu: Any menu (in fact, any window) can be moved by positioning the
cursor over the title bar, pressing the primary mouse button, and dragging the cursor and
the menu to the desired location.
•
Making a selection from a main menu: To select a command from the main menu of
the active application, simply click the desired command. Menu items appear in one of
the following four forms:
label only: Many menu items contain only a functional description of the action that
will be performed when the item is selected.
label and keyboard alternative: Many menu items also contain a letter indicating a
keyboard alternative that can be used to initiate the associated action without the
mouse.
label and " .•• ": Some menu items, when selected, result in the display of a panel.
These items contain" ... " following the label.
label and arrowhead: Some menu items, when selected, result in the opening of a
submenu. These items contain an arrowhead following the label.
•
Opening a submenu: To open a submenu, simply position the cursor on any menu item
that contains an arrowhead and hold the primary mouse button down. The submenu
associated with your selection will appear directly to the right of the main menu. If you
release the mouse button at this point the submenu will remain displayed .
5o
•
Making a selection from a submenu: Whatever menu item is under the cursor when
you release the primary mouse button will be selected and executed. Thus, there are two
ways to select an item from a submenu. The first is to click the submenu name, wait for
the submenu to appear, and click the desired item on the submenu. The second is to press
the primary mouse key while the cursor is over the name of the submenu, drag the cursor
into the resulting menu, and release the mouse button while the cursor is over the desired
selection.
Tearing off a submenu: Submenus can be torn off and moved in much the same way as
main menus. Once the submenu is open, simply position the cursor over the menu's title
bar, press the primary mouse button and drag the cursor and the menu to the desired
location. When you release the mouse button the submenu will grow a close button and
remain visible until you close it.
•
•
Popping up a menu: For users who believe in economy of motion (i.e., are truly lazy),
and don't like having to move the cursor to the menu to make a selection, it is a simple
matter to have the main menu associated with the active application pop up at the cursor's
current location. One of the Preferences options regarding the mouse is Enable menu
button. If you have selected this option, you can just press down on the secondary mouse
button (determined by the Handedness option in Preferences) to bring up the menu .
You can then drag the cursor to the desired selection or submenu and release it. The
popup menu will disappear after use .
Standard Menu Components
•
Title
•
Workspace
Additional
Panel
..t---.....
Info ...
Window
Edit
•
Files
~ ~-~ Submenu
1----------t
View
~
Optical
Utilities
h
t-----------i>Keyboard
Alternative
q .
Log Out
Hide
•
•
Less Than One Hundred and One Things
You Can Do to an Application
Launching an a pplication: Applications can be launched (executed) in numerous ways:
• double clicking the name in the Browser
• double clicking the icon in the Browser icon well
• double clicking the icon in the dock
• entering a command line in a UNIX shell
• entering the name and pressing Return in the Browser Name Expansion window
• opening a file associated with the application (double clicking the file 's name or
icon, or selecting Open from the Workspace Manager's Window submenu)
• selecting Dock Info... from the Utilities submenu and checking off the application
to be auto started at login
•
Hiding an application: Almost all applications can be hidden either by selecting the
Hide menu choice or by using the Command-h keyboard alternative. Hiding an
application removes all visual objects associated with that application from the screen,
including open windows, but excepting the icon. The docked icon associated with a
hidden application will be missing its dimples. Applications that are hidden but were not
launched from the dock will be marked by their icon at the bottom of the screen.
Unhiding a n application: Applications can be unhidden by double clicking their icon in
the dock or at the bottom of the screen.
Making a n application active: To make an application active, click any visual object
associated with that application or double click the associated icon.
Quitting an application: All applications can be exited either by selecting the Quit
menu choice or by using the Command-q keyboard alternative.
In summary, an application can be in one of five states at any time:
•
1) Not running
2) Launching
3) Running, inactive, and visible
4) Running, inactive, and hidden
5) Running, active and visible
•
•
•
Relationships Between Window and
Application Functionality
Applications
Windows
Launch
Open
Hide
(token)
Miniaturi ze
(mini-window)
Qu it
Close
•
•
•
The Preferences Application
The Preferences application is used to set several system variables to meet your
individual needs. The available options are separated into different components of the
system, as described on the following pages .
•
Mouse
~
•
"'" ~
Double-Click D~.,la...y•"'
'TeSt
~~c-. . ·
~ ~ \d~ . -~. J ~;~~' ,.
.
. ..
Left
~
Mouse Speed: Four different speeds are available, with the leftmost button
representing the fastest mouse speed.
Double-Click Delay: Four different double click intervals are available, with the
leftmost button representing the shortest interval (the amount of time allowed between
clicks constituting a double click).
Menu Button: When Enabled is selected, pressing the secondary mouse button will
display a pop up menu at the current cursor location.
•
The handedness buttons determine which mouse button will serve as the primary
button. The left mouse button is the primary one for right-handedness, the right
button for left-handedness.
•
Keyboard
•
Initial Key Repeat: Sets the amount of time a key must be held down before repeat
starts. Leftmost button selects the most amount of time before repeat starts.
Key Repeat Rate: Sets the speed at which keys will repeat when held down. The
leftmost button represents the slowest repeat.
•
57
•
Monitor
Mega Pixel
Display
Preferences
•
Automatic Dimming: Selects the number of minutes of inactivity before screen will
automatically be dimmed.
Brightness: Sets screen brightness, just as pressing the brightness keys do.
Volume: Slider sets volume; button turns muting on or off.
•
•
General
Basso
Frog
•
Fun!<
SystemBeep
T
r
I
Audio ("' Visual
Use Voice Alerts: Allows you to turn on Voice Alerts (verbal messages are up to
each individual application; currently, only printing makes use of any).
Menu Location: Determines the initial location of the main menu for applications.
Application Font: Sets the default font for applications. The Font Panel button will
bring up a font panel from which you can select the application font
•
System Beep: Allows you to select the sound used as the system beep. If Visual is
se lected, the system beep will be represented by the NeXT logo at the top of the dock
graying out briefly. The system beep is played or displayed when selected .
•
Date and Time
•
Date: Allows you to change the system date. The arrow buttons scroll select the
month and year, while clicking a date in the calendar selects that date.
Clock: Allows you to change the system time, using the arrow buttons (double click
the hour, seconds or minutes of the digital clock display before using the buttons).
Time Zone: This is where you select the time zone, by clicking the map of the world
in the appropriate spot. The pop-up list can be used to further refine your selection .
•
•
Password
•
Changes your Netinfo password. If this is unsuccessful, changes your yp password .
•
4f
•
Startup
•
Allows you to select the boot device (Hard Disk, Optical or Network) .
•
•
Expert
•
. ,~:"'PUblic'i
. Wlndow
Server
UNIX Expert: When selected, all files on the system will be visible through the
Browser. When not selected, only a subset will be displayed. (See the handout NeXT
Directory Structure for details.)
Public Window Server: When selected, allows remote connections to your window
server.
File-Creation Mask: Determines the default permissions for newly created files .
•
•
Shut Down Procedures
Shutting down the NeXT way: Before shutting down the machine, you should quit each
and every application that is running, so that any open files will be saved to disk. Once
this is done, simply press the Power key. A panel will appear, warning you to save all
files by quitting all active applications. You may then select Power Off. This is a clean
shut down.
Shutting down the UNIX way: If you can become the superuser, log in and launch
either Terminal or Shell and switch user to the super user. From here, you can issue the
standard UNIX shutdown or halt commands. This will leave you in the ROM
Monitor with the NeXT> prompt. From there you can press the Power key, which will
give you a prompt asking if you really wish to power off. Respond with a y to turn off
the power.
If you cannot log in because the Workspace Manger is tossing you back out, you can
enter console at the loginwindow and get a standard UNIX login prompt. You can now
log in and go through the above steps .
•
These are all clean shut downs.
Returning to the NMI monitor: If you cannot get anywhere because PostScript is
locked up, or can' t become the superuser, you must resort to keystroke shutdown. Hold
both Command keys down while typing the keypad tilde key. This will present you
with the NMI mini monitor prompt, nml> . From this prompt, type halt. After the
monitor has synched your disk(s) you will be left in the ROM monitor, from which you
can use the Power key. This, too, is a clean shut down.
If entering halt does not work, you can enter monitor. This will take you directly to
the ROM monitor, but it is not a clean shut down.
•
If all else fails: If none of the above mechanisms are available to you, you can do a hard
reset of the CPU by pressing Alternate-Command-* (that's the left Alternate
and Command keys and the numeric keypad * key). This will not power off the machine,
but it will restart everything. Or, you can pull the plug. (Obviously not a clean shut
down.) Be warned-both of these two procedures are potentially damaging to an optical
disk if the drive is in the middle of a write operation .
•
ROM Monitor Commands
The NeXT ROM monitor automatically performs self-test diagnostics and initiates the
boot procedure when the system is powered up or restarted. Less frequently, the ROM
monitor is used interactively to perform specialized functions. The more frequently used
of these infrequently used functions, and how to perform them, are described below. For
more information on the NeXT monitors see Chapter 17 in the NeXT System Reference
Manual.
Note: All monitor and mini-monitor commands can be abbreviated.
abbreviation for each command is in bold face.
The minimum
Using the NMI Mini-monitor
Accessing the NMI Mini-monitor: To enter the NMI (non-maskable interrupt) minimonitor from a running system, enter Command-Command--. You will be greeted by
the mini-monitor's friendly nmi> prompt.
•
Displaying the Commands that can be Executed from the NMI Mini-monitor: To
display a listing of all of the commands that can be executed from the NMI mini-monitor,
enter ? at the NMI prompt. (Because of the size of the nmi window, the first several
commands cannot be read.)
Returning to the Operating System from the NMI Mini-monitor:
execution after an escape to the NMI mini-monitor, enter continue.
To resume
Displaying System Messages from the NMI Mini-monitor: To display the kernel
message buffer which includes the machine's Ethernet address, entermsq.
Shutting Down the System from the NMI Mini-monitor: If you want to shut the
system down and are in contact with the NMI or panic mini-monitor, and the power
switch is notresponding, enter halt. You should also use this procedure to reboot the
system if you are stuck in either mini-monitor.
Rebooting the System from the NMI Mini-monitor: To reboot the system, enter
reboot at the NMI prompt. This will save files to disk and then reboot with the last
boot command used .
•
•
Accessing the Monitor from the NMI Mini-monitor: The ROM monitor itself is not
directly accessible from the operating system. To access the ROM monitor from the
operating system you must first access the NMI mini-monitor and then enter monitor.
Please note that this is not a clean shut down and should only be performed when nothing
else works.
Using the ROM Monitor
Accessing the Monitor During the Boot Process: To access the ROM Monitor during
the boot process, enter Command-... as soon as the message testing system is replaced
by the loading from disk message. You will be greeted by the Monitor's NeXT>
prompt.
Booting from the Monitor Using Default Parameters: To boot the system from the
monitor using the default boot device enter boot.
•
Booting from a Non-default Device: To boot the system from a device that is not the
default device enter the command listed below that corresponds to the device from which
you wish to boot:
boot device
optical disk
SCSI disk
ethernet
command
bod
bsd
ben
The b in each of these commands stands for boot, od stands for optical disk, sd for SCSI
disk, and en for Ethernet. Each can be followed by a - s to boot the system from the
specified device in single user mode (e.g., bod -s).
Ejecting an Optical Disk: To eject an optical disk from the monitor, enter the command
eject. Please see the handout titled Ejecting an Optical Disk.
•
Setting the Hardware Password: If security is an issue at your site, you will probably
want to restrict access to the ROM monitor commands. THis is possible by setting a
hardware password. To set the password, enter P. Once set, three configuration
parameters (described in the following section) determine which monitor commands will
be restricted.
•
C hanging default boot para meters: Which device is the default boot device can be set
tl1rought the Preferences application or from the ROM monitor. It is also possible to
change whether or not several power-on tests are performed, as well as set several
security parameters. The basic method for changing any of these defaults is the same.
You enter the p arameter command at the ROM monitor's NeXT> prompt, which initiates
a dialogue like the one illustrated below:
NeXT>p
boot command: od?
DRAM tests: yes?
perform power-on system test: yes?
sound out tests: yes?
SCSI tests: no?
loop until key press: no?
verbose test mode: no?
boot extendeddiagnostics: no?
serial port A is alternate console: no?
allow a ny ROM command even if password protected: no?
allow boot command from any device even If password protected: no?
allow optical d rive #0 eject even if password protected: no?
•
Pressing Re t urn in response to any of the monitor's questions will result in the value
named before the question mark remaining in effect. To change a value simply specify
the new value after the question mark and press Return.
The possible values for the boot command are the name of the device you wish to be your
default boot device as listed below (note that they are not preceded by a b):
boot device
optical disk
SCSI disk
ethemet
null
•
command
od
sd
en
The remaining parameter values are boolean. Here you can answer yes or y to have the
test perfonned, no or n to have the test not perfonned, or simply press Return to
leave the values as they are. The final three parameters determine which ROM
commands will be protected when the hardware password is set.
•
Monitor Command Sequence
"' ..
NeXT>
halt
/
"'
nmi>
•monitor
/
'
/
'
-
:::::s
c
:::
c
.c
0
(,)
,,
/
MACH
\...
'
( read msg's
'
Command-Command·-
/
• Not a clean shutdown. Use only when halt doesn't work .
•
-
Q)
0
0
•
msa
Monitor Map
•
testing
system
D
yes
•
no
no
no
cmd·NeXT>
please
insert
disk
D
continue
cmd-cmd·-
•
cmd
=hold down the Command key
=Mach runn ing
Alt =hold down the Alternate key
will always return to 'testing system•, regardless of system state
Alt·cmd·* (hard reset)