1
®
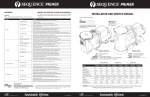
MAINTENANCE
Lubrication
Motor - Permanently Lubricated ball bearings - no service required.
Rotary Seal - Requires no lubrication after assembly.
Symptom
Problem
750
®
WARNING: EYE PROTECTION IS STRONGLY RECOMMENDED
*The pump must be drained before servicing or if stored below freezing
temperatures. Periodic replacement of seals may be required due to normal
carbon wear.
Resolution
Insufficient Prime
Insufficient Power
No Flow
Flow Restriction
Air leak
System Incompatibility
Air leak
System Incompatibility
Insufficient Power
Flow Restriction
Low Flow
Insufficient Prime
Cavitation
Prime system with water and purge all air from suction piping.
Install check valve.
Verify power supply and connection from panel to pump.
Verify proper voltage. Some models are dual voltage (115/230).
Ensure valves are open.
Ensure plumbing is clear, including suction strainers, check valves, etc.
Verify check valve orientation and direction of permitted flow.
Clean out leaves or other debris from basket strainer (if applicable).
Fix air leaks at fittings, connections, strainer basket etc. This typically occurs on the intake side.
Verify hydraulic compatibility: i.e. pump & pipe are sized for the system.
Fix air leaks at fittings, connections, strainer basket etc. This typically occurs on the intake side.
Verify hydraulic compatibility: i.e. pump & pipe are sized for the system.
Verify power supply and connection from panel to pump.
Verify proper voltage. Some models are dual voltage (115/230).
Ensure valves are open.
Ensure plumbing is clear, including suction strainers, check valves, etc.
Clean out leaves or other debris from basket strainer (if applicable).
Prime system with water and purge all air from suction piping.
Verify airtight plumbing on the suction plumbing especially fittings!
Clean out leaves or other debris from basket strainer (if applicable).
Increase pipe size where possible.
Decrease suction pipe length, reduce the number of elbows, etc.
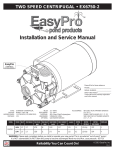
INSTALLATION AND SERVICE MANUAL
PLEASE FILL IN FOR FUTURE REFERENCE:
MODEL: ___________________________
SERIAL NUMBER: ____________________
DATE PURCHASED: ___________________
* PLEASE FILL OUT THE WARRANTY REGISTRATION
CARD INCLUDED WITH THIS PRODUCT OR ONLINE
AT: WWW.MDMINC.COM
XXXXSEQXX
S/N: XXXX-XXXXXX
TYPE: STRAIGHT CENTRIFUGAL
MOTOR: INDUSTRIAL DUTY 1/8 HP,
1 PHASE, TEFC, 1550 RPM,
115 VAC MOTOR,
8 FT 3-PRONGED CORD
INLET: 2” FNPT
DISCHARGE: 1-1/2” FNPT
MATERIAL: 40% GLASS FILLED POLYPROPYLENE
WITH NORYL IMPELLER
HARDWARE: STAINLESS STEEL
OPTIONS: SALTWATER SERVICE
ACCESORIES: 90 CUBIC INCH STRAINER BASKETS (1.5” & 2”),
SWING CHECK VALVES (1.5”, 2”, 3”)
Verify hydraulic compatibility: i.e. pump and pipe are sized for the system.
Insufficient Power
Sporadic Operation
Verify power supply and connection from panel to pump.
Verify proper voltage. Some models are dual voltage (115/230).
Poor Ventilation
Cavitation
Excessive Noise
Insufficient Power
Flow Restriction
MDM INCORPORATED
3345 N. Cascade Ave • Colorado Springs, CO • 80907
Toll Free Phone (800) 447-8342 • Fax (866) 425-1346
www.mdminc.com • [email protected]
Proudly Made in the USA
Ensure adequate aiflow over motor to prevent overheating.
Verify airtight plumbing on the suction plumbing especially fittings!
Clean out leaves or other debris from basket strainer (if applicable).
Increase pipe size where possible.
Decrease suction pipe length, reduce the number of elbows, etc.
Verify hydraulic compatibility: i.e. pump and pipe are sized for the system.
Verify power supply and connection from panel to pump.
Verify proper voltage. Some models are dual voltage (115/230).
Ensure valves are open.
Ensure plumbing is clear, including suction strainers, check valves, etc.
Verify check valve orientation and direction of permitted flow.
Gasgacinch® is a registered trademark of Porter Manufacturing. Noryl® is a registered trademark of the General
Electric Company. Teflon® is a registered trademark of DuPont Company. Sequence® is a registered trademark of
MDM Incorporated. Sequence® 750 Installation Manual.indd Adobe Indesign CC 06-06-14
Sustainable, Efficient.
© 2014 MDM INC.
750
Model
3600SEQ12
4200SEQ12
INLET
2”
2”
DISCHARGE
1.5”
1.5”
MAX FLOW (gph)
3600
4200
MAX HEAD (feet)
12’
12’
MAX POWER (watts)
139
160
MAX CURRENT (amps)
1.40
1.56
@(volts)
115
115
MOTOR HP
1/8
1/8
MOTOR ENCLOSURE
TEFC
TEFC
IMPELLER
8
9
WARNING: Please read completely before you install or operate your new pump! This is an external “out-of-pond” pump!
It is NOT submersible! Do NOT allow this pump to become submerged! Never run dry! Max. case pressure.- 25 PSI!
Proudly Made in the USA
Sustainable, Efficient.
© 2014 MDM INC.
®
750
®
We congratulate you on your choice of the Sequence® 750 centrifugal pump! Its leading edge design provides you with high output at a minimal operating cost.
It is carefully constructed to give you long term, reliable service. To insure proper performance, we urge you to carefully follow the instructions in this manual.
If you have any questions, please call your supplier for assistance.
INSTALLATION
1.
2.
3.
4.
5.
6.
7.
PUMP END ASSEMBLY
1.
2.
3.
Please read carefully! When properly installed, the Sequence® 750 will provide dependable, trouble-free service.
Do not submerse the unit in water - it is not a submersible pump. Do not allow the pump to become submerged during transient periods, such as heavy rain,
run-off, etc.
Locate the pump as near the water source as possible. A flooded suction is preferred.
The pump is not self-priming. Therefore, if the fluid level is below the pump, a swing check valve must be installed below water level. The pump and inlet line
must be primed prior to start up. Do not run pump dry! For non-flooded installations, a strainer basket and check valve are recommended.
Mount the motor base to a secure, immobile foundation.
Use only plastic fittings on both the inlet and discharge ports. Seal the inlet & discharge fittings with Teflon™ pipe dope. These fittings should be self-supported
and in neutral alignment with each port (i.e., Fittings must not be forced into port alignment which may cause premature line failure or damage to the pump volute).
Never restrict the inlet! Keep both inlet and discharge lines as free of elbows and valves as possible. Always use pipe of adequate diameter. This will reduce
friction losses and maximize output. Never use an inlet line of smaller diameter than the discharge line. Minimize the suction lift.
For additional plumbing tips, review MDM’s website: www.mdminc.com for pond plumbing and pump installation hints.
750
4.
5.
6.
7.
8.
9.
10.
11.
12.
Inspect all pump parts (O-ring, O-ring groove, impeller hub ID, motor shaft, etc.) and clean if necessary.
Apply sealant to the bracket bore ID wall and around the seal case - follow sealant mfg. instructions. We recommend using Gasgacinch®.
Silicone sealant can also be used.
Press the carbon graphite seal into the bracket while taking care not to touch or damage the carbon graphite face. Never touch or apply pressure to
the carbon graphite seal face!
Screw four M-Bolts five complete turns into the threaded holes located on the motor face.
Mount the bracket to the motor by aligning the key holes over each bolt head, then rotate clockwise which will position the small key hole slot under each bolt
head. Tighten each bolt with a wrench to secure the bracket to the motor (8-25 lb. in.).
Carefully, lubricate the seal seat elastomer OD and impeller hub ID with water. Press the seal seat into the impeller hub making certain that the ceramic is in
evenly - the sealing surface should be parallel with the impeller hub.
Apply CLEAN water to the carbon-graphite and seal seat sealing surfaces. Do not use silicon lubricants or grease!
Lock the shaft by placing a screwdriver blade into the shaft slot at the fan end of the motor. Thread the impeller onto the motor shaft (Insure that the small
impeller washer is in place on the impeller). Thread until the washer securely contacts the shaft shoulder.
Seat the large O-ring into the bracket O-ring groove.
Assemble the volute onto the bracket with six P-Bolts (10-24 x 2 3/4” carriage bolts) and six flanged lock nuts. Tighten in a cross pattern (30 lb. in.).
Install the drain plug and O-ring, into the volute drain hole.
Before operating the Sequence® 750, allow a proper cure time for the sealant used in step 2.
DESCRIPTION
SEQUENCE® P/N
BRACKET
M BOLT
SLINGER
BALL VALVE
IMPELLER
IMPELLER
WASHER
VOLUTE
BALL VALVE
FLOODED SUCTION
SS SEAL
LARGE
O-RING
PUMP
1000.110
E014B70
750.070
750.061
750.05__*
750.012M
750.0414
750.030
750.502
SLINGER
750.010
Note: These part numbers are only for standard models within
the Sequence® 750 series. *750.05__ Reference page one for
Impeller number (5,8,9).
FLANGED
LOCK NUT
2.19
1.89
DRAIN PLUG
& O-RING
SUCTION LIFT
DRAIN PLUG
O-RING, DRAIN PLUG
VOLUTE
LARGE O-RING
IMPELLER
WASHER, IMPELLER
SS SEAL
BRACKET
HARDWARE KIT
1.5” FNPT
DISCHARGE
2” INLET
FNPT
3.86
7.00
P-BOLT
SWING CHECK VALVE
WARNING: DO NOT RUN DRY!
WARNING: ALWAYS SHUT OFF ELECTRICAL POWER BEFORE INSTALLATION AND / OR SERVICING THIS PUMP! ALL ELECTRICAL WIRING SHOULD
MEET STATE AND LOCAL ORDINANCES. NOTE: THE PUMP MOTOR IS DESIGNED FOR 115 VAC 60HZ POWER ONLY! WARNING: SHUT OFF ELECTRICAL
POWER BEFORE INSTALLATION AND / OR SERVICING THIS PUMP!
DISASSEMBLY
1.
2.
3.
4.
ELECTRICAL HOOK-UP
5.
6.
CAREFULLY, EXAMINE THE POWER CORD BEFORE USE. DO NOT USE THIS POWER CORD IF THERE IS ANY VISIBLE DAMAGE. DO NOT USE THIS POWER CORD IN WATER OR IF
THE MOTOR OR ELECTRICAL RECEPTACLE IS IN CONTACT WITH ANY STANDING WATER! THIS POWER CORD SHOULD ONLY BE PLUGGED INTO A PROPERLY INSTALLED 115
VAC GFI RECEPTACLE! ALWAYS TEST CYCLE A GFI RECEPTACLE TO DETERMINE ITS CONDITION BEFORE USE!
7.
Proudly Made in the USA
Sustainable, Efficient.
© 2014 MDM INC.
3.07
0.25” DRAIN PORT FNPT (PLUGGED)
Shut off power to the motor before servicing any pump!
Unplug the power cord.
Disassemble the volute from the bracket - six P-Bolts and six flanged lock nuts. The volute may remain attached to the plumbing to help simplify re-installation.
Lock the shaft by placing a screwdriver blade into the shaft slot at the fan end of the motor. Unthread the impeller from the motor shaft - Take care not to misplace
the small metal impeller washer.
Remove the ceramic, with rubber boot, from the impeller hub (if you are replacing the seal).
Loosen the four M-Bolts attaching the bracket to the motor. Rotate the bracket counter-clock wise until the screw heads are located in the large key hole slots. Lift off
the bracket from the motor.
Remove the carbon-graphite seal assembly from the bracket by pressing it out from the motor-side of the bracket. Do not pry it out with a screwdriver from the pump
cavity-side of the bracket (if you are replacing the seal)!
Proudly Made in the USA
Sustainable, Efficient.
© 2014 MDM INC.
®
750
®
We congratulate you on your choice of the Sequence® 750 centrifugal pump! Its leading edge design provides you with high output at a minimal operating cost.
It is carefully constructed to give you long term, reliable service. To insure proper performance, we urge you to carefully follow the instructions in this manual.
If you have any questions, please call your supplier for assistance.
INSTALLATION
1.
2.
3.
4.
5.
6.
7.
PUMP END ASSEMBLY
1.
2.
3.
Please read carefully! When properly installed, the Sequence® 750 will provide dependable, trouble-free service.
Do not submerse the unit in water - it is not a submersible pump. Do not allow the pump to become submerged during transient periods, such as heavy rain,
run-off, etc.
Locate the pump as near the water source as possible. A flooded suction is preferred.
The pump is not self-priming. Therefore, if the fluid level is below the pump, a swing check valve must be installed below water level. The pump and inlet line
must be primed prior to start up. Do not run pump dry! For non-flooded installations, a strainer basket and check valve are recommended.
Mount the motor base to a secure, immobile foundation.
Use only plastic fittings on both the inlet and discharge ports. Seal the inlet & discharge fittings with Teflon™ pipe dope. These fittings should be self-supported
and in neutral alignment with each port (i.e., Fittings must not be forced into port alignment which may cause premature line failure or damage to the pump volute).
Never restrict the inlet! Keep both inlet and discharge lines as free of elbows and valves as possible. Always use pipe of adequate diameter. This will reduce
friction losses and maximize output. Never use an inlet line of smaller diameter than the discharge line. Minimize the suction lift.
For additional plumbing tips, review MDM’s website: www.mdminc.com for pond plumbing and pump installation hints.
750
4.
5.
6.
7.
8.
9.
10.
11.
12.
Inspect all pump parts (O-ring, O-ring groove, impeller hub ID, motor shaft, etc.) and clean if necessary.
Apply sealant to the bracket bore ID wall and around the seal case - follow sealant mfg. instructions. We recommend using Gasgacinch®.
Silicone sealant can also be used.
Press the carbon graphite seal into the bracket while taking care not to touch or damage the carbon graphite face. Never touch or apply pressure to
the carbon graphite seal face!
Screw four M-Bolts five complete turns into the threaded holes located on the motor face.
Mount the bracket to the motor by aligning the key holes over each bolt head, then rotate clockwise which will position the small key hole slot under each bolt
head. Tighten each bolt with a wrench to secure the bracket to the motor (8-25 lb. in.).
Carefully, lubricate the seal seat elastomer OD and impeller hub ID with water. Press the seal seat into the impeller hub making certain that the ceramic is in
evenly - the sealing surface should be parallel with the impeller hub.
Apply CLEAN water to the carbon-graphite and seal seat sealing surfaces. Do not use silicon lubricants or grease!
Lock the shaft by placing a screwdriver blade into the shaft slot at the fan end of the motor. Thread the impeller onto the motor shaft (Insure that the small
impeller washer is in place on the impeller). Thread until the washer securely contacts the shaft shoulder.
Seat the large O-ring into the bracket O-ring groove.
Assemble the volute onto the bracket with six P-Bolts (10-24 x 2 3/4” carriage bolts) and six flanged lock nuts. Tighten in a cross pattern (30 lb. in.).
Install the drain plug and O-ring, into the volute drain hole.
Before operating the Sequence® 750, allow a proper cure time for the sealant used in step 2.
DESCRIPTION
SEQUENCE® P/N
BRACKET
M BOLT
SLINGER
BALL VALVE
IMPELLER
IMPELLER
WASHER
VOLUTE
BALL VALVE
FLOODED SUCTION
SS SEAL
LARGE
O-RING
PUMP
1000.110
E014B70
750.070
750.061
750.05__*
750.012M
750.0414
750.030
750.502
SLINGER
750.010
Note: These part numbers are only for standard models within
the Sequence® 750 series. *750.05__ Reference page one for
Impeller number (5,8,9).
FLANGED
LOCK NUT
2.19
1.89
DRAIN PLUG
& O-RING
SUCTION LIFT
DRAIN PLUG
O-RING, DRAIN PLUG
VOLUTE
LARGE O-RING
IMPELLER
WASHER, IMPELLER
SS SEAL
BRACKET
HARDWARE KIT
1.5” FNPT
DISCHARGE
2” INLET
FNPT
3.86
7.00
P-BOLT
SWING CHECK VALVE
WARNING: DO NOT RUN DRY!
WARNING: ALWAYS SHUT OFF ELECTRICAL POWER BEFORE INSTALLATION AND / OR SERVICING THIS PUMP! ALL ELECTRICAL WIRING SHOULD
MEET STATE AND LOCAL ORDINANCES. NOTE: THE PUMP MOTOR IS DESIGNED FOR 115 VAC 60HZ POWER ONLY! WARNING: SHUT OFF ELECTRICAL
POWER BEFORE INSTALLATION AND / OR SERVICING THIS PUMP!
DISASSEMBLY
1.
2.
3.
4.
ELECTRICAL HOOK-UP
5.
6.
CAREFULLY, EXAMINE THE POWER CORD BEFORE USE. DO NOT USE THIS POWER CORD IF THERE IS ANY VISIBLE DAMAGE. DO NOT USE THIS POWER CORD IN WATER OR IF
THE MOTOR OR ELECTRICAL RECEPTACLE IS IN CONTACT WITH ANY STANDING WATER! THIS POWER CORD SHOULD ONLY BE PLUGGED INTO A PROPERLY INSTALLED 115
VAC GFI RECEPTACLE! ALWAYS TEST CYCLE A GFI RECEPTACLE TO DETERMINE ITS CONDITION BEFORE USE!
7.
Proudly Made in the USA
Sustainable, Efficient.
© 2014 MDM INC.
3.07
0.25” DRAIN PORT FNPT (PLUGGED)
Shut off power to the motor before servicing any pump!
Unplug the power cord.
Disassemble the volute from the bracket - six P-Bolts and six flanged lock nuts. The volute may remain attached to the plumbing to help simplify re-installation.
Lock the shaft by placing a screwdriver blade into the shaft slot at the fan end of the motor. Unthread the impeller from the motor shaft - Take care not to misplace
the small metal impeller washer.
Remove the ceramic, with rubber boot, from the impeller hub (if you are replacing the seal).
Loosen the four M-Bolts attaching the bracket to the motor. Rotate the bracket counter-clock wise until the screw heads are located in the large key hole slots. Lift off
the bracket from the motor.
Remove the carbon-graphite seal assembly from the bracket by pressing it out from the motor-side of the bracket. Do not pry it out with a screwdriver from the pump
cavity-side of the bracket (if you are replacing the seal)!
Proudly Made in the USA
Sustainable, Efficient.
© 2014 MDM INC.
®
MAINTENANCE
Lubrication
Motor - Permanently Lubricated ball bearings - no service required.
Rotary Seal - Requires no lubrication after assembly.
Symptom
Problem
750
®
WARNING: EYE PROTECTION IS STRONGLY RECOMMENDED
*The pump must be drained before servicing or if stored below freezing
temperatures. Periodic replacement of seals may be required due to normal
carbon wear.
Resolution
Insufficient Prime
Insufficient Power
No Flow
Flow Restriction
Air leak
System Incompatibility
Air leak
System Incompatibility
Insufficient Power
Flow Restriction
Low Flow
Insufficient Prime
Cavitation
Prime system with water and purge all air from suction piping.
Install check valve.
Verify power supply and connection from panel to pump.
Verify proper voltage. Some models are dual voltage (115/230).
Ensure valves are open.
Ensure plumbing is clear, including suction strainers, check valves, etc.
Verify check valve orientation and direction of permitted flow.
Clean out leaves or other debris from basket strainer (if applicable).
Fix air leaks at fittings, connections, strainer basket etc. This typically occurs on the intake side.
Verify hydraulic compatibility: i.e. pump & pipe are sized for the system.
Fix air leaks at fittings, connections, strainer basket etc. This typically occurs on the intake side.
Verify hydraulic compatibility: i.e. pump & pipe are sized for the system.
Verify power supply and connection from panel to pump.
Verify proper voltage. Some models are dual voltage (115/230).
Ensure valves are open.
Ensure plumbing is clear, including suction strainers, check valves, etc.
Clean out leaves or other debris from basket strainer (if applicable).
Prime system with water and purge all air from suction piping.
Verify airtight plumbing on the suction plumbing especially fittings!
Clean out leaves or other debris from basket strainer (if applicable).
Increase pipe size where possible.
Decrease suction pipe length, reduce the number of elbows, etc.
INSTALLATION AND SERVICE MANUAL
PLEASE FILL IN FOR FUTURE REFERENCE:
MODEL: ___________________________
SERIAL NUMBER: ____________________
DATE PURCHASED: ___________________
* PLEASE FILL OUT THE WARRANTY REGISTRATION
CARD INCLUDED WITH THIS PRODUCT OR ONLINE
AT: WWW.MDMINC.COM
XXXXSEQXX
S/N: XXXX-XXXXXX
TYPE: STRAIGHT CENTRIFUGAL
MOTOR: INDUSTRIAL DUTY 1/8 HP,
1 PHASE, TEFC, 1550 RPM,
115 VAC MOTOR,
8 FT 3-PRONGED CORD
INLET: 2” FNPT
DISCHARGE: 1-1/2” FNPT
MATERIAL: 40% GLASS FILLED POLYPROPYLENE
WITH NORYL IMPELLER
HARDWARE: STAINLESS STEEL
OPTIONS: SALTWATER SERVICE
ACCESORIES: 90 CUBIC INCH STRAINER BASKETS (1.5” & 2”),
SWING CHECK VALVES (1.5”, 2”, 3”)
Verify hydraulic compatibility: i.e. pump and pipe are sized for the system.
Insufficient Power
Sporadic Operation
Verify power supply and connection from panel to pump.
Verify proper voltage. Some models are dual voltage (115/230).
Poor Ventilation
Cavitation
Excessive Noise
Insufficient Power
Flow Restriction
MDM INCORPORATED
3345 N. Cascade Ave • Colorado Springs, CO • 80907
Toll Free Phone (800) 447-8342 • Fax (866) 425-1346
www.mdminc.com • [email protected]
Proudly Made in the USA
Ensure adequate aiflow over motor to prevent overheating.
Verify airtight plumbing on the suction plumbing especially fittings!
Clean out leaves or other debris from basket strainer (if applicable).
Increase pipe size where possible.
Decrease suction pipe length, reduce the number of elbows, etc.
Verify hydraulic compatibility: i.e. pump and pipe are sized for the system.
Verify power supply and connection from panel to pump.
Verify proper voltage. Some models are dual voltage (115/230).
Ensure valves are open.
Ensure plumbing is clear, including suction strainers, check valves, etc.
Verify check valve orientation and direction of permitted flow.
Gasgacinch® is a registered trademark of Porter Manufacturing. Noryl® is a registered trademark of the General
Electric Company. Teflon® is a registered trademark of DuPont Company. Sequence® is a registered trademark of
MDM Incorporated. Sequence® 750 Installation Manual.indd Adobe Indesign CC 06-06-14
Sustainable, Efficient.
© 2014 MDM INC.
750
Model
3600SEQ12
4200SEQ12
INLET
2”
2”
DISCHARGE
1.5”
1.5”
MAX FLOW (gph)
3600
4200
MAX HEAD (feet)
12’
12’
MAX POWER (watts)
139
160
MAX CURRENT (amps)
1.40
1.56
@(volts)
115
115
MOTOR HP
1/8
1/8
MOTOR ENCLOSURE
TEFC
TEFC
IMPELLER
8
9
WARNING: Please read completely before you install or operate your new pump! This is an external “out-of-pond” pump!
It is NOT submersible! Do NOT allow this pump to become submerged! Never run dry! Max. case pressure.- 25 PSI!
Proudly Made in the USA
Sustainable, Efficient.
© 2014 MDM INC.